# (IOTA TangleID) 空氣盒子教學
###### tags: `iota`
* [本頁連結](https://hackmd.io/s/H1HxM-2hz)

* [twzjwang/airbox-with-iota](https://github.com/twzjwang/airbox-with-iota)
* 修改自 [HACK4U#4: Hack4u 87Live 課程教學](https://paper.dropbox.com/doc/HACK4U4-Hack4u-87Live-TRmqFxXLJHXrKBo4kiR6O)
* 透過分散式帳本 IOTA 代替 MQTT server
* **空氣盒子應裝設在 : 室外、不會淋雨、通風良好處!**
* 空氣盒子

* Hack4u 87 Live 現在使用 “啤酒軟體” 授權
```
* --------------------------------------------------------------
*“啤酒軟體授權”(第八十七版 又稱很 87 版):
* 87Live所有貢獻者共同發起了本協議只要你還保留本協議文本,你可以使用此軟體做任何事。
如果我們在某一天相遇了,而且你認為此軟體很有價值,你可以為我買一些啤酒或者珍珠奶茶來答謝,當然如果可以的話,我們可以順便一起吃個雞排,此外有人也喜歡吃蛋糕,叫我一定要寫進來。我們往後將會提供正面表列清單...
* --------------------------------------------------------------
* 請注意:未滿18歲禁止飲酒,開車不喝酒,喝酒不開車。
```
* 本專案由以下單位共同貢獻:
肉多多工作室 - 阿海(87Live共同原創) https://www.facebook.com/rododo.farm/
中央研究院 - 荊輔翔(87Live共同原創). 陳伶志(SHT31版本-提供)
協明工業 - Joe Lai (機構設計)
iCShop - iCShopping (組裝影片教學)
**NCKU(整合 TangleID)**
* 本課程的教學討論區
HACK4U by RoDoDo : https://www.facebook.com/groups/1528657247160471/
# 硬體教學
* 項目
* Realtek Ameba 8195開發版
* [介紹](https://docs.google.com/document/d/1o16pomjC6780qWk4OcFzMPg2GxsOYKvQyuaUtS--2uw)
* MicroUSB傳輸線
* SHT31 or BME280
* 溫溼度模組
* PlanTower PMS3003 (G3)
* 粉塵感測器
* 麵包板
* 一些杜邦線和杜邦頭
* 一些杜邦針
* 24 Awg 的單心線 * 8
* (選擇性) 1.25mm 8p 轉杜邦連接線
* (選擇性) OLED SSD1306 模組
* (選擇性) 3D列印的外殼
* 接線 PMS3003 (G3)
* (Ameba) → (PMS3003)
* 5V → pin1
* GND → pin2
* D1(TX) → pin4
* D0(RX) → pin5
* 
* 接線 SHT31 和 OLED
* (Ameba) → (SHT31) → (OLED)
* GND → GND → GND
* 3.3V → VIN → VCC
* SDA → SDA → SDA
* SCL → SCL → SCL
* **如果使用紫色 CJMCU BME280,將 SDO 接上3V3**
* 
> 參考:
> * [空氣盒子Diy套件](https://shopee.tw/HACK4U-87live-Zero-%E7%A9%BA%E6%B0%A3%E7%9B%92%E5%AD%90Diy%E5%A5%97%E4%BB%B6-i.2577462.193135946)
> * [組裝影片](https://youtu.be/73QzM162Hm4)
# 安裝教學
## 1. [win10 用戶 only] 更新DAP Firmware
1. 前往 https://www.amebaiot.com/change-dap-firmware/ 最下方下載 `DAP_FW_Ameba_V12_1_2-2M`
> 或直接下載 [DAP_FW_Ameba_V12_1_2-2M (下載連結)](https://github.com/Ameba8195/Arduino/raw/master/misc/dap_firmware/DAP_FW_Ameba_V12_1_2-2M.bin)
2. 將開發板接上電腦

3. 按住CON2旁邊的按鈕不放
4. 按一下CON1旁邊的按鈕
5. 放開在第一步按住的按鈕

6. 此時會出現一個磁碟槽,上面的標籤為 “CRP DISABLED”

7. 打開這個磁碟,裡面有個檔案 `firmware.bin`
8. 用新的 DAP firmware 取代
9. 將USB重新插拔,新的firmware就生效了。
> 參考: [如何更換DAP Firmware?](https://www.amebaiot.com/change-dap-firmware/)
## 2. 安裝Driver
1. 將 Micro USB 接上 Ameba 的 DAP+DC+serial port 那一孔,另一端接上電腦,在電腦上關閉檔案視窗


2. 前往 https://os.mbed.com/handbook/Windows-serial-configuration#1-download-the-mbed-windows-serial-port 點選 `Download latest driver` 下載 ARM MBED CMSIS DAP driver
> 或直接下載 [ARM MBED CMSIS DAP driver (下載連結)](https://os.mbed.com/media/downloads/drivers/mbedWinSerial_16466.exe)
>
3. 安裝 driver
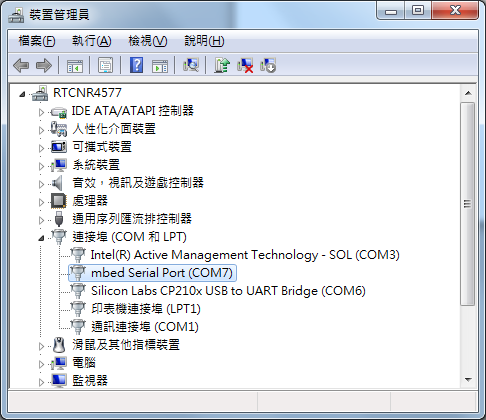
4. 安裝完成後會在裝置管理員看到 mbed serial port

> 參考: [Windows serial configuration](https://os.mbed.com/handbook/Windows-serial-configuration)
## 3. 安裝 Arduino IDE 及相關資源
1. 下載安裝 [Arduino IDE](https://www.arduino.cc/en/Main/Software)
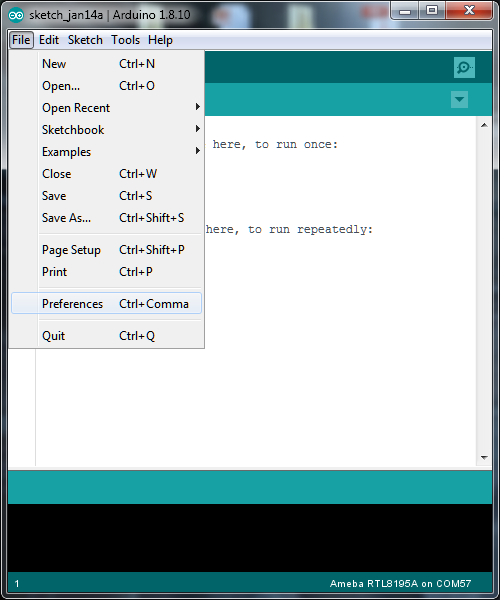
2. 打開 Arduino IDE,為了讓 Arduino IDE 找到 Ameba 的設定檔,先到 `File` -> `Preferences`
3. 在 Additional Boards Manager URLs: 填入:
`https://github.com/Ameba8195/Arduino/raw/master/release/package_realtek.com_ameba_index.json`
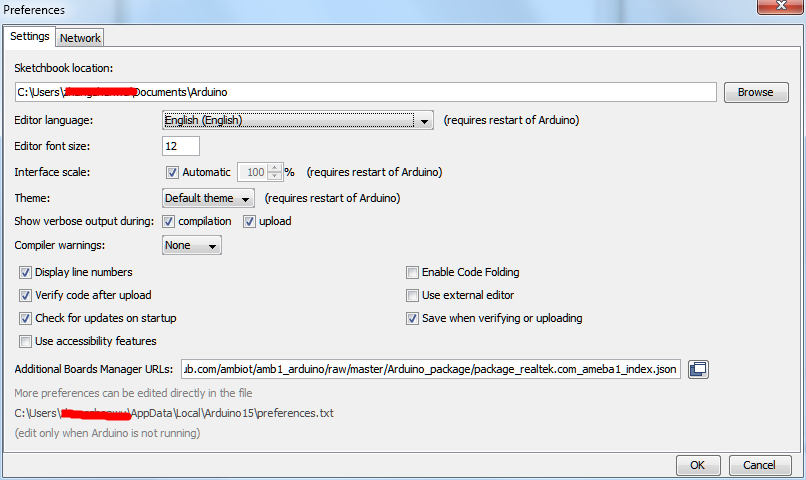
4. 填完之後按 OK,然後因為改編輯器語言的關係,我們將 Arduino IDE 關掉之後重開
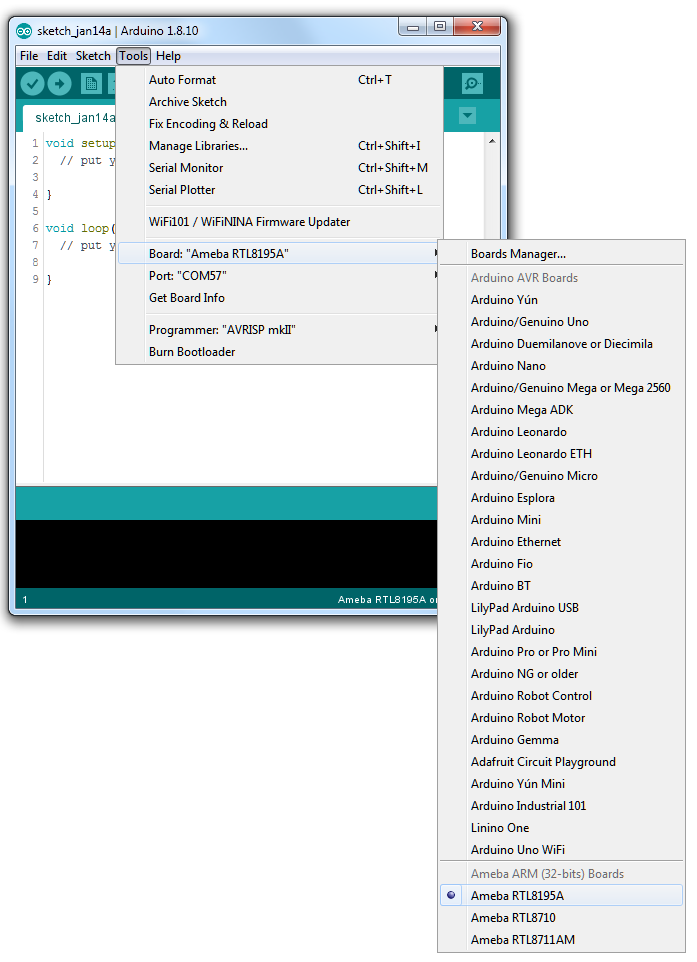
5. 到 `Tools` -> `Board` -> `Boards Manager`
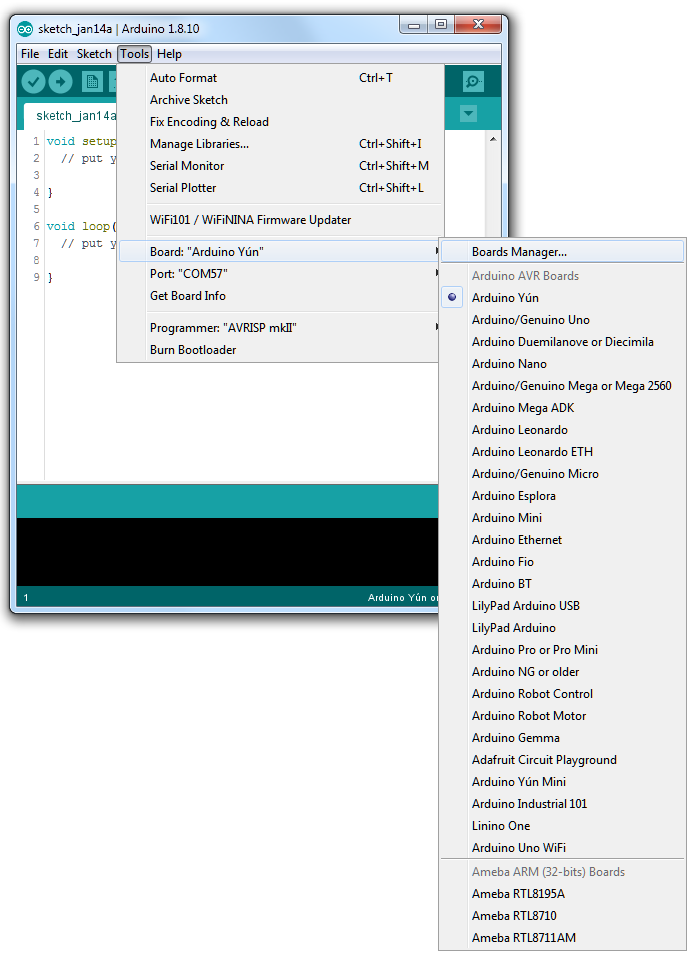
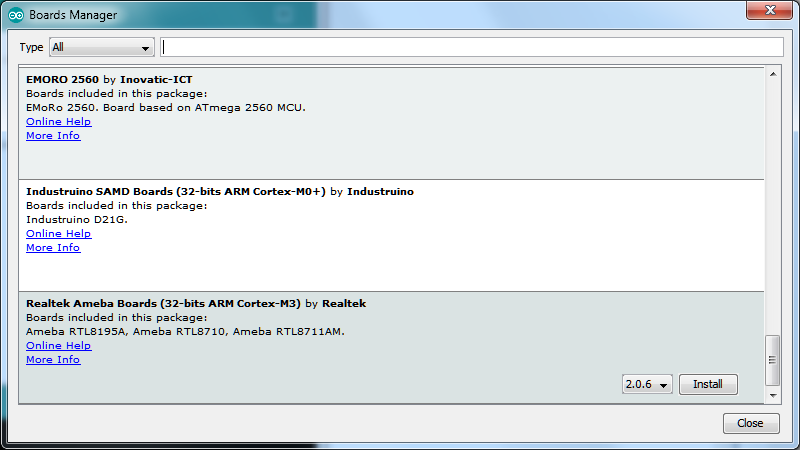
6. 在 `Boards Manager` 裡,它需要約十幾秒鐘整理所有硬體檔案,如果網路狀況不好可能會等上數分鐘。每當有新的硬體設定,我們需要重開 `Boards Manager`,所以我們等一會兒之後,關掉 `Boards Manager`,然後再打開它,將捲軸往下拉找到 `Realtek Ameba Boards`,點右邊的 Install,這時候 Arduino IDE 就根據 Ameba 的設定檔開始下載 Ameba 所需要的檔案
7. 將板子選成 Ameba,選取 `tools` -> `Board` -> `Arduino Ameba`,並選擇 port
> 參考: [Ameba Arduino: Getting Started With RTL8195](https://www.amebaiot.com/ameba-arduino-getting-started/)
## 4. 上傳程式到 Ameba
1. 取得主程式 [twzjwang/airbox-with-iota](https://github.com/twzjwang/airbox-with-iota)
> 如遇到錯誤請回報,並可使用 LASS 提供的主程式測試
> https://drive.google.com/drive/folders/0B7CvSQoX2QQKdndwSmxQb0VjRUU
2. 複製 `lib` 下的檔案到放到 `我的文件\Arduino\library` 資料夾

3. 點 `main/main.ino` 開啟專案
4. 修改 `config.h` 內 wifi SSID `ssid`、wifi password `pass`、緯度`gps_lat`、經度 `gps_lon`

5. 點選左上角 `上傳` 按鈕,上傳程式至開發板

6. 點選右上角 `序列埠監控視窗` ,開啟 serial monitor 並選擇 baud rate 為 38400


7. 初始化 wifi 成功

8. `clientID` 及 `uuid`,**請記下 `uuid`**
clientID 為 mac address 後 8 碼
uuid 為 `LASS` + toTrytes(clientID)

9. 讀 sensor 資料,編碼,發出聲明

# 查看感測紀錄
## IOTA Tangle explorer
* uuid list
https://thetangle.org/tag/LASSUUIDLISTC
1. `uuid` : `LASSPBUAUAXABBMBOBAB`
`Tag` (`uuid` + `'C'`) :`LASSPBUAUAXABBMBOBABC`
https://thetangle.org/tag/LASSPBUAUAXABBMBOBABC
2. 在 [Tangle explorer](https://thetangle.org/) 用 `Tag` 搜尋

3. 結果

3. Message 選 Text 可看見相關資料

## APIs
## g0v零時空汙觀測網 [WIP]
https://airmap.g0v.asper.tw/v5/#/map