---
title: Recording High-Quality Audio with Your iPhone
tags: [guide, audio, iphone, language-learning]
---
# Recording High-Quality Audio with Your iPhone
This guide shows you how to record clear audio with your iPhone and how we’ll use phone recordings in language learning activities.
# Preamble
## What's a podcast?
Let's take an example people might of heard of:
<iframe width="560" height="315" src="https://www.youtube.com/embed/qrJaonJt1QU?si=Y6pwidQ1T_CKO30H" title="YouTube video player" frameborder="0" allow="accelerometer; autoplay; clipboard-write; encrypted-media; gyroscope; picture-in-picture; web-share" referrerpolicy="strict-origin-when-cross-origin" allowfullscreen></iframe>
Serial is a groundbreaking, Peabody-winning investigative journalism podcast hosted by Sarah Koenig that explores one true story over the course of a whole season. Season 1 famously re-examines the 1999 murder of 18-year-old Hae Min Lee and the conviction of her ex-boyfriend, Adnan Syed, who maintains his innocence.
Listen to the first minute or so of the podcast and let's think about what you hear! Some things you may notice are:
1. Music- how does the music in the intro set the tone for the topic material discussed?
2. Audio textures- do you notice how different audios are mixed througout the podcast (i.e. clear recorded narration vs audio clips from a phone call to the prison), what do these both accomplish?
3. Volume- how does narration volume vs music volume compare?
This is an example of a single narrative style podcast that aims to tell a story. Other podcasting styles exist that are more conversational, and each serves a purpose! It's up to you to decide what works best for your purpose.
---
## 1. Quick Start: Recording with Voice Memos
**Recommended app:** Built-in **Voice Memos** (no install needed).
### 1.1 Basic steps
1. Open **Voice Memos**.
2. Tap the **red record button** to start.
3. Speak clearly towards the **bottom** of the iPhone (that’s where the main mic is).
4. Tap the **pause** button if you need a break; tap again to continue.
5. Tap the **stop** button when finished.
### 1.2 Recommended settings
- Go to **Settings → Voice Memos → Audio Quality**:
- Select **Lossless** if you have enough storage.
- Otherwise, **Compressed** is fine for homework tasks.
- If available, enable **Reduce Background Noise** or similar options in:
- **Settings → Accessibility → Audio/Visual** (varies by iOS version).
---
## 2. Getting Clearer Sound: Environment & Positioning
### 2.1 Choose a good environment
- **Quiet room**: Close windows/doors; avoid fans, AC noise, and loud streets.
- **Soft surfaces**: Record in a room with curtains, carpets, or furniture to reduce echo.
- Ideally, wrap yourself loosely in a fluffy blanket while recording to reduce echo completely.
- **Avoid echoey spaces**: Kitchens, hallways, bathrooms, stairwells.
### 2.2 How to hold the phone
- Hold the **bottom microphone** about **15–30 cm (6–12 inches)** from your mouth.
- Keep the phone **slightly below** your mouth, not directly in front of it.
- Don’t cover the microphone with your fingers or a case.
- Removing the case completely is ideal.
- Stay in the **same position** while recording (don’t walk around).
### 2.3 Speaking technique
- Speak a bit **slower and clearer** than normal conversation.
- Aim for a **steady volume**—not whispering, not shouting.
- Pause briefly between sentences. This makes your speech clearer and easier to analyze.
- Be conscious of "plosives": high-frequency sounds caused by a sudden release of air when pronouncing certain consonants, such as "p" and "b."
- These can cause distortion in a recording, so try to soften these when speaking, and generally speak a little further away from and less directly towards the microphone.
---
## 3. Using Earbuds or External Mics (Optional)
### 3.1 Earbuds / Headsets
- **Wired EarPods** or good-quality **Bluetooth earbuds** can improve clarity:
- Keep the microphone part **5–10 cm** (2-4 inches) from your mouth.
- Avoid rubbing the mic against clothes or hair.
---
## 4. Checking and Improving Your Recordings
### 4.1 Quick self-check
After recording:
1. Put on **headphones**.
2. Listen to your recording and ask:
- Can I hear myself clearly?
- Is there loud background noise?
- Is the volume stable (no big jumps)?
If not:
- Move to a quieter spot, adjust distance, and record again.
- Try to keep your **mouth-to-mic distance** consistent.
- Try to add more echo-reducing materials (blankets, pillows, etc.)
### 4.2 Trimming a recording
In **Voice Memos**:
1. Tap your recording.
2. Tap the **three dots (…) → Edit Recording**.
3. Use the **trim handles** to cut silence at the beginning or end.
4. Tap **Save**.
---
# Editing in Garage Band
Once you are done creating your audio file the next step is to upload it into GarageBand, or any audio editing platform of your chosing. Here we will show you how to upload and edit in GarageBand.
1. Upload your file
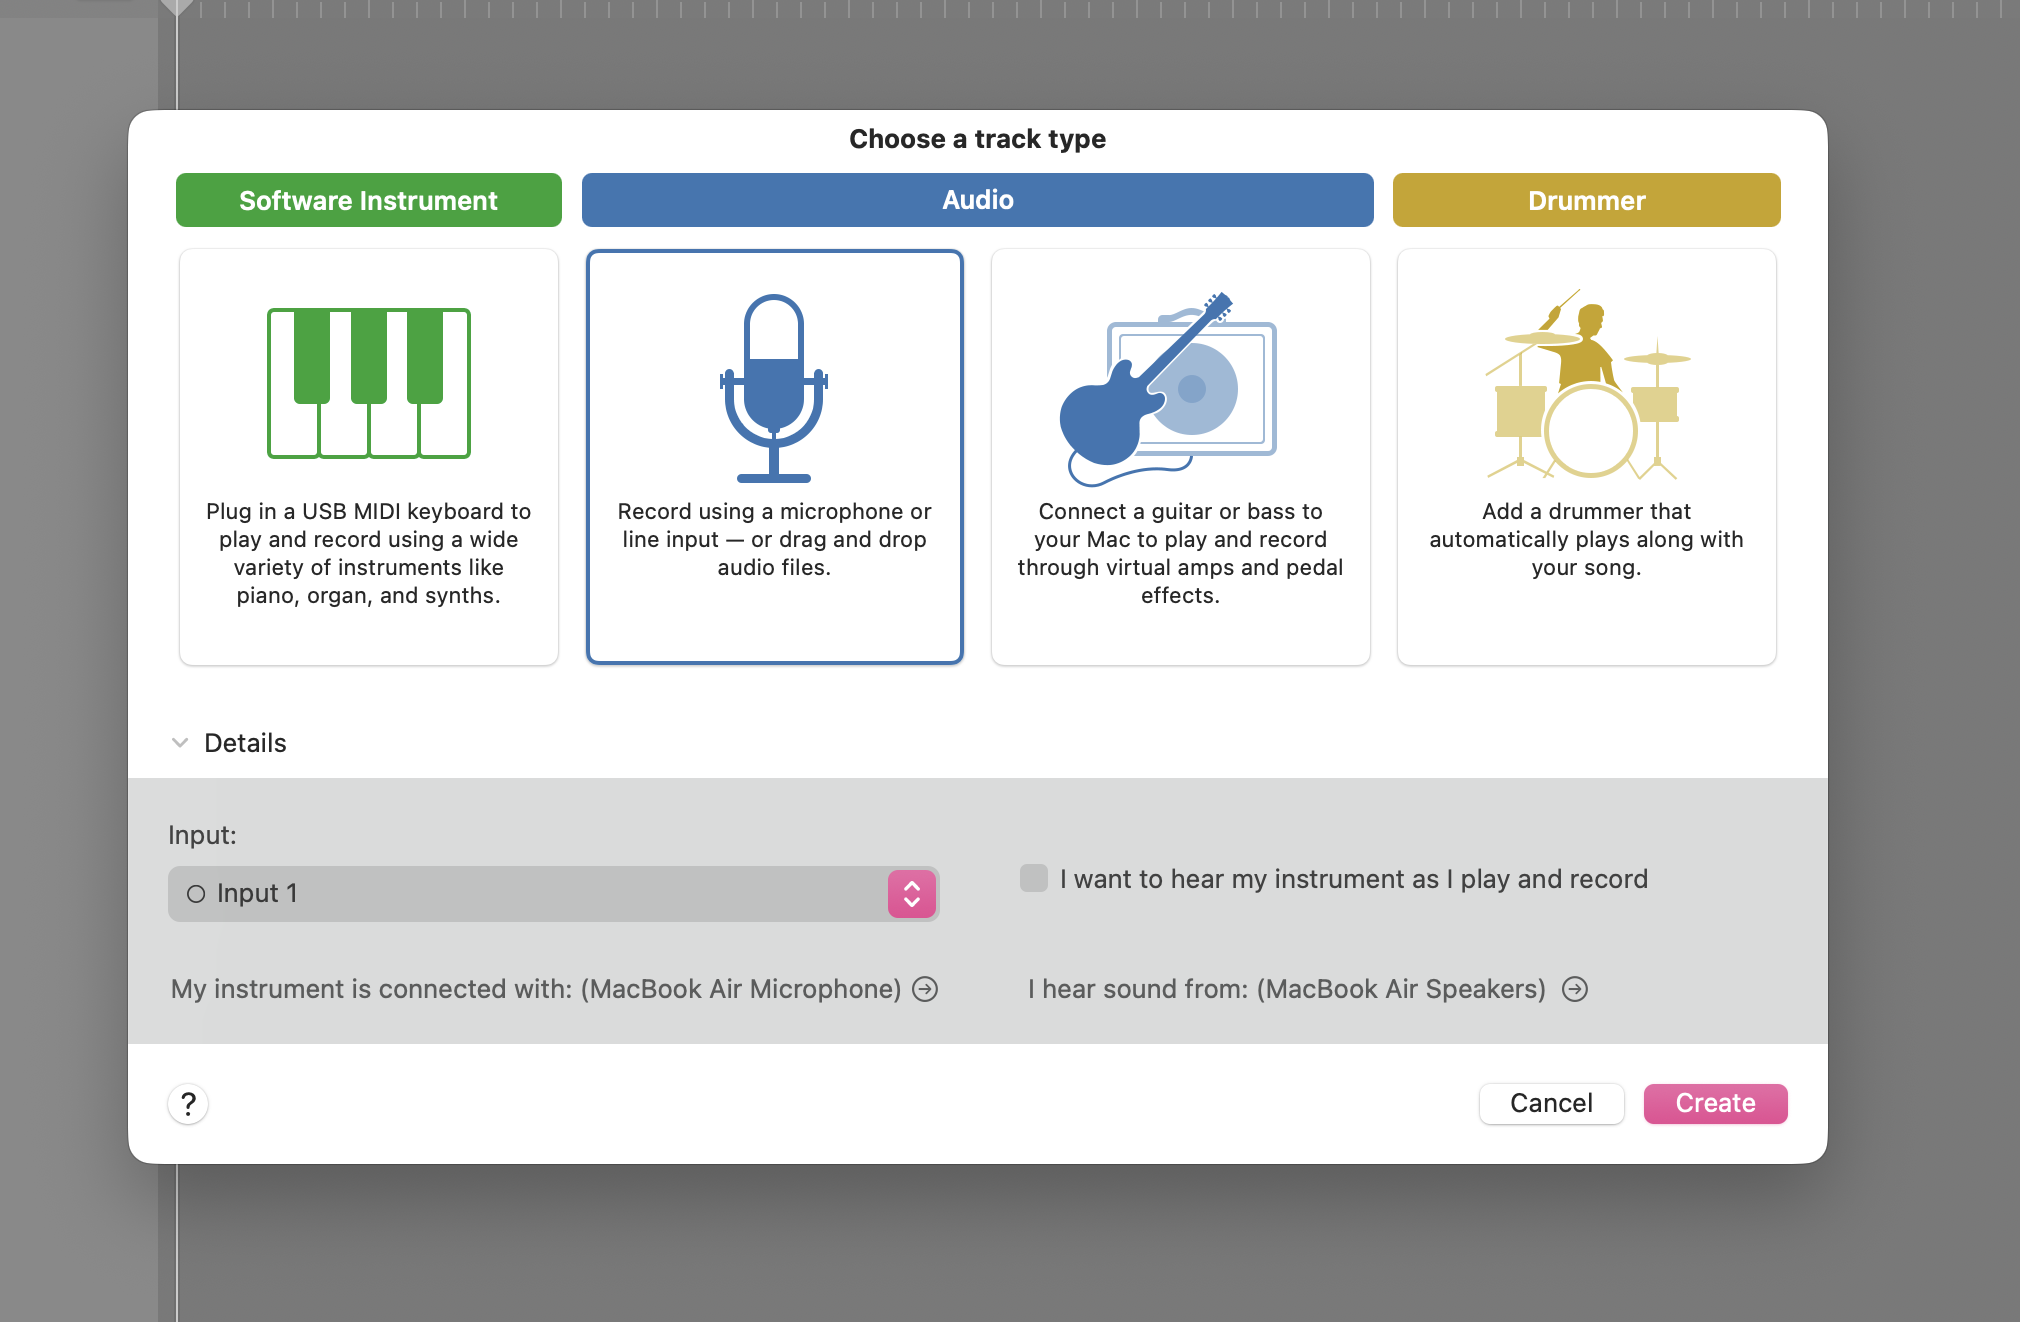
Select an audio mp3 file from your phone to drag and drop into GarageBand.
2. Adjust volume in tracks
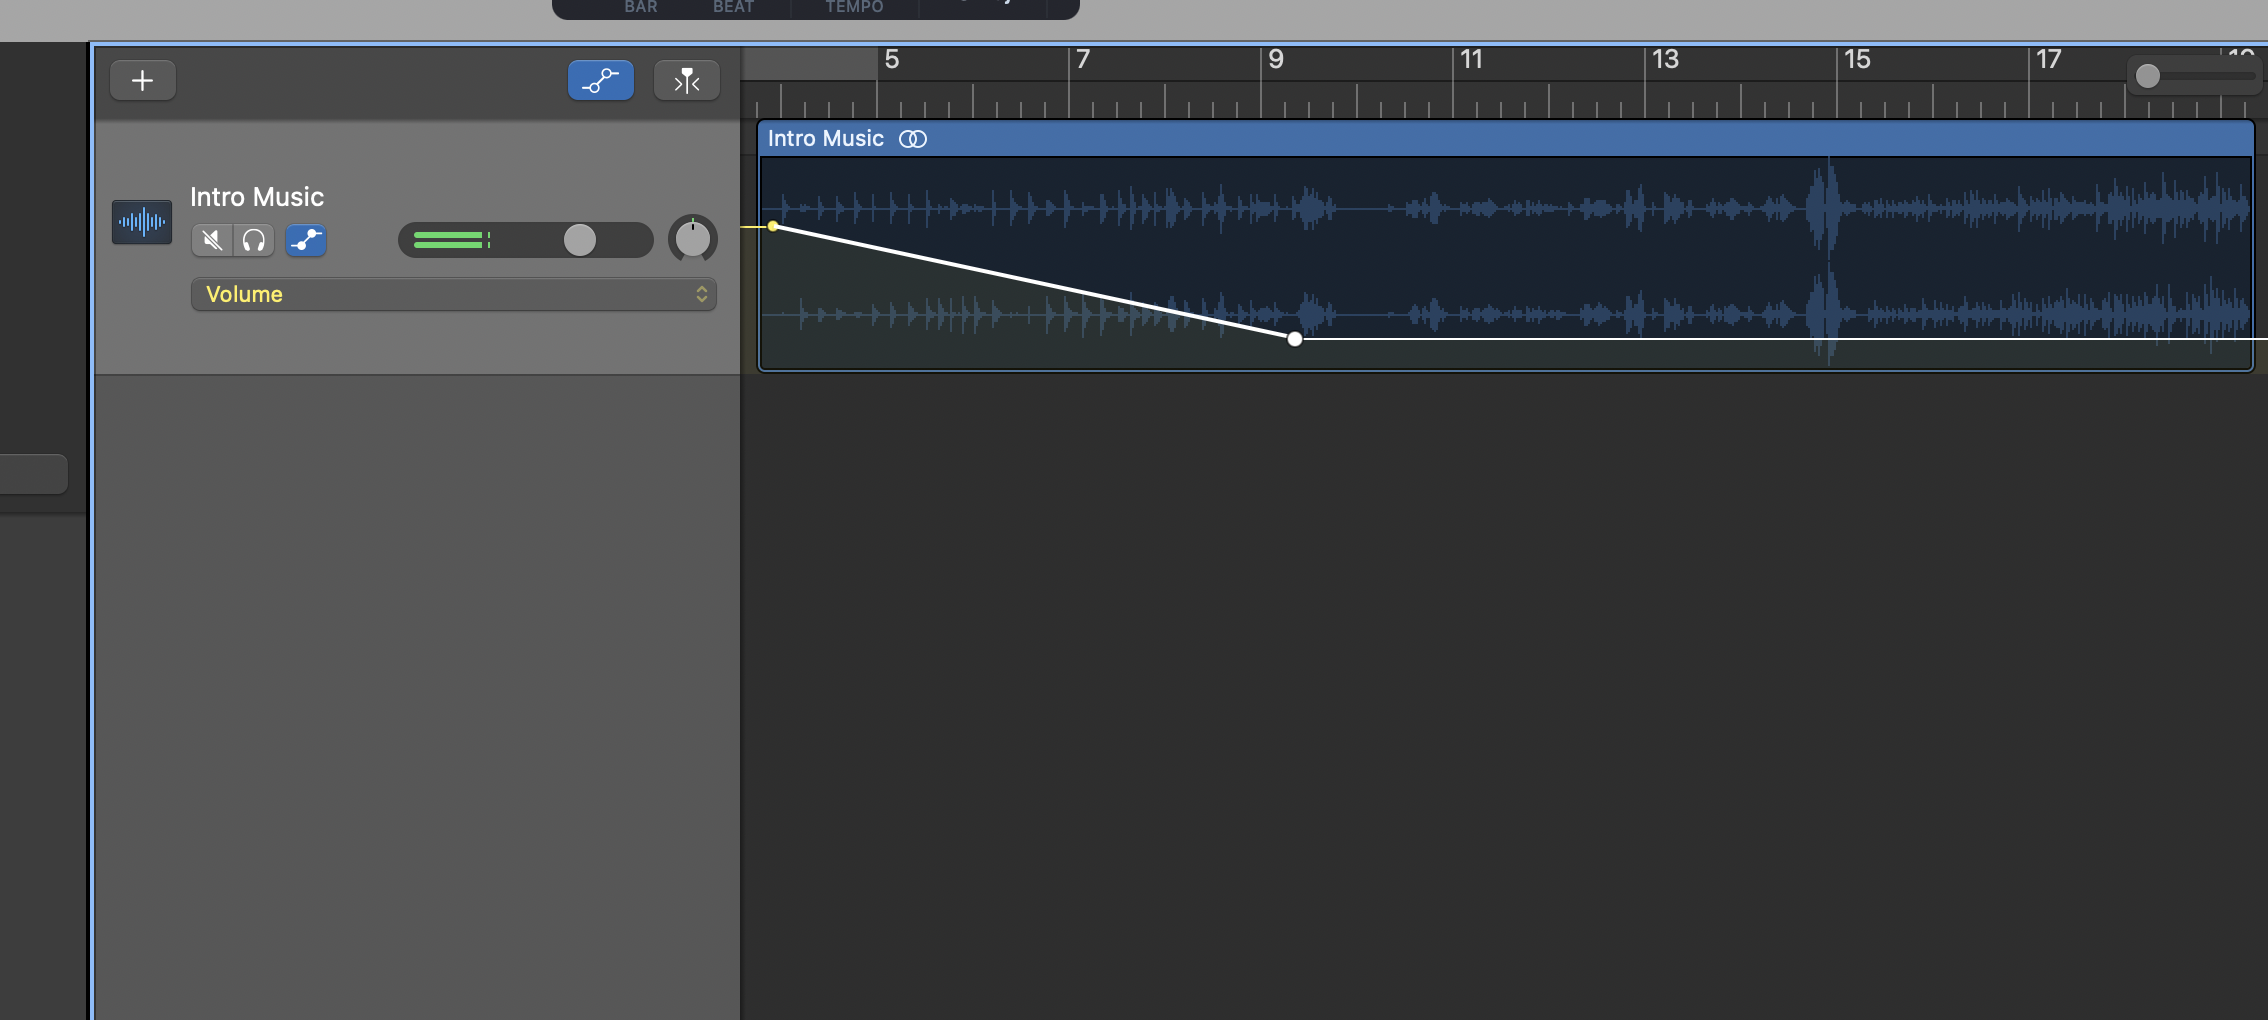
Click A on your keyboard to reveal a volume track line (in yellow) that you can create nodes to adjust the volume of your track
3. Trim audio tracks
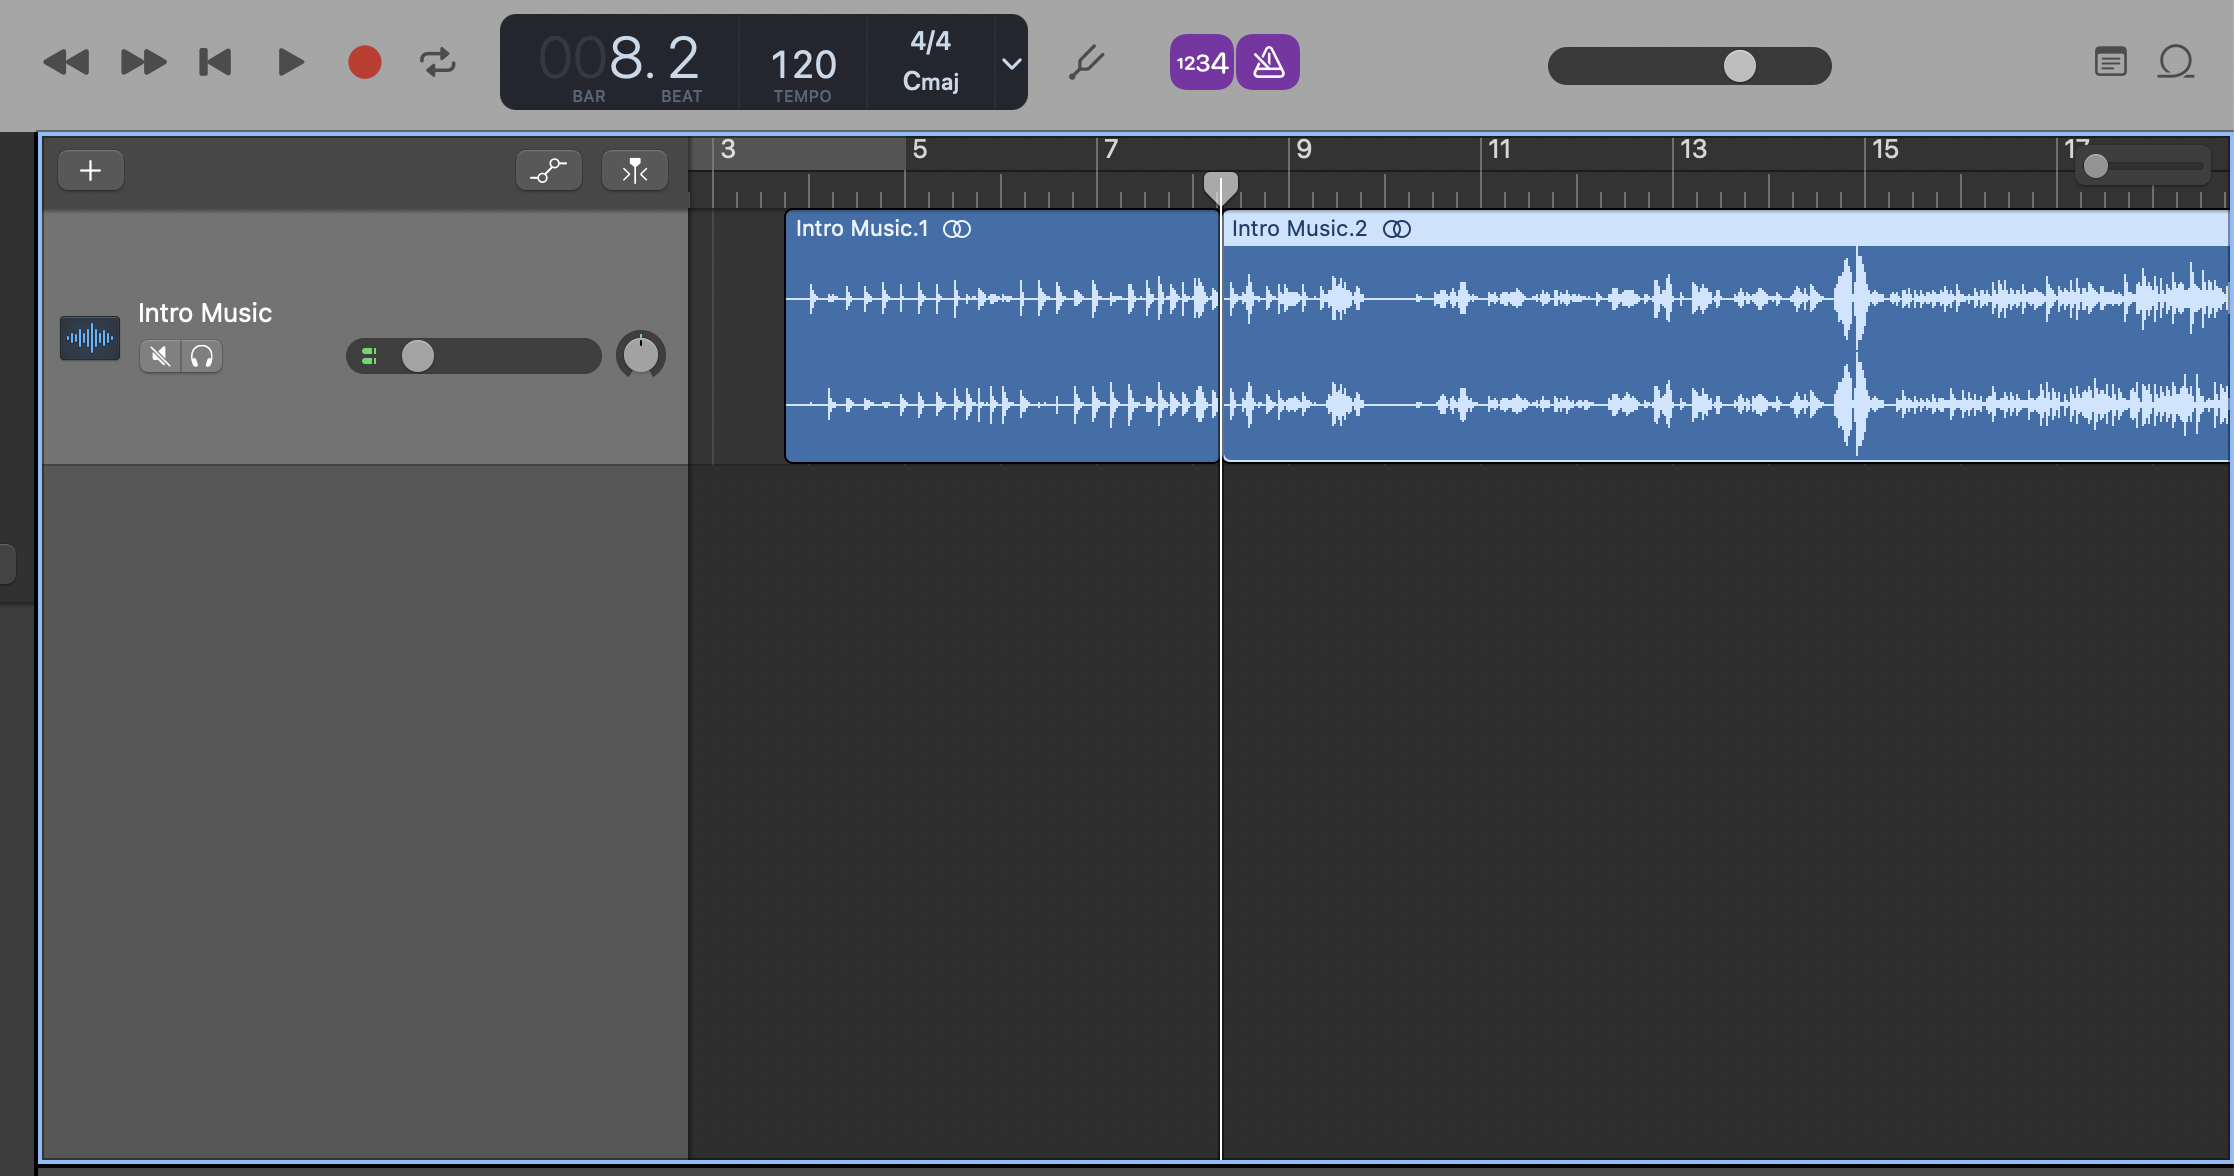
Press command + T to select areas of your track to trim
4. Embed additional audio tracks preloaded on Garageband
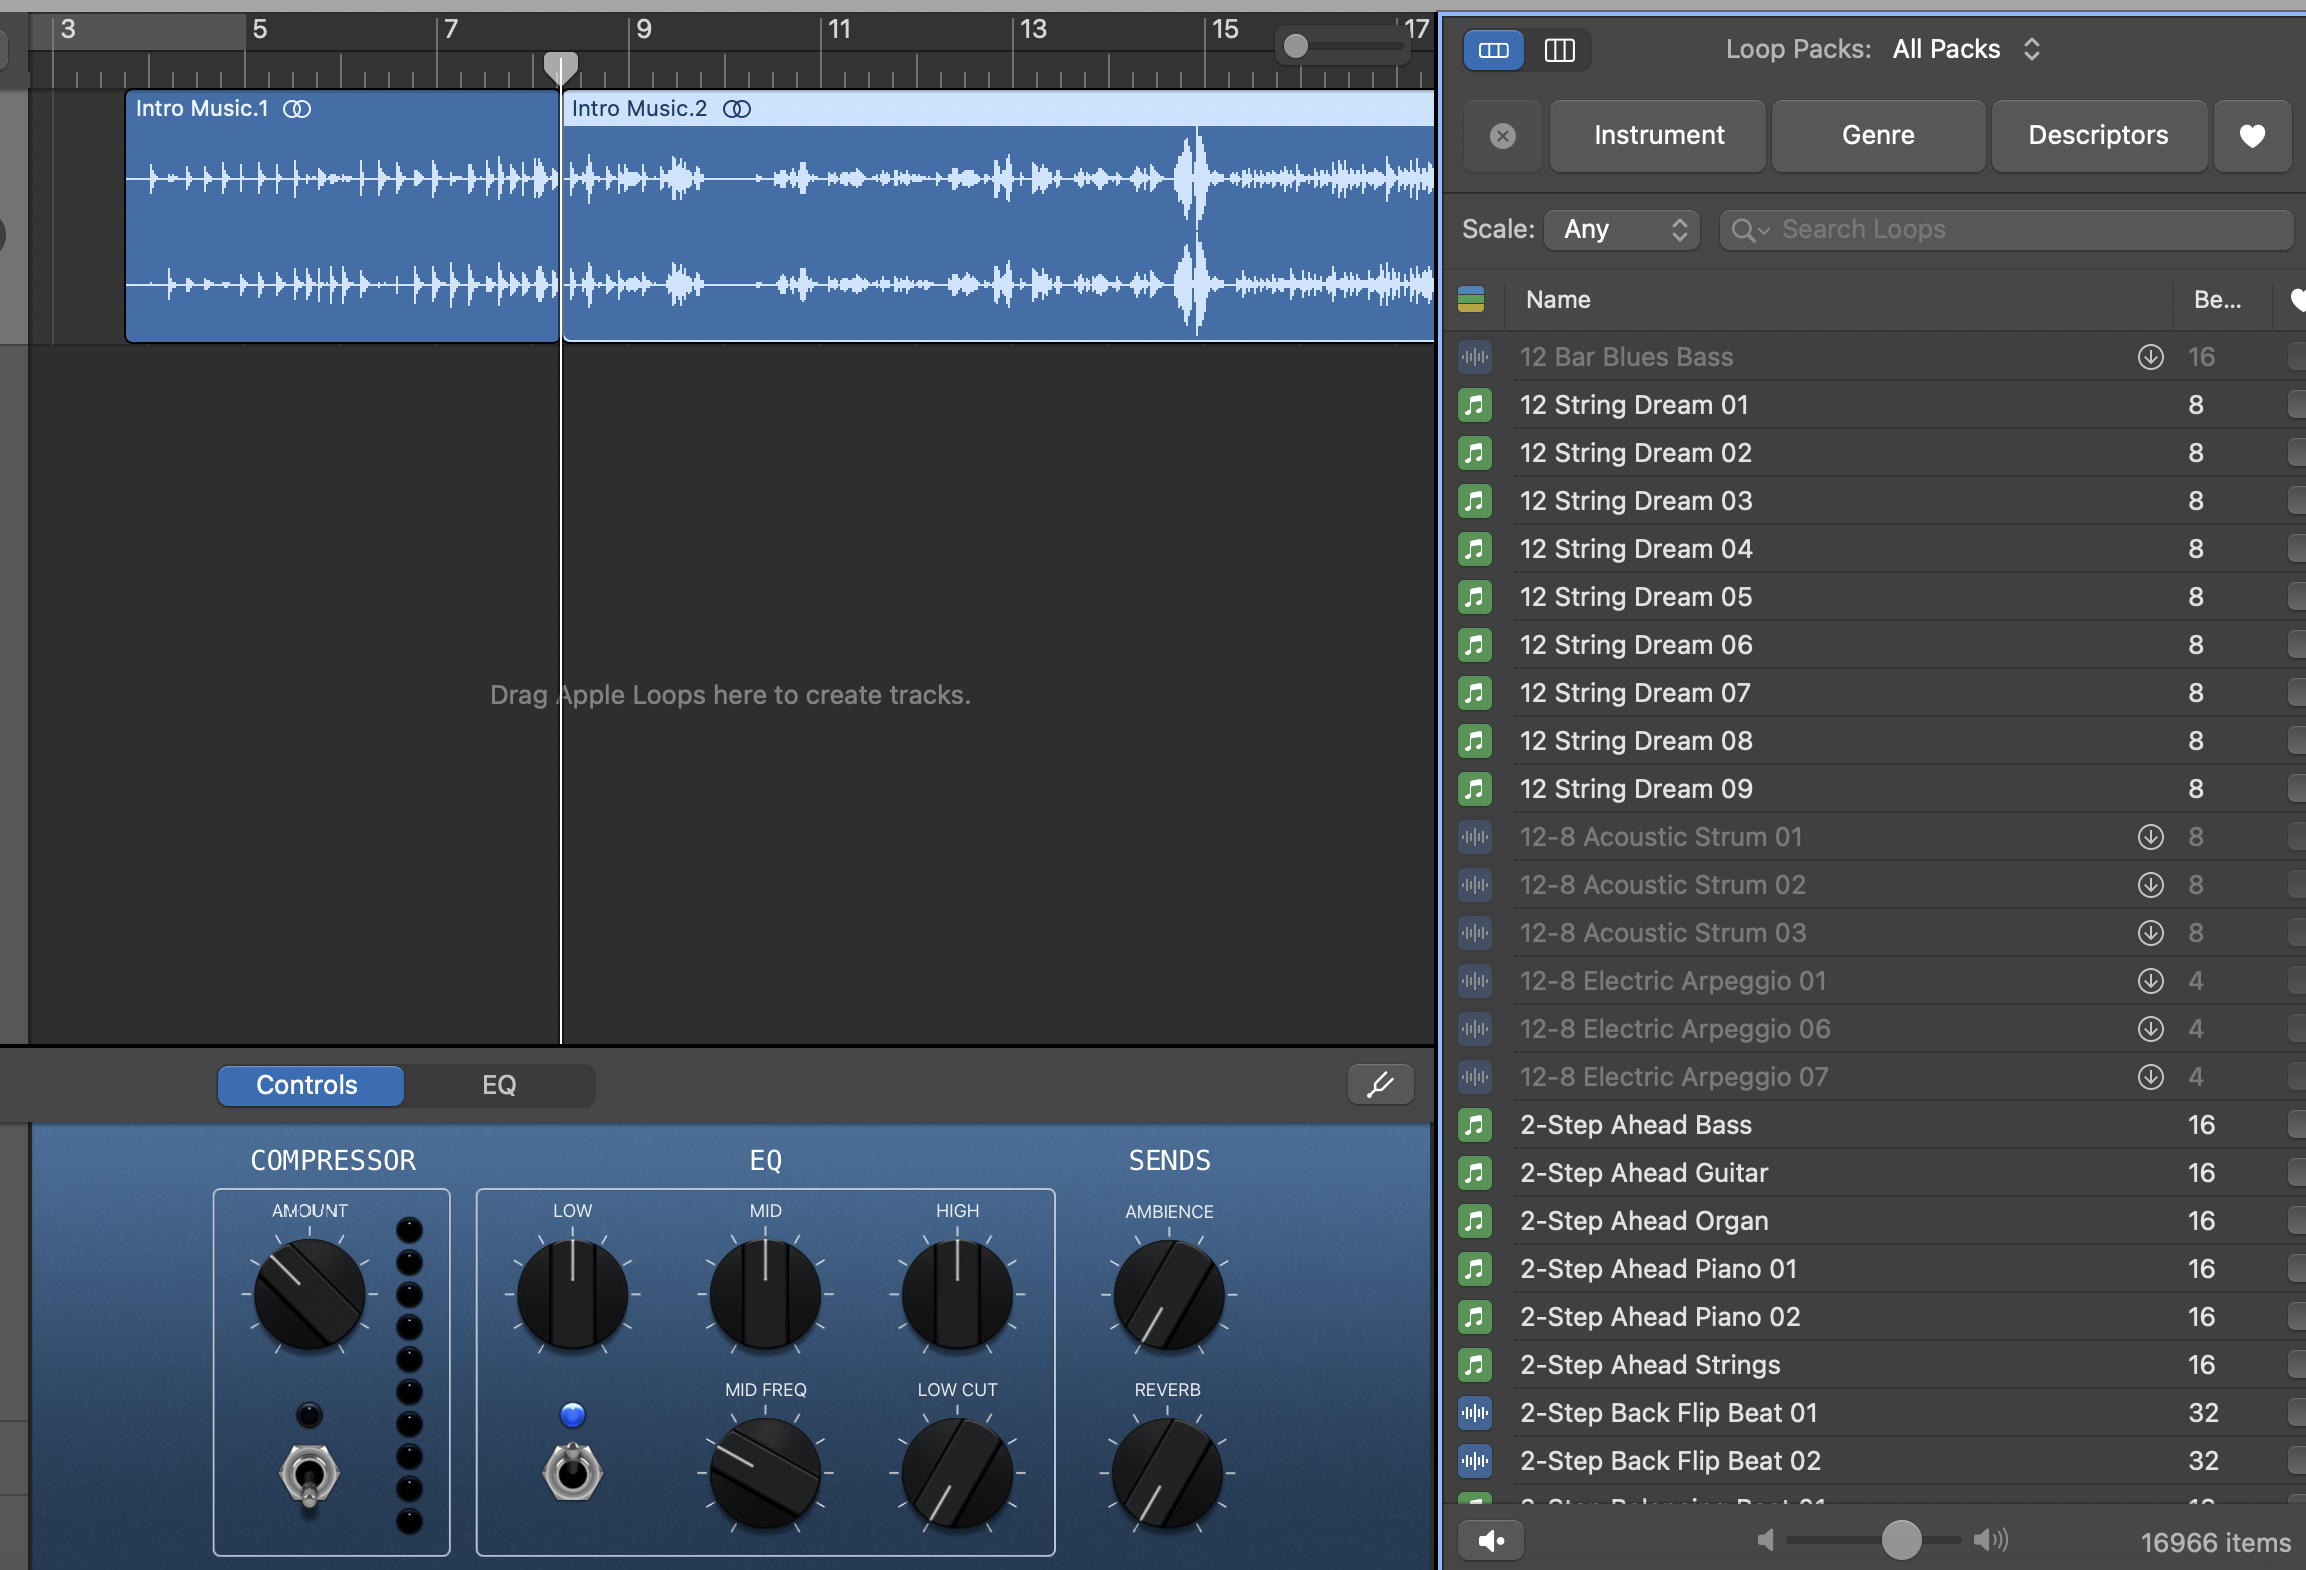
Clicking the circle icon on the upper right hand side, you can select a list of audio tracks preloaded into GarageBand that you can drag and drop into GarageBand.
## **Additional podcasting resources**
### 1. Podcasting with Logic:
https://hackmd.io/92a90sPvRz6rGyZsQ5spcg
### 2. Podcasting with Audacity (free on all computers)
https://hackmd.io/LUsMe9m7R5yONg1JpYjKlg


