AI 影像辨識
==
###### tags: `AI`,`IOT`,`AIOT`,`MQTT`,`Jetson Xavier NX`
## 1.硬體說明
## 2.作業系統安裝
1.Jetson Xavier NX 作業系統(Linux)建立,請參閱NVIDIA Jetson Nano安裝教學:
>https://d246810g2000.medium.com/nvidia-jetson-nano-for-jetpack-4-4-01-%E7%92%B0%E5%A2%83%E5%AE%89%E8%A3%9D-fd48d5658a13<br>
>[name=張銘][time=Mon, Jul 7, 2020]
2.更新相關套件程式<br>
```python=
sudo apt-get update
sudo apt-get upgrade -y
sudo apt-get full-upgrade
sudo apt-get install python3-pip
python3 -m pip install --upgrade pip
sudo apt-get install build-essential
sudo apt-get install git
sudo apt install curl
sudo -H pip3 install jetson-stats
sudo systemctl restart jetson_stats.service
```
設定 CUDA 環境變數
```python=
# 安裝 vi 編輯器
sudo apt-get install vi
# 進入 .bashrc 設定
sudo vi ~/.bashrc
加入以下指令
export CUDA_HOME=/usr/local/cuda-10.2
export LD_LIBRARY_PATH=/usr/local/cuda-10.2/lib64:$LD_LIBRARY_PATH
export PATH=/usr/local/cuda-10.2/bin:$PATH
source ~/.bashrc
# 查看是否設定成功
nvcc -V
```
3.加入硬體M2 NVMe SSD 固態硬碟取代SD卡讀取,以其加快系統存取速度
```python=
$ git clone https://github.com/jetsonhacks/rootOnNVMe
$ cd rootOnNVMe #進入資料夾
$ ./copy-rootfs-ssd.sh #SD卡的rootfs複製到SSD
$ ./setup-service.sh #將root移至SSD
$ sudo reboot #完成系統重開機
```
4.更新相關套件程式
```python=
sudo apt-get install python-pip python-dev
sudo pip install --upgrade pip
sudo pip install --upgrade virtualenv
sudo apt-get install cmake libpython3-dev python3-numpy
```
5.兩者存取速度之比較
| 硬體說明 | Average Rate | Average Access Time |
| -------- | ------------ | ------------------- |
| NVMe SSD (128GB) |2832 MB/s | 0.07ms |
| SD卡 (64GB) | 85.2 MB/s | 0.63ms |
6.python版本默認是python2.7,切换到python3.6版本
```python=
sudo update-alternatives --install /usr/bin/python python /usr/bin/python2 100
sudo update-alternatives --install /usr/bin/python python /usr/bin/python3 150
sudo update-alternatives --config python
```
選取0,將預設模式設定於Python3

7.安裝Framework
```python=
########## PyTorch ##########
sudo apt-get install libopenblas-base libopenmpi-dev libomp-dev python3-pip
pip3 install Cython
wget https://nvidia.box.com/shared/static/9eptse6jyly1ggt9axbja2yrmj6pbarc.whl -O torch-1.6.0-cp36-cp36m-linux_aarch64.whl
pip3 install torch-1.6.0-cp36-cp36m-linux_aarch64.whl
```
安裝完確認PyTorch版本

8.安裝ONNX Runtime
```python=
# Download pip wheel from location mentioned above
wget https://nvidia.box.com/shared/static/jy7nqva7l88mq9i8bw3g3sklzf4kccn2.whl -O onnxruntime_gpu-1.10.0-cp36-cp36m-linux_aarch64.whl
# Install pip wheel
pip3 install onnxruntime_gpu-1.10.0-cp36-cp36m-linux_aarch64.whl
```
安裝後確認運行狀況

16.確認版本
```python=
sudo apt-cache show nvidia-jetpack
```
17.安裝物件偵測程式
```python=
git clone https://github.com/dusty-nv/jetson-inference
cd jetson-inference
mkdir build
cd build
git submodule update --init
cmake ../
make -j$(nproc)
sudo make install
```
18.MIPI CAMERA功能測試
```python=
gst-launch-1.0 nvarguscamerasrc sensor_id=0 ! 'video/x-raw(memory:NVMM),width=1920, height=1080, framerate=30/1' ! nvvidconv flip-method=0 ! 'video/x-raw,width=960, height=540' ! nvvidconv ! nvegltransform ! nveglglessink -e
```
19.deepstream
```python=
sudo apt-get install libssl1.0.0 libgstreamer1.0-0 gstreamer1.0-tools gstreamer1.0-plugins-good gstreamer1.0-plugins-bad gstreamer1.0-plugins-ugly gstreamer1.0-libav libgstrtspserver-1.0-0 libjansson4
sudo apt-get install libgstreamer1.0-0 gstreamer1.0-plugins-base gstreamer1.0-plugins-good gstreamer1.0-plugins-bad gstreamer1.0-plugins-ugly gstreamer1.0-libav gstreamer1.0-doc gstreamer1.0-tools gstreamer1.0-x gstreamer1.0-alsa gstreamer1.0-gl gstreamer1.0-gtk3 gstreamer1.0-qt5 gstreamer1.0-pulseaudio libgstrtspserver-1.0-dev gstreamer1.0-rtsp
sudo apt-get install libgstreamer1.0-dev libgstreamer-plugins-base1.0-dev
sudo apt-get install libgstreamer-plugins-base1.0-dev libgstreamer1.0-dev libgstrtspserver-1.0-dev libx11-dev libgstrtspserver-1.0-dev gstreamer1.0-rtsp ffmpeg
sudo apt-get install libgstreamer-plugins-base1.0-dev libgstreamer1.0-dev libgstrtspserver-1.0-dev libx11-dev libjson-glib-dev
```
20.deepstream 安裝
```python=
sudo tar -jxvf deepstream_sdk_v6.0.1_jetson.tbz2 -C /
cd /opt/nvidia/deepstream/deepstream-6.0/
sudo ./install.sh
sudo ldconfig
```
21.新增環境變數
```python=
sudo vim /etc/ld.so.conf
/opt/nvidia/deepstream/deepstream-6.0/lib/ #新增在檔案最後
sudo ldconfig #立即生效
sudo vim ~/.bashrc
unset DISPLAY #新增在bashrc最後
source ~/.bashrc #儲存退出&生效
reboot #重開機
```
22.檢視deepstream版本資訊
```python=
deepstream-app --version-all
```
23.ssss
```python=
sudo apt-get install curl
. <( wget -O - https://code.headmelted.com/installers/apt.sh )
sudo apt-get install libcanberra-gtk-module
sudo apt-get install v4l-utils
```
## 1.動機與目的
1. 動機:部門最近計畫推出應用於超商之冰箱廣告機。並汲取戴資穎所代言之喬山健身魔鏡所啟發之靈感,希望能夠針對臉部、肢體以及行為進行AI辨識,以期能夠成功應用於公司自家產品上。<br>

2. 目的:抓取臉部框架以及特徵
| 項目 | 代碼 | 數值區間 |
| ---------------------- | ------------- | ---------------- |
| 年紀 | age | 0~100 |
| 辨別碼 | ID | 工號或身分證字號 |
| 性別 | gender | Male,Female |
| 口罩 | mask | True,False |
| 臉部框架 faceRactangle | 左上X座標left | 0~480 |
| | 左上Y座標top | 0~480 |
| | 高height | 0~480 |
| | 寬width | 0~480 |
| 情緒emotion | 開心happiness | 0~1 |
| | 怒anger | 0~1 |
| | 哀sadness | 0~1 |
| | 恐懼fear | 0~1 |
| | 驚訝surprise | 0~1 |
人程式定義宣告 [Python]:
```python=
class person:
def __init__(self, age,ID ,gender,mask):
self.age = age
self.ID = ID
self.gender = gender
self.mask = mask
```
臉部框架定義宣告 [Python]:
```python=
class faceRactangle:
def __init__(self, left, top, height, weight, line_color="blue"):
self.left = left
self.top = top
self.height = height
self.weight = weight
self.line_color = line_color #框框框起來的顏色
```
人情緒表情定義宣告 [Python]:
```python=
class emotion:
def __init__(self, happiness, anger,sadness,fear,surprise):
self.happiness = happiness
self.anger = anger
self.sadness = sadness
self.fear = fear
self.surprise = surprise
```
## 2.題目構思與方向確立
1. 大方向架構
<br>尚待討論....
2. 硬體選擇
> Jetson Xavier NX Developer KIT[color=#f407e4]
> 
> - 384-core NVIDIA Volta™ GPU
> - 48 Tensor Cores
> - 6-core NVIDIA ARM®v8.2 64-bit CPU 6MB L2 + 4MB L3
> - 2x NVDLA Engines
> - 7-way VLIW Vision Processor
> - 8 GB 128-bit LPDDR4x
> - 10/100/1000 Base-T Ethernet
> - 40pin GPIO: UART,I2C,I2S,SPI
> - [color=#61d8bc]
> 樹莓派800萬像素CCD[color=#f407e4]
> 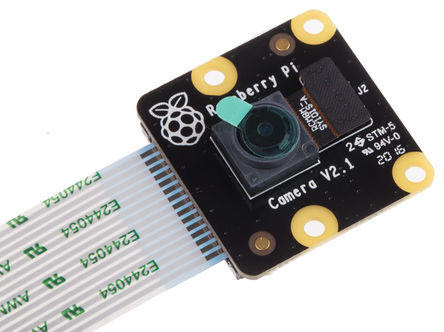
> - 800萬像素
> - MIPI CSI-2
> - 靜態圖片:3280*2464
> - 動態影片:1080p30,720p60,480p60
> - [color=#61d8bc]
3. 開發軟體工具
| 分類 | 語言 | 使用工具 | 使用說明 |
| ---------- | -------- | ---------------------------- | -------------- |
| 前端 | Python | Anaconda | 深度學習 |
| 後端排程 | Python | Anaconda, ASP .NET Core | 演算法優化排程 |
| 後端資料庫 | AzureSQL | SQL Server Management Studio | 資料回饋 |
| IOT應用 | 無 | MQTT | 物聯網 |
## 3.系統環境建置
2. SD卡(存取速度80MB/s)硬體切換至SSD硬碟(存取速度2800MB/s),加速執行速度,請參閱設定教學:
>https://blog.cavedu.com/2020/06/02/jetson-xavier-nx-ssd/<br>
>[name=CAVEDU小編][time=Mon, Jun 2, 2020]
4. 安裝Linux系統常用模組
```linux=
sudo apt-get update
sudo apt-get upgrade
sudo apt-get install libfreetype6-dev pkg-config -y
sudo apt-get install zlib1g-dev zip libjpeg8-dev libhdf5-dev -y
sudo apt-get install libssl-dev libffi-dev python3-dev -y
sudo apt-get install libhdf5-serial-dev hdf5-tools -y
sudo apt-get install libblas-dev liblapack-dev
sudo apt-get install libatlas-base-dev -y
sudo apt-get install build-essential cmake libgtk-3-dev libboost-all-dev -y
```
4. 安裝Python必要套件模組
```python=
pip install matplotlib
pip install scikit-build
pip install imutils
pip install pillow
pip install scipy
pip install keras
pip install scikit-learn
pip install jupyter notebook
pip install pycuda
```
5. 安裝Tensorflow
```python=
pip install --extra-index-url https://developer.download.nvidia.com/compute/redist/jp/v42 tensorflow-gpu==1.13.1+nv19.4
```
6. todo
7. todo
## 4.資料收集與訓練學習
1. 類神經網路訓練模型:
```python=
from keras.preprocessing.image import ImageDataGenerator,load_img,img_to_array
def Training_Face(): #臉部訓練
pass
#(img_train,label_train),(img_test,label_test)=v2.keras........
# referense from Google
def Training_SolarBoard(): #太陽能板熱能訓練
pass
```
2. 人臉辨識:將一萬多張臉部的圖片檔進行訓練
```python=
photo_path = r"Z:\face_train\face" #本機端存放人臉圖片位址
img_format = {'png', 'jpg', 'bmp'}
for dir_name,sub_dir_list,filename_list in os.walk(photo_path):
if len(filename_list) > 0:
for filename in filename_list:
if filename.split(".")[-1] in img_format:
Training_Face()
```
3. todo
4. todo
## 5.成果展現
1. 影像輸入導入模型:
```python=
import cv2,time
import numpy as np
video_source = "https://localhost:8080/video"
cap, height, width = video_init(video_source)
while (cap.isOpened()):
status, find_face.infer = cap.read()
if status is True:
Detection_Face(img)#-----------進行臉部辨識
Detection_SolarBoard(img)#-----進行太陽能板辨識
cv2.putText(img, #影像
"我是文字", #文字
(10, 50), #座標
cv2.FONT_HERSHEY_SIMPLEX, #字型
1, #大小
(0, 255, 0), #RGB顏色
3, #線條寬度
cv2.LINE_AA) #線條種類
cv2.imshow("Rafael's video", img)
cap.release()
cv2.destroyAllWindows()
```
2. todo
3. todo
---
<body>
<div class="alert alert-warning">
<strong>Warning!</strong><p>There was a problem with your network connection.</p></div></body>
 Sign in with Wallet


