OmniXRI-Jack
    • Create new note
    • Create a note from template
      • Sharing URL Link copied
      • /edit
      • View mode
        • Edit mode
        • View mode
        • Book mode
        • Slide mode
        Edit mode View mode Book mode Slide mode
      • Customize slides
      • Note Permission
      • Read
        • Only me
        • Signed-in users
        • Everyone
        Only me Signed-in users Everyone
      • Write
        • Only me
        • Signed-in users
        • Everyone
        Only me Signed-in users Everyone
      • Engagement control Commenting, Suggest edit, Emoji Reply
      • Invitee
    • Publish Note

      Share your work with the world Congratulations! 🎉 Your note is out in the world Publish Note

      Your note will be visible on your profile and discoverable by anyone.
      Your note is now live.
      This note is visible on your profile and discoverable online.
      Everyone on the web can find and read all notes of this public team.
      See published notes
      Unpublish note
      Please check the box to agree to the Community Guidelines.
      View profile
    • Commenting
      Permission
      Disabled Forbidden Owners Signed-in users Everyone
    • Enable
    • Permission
      • Forbidden
      • Owners
      • Signed-in users
      • Everyone
    • Suggest edit
      Permission
      Disabled Forbidden Owners Signed-in users Everyone
    • Enable
    • Permission
      • Forbidden
      • Owners
      • Signed-in users
    • Emoji Reply
    • Enable
    • Versions and GitHub Sync
    • Note settings
    • Engagement control
    • Transfer ownership
    • Delete this note
    • Save as template
    • Insert from template
    • Import from
      • Dropbox
      • Google Drive
      • Gist
      • Clipboard
    • Export to
      • Dropbox
      • Google Drive
      • Gist
    • Download
      • Markdown
      • HTML
      • Raw HTML
Menu Note settings Sharing URL Create Help
Create Create new note Create a note from template
Menu
Options
Versions and GitHub Sync Engagement control Transfer ownership Delete this note
Import from
Dropbox Google Drive Gist Clipboard
Export to
Dropbox Google Drive Gist
Download
Markdown HTML Raw HTML
Back
Sharing URL Link copied
/edit
View mode
  • Edit mode
  • View mode
  • Book mode
  • Slide mode
Edit mode View mode Book mode Slide mode
Customize slides
Note Permission
Read
Only me
  • Only me
  • Signed-in users
  • Everyone
Only me Signed-in users Everyone
Write
Only me
  • Only me
  • Signed-in users
  • Everyone
Only me Signed-in users Everyone
Engagement control Commenting, Suggest edit, Emoji Reply
Invitee
Publish Note

Share your work with the world Congratulations! 🎉 Your note is out in the world Publish Note

Your note will be visible on your profile and discoverable by anyone.
Your note is now live.
This note is visible on your profile and discoverable online.
Everyone on the web can find and read all notes of this public team.
See published notes
Unpublish note
Please check the box to agree to the Community Guidelines.
View profile
Engagement control
Commenting
Permission
Disabled Forbidden Owners Signed-in users Everyone
Enable
Permission
  • Forbidden
  • Owners
  • Signed-in users
  • Everyone
Suggest edit
Permission
Disabled Forbidden Owners Signed-in users Everyone
Enable
Permission
  • Forbidden
  • Owners
  • Signed-in users
Emoji Reply
Enable
Import from Dropbox Google Drive Gist Clipboard
   owned this note    owned this note      
Published Linked with GitHub
Subscribed
  • Any changes
    Be notified of any changes
  • Mention me
    Be notified of mention me
  • Unsubscribe
Subscribe
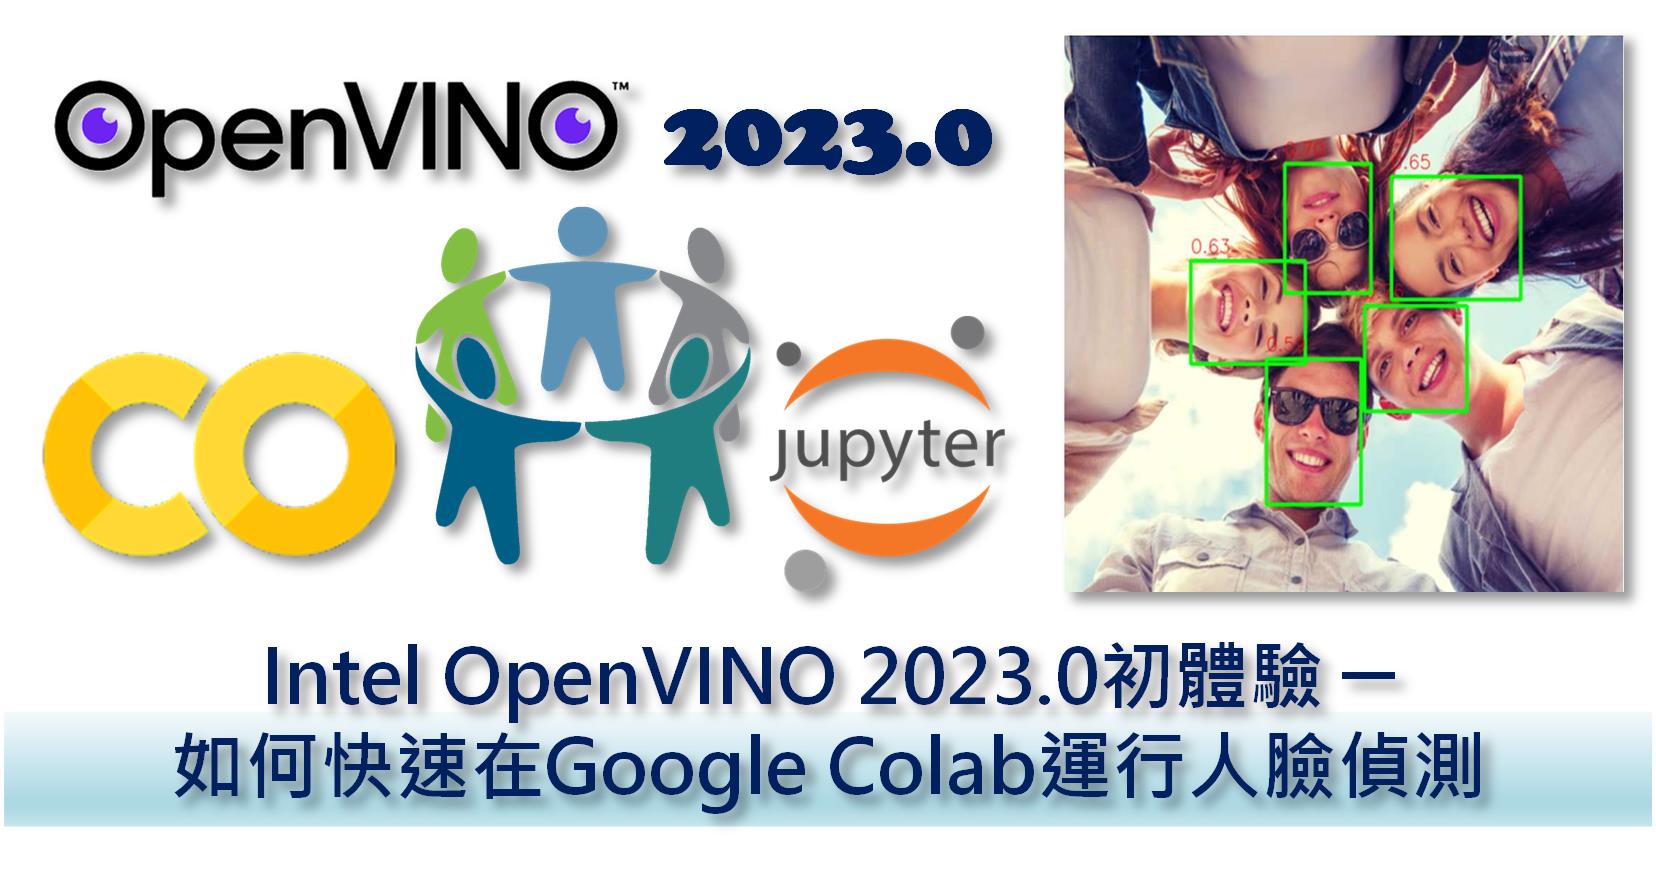
# 【vMaker Edge AI專欄 #06】 Intel OpenVINO 2023.0初體驗─如何快速在Google Colab運行人臉偵測 作者:Jack OmniXRI, 2023/06/12 ![](https://hackmd.io/_uploads/Bkc49gkD2.jpg) 話說二十多年前第一次到教練場學開車,當時是手排車,常常因換檔時離合器、排擋、油門控制不當就導致車子瞬間熄火,不然就是猛烈振動甚至暴衝,好在教練細心指導,才能讓車子平順前進。後來改開自排車後,突然覺得以前那些換擋技巧根本用不到,車子自己就會處理好這些換檔工作,我們只要會轉方向盤,會踩油門、剎車加上專心路況就能順利把車開上路到達目的地。如今在學習AI這台大車時也遇到類似問題,需要一個好的教練指導開發AI的每個步驟和細節,不然就得換一套方便的工具,讓我們能專心在開發應用程式而不需要了解太多AI的數學和原理,而其中 **Intel OpenVINO Toolkit (以下簡稱OpenVINO)** [1] 就是一套不錯的AI推論(Infernece)優化工具。 一般常見的AI應用有「電腦視覺」、「自然語言處理」、「資料分析」等,通常多半需要收集大量的資料,經過訓練特定的模型(或機器學習算法、神經網路等)才能應付各式AI應用的需求。訓練過程非常繁瑣且須依靠極高算力才能完成模型巨量權重(參數)的訓練。不過好在當完成模型訓練後,只需運行一次推論就能得到結果。如果還覺得模型太大或推論速度不夠快,此時可透過一些複雜程序來進行參數量化(如FP32變成INT8)或模型優化(如減枝、壓縮、蒸餾等),以達到又快又準的結果。而以上介紹的 OpenVINO 正是這樣的工具,它已幫大家把常用AI應用的模型都預訓練好了,如影像分類、物件偵測、人臉辨識、影像分割、姿態估測等,甚至現在流行的大型語言模型(LLM)及AI生成影像模型(AIGC),這樣大家就可輕鬆上手AI應用。 以下就以最常見的 **「人臉辨識」** (只作人臉位置偵測,不作身份辨識)作為起手式,使用網頁版 Python 開發環境 Google Colab (Jupyter Notebook環境)直接安裝最新2023.0版的 OpenVINO 運行其 Notebooks 範例,來讓大家快速體驗一下AI應用帶來的好處。 ## 1. 人臉辨識技術的演進 以電腦視覺進行「人臉辨識」已發展有數十年,如Fig. 1所示,從最早的統計式(特徵臉)再演進到模板式(VJ聯級法)、特徵式(主動形狀模型ASM)、外觀式(主動外觀模型AAM)。但這些方式通常只能辨識較正面且大小、位置差不多,光照均勻的人臉影像,若遇到各種拍攝角度、尺寸、光照、背景、表情、化妝、眼鏡、口罩等干擾因素時,辨識率就會急速下降,變得不夠實用。更多人臉辨識相關介紹可參考[2],這裡就不多作說明。 近年來深度學習(神經網路)技術及電腦硬體算力突飛猛進,所以透過巨量的人臉資料集進行模型訓練,就能得到較穩定實用的模型。不論是人臉偵測、身份辨識、表情、性別、年齡等都有單獨對應或整合式的模型可供使用。所以在人臉辨識上,除了可設計專用模型外,亦可當成普通物件來進行偵測。 ![](https://hackmd.io/_uploads/rJqKqe1Pn.jpg) 
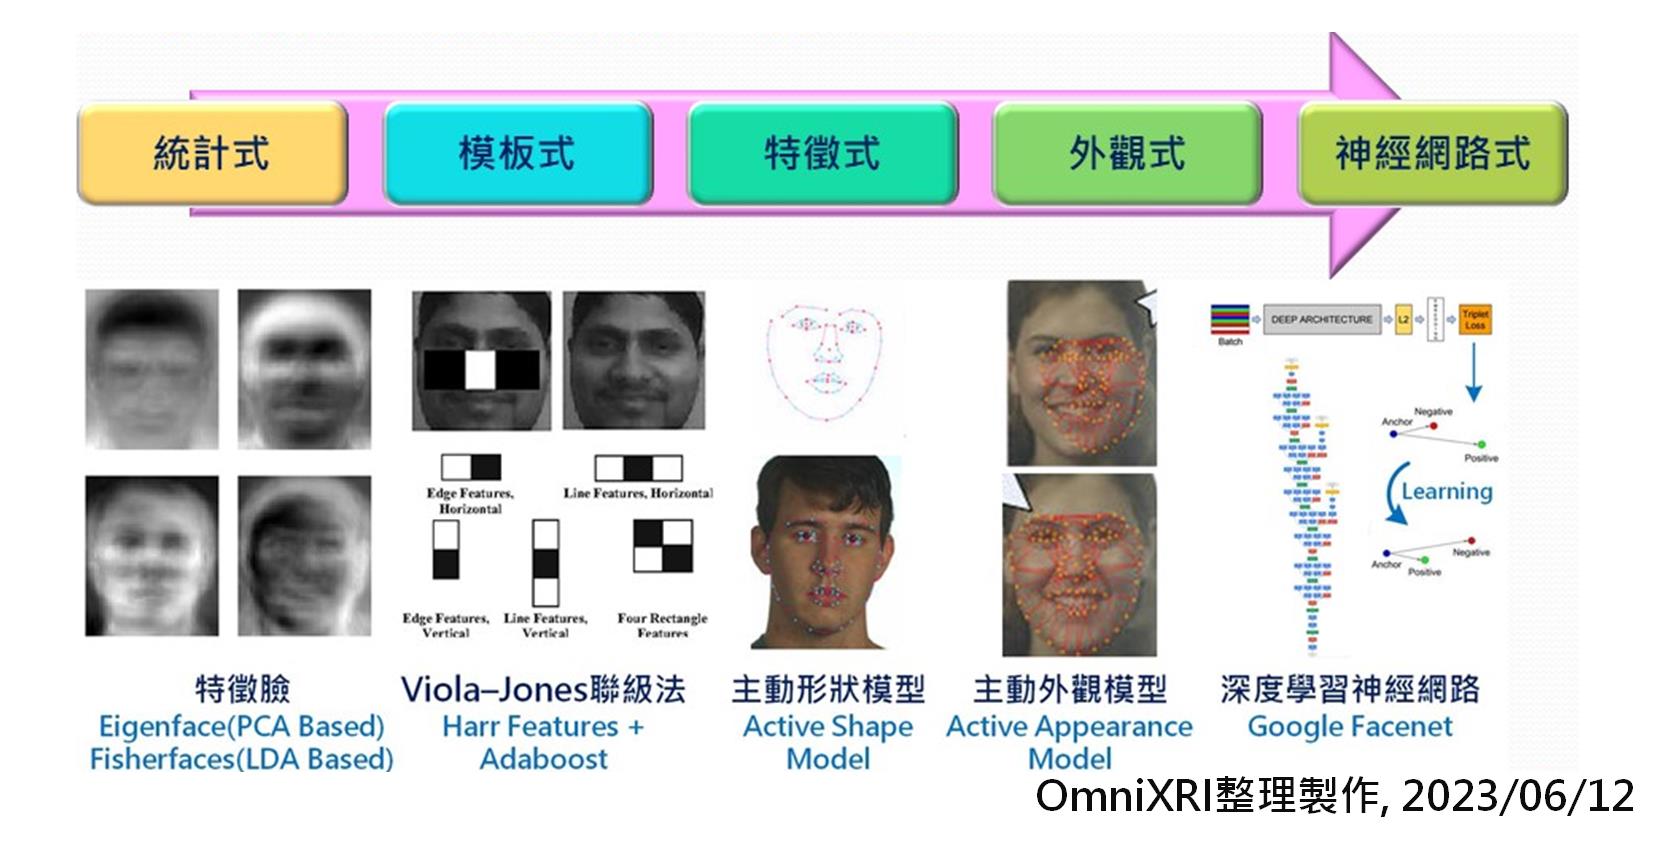
Fig. 1 人臉辨識技術發展圖。[2] (OmniXRI整理製作,2023/06/12) ## 2. 如何在Colab上安裝OpenVINO OpenVINO可支援多種作業系統(如Windows, Linux, macOS),多種安裝模式(如執行檔、APK、PyPl(pip install)、自行編譯、Docker等),甚至有提供雲端免安裝的 DevCloud版本。 在本文中,為了讓大家能更輕鬆的試用,只要找一台能上網的電腦,開啟文末提供的 Colab 範例(*.ipynb)點擊連結就能馬上安裝 OpenVINO 並運行人臉辨識範例。 如範例中所示,安裝 OpenVINO 非常簡單,只要下列指令就完成。由於預設只會安裝必要套件,所以只需40到60秒就能完成,不像以前透過APK方式安裝需要4到5分鐘。 ```python= #更新 pip !python -m pip install --upgrade pip # 開始安裝 OpenVINO開發者版最新版本,本文發佈時為2023.0版 !pip install openvino-dev ``` 註:安裝後會出部份紅字錯誤訊息,如下所示 ERROR: pip's dependency resolver does not currently take into account all the packages that are installed. This behaviour is the source of the following dependency conflicts. google-colab 1.0.0 requires pandas~=1.5.3, but you have pandas 1.3.5 which is incompatible. 主要是因 Colab 要求的套件版本和 OpenVINO 安裝的不同,本範例沒有使用到這些模組,可暫時忽略這項錯誤,繼續執行下面範例。 ## 3. 使用OpenVINO進行人臉辨識 在 OpenVINO 中已有許多預訓練好的模型和範例程式,其中以 Notebooks 最為方便,只要在電腦上安裝好 Python 並架好一個虛擬環境,再下載 Notebooks 安裝 Jupyter Lab 就能玩到數十種範例,完整安裝方式及範例內容可參考[3]。 不過這些範例雖然也是 *.ipynb 但由於很多相對路徑及設定不同,所以無法直接在 Colab 上運行。這裡為了方便大家快速上手,不用在本機端安裝就可測試,所以參考了 Notebooks 中的 Hello Object Detectio [4] 進行修改,使其可在 Colab 上運行。 另外由於不同模型輸出格式略有不同,而本範例僅適用輸出格式為 [image_id, label, conf, x_min, y_min, x_max, y_max] ,所以目前可支援模型名稱如下所示。 * face-detection-0200 * face-detection-0202 * face-detection-adas-0001 * face-detection-retail-0004 * face-detection-retail-0005 * face-detection-retail-0044 接下來就開始說明完整執行步驟。首先要先下載及轉換模型及測試用的圖檔。模型名稱(--name)可替換成上述任一名稱。測試用的圖檔來源及名稱可自訂,但記得後續推論時輸入影像名稱要記得更換。 ```python= !omz_downloader --name face-detection-adas-0001 !omz_converter --name face-detection-adas-0001 !wget -N https://raw.githubusercontent.com/OmniXRI/OpenVINO2022_on_Colab_Samples/main/data/face_ring.jpg ``` 接下來準備好必要的函式庫,載入及編譯模型,載入原始圖檔並轉成指定格式(尺寸、矩陣順序、色彩格式),就能進行推論。完成後會得到物件框(即人臉)的外框資訊,包含人臉數量、影像編號、標籤名稱、置信度、物件框左上角座標 [image_id, label, conf, x_min, y_min, x_max, y_max] 。最後再把這些資訊畫回影像上就完成。如下範例程式所示。 如果不想了解程式運作方式的朋友可直接跳過,直接享受找到人臉的結果就可以了。 ```python= # 引入必要函式庫 import cv2 import matplotlib.pyplot as plt import numpy as np from openvino.runtime import Core # 載入及編譯模型 ie = Core() # 讀入模型並編譯 model = ie.read_model(model="intel/face-detection-adas-0001/FP32/face-detection-adas-0001.xml") # 在Colab上裝置名稱只能選CPU compiled_model = ie.compile_model(model=model, device_name="CPU") # 建立輸出入層定義 input_layer_ir = compiled_model.input(0) output_layer_ir = compiled_model.output(0) # 載入待測試影像並轉換格式 # 讀入待測試影像並將BGR格式轉換為RGB格式以滿足 MobileNet 模型需求 image = cv2.imread(filename="face_ring.jpg") # N,C,H,W = 批次數量, 影像通道數, 影像高及寬 N, C, H, W = input_layer_ir.shape # 調整影像尺寸至模型指定輸入尺寸 resized_image = cv2.resize(image, (W, H)) # # 擴展輸入陣列維度 input_image = np.expand_dims(resized_image.transpose(2, 0, 1), 0) # 顯示待測試影像並將色彩格式由BGR變成RGB plt.imshow(cv2.cvtColor(image, cv2.COLOR_BGR2RGB)); # 進行推論,取得偵測到的物件(人臉)資訊 boxes = compiled_model([input_image])[output_layer_ir] # 定義「轉換結果到影像」函式 # 對每一個偵測的物件描述包括 [x_min, y_min, x_max, y_max, conf] 外框的左上角及右下角座標及置信度 # 輸入參數包含原始BGR格式影像、已縮放尺寸之影像、已偵測到的人臉資訊、最低接受門檻及置信度顯示 def convert_result_to_image(bgr_image, resized_image, boxes, threshold=0.3, conf_labels=True): # 定義色彩名稱及數值 colors = {"red": (255, 0, 0), "green": (0, 255, 0)} # 取得原始影像尺寸並計算長寬縮放比 (real_y, real_x), (resized_y, resized_x) = bgr_image.shape[:2], resized_image.shape[:2] ratio_x, ratio_y = real_x / resized_x, real_y / resized_y # 將原始BGR格式影像轉換成RGB格式 rgb_image = cv2.cvtColor(bgr_image, cv2.COLOR_BGR2RGB) # 重覆處理物件外框資訊 for box in boxes[0][0]: # 確認取得之物件外框其置信度是否已高於門檻 conf = box[2] if conf > threshold: # 若是則將物件外框浮點數座標轉換成實際繪圖的整數座標 # 若座標在影像最高處則略微調低以利繪圖及可視。 (x_min, y_min, x_max, y_max) = [ int(max(corner_position * resized_y * ratio_y, 10)) if idx % 2 else int(corner_position * resized_x * ratio_x) for idx, corner_position in enumerate(box[3:]) ] # 繪製物件外框(綠色,線粗3pt) rgb_image = cv2.rectangle(rgb_image, (x_min, y_min), (x_max, y_max), colors["green"], 3) # 若要顯示置信度,則繪製文字到圖上(紅字,0.8倍文字大小) if conf_labels: rgb_image = cv2.putText( rgb_image, f"{conf:.2f}", (x_min, y_min - 10), cv2.FONT_HERSHEY_SIMPLEX, 0.8, colors["red"], 1, cv2.LINE_AA, ) return rgb_image # 呼叫函式,繪製物件(人臉)的外框,可選擇性的開啟顯示置信度訊息(conf_labels=True/False)。 plt.figure(figsize=(10, 6)) plt.axis("off") plt.imshow(convert_result_to_image(image, resized_image, boxes, conf_labels=True)); ``` ![](https://hackmd.io/_uploads/B1OJSSJvn.jpg) Fig. 2 人臉辨識(物件偵測)結果。(OmniXRI整理製作,2023/06/12) 人臉偵測結果如Fig. 2所示,可看出即使是人臉旋轉很大角度、有不同表情甚至戴墨鏡也能順利被檢出,相較傳統的 OpenCV Haar 聯級法(Cascase)只能接受小幅度的旋轉有很大改善。如果想了解OpenCV作法的朋友可以參考[5]。 **本文完整範例如下連結,直接點擊就能啟動。進入 Colab 後,點擊選單<執行階段>中的<全部執行>就能執行範例。** https://colab.research.google.com/github/OmniXRI/OpenVINO2022_on_Colab_Samples/blob/main/OpenVINO_Face_Detection_on_Colab_2.ipynb 註:如果執行完出現結果影像一直閃爍情況,將游標移至影像上點擊一下即解決。另外如果想要備份這份範例,方便自己進行修改測試,要先登入自己的 Google 帳號,再點擊選單<檔案>中的<在雲端硬碟中儲存複本>,即完成備份。 ## 小結 以上人臉辨識(物件偵測)只是AI應用的一個簡單起手式,透過本文大家可了解到如何透過簡單的 Python 程式加上 OpenVINO的助力,就可輕鬆完成AI應用程式的開發。如果還想要測試更多的Colab + OpenVINO範例,可參考延伸閱讀[A]。相信有了這些基礎,後續學習上會更加順手。 ## 參考文獻 [1] Intel, "OpenVINO Document" https://docs.openvino.ai/2023.0/home.html [2] 許哲豪, "【課程簡報】Edge AI社聚#1 身份辨識防疫技術交流 ─ Edge AI人臉辨識技術剖析 " https://omnixri.blogspot.com/2021/02/edge-ai1-edge-ai.html [3] Intel, "Learn OpenVINO - Interactive Tutorials (Python) - OpenVINO notebooks documentation" https://docs.openvino.ai/2023.0/notebooks/notebooks.html [4] Intel, "OpenVINO Notebooks - Hello Object Detection" https://docs.openvino.ai/2022.3/notebooks/004-hello-detection-with-output.html [5] 許哲豪, "OpenCV Haar 聯級法(Cascase)人臉辨識Colab範例" https://colab.research.google.com/github/OmniXRI/NTUST_EdgeAI_2022/blob/main/Ch7_Implementations/Ch7-3_Face_Recognition/Ch7-3-1_OpenCV_Face_Detection/OpenCV_Haar_Face_Dtection.ipynb ## 延伸閱讀 [A] 許哲豪, "Intel OpenVINO 2022.x運行於Google Colab之範例分享" https://omnixri.blogspot.com/2023/05/intel-openvino-2022xgoogle-colab.html **本文同步發表在[【台灣自造者 vMaker】](https://vmaker.tw/)** --- OmniXRI 整理製作,歡迎點贊、收藏、訂閱、留言、分享, ###### tags: `vMaker` `Edge AI`

Import from clipboard

Paste your markdown or webpage here...

Advanced permission required

Your current role can only read. Ask the system administrator to acquire write and comment permission.

This team is disabled

Sorry, this team is disabled. You can't edit this note.

This note is locked

Sorry, only owner can edit this note.

Reach the limit

Sorry, you've reached the max length this note can be.
Please reduce the content or divide it to more notes, thank you!

Import from Gist

Import from Snippet

or

Export to Snippet

Are you sure?

Do you really want to delete this note?
All users will lose their connection.

Create a note from template

Create a note from template

Oops...
This template has been removed or transferred.
Upgrade
All
  • All
  • Team
No template.

Create a template

Upgrade

Delete template

Do you really want to delete this template?
Turn this template into a regular note and keep its content, versions, and comments.

This page need refresh

You have an incompatible client version.
Refresh to update.
New version available!
See releases notes here
Refresh to enjoy new features.
Your user state has changed.
Refresh to load new user state.

Sign in

Forgot password

or

By clicking below, you agree to our terms of service.

Sign in via Facebook Sign in via Twitter Sign in via GitHub Sign in via Dropbox Sign in with Wallet
Wallet ( )
Connect another wallet

New to HackMD? Sign up

Help

  • English
  • 中文
  • Français
  • Deutsch
  • 日本語
  • Español
  • Català
  • Ελληνικά
  • Português
  • italiano
  • Türkçe
  • Русский
  • Nederlands
  • hrvatski jezik
  • język polski
  • Українська
  • हिन्दी
  • svenska
  • Esperanto
  • dansk

Documents

Help & Tutorial

How to use Book mode

Slide Example

API Docs

Edit in VSCode

Install browser extension

Contacts

Feedback

Discord

Send us email

Resources

Releases

Pricing

Blog

Policy

Terms

Privacy

Cheatsheet

Syntax Example Reference
# Header Header 基本排版
- Unordered List
  • Unordered List
1. Ordered List
  1. Ordered List
- [ ] Todo List
  • Todo List
> Blockquote
Blockquote
**Bold font** Bold font
*Italics font* Italics font
~~Strikethrough~~ Strikethrough
19^th^ 19th
H~2~O H2O
++Inserted text++ Inserted text
==Marked text== Marked text
[link text](https:// "title") Link
![image alt](https:// "title") Image
`Code` Code 在筆記中貼入程式碼
```javascript
var i = 0;
```
var i = 0;
:smile: :smile: Emoji list
{%youtube youtube_id %} Externals
$L^aT_eX$ LaTeX
:::info
This is a alert area.
:::

This is a alert area.

Versions and GitHub Sync
Get Full History Access

  • Edit version name
  • Delete

revision author avatar     named on  

More Less

Note content is identical to the latest version.
Compare
    Choose a version
    No search result
    Version not found
Sign in to link this note to GitHub
Learn more
This note is not linked with GitHub
 

Feedback

Submission failed, please try again

Thanks for your support.

On a scale of 0-10, how likely is it that you would recommend HackMD to your friends, family or business associates?

Please give us some advice and help us improve HackMD.


Thanks for your feedback

Remove version name

Do you want to remove this version name and description?

Transfer ownership

Transfer to
    Warning: is a public team. If you transfer note to this team, everyone on the web can find and read this note.

      Link with GitHub

      Please authorize HackMD on GitHub
      • Please sign in to GitHub and install the HackMD app on your GitHub repo.
      • HackMD links with GitHub through a GitHub App. You can choose which repo to install our App.
      Learn more  Sign in to GitHub

      Push the note to GitHub Push to GitHub Pull a file from GitHub

        Authorize again
       

      Choose which file to push to

      Select repo
      Refresh Authorize more repos
      Select branch
      Select file
      Select branch
      Choose version(s) to push
      • Save a new version and push
      • Choose from existing versions
      Include title and tags
      Available push count

      Pull from GitHub

       
      File from GitHub
      File from HackMD

      GitHub Link Settings

      File linked

      Linked by
      File path
      Last synced branch
      Available push count

      Danger Zone

      Unlink
      You will no longer receive notification when GitHub file changes after unlink.

      Syncing

      Push failed

      Push successfully