# Mechanical Design
**group assignment**
- design a machine that includes mechanism+actuation+automation
- build the mechanical parts and operate it manually
- document the group project and your individual contribution
## Ideas
Before start researching we discussed as a group the scope, budget and time limitations. After this we talked about some espontaneous ideas and shared some references. Then we mounted a board with some possible machines:

### Sushi machine
#### Products on the market
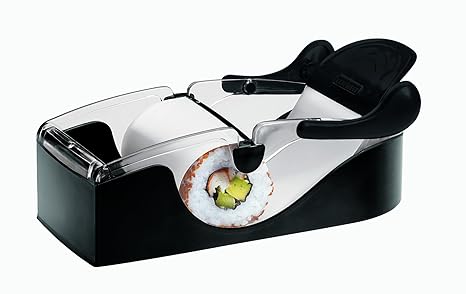
[https://www.youtube.com/watch?v=N9qujcyktrg](https://www.youtube.com/watch?v=N9qujcyktrg)

[https://www.youtube.com/watch?v=x158Zu8pp6A](https://www.youtube.com/watch?v=x158Zu8pp6A)


[https://www.youtube.com/watch?v=sSfuFzkInDI](https://www.youtube.com/watch?v=sSfuFzkInDI)
#### Process
I believe the ingredients prep is out of the scope. But still there are 4 steps to prepare sushi.
1. Place the nori sheet
2. Spread rice
3. Place ingredients
4. Roll it
The machine doesn't necessarily needs to make all of them, but of course the more the better.
### Kinetic sculptures
#### Origami kinetic sculpture

https://www.youtube.com/watch?v=5e28J066oGY
This kinetic sculpture was a popular piece in the exhibit titled "Folding Paper: The Infinite Possibilities of Origami" at the BYU Museum of Art. It was designed by mechanical engineering students in the Compliant Mechanisms Research Group using the Offset Panel Technique, a technique co-developed by the BYU CMR and Dr. Robert Lang for accommodating thick materials in origami design. The original pattern is called the square twist and the structure is 8'x8' with 1" thick panels
#### Evolution door

Klemens Torggler's doors are kinetic art objects based on rotating squares. The special invention makes it possible to move the object sideways without the use of tracks.

Other works from the artist: http://www.torggler.co.at/main/objects3.html
#### Zimoun's cardboard installations

https://player.vimeo.com/video/97347144?autoplay=1&loop=1
150 prepared dc-motors
150 cotton balls
60x20x20cm cardboard boxes
Zimoun creates complex kinetic sound sculptures by arranging industrially produced parts according to seemingly simple rules. Using motors, wires, ventilators, etc.., he creates closed systems that develop their own behavior and rules similarly to artificial creatures. Once running, they are left to themselves and go through an indeterminable process of (de)generation. These quasi autonomous creatures exist in an absolutely synthetic sphere of lifeless matter.
https://www.zimoun.net
#### BMW Museum's kinetic sculpture, by Joachim Sauter

https://www.youtube.com/watch?v=6ZFHAZAkL2E
In a 6 sqm large field, 714 metal spheres are suspended from the ceiling on thin steel wires and animated with a help of mechanics, electronics and code.
The topic of the installation is the form-finding process in car design which is performed in a 7 min choreography: At the beginning the installation is in a chaotic state. No form or design idea has yet been found. The spheres move individually creating an impression of a spatial white noise. Slowly the first abstract forms emerge, loosely relating to the later contours of the vehicle. In the following choreography, the succession of competing forms intersect with each other, one displacing the next. Out of this the final shape of the vehicle then emerges. This narrative is repeated, covering the design process of five historical and contemporary cars .
The project was commissioned by the new BMW museum Munich and realized in conjunction with my friends and colleagues at ART+COM. special mention: Gert Monath, Patrick Kochlik, Simon Schissel, David Siegel, Jussi Ängeslevä and all technicians from MKT, Munich.
#### Clock Prototype: A million times

https://collection.cooperhewitt.org/objects/69155335/
This is a Clock prototype. It was designed by Humans since 1982 (Swedish, founded 2010), Per Emanuelsson (Swedish, b. 1982) and Bastian Bischoff (German, b. 1982).
Its medium is aluminum, electric components, powder-coated clock hands, screen-printed dials.
#### Strandbeest, by Theo Jansen

https://strandbeest.com/admin/wp-content/uploads/2019/03/kort_6.mp4
"Since 1990 I have been occupied creating new forms of life. Not pollen or seeds but plastic yellow tubes are used as the basic material of this new nature. I make skeletons that are able to walk on the wind, so they don’t have to eat. Over time, these skeletons have become increasingly better at surviving the elements such as storm and water and eventually I want to put these animals out in herds on the beaches, and they will live their own lives."
https://www.strandbeest.com
### Automated Light Painting Rig
This idea came from [this](http://www.ebspelman.com/goodby-light-painting) project by Elliot Spelman where a light painting rig is used to make a big advertisement picture on a building's façade. All the images here are from this project.

The concept is really simple: an addressable led strip that shows a row of pixels each time to form a full image on a picture. The camera must be on *bulb* function to capture the full motion.

With a led strip and an Arduino is easy to assemble the rig itself but being able to do the light paiting in the right time is a little more complex. You have to be really precise otherwise you end up with a distorted image.

This machine making proposal is about automating the process of walking with the rig to form the image. Maybe with a simple X-Y core and some timing calculations (or a rotary encoder) we can do a system that is automatic and forms the image with precise timing.
### Glow in the dark painting machine
What I propose is to create something similar to the double pendulus and automatize it to create art pieces. Here is the video:
https://www.youtube.com/watch?v=hXOEoH5q3Hw
I think it is an amazing machine and could be pretty easy to make and control as it could read GCode and we can create it using Inkscape really easy. The idea is to make it seem like magic, putting all the mechanism in the back of the panel so people could just see a light point moving and the trace that it follows.
The mechanism behind it can have different shapes:
- A double pendulum as the video with two steppers to control the movement precisely:


- A sppining piece that also act like an axis for the pointer to be able to reach all the points of the panel:


- A Core X/Y mechanism to control a 3D printer as we saw in class. This one would be a Square and not a Circle:

Here are some examples of cool thing done with laser painting in a glow in the dark panel:
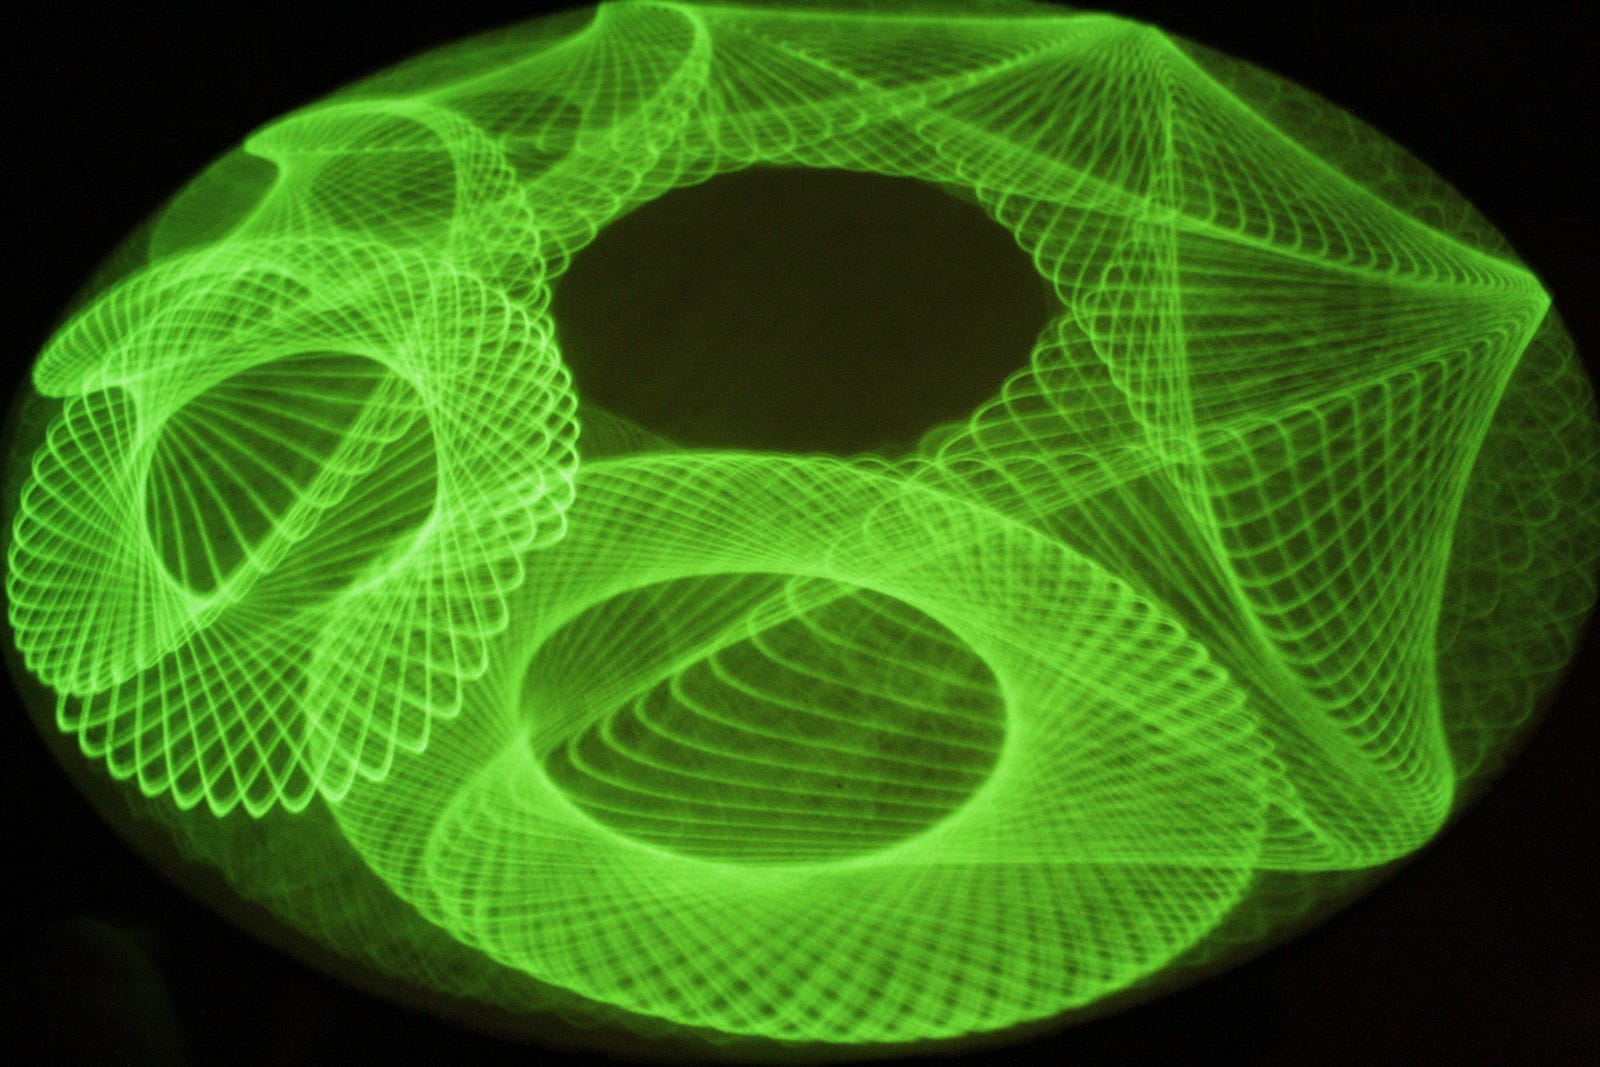

We could also control the amount of light to have like different stroke widht's and play with it.
Then we could paint whatever we like to. Also, look at this tinny clock, it's awsome too!

https://makezine.com/projects/glow-in-the-dark-robot-plot-clock/
## A Full body scanner
My Idea is to build a 3D Scanner support to make the fullbody scan I wanted to do in W4.
I prototyped with the lasercutter


NO GLUE, NO SCREWS, NO BUGGERS, NO BUBBLEGUM.
The scanner will have a 3D printer fixture, pulley and will have a counterweight to allow the scanner scan with a controlled free fall, the scanner will then be pulled back on top and the angle selector will be moved 10º acording to the divisions of the base.
The bearing will be made with to concentric pipes
In order to acomplish that I´m going to build a frame for the Kinect on which it will slide down on a counterweight controlled freefall.


The model will be made using PARAMETRIC DESIGN with grasshopper in order to be able to rescale it and adjust it according to the machine tolerances; and made in thin (0.4cm) MDF on a 1:10 scale, cut in W3 with the laser cutter and if it looks allright or when it does, I will make it in real size in W7 with the CNC.
The parametric design proved usefull in the laser cutting process as I had designed things to be 1.5 thick and the MDF was 4 (cm, mm are not important in this case, as been parametric multiplyers are what matters)
## Defining the project
After trying to scan ourselves during the 3D week, we realized how difficult it is to do so without some kind of aid.
A quick research shows that most of the solutions are on the thousands dollars scale. We believe is possible to build a cheaper solution while maintaining the quality of the scan.
To maintain the small price tag, the goal is to develop an adjustable moving head, so we can use an existing kinect, smartphone or a camera to scan the person.
We've decided to go for the scanner... **Explain why**
## Research
### Scanning methods
[Stanford paper on State of the Art on 3D Reconstruction with RGB-D Cameras](https://web.stanford.edu/~zollhoef/papers/EG18_RecoSTAR/paper.pdf)
[Source: edge3d](https://www.edge3d.io/what-3d-scanning-types-applications-advantages-and-methods-laser-lidar-contact-based-photogrammetry-triangulation-structured-pulse-light/)
#### LASER triangulation
Advantage of this technology is its resolution and accuracy while the disadvantage is it is sensitive to the properties of the surface that it scans. There could be a problem in scanning a very shinny or transparent surfaces.
#### Structured light
Advantages of this technology are its resolution, speed and this can be used to scan people.
The main disadvantage with the structured lighting 3d scanning is its sensibility to lighting conditions and therefore its difficult to work outside.
#### Photogrammetry
The main advantages of this scanning technology is its precision, acquisition speed and its capability of reconstructing subjects of various scales that are photographed from the ground or air.
#### Contact-based
Advantages with this scanning are its precision and ability to scan reflective or transparent surfaces.
The disadvantages are its speed and inability to work on organic and free-form shapes.
### 3D Model construction
[Skanect](https://skanect.occipital.com)

Free up to 5000 polygons
[ReconstructMe](http://reconstructme.net)

Free for non-commercial use
[ReCap](https://www.autodesk.com/products/recap/overview)

Paid with free trial
[RecFusion](https://www.recfusion.net/index.php/en/)
<iframe width="560" height="315" src="https://www.youtube.com/embed/nMFIsZyQGDI" frameborder="0" allow="accelerometer; autoplay; encrypted-media; gyroscope; picture-in-picture" allowfullscreen></iframe>
Paid with free trial
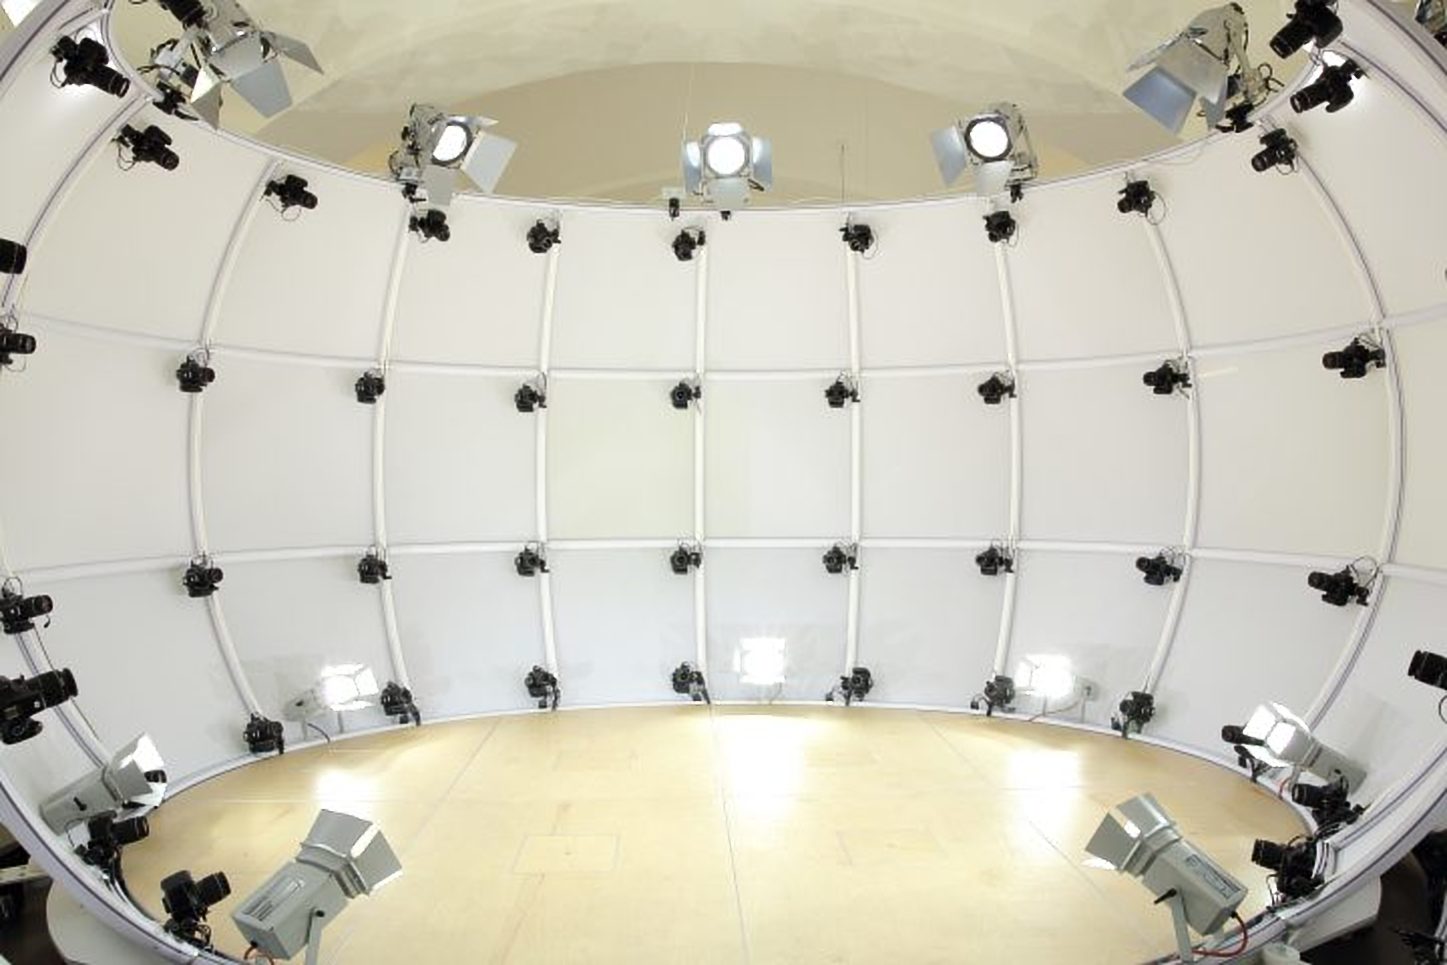
### Products on the market
[BIG Alice €80.000](https://3dprintingindustry.com/news/3dcopysystems-3d-full-body-scanner-makes-waves-in-the-fashion-industry-138642/)
[Shaper 3D Scanner $4.500]
(https://shenghuijingmi.en.made-in-china.com/product/MXnxABvhnKkc/China-Full-Body-3D-Scanner-with-High-Precision-and-Fast-Speed.html)

[GO-3DPrint scanner $1.200](http://www.go-3dprint.com/full-body-3d-scanning-rig-scanner-system-for-rgbd-sensor-kinect-xtion-primesense-carmine-and-all-sensors-compatible-with-skanect/)
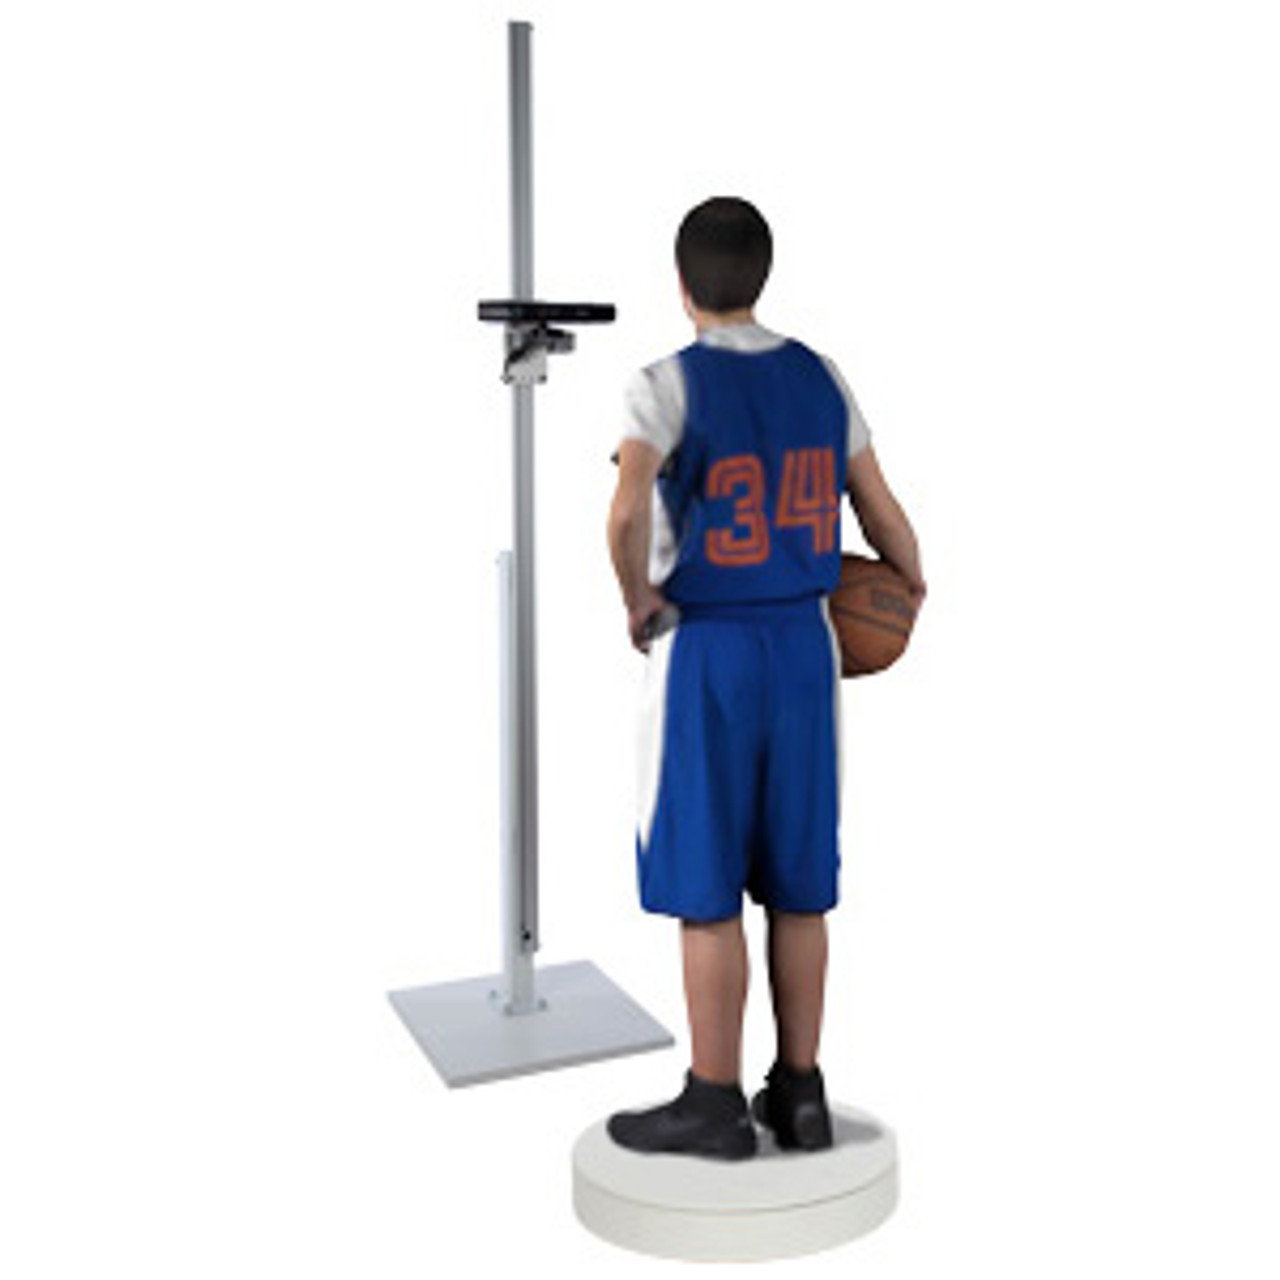
[2019 best 3d body scanners](https://www.aniwaa.com/best-3d-body-scanners/)

### What was done beforehand
[fuboss 3d scanner](https://www.3ders.org/articles/20151023-3d-printed-selfies-now-easier-than-ever-with-fuboss-full-body-3d-scanning-system.html)

[Portable 3D scanner](https://www.thingiverse.com/thing:393999) / [ReconstructMe](http://reconstructme.net/scanoman-open-source-portable-full-body-scanner/)
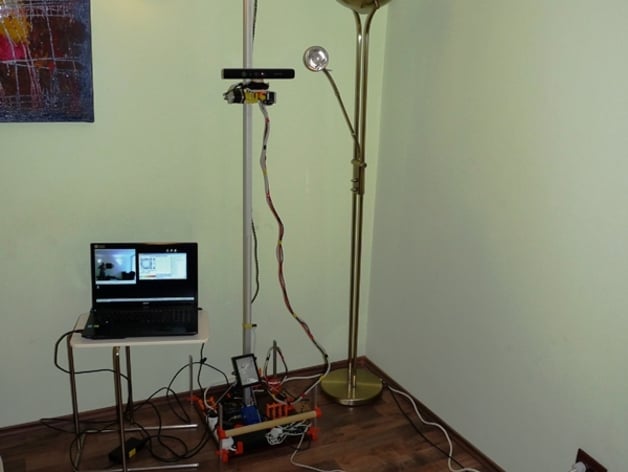
[DIY Scanner](https://www.instructables.com/id/DIY-3D-Body-Scanner-Intro/)

Here is an scanner with 3 Kinects
[Click here](https://av.dfki.de/projects/density/)
There was the idea to use more than one kinect as we have several available, in the mentioned web an explanation of the challenge is presented.
The cons would be that we want it to be made as many people as possible, asuming that can be done with a phone with camera or one kinect, which is cheapper.
In anny case [here](https://groups.google.com/forum/#!topic/skanect/OGDZWmeXY30) is how it could be done with more than one kinect.
Th
Working examples
<iframe width="560" height="315" src="https://www.youtube.com/embed/TLFonu92Wn4?start=786" frameborder="0" allow="accelerometer; autoplay; encrypted-media; gyroscope; picture-in-picture" allowfullscreen></iframe>
<iframe width="560" height="315" src="https://www.youtube.com/embed/nn0OhKYg848?start=65" frameborder="0" allow="accelerometer; autoplay; encrypted-media; gyroscope; picture-in-picture" allowfullscreen></iframe>
<iframe width="560" height="315" src="https://www.youtube.com/embed/pWub1k0eZ3U?start=45" frameborder="0" allow="accelerometer; autoplay; encrypted-media; gyroscope; picture-in-picture" allowfullscreen></iframe>
<iframe width="560" height="315" src="https://www.youtube.com/embed/TAv1Y5T1iXc" frameborder="0" allow="accelerometer; autoplay; encrypted-media; gyroscope; picture-in-picture" allowfullscreen></iframe>
<iframe width="560" height="315" src="https://www.youtube.com/embed/4UoiJWlZUpo" frameborder="0" allow="accelerometer; autoplay; encrypted-media; gyroscope; picture-in-picture" allowfullscreen></iframe>
<iframe width="560" height="315" src="https://www.youtube.com/embed/0VG6f8Cm6JU?start=12" frameborder="0" allow="accelerometer; autoplay; encrypted-media; gyroscope; picture-in-picture" allowfullscreen></iframe>
<iframe width="560" height="315" src="https://www.youtube.com/embed/28vrZIj-hYQ?start=486" frameborder="0" allow="accelerometer; autoplay; encrypted-media; gyroscope; picture-in-picture" allowfullscreen></iframe>
<iframe width="560" height="315" src="https://www.youtube.com/embed/6eKOEgXxdUw?start=164" frameborder="0" allow="accelerometer; autoplay; encrypted-media; gyroscope; picture-in-picture" allowfullscreen></iframe>
Interesting testd with a single Kinect:
<iframe width="560" height="315" src="https://www.youtube.com/embed/GKRHWBS6guM" frameborder="0" allow="accelerometer; autoplay; encrypted-media; gyroscope; picture-in-picture" allowfullscreen></iframe>
### Scanning objects
*3D scanning apps ranking*:
https://all3dp.com/2/5-best-3d-scanner-apps-for-your-smartphone/
**Qlone**
https://www.qlone.pro
<iframe width="560" height="315" src="https://www.youtube.com/embed/QmfqlJkRPU0" frameborder="0" allow="accelerometer; autoplay; encrypted-media; gyroscope; picture-in-picture" allowfullscreen></iframe>
Scanning app for both iOS and Android devices in real time, even 4K.
Includes AR View with ARKit/ARCore.
Exports in OBJ, STL, USDZ, GLB, PLY, X3D.
For better results, use a scanning mat.
**Capture**
https://itunes.apple.com/us/app/capture-3d-scan-anything/id1444183458?mt=8
<iframe width="878" height="494" src="https://www.youtube.com/embed/XO6Eu89P0Rs" frameborder="0" allow="accelerometer; autoplay; encrypted-media; gyroscope; picture-in-picture" allowfullscreen></iframe>
**Capture** uses the TrueDepth sensors on X-series iPhones to make crude 3D models of small objects, which you can then plop into different settings through augmented reality or share with other folks through iMessage or other means. Paying, 3D models into PLY and STL files.
## Bearing
DIY thrust bearing
<iframe width="560" height="315" src="https://www.youtube.com/embed/jWaAyS0n-IM" frameborder="0" allow="accelerometer; autoplay; encrypted-media; gyroscope; picture-in-picture" allowfullscreen></iframe>
[heavy-duty-turntable](https://makezine.com/projects/guide-to-3d-printing-2014/heavy-duty-turntable/)

<iframe width="560" height="315" src="https://www.youtube.com/embed/50xEybvQDMk" frameborder="0" allow="accelerometer; autoplay; encrypted-media; gyroscope; picture-in-picture" allowfullscreen></iframe>
diy lazy susan
## Group page set up
Started with an empty repo, added readme, cloned to local machine, pushed mkdocs init.
Need to config the GitLab CI/CD.
 Sign in with Wallet

