# Valerio I have moved this to https://hackmd.io/@conda-us-rse-2023/tutorial
Please edit that version
# Valerio I have moved this to https://hackmd.io/@conda-us-rse-2023/tutorial
Please edit that version
# Valerio I have moved this to https://hackmd.io/@conda-us-rse-2023/tutorial
Please edit that version
# Valerio I have moved this to https://hackmd.io/@conda-us-rse-2023/tutorial
Please edit that version
# Publish Your Software in conda-forge
<center>
**[US RSE-23 Tutorial](https://us-rse.org/usrse23/program/tutorials/#publish-your-software-in-conda-forge)**
**Valerio Maggio and Dave Clements, [Anaconda](https://anaconda.com)**
**October 10, 2023**
</center>
---
This tutorial was presented at PyCon 2023 US. This is a copy that we are updating to reflect what we learned at PyCon. **This is a [PyCon US 2023 sprint project](https://hackmd.io/l8CBSTFHQh63VZDUOBmR7A?both).**
**The [original, unmodified tutorial is here](https://hackmd.io/ElBrRQ6rT4K_dfzjY6pAFQ).**
- Some things we will do here
- Present the code parts as one, already done unit.
- Thought about creating a repo for this, but it would just contain the initial Python file, so probably not doing this (DPC).
- Start the tutorial part at Testing and other parts needed for packaging.
- Drop the emoji parts, as it does not work on Windows.
- Include a pointer to a "finished" repo.
What's been changed so far:
* Dropped the [Check your internet connectivity section](https://hackmd.io/ElBrRQ6rT4K_dfzjY6pAFQ#Set-up-your-computer). We will just assume they are connected. (DPC)
* Dropped the [Pair Up section](https://hackmd.io/ElBrRQ6rT4K_dfzjY6pAFQ#Pair-Up). (DPC)
* Present the code parts as one, already done unit. (DPC)
* `__init.py__` - decide what functions should go here. (DPC)
* Remove inline references to PyCon. (BH, MK)
---
## Before we start
In this hands-on tutorial, we will be assuming that:
- you are already familiar with Python program and [module structure](https://docs.python.org/3/tutorial/modules.html) best practices;
- you have a basic knowledge of [Git](https://git-scm.com/) and [GitHub](https://github.com/), including how to fork projects, update your copy, and then submit pull requests.
- Have basic familiarity with a command line interface and a text editor program
### A word for Windows users
If you have the [Linux Subsystem for Windows](https://learn.microsoft.com/en-us/windows/wsl/) installed then you can use the mainline instructions in this tutorial. You will only need to follow the "Windows specific" instructions if you don't have LSW installed.
When instructions are different on Windows than they are on Linux, macOS, or LSW there will be a separate section with Windows instructions like this:
:::info
**Windows (non LSW) 💁**
Launch the command prompt.
> **Start → Windows System → Command Prompt**
:::
We'll be using the `command prompt` and then the `anaconda prompt` throughout.
## Getting started
Before diving into the exercises, let's make sure we have everything we need to get started.
1. A working internet connection! (If you're reading this online, you could already mark ✅ this.. but better be sure! 🙃)
2. Working versions of [`conda`](https://docs.conda.io/en/latest/miniconda.html) and [`git`](https://git-scm.com/) installed on your computer.
3. A preferred Code editor of choice with syntax highlighting for the Python language.
If you don't have all of these then please have a look at the [next](#set-up-your-computer) section for detailed instructions on how to install what you need.
Otherwise, please feel free to jump directly to the [Create Conda Environment](#create-conda-environment) section to proceed.
### Set up your computer
**1. Install Miniconda**
For this tutorial we recommend [Miniconda](https://docs.conda.io/en/latest/miniconda.html), a free minimal installer for `conda`. It includes only conda, Python, the packages they depend on, and a small number of other useful packages, including `pip`, `zlib` and a few others.
Use the `conda install` command to install over 3000 additional conda packages from the Anaconda repository, and over 20000 packages from conda-forge.
Please [download](https://docs.conda.io/en/latest/miniconda.html#system-requirements) and install the most recent Miniconda installer that matches your computer architecture **and** Operating System. Accept the default settings when installing.
**2. Install Git**
Installing `Git` will vary depending on your Operating System. You could follow all the instructions reported [here](https://git-scm.com/book/en/v2/Getting-Started-Installing-Git) for a detailed step-by-step setup.
**3. Code Editor**
> Choosing the "**right**" code editor is always a matter of _personal taste_, _lazyness_ (to adjust to new UIs) and _religious attachment_ to certain _lines of code_. Also, what you can possibly find online isn't that helpful either, with oxymoronic titles like "The 5 Best Code Editors".
For these _very_ reason, we are not requiring you to use any specific code editor. **Any** editor that you like which has **syntax highlighting** for the Python language will do.
During the live coding sessions of the tutorial, we will be using [Visual Studio Code](https://code.visualstudio.com/), with the [MS Python Extension](https://marketplace.visualstudio.com/items?itemName=ms-python.python).
### Create Conda Environment
If you are here, it's because you already have a working version of [`conda`](https://docs.conda.io/en/latest/miniconda.html) installed on your computer. The first thing to do now is to create a virtual [Conda environment](https://conda.io/projects/conda/en/latest/user-guide/tasks/manage-environments.html) that we will be using throughout the tutorial.
:::info
**Windows (non LSW) 💁**
Launch the newly installed Anaconda Prompt:
> **Start → Anaconda Prompt (miniconda3)**
:::
To create our new `packaging` conda environment just type the following instruction in the terminal/command line/Anaconda Prompt:
```bash=
conda create -n packaging -y python=3.10 pytest ipython
```
This will create a new conda environment using Python 3.10, and then install [`IPython`](https://ipython.org/) and [`pytest`](https://docs.pytest.org/en/7.3.x/) as extra packages.
This is all we need to get started. At this point, we just have to **activate** our new environment, and then we will be **ready to go**!
```bash=
conda activate packaging
```
The command line now starts with `(packaging)` instead of `(base)` reflecting that you now in the `packaging` environment.
## D&D ROLLER :game_die:
In this tutorial we will be working together on a new and _never-been-seen-before_ application that will be implement a die roller to be used during our campaign of [Dungeons & Dragons](https://dnd.wizards.com/).
The specs of this applications are pretty simple:
1. We would need to roll a single die, choosing one of `d4`, `d6`, `d8`, `d10`, `d12`, `d20`, `d100`
* In this case, we want to print in the console the result of the dice using emojis (e.g. :one:, :two:, :keycap_ten:).
2. We would need to make multiple die rolls, of multiple dice (e.g. `2d4` and `3d6`).
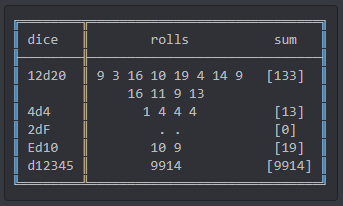
* In this case, we want to do all the rolls and generate a tabular report like the one below:
Nice, let's get started! Shall we!?
## 1. Create & Clone the `dnd-roller` GitHub repository
Let's start by creating the [GitHub](https://github.com) repository that will host our `dnd-roller` project.
Let's go to your GitHub profile page (i.e. `https://github.com/<your-gh-username>`); click the green **🖥️ New** button in the upper right corner.
Name the new repository **dnd-roller**, with the following description:
> Simple python app to roll dice for D&D (Dungeons&Dragons)
Also:
* Mark the repository as **Public**;
* Add a `README` file
* Add `gitignore`, choosing the template for Python
* Add an `MIT License`
We're now ready to proceed, and to hit the button **Create repository**.
At this point, all that remains is to **clone** this repo on your local computer:
```bash=
cd <to-some-working-space-on-your-laptop>
mkdir CondaPkgTutorial
cd CondaPkgTutorial
git clone https://github.com/<your-gh-username>/dnd-roller
```

Image from [teeturtle.com](https://www.teeturtle.com/products/d20-dragon)
## 2. Let's dig into our `dnd-roller`
It's finally time to write some Python code for our `dnd-roller`!
We will start by creating the new `dnd_roller` Python package, and its corresponding folder for `tests`.
```bash=
cd dnd-roller
mkdir dnd_roller
mkdir tests
```
Note the underscore in the `dnd_roller` subdirectory name. The directory of your project will look something like this:
```
dnd-roller
|_ dnd_roller
|_ tests
|_ .gitignore
|_ LICENSE
|_ README.md
```
### The `dice.py` Module
Let's now work on our new `dice.py` module: `dnd_roller/dice.py`. This module will contain all the functions that implement the main core functionalities of our `dnd-roller`.
Let's recap what we need to implement in our dice roller:
1. We need a function to roll a single die (i.e. `roll`)
- This die must be one of the seven dice used in D&D: `d4|6|8|10|12|100`
- We want to print the dice roll in the console using emojis
2. We need a function to roll a single die, multiple times (i.e. `dice_roll`)
3. We need a function that would receive a sequence of dice rolls (e.g. `"2d4, 3d6, 1d10, 6d12"`) and will generate a tabular report of the outcomes.
Here is the code for `dice.py`. Paste this into a file named `dnd_roller/dice.py` using your text editor.
```python=
# file: dnd_roller/dice.py
from random import randint
from tabulate import tabulate
SUPPORTED_DICE = (4, 6, 8, 10, 12, 20, 100)
HEADERS = ["dice", "rolls", "sum"]
def roll(d: int, verbose: bool = False) -> int:
"""Roll a single die choosing one of d4, d6, d8, d10, d12, d20, d100"""
try:
d = int(d)
except ValueError:
raise ValueError(f"'{d}' is not an appropriate number of faces.")
else:
if d not in SUPPORTED_DICE:
raise ValueError("Unsupported Game die for D&D")
r = randint(1, d) if d != 100 else (randint(1, 10) * 10)
if verbose:
print("You rolled ", r)
return r
def dice_roll(throws: int, sides: int) -> list[int]:
"""Rolls a single die with given `sides` a `throws` number of times"""
return [roll(d=sides) for _ in range(throws)]
def sequence_rolls(sequence: str, verbose: bool = True) -> str:
"""Generating a tabular summary of a sequence of dice rolls passed in input.
Each dice roll are comma separated, and defined in the form of
`throwsdface`, e.g. 2d12."""
rolls_in_sequence = {
roll: dice_roll(*tuple(map(int, roll.split("d"))))
for roll in map(str.strip, sequence.split(","))
}
if verbose:
table = [(seq, rolls, sum(rolls)) for seq, rolls in rolls_in_sequence.items()]
print(tabulate(table, headers=HEADERS, tablefmt="fancy_grid"))
return rolls_in_sequence
```
Here is more information about this module. We will use this to implement tests.
#### 1. The `roll` function
The requirements for this function are pretty simple indeed:
- `roll(d=4) -> return a number in [1,4]`
- `roll(d=10) -> return a number in [1,10]`
- `roll(d=5) -> Exception: Unsupported die`
- [A little catch] `roll(d=100) -> roll(d=10) * 10`
💡 **A few comments**:
In this implementation, we first want to be sure that the parameter `d` does actually correspond to an integer. We do so adopting an idiomatic [approach](https://devblogs.microsoft.com/python/idiomatic-python-eafp-versus-lbyl/) known as `EAFP` (Easier to ask for Forgiveness than Permission). Afterwards, we check that the number of sides chosen for the die is indeed valid in D&D, and then we simply rely on the [`random.randint`](https://docs.python.org/3/library/random.html#random.randint) function to generate the result of our rolling. Simple as that!
#### 2. The `dice_roll` function
Given that all the heavy-lifting has been done already in the `roll` function, the implementation of the `dice_roll` function is pretty straightforward: _it just needs to call the `roll` function multiple times, and return the outcomes as a Python list_.
#### 3. The `sequence_rolls` function
The last function in `dnd-roller` is `sequence_rolls`.
Generating the dice rolls is pretty straightforward. All that is really left to do is to parse the input sequence so that it becomes input parameters for the `dice_roll` function. However that is pretty simple to do as well, so we do it in a quite _convoluted_ way using a combination of [functional programming](https://docs.python.org/3/howto/functional.html) and [dictionary comprehension](https://peps.python.org/pep-0274/) to make it fun.
### `__init__.py`
We'll need an `__init__.py` file to make Python treat our directory as a package. The file can be empty, but it must exist. Create it in the main `dnd_roller` directory. `__init__.py` is run once when the module is first imported and it's an important part of defining the public interface to our module.
Our module has three functions, `roll`, `dice_roll`, and `sequence_rolls`. The `roll` function supports the `dice_roll` function, which in turn supports the `sequence_rolls` function. So, it is possible that we want only `sequence_rolls` in the package's public interface. But, these 3 functions all serve useful functions so, let's put all 3 in the public interface. Create `__init_py__` in our top level directory:
```python=
# file: dnd_roller/__init__.py
from .dice import roll, dice_roll, sequence_rolls, SUPPORTED_DICE
```
which enables this
```python=
from dnd_roller import dice_roll
rolls = dice_roll(throws=3, sides=6)
```
instead of this
```python=
from dnd_roller.dice import dice_roll
rolls = dice_roll(throws=3, sides=6)
```
Users of your package don't need to know the details of where you implemented your API.
### Dependencies and `tabulate`
As for the tabulation part, we will leverage the [`tabulate`](https://anaconda.org/anaconda/tabulate) package, that is directly available in the default conda channel:
```bash=
conda install tabulate
```
Alternatively, you could install the `tabulate` package directly from PyPI:
```bash=
pip install tabulate
```
💡 This is a good opportunity to remind you that it is **indeed** possible to [install **non-conda** packages](https://conda.io/projects/conda/en/latest/user-guide/tasks/manage-pkgs.html#installing-non-conda-packages) into a Conda environment 💫
### Let's try it out
🎉 We are finally done with our fancy `dnd-roller`. All we need to do is to try to generate some tabular report. In a [I]Python interpreter:
We could try the new implementation interactively in the Python interpreter.
Note: `ipython` (or even default `python` interpreter) would equally do:


### Testing
Published packages (and all software for that matter) should include test cases.
To verify that this implementation does everything we expect it to, the best possible way is to write a few **tests**.
We will be using PyTest as our testing framework, so let's first create a `pytest.ini` configuration file in the main root folder. This file will instruct `pytest` to run the test by managing the namespace resolution properly:
```ini=
# file: pytest.ini
[pytest]
# Add pytest options here:
# https://docs.pytest.org/en/7.1.x/reference/customize.html
```
**``roll`` tests**
Now let's create a new test module `test_roll.py` under the `tests` folder with a bunch of pretty simple test functions that test `roll`:
```python=
# file: tests/test_roll.py
import pytest
from dnd_roller import roll, SUPPORTED_DICE
@pytest.mark.parametrize("dface", SUPPORTED_DICE[:-1])
def test_roll_die_return_a_valid_number(dface):
assert roll(dface) in range(1, dface+1)
def test_roll_d100():
assert roll(100) in range(1, 101)
assert roll(100) % 10 == 0
def test_roll_with_nan_string_will_raise_exception():
with pytest.raises(ValueError):
roll("not a die")
@pytest.mark.parametrize("dface", SUPPORTED_DICE[:-1])
def test_roll_with_no_string_will_still_work_as_expected(dface):
assert roll(str(dface)) in range(1, dface+1)
def test_roll_with_unsupported_dice_will_raise_exception():
with pytest.raises(ValueError):
roll(45)
@pytest.mark.parametrize("dface", [-4, 2.3, 11.8])
def test_roll_with_negative_or_float_no_will_raise_exception(dface):
with pytest.raises(ValueError):
roll(dface)
```
Using pytest, and its [`parametrize`](https://docs.pytest.org/en/6.2.x/parametrize.html#pytest-mark-parametrize) feature, we're checking a few corner cases (e.g. [NaN](https://developer.mozilla.org/en-US/docs/Glossary/NaN) inputs, negative or float numbers), as well as correct expected behaviours for our `roll` function (including the only "problematic" case of the `d100`).
**`dice_roll` tests**
Testing should verify that the actual implementation of the `dice_roll` is indeed calling the `roll` function (multiple times), without **duplicating code**! (_which is a very [bad practice](https://en.wikipedia.org/wiki/Duplicate_code)_, ed.). To do so, we will be creating a [`Mock`](https://docs.python.org/3/library/unittest.mock.html#the-mock-class) (more [here](https://en.wikipedia.org/wiki/Mock_object)).
```python=
# file: tests/test_dice_roll.py
import pytest
from unittest.mock import patch
from dnd_roller.dice import dice_roll
@pytest.mark.parametrize("throws, sides", [(2, 4), (1, 6), (4, 8), (1, 10)])
def test_dice_rolls(throws, sides):
rolls = dice_roll(throws=throws, sides=sides)
assert len(rolls) == throws
assert all([r in range(1, sides + 1) for r in rolls])
@patch("dnd_roller.dice.roll")
def test_dice_roll_calls_roll(roll_mock):
dice_roll(throws=2, sides=4)
roll_mock.assert_called()
roll_mock.assert_called_with(d=4)
```
The more interesting part here is about the tests:
- first we could re-use the same strategy we used with `roll` by using `pytest.mark.parametrize` to generate a few test inputs (a.k.a. [`fixtures`](https://en.wikipedia.org/wiki/Test_fixture#Software)).
In this case we will be generating a few combinations of `throws` and `sides` values, and we will be checking that
1. The number of returned rolls are exactly equal to `throws`
1. That all the rolls are within the expected range, `[1, sides]`
**`sequence_rolls` tests**
Our last function needs some tests too. We will be adding the tests for the `sequence_rolls` function into a new `tests/test_sequence_rolls.py` test module.
```python=
# file: tests/test_sequence_rolls.py
import pytest
from random import seed, randint
from unittest.mock import patch
from dnd_roller.dice import sequence_rolls, roll
@patch("dnd_roller.dice.dice_roll")
def test_dice_roll_is_called_in_sequence_rolls(dice_roll_mock):
sequence_rolls(sequence="2d4")
dice_roll_mock.assert_called()
dice_roll_mock.assert_called_with(2, 4)
def unfair_dice(sequence, rnd_seed: int) -> dict[int, list[int]]:
"""generates a fixed list of t rolls for each die in sequence."""
seed(rnd_seed) # this does the trick!
return {d: [randint(1, d) for _ in range(t)] for t, d in sequence}
def test_roll_is_repeatable():
# FIX the random seed
rnd_seed = 123456
unfair_rolls = unfair_dice(((2, 4),), rnd_seed=rnd_seed)
seed(rnd_seed)
assert roll(4) == unfair_rolls[4][0]
assert roll(4) == unfair_rolls[4][1]
def test_sequence_rolls_with():
sequence = "2d4, 6d6, 4d8"
rnd_seed = 4567
unfair_rolls = unfair_dice(((2, 4), (6, 6), (4, 8)), rnd_seed=rnd_seed)
seed(rnd_seed)
rolls = sequence_rolls(sequence=sequence)
assert "2d4" in rolls
assert len(rolls["2d4"]) == 2
assert all(r == unfr for r, unfr in zip(rolls["2d4"], unfair_rolls[4]))
assert "4d8" in rolls
assert len(rolls["4d8"]) == 4
assert all(r == unfr for r, unfr in zip(rolls["4d8"], unfair_rolls[8]))
assert "6d6" in rolls
assert len(rolls["6d6"]) == 6
assert all(r == unfr for r, unfr in zip(rolls["6d6"], unfair_rolls[6]))
```
The first test is pretty similar to the last previously discussed: we're just checking that `sequence_rolls` is not reinventing the wheel, and that the `dice_roll` function is called instead, with the right parameters. Again, we are leveraging on `unittest.mock.patch` to do so.
The other tests are more generally testing the output generated by `sequence_rolls`, so that each sequence has (a) the **correct** number of rolls, and (b) **exactly the very same rolls we are expecting**. To do so, we use a [trick](https://docs.python.org/3/library/random.html) that **sets the random seed**. We repeat the calls to random in the same way/order. In this way, we are absolutely sure to always generate the same sequence of numbers.
FYI, this is the foundation on which [Reproducibility](https://en.wikipedia.org/wiki/Reproducibility) in Data Science could be obtained (e.g. see [Reproducibility](https://pytorch.org/docs/stable/notes/randomness.html) in Deep learning).
### Test!
To run our tests, let's move back to our terminal:
```bash=
python -m pytest -v
```
You should get an output similar to the one reported below:

## 3. Time to pack 📦
It's finally time to pack! Our `dnd-roller` is ready to become a re-usable Python package for everybody to use. So, let's create the skeleton for our future package-to-be, following the instructions reported in the official Python [documentation](https://packaging.python.org/en/latest/tutorials/packaging-projects/).
### Creating `setup.py` and package metadata
First thing we do is to create a new `setup.py` file that uses Python [`setuptools.setup`](https://docs.python.org/3/distutils/setupscript.html) to specify initial package metadata:
```python=
# file: setup.py
import os
from pathlib import Path
from setuptools import find_packages, setup
PKG_FOLDER = Path(os.path.abspath(os.path.dirname(__file__)))
with open(PKG_FOLDER / "README.md") as f:
long_description = f.read()
setup(
name="dnd-roller",
version="0.0.1",
author="Dave, Bianca, Mahe, Valerio OR YOU",
author_email="vmaggio@gmail.com OR YOURS",
description="Python package to roll D&D dice in the terminal.",
long_description=long_description,
long_description_content_type="text/markdown",
url="http://github.com/leriomaggio OR YOUR-GITHUB_ID/dnd-roller",
include_package_data=True,
packages=find_packages(exclude=[]),
install_requires=["tabulate"],
)
```
💡 **Please note** that we specified our external dependencies in the `install_requires=[...]` paramneter of the `setup` function, that is `tabulate`.
❗️ At this point, please feel free to add any additional metadata to the `README.md` file as this will be used for the `long_description` of the `dnd-roller` package. For example:
<pre class="part">
The `dnd_roller` provides three main functions: `roll`, `dice_roll`, and `sequence_rolls` to generate a single die roll, multiple rolls of the same die, or multiple rolls of multiple dice.
The former (i.e. `roll()`) could generate an output in the terminal using emoji characters, whilst the latter (i.e. `sequence_rolls()`) generate a tabular report for the outcome of each roll in the sequence.
Please have a look at the examples below for additional details.
### Examples
Rolling a single game die:
```python
>>> from dnd_roller import roll
>>> roll(d=4)
4
>>> roll(d=20, verbose=true)
You rolled 17
17
```
Rolling multiple times the same game die:
```python
>>> from dnd_roller import dice_roll
>>> dice_roll(throws=3, sides=4)
[3, 2, 4]
```
Rolling a sequence of dice rolls:
```python
>>> from dnd_roller import sequence_rolls
>>> sequence_rolls(sequence="12d20, 4d4, 2d10, 1d100", verbose=True)
╒════════╤════════════════════════════════════════════════╤═══════╕
│ dice │ rolls │ sum │
╞════════╪════════════════════════════════════════════════╪═══════╡
│ 12d20 │ [15, 9, 13, 2, 14, 13, 18, 15, 13, 10, 17, 18] │ 157 │
├────────┼────────────────────────────────────────────────┼───────┤
│ 4d4 │ [2, 3, 2, 1] │ 8 │
├────────┼────────────────────────────────────────────────┼───────┤
│ 2d10 │ [8, 5] │ 13 │
├────────┼────────────────────────────────────────────────┼───────┤
│ 1d100 │ [50] │ 50 │
╘════════╧════════════════════════════════════════════════╧═══════╛
{'12d20': [15, 9, 13, 2, 14, 13, 18, 15, 13, 10, 17, 18],
'4d4': [2, 3, 2, 1],
'2d10': [8, 5],
'1d100': [50]}
```
</pre>
Finally we will add some [additional metadata](https://packaging.python.org/en/latest/specifications/declaring-project-metadata/) in the `setup.cfg` and `pyproject.toml` configuration files, such as the license, and the package [classifiers](https://pypi.org/classifiers/).
💡 **Note**: We will soon see how these metadata can be consumed by automatic build tools for packaging.
```ini=
# file: setup.cfg
[metadata]
version = 0.0.1
license_file = LICENSE
classifiers =
License :: OSI Approved :: MIT License
Environment :: Console
Intended Audience :: Developers
Intended Audience :: Science/Research
Programming Language :: Python :: 3
[options]
python_requires = >=3.10
```
Similarly, in `pyproject.toml`:
```toml=
# file: pyproject.toml
version = "0.0.1"
name = "dnd-roller"
authors = [
{name = "Valerio Maggio", email = "vmaggio@anaconda.com"},
{name = "Dave Clements", email="dclements@anaconda.com"}
]
description = "Python package to roll D&D dice in the terminal."
requires-python = ">=3.10"
classifiers = [
"License :: OSI Approved :: MIT License",
"Environment :: Console",
"Intended Audience :: Developers",
"Intended Audience :: Science/Research",
"Programming Language :: Python :: 3"
]
dependencies = [
"tabulate>=0.8.10"
]
[build-system]
requires = ["setuptools", "setuptools-scm"]
build-backend = "setuptools.build_meta"
```
🎉 Whoot whoot! Now everything is ready for our `dnd-roller` package!
#### Publish on GitHub
Time to publish everything on **GitHub**:
```bash=
git add .
git commit -m "dnd-roller 0.0.1"
git push
```
If we now open the browser, and visit the GH repository url (e.g., https://github.com/leriomaggio/dnd-roller), you should see something similar to the image below.

## 4. By the power of Grayskull… I have the Conda recipe

Image Credits: [https://he-man.fandom.com/](https://he-man.fandom.com/)
All the _hipster geeks_ in the audience shouldn't require further references and explanation.
And **Yes**: you are still in the right room! We are still talking about **Conda and Python packaging**.
From the official [documentation](https://github.com/conda/grayskull):
>Grayskull is an automatic conda recipe generator. <br>
The main goal of this project is to generate concise recipes for [conda-forge](https://conda-forge.org/). The Grayskull project was created with the intention to eventually replace `conda skeleton`. <br>
Presently Grayskull can generate recipes for Python packages available on PyPI and also those not published on PyPI but available as GitHub repositories. Grayskull can also generate recipes for R packages published on CRAN. Future versions of Grayskull will support recipe generation for packages of other repositories such as Conan and CPAN etc..
🎉 Looks like a fantastic treat! We will be using `grayskull` to automatically generate a recipe for our `dnd-roller` project, so that we can build a conda project for it!
### Installing `Grayskull`
We start by installing `grayskull` using `conda`, from the `conda-forge` channel:
```bash=
conda install -c conda-forge grayskull semver=2.13.0 -y
```
### Creating a Release on GitHub
The next thing we want to do, is to create a **release** of our project on GitHub. Once we have done that, we will be able to use `grayskull` to generate our recipe. In fact, grayskull will fetch all the necessary information (and package) from GitHub to prepare our `conda-recipe`.
To do a relase, we can use the GitHub interface directly. The **only** thing to bear in mind is to specify a **proper** version tag for our release: `v0.0.1`. The version tag is what `grayskull` will be using to gather the version of our package, as well as the name of the archive generated by GitHub. Click **Create a new release** on the right hand side of your GitHub's repo page, and then create the release

Once we have a release, we are able to proceed to generate our `conda-recipe` with **Grayskull**.
### Generating conda recipe for `dnd-roller`
One of the main advantages of using `grayskull` is **not only** that we don't need to worry about (manually) creating the `conda-recipe` to build our package, but it can also get everything that is required directly from GitHub.
Generate the recipe for `dnd-roller` with `grayskull` is just two-steps away:
1. if you are located in the `dnd-roller` folder, please move away (say, in the parent directory), and create a new folder named `grayskull` (or as you prefer, the name does not matter):
```bash=
cd ..
mkdir -p grayskull
```
2. Now let's move into this new `grayskull` folder, and generate the recipe:
```bash=
cd grayskull
grayskull pypi https://github.com/<you-gh-username>/dnd-roller
```
🎉 When it's completed, you should now see a `dnd-roller` folder, containing a `meta.yml`.
This is indeed your **conda recipe** we where hoping for! 👨🍳
## 5. It's time for `conda build`
Now that we have our recipe, all that's need to do is to use it to build our `dnd-roller` conda package.
First install `conda-build` which will enable the `conda build` command.
```bash=
conda install conda-build
```
Next, still within the `grayskull` folder, let's type:
```bash=
conda build -c leriomaggio dnd-roller
```
If everything goes well, a `dnd-roller.tar.gz` archive should have been created here
```
$CONDA_PREFIX_1/conda-bld/noarch/dnd-roller-0.0.1-py_0.tar.bz2
```
:::info
**Windows 💁**
```
%CONDA_PREFIX_1%\conda-bld\noarch\dnd-roller-0.0.1-py_0.tar.bz2
```
:::
## 6. Submitting to conda-forge (time allowing)
Today, we are **not** going to submit multiple (or even single) copies of our `dnd-roller` package to conda-forge. We don't want to test the patience of the conda-forge gods.
But, we will get you to the point just before submission, and time allowing, we will also show you how to create your own channel on anaconda.org and publish packages there.
### conda-forge's step-by-step instructions
The instructions here are heavily based on the [conda-forge instructions](https://conda-forge.org/docs/maintainer/adding_pkgs.html#step-by-step-instructions) for package submission.
From conda-forge
> 1. Ensure your source code can be downloaded as a single file. Source code should be downloadable as an archive (.tar.gz, .zip, .tar.bz2, .tar.xz) or tagged on GitHub, to ensure that it can be verified. (For further detail, see Build from tarballs, not repos).
We got this!
> 2. Fork and clone the [staged-recipes](https://github.com/conda-forge/staged-recipes) repository from GitHub.
We will fork the repo using the GitHub web interface, and then clone that fork on our laptop
* Go to the [staged-recipes](https://github.com/conda-forge/staged-recipes) repo in GitHub.
* Click on **Fork** in the upper right, and create a copy of the repo under your user.
Now, clone the new repo locally.
```bash=
cd .. # up out of grayskull directory
git clone https://github.com/<your-github-username>/staged-recipes.git
```
*That clone may test the Salt Palace wifi - the repo is around 100mb.*
> 3. Checkout a new branch from the staged-recipes `main` branch.
```bash=
cd staged-recipes
git checkout -b dnd-roller-submission
```
> 4. Through the CLI, cd inside the ‘staged-recipes/recipes’ directory.
```bash=
cd recipes
```
> 5. Within your forked copy, create a new folder in the recipes folder for your package (i.e, `...staged-recipes/recipes/<name-of-package>`)
```bash=
mkdir dnd-roller
```
> 6. Copy `meta.yaml` from the example directory. All the changes in the following steps will happen in the COPIED meta.yaml (i.e., `...staged-recipes/recipes/<name-of-package>/meta.yaml)`. Please leave the example directory unchanged!
We could do this, but `grayskull` has already generated a perfectly good `meta.yaml` that we can use, so let's use that instead.
```bash=
cd dnd-roller
cp ../../../grayskull/dnd-roller/meta.yaml meta.yaml
```
:::info
**Windows 💁**
```bash=
cd dnd-roller
copy ..\..\..\grayskull\dnd-roller\meta.yaml meta.yaml
```
:::
> 7. Modify the copied recipe (`meta.yml`) as needed. To see how to modify meta.yaml, take a look at the [recipe `meta.yaml`](https://conda-forge.org/docs/maintainer/adding_pkgs.html#id2).
Some things to note:
1. We still need to modify the `meta.yaml` file generated by `grayskull`. See below.
2. The [`staged-recipes/recipes/example/meta.yaml`](https://github.com/conda-forge/staged-recipes/blob/main/recipes/example/meta.yaml) file is full of useful guidance, as is the conda-forge [`meta.yml` documentation](https://conda-forge.org/docs/maintainer/adding_pkgs.html#id2). Spend some time getting to understand the contents of this file.
Now, lets tidy up the `meta.yaml` file we just copied in. The end of that file says:
```yaml=
extra:
recipe-maintainers:
- AddYourGitHubIdHere
```
We need to replace `AddYourGitHubIdHere` with our GitHub ID.
> 8. Generate the SHA256 key for your source code archive, as described in the example recipe using the `openssl` tool. As an alternative, you can also go to the package description on [PyPI](https://pypi.org/) from which you can directly copy the SHA256.
Thanks to the *power of Grayskull* we already have a SHA256.
> 9. Be sure to fill in the `test section`. The simplest test will simply test that the module can be imported, as described in the example.
Thanks to the *power of Valerio* we have already created our tests.
> 10. Remove all irrelevant comments in the `meta.yaml` file.
The file generated by Grayskull contains no comments.
### conda-forge's checklist
The conda-forge documentation follows the above instructions with [this checklist](https://conda-forge.org/docs/maintainer/adding_pkgs.html#checklist):
> * Ensure that the license and license family descriptors (optional) have the right case and that the license is correct. Note that case sensitive inputs are required (e.g. Apache-2.0 rather than APACHE 2.0). Using SPDX identifiers for license field is recommended. (see [SPDX Identifiers and Expressions](https://conda-forge.org/docs/maintainer/adding_pkgs.html#spdx))
Our `meta.yaml` says `MIT` and `MIT` is on the example list of approved strings, so we are good.
> * Ensure that you have included a license file if your license requires one – most do. (see [here](https://github.com/conda-forge/staged-recipes/blob/a504af81c05491bf7b0b018b2fa1efe64767985c/recipes/example/meta.yaml#L52-L55))
[Some](https://github.com/conda-forge/staged-recipes/pull/22618/files) of the packages that [are merged into conda-forge](https://github.com/conda-forge/staged-recipes/pulls?q=is%3Apr+is%3Aclosed) have a `LICENSE.txt` file alongside the `meta.yaml` file, and [some don't](https://github.com/conda-forge/staged-recipes/pull/22614/files).
Does the MIT license require this? We have no idea, but [this recently merged PR](https://github.com/conda-forge/staged-recipes/pull/22614/files) uses an MIT license and it does not include a top level `LICENSE.txt` file. If they don't need one, we don't either!
> * In case your project has tests included, you need to decide if these tests should be executed while building the conda-forge feedstock.
> * Make sure that all tests pass successfully at least on your development machine.
Already done.
> * Recommended: run the test locally on your source code to ensure the recipe works locally (see [Running tests locally for staged recipes](https://conda-forge.org/docs/maintainer/adding_pkgs.html#staging-test-locally)).
Already done.
> * Make sure that your changes do not interfere with other recipes that are in the `recipes` folder (e.g. the `example` recipe).
Our folder is `dnd-roller` and that does not collide in anyway with `example` which is the only other folder in the `recipes` directory.
### Commit, push, request
Let's get our staged recipe into our GitHub repo, and then submit a pull request to conda-forge.
```bash=
cd .. # cd at least up to recipes
git add .
git commit -m "DND Roller rolls dice of all sizes."
git push # oops, but error message tells us what to do next:
git push --set-upstream origin dnd-roller-submission
```
The status message in the push tells us where to go next:
```
https://github.com/<your-github-id>/staged-recipes/pull/new/dnd-roller-submission
```
Go there to create (almost) a conda-forge PR submissions. conda-forge PRs use this PR template:
```<!--
Thank you very much for putting in this recipe PR!
This repository is very active, so if you need help with a PR, please let the
right people know. There are language-specific teams for reviewing recipes.
| Language | Name of review team |
| --------------- | ----------------------------- |
| python | `@conda-forge/help-python` |
| python/c hybrid | `@conda-forge/help-python-c` |
| r | `@conda-forge/help-r` |
| java | `@conda-forge/help-java` |
| nodejs | `@conda-forge/help-nodejs` |
| c/c++ | `@conda-forge/help-c-cpp` |
| perl | `@conda-forge/help-perl` |
| Julia | `@conda-forge/help-julia` |
| ruby | `@conda-forge/help-ruby` |
| other | `@conda-forge/staged-recipes` |
Once the PR is ready for review, please mention one of the teams above in a
new comment. i.e. `@conda-forge/help-some-language, ready for review!`
Then, a bot will label the PR as 'review-requested'.
Due to GitHub limitations, first time contributors to conda-forge are unable
to ping conda-forge teams directly, but you can [ask a bot to ping the team][1]
using a special command in a comment on the PR to get the attention of the
`staged-recipes` team. You can also consider asking on our [Gitter channel][2]
if your recipe isn't reviewed promptly.
[1]: https://conda-forge.org/docs/maintainer/infrastructure.html#conda-forge-admin-please-ping-team
[2]: https://gitter.im/conda-forge/conda-forge.github.io
-->
```
We have a decidely Pythonic submission.
Next there is a checklist. Read it and add `x`'s as you confirm each item.
```
Checklist
- [ ] Title of this PR is meaningful: e.g.
"Adding my_nifty_package", not
"updated meta.yaml".
- [ ] License file is packaged (see
[here](https://github.com/conda-forge/staged-recipes/blob/5eddbd7fc9d1502169089da06c3688d9759be978/recipes/example/meta.yaml#L64-L73)
for an example).
- [ ] Source is from official source.
- [ ] Package does not vendor other packages.
(If a package uses the source of another
package, they should be separate packages
or the licenses of all packages need to
be packaged).
- [ ] If static libraries are linked in, the
license of the static library is packaged.
- [ ] Package does not ship static libraries.
If static libraries are needed,
[follow CFEP-18](https://github.com/conda-forge/cfep/blob/main/cfep-18.md).
- [ ] Build number is 0.
- [ ] A tarball (`url`) rather than a repo
(e.g. `git_url`) is used in your recipe
(see [here](https://conda-forge.org/docs/maintainer/adding_pkgs.html#build-from-tarballs-not-repos)
for more details).
- [ ] GitHub users listed in the maintainer
section have posted a comment confirming
they are willing to be listed there.
- [ ] When in trouble, please check our
[knowledge base documentation](https://conda-forge.org/docs/maintainer/knowledge_base.html)
before pinging a team.
```
When it's ready, click **Create pull request** to submit it. **EXCEPT DON'T DO THAT TODAY**.
### After submitting the PR
There is a whole [post-staging process](https://conda-forge.org/docs/maintainer/adding_pkgs.html#post-staging-process) for what happens to your PR after submission.
conda-forge is an all volunteer organization, and depending on how much else is going on, it may take a while for the conda-forge team to engage with your PR. After the initial ping to the appropriate team (see above), how long should you wait before pinging conda-forge again? If you can, try to wait at least a week, and always (**always**) be polite in your communications.
### Publishing in conda-forge
From the [conda-forge doc]():
> Once the PR containing the recipe for a package is merged in the `staged-recipes` repository, a new repository is created automatically called `<package-name>-feedstock`. A feedstock is made up of a conda recipe (the instructions on what and how to build the package) and the necessary configuration files for automatic builds using freely available continuous integration (CI) services.
>
> Each feedstock contains various files that are generated automatically using our automated provisioning tool [`conda-smithy`](https://github.com/conda-forge/conda-smithy/).
## 7. Publishing in your own channel (time allowing)
You, as Valerio has done, can also publish your package in your own channel on Anaconda.org.
These instructions are based on the [conda documentation](https://docs.conda.io/projects/conda-build/en/latest/user-guide/tutorials/build-pkgs.html#optional-uploading-new-packages-to-anaconda-org).
1. [Create an account on Anaconda.org](https://anaconda.org/account/login)
* Once you log in, it will tell you to verify your email. Please do so. Sometimes, you have to ask for the email to be resent.
2. Install anaconda-client:
`conda install anaconda-client`
3. Login
`anaconda login`
4. Upload your package to Anaconda.org:
```
anaconda upload $CONDA_PREFIX_1/conda-bld/noarch/dnd-roller-0.0.1-py_0.tar.bz2
```
:::info
**Windows 💁**
```
anaconda upload %CONDA_PREFIX_1%\conda-bld\noarch\dnd-roller-0.0.1-py_0.tar.bz2
```
:::
Now, go to your profile page on anaconda.com, which is at https://anaconda.org/__YOUR_USERNAME__.
 Sign in with Wallet


