PHPerのための「PHPフレームワーク」を語り合うPHP TechCafe
==================================================
https://rakus.connpass.com/event/264108/
# PHPer's NEWS
::: info
**[PHPクイズの解答と解説 (PHP Conference Japan 2022)](https://tech.pepabo.com/2022/10/05/php-conference-japan-2022-quiz/)**
:::
::: info
**[【PHP8.3】JSONが正しいかどうか判定できるようになる](https://wiki.php.net/rfc/json_validate)**
:::
::: info
**[PHP 8.1.12 Released!
PHP 8.0.25 Released!](https://www.php.net/)**
:::
::: info
**[Generics via Attributes in PHP — Can We Have Them?](https://pronskiy.com/blog/generics-via-attributes-in-php/)**
:::
::: info
**[「OpenSSL」にセキュリティアップデート - 脆弱性の評価は下方修正](https://www.security-next.com/141071)**
:::
::: info
**[GitHub、より細かな権限設定が可能な新しい個人用アクセストークンをパブリックベータ版として提供](https://codezine.jp/article/detail/16709)**
:::
::: info
**[Laravel Workflow - 個々のマイクロサービスを利用して複雑なビジネス要求を達成するためのツール](https://dev.to/rmcdaniel/laravel-workflow-orchestration-vs-choregraphy-5aj8)**
:::
::: info
**[「XKCP SHA-3」に脆弱性 - 「Python」「PHP」などにも影響](https://www.security-next.com/141201)**
:::
::: info
**[PHPerKaigi 各種募集開始!!](https://fortee.jp/phperkaigi-2023/proposal/callfor)**
:::
::: info
**[PHP8.2のリリースがちょっと延期](https://news-web.php.net/php.internals/118991/php.internals/)**
バグが見つかったんなら仕方がないね
:::
::: info
**[「gmail」ドメインを「gmai」と誤記、10カ月気付かず2000件超の情報漏えいか 埼玉大が「ドッペルゲンガー・ドメイン」の毒牙に](https://www.itmedia.co.jp/news/articles/2211/21/news144.html)**
送信側によるドメインチェックは必須
:::
::: info
**[PHP7.4サポート終了!!](https://www.php.net/supported-versions.php)**
:::
::: info
**[PHPStan 1.9.0リリース](https://phpstan.org/blog/phpstan-1-9-0-with-phpdoc-asserts-list-type)**
:::
::: info
**[AWSが「Docker Desktop」代替となり得る「Finch」をオープンソースで公開](https://www.itmedia.co.jp/news/articles/2211/24/news107.html)**
:::
::: info
**[GitHub、テキストエディタ「Atom」の最終版を公開、12月にはリポジトリをアーカイブへ](https://codezine.jp/article/detail/16912)**
:::
::: info
**[PHPフレームワーク「Symfony 6.2」リリース](https://thinkit.co.jp/news/bn/20376)**
:::
::: info
**[The PHP Foundation: Impact and Transparency Report 2022](https://thephp.foundation/blog/2022/11/22/transparency-and-impact-report-2022/)**
PHPの保守・開発は順調に進んでいるようでなによりです。
:::
# 特集:「PHPフレームワーク」を語り合う
* Webアプリケーションフレームワーク とは([wiki](https://ja.wikipedia.org/wiki/Web%E3%82%A2%E3%83%97%E3%83%AA%E3%82%B1%E3%83%BC%E3%82%B7%E3%83%A7%E3%83%B3%E3%83%95%E3%83%AC%E3%83%BC%E3%83%A0%E3%83%AF%E3%83%BC%E3%82%AF))
* 動的な ウェブサイト、Webアプリケーション、Webサービスの開発をサポートするために設計されたアプリケーションフレームワーク
* Web開発で用いられる共通した作業に伴う労力を軽減する
* データベースへのアクセス
* テンプレートエンジン
* セッション管理
* コードの再利用を促進させる
* そもそもFWってなんで必要?
* 開発速度向上
* Webアプリケーション開発でよく利用する処理(セッション管理やDBアクセス、Cookieなど)が既に用意されているため、それらを再利用するだけで開発が進められる
* セキュリティ対応
* 脆弱性が見つかった場合に修正版がリリースされる
* メンテされているOSSの場合
* 開発ルールの順守
* フレームワークのルールに従って作成することが強いられる反面、開発チーム全体で共通のルールで開発できるため、ルールに逸脱するようなコードが生まれにくい
## 比較するフレームワーク
* Laravel
* Symfony
* CakePHP
* Slim
## 設計思想
### Laravel
https://laravel.com/docs/9.x/installation
- プログレッシブフレームワーク
- we mean that Laravel grows with you.
- Laravel はあなたと共に成長するということです。
- Laravel は依存性注入、単体テスト、キュー、リアルタイム イベント などのための堅牢なツールを提供します。
- スケーラブルなフレームワーク
- Laravel は信じられないほどスケーラブルです。
- 実際、Laravel アプリケーションは、1 か月あたり数億のリクエストを処理するように簡単にスケーリングされています。
- コミュニティ フレームワーク
### Symfony
> What could be more useful than an application developed by users for their own needs
> https://symfony.com/at-a-glance#a-philosophy
ユーザーが自分たちのニーズに合わせて開発したアプリケーションほど便利なものはない
作成されたコンポーネントを組み合わせて、フルスタックフレームワークを作成することもマイクロサービスを作成することも可能。
開発者の目的に応じて規模を変えることができることが特徴。
コンポーネントが標準化されており、アプリケーションが成熟しても使用したいコンポーネントを自由に導入することができる。
Java の [Spring Framework](https://spring.io/) や Ruby の [Ruby on Rails](https://rubyonrails.org/) の影響を受けているとのこと。
Symfony コンポーネントは [Drupal](https://www.drupal.org/), [Prestashop](https://www.prestashop.com/en), [Laravel](https://laravel.com/) で利用されている
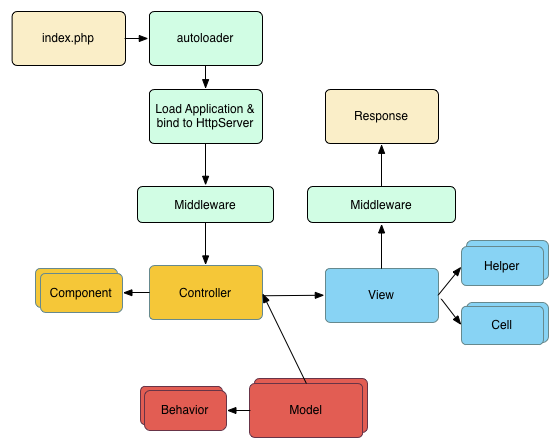
### CakePHP
- MVC
### Slim
> Slim is a PHP micro framework that helps you quickly write simple yet powerful web applications and APIs.
> https://www.slimframework.com/
Slimはシンプルかつ強力な Web アプリケーションと API をすばやく作成するのに役立つ PHP マイクロ フレームワークです。
> At its core, Slim is a dispatcher that receives an HTTP request, invokes an appropriate callback routine, and returns an HTTP response. That’s it.
> You don’t always need a kitchen-sink solution like Symfony or Laravel. These are great tools, for sure. But they are often overkill. Instead, Slim provides only a minimal set of tools that do what you need and nothing else.
> https://www.slimframework.com/docs/v4/
本質的に、Slim は HTTP リクエストを受け取り、適切なコールバック ルーチンを呼び出し、HTTP レスポンスを返すディスパッチャーです。それだけ。
SymfonyやLaravelのようなキッチン シンク ソリューションが常に必要なわけではありません。これらは確かに優れたツールです。しかし、それらはしばしばやり過ぎです。代わりに、Slim は、必要なことだけを行う最小限のツール セットのみを提供します。
## ルーティング
### Laravel
https://laravel.com/docs/9.x/routing
#### デフォルトルートファイル
デフォルトでは下記2つファイルにルーティングを定義する
- routes/web.php
- routes/api.php
#### 定義方法
UserControllerにindxメソッドを定義している場合
下記のように定義すると`/user`のパスに対して、UserControllerのindexメソッドが対応される
```php=
<?php
use App\Http\Controllers\UserController;
Route::get('/user', [UserController::class, 'index']);
```
#### 利用可能なルーターメソッド
```php=
<?php
Route::get($uri, $callback);
Route::post($uri, $callback);
Route::put($uri, $callback);
Route::patch($uri, $callback);
Route::delete($uri, $callback);
Route::options($uri, $callback);
```
#### パラメータ
```php=
<?php
Route::get('/posts/{post}/comments/{comment}', [CommentController::class, 'show']);
```
### Symfony
#### routes.yaml に記載するパターン
`routes.yaml` を以下の通り編集する
```yaml=
app_lucky_number:
path: /lucky/number
controller: App\Controller\LuckyController::number
```
`/lucky/number` にアクセスすることで `LuckyController` の `number` メソッドにルーティングされる
#### アノテーションまたはアトリビュートを利用するパターン(こっちが推奨)
コントローラを以下の通り変更
```php=
<?php
// src/Controller/LuckyController.php
namespace App\Controller;
use Symfony\Component\HttpFoundation\Response;
use Symfony\Component\Routing\Annotation\Route;
class LuckyController
{
#[Route('/lucky/number')]
public function number(): Response
{
$number = random_int(0, 100);
return new Response(
'<html><body>Lucky number: '.$number.'</body></html>'
);
}
}
```
上記の通り記述することで `routes.yaml` を作成しなくともルーティングされる
### CakePHP
https://book.cakephp.org/3/ja/development/routing.html
`routes.php`に記載
例:`/`にアクセスすると`ArticlesController`の`index()`メソッドを実行する
```php=
use Cake\Routing\Router;
// スコープ付きルートビルダーを使用。
Router::scope('/', function ($routes) {
$routes->connect('/', ['controller' => 'Articles', 'action' => 'index']);
});
// static メソッドを使用。
Router::connect('/', ['controller' => 'Articles', 'action' => 'index']);
```
`/articles/15`にアクセスすると`ArticlesController`の`view(15)`メソッドを実行する
```php=
$routes->connect(
'/articles/:id',
['controller' => 'Articles', 'action' => 'view']
)
->setPatterns(['id' => '\d+'])
->setPass(['id']);
```
HTTPメソッドによって分けたいときは以下の記述
```php=
// GET リクエストへのみ応答するルートの作成
$routes->get(
'/cooks/:id',
['controller' => 'Users', 'action' => 'view'],
'users:view'
);
// PUT リクエストへのみ応答するルートの作成
$routes->put(
'/cooks/:id',
['controller' => 'Users', 'action' => 'update'],
'users:update'
);
```
### Slim
https://www.slimframework.com/docs/v4/objects/routing.html
```php=
$app->get('/books/{id}', function ($request, $response, array $args) {
// Show book identified by $args['id']
});
```
## セッション管理
### Laravel
https://laravel.com/docs/9.x/session
#### 設定ファイル
config/session.php
#### セッションの操作方法
グローバルセッションヘルパーとRequestインスタンス経由の2つの方法
##### グローバルセッションヘルパー
```php=
<?php
$value = session('key');
```
##### Requestインスタンス経由
```php=
<?php
public function show(Request $request, $id)
{
$value = $request->session()->get('key');
//
}
```
### Symfony
以下の2通り
* RequestStack から取得
* SessionInterface から取得
#### [RequestStack](https://symfony.com/doc/current/session.html) から取得するパターン
* `HttpFoundation component` を追加することで利用可能
```bash=
composer require symfony/http-foundation
```
* セッションの設定は `config/packages/framework.yaml` に記載
* 公式にはXMLとPHPの説明もあるが、デフォルトは `yaml` ?
* `handler_id`
* null
* 稼働しているPHPの設定に依存
* session.handler.native_file
* `save_path` に記載したパスにSymfonyのセッションメタデータを保存
* [その他詳細](https://symfony.com/doc/current/reference/configuration/framework.html#session)
##### 基本的な使い方
```php=
use Symfony\Component\HttpFoundation\RequestStack;
class SomeService
{
private $requestStack;
public function __construct(RequestStack $requestStack)
{
$this->requestStack = $requestStack;
// Accessing the session in the constructor is *NOT* recommended, since
// it might not be accessible yet or lead to unwanted side-effects
// $this->session = $requestStack->getSession();
}
public function someMethod()
{
$session = $this->requestStack->getSession();
// stores an attribute in the session for later reuse
$session->set('attribute-name', 'attribute-value');
// gets an attribute by name
$foo = $session->get('foo');
// the second argument is the value returned when the attribute doesn't exist
$filters = $session->get('filters', []);
// ...
}
}
```
* 公式にはコンストラクタ内でセッションを利用することはおすすめしていない。
* Symfony 6.0 より、旧方式のセッションは[廃止](https://symfony.com/blog/new-in-symfony-5-3-session-service-deprecation)された模様
##### [SessionInterface](https://symfony.com/doc/current/controller.html#managing-the-session) から取得するパターン
`SessionInterface` でタイプヒントしてコントローラ引数に渡すだけ。
##### 基本的な使い方
```php=
use Symfony\Component\HttpFoundation\Response;
use Symfony\Component\HttpFoundation\Session\SessionInterface;
// ...
public function index(SessionInterface $session): Response
{
// stores an attribute for reuse during a later user request
$session->set('foo', 'bar');
// gets the attribute set by another controller in another request
$foobar = $session->get('foobar');
// uses a default value if the attribute doesn't exist
$filters = $session->get('filters', []);
// ...
}
```
### CakePHP
- PHP のネイティブ session 拡張上に、ユーティリティ機能のスイートとラッパーを提供
- https://book.cakephp.org/4/ja/development/sessions.html
#### 設定
##### データベースセッション
```php
'Session' => [
'defaults' => 'database',
'handler' => [
'engine' => 'DatabaseSession',
'model' => 'CustomSessions'
]
]
```
- 1行目:cakePHPにセッションはデータベースに保持することを伝える
- セッション保持するためのカスタムモデルを定義することもできる(`model => 'CustomSessions'`)
##### キャッシュセッション
```php
Configure::write('Session', [
'defaults' => 'cache',
'handler' => [
'config' => 'session'
]
]);
```
- これは Session に `CacheSession` クラスをセッション保存先として 委任する
##### セッションを利用する
- セッションはリクエストオブジェクトを呼び出せる場所ならどこでも呼び出せる
- Controllers
- Views
- Helpers
- Cells
- Components
```php
$name = $this->getRequest()->getSession()->read('User.name');
// 複数回セッションにアクセスする場合、
// ローカル変数にしたくなるでしょう。
$session = $this->getRequest()->getSession();
$name = $session->read('User.name');
```
- Session::read($key)
- Session::write($key)
- Session::check($key)
- Session::destroy()
- ユーザーがログインやログアウトした時、 `AuthComponent` は自動的にセッション ID を更新
### Slim
実装なし
## リクエスト管理
### Laravel
https://laravel.com/docs/9.x/requests
#### リクエストの内容を取得する
Illuminate\Http\Requestクラスのインスタンスを生成して取得する
```php=
<?php
$name = $request->input('name');
$name = $request->query('name');
```
### Symfony
https://symfony.com/doc/current/components/http_kernel.html
```php=
use Symfony\Component\HttpFoundation\Request;
use Symfony\Component\HttpFoundation\Response;
public function index(Request $request): Response
{
$request->isXmlHttpRequest(); // is it an Ajax request?
$request->getPreferredLanguage(['en', 'fr']);
// retrieves GET and POST variables respectively
$request->query->get('page');
$request->request->get('page');
// retrieves SERVER variables
$request->server->get('HTTP_HOST');
// retrieves an instance of UploadedFile identified by foo
$request->files->get('foo');
// retrieves a COOKIE value
$request->cookies->get('PHPSESSID');
// retrieves an HTTP request header, with normalized, lowercase keys
$request->headers->get('host');
$request->headers->get('content-type');
}
```
### CakePHP
$this->request を使用して取得
```php=
$controllerName = $this->request->getParam('controller');
// URL は /posts/index?page=1&sort=title の場合に page を取得するとき
$page = $this->request->getQuery('page');
// POSTデータにアクセスするとき
$title = $this->request->getData('MyModel.title');
```
### Slim
https://www.slimframework.com/docs/v4/objects/request.html
```php=
<?php
use Psr\Http\Message\ResponseInterface as Response;
use Psr\Http\Message\ServerRequestInterface as Request;
use Slim\Factory\AppFactory;
require __DIR__ . '/../vendor/autoload.php';
$app = AppFactory::create();
$app->get('/hello', function (Request $request, Response $response) {
$response->getBody()->write('Hello World');
return $response;
});
$app->run();
```
## エラーハンドリング
### Laravel
https://readouble.com/laravel/9.x/ja/errors.html
* `App\Exceptions\Handler`クラスによって、アプリケーションが投げるすべての例外がログに記録され、ユーザーへレンダーされる
#### エラーハンドリングのカスタマイズ
* `Handler`クラスは、カスタム例外レポートとレンダリングコールバックを登録できる`register`メソッドを持っている。
* `reportable`メソッドで、例外をさまざまな方法で報告できる。(エラー監視ツールに登録するなど。デフォルトではログに記録される。)
* `renderable`メソッドで、特定の例外に対して、個別にレンダリング方法を指定することができる。(デフォルトでは例外はHTTPレスポンスに変換される)
* HTTPエラーが返された場合、`resources/views/errors`下のHTTPステータスコード名のbladeファイルがレンダリングされる(`404.blade.php`など)
```php=
use App\Exceptions\InvalidOrderException;
/**
* アプリケーションの例外処理コールバックを登録
*
* @return void
*/
public function register()
{
$this->reportable(function (InvalidOrderException $e) {
// 例外を報告
});
$this->renderable(function (InvalidOrderException $e, $request) {
return response()->view('errors.invalid-order', [], 500);
});
}
```
### Symfony
Symfony アプリケーションでは、エラーが 404 Not Found エラーであろうと、
コードで何らかの例外をスローすることによってトリガーされた致命的なエラーであろうと、
すべてのエラーを例外として扱う。
組み込みの Twig エラーレンダラーを使用して、デフォルトのエラーテンプレートをオーバーライド可能。
```bash
composer require symfony/twig-pack
```
これらのテンプレートをオーバーライドするには、標準の Symfony メソッドを使用し て、バンドル内にあるテンプレートをオーバーライドし、それらをtemplates/bundles/TwigBundle/Exception/ディレクトリに配置する。
HTML ページを返す典型的なプロジェクトは次のようになります。
```
Copy
templates/
└─ bundles/
└─ TwigBundle/
└─ Exception/
├─ error404.html.twig
├─ error403.html.twig
└─ error.html.twig # All other HTML errors (including 500)
```
HTML ページの 404 エラー テンプレートをオーバーライドするには、次の場所にある新しい error404.html.twigテンプレートを作成しtemplates/bundles/TwigBundle/Exception/ます。
```htmlembedded
{# templates/bundles/TwigBundle/Exception/error404.html.twig #}
{% extends 'base.html.twig' %}
{% block body %}
<h1>Page not found</h1>
<p>
The requested page couldn't be located. Checkout for any URL
misspelling or <a href="{{ path('homepage') }}">return to the homepage</a>.
</p>
{% endblock %}
```
[error_controller](https://github.com/symfony/symfony/blob/6.1/src/Symfony/Component/HttpKernel/Controller/ErrorController.php)
[参考](https://symfony.com/doc/current/controller/error_pages.html)
### CakePHP
https://book.cakephp.org/3/ja/development/errors.html
ErrorController にてエラーページを描画
```php=
namespace App\Controller\Admin;
use App\Controller\AppController;
use Cake\Event\EventInterface;
class ErrorController extends AppController
{
/**
* Initialization hook method.
*
* @return void
*/
public function initialize(): void
{
$this->loadComponent('RequestHandler');
}
/**
* beforeRender callback.
*
* @param \Cake\Event\EventInterface $event Event.
* @return void
*/
public function beforeRender(EventInterface $event)
{
$this->viewBuilder()->setTemplatePath('Error');
}
}
```
### Slim
https://www.slimframework.com/docs/v4/middleware/error-handling.html
```php=
use Slim\Factory\AppFactory;
require __DIR__ . '/../vendor/autoload.php';
$app = AppFactory::create();
/**
* The routing middleware should be added earlier than the ErrorMiddleware
* Otherwise exceptions thrown from it will not be handled by the middleware
*/
$app->addRoutingMiddleware();
/**
* Add Error Middleware
*
* @param bool $displayErrorDetails -> Should be set to false in production
* @param bool $logErrors -> Parameter is passed to the default ErrorHandler
* @param bool $logErrorDetails -> Display error details in error log
* @param LoggerInterface|null $logger -> Optional PSR-3 Logger
*
* Note: This middleware should be added last. It will not handle any exceptions/errors
* for middleware added after it.
*/
$errorMiddleware = $app->addErrorMiddleware(true, true, true);
// ...
$app->run();
```
* slimが用意したエラー画面を出すかどうかを選択できたり、カスタムエラー画面を表示するなど柔軟な設定が可能。
## DBサポート
### Laravel
https://readouble.com/laravel/9.x/ja/database.html
#### コネクション
Lavavelでは以下のDBがサポートされる
* MariaDB
* MySQL
* PostgreSQL
* SQLite
* SQL Server
config/database.phpで設定を行う
データベースにアクセスする方法は以下
* DBファサード
```
$users = DB::select('select * from users where active = ?', [1]);
```
* クエリビルダ
```
$users = DB::table('users')->where('active', $isActive)->get();
```
* Eloquent
```
$users = User::where('active', $isActive)->get();
```
### Symfony
https://symfony.com/doc/current/doctrine.html
コネクション
* Doctrine(ORM)を使用
```
composer require doctrine maker
```
インストールが完了すると .env ファイルにデータベースへの接続設定に関する項目が書き足されます。
DATABASE_URL の箇所を接続するデータベースに合わせて書き換えて下さい。
```
DATABASE_URL=mysql://db_user:db_password@127.0.0.1:3306/db_name
```
```
php bin/console doctrine:database:create
```
エンティティクラスを作成する
```
symfony console make:entity hoge
```
### CakePHP
SELECT文の実行
```php=
use Cake\Datasource\ConnectionManager;
$connection = ConnectionManager::get('default');
$results = $connection->execute('SELECT * FROM articles')->fetchAll('assoc');
```
INSERT文の実行
```php=
use Cake\Datasource\ConnectionManager;
use DateTime;
$connection = ConnectionManager::get('default');
$connection->insert('articles', [
'title' => 'A New Article',
'created' => new DateTime('now')
], ['created' => 'datetime']);
```
UPDATE文の実行
```php=
use Cake\Datasource\ConnectionManager;
$connection = ConnectionManager::get('default');
$connection->update('articles', ['title' => 'New title'], ['id' => 10]);
```
DELETE文の実行
```php=
use Cake\Datasource\ConnectionManager;
$connection = ConnectionManager::get('default');
$connection->delete('articles', ['id' => 10]);
```
### Slim
なし
## バリデーション
### Laravel
https://readouble.com/laravel/9.x/ja/validation.html
複数のバリデーション方法がある
例を2つ紹介
#### Requestクラスを使う方法
連想配列形式で各パラメータに適応したいバリデーションルールを指定する
[他のバリデーションルール](https://readouble.com/laravel/9.x/ja/validation.html?header=unique:_%25E3%2583%2586%25E3%2583%25BC%25E3%2583%2596%25E3%2583%25AB_,_%25E3%2582%25AB%25E3%2583%25A9%25E3%2583%25A0_#rule-accepted)
```php=
<?php
public function rules()
{
return [
'title' => 'required|unique:posts|max:255',
'body' => 'required',
];
}
```
#### Validatorファサードを使用する方法
ファサードを使ってバリデーションをすることも可能
第一引数に対象のデータ、第二引数にバリデーションルールを指定する
```php=
<?php
$validator = Validator::make($request->all(), [
'title' => 'required|unique:posts|max:255',
'body' => 'required',
]);
```
### Symfony
config/validator/ ディレクトリ内の .yaml または .xml ファイルとして定義する。
(例)$nameプロパティが空
```php=
Attributes
// src/Entity/Author.php
namespace App\Entity;
// ...
use Symfony\Component\Validator\Constraints as Assert;
class Author
{
#[Assert\NotBlank]
private $name;
}
```
YAML
```yml=
# config/validator/validation.yaml
App\Entity\Author:
properties:
name:
- NotBlank: ~
```
XML
```xml=
<!-- config/validator/validation.xml -->
<?xml version="1.0" encoding="UTF-8" ?>
<constraint-mapping xmlns="http://symfony.com/schema/dic/constraint-mapping"
xmlns:xsi="http://www.w3.org/2001/XMLSchema-instance"
xsi:schemaLocation="http://symfony.com/schema/dic/constraint-mapping
https://symfony.com/schema/dic/constraint-mapping/constraint-mapping-1.0.xsd">
<class name="App\Entity\Author">
<property name="name">
<constraint name="NotBlank"/>
</property>
</class>
</constraint-mapping>
```
```php=
PHP
// src/Entity/Author.php
namespace App\Entity;
// ...
use Symfony\Component\Validator\Constraints\NotBlank;
use Symfony\Component\Validator\Mapping\ClassMetadata;
class Author
{
private $name;
public static function loadValidatorMetadata(ClassMetadata $metadata)
{
$metadata->addPropertyConstraint('name', new NotBlank());
}
}
```
### CakePHP
https://book.cakephp.org/4/en/core-libraries/validation.html#namespace-Cake\Validation
```php=
$validator
->requirePresence('title')
->notEmptyString('title', 'このフィールドに入力してください')
->add('title', [
'length' => [
'rule' => ['minLength', 10],
'message' => 'タイトルは10文字以上必要です。',
]
])
->allowEmptyDateTime('published')
->add('published', 'boolean', [
'rule' => 'boolean'
])
->requirePresence('body')
->add('body', 'length', [
'rule' => ['minLength', 50],
'message' => '記事の内容は意味がなければなりません。'
]);
```
### Slim
ドキュメントに記述なし
## マイグレーション
### Laravel
https://readouble.com/laravel/9.x/ja/migrations.html
* マイグレージョン関連のコマンドがartisanコマンドで準備されている
* マイグレーションの生成
```
php artisan make:migration create_flights_table
```
* マイグレーションの構造
```php=
<?php
use Illuminate\Database\Migrations\Migration;
use Illuminate\Database\Schema\Blueprint;
use Illuminate\Support\Facades\Schema;
class CreateFlightsTable extends Migration
{
/**
* マイグレーションの実行
*
* @return void
*/
public function up()
{
Schema::create('flights', function (Blueprint $table) {
$table->id();
$table->string('name');
$table->string('airline');
$table->timestamps();
});
}
/**
* マイグレーションを戻す
*
* @return void
*/
public function down()
{
Schema::drop('flights');
}
}
```
### Symfony
Doctrine Migrationsを使用。
```
symfony console make:migration
```
生成されたファイル名が出力される(migrations/Version20191019083640.php のような名前のファイル):
```php=
namespace DoctrineMigrations;
use Doctrine\DBAL\Schema\Schema;
use Doctrine\Migrations\AbstractMigration;
final class Version00000000000000 extends AbstractMigration
{
public function up(Schema $schema): void
{
// this up() migration is auto-generated, please modify it to your needs
$this->addSql('CREATE SEQUENCE comment_id_seq INCREMENT BY 1 MINVALUE 1 START 1');
$this->addSql('CREATE SEQUENCE conference_id_seq INCREMENT BY 1 MINVALUE 1 START 1');
$this->addSql('CREATE TABLE comment (id INT NOT NULL, conference_id INT NOT NULL, author VARCHAR(255) NOT NULL, text TEXT NOT NULL, email VARCHAR(255) NOT NULL, created_at TIMESTAMP(0) WITHOUT TIME ZONE NOT NULL, photo_filename VARCHAR(255) DEFAULT NULL, PRIMARY KEY(id))');
$this->addSql('CREATE INDEX IDX_9474526C604B8382 ON comment (conference_id)');
$this->addSql('CREATE TABLE conference (id INT NOT NULL, city VARCHAR(255) NOT NULL, year VARCHAR(4) NOT NULL, is_international BOOLEAN NOT NULL, PRIMARY KEY(id))');
$this->addSql('ALTER TABLE comment ADD CONSTRAINT FK_9474526C604B8382 FOREIGN KEY (conference_id) REFERENCES conference (id) NOT DEFERRABLE INITIALLY IMMEDIATE');
}
public function down(Schema $schema): void
{
// ...
}
}
```
### CakePHP
https://book.cakephp.org/migrations/3/ja/index.html
* Cake PHP 本体には含まれていない
* Cake PHP コアメンバが開発するプラグインとして利用可能
```
composer require cakephp/migrations "@stable"
```
```PHP=
<?php
use Migrations\AbstractMigration;
class CreateProducts extends AbstractMigration
{
/**
* Change Method.
*
* More information on this method is available here:
* https://book.cakephp.org/phinx/0/en/migrations.html#the-change-method
* @return void
*/
public function change()
{
$table = $this->table('products');
$table->addColumn('name', 'string', [
'default' => null,
'limit' => 255,
'null' => false,
]);
$table->addColumn('description', 'text', [
'default' => null,
'null' => false,
]);
$table->addColumn('created', 'datetime', [
'default' => null,
'null' => false,
]);
$table->addColumn('modified', 'datetime', [
'default' => null,
'null' => false,
]);
$table->create();
}
}
```
* 主キーとなるカラム id は、 勝手に追加される
### Slim
なし


