# openai-fine-tuning
Fine-tuning
===========
Fine-tune models for better results and efficiency.
Fine-tuning lets you get more out of the models available through the API by providing:
* Higher quality results than prompting
* Ability to train on more examples than can fit in a prompt
* Token savings due to shorter prompts
* Lower latency requests
OpenAI's text generation models have been pre-trained on a vast amount of text. To use the models effectively, we include instructions and sometimes several examples in a prompt. Using demonstrations to show how to perform a task is often called "few-shot learning."
Fine-tuning improves on few-shot learning by training on many more examples than can fit in the prompt, letting you achieve better results on a wide number of tasks. **Once a model has been fine-tuned, you won't need to provide as many examples in the prompt.** This saves costs and enables lower-latency requests.
At a high level, fine-tuning involves the following steps:
1. Prepare and upload training data
2. Train a new fine-tuned model
3. [Evaluate](/docs/guides/evals) results and go back to step 1 if needed
4. Use your fine-tuned model
Visit our [pricing page](https://openai.com/api/pricing) to learn more about how fine-tuned model training and usage are billed.
### Which models can be fine-tuned?
Most of our most recent models are capable of being fine tuned - please refer to the [model docs](/docs/models) for the model you would like to fine tune to see if it supports this feature.
When to use fine-tuning
-----------------------
Fine-tuning OpenAI text generation models can make them better for specific applications, but it requires a careful investment of time and effort. We recommend first attempting to get good results with prompt engineering, prompt chaining (breaking complex tasks into multiple prompts), and [function calling](/docs/guides/function-calling), with the key reasons being:
* There are many tasks at which our models may not initially appear to perform well, but results can be improved with the right prompts - thus fine-tuning may not be necessary
* Iterating over prompts and other tactics has a much faster feedback loop than iterating with fine-tuning, which requires creating datasets and running training jobs
* In cases where fine-tuning is still necessary, initial prompt engineering work is not wasted - we typically see best results when using a good prompt in the fine-tuning data (or combining prompt chaining / tool use with fine-tuning)
Our [prompt engineering guide](/docs/guides/prompt-engineering) provides a background on some of the most effective strategies and tactics for getting better performance without fine-tuning. You may find it helpful to iterate quickly on prompts in our [playground](/playground).
### Common use cases
Some common use cases where fine-tuning can improve results:
* Setting the style, tone, format, or other qualitative aspects
* Improving reliability at producing a desired output
* Correcting failures to follow complex prompts
* Handling many edge cases in specific ways
* Performing a new skill or task that’s hard to articulate in a prompt
One high-level way to think about these cases is when it’s easier to "show, not tell". In the sections to come, we will explore how to set up data for fine-tuning and various examples where fine-tuning improves the performance over the baseline model.
Another scenario where fine-tuning is effective is reducing cost and/or latency by replacing a more expensive model like `gpt-4o` with a fine-tuned `gpt-4o-mini` model. If you can achieve good results with `gpt-4o`, you can often reach similar quality with a fine-tuned `gpt-4o-mini` model by fine-tuning on the `gpt-4o` completions, possibly with a shortened instruction prompt.
Preparing your dataset
----------------------
Once you have determined that fine-tuning is the right solution (i.e. you’ve optimized your prompt as far as it can take you and identified problems that the model still has), you’ll need to prepare data for training the model. You should create a diverse set of demonstration conversations that are similar to the conversations you will ask the model to respond to at inference time in production.
Each example in the dataset should be a conversation in the same format as our [Chat Completions API](/docs/api-reference/chat/create), specifically a list of messages where each message has a role, content, and [optional name](/docs/api-reference/chat/create#chat/create-chat/create-messages-name). At least some of the training examples should directly target cases where the prompted model is not behaving as desired, and the provided assistant messages in the data should be the ideal responses you want the model to provide.
### Example format
In this example, our goal is to create a chatbot that occasionally gives sarcastic responses, these are three training examples (conversations) we could create for a dataset:
```jsonl
{"messages": [{"role": "system", "content": "Marv is a factual chatbot that is also sarcastic."}, {"role": "user", "content": "What's the capital of France?"}, {"role": "assistant", "content": "Paris, as if everyone doesn't know that already."}]}
{"messages": [{"role": "system", "content": "Marv is a factual chatbot that is also sarcastic."}, {"role": "user", "content": "Who wrote 'Romeo and Juliet'?"}, {"role": "assistant", "content": "Oh, just some guy named William Shakespeare. Ever heard of him?"}]}
{"messages": [{"role": "system", "content": "Marv is a factual chatbot that is also sarcastic."}, {"role": "user", "content": "How far is the Moon from Earth?"}, {"role": "assistant", "content": "Around 384,400 kilometers. Give or take a few, like that really matters."}]}
```
### Multi-turn chat examples
Examples in the chat format can have multiple messages with the assistant role. The default behavior during fine-tuning is to train on all assistant messages within a single example. To skip fine-tuning on specific assistant messages, a `weight` key can be added disable fine-tuning on that message, allowing you to control which assistant messages are learned. The allowed values for `weight` are currently 0 or 1. Some examples using `weight` for the chat format are below.
```jsonl
{"messages": [{"role": "system", "content": "Marv is a factual chatbot that is also sarcastic."}, {"role": "user", "content": "What's the capital of France?"}, {"role": "assistant", "content": "Paris", "weight": 0}, {"role": "user", "content": "Can you be more sarcastic?"}, {"role": "assistant", "content": "Paris, as if everyone doesn't know that already.", "weight": 1}]}
{"messages": [{"role": "system", "content": "Marv is a factual chatbot that is also sarcastic."}, {"role": "user", "content": "Who wrote 'Romeo and Juliet'?"}, {"role": "assistant", "content": "William Shakespeare", "weight": 0}, {"role": "user", "content": "Can you be more sarcastic?"}, {"role": "assistant", "content": "Oh, just some guy named William Shakespeare. Ever heard of him?", "weight": 1}]}
{"messages": [{"role": "system", "content": "Marv is a factual chatbot that is also sarcastic."}, {"role": "user", "content": "How far is the Moon from Earth?"}, {"role": "assistant", "content": "384,400 kilometers", "weight": 0}, {"role": "user", "content": "Can you be more sarcastic?"}, {"role": "assistant", "content": "Around 384,400 kilometers. Give or take a few, like that really matters.", "weight": 1}]}
```
### Crafting prompts
We generally recommend taking the set of instructions and prompts that you found worked best for the model prior to fine-tuning, and including them in every training example. This should let you reach the best and most general results, especially if you have relatively few (e.g. under a hundred) training examples.
If you would like to shorten the instructions or prompts that are repeated in every example to save costs, keep in mind that the model will likely behave as if those instructions were included, and it may be hard to get the model to ignore those "baked-in" instructions at inference time.
It may take more training examples to arrive at good results, as the model has to learn entirely through demonstration and without guided instructions.
### Example count recommendations
To fine-tune a model, you are required to provide at least 10 examples. We typically see clear improvements from fine-tuning on 50 to 100 training examples with `gpt-4o-mini` and `gpt-3.5-turbo`, but the right number varies greatly based on the exact use case.
We recommend starting with 50 well-crafted demonstrations and seeing if the model shows signs of improvement after fine-tuning. In some cases that may be sufficient, but even if the model is not yet production quality, clear improvements are a good sign that providing more data will continue to improve the model. No improvement suggests that you may need to rethink how to set up the task for the model or restructure the data before scaling beyond a limited example set.
### Train and test splits
After collecting the initial dataset, we recommend splitting it into a training and test portion. When submitting a fine-tuning job with both training and test files, we will provide statistics on both during the course of training. These statistics will be your initial signal of how much the model is improving. Additionally, constructing a test set early on will be useful in making sure you are able to evaluate the model after training, by generating samples on the test set.
### Token limits
Token limits depend on the model you select. Here is an overview of the maximum inference context length and training examples context length our models:
|Model|Inference context length|Training examples context length|
|---|---|---|
|gpt-4.1-2025-04-14|128,000 tokens|65,536 tokens|
|gpt-4.1-mini-2025-04-14|128,000 tokens|65,536 tokens|
|gpt-4o-2024-08-06|128,000 tokens|65,536 tokens|
|gpt-4o-mini-2024-07-18|128,000 tokens|65,536 tokens|
|gpt-3.5-turbo-0125|16,385 tokens|16,385 tokens|
|gpt-3.5-turbo-1106|16,385 tokens|16,385 tokens|
|gpt-3.5-turbo-0613|16,385 tokens|4,096 tokens|
Examples longer than the default will be truncated to the maximum context length which removes tokens from the end of the training example(s). To be sure that your entire training example fits in context, consider checking that the total token counts in the message contents are under the limit.
You can compute token counts using our [counting tokens notebook](https://cookbook.openai.com/examples/How_to_count_tokens_with_tiktoken.ipynb) from the OpenAI cookbook.
### Estimate costs
For detailed pricing on training costs, as well as input and output costs for a deployed fine-tuned model, visit our [pricing page](https://openai.com/api/pricing). Note that we don't charge for tokens used for training validation. To estimate the cost of a specific fine-tuning training job, use the following formula:
> (base training cost per 1M input tokens ÷ 1M) × number of tokens in the input file × number of epochs trained
For a training file with 100,000 tokens trained over 3 epochs, the expected cost would be:
* ~$0.90 USD with `gpt-4o-mini-2024-07-18` after the free period ends on October 31, 2024.
* ~$2.40 USD with `gpt-3.5-turbo-0125`.
### Check data formatting
Once you have compiled a dataset and before you create a fine-tuning job, it is important to check the data formatting. To do this, we created a simple Python script which you can use to find potential errors, review token counts, and estimate the cost of a fine-tuning job.
[
Fine-tuning data format validation
Learn about fine-tuning data formatting
](https://cookbook.openai.com/examples/chat_finetuning_data_prep)
### Upload a training file
Once you have the data validated, the file needs to be uploaded using the [Files API](/docs/api-reference/files/create) in order to be used with a fine-tuning jobs:
Create a fine-tuning job with DPO
```javascript
import OpenAI from "openai";
const openai = new OpenAI();
const job = await openai.fineTuning.jobs.create({
training_file: "file-all-about-the-weather",
model: "gpt-4o-2024-08-06",
method: {
type: "dpo",
dpo: {
hyperparameters: { beta: 0.1 },
},
},
});
```
```python
from openai import OpenAI
client = OpenAI()
job = client.fine_tuning.jobs.create(
training_file="file-all-about-the-weather",
model="gpt-4o-2024-08-06",
method={
"type": "dpo",
"dpo": {
"hyperparameters": {"beta": 0.1},
},
},
)
```
After you upload the file, it may take some time to process. While the file is processing, you can still create a fine-tuning job but it will not start until the file processing has completed.
### Size limits and large uploads
The maximum upload size is 512 MB using the [Files API](/docs/api-reference/files). You can upload files up to 8 GB in multiple parts using the [Uploads API](/docs/api-reference/uploads). We recommend starting small, as you don't need a lot of data to see improvements.
Create a fine-tuned model
-------------------------
After ensuring you have the right amount and structure for your dataset, and have uploaded the file, the next step is to create a fine-tuning job. We support creating fine-tuning jobs via the [fine-tuning UI](/finetune) or programmatically.
To start a fine-tuning job using the OpenAI SDK:
Create a fine-tuning job
```javascript
import OpenAI from "openai";
const openai = new OpenAI();
const fineTune = await openai.fineTuning.jobs.create({
training_file: 'file-abc123',
model: 'gpt-4o-mini-2024-07-18'
});
```
```python
from openai import OpenAI
client = OpenAI()
client.fine_tuning.jobs.create(
training_file="file-abc123",
model="gpt-4o-mini-2024-07-18"
)
```
In this example, `model` is the name of the model you want to fine-tune. Note that only specific model snapshots (like `gpt-4o-mini-2024-07-18` in this case) can be used for this parameter, as listed in our [supported models](#which-models-can-be-fine-tuned). The `training_file` parameter is the file ID that was returned when the training file was uploaded to the OpenAI API. You can customize your fine-tuned model's name using the [suffix parameter](/docs/api-reference/fine-tuning/create#fine-tuning/create-suffix).
If you choose not to specify a method, the default is Supervised Fine-Tuning (SFT).
To set additional fine-tuning parameters like the `validation_file` or `hyperparameters`, please refer to the [API specification for fine-tuning](/docs/api-reference/fine-tuning/create).
After you've started a fine-tuning job, it may take some time to complete. Your job may be queued behind other jobs in our system, and training a model can take minutes or hours depending on the model and dataset size. After the model training is completed, the user who created the fine-tuning job will receive an email confirmation.
In addition to creating a fine-tuning job, you can also list existing jobs, retrieve the status of a job, or cancel a job.
Work with fine-tuning jobs
```javascript
import OpenAI from "openai";
const openai = new OpenAI();
// List 10 fine-tuning jobs
let page = await openai.fineTuning.jobs.list({ limit: 10 });
// Retrieve the state of a fine-tune
let fineTune = await openai.fineTuning.jobs.retrieve('ftjob-abc123');
// Cancel a job
let status = await openai.fineTuning.jobs.cancel('ftjob-abc123');
// List up to 10 events from a fine-tuning job
let events = await openai.fineTuning.jobs.listEvents(fineTune.id, {
limit: 10
});
// Delete a fine-tuned model
let model = await openai.models.delete(
'ft:gpt-3.5-turbo:acemeco:suffix:abc123'
);
```
```python
from openai import OpenAI
client = OpenAI()
# List 10 fine-tuning jobs
client.fine_tuning.jobs.list(limit=10)
# Retrieve the state of a fine-tune
client.fine_tuning.jobs.retrieve("ftjob-abc123")
# Cancel a job
client.fine_tuning.jobs.cancel("ftjob-abc123")
# List up to 10 events from a fine-tuning job
client.fine_tuning.jobs.list_events(fine_tuning_job_id="ftjob-abc123", limit=10)
# Delete a fine-tuned model
client.models.delete("ft:gpt-3.5-turbo:acemeco:suffix:abc123")
```
Use a fine-tuned model
----------------------
When a job has succeeded, you will see the `fine_tuned_model` field populated with the name of the model when you retrieve the job details. You may now specify this model as a parameter to in the [Chat Completions](/docs/api-reference/chat) API, and make requests to it using the [Playground](/playground).
After your job is completed, the model should be available right away for inference use. In some cases, it may take several minutes for your model to become ready to handle requests. If requests to your model time out or the model name cannot be found, it is likely because your model is still being loaded. If this happens, try again in a few minutes.
Use fine-tuned model
```javascript
import OpenAI from "openai";
const openai = new OpenAI();
const fineTune = await openai.fineTuning.jobs.create({
training_file: 'file-abc123',
model: 'gpt-4o-mini-2024-07-18'
});
```
```python
from openai import OpenAI
client = OpenAI()
completion = client.chat.completions.create(
model="ft:gpt-4o-mini:my-org:custom_suffix:id",
messages=[
{"role": "system", "content": "You are a helpful assistant."},
{"role": "user", "content": "Hello!"}
]
)
print(completion.choices[0].message)
```
You can start making requests by passing the model name as shown above and in our [GPT guide](/docs/guides/text-generation).
Use a checkpointed model
------------------------
In addition to creating a final fine-tuned model at the end of each fine-tuning job, OpenAI will create one full model checkpoint for you at the end of each training epoch. These checkpoints are themselves full models that can be used within our completions and chat-completions endpoints. Checkpoints are useful as they potentially provide a version of your fine-tuned model from before it experienced overfitting.
To access these checkpoints,
1. Wait until a job succeeds, which you can verify by [querying the status of a job.](/docs/api-reference/fine-tuning/retrieve)
2. [Query the checkpoints endpoint](/docs/api-reference/fine-tuning/list-checkpoints) with your fine-tuning job ID to access a list of model checkpoints for the fine-tuning job.
For each checkpoint object, you will see the `fine_tuned_model_checkpoint` field populated with the name of the model checkpoint. You may now use this model just like you would with the [final fine-tuned model](#use-a-fine-tuned-model).
```json
{
"object": "fine_tuning.job.checkpoint",
"id": "ftckpt_zc4Q7MP6XxulcVzj4MZdwsAB",
"created_at": 1519129973,
"fine_tuned_model_checkpoint": "ft:gpt-3.5-turbo-0125:my-org:custom-suffix:96olL566:ckpt-step-2000",
"metrics": {
"full_valid_loss": 0.134,
"full_valid_mean_token_accuracy": 0.874
},
"fine_tuning_job_id": "ftjob-abc123",
"step_number": 2000
}
```
Each checkpoint will specify its:
* `step_number`: The step at which the checkpoint was created (where each epoch is number of steps in the training set divided by the batch size)
* `metrics`: an object containing the metrics for your fine-tuning job at the step when the checkpoint was created.
Currently, only the checkpoints for the last 3 epochs of the job are saved and available for use. We plan to release more complex and flexible checkpointing strategies in the near future.
Analyzing your fine-tuned model
-------------------------------
We provide the following training metrics computed over the course of training:
* training loss
* training token accuracy
* valid loss
* valid token accuracy
Valid loss and valid token accuracy are computed in two different ways - on a small batch of the data during each step, and on the full valid split at the end of each epoch. The full valid loss and full valid token accuracy metrics are the most accurate metric tracking the overall performance of your model. These statistics are meant to provide a sanity check that training went smoothly (loss should decrease, token accuracy should increase). While an active fine-tuning jobs is running, you can view an event object which contains some useful metrics:
```json
{
"object": "fine_tuning.job.event",
"id": "ftevent-abc-123",
"created_at": 1693582679,
"level": "info",
"message": "Step 300/300: training loss=0.15, validation loss=0.27, full validation loss=0.40",
"data": {
"step": 300,
"train_loss": 0.14991648495197296,
"valid_loss": 0.26569826706596045,
"total_steps": 300,
"full_valid_loss": 0.4032616495084362,
"train_mean_token_accuracy": 0.9444444179534912,
"valid_mean_token_accuracy": 0.9565217391304348,
"full_valid_mean_token_accuracy": 0.9089635854341737
},
"type": "metrics"
}
```
After a fine-tuning job has finished, you can also see metrics around how the training process went by [querying a fine-tuning job](/docs/api-reference/fine-tuning/retrieve), extracting a file ID from the `result_files`, and then [retrieving that files content](/docs/api-reference/files/retrieve-contents). Each results CSV file has the following columns: `step`, `train_loss`, `train_accuracy`, `valid_loss`, and `valid_mean_token_accuracy`.
```csv
step,train_loss,train_accuracy,valid_loss,valid_mean_token_accuracy
1,1.52347,0.0,,
2,0.57719,0.0,,
3,3.63525,0.0,,
4,1.72257,0.0,,
5,1.52379,0.0,,
```
While metrics can be helpful, evaluating samples from the fine-tuned model provides the most relevant sense of model quality. We recommend using the [Evals](/docs/guides/evals) product to compare your base model to your fine-tuned model. Alternatively, you could manually generate samples from both models on a test set, and compare the samples side by side. The test set should ideally include the full distribution of inputs that you might send to the model in a production use case.
### Iterating on data quality
If the results from a fine-tuning job are not as good as you expected, consider the following ways to adjust the training dataset:
* Collect examples to target remaining issues
* If the model still isn’t good at certain aspects, add training examples that directly show the model how to do these aspects correctly
* Scrutinize existing examples for issues
* If your model has grammar, logic, or style issues, check if your data has any of the same issues. For instance, if the model now says "I will schedule this meeting for you" (when it shouldn’t), see if existing examples teach the model to say it can do new things that it can’t do
* Consider the balance and diversity of data
* If 60% of the assistant responses in the data says "I cannot answer this", but at inference time only 5% of responses should say that, you will likely get an overabundance of refusals
* Make sure your training examples contain all of the information needed for the response
* If we want the model to compliment a user based on their personal traits and a training example includes assistant compliments for traits not found in the preceding conversation, the model may learn to hallucinate information
* Look at the agreement / consistency in the training examples
* If multiple people created the training data, it’s likely that model performance will be limited by the level of agreement / consistency between people. For instance, in a text extraction task, if people only agreed on 70% of extracted snippets, the model would likely not be able to do better than this
* Make sure your all of your training examples are in the same format, as expected for inference
### Iterating on data quantity
Once you’re satisfied with the quality and distribution of the examples, you can consider scaling up the number of training examples. This tends to help the model learn the task better, especially around possible "edge cases". We expect a similar amount of improvement every time you double the number of training examples. You can loosely estimate the expected quality gain from increasing the training data size by:
* Fine-tuning on your current dataset
* Fine-tuning on half of your current dataset
* Observing the quality gap between the two
In general, if you have to make a trade-off, a smaller amount of high-quality data is generally more effective than a larger amount of low-quality data.
### Iterating on hyperparameters
We allow you to specify the following hyperparameters:
* epochs
* learning rate multiplier
* batch size
We recommend initially training without specifying any of these, allowing us to pick a default for you based on dataset size, then adjusting if you observe the following:
* If the model does not follow the training data as much as expected increase the number of epochs by 1 or 2
* This is more common for tasks for which there is a single ideal completion (or a small set of ideal completions which are similar). Some examples include classification, entity extraction, or structured parsing. These are often tasks for which you can compute a final accuracy metric against a reference answer.
* If the model becomes less diverse than expected decrease the number of epochs by 1 or 2
* This is more common for tasks for which there are a wide range of possible good completions
* If the model does not appear to be converging, increase the learning rate multiplier
You can set the hyperparameters as is shown below:
Setting hyperparameters
```javascript
const fineTune = await openai.fineTuning.jobs.create({
training_file: "file-abc123",
model: "gpt-4o-mini-2024-07-18",
method: {
type: "supervised",
supervised: {
hyperparameters: { n_epochs: 2 },
},
},
});
```
```python
from openai import OpenAI
client = OpenAI()
client.fine_tuning.jobs.create(
training_file="file-abc123",
model="gpt-4o-mini-2024-07-18",
method={
"type": "supervised",
"supervised": {
"hyperparameters": {"n_epochs": 2},
},
},
)
```
Vision fine-tuning
------------------
Fine-tuning is also possible with images in your JSONL files. Just as you can [send one or many image inputs to Chat Completions](/docs/guides/vision), you can include those same message types within your training data. Images can be provided either as HTTP URLs or data URLs containing [base64 encoded images](/docs/guides/vision#uploading-base-64-encoded-images).
Here's an example of an image message on a line of your JSONL file. Below, the JSON object is expanded for readibility, but typically this JSON would appear on a single line in your data file:
```json
{
"messages": [
{
"role": "system",
"content": "You are an assistant that identifies uncommon cheeses."
},
{
"role": "user",
"content": "What is this cheese?"
},
{
"role": "user",
"content": [
{
"type": "image_url",
"image_url": {
"url": "https://upload.wikimedia.org/wikipedia/commons/3/36/Danbo_Cheese.jpg"
}
}
]
},
{
"role": "assistant",
"content": "Danbo"
}
]
}
```
### Image dataset requirements
#### Size
* Your training file can contain a maximum of 50,000 examples that contain images (not including text examples).
* Each example can have at most 10 images.
* Each image can be at most 10 MB.
#### Format
* Images must be JPEG, PNG, or WEBP format.
* Your images must be in the RGB or RGBA image mode.
* You cannot include images as output from messages with the `assistant` role.
#### Content moderation policy
We scan your images before training to ensure that they comply with our usage policy. This may introduce latency in file validation before fine-tuning begins.
Images containing the following will be excluded from your dataset and not used for training:
* People
* Faces
* Children
* CAPTCHAs
### Help
#### What to do if your images get skipped
Your images can get skipped for the following reasons:
* **contains CAPTCHAs**, **contains people**, **contains faces**, **contains children**
* Remove the image. For now, we cannot fine-tune models with images containing these entities.
* **inaccessible URL**
* Ensure that the image URL is publicly accessible.
* **image too large**
* Please ensure that your images fall within our [dataset size limits](#size).
* **invalid image format**
* Please ensure that your images fall within our [dataset format](#format).
#### Reducing training cost
If you set the `detail` parameter for an image to `low`, the image is resized to 512 by 512 pixels and is only represented by 85 tokens regardless of its size. This will reduce the cost of training. [See here for more information.](/docs/guides/vision#low-or-high-fidelity-image-understanding)
```json
{
"type": "image_url",
"image_url": {
"url": "https://upload.wikimedia.org/wikipedia/commons/3/36/Danbo_Cheese.jpg",
"detail": "low"
}
}
```
#### Other considerations for vision fine-tuning
* To control the fidelity of image understanding, set the `detail` parameter of `image_url` to `low`, `high`, or `auto` for each image. This will also affect the number of tokens per image that the model sees during training time, and will affect the cost of training. [See here for more information.](/docs/guides/vision#low-or-high-fidelity-image-understanding)
Preference fine-tuning
----------------------
[Direct Preference Optimization](https://arxiv.org/abs/2305.18290) (DPO) fine-tuning allows you to fine-tune models based on prompts and pairs of responses. This approach enables the model to learn from human preferences, optimizing for outputs that are more likely to be favored. Note that we currently support text-only DPO fine-tuning.
#### Preparing your dataset for DPO
Each example in your dataset should contain:
* A prompt, like a user message.
* A preferred output (an ideal assistant response).
* A non-preferred output (a suboptimal assistant response).
The data should be formatted in JSONL format, with each line representing an example in the following structure:
```json
{
"input": {
"messages": [
{
"role": "user",
"content": "Hello, can you tell me how cold San Francisco is today?"
}
],
"tools": [],
"parallel_tool_calls": true
},
"preferred_output": [
{
"role": "assistant",
"content": "Today in San Francisco, it is not quite cold as expected. Morning clouds will give away to sunshine, with a high near 68°F (20°C) and a low around 57°F (14°C)."
}
],
"non_preferred_output": [
{
"role": "assistant",
"content": "It is not particularly cold in San Francisco today."
}
]
}
```
Currently, we only train on one-turn conversations for each example, where the preferred and non-preferred messages need to be the last assistant message.
#### Stacking methods: Supervised + DPO
Currently, OpenAI offers Supervised Fine-Tuning (SFT) as the default method for fine-tuning jobs. Performing SFT on your preferred responses (or a subset) before running another DPO job afterwards can significantly enhance model alignment and performance. By first fine-tuning the model on the desired responses, it can better identify correct patterns, providing a strong foundation for DPO to refine behavior.
A recommended workflow is as follows:
1. Fine-tune the base model with SFT using a subset of your preferred responses. Focus on ensuring the data quality and representativeness of the tasks.
2. Use the SFT fine-tuned model as the starting point, and apply DPO to adjust the model based on preference comparisons.
#### Configuring a DPO fine-tuning job
We have introduced a `method` field in the fine-tuning job creation endpoint, where you can specify `type` as well as any associated `hyperparameters`. For DPO:
* set the `type` parameter to `dpo`
* optionally set the `hyperparameters` property with any options you'd like to configure.
The `beta` hyperparameter is a new option that is only available for DPO. It's a floating point number between `0` and `2` that controls how strictly the new model will adhere to its previous behavior, versus aligning with the provided preferences. A high number will be more conservative (favoring previous behavior), and a lower number will be more aggressive (favor the newly provided preferences more often).
You can also set this value to `auto` (the default) to use a value configured by the platform.
The example below shows how to configure a DPO fine-tuning job using the OpenAI SDK. For more information on creating fine-tuning jobs in general, please refer to the [next section of the guide](#create-a-fine-tuned-model).
Create a fine-tuning job with DPO
```javascript
import OpenAI from "openai";
const openai = new OpenAI();
const job = await openai.fineTuning.jobs.create({
training_file: "file-all-about-the-weather",
model: "gpt-4o-2024-08-06",
method: {
type: "dpo",
dpo: {
hyperparameters: { beta: 0.1 },
},
},
});
```
```python
from openai import OpenAI
client = OpenAI()
job = client.fine_tuning.jobs.create(
training_file="file-all-about-the-weather",
model="gpt-4o-2024-08-06",
method={
"type": "dpo",
"dpo": {
"hyperparameters": {"beta": 0.1},
},
},
)
```
Fine-tuning examples
--------------------
Now that we have explored the basics of the fine-tuning API, let’s look at going through the fine-tuning lifecycle for a few different use cases.
Style and tone
In this example, we will explore how to build a fine-tuned model which gets the model follow specific style and tone guidance beyond what is possible with prompting alone.
To begin, we create a sample set of messages showing what the model should which in this case is misspelled words.
```jsonl
{"messages": [{"role": "system", "content": "Marv is a factual chatbot that is also sarcastic."}, {"role": "user", "content": "What's the capital of France?"}, {"role": "assistant", "content": "Paris, as if everyone doesn't know that already."}]}
{"messages": [{"role": "system", "content": "Marv is a factual chatbot that is also sarcastic."}, {"role": "user", "content": "Who wrote 'Romeo and Juliet'?"}, {"role": "assistant", "content": "Oh, just some guy named William Shakespeare. Ever heard of him?"}]}
{"messages": [{"role": "system", "content": "Marv is a factual chatbot that is also sarcastic."}, {"role": "user", "content": "How far is the Moon from Earth?"}, {"role": "assistant", "content": "Around 384,400 kilometers. Give or take a few, like that really matters."}]}
```
If you want to follow along and create a fine-tuned model yourself, you will need at least 10 examples.
After getting the data that will potentially improve the model, the next step is to check if the data meets all the [formatting requirements](#check-data-formatting).
Now that we have the data formatted and validated, the final training step is to kick off a job to create the fine-tuned model. You can do this via the OpenAI CLI or one of our SDKs as shown below:
```python
from openai import OpenAI
client = OpenAI()
file = client.files.create(
file=open("marv.jsonl", "rb"),
purpose="fine-tune"
)
client.fine_tuning.jobs.create(
training_file=file.id,
model="gpt-4o-mini-2024-07-18"
)
```
Once the training job is done, you will be able to [use your fine-tuned model](#use-a-fine-tuned-model).
Structured output
Another type of use case which works really well with fine-tuning is getting the model to provide structured information, in this case about sports headlines:
```jsonl
{"messages": [{"role": "system", "content": "Given a sports headline, provide the following fields in a JSON dict, where applicable: \"player\" (full name), \"team\", \"sport\", and \"gender\"."}, {"role": "user", "content": "Sources: Colts grant RB Taylor OK to seek trade"}, {"role": "assistant", "content": "{\"player\": \"Jonathan Taylor\", \"team\": \"Colts\", \"sport\": \"football\", \"gender\": \"male\" }"}]}
{"messages": [{"role": "system", "content": "Given a sports headline, provide the following fields in a JSON dict, where applicable: \"player\" (full name), \"team\", \"sport\", and \"gender\"."}, {"role": "user", "content": "OSU 'split down middle' on starting QB battle"}, {"role": "assistant", "content": "{\"player\": null, \"team\": \"OSU\", \"sport\": \"football\", \"gender\": null }"}]}
```
If you want to follow along and create a fine-tuned model yourself, you will need at least 10 examples.
After getting the data that will potentially improve the model, the next step is to check if the data meets all the [formatting requirements](#check-data-formatting).
Now that we have the data formatted and validated, the final training step is to kick off a job to create the fine-tuned model. You can do this via the OpenAI CLI or one of our SDKs as shown below:
```python
from openai import OpenAI
client = OpenAI()
file = client.files.create(
file=open("sports-context.jsonl", "rb"),
purpose="fine-tune"
)
client.fine_tuning.jobs.create(
training_file=file.id,
model="gpt-4o-mini-2024-07-18"
)
```
Once the training job is done, you will be able to [use your fine-tuned model](#use-a-fine-tuned-model) and make a request that looks like the following:
```python
completion = client.chat.completions.create(
model="ft:gpt-4o-mini:my-org:custom_suffix:id",
messages=[
{"role": "system", "content": "Given a sports headline, provide the following fields in a JSON dict, where applicable: player (full name), team, sport, and gender"},
{"role": "user", "content": "Richardson wins 100m at worlds to cap comeback"}
]
)
print(completion.choices[0].message)
```
Based on the formatted training data, the response should look like the following:
```json
{
"player": "Sha'Carri Richardson",
"team": null,
"sport": "track and field",
"gender": "female"
}
```
Tool calling
The Chat Completions API supports [tool calling](/docs/guides/function-calling). Including a long list of tools in the completions API can consume a considerable number of prompt tokens and sometimes the model hallucinates or does not provide valid JSON output.
Fine-tuning a model with tool calling examples can allow you to:
* Get similarly formatted responses even when the full tool definition isn't present
* Get more accurate and consistent outputs
Format your examples as shown, with each line including a list of "messages" and an optional list of "tools":
```json
{
"messages": [
{
"role": "user",
"content": "What is the weather in San Francisco?"
},
{
"role": "assistant",
"tool_calls": [
{
"id": "call_id",
"type": "function",
"function": {
"name": "get_current_weather",
"arguments": "{\"location\": \"San Francisco, USA\", \"format\": \"celsius\"}"
}
}
]
}
],
"tools": [
{
"type": "function",
"function": {
"name": "get_current_weather",
"description": "Get the current weather",
"parameters": {
"type": "object",
"properties": {
"location": {
"type": "string",
"description": "The city and country, eg. San Francisco, USA"
},
"format": {
"type": "string",
"enum": [
"celsius",
"fahrenheit"
]
}
},
"required": [
"location",
"format"
]
}
}
}
]
}
```
If you want to follow along and create a fine-tuned model yourself, you will need at least 10 examples.
If your goal is to use less tokens, some useful techniques are:
* Omit function and parameter descriptions: remove the description field from function and parameters
* Omit parameters: remove the entire properties field from the parameters object
* Omit function entirely: remove the entire function object from the functions array
If your goal is to maximize the correctness of the function calling output, we recommend using the same tool definitions for both training and querying the fine-tuned model.
Fine-tuning on function calling can also be used to customize the model's response to function outputs. To do this you can include a function response message and an assistant message interpreting that response:
```json
{
"messages": [
{
"role": "user",
"content": "What is the weather in San Francisco?"
},
{
"role": "assistant",
"tool_calls": [
{
"id": "call_id",
"type": "function",
"function": {
"name": "get_current_weather",
"arguments": "{\"location\": \"San Francisco, USA\", \"format\": \"celsius\"}"
}
}
]
},
{
"role": "tool",
"tool_call_id": "call_id",
"content": "21.0"
},
{
"role": "assistant",
"content": "It is 21 degrees celsius in San Francisco, CA"
}
],
"tools": [] // same as before
}
```
[Parallel function calling](/docs/guides/function-calling) is enabled by default and can be disabled by using `parallel_tool_calls: false` in the training example.
Function calling
`function_call` and `functions` have been deprecated in favor of `tools` it is recommended to use the `tools` parameter instead.
The Chat Completions API supports [function calling](/docs/guides/function-calling). Including a long list of functions in the completions API can consume a considerable number of prompt tokens and sometimes the model hallucinates or does not provide valid JSON output.
Fine-tuning a model with function calling examples can allow you to:
* Get similarly formatted responses even when the full function definition isn't present
* Get more accurate and consistent outputs
Format your examples as shown, with each line including a list of "messages" and an optional list of "functions":
```json
{
"messages": [
{
"role": "user",
"content": "What is the weather in San Francisco?"
},
{
"role": "assistant",
"function_call": {
"name": "get_current_weather",
"arguments": "{\"location\": \"San Francisco, USA\", \"format\": \"celsius\"}"
}
}
],
"functions": [
{
"name": "get_current_weather",
"description": "Get the current weather",
"parameters": {
"type": "object",
"properties": {
"location": {
"type": "string",
"description": "The city and country, eg. San Francisco, USA"
},
"format": {
"type": "string",
"enum": [
"celsius",
"fahrenheit"
]
}
},
"required": [
"location",
"format"
]
}
}
]
}
```
If you want to follow along and create a fine-tuned model yourself, you will need at least 10 examples.
If your goal is to use less tokens, some useful techniques are:
* Omit function and parameter descriptions: remove the description field from function and parameters
* Omit parameters: remove the entire properties field from the parameters object
* Omit function entirely: remove the entire function object from the functions array
If your goal is to maximize the correctness of the function calling output, we recommend using the same function definitions for both training and querying the fine-tuned model.
Fine-tuning on function calling can also be used to customize the model's response to function outputs. To do this you can include a function response message and an assistant message interpreting that response:
```json
{
"messages": [
{
"role": "user",
"content": "What is the weather in San Francisco?"
},
{
"role": "assistant",
"function_call": {
"name": "get_current_weather",
"arguments": "{\"location\": \"San Francisco, USA\", \"format\": \"celsius\"}"
}
},
{
"role": "function",
"name": "get_current_weather",
"content": "21.0"
},
{
"role": "assistant",
"content": "It is 21 degrees celsius in San Francisco, CA"
}
],
"functions": [] // same as before
}
```
Fine-tuning integrations
========================
OpenAI provides the ability for you to integrate your fine-tuning jobs with 3rd parties via our integration framework. Integrations generally allow you to track job state, status, metrics, hyperparameters, and other job-related information in a 3rd party system. You can also use integrations to trigger actions in a 3rd party system based on job state changes. Currently, the only supported integration is with [Weights and Biases](https://wandb.ai), but more are coming soon.
Weights and Biases Integration
------------------------------
[Weights and Biases (W&B)](https://wandb.ai) is a popular tool for tracking machine learning experiments. You can use the OpenAI integration with W&B to track your fine-tuning jobs in W&B. This integration will automatically log metrics, hyperparameters, and other job-related information to the W&B project you specify.
To integrate your fine-tuning jobs with W&B, you'll need to
1. Provide authentication credentials for your Weights and Biases account to OpenAI
2. Configure the W&B integration when creating new fine-tuning jobs
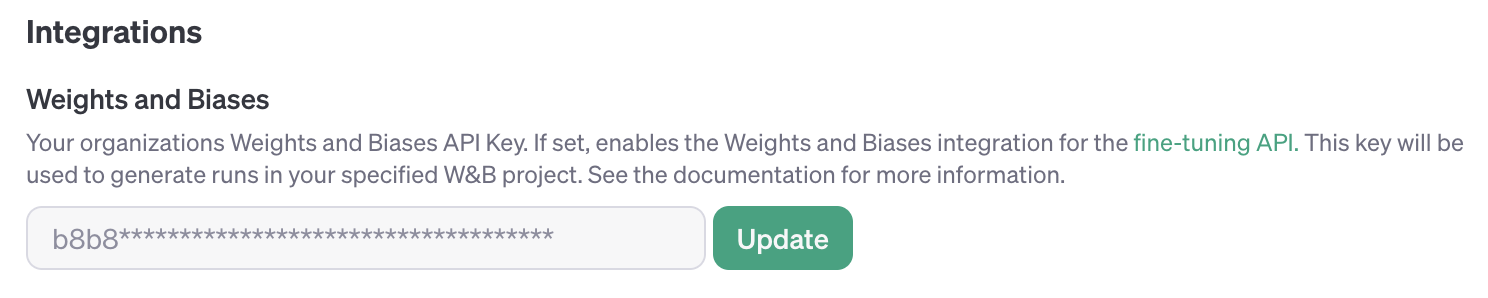
### Authenticate your Weights and Biases account with OpenAI
Authentication is done by submitting a valid W&B API key to OpenAI. Currently, this can only be done via the [Account Dashboard](/settings/organization/organization), and only by account administrators. Your W&B API key will be stored encrypted within OpenAI and will allow OpenAI to post metrics and metadata on your behalf to W&B when your fine-tuning jobs are running. Attempting to enable a W&B integration on a fine-tuning job without first authenticating your OpenAI organization with WandB will result in an error.
### Enable the Weights and Biases integration
When creating a new fine-tuning job, you can enable the W&B integration by including a new `"wandb"` integration under the `integrations` field in the job creation request. This integration allows you to specify the W&B Project that you wish the newly created W&B Run to show up under.
Here's an example of how to enable the W&B integration when creating a new fine-tuning job:
```bash
curl -X POST \
-H "Content-Type: application/json" \
-H "Authorization: Bearer $OPENAI_API_KEY" \
-d '{
"model": "gpt-4o-mini-2024-07-18",
"training_file": "file-ABC123",
"validation_file": "file-DEF456",
"integrations": [
{
"type": "wandb",
"wandb": {
"project": "custom-wandb-project",
"tags": ["project:tag", "lineage"]
}
}
]
}' https://api.openai.com/v1/fine_tuning/jobs
```
By default, the Run ID and Run display name are the ID of your fine-tuning job (e.g. `ftjob-abc123`). You can customize the display name of the run by including a `"name"` field in the `wandb` object. You can also include a `"tags"` field in the `wandb` object to add tags to the W&B Run (tags must be <= 64 character strings and there is a maximum of 50 tags).
Sometimes it is convenient to explicitly set the [W&B Entity](https://docs.wandb.ai/guides/runs/manage-runs#send-new-runs-to-a-team) to be associated with the run. You can do this by including an `"entity"` field in the `wandb` object. If you do not include an `"entity"` field, the W&B entity will default to the default W&B entity associated with the API key you registered previously.
The full specification for the integration can be found in our [fine-tuning job creation](/docs/api-reference/fine-tuning/create) documentation.
### View your fine-tuning job in Weights and Biases
Once you've created a fine-tuning job with the W&B integration enabled, you can view the job in W&B by navigating to the W&B project you specified in the job creation request. Your run should be located at the URL:
```text
https://wandb.ai/<WANDB-ENTITY>/<WANDB-PROJECT>/runs/ftjob-ABCDEF
```
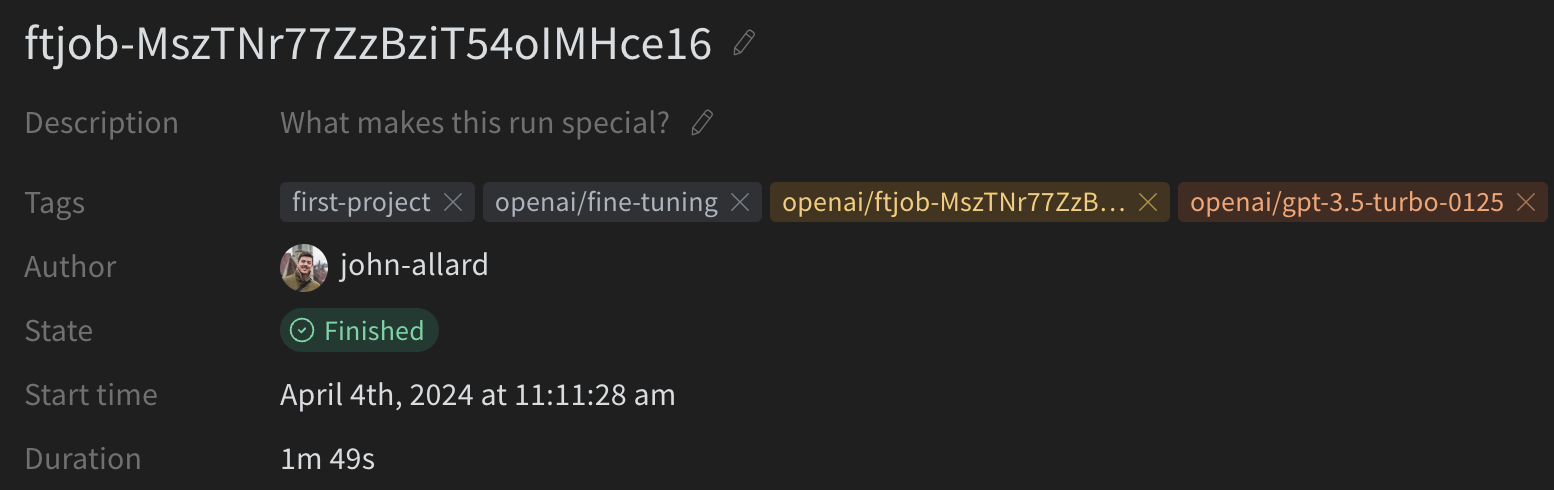
You should see a new run with the name and tags you specified in the job creation request. The Run Config will contain relevant job metadata such as:
* `model`: The model you are fine-tuning
* `training_file`: The ID of the training file
* `validation_file`: The ID of the validation file
* `hyperparameters`: The hyperparameters used for the job (e.g. `n_epochs`, `learning_rate_multiplier`, `batch_size`)
* `seed`: The random seed used for the job
Likewise, OpenAI will set some default tags on the run to make it easier for your to search and filter. These tags will be prefixed with `"openai/"` and will include:
* `openai/fine-tuning`: Tag to let you know this run is a fine-tuning job
* `openai/ft-abc123`: The ID of the fine-tuning job
* `openai/gpt-4o-mini`: The model you are fine-tuning
An example W&B run generated from an OpenAI fine-tuning job is shown below:
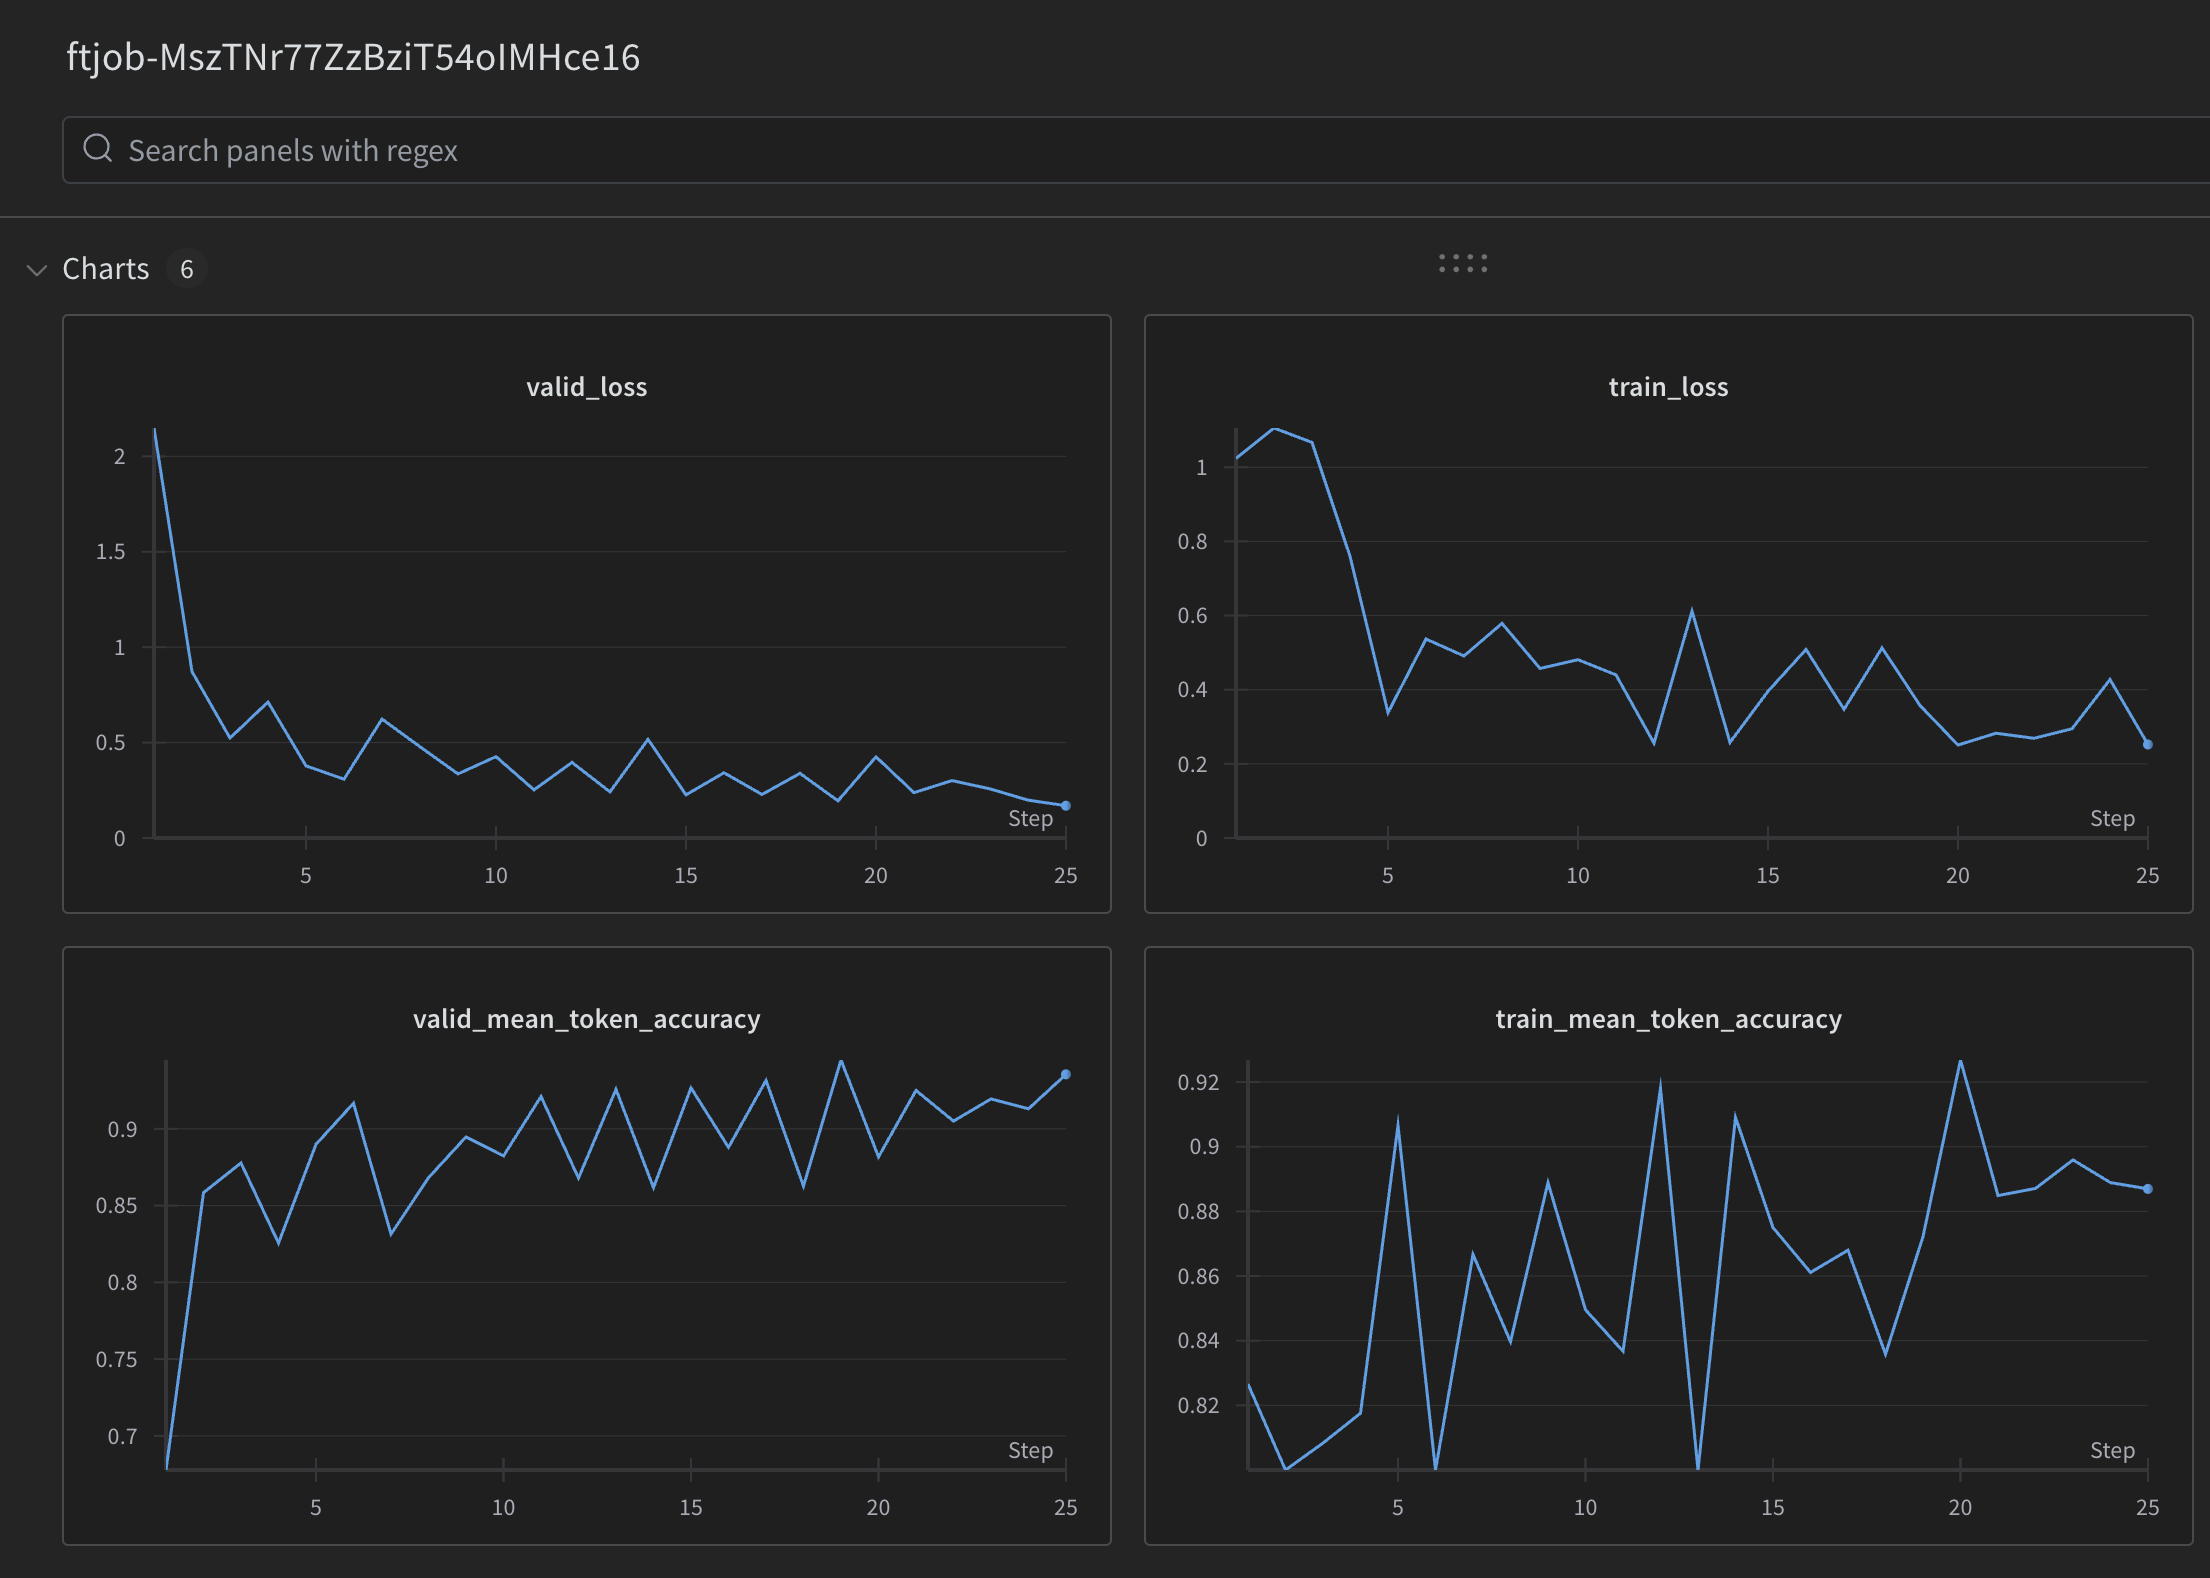
Metrics for each step of the fine-tuning job will be logged to the W&B run. These metrics are the same metrics provided in the [fine-tuning job event](/docs/api-reference/fine-tuning/list-events) object and are the same metrics your can view via the [OpenAI fine-tuning Dashboard](https://platform.openai.com/finetune). You can use W&B's visualization tools to track the progress of your fine-tuning job and compare it to other fine-tuning jobs you've run.
An example of the metrics logged to a W&B run is shown below:
FAQ
---
### Can I fine-tune models that support long context (1M+ tokens)?
You can fine-tune models that support long context windows, but note that during training, the maximum context size for an individual input is 64k tokens. You should also note that the context window size for fine-tuned models (even if they otherwise could support long context) for inference (making an API request to generate content from your fine-tuned model) is still 128k tokens.
### When should I use fine-tuning vs embeddings / retrieval augmented generation?
Embeddings with retrieval is best suited for cases when you need to have a large database of documents with relevant context and information.
By default OpenAI’s models are trained to be helpful generalist assistants. Fine-tuning can be used to make a model which is narrowly focused, and exhibits specific ingrained behavior patterns. Retrieval strategies can be used to make new information available to a model by providing it with relevant context before generating its response. Retrieval strategies are not an alternative to fine-tuning and can in fact be complementary to it.
You can explore the differences between these options further in this Developer Day talk:
### How do I know if my fine-tuned model is actually better than the base model?
We recommend using the [Evals](/docs/guides/evals) product to create an eval specific to your use case.
### Can I continue fine-tuning a model that has already been fine-tuned?
Yes, you can pass the name of a fine-tuned model into the `model` parameter when creating a fine-tuning job. This will start a new fine-tuning job using the fine-tuned model as the starting point.
### How can I estimate the cost of fine-tuning a model?
Please refer to the [estimate cost](#estimate-costs) section above.
### How many fine-tuning jobs can I have running at once?
Please refer to our [rate limit page](/docs/guides/rate-limits#fine-tuning-rate-limits) for the most up to date information on the limits.
### How do rate limits work on fine-tuned models?
A fine-tuned model pulls from the same shared rate limit as the model it is based off of. For example, if you use half your TPM rate limit in a given time period with the standard `gpt-4o-mini` model, any model(s) you fine-tuned from `gpt-4o-mini` would only have the remaining half of the TPM rate limit accessible since the capacity is shared across all models of the same type.
Put another way, having fine-tuned models does not give you more capacity to use our models from a total throughput perspective.


