# CS2 Lab 2 2024, HTML 🎰
[<<< Back to main site](https://cs.brown.edu/courses/csci0020/)

> **Due Date: 10/04/2024**
> **Need help?** Remember to check out Edstem and our Website for TA help assistance.
## Introduction 🎰
Have you ever wondered how websites are made? They’re all written in a language called HTML (HyperText Markup Language), which is the building block and structure of the webpage. We can use HTML to create headings, paragraphs, lists, tables, links, and more.
This tutorial will introduce you to the basics of HTML. By the end of it, you should know enough to create your own webpage.
**This tutorial will require:**
- Chrome web browser --- <mark>Your lab is viewed by graders in Chrome</mark>
- Visual Studio Code (which, you downloaded in lab 0)
**💥 Pro Tip on this lab and all future coding assignments:**
- Check your code incrementally. This means that after every task, save your file (`command` + `s`) and view the Chrome browser to see if the correct things appear (*more on this later!*). You add a paragraph - did it appear the way you wanted it when you opened it in the browser? Don't wait until you've “finished” your file to check - this will make it much harder to pinpoint where errors happen.
- If you have questions about the lab content, you can ask a TA during lab hours or post on https://edstem.org/
<hr />
## Lab Goals🎰
* Learn how to set up an HTML document
* Use common HTML tags to add headings, paragraphs, links, and images
* Make lists and tables
* Understand divs, classes, and IDs
* Use comments to annotate and explain code
* Make forms with different input elements
## Tasks 🎰
### Initialize HTML Lab
:::info
**Task 0:** Set your VSCode up for HTML:
You will need to download the extension "Live Server" so that you can easily see your files rendering in the Chrome browser.
1. Open Visual Studio Code.
2. Click the "Extensions" widget.
3. Search for "Live Server", and choose the first one:

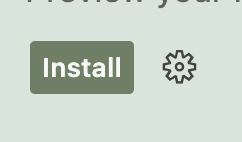
4. Click install! Your Visual Studio Code will now have the extension for you to use for the rest of the course.
5. 
:::
:::info
**Task 1:** Double click your `CS2` folder on your desktop, and create a folder for `HTML`. Then, create a new folder inside called `HTML Lab`. All your files for the HTML Lab should live in this folder.
:::
:::info
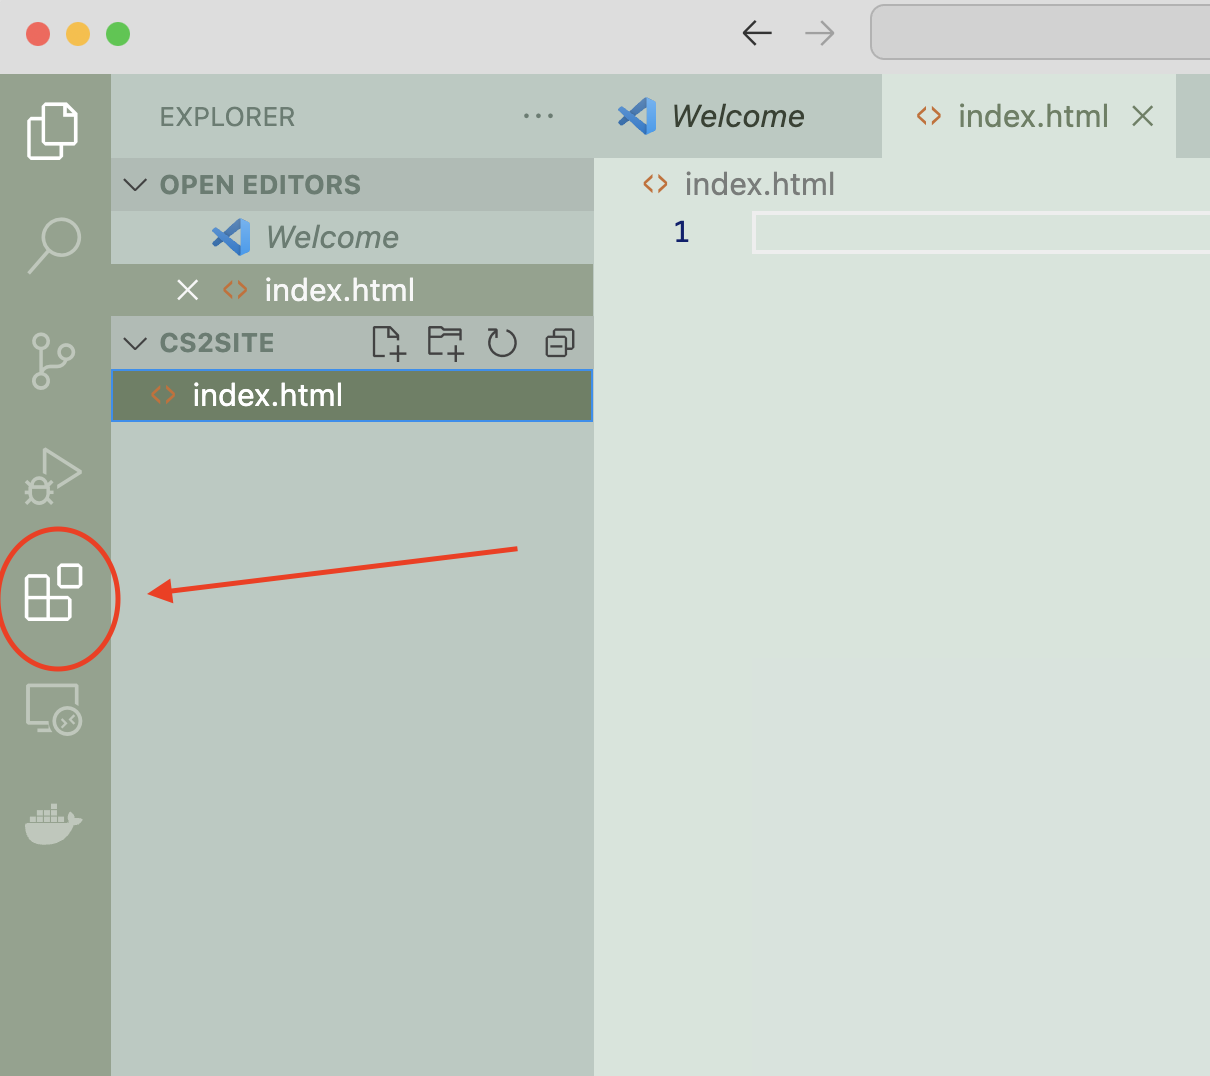
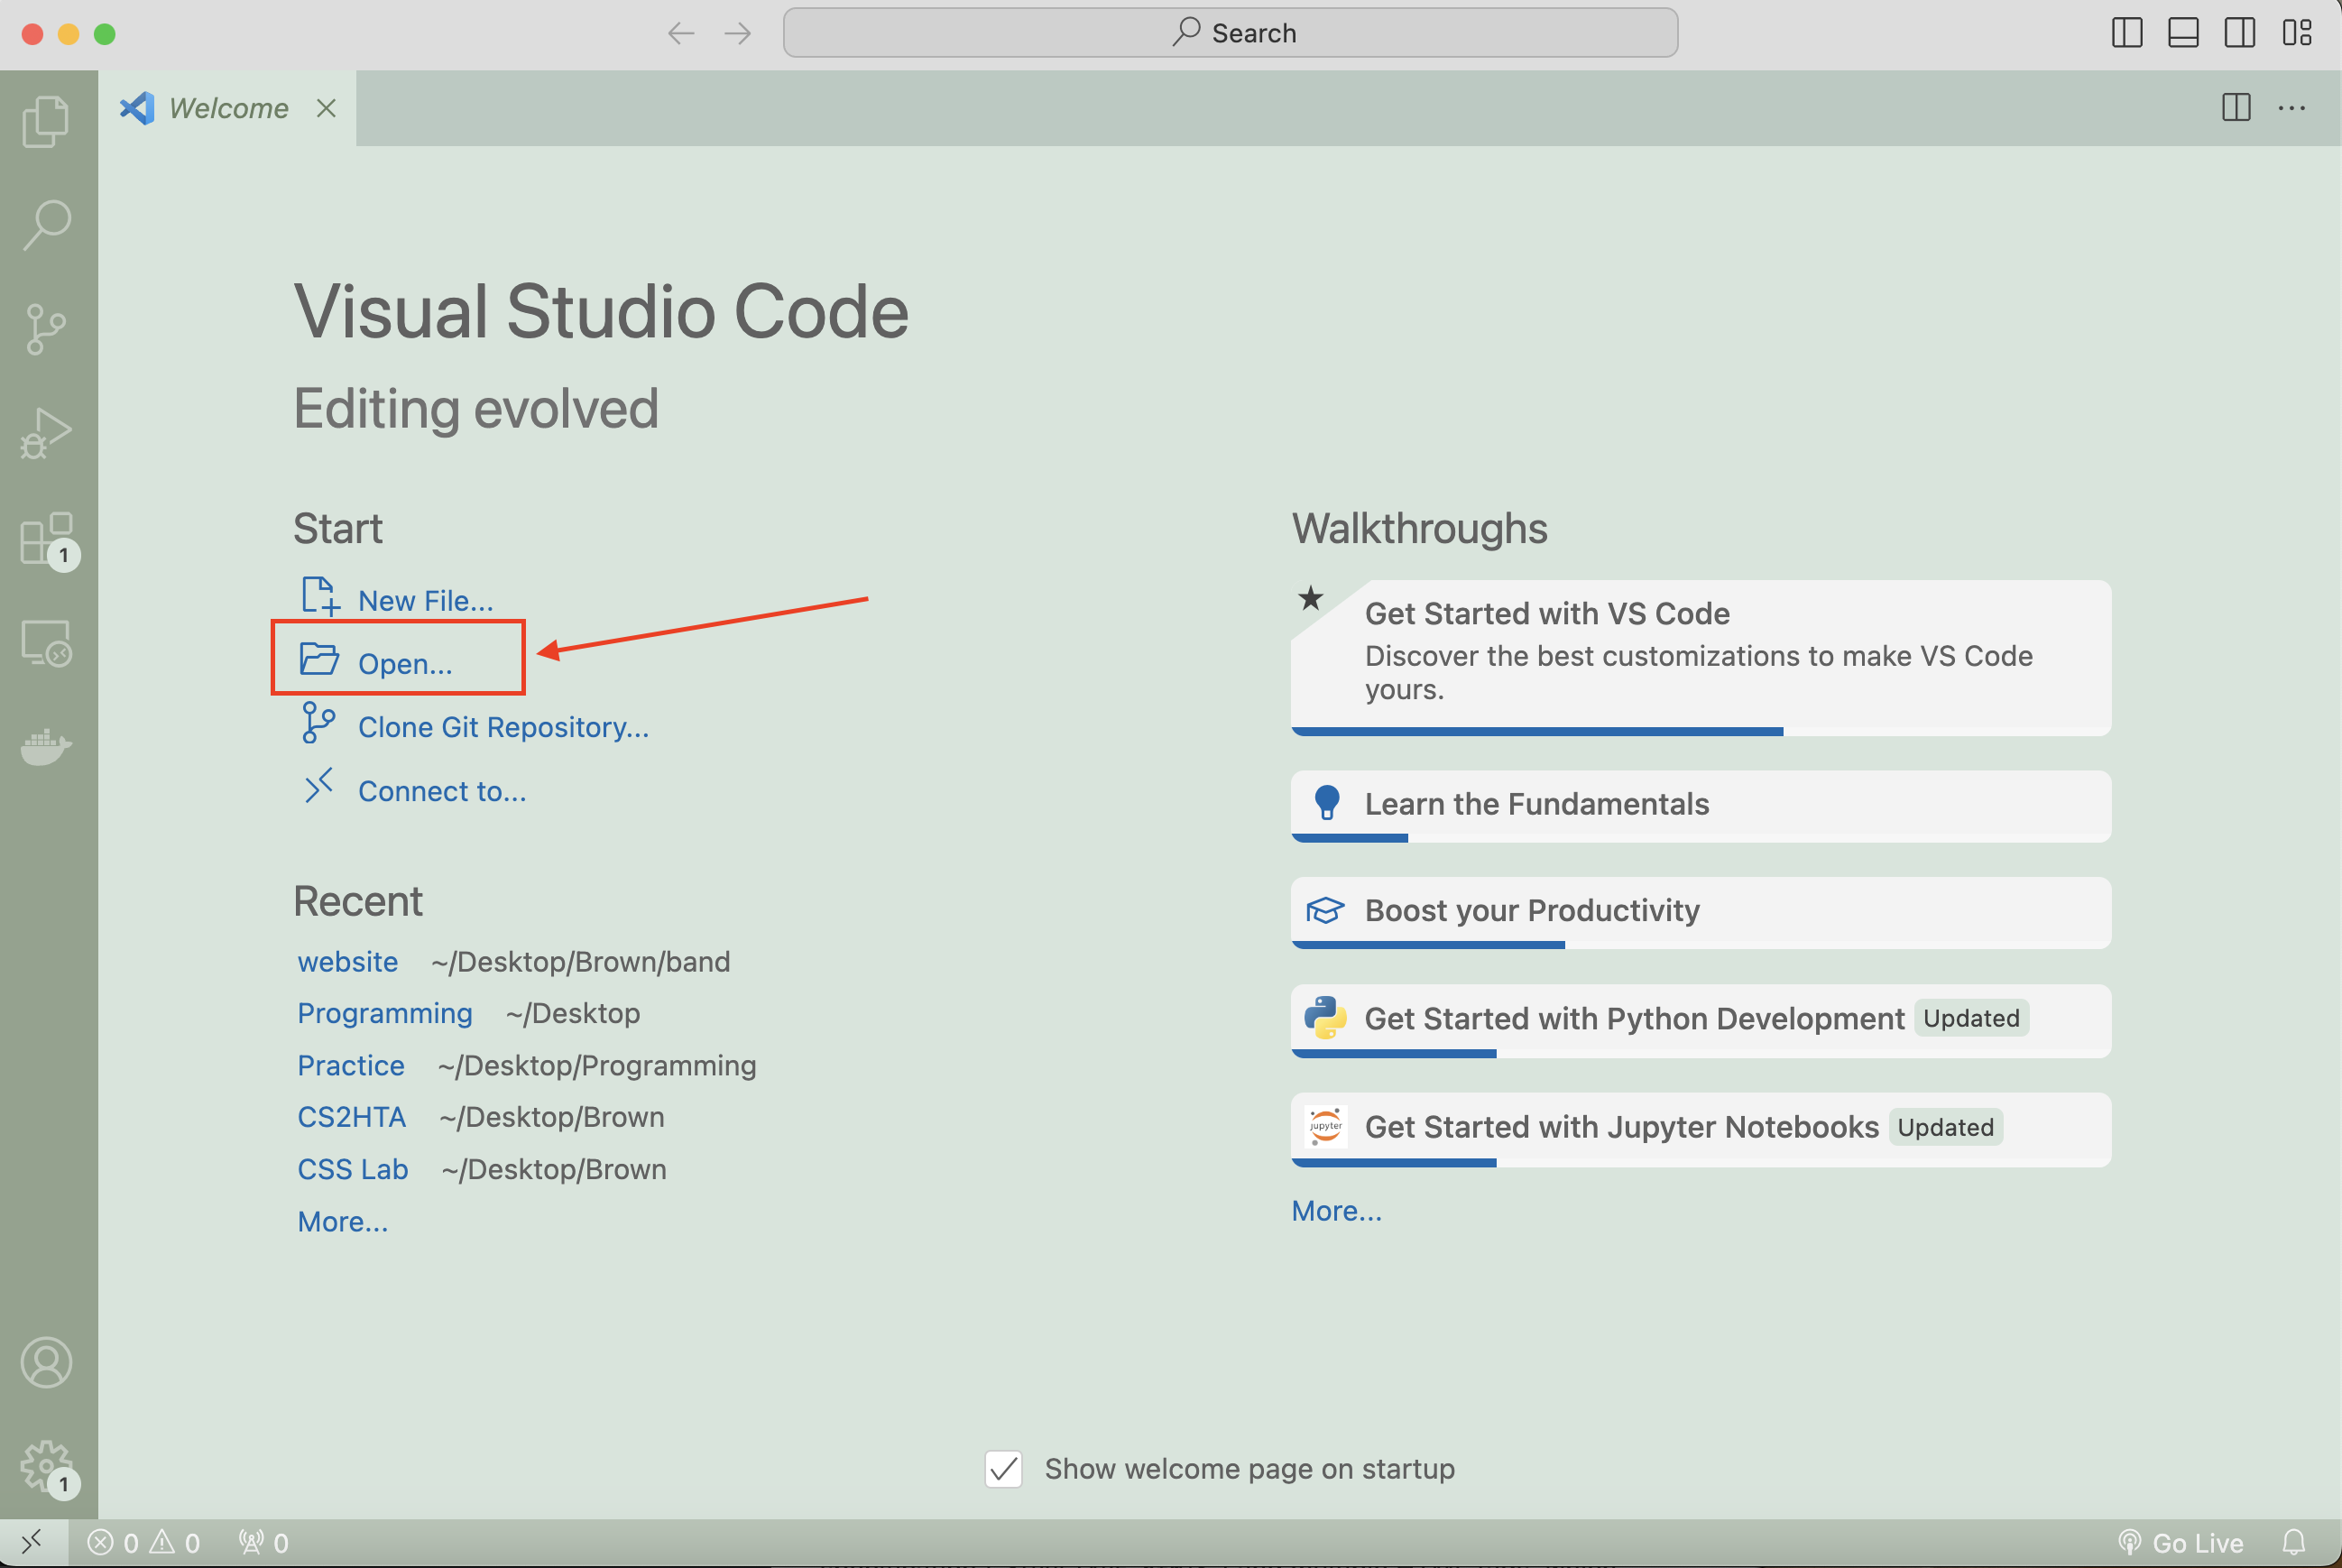
**Task 2:** Open up your `HTML Lab` folder by dragging the folder into Visual Studio Code, or by opening up Visual Studio Code, clicking "Open" under the "Start" header, and finding the folder in your file system.
:::
### Setting up an HTML File
As a general rule, HTML pages can be named anything as long as it ends with `.html`. ==However, it’s accepted practice to name your first page, or your website’s homepage, `index.html`.==
:::info
**Task 3:** Create a file `index.html` now within your `HTML Lab` folder.
<img src="https://hackmd.io/_uploads/B1AOHN0kp.png" width="500px"/>

:::
HTML pages are always composed of a single **DOCTYPE** specification (`<!DOCTYPE html>`) and multiple HTML tags, which are things that look like `<html></html>`. The DOCTYPE specification tells the browser what language it is reading (in this case, HTML).
HTML tags consist of an open angled bracket, the name of the tag, and a close angled bracket. Tags almost always come in a set of 2: an **opening tag** and a **closing tag**. A closing tag will always have a slash (`/`) before the name of the tag (for example, `</html>`). Some tags do not need closing tags, but unless we specify, **you should always have a closing tag for every opening tag.**
:::info
**Task 4:** Once you’ve created your file, start by typing in `<!DOCTYPE html>`. Next, make a new line and type in `<html>`, and then create another line with `</html>`. (Typically Visual Studio Code will create "closing" tags like `</html>` for you!) Your entire document will look like this:
```html=
<!DOCTYPE html>
<html> -- opening tag
</html> -- closing tag (note the /)
```
:::
After your opening `<html>` tag, you’ll also need two other tags: a head and a body. The head is where you will put information like the title (what it says at the top of your browser and its tab), information about the document (don’t worry about this yet), and links to other files (don’t worry about this yet, either).
:::info
**Task 5:** Add the head (`<head></head>`), title (`<title></title>`), and body (`<body></body>`) tags to your document. There should only be ONE set each of html, head, title, and body tags. All other tags may be repeated.
:::
:::warning
**IMPORTANT NOTE**: Everything we will be adding to our web page from now on will go between the body (`<body></body>`) tags.
:::
Sample HTML file:
```html=
<!DOCTYPE html>
<html>
<head>
<title>My first HTML page</title>
</head>
<body>
</body>
</html>
```
When you make web pages, you should always set up your document to look like this— specifying the DOCTYPE and adding the html, head, title, and body tags. These tags are essential in every HTML page you write.
**Indenting your code as we have above will make your life much easier**, and is industry standard. The extra spaces from indents don’t actually show up in your page, but makes your code more readable as it is much easier to identify where a tag begins and ends.
:::warning
**Summary** At this point, you should have initialized your HTML file according to the following steps!
1. Open VS Code and create a new file. (`File -> New File`, name it `index.html`, and add it to your CS2 folder)
3. Set up your file with DOCTYPE, head, title, and body tags.
> More information on HTML basics: https://www.w3schools.com/html/html_basic.asp
:::
### Writing HTML In Visual Studio Code
As you go along, opening the document in Chrome will take care of interpreting what you have written and rendering it into a web page.
The following steps are a high-level overview of your workflow throughout the lab:
1. Save your files. You can do this by going to `File → Save As` or using a keyboard shortcut <kbd>Command</kbd> <kbd>+</kbd> <kbd>S</kbd> (Mac) or <kbd>CTRL</kbd> <kbd>+</kbd> <kbd>S</kbd> (Windows). <mark>**Make sure that your file name ends in ".html", so that the operating system will know to open it with Chrome.**</mark>
2. To preview your web page, just right-click the name of the HTML file on the left side of the VScode screen and click `Open With → Live Server`. You can go back to editing your HTML file by opening it in the text editor.
3. We will provide checkpoints throughout the lab where you open the document in Chrome and make sure that your web page is showing everything you need!
**Tip:** You can keep the webpage open in your Chrome browser and reload it as you save changes to your html file to make the changes appear.
### More Tags!
We’ve added some HTML tags to our page, but the ones we’ve added don’t actually make anything show up when you open your page in your web browser. They’re just essential tags every web page needs in order to be correctly “set up.”
Now we’re going to actually add some content to our page! Let’s start off with the **paragraph tag**. Everything between your opening and closing paragraph tags will be displayed on your website as text.
:::info
**Task 6:** Add a paragraph tag `<p></p>` to your document between the body tags and write a message between the opening and closing paragraph tags.
:::spoiler Hint
```
<p>Paragraph text here.</p>
```
:::
If you want to add more text in a new line, try adding another paragraph tag after the first tag.
### Adding Headings
**Headings** (not to be confused with the head, `<head></head>`) help break up and emphasize sections of the page. There are six heading tags, `<h1>` to `<h6>`. `<h1>` is the biggest heading, and `<h6>` is the smallest.
Example:
```
<h1>Big Heading!</h1>
<h6>Little Heading!</h6>
```
:::info
**Task 7:** Add three different-sized headings to your document. These should go above the paragraph tags (`<p>"your message here"</p>`) that we just created in Task 6.
> Remember, these go between the body tags.
:::
:::warning
**Checkpoint**: be sure to check what your website looks like at this point!
Save your code by going to `File → Save As` or using a keyboard shortcut <kbd>Command</kbd> <kbd>+</kbd> <kbd>S</kbd> (Mac) or <kbd>CTRL</kbd> <kbd>+</kbd> <kbd>S</kbd> (Windows).
Then, right click the file name and click "open with live server". Make sure everything looks ok. A reminder that everytime you save your code in Visual Studio Code, the edits will be re-rendered in your browser. (**you might have to refresh the browser tab.**)
> Remember, we recommend you save and check the browser often to see your edits and catch bugs early on!
:::
### Adding Links
To add a link to another web page, we use an **anchor tag**.
```
<a href="http://google.com">Click me to go to Google!</a>
```
There are three main parts in an anchor tag. Anchor links are different from other tags because they have an `href` attribute. An attribute is an extra bit of information you’re giving about the tag. The `href` attribute specifies the address you want the link to point to. If you wanted to change the address, simply change the http://google.com between the quotation marks! Lastly, the text in between the opening and closing tags themselves specifies the link text actually displayed on the page.
In the above example, we’ve created an absolute link. An absolute link points to any website on the internet. You can tell that a link is absolute if it has the `http://` prefix in it. If you want to link to a page you’ve created on your own computer, you must create a relative link. For example:
```
<a href="index.html">Homepage</a>
```
The HTML above would make the "Homepage" text a link to your index.html page. Of course, the link will only work if you have an index.html file in the folder you’re working in.
:::info
**Task 8:** Add a link to your HTML page. The link can be anywhere on your page and lead to anything!
> These can go anywhere between the body tags.
> More information about links: https://www.w3schools.com/html/html_links.asp
:::
### Adding Images
We can also add **images** to our webpage using an `<img>` tag. For example:
```
<img src="slotmachine.jpg" />
```
Notice that unlike all the other tags we’ve seen before, there is an extra `/` before the `>` of an image tag, and the img tag does not have a closing tag. Moreover, an `img` tag has an `src` (source) attribute which defines the location of the image.
One way to include images is to link images from the internet using the image's URL, for example, to include an image of slotmachine, we can search for an slotmachine image, right click, select copy image address, and include the image address as the `src`:
```
<img src="https://upload.wikimedia.org/wikipedia/commons/8/82/Las_Vegas_slot_machines.jpg" />
```
We can also link an image that's saved to the computer. This link is relative to where you are in the file system. For example, if your image is saved to your Downloads folder, you will need to have something like this:
```
<img src="Downloads/slotmachine.jpg" />
```
An easy way to include an image is to put it in the SAME folder as our HTML file; then our src is just the image name. For example, if we put an image called "slotmachine.jpg" in the same folder as our HTML file, we could include it using just:
```
<img src="slotmachine.jpg" />
```
<mark>Make sure your image file has an image extension (example: .png, .jpg)</mark>
:::info
**Task 9:** Add two images to your web page: one that is online, and another that is saved to your computer.
*Make sure the image is saved in your CS2 HTML Lab folder*
> More information about images: https://www.w3schools.com/html/html_images.asp
:::
### Nesting Tags
Note that you can place tags inside other tags. This is called **nesting**. Say you have a paragraph of text, and you want to link a single word in it. With the power of HTML, we can nest an `<a>` tag in a `<p>` tag!
```<p>Click <a href="other.html">here!</a></p>```
Note that the order of closing tags is important. Whatever the most recently opened tag is must be closed before you can close any other tag.
:::warning
**Summary**
* End tags have a slash before the tag name.
* Tags must be closed, either with a separate closing tag or self-closing, and closed in the proper order. If you fail to do this, the browser will try to guess how to show your page, which could be wrong. If your page looks strange, *you may have forgotten to properly close a tag.*
* Follow this rule: Always set the beginning and end tags at the same time, always placing them on the farthest end of the item being affected. For example:
```<tag3><tag2><tag1>Multiple Tags</tag1></tag2></tag3>```
:::
### Making Lists
In HTML, there are two types of lists: ordered (numbered) and unordered (bullets). An **Ordered List** begins with the `<ol>` tag and ends with `</ol>`. An **Unordered List** begins with `<ul>` and ends with `</ul>`.
Each item in the list must be surrounded with `<li>` and `</li>`, which stands for List Item.
Here’s an example of an ordered list:
```html=
<ol>
<li>Las Vegas</li>
<li>Macao</li>
<li>Monaco</li>
</ol>
```
Which looks like:
1. Las Vegas
2. Macao
3. Monaco
You can also nest multiple lists together, like so:
```html=
<ul>
<li>Las Vegas</li>
<li>Macao</li>
<li>Monaco
<ol>
<li>Poker</li>
<li>Blackjack</li>
<li>Craps</li>
</ol>
</li>
</ul>
```
Which looks like:
- Las Vegas
- Macao
- Monaco
1. Poker
2. Blackjack
3. Craps
Notice that the above code indents "Poker", "Blackjack", and "Craps" (sublist) under "Monaco". Also notice that an ordered list lists items numerically, starting with 1. An unordered list lists items in bullet points.
:::info
**Task 10:** Make an unordered list with four bullet points and an ordered sublist with three numbered points.
> More information on lists: https://www.w3schools.com/html/html_lists.asp
:::
### Making Tables
You can organize data on your page using a **table**.
Here’s a breakdown of the tags used in a table, in the order used to declare a table:
1. `<table>` starts the table. It can have attributes:
* border tells how thick the table borders are, in pixels
* cellspacing is the amount of spacing between cells
* cellpadding is the amount of space/padding between the cell border and the cell contents
2. ```<caption> </caption> ```adds a caption over the table. This is optional.
3. `<tr>` starts a new table row.
4. `<td></td>` adds a piece of table data (text, image, or link) as a cell in the row (like a column).
5. `</tr>` ends the current table row.
6. `</table>` ends the table declaration.
Example:
```
<table border="5" cellspacing="2" cellpadding="10">
<caption>Gamblers</caption>
<tr>
<td>Las Vegas</td>
<td>Macao</td>
<td>Monaco</td>
<td>Atlantic City</td>
</tr>
<tr>
<td>112k people</td>
<td>92k people</td>
<td>200k people</td>
<td>74k people</td>
</tr>
</table>
```

If you want to make headings for a table, you can do so by making the `<td>` tags in the first row (the first `<tr>` tag) as `<th>` tags. Example:
```
<table border="5" cellspacing="2" cellpadding="10">
<caption>Gamblers</caption>
<tr>
<th>Las Vegas</th>
<th>Macao</th>
</tr>
<tr>
<td>112k people</td>
<td>92k people</td>
</tr>
</table>
```
:::info
**Task 11:** Make a table with 7 rows and 3 columns. Don't worry about table headings.
> More information on tables: https://www.w3schools.com/html/html_tables.asp
:::
<hr />
### Making Divs
Divs are useful because they allow you to divide your page into different containers. You will need this when you learn CSS in the next lab, so that you can style different parts of your website individually. They are important to help us style our web page, but they also help us group several HTML tags together. For example, we might want a div to group together some tags for a navigation bar on our website.
Try this:
```
<div style="width:30px; height:30px;background-color:red">
</div>
<div style="width:30px; height:30px;background-color:yellow">
</div>
```
Now, you can visually see the two different divs as two different containers.
<div style="width:80px; height:80px;background-color:red">
</div>
<div style="width:80px; height:80px;background-color:yellow">
</div>
</br>
:::info
**Task 12:** Make three divs with different colors and sizes. (hint: change the size of the div by modifying the width and height).
> More information on divs: https://www.w3schools.com/tags/tag_div.ASP
:::
### Making Comments in HTML
When working in HTML, it’s important to thoroughly explain and annotate your page as you create it. If you don’t, your work can become cluttered and disorganized. This is especially a problem if you have to show others your work! Comments are also great for debugging, since you can comment out certain lines to look for problems in your HTML code.
Comments take on the following syntax:
```<!-- Write your comments here -->```
Notice how the start tag has an exclamation mark, but the end tag doesn’t. You can apply this to any line of code to “comment it out”, or remove it from being compiled/loaded onto your page.
>More information on comments: https://www.w3schools.com/html/html_comments.asp
### Creating Email Links From Your Page
To let your visitors email you (or somebody else) directly from your website, you can use the `mailto:` command. It follows the same coding scheme as a standard hypertext link and appears in a similar manner, but clicking it should prompt the visitor to send you a piece of email using an email application on their computer. For example:
```
<a href="mailto:liam_capozza@brown.edu">Click Here To Email Liam Capozza</a>
```
Notice it's the same format as the links you should be used to writing except you write mailto: in place of `http://` and your email address in place of the page address. You still need the `</a>` tag at the end. Note there is *no space* between the colon and the e-mail address.
## Common Tags 🎰
| Tag/Closing Tag | Description |
|:------------------- |:-------------------------------------------------------------------------------------------------- |
| `<html></html>` | This starts an entire web page. Everything goes inside of it. |
| `<head></head>` | This declares the head section, which contains information about the page (such as the title). |
| `<title></title> ` | This contains the title for the page. Goes inside `<head>`. |
| `<body></body>` | This declares the body section, which contains the content that will actually be on the page. |
| `<p></p>` | This creates a paragraph. |
| `<a></a>` | This creates a HyperText link (Hyperlink). Attribute: href (link to another page) |
| `<br />` | This tag creates a line break. |
| `<hr />` | This creates a horizontal line across the page. |
| `<img />` | This inserts an image. Attribute: src (URL of the image) |
| `<span></span>` | This declares a section of text that you want to be logically separated from its surrounding text. |
| `<div></div>` | Declares a division of the page for grouping together HTML elements. |
| `<strong></strong>` | This tag bolds the text within it. |
| `<em></em>` | This tag italicizes the text within it. |
## Hand-In 🎰
:::success
**To Hand-In Lab 2**:
Come to hours and show your TA six things for checkoff:
1. Have a correctly set up HTML document with DOCTYPE, head, title, and body tags
2. Have one paragraph tag, three different sized headings, and a link
3. Have two images, one from an online source, and one that you downloaded to your computer
4. Have an unordered list with four bullet points and a sublist (ordered) with three numbered points
5. Have a table with seven rows and three columns
6. Have three different divs of different colors/sizes
Congrats! You just finished your third CS2 lab! :slot_machine:
:::
:::warning
If you have any issues with completing this assignment, please reach out to the course HTAs: cs0020headtas@lists.brown.edu
If you need to request an extension, contact Professor Stanford directly: don.stanford@gmail.com
:::
<hr />
 Sign in with Wallet


