# EDU 635 Tutorial: How to Create Interactive Stories in Twine
:::info
This tutorial is meant to provide a baseline of knowledge needed to really start adapting and creating interactive stories in Twine. It is *not*, however, a thorough dive into everything the software is capable of doing. For that, we recommend diving into the [**Twine Documentation**](https://twinery.org/cookbook/).
:::
## The Twine Interface
Twine is a free software designed to make creating branching scenarios easy to create and distribute. They do this by taking care of the vast majority of the coding for their users and providing the output of an HTML document. This can then be shared and opened in any modern web browser.
Let's start by taking a look at the [Twine interface](https://twinery.org).
As it's a free software, you are able to download the desktop version if you would like, but we'll be using the browser version in this tutorial. To access it, click "Use it online".
This will take you to your story library. You can see here that I have one story kept in my browser history.
Let's make a new story by clicking on the green "+Story" button.

### Breaking down the Editing Screen
The base editing screen for Twine has a Starting passage, a grid background, and a toolbar on the bottom. You can drag and drop the passage tiles wherever you'd like for your own organization. This makes the grid background particularly useful.
Let's take a closer look at the toolbar on the bottom.
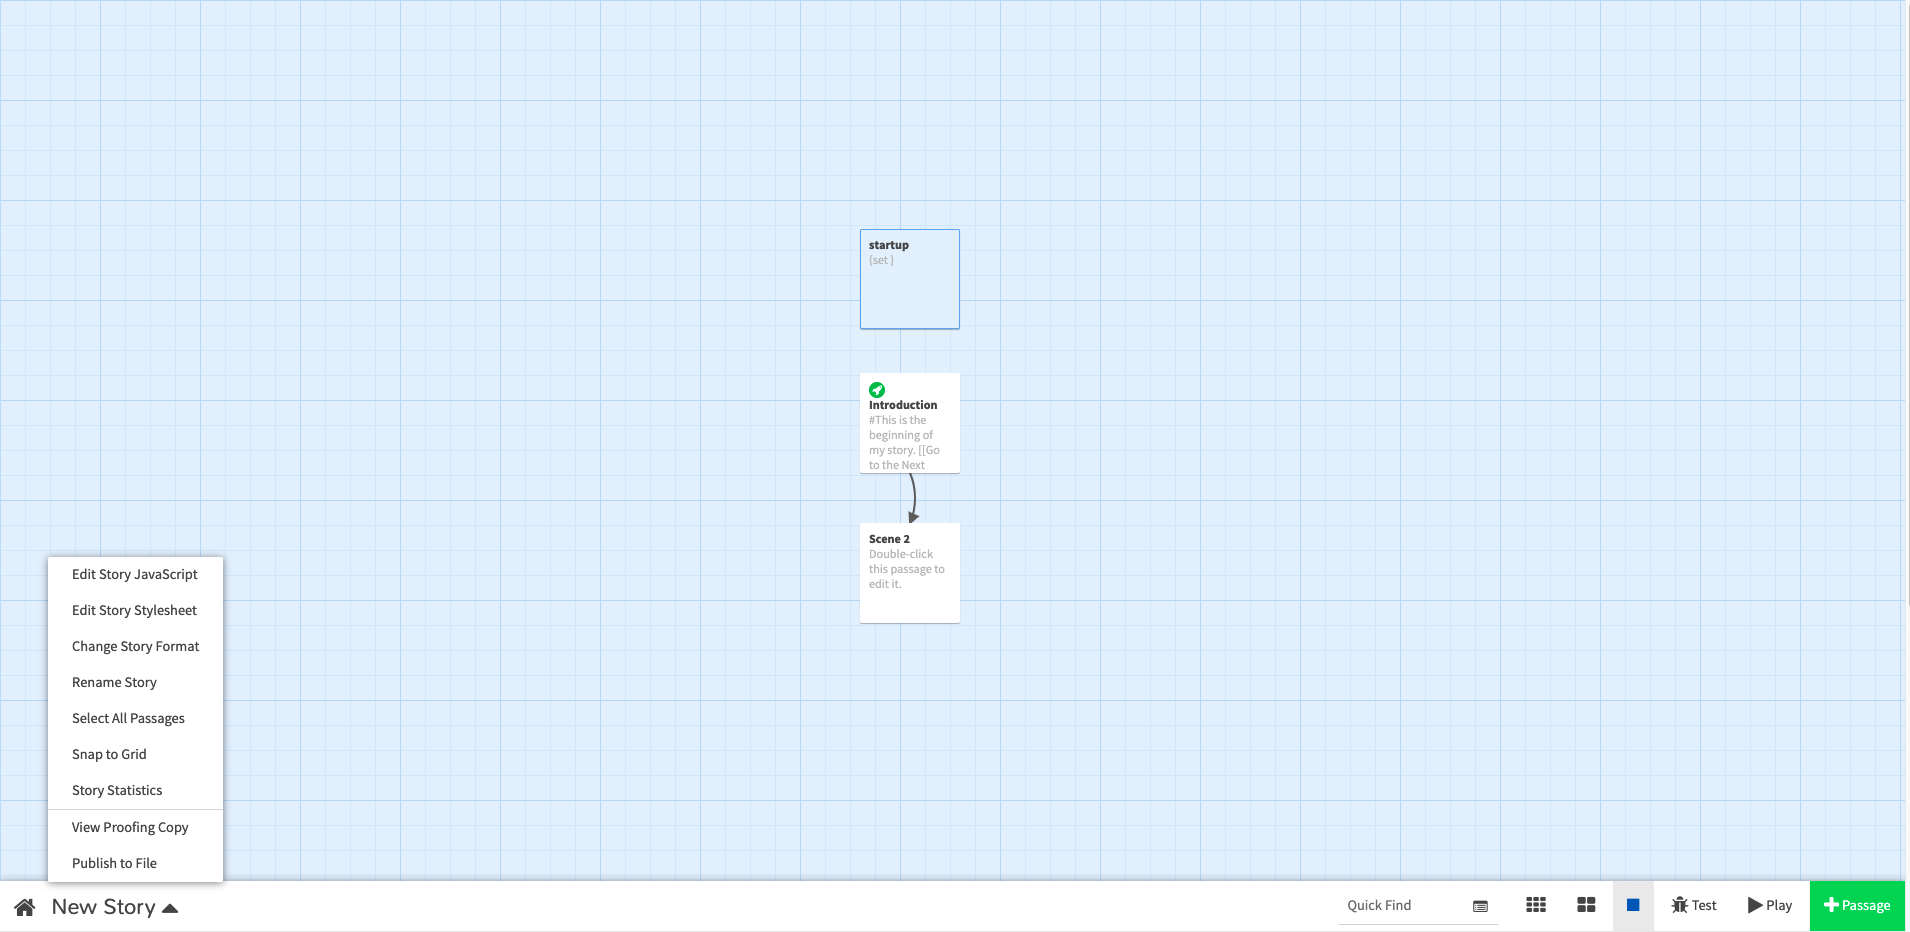
#### Title and Story Options
Clicking on the arrow next to the title on the bottom of the toolbar brings up a menu with the following options (bolded are important to use in this course):
1. Edit Story JavaScript -- Usefuly if you would like to edit the behavior of the story or add any extra functionality through the programming language JavaScript. (beyond the scope of this course)
2. **Edit Story Stylesheet -- Allows you to change the style and appearance of the story and inner elements. We'll dive into this further down in this tutorial.**
3. Change Story Format -- Change the format of the story. The default is something called Harlowe. For the purposes of this course, we won't be changing the format.
4. Rename Story
5. Select All Passages
6. Snap to Grid
7. Story Statistics
8. **View Proofing Copy -- Creates a flat, printable file with all passages in one place. Useful for proofreading.**
9. **Publish to File -- Creates and downloads an HTML file with all passages and settings. This is how you will turn in your assignment**
#### Quick Find and View
The other side of the toolbar has the quick find search which allows you to search for a specific passage and complete a find and replace function.
Next to that are your view options that you can select based on your preference. Don't worry about the Test button over on the very right for now.
#### Inside a Passage
Hover over the passage to see a smaller toolbar with the options to delete the passage, edit the passage, and test the story from that passage.
Double click or click the pencil icon to enter the passage and make edits.

At the top of the passage pane is the title. Make sure that you name that something descriptive. Underneath it is a button that allows you to add tags. This is more for you to organize with, but there are a few tags that mean specific things (startup, header, footer) -- if you're interested in learning more, go to the [Twine documentation](https://twinery.org/cookbook/).

Over to the right is a down arrow that toggles the formatting toolbar. If you're just getting started with Twine, I recommend keeping that open as it gives you information about how to get the formatting you want in your passage.
Finally, down below is the text editor where you will add in your story elements.
## A Brief Explanation on How Twine Works
Twine, and Branching Scenarios in general, relies largely on the if...then... type of logic. Basically, you create a series of scenes or scenarios and then link them together.
For Example, let's say you have 5 different scenes:
* Scene 1
* Scene 2
* Scene 3
* Scene 4
* Scene 5
In an ordinary story, these would progress in a linear fashion
```flow
s1=>start: Scene 1
s2=>operation: Scene 2
s3=>operation: Scene 3
s4=>operation: Scene 4
s5=>end: Scene 5
s1->s2->s3->s4->s5
```
In a story with branching scenarios, you would see something more like this:
```flow
s1=>start: Scene 1
s2=>operation: Scene 2
s3=>operation: Scene 3
s4=>operation: Scene 4
s5=>operation: Scene 5
cond=>condition: Did you Pick Scene 2?
e=>end: End A
e2=>end: End B
s1->cond
cond(yes)->s2->s5->e
cond(no)->s3->s4->e2
```
Thus making the choice that you made in Scene 1 affect the path that the story heads to next.
When a user goes through, for example, a Twine story their path could be
```Scene 1 -> Scene 3 -> Scene 6 -> Scene 7 -> Scene 12 -> END A```
OR
```Scene 1 -> Scene 2 -> Scene 5 -> Scene 7 -> Scene 10 -> END B```
as long as each of the scenes makes sense in where they are placed.
The method that Twine uses to connect the scenes to the choices is through the creation of links. So, using the same example as above, the Scene 1 passage would have links to both Scene 2 and Scene 3 in it that would lead down different paths.
So, think about the choices that you'll be designing as these progressive steps linked together.
## Creating Links
Since creating links is the core of making a Branching Scenario in Twine, the language for doing so in the program is the most important thing to know.
Inside of a passage, surround the text that you want to link with square brackets.
:::info
[[The words that you want to link]] or The words that you [[want to link]]
:::
Twine will take that information and create a new passage with the same title as what is listed in the brackets. You can, however, also adjust this to make it so the choice links to an existing passage or to make it so that you can have the passage be called something different from the choice.
:::info
[[The words of your choice -> The Passage you want to link to]]
[[The Passage that you want to link to <- The words of your choice]]
[[The words of your choice | PassageName]]
:::

Once you exit out of the individual passage, you should now see new ones populated on the editing screen that you can double click into and do the same thing.
This is the basics of how to weave together a story in Twine.
## Useful Text Formatting to Know
This format of Twine uses something called Markup for easier in-text formatting. [Here's a quick start guide for that language](https://hackmd.io/c/codimd-documentation/%2F%40codimd%2Fmarkdown-syntax). Not all of the elements are allowed, but the section below covers the basics.
:::info
# # before an item is h1
## ## before an item is h2
### ### before an item is h3
#### #### before an item is h4
*`*` on either side makes an item italicized*
**`**` on either side makes an item bold**
***`***` on either side makes an item bold and italicized***
:::
All of these markup syntax elements also work within Twine and are generally how you are going to edit your text elements. I recommend playing around and seeing what you like in order to craft the correct reading experience.
You can also play around with the formatting toolbar within the passages to get some of the more specific formatting you would like.
## Exporting
Once you've finished creating your story, you'll need to export it as an HTML file. Go to the Story Options menu and select "Publish to File"

This is what you'll need to export to provide to your instructor and later peers for review.
:::danger
**This is as far as you need to go to finish the Week 3 Assignment. The rest of this tutorial is for any extra formatting you would like to investigate and as a reference.**
:::
## Further Information
### Images, Links, Videos, Oh My!
Embedding media in Twine requires the use of good old-fashioned HTML.
The good news with how it has been included, however, is that all of the HTML can be inserted in-line (you don't have to navigate to another page to do any editing...which is very nice).
Here's a quick quide for popular HTML elements you might add (please see the tutorial in Week 6 for information on how to use these).
:::success
Image: `<img src="imageurl.jpg" alt="alt text">`
Video/Web app: `<iframe src="videofileURL" width="" height="" alt=""></iframe>`
Link: `<a href="url">Placeholder Text</a>`
Center on page: `<center>element</center>`
:::
### An Aside on Variables
Variables are where Twine connects with the programming languages Javascript/JQuery for the average user. They are the ways that you can truly shape the experience of the player. Using a variable allows you to determine which areas the player can access or what will show up depending on their past choices.
:::info
A variable is just something used to story information in coding. Examples could be numbers, words, arrays, or datamaps. [For more information on each, check the Twine Cookbook](https://twinery.org/cookbook/terms/terms_variables.html).
:::
To define a variable, you have to initialize it. This doesn't necessarily have to be at the beginning of the story, but it's pretty good practice to do so. I have an unseen passage with the tag startup that does this purpose for any variables used.
Define a variable like this:
```JQuery=
{
(set: $fear to 0)
}
```
For any event that would affect that variable, you can call and change it on that passage. **Note: you have to have the curly brackets and the parentheses**
```JQuery=
{(set: $fear to it + 1)}
Rest of the passage
```
And you can also use it to change what is visible to the player depending on the level of your variable (or if it is present, what its value is, etc.) using a bit of Javascript
```JQuery=
(if: $fear > 2)[what you want to show up [[link to the next page]]]
(elseif: $fear >=1) [what you want to show up with this [[link to another page]]]
(else:)[remaining option [[link to still another page]]]
```
There are so many more things that you can do with the variables that are really only limited to what you could imagine/figure out how to create.
### [CSS](http://www.dhs.state.il.us/accessibility/references/css-quick-reference.html)
Depending on the style that you have chosen, you have to investigate exactly which elements to target within your story. For Harlowe, if you want to adjust globally, you have to use **tw-story** as your selector.
For now, we recommend just copying the code below and pasting it into the Story Style Sheet from the Story Options menu.
```CSS
tw-story {
background-color: #f8f8ff;
color: #36454f;
font-family: sans-serif;
}
```

:::danger
See the Week 6 Tutorial for more information on how to use CSS.
:::