---
tags: 新人資訊
GA: G-YWCCFEGXSJ
---
[新人資訊](https://hackmd.io/@newman/portal-info)
# 技術-開發板 #2-將 Arduino 連上網路
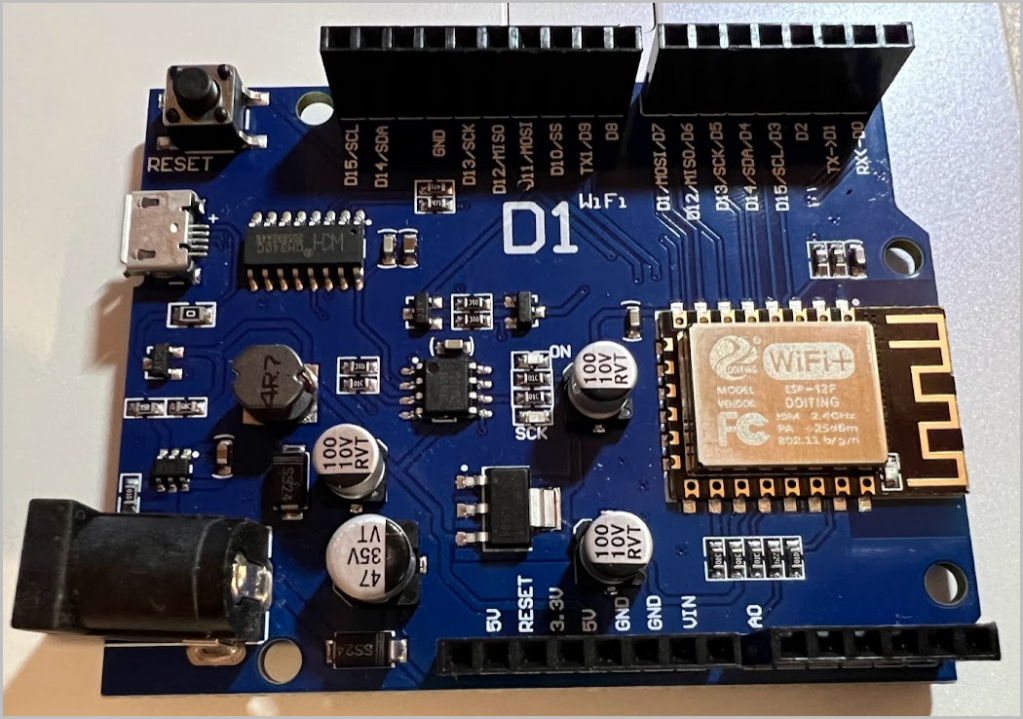
在第一回合中初步了解了 sensor 資料的抓法,和簡單的把資料顯示在本地端的 LCD 螢幕,接下來迫不及待的就是要趕快讓裝置有連網能力。經查有一種 ESP-8266 的模組可以完成,正好前幾天逛材料行隨意買的一塊,其 ESP-8266 已經跟主板整合完成且跟 Arduino 相容,正是 WeMos D1。他的大小跟原版 Arduino Uno 完全一樣,只是 USB 介面變成小孔的 Micro USB,且多了一大顆 Wifi 晶片。
要使用它有一些囉嗦的準備工作,還讓我花了不少時間!首先因此板子採用 CH340 USB to Serial 晶片,需要安裝驅動程式,安裝網址找到如下 http://www.wch-ic.com/downloads/CH341SER_ZIP.html 另外要注意 Micro USB 的「線材」!曾經花了大半天試裝了 n 板的驅動程式,爬了 n 篇文章,連不上就是連不上,幾乎到了放棄邊緣而到 FB 跟朋友圈求救,最後承蒙一位領域資深高手的一句話提醒「換條線試試」,竟然就成功了!後來分析原因可能是因為線材的「電流」規格太小所致,或是一些簡易型的線材只提供「充電」功能,資料控制部分可能完全不存在,它們擁有一樣的外表,這令人很煩!
連線成功後照例在 IDE 需要完成兩個設定:
1. 在開發版管理員中選擇正確的型號
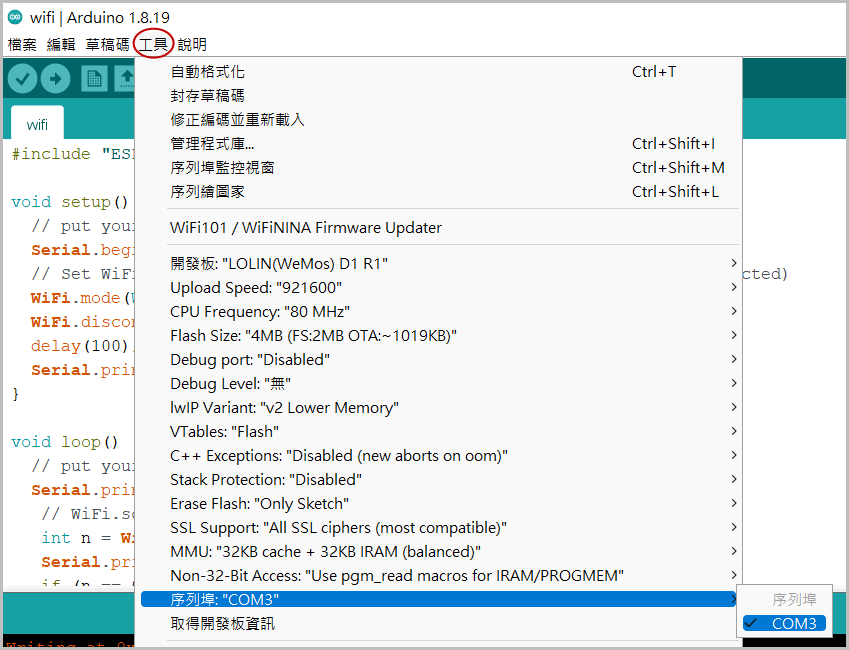
2. 選擇正確的 COM Port
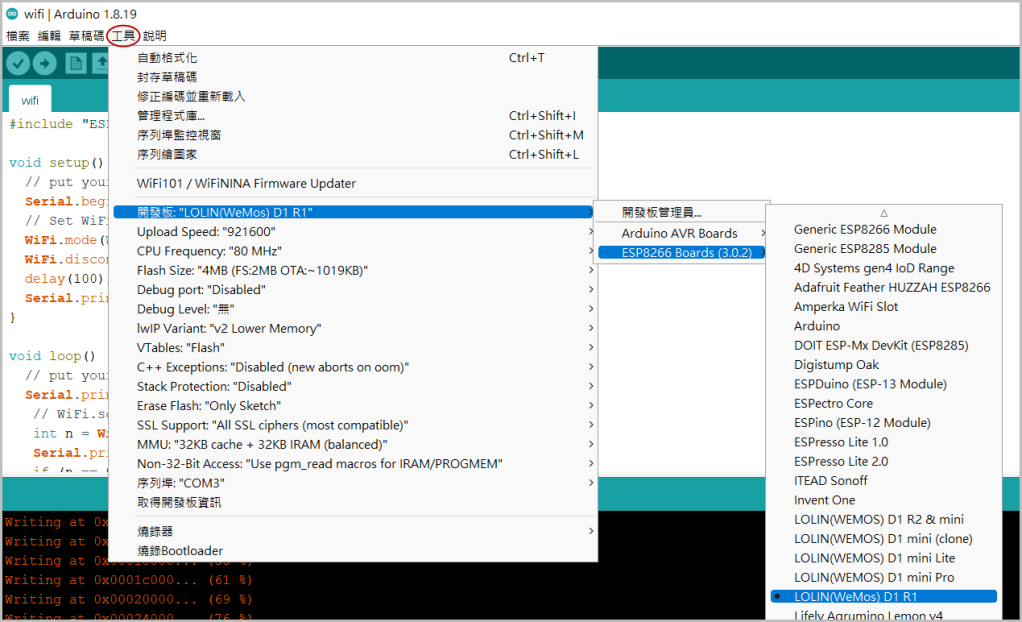
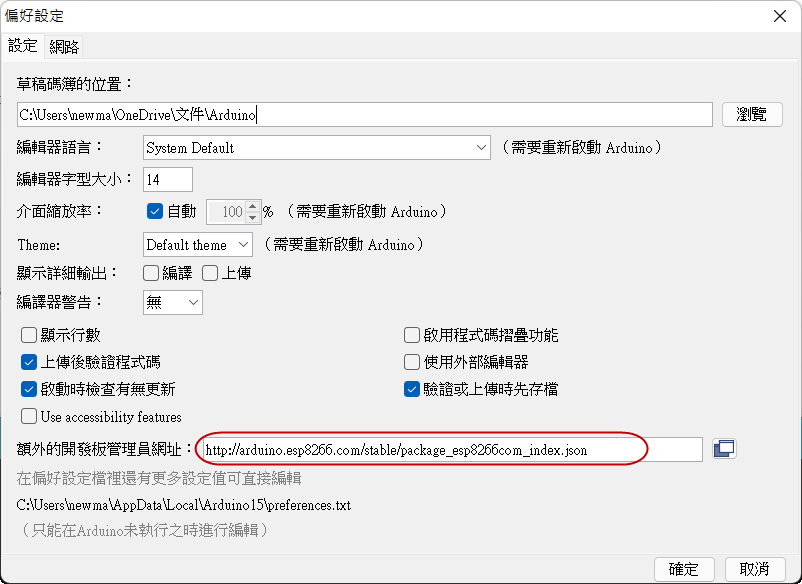
DE 中預設是沒有 ESP8266 的板子可選,需要去偏好設定中將此網址加入 http://arduino.esp8266.com/stable/package_esp8266com_index.json
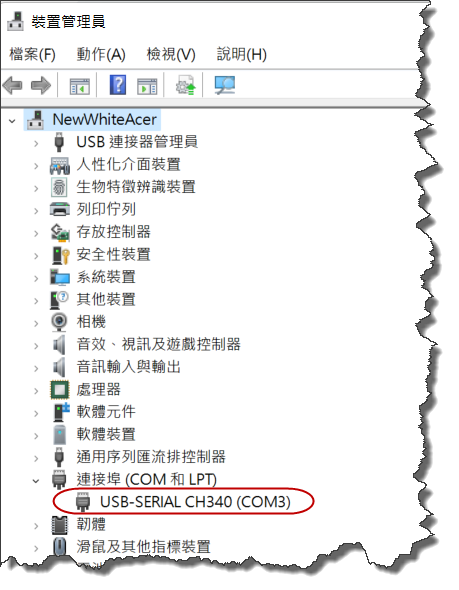
而通訊埠以我的例子是選 COM3,這在不同電腦有可能不一樣,必須去「裝置管理員」查看。
以上終於完成基本的環境設定,接下來開始來看 Wifi 模組的操作方法,預計執行以下動作:
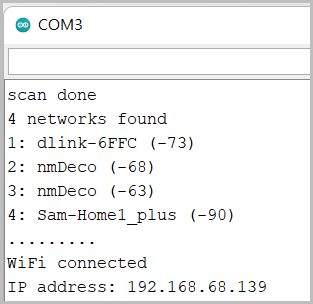
1. 掃描當前環境下所有 wifi 訊號的 ssid,確認網卡運作正常。
2. 連上某一個 ssid,取得動態 ip。此步驟完成後就已經完全準備好連上無限大的網路囉!
這兩個動作只需要執行一次,因此寫在 setup(),將 scan_wifi() and connect_wifi() 切出去維持程式結構清晰。

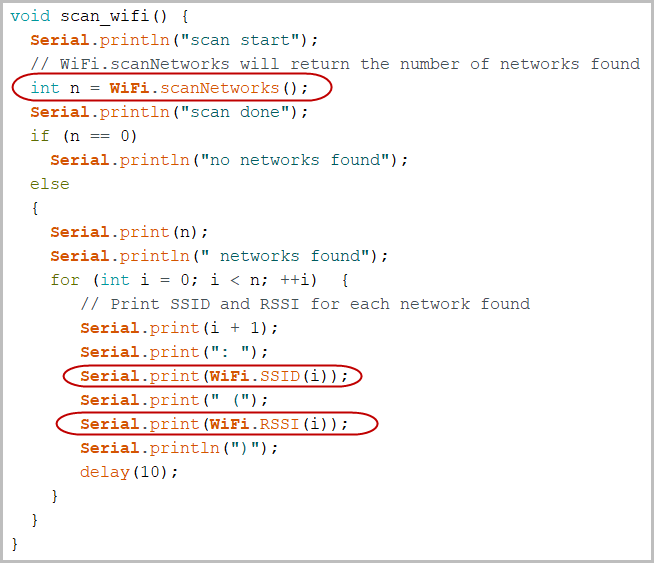
scan_wifi() 關鍵也只有一行,然後依序從序列埠印出每一個 ssid 和其訊號強度。
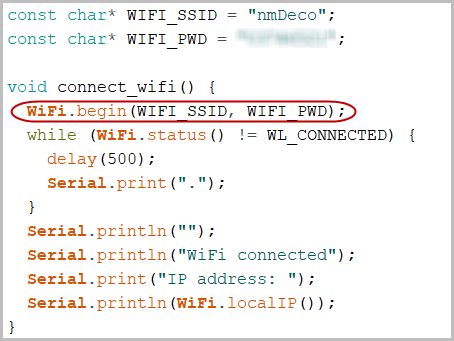
連到特定的 ssid 的關鍵也只是一行,然後每 500 ms 印出一個點等待連線,真是感謝那些在底層函式庫貢獻的開發者們,讓寫程式變得這麼方便。
上述測試可以快速完成是要感謝這篇文章的作者:https://laoweizz.blogspot.com/2017/02/wemos-d1-with-arduino-ide-wifi.html 經測試已經全部成功了。
下一步就是實作 MQTT Client and Web Api Client,搞定這兩種連線方式後,這個終端裝置就越來越有用了,可以放飛我的想像力,IoT 的世界我來叩門了。
By Newman Chen 2022/4/10
參考資料:
http://www.wch-ic.com/downloads/CH341SER_ZIP.html
https://laoweizz.blogspot.com/2017/02/wemos-d1-with-arduino-ide-wifi.html