# ML for IoT: TinyML
###### tags: `2021`
> Based on https://github.com/tinyMLx/courseware
> Creative Commons Attribution-NonCommercial-ShareAlike 4.0 International Public License ("Public License")(C)
> and https://towardsdatascience.com/exploring-ia-at-the-edge-b30a550456db
### Baisc reference books:
[](https://learning.oreilly.com/library/view/tinyml/9781492052036/)
The reference book on **TinyML**.
---
[](https://www.oreilly.com/library/view/hands-on-machine-learning/9781491962282/),
It has good introductions about ML and TF. The TinyML book is clearly written for people who already understand TF well enough.
:::warning
## Warning!

:::
## Context
The figure below shows the classical sequence of an IoT system

We are used to collect data from simple sensors, like temperature, humidity, and so on and, once collected, data is typically organized in JSON files like this:
```
{"sensor\_type":"CajaMedida1.TBS","value":"25.39",
"timestamp":1612696321000},
{"sensor\_type":"CajaMedida1.TBS","value":"25.59",
"timestamp":1612696501000},
{"sensor\_type":"CajaMedida1.TBS","value":"25.96",
"timestamp":1612697161000},
...
```
that are sent to a cloud based service where they will be stored, analyzed and so on; this approach works fine for many applications. But the advancements in the HW capacities at very accessible costs, allows for new ways to collect data. This trend is tightly associate to another one called “Edge computing”.
> Gartner defines edge computing as: “a part of a distributed computing topology in which information processing is located close to the edge — where things and people produce or consume that information.”

In other words, edge computing brings computation (and some data storage) closer to the devices where data are being generated or consumed (especially in real-time), rather than relying on a cloud-based central system far away.
Edge computing allows to handle the exponential growth of IoT devices connected to the Internet for either receiving information from the cloud or delivering data back to the cloud, and many IoT devices generate enormous amounts of data during their operations.
**Edge computing provides new possibilities in IoT applications**, particularly for those relying on machine learning (ML) for tasks such as object and pose detection, image (and face) recognition, language processing, and obstacle avoidance.
Performing machine learning on-device at the edge can help to improve:
- **Latency**: there’s no round-trip to a server
- **Privacy**: no data needs to leave the device
- **Connectivity**: an Internet connection isn’t required
- **Power consumption**: network connections are power-hungry
[](https://github.com/tinyMLx/courseware/blob/master/edX/readings/1-2-2.pdf)
This [\[document\]](https://github.com/tinyMLx/courseware/blob/master/edX/readings/1-2-2.pdf) from the [HarvardX tinyML courseware](https://github.com/tinyMLx/courseware/tree/master/edX) surveys a few emerging application areas that have great potential for TinyML. This list is a small preview into the wealth of applications on the horizon.
## Some initial definitions

---

---
### Training and Inference

> Image source: Machine Learning Training versus Inference — Gartner
* **Training** refers to the process of creating a machine learning algorithm. Training involves using a **deep-learning framework** (e.g., TensorFlow) and a **training dataset** (see the left-hand side of the above figure). IoT data provides a source of training data that data scientists and engineers can use to train machine learning models for various cases, from failure detection to consumer intelligence.
* **Inference** refers to the process of using a trained machine-learning algorithm to make a prediction. IoT data can be used as the input to a trained machine learning model, enabling predictions that can guide decision logic on the device, at the edge gateway, or elsewhere in the IoT system (see the right-hand side of the above figure).
### What is TinyML?

:::info
Tentative definition: "...a neural network model that runs at an energy cost of below 1 mW."
*(C) "TinyML" by Pete Warden, Daniel Situnayake*
:::
### Microcontrollers (MCUs) enable TinyML

### About the available frameworks

The topmost three frameworks which are available as an open-source library are opted by data scientist in deep learning is [PyTorch](https://pytorch.org), [TensorFlow](https://www.tensorflow.org), and [Keras](https://keras.io). The Keras is a neural network library scripted in Python and can execute on the top layer of TensorFlow. It is specially designed for robust execution in deep neural networks. TensorFlow is used to perform multiple tasks in data flow programming and machine learning applications. PyTorch is a machine learning library that is mainly used in natural language processing.
**TensorFlow Lite** is an open-source deep learning framework that enables on-device machine learning inference with low latency and small binary size. It is designed to make it easy to perform machine learning on devices, “at the edge” of the network, instead of sending data back and forth from a server.
TensorFlow Lite (TFLite) consists of two main components:
1. The **TFLite converter**, which converts TensorFlow models into an efficient form for use by the interpreter, and can introduce optimizations to improve binary size and performance.
2. The **TFLite interpreter** runs with specially optimized models on many different hardware types, including mobile phones, embedded Linux devices, and microcontrollers.

The example below is based on [an experiment by "Edje Electronics"](https://github.com/EdjeElectronics/TensorFlow-Lite-Object-Detection-on-Android-and-Raspberry-Pi/blob/master/Raspberry_Pi_Guide.md) which shows how to set up TensorFlow Lite on the Raspberry Pi and use it to run object detection models. The same repository also shows how to set up the **Coral USB Accelerator** on the Pi and run Edge TPU detection models.
{%youtube b7Yul7NxNq0 %}
This other example performs ["Blob Detection" with a Portenta](https://www.arduino.cc/pro/tutorials/portenta-h7/por-openmv-bt) detecting the presence and the position of objects in a camera image.
{%youtube b8VmOwiN-20 %}
[Portenta H7](https://store.arduino.cc/portenta-h7) is probably one of the currently most powerful MCUs. H7's main processor is the dual core STM32H747 including a Cortex® M7 running at 480 MHz and a Cortex® M4 running at 240 MHz. The two cores communicate via a _Remote Procedure Call_ mechanism that allows calling functions on the other processor seamlessly. Both processors share all the in-chip peripherals and can run:
- Arduino sketches on top of the [Arm® Mbed™ OS](https://os.mbed.com/mbed-os/)
- Native Mbed™ applications
- MicroPython / JavaScript via an interpreter
- TensorFlow™ Lite

The video above uses a **Arduino Portenta Vision Shield** that comes in two versions:
* with [Ethernet](https://store.arduino.cc/portenta-vision-shield)

* or with [LoRa](https://store.arduino.cc/portenta-vision-shield-lora)

# How-to Get Started with Machine Learning on Arduino
> Based on: https://blog.tensorflow.org/2019/11/how-to-get-started-with-machine.html
> _A guest post by Sandeep Mistry & Dominic Pajak of the Arduino team_(C)
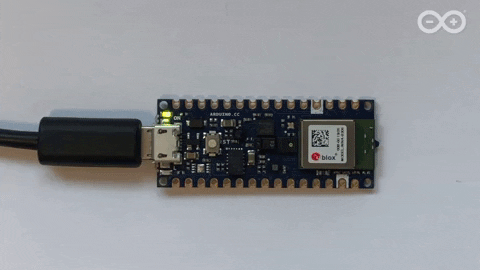
[Arduino](https://www.arduino.cc/) is on a mission to make Machine Learning simple enough for anyone to use. In this section, we will work on how to install and run [TensorFlow Lite Micro](https://www.tensorflow.org/lite/microcontrollers/overview ) examples on a [Arduino Nano 33 BLE Sense](https://store.arduino.cc/nano-33-ble-sense).
TensorFlow Lite for Microcontrollers is currently experimental within the [TensorFlow repo](https://github.com/tensorflow/tflite-support).
## Microcontrollers and TinyML
Microcontrollers, such as those used on Arduino boards, are low-cost, single chip, self-contained computer systems. They’re the invisible computers embedded inside _billions_ of everyday gadgets like wearables, drones, 3D printers, toys, rice cookers, smart plugs, e-scooters, washing machines.
There are practical reasons you might want to squeeze ML on microcontrollers, including:
* **Function**: wanting a smart device to act quickly and locally (independent of the Internet).
* **Cost**: accomplishing this with simple, lower cost hardware.
* **Efficiency**: smaller device form-factor, energy-harvesting or longer battery life.
* **Privacy**: not wanting to share all sensor data externally.
TinyML is an emerging field and there is still work to do. Billions of microcontrollers combined with all sorts of sensors in all sorts of places which can lead to some seriously creative and valuable Tiny ML applications in the future.
## The Arduino Nano 33 BLE Sense board
Among the most used devices for TinyML experiments there is the [Arduino Nano 33 BLE Sense board.](https://store.arduino.cc/usa/nano-33-ble-sense)
This is an Arm Cortex-M4 microcontroller running at 64 MHz with 1MB Flash memory and 256 KB of RAM.

It also has a variety of onboard sensors meaning potential for various Tiny ML applications:

The board is small enough to be used in end applications like wearables. As the name suggests, it has Bluetooth LE connectivity so you can send data (or inference results) to a laptop, mobile app or other BLE boards and peripherals.
Connecting the BLE Sense board over USB is an easy way to capture data and add multiple sensors to single board computers without the need for additional wiring or hardware — a nice addition to a Raspberry Pi, for example.
To program this board, you can use the [Arduino Web Editor](https://create.arduino.cc/editor) or install the [Arduino IDE](https://www.arduino.cc/en/main/software).
The inference examples for TensorFlow Lite for Microcontrollers are packaged and available through the Arduino Library manager.
For example, the `micro_speech` allows to recognize, using TensorFlow Lite Micro,voice keywords. It has a simple vocabulary of “yes” and “no”.

Remember this model is running locally on a microcontroller with only 256KB of RAM, so don’t expect commercial ‘voice assistant’ level accuracy — it has no Internet connection and on the order of 2000x less local RAM available.
## "Hands on" a TinyML example
:::info
Based on [EloquentTinyML: Easier Voice Classifier on Nano 33 BLE Sense © CC BY-NC-SA](https://create.arduino.cc/projecthub/alankrantas/eloquenttinyml-easier-voice-classifier-on-nano-33-ble-sense-ebb81e) which is based on the library [EloquentTinyML](https://github.com/eloquentarduino/EloquentTinyML) (a wrapped-up version of TF Lite) for Arduino IDE, and a Python tool package [TinyML gen](https://github.com/eloquentarduino/tinymlgen) a library written by [Simone Salerno](https://eloquentarduino.github.io/) ([@EloquentArduino](https://twitter.com/EloquentArduino))
:::
This section describes the steps to deploy on a Nano 33 the TinyML code necessary to "understand" a few words. **The objective is to detail the process involved so that all the necessary elements, from the creation of the dataset to the final deployment on the HW are clear**.
The basic goals are:
- To be able to train the model with any words (including non-English words) spoken by your own voice. (The TinyML book uses Google's Speech Commands dataset as input.)
- To use as few libraries, files and develop tools as possible.
- To provide a preliminary work for others to produce better and even easier voice/speech recognition on edge devices in the future.
This experiment demonstrates a 2-words, "Si" (i.e., "Yes" :smile:), and "No" classifier. The model had a good accuracy rating after training, but in reality the successful predict ratio was lower on the device. The reason may be that trying to record words in a very specific way (to keep the same distance/volume/pronunciation in order to improve the model training), the classifier would only respond well if words are spoken in the exact same way. Not to mention the way you speak into the mic would also have a lot of impact on how the model performs.
Of course, if you provide A LOT of samples (like several hundreds per word) and train the model long enough, you might get really good predictions.
:::warning
Disclaimer (once again)
This experiment is simply an example on how to use ML to perform a task. It is **not** oriented to experts on neural networks and the Tensorflow framework. Training neural network models is a long and difficult process, easily full of frustration.
:::
<!-- Non necessario....
### HW Setup (with the Arduino IDE)
- Install support for Arduino Nano 33 BLE Sense (add **[Arduino nRF528x Boards](https://www.arduino.cc/en/Guide/NANO33BLESense)**from your board manager), which will also install the PDM library
- Install the [EloquentTinyML](https://github.com/eloquentarduino/EloquentTinyML) library
-->
### Part I: creating the dataset: the voice sampler
:::success
The Arduino script is available here: https://github.com/pmanzoni/docker4iot/tree/main/code/2/tinyML/Nano33ble_voice_sampler
:::
First, we need to create our dataset by sampling voice or spoken words as training data. Every "word" sample or instance is converted in a Numpy array of `FEATURE_SIZE=32` numbers (of type `float`).
This is how the script "record" samples from the PDM mic:
- Upload the script. When done, open the serial monitor window.
- There are some parameters that you can change. I set the RMS threshold `SAMPLE_THRESHOLD=200` so not to have to talk to loud. With a value too low the mic will be often triggered by random noises and your own breath.
- Since the PDM mic is only sensitive enough in a very close range, I decided to press my mouth very close to the mic, and immediately move the board away to avoid breathing into the mic.
- In its callback function `void onPDMdata()`, the mic records 256 readings continuously. Sampling rate is 16 KHz, which means it get 16000 readings per second. These 256 values are then read as 128 PDM ([pulse-density modulation](https://en.wikipedia.org/wiki/Pulse-density_modulation)) data.
- These PDM data will be then calculated into a single RMS (root mean square) value - in other word, a summary of this sampling window.
- If the current RMS value get higher than the threshold, it means the user has said something loud enough. The onboard LED lights up and the recording process starts. (The beginning of the word would be lost but we can still get the rest of it.)
- Record a new RMS value every `SAMPLE_DAY=20` ms for `FEATURE_SIZE=32` times, to cover a period of 640 ms; enough to pronounce a single word.
- This 32-value data is the representation of one spoken word (an instance). You'll see it printed out in the serial monitor window.
- Wait until the onboard LED blinks to say the word again.
The **FFT (Fast Fourier Transform)** could be used to convert original signal into frequencies. In this case it is not used because the readings are already converted to PDM signals by the mic itself.
### Testing/sampling voice data
Setting `SERIAL_PLOT_MODE` to **true** allows to test it in the Arduino IDE [serial plotter](https://arduinogetstarted.com/tutorials/arduino-serial-plotter) window: (baud rate 115200)

The plot mode doesn't count sample numbers and add some 0s between samples to separate them. This mode can be used for practice and find out how and where you are going to record reliable data. (Surprisingly, it's not as easy as you'd think.)
Setting `SERIAL_PLOT_MODE` to **false** you'll get the data you need:

After total 50 samples collected (it can be changed with the `TOTAL_SAMPLE` parameter), the board will go into an endless loop and keep blinking its LED.
Now copy and paste the data (_as you can see, they are outputted in the form of Python list; you can remove the # comment if you like._) into the `data = np.array` of the `voice_dataset.py` Python file (see below).
Reboot the Nano 33 BLE Sense and collect 50 samples for the next word.
:::success
In https://github.com/pmanzoni/docker4iot/tree/main/code/2/tinyML you can find file:
* `No.m4a`: the recording of 'No'
* `Si.m4a`: the recording of 'Si'
* [no\_rec\_dataset.txt](https://github.com/pmanzoni/docker4iot/blob/main/code/2/tinyML/no_rec_dataset.txt "no_rec_dataset.txt"): the dataset with the 'No' values
* [si\_rec\_dataset.txt](https://github.com/pmanzoni/docker4iot/blob/main/code/2/tinyML/si_rec_dataset.txt "si_rec_dataset.txt"): the dataset with the 'Si' values
* [Nano33ble\_voice\_trainer/voice_dataset.py](https://github.com/pmanzoni/docker4iot/blob/main/code/2/tinyML/Nano33ble_voice_trainer/voice_dataset.py "voice_dataset.py"): the generated file
:::
### Part 2: voice trainer
Now comes the hardest and most mysterious part: try to train a neural network that is good enough for prediction. Which will take a lot of time and effort.
In the following code, the used model will be this:
```python
model = Sequential()
model.add(layers.Dense(data.shape[1], activation='relu', input_shape=(data.shape[1],)))
model.add(layers.Dropout(0.25))
model.add(layers.Dense(np.unique(target).size * 4, activation='relu'))
model.add(layers.Dropout(0.25))
model.add(layers.Dense(np.unique(target).size, activation='softmax'))
model.compile(optimizer='adam', loss='sparse_categorical_crossentropy', metrics=['accuracy'])
model.summary()
```
This defines a **RNN (recurrent neural network)** with five layers, each layer has neural nodes which would pass data to the next layer, and get the result in the final one.
The first layer is as big as the length of the data instance (the `FEATURE_SIZE=32`) (32 nodes). The third one is the number of labels x 4 (= 8 nodes). The final one has 2 nodes, for which we will get prediction results. The Dropout layers are used to prevent over-fitting, both of them will randomly discard 1 input data in 4 in order to force the rest of nodes to adapt.
```
_________________________________________________________________
Layer (type) Output Shape Param #
=================================================================
dense_6 (Dense) (None, 32) 1056
_________________________________________________________________
dropout_4 (Dropout) (None, 32) 0
_________________________________________________________________
dense_7 (Dense) (None, 8) 264
_________________________________________________________________
dropout_5 (Dropout) (None, 8) 0
_________________________________________________________________
dense_8 (Dense) (None, 2) 18
=================================================================
Total params: 1,338
Trainable params: 1,338
Non-trainable params: 0
_________________________________________________________________
Train on 60 samples, validate on 20 samples
```
Activation functions are like filters, which controls how a node send data to the next ones (or if a node will be "fired" to send information, like the neurons in our brain).


When training the model, Tensorflow will try to optimize best weights in each nodes based on prediction accuracy and loss from previous iteration (or epoch). It's like trying to find a way down hill by blindly walking around. However, it may also be stuck in the same place for a very, very long time, unable to improve the model further.
**Softmax** (the multi-class version of Logistic Regression) and loss function **sparse\_categorical\_crossentropy** are used for classification; in the final layer of the model they will generate floating numbers as probability for each label. The label with highest probability is the final "predicted" word.

For that case, you'll need to change some parameters (number of nodes, dropout ratio, batch size (training speed) and number of training iterations) to see if it will get better.
It is not easy to say how, and as far as I know, there are no best practice to follow unless you understand the math behind it very well.
:::success
The file is here: https://github.com/pmanzoni/docker4iot/blob/main/code/2/tinyML/Nano33ble_voice_trainer/nano33ble_voice_trainer.py
It can be executed on your machine but you have to previously install all the required libraries, or can e execute in [Google Colab](https://colab.research.google.com/notebooks/intro.ipynb) (easier :wink:)
:::
Run the script and patiently wait for the result.
By default the **tf\_lite\_model.h** file will be generated in the same folder of this Python script.
Note: you might see some warning messages when this script starts. Warnings are currently normal and should not affect the outputted model .
### The training result
Below are the results obtained with the data provided:
```
Prediction Accuracy: 0.95
Test accuracy: 0.95
Test loss: 2.966
precision recall f1-score support
0 1.00 0.92 0.96 12
1 0.89 1.00 0.94 8
accuracy 0.95 20
macro avg 0.94 0.96 0.95 20
weighted avg 0.96 0.95 0.95 20
```
Overall 90% accuracy looks great but it doesn't count in the human error on speaking to the mic in the wrong way.
Here's the visualization of the training process, which is useful to see how did the training went:

Ideally, we need to get accuracy/validate accuracy >= 0.8-0.9 and loss/val_loss as low as possible. Validate accuracy should also be as close as accuracy and validate loss as close as loss, to make sure the model wasn't over-fitting (over trained on training data and sucks on predicting test data).
Again, with more samples in the dataset available, the training result may improve.
### The generated TF Lite model
The [`tinymlgen`](https://github.com/eloquentarduino/tinymlgen) package, that has to be [installed with the Arduino libraries](https://www.arduino.cc/en/guide/libraries) in you computer, basically automates the process of converting TF model to its Lite version, then convert it to C++ (which you have to do all of these by yourself in the TinyML book).
The code will write the result (C++ code string) into a .h file. It should appear in the same directory of _Nano33ble\_voice\_trainer.py_, unless you changed the output path in the script.
_**\[tf\_lite\_model.h\]**_
```
#ifdef __has_attribute
#define HAVE_ATTRIBUTE(x) __has_attribute(x)
#else
#define HAVE_ATTRIBUTE(x) 0
#endif
#if HAVE_ATTRIBUTE(aligned) || (defined(__GNUC__) && !defined(__clang__))
#define DATA_ALIGN_ATTRIBUTE __attribute__((aligned(4)))
#else
#define DATA_ALIGN_ATTRIBUTE
#endif
const unsigned char model_data[] DATA_ALIGN_ATTRIBUTE = {0x1c, 0x00, ...
0x00, 0x07, 0x00, 0x06, 0x00, 0x00, 0x00, 0x00, 0x00, 0x00, 0x09};
const int model_data_len = 6972;
```
This file is the one to be used by the classifier below.
### Part 3: voice classifier
back to our Arduino, we have to upload the files that are available here: https://github.com/pmanzoni/docker4iot/tree/main/code/2/tinyML/Nano33ble_voice_classifier
Upload the files in the board (it would take a while to compile with a new TF model).
You can see that the classifier script collects voice data in the exact same way like the sampler script. The difference is that the classifier would feed those data to the model and get predictions.
Here is some example of the output:

### Final thoughts
Like mentioned before, it is complicated to maintain the same way of speaking words into the mic during the lengthy sampling and training process. Eventually, to get reliable results I ended up by recording my voice and play it. There is clearly a lot of room for future improvement.
However, this project successfully demonstrated that the Tensorflow Lite training/deployment process can be semplified down to total only 5 files, and everything can be done in Arduino IDE plus a standard Python environment. You can also train with your own voice/words and customize the neural network model in anyway you like.
## Edge Impulse
As you had the opportunity to see the process is anyway pretty long and with many details to be taken into consideration.
There is a new project, called [Edge Impulse](https://www.edgeimpulse.com), that allows to build a model in real-time using your phone’s accelerometer, microphone or camera to collect data and train machine learning algorithms, and see what happens live on the platform.

Moreover, general *Data forwarders* are easy to build. A data forwarder is used to relay data from any device to Edge Impulse over serial. Devices write sensor values over a serial connection, and the data forwarder collects the data, signs the data and sends the data to the ingestion service. The data forwarder is useful to quickly enable data collection from a wide variety of development boards without having to port the full [remote management protocol](https://docs.edgeimpulse.com/reference#remote-management) and [serial protocol](https://docs.edgeimpulse.com/reference#remote-mgmt-serial-protocol), but only supports collecting data at relatively low frequencies. Various boards are fully [supported](https://docs.edgeimpulse.com/docs/fully-supported-development-boards):
- [**Arduino Nano 33 BLE Sense**](https://docs.edgeimpulse.com/docs/arduino-nano-33-ble-sense)
- [OpenMV Cam H7 Plus](https://docs.edgeimpulse.com/docs/openmv-cam-h7-plus)
- [Arduino Portenta H7 + Vision shield](https://docs.edgeimpulse.com/docs/arduino-portenta-h7) (preview support)
- [ST B-L475E-IOT01A (IoT Discovery Kit)](https://docs.edgeimpulse.com/docs/unboxing-the-st-b-l475e-iot01a)
- [Eta Compute ECM3532 AI Sensor](https://docs.edgeimpulse.com/docs/eta-compute-ecm3532-ai-sensor)
- [Eta Compute ECM3532 AI Vision](https://docs.edgeimpulse.com/docs/eta-compute-ecm3532-ai-vision)
- [Himax WE-I Plus](https://docs.edgeimpulse.com/docs/himax-we-i-plus)
- [Nordic Semiconductor nRF52840 DK](https://docs.edgeimpulse.com/docs/nordic-semi-nrf52840-dk)
- [Nordic Semiconductor nRF5340 DK](https://docs.edgeimpulse.com/docs/nordic-semi-nrf5340-dk)
- [Silicon Labs Thunderboard Sense 2](https://docs.edgeimpulse.com/docs/silabs-thunderboard-sense-2)
And finally there is the "[Ingestion service](https://docs.edgeimpulse.com/reference#ingestion-api)" used to send new device data to Edge Impulse. It's available on both HTTP and HTTPS endpoints, and requires an API key to authenticate. Data needs to be sent in the [Edge Impulse Data Acquisition format](https://docs.edgeimpulse.com/docs/data-acquisition-format), and is optionally signed with an HMAC key. Data with invalid signatures will still show up in the studio, but will be marked as such, and can be excluded from training.
There are three endpoints available:
- `POST /api/training/data` \- for gathering training data.
- `POST /api/testing/data` \- for gathering testing data. If you have the 'Live classification' page open in your browser the file will automatically be classified against the current impulse.
- `POST /api/anomaly/data` \- for anomaly data from deployed devices.
For example, the code below, reads a block of `TRAINING_DS_SIZE` data from a TTN application and `POST` it to the `https://ingestion.edgeimpulse.com/api/training/data`.
```python=
import sys
import time
import base64
import json
import struct
import hmac, hashlib
import requests
import paho.mqtt.client as mqtt
TRAINING_DS_SIZE = 100
last_time = 0 # storing inter-data time
data_set = []
freq = []
# empty signature (all zeros). HS256 gives 32 byte signature, and we encode in hex, so we need 64 characters here
emptySignature = ''.join(['0'] * 64)
def upload_dataset(dset, int_ms):
API_KEY = "ei_b2fXXXXXXXXXXX822586d2c1a7257ff2d"
HMAC_KEY = "630b2100............a6e6b095bfc"
data = {
"protected": {
"ver": "v1",
"alg": "HS256",
"iat": time.time() # epoch time, seconds since 1970
},
"signature": emptySignature,
"payload": {
"device_name": "00:00:00:00:00:01",
"device_type": "TTN_ingestion_module",
"interval_ms": int_ms,
"sensors": [
{ "name": "temp", "units": "Cel" },
{ "name": "humi", "units": "%RH" }
],
"values": dset,
}
}
# encode in JSON
encoded = json.dumps(data)
# sign message
signature = hmac.new(bytes(HMAC_KEY, 'utf-8'), msg = encoded.encode('utf-8'), digestmod = hashlib.sha256).hexdigest()
# set the signature again in the message, and encode again
data['signature'] = signature
encoded = json.dumps(data)
print(encoded)
with open('dataset.json', 'w') as fjs:
fjs.write(encoded)
# and upload the file
res = requests.post(url='https://ingestion.edgeimpulse.com/api/training/data',
data=encoded,
headers={
'Content-Type': 'application/json',
'x-file-name': 'idle01',
'x-api-key': API_KEY
})
if (res.status_code == 200):
print('Uploaded file to Edge Impulse', res.status_code, res.content)
else:
print('Failed to upload file to Edge Impulse', res.status_code, res.content)
def on_connectTTN(client, userdata, flags, rc):
print("Connected to:", client._host, "port:", client._port, "returned code:", rc)
client.subscribe("+/devices/+/up", qos=0)
def on_messageTTN(client, userdata, msg):
global last_time
global data_set
global freq
# print("sisub: msg received with topic: {} and payload: {}".format(msg.topic, str(msg.payload)))
# Just consider values of lopysense2 sensor
if ("lopysense2" in msg.topic):
now_time = int(time.time_ns() / 1000000)
el_time = now_time-last_time
last_time = now_time
tmsg = json.loads(msg.payload)
temp = tmsg["payload_fields"]["temperature"]
humi = tmsg["payload_fields"]["humidity"]
# print("temperatura", temp)
# print("humidity", humi)
data_set.append([temp,humi])
freq.append(el_time)
print(len(data_set), [temp,humi], el_time)
if (len(data_set)==TRAINING_DS_SIZE):
freq.pop(0) # discarding 1st timing value
upload_dataset(data_set,int(sum(freq)/len(freq)))
with open('dataset.txt', 'w') as fds:
for ele in data_set:
fds.write(ele+'\n')
time.sleep(1)
sys.exit(0)
if __name__ == "__main__":
clientTTN = mqtt.Client()
clientTTN.on_connect = on_connectTTN
clientTTN.on_message = on_messageTTN
clientTTN.username_pw_set("lopy2ttn", password="ttn-account-v2.TPE7-bT_UDf5Dj4XcGpcCQ0Xkhj8n74iY-rMAyT1bWg")
clientTTN.connect("eu.thethings.network", port=1883, keepalive=60)
last_time = int(time.time_ns() / 1000000) # storing initial time
clientTTN.loop_forever()
```
But ... more on this in another session :)
