# GenEd 1049
## Setting up your Premiere project
## Just starting things off
you'll hear us say this again and again, but Premiere Pro has been built with the intent that every aspect of your editing is 100% in your control. unfortunately, this does mean that there's a small time investment to get your project started -- but once you have this down, everything starts to fall in place!
to start things off, I recommend deciding where you'll be storing all your media assets. You have the option to put it wherever, but for now **I recommend creating a dedicated folder on your desktop** and we'll be putting everything there.
This folder is going to contain:
* your footage
* your project file
* your auto-save files
* any cached render data
in the short-term, this will keep things nicely organized through the course of your project. In the long term, this can help keep your computer from inflating with all the cached files.
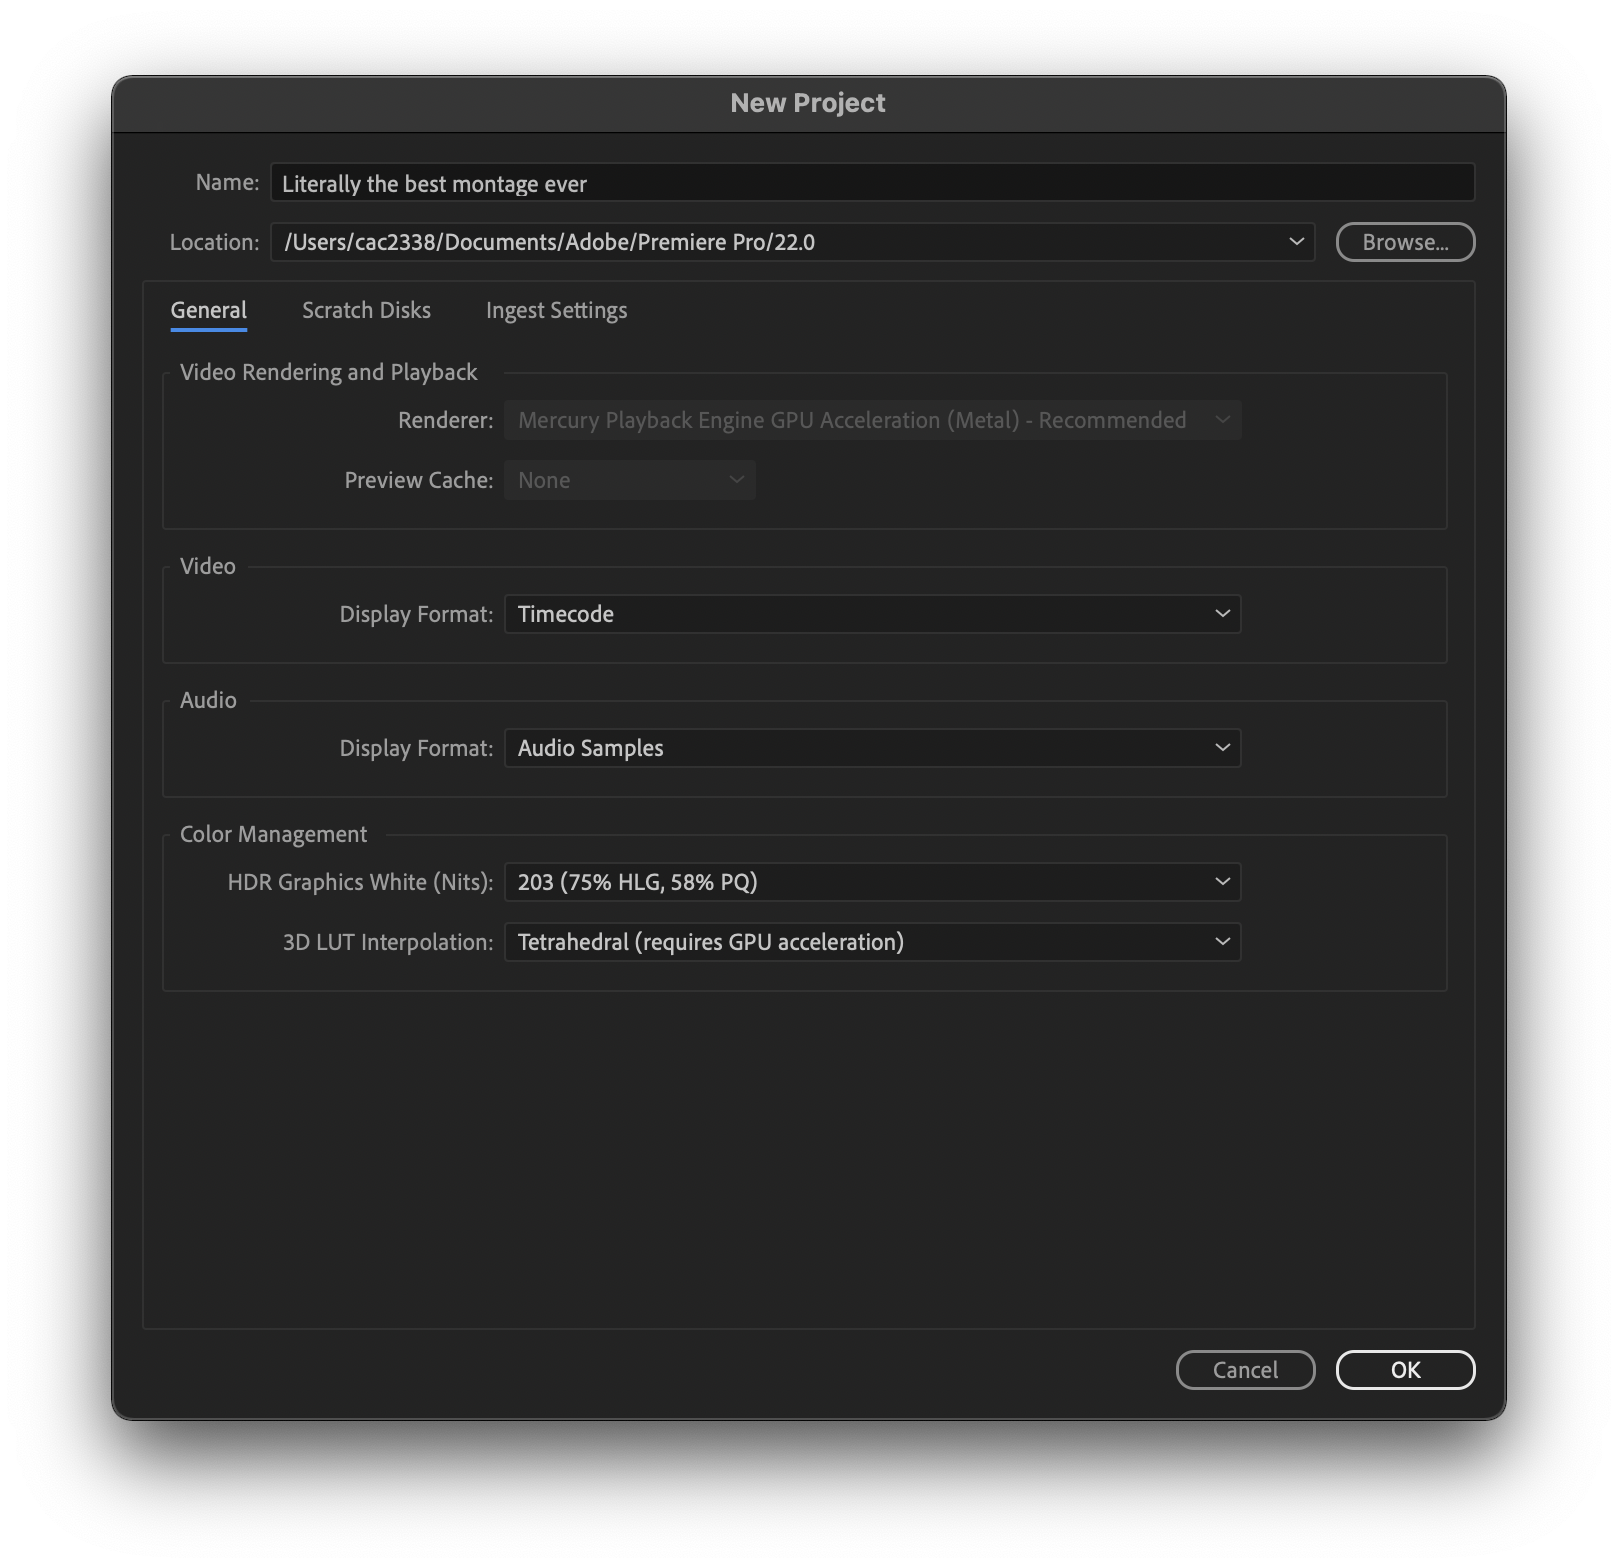
**once you have this folder created, start up Premiere and select New Project**
this is going to open up this interface, giving you the option to select that folder you already created.
**give it a name, select Browse, and choose your folder**
## setting up your workspace
in many ways, editing is a method of organizing moments in time into story, Premiere really takes this to heart. it gives you unlimited ways to customize your workspace, manage your workflow, and organize your footage.
the way we approach just about any technique in this tutorial is one of many. it's simply a good starting point, rather than the perfect option for you! so feel free to play around and find what makes sense.
**To start off, select the Editing workspace from your choices at the top**

this is going to rearrange the panes in your project -- you can absolutely do this manually. each pane can be expanded or shrunk, by just grabbing the edges of it. the workspace options at the top are simply an easy way to move them around.
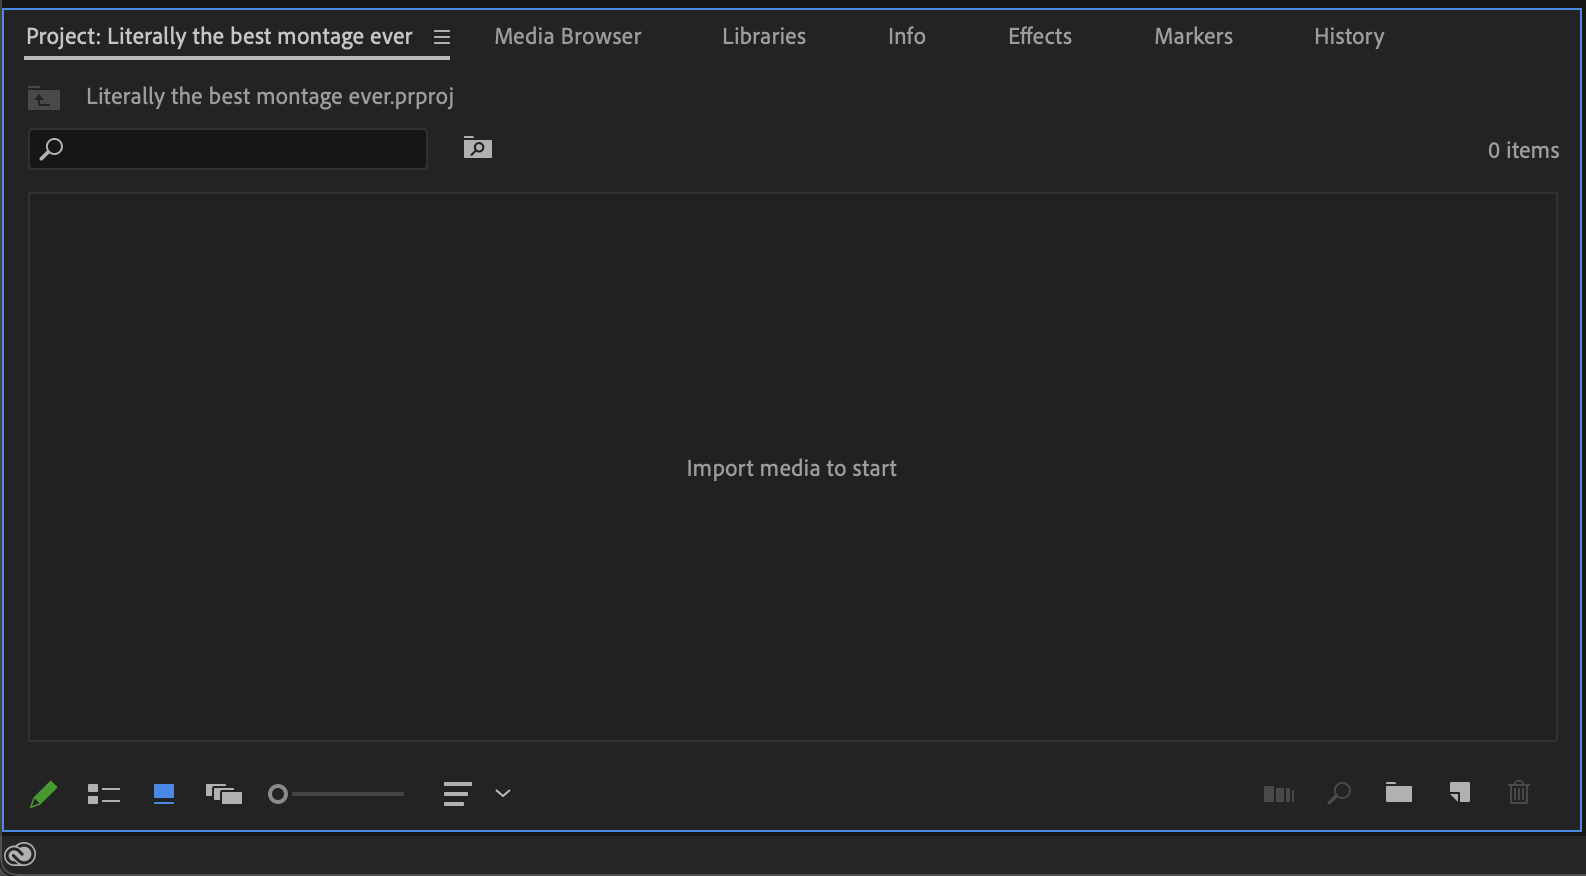
next up, navigate down to the Project browser -- this is going to be where your footage is "held".
**open up a Finder window, navigate to that footage folder, and drag all your footage from your Finder window into your Project pane**
now that you have footage in your project, you're just about good to go. the last thing you need is a timeline to start filling in.
**navigate to the top of the screen, File => New => Sequence**
if you simply hit *OK*, you'll have a 1080p sequence in 24fps. which should be fine for what you're making today. some footage may need to be scaled up to fit.
otherwise, you're good to start editing!
## Editing
### Ins and Outs
To create a clip from footage that you have imported, you will want to create "ins" and "outs." These are essentially markers that you can apply to the original footage in order to bring a shortened clip into your timeline. The "in" will be the marker that indicates when you want the clip to being and the "o" where you'd like the clip to end. In Premiere Pro, you press "i" to create an in and "o" to create an out. Then, you click on the image in the preview window (usually in the top left of the editing workspace) and drag the clip into your timeline.
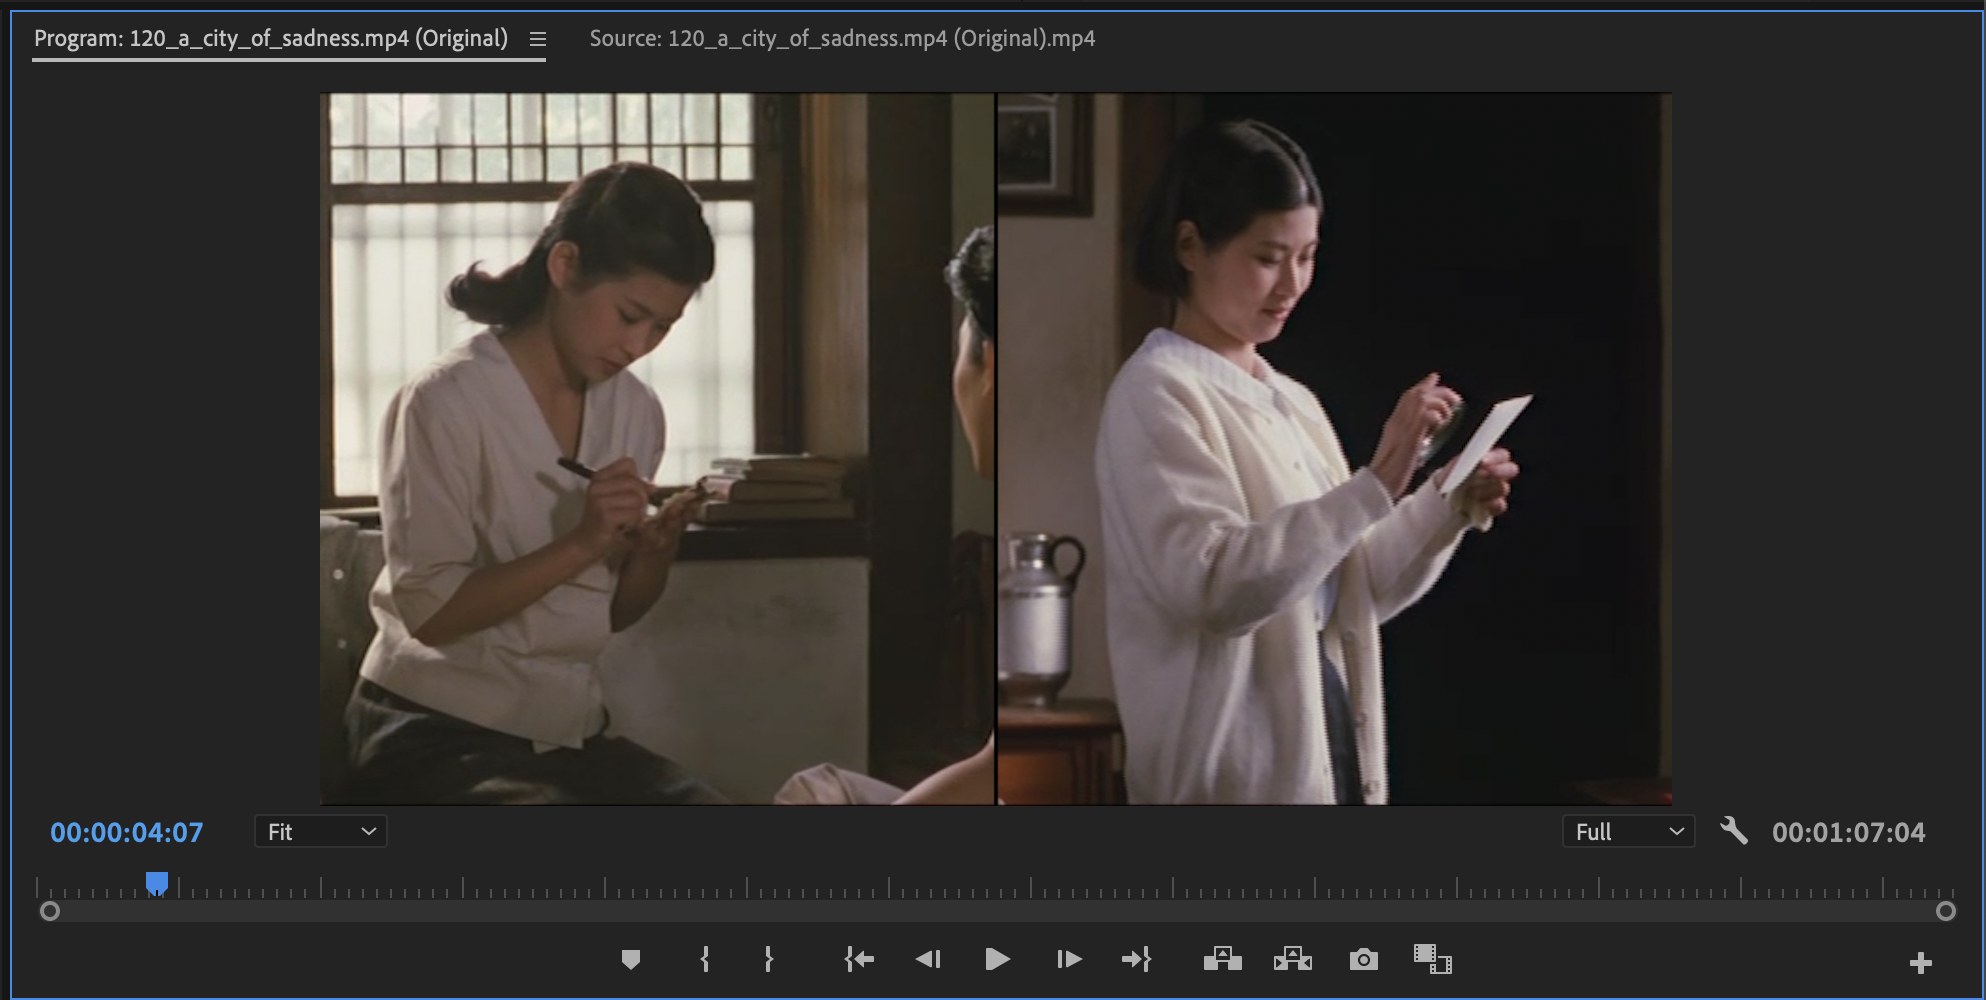
### Supercuts with split screens
As Professor Jie Li writes, a supercut "is very short video that combines multiple clips, often rapidly following one another, in sequence in order to draw connections and parallels between them." Using a split screen, which juxtaposes two images simultaneously, you can see interesting comparisons/contrasts, bring the viewer's attention to recurring motifs and other compositional and formal elements.
### Downloading from YouTube
By far the safest and most reliable way to download from YouTube is to use [youtube-dl](https://youtube-dl.org/), a simple command line tool.
To use it on Windows:
1. install [choco](https://chocolatey.org/install) if you don't already have it
2. `choco install youtube-dl`
3. then `youtube-dl "https://www.youtube.com/watch?v=dQw4w9WgXcQ"` or other URL
To use it on Mac:
1. install [homebrew](https://brew.sh/) if you don't already have it
2. `brew install youtube-dl`
3. then `youtube-dl https://www.youtube.com/watch?v=dQw4w9WgXcQ"` or other URL
If you want a specific format:
1. `youtube-dl -F [your/URL]` to see all formats so you can select the number of the format you want--let's say "22"
2. `youtube-dl -f 22 [your/URL]` to download
be sure to `cd /Users/me/Desktop/folder-i-want-my-stuff-in` first!
You can also use online methods at your own risk.
### Separating audio from visual tracks
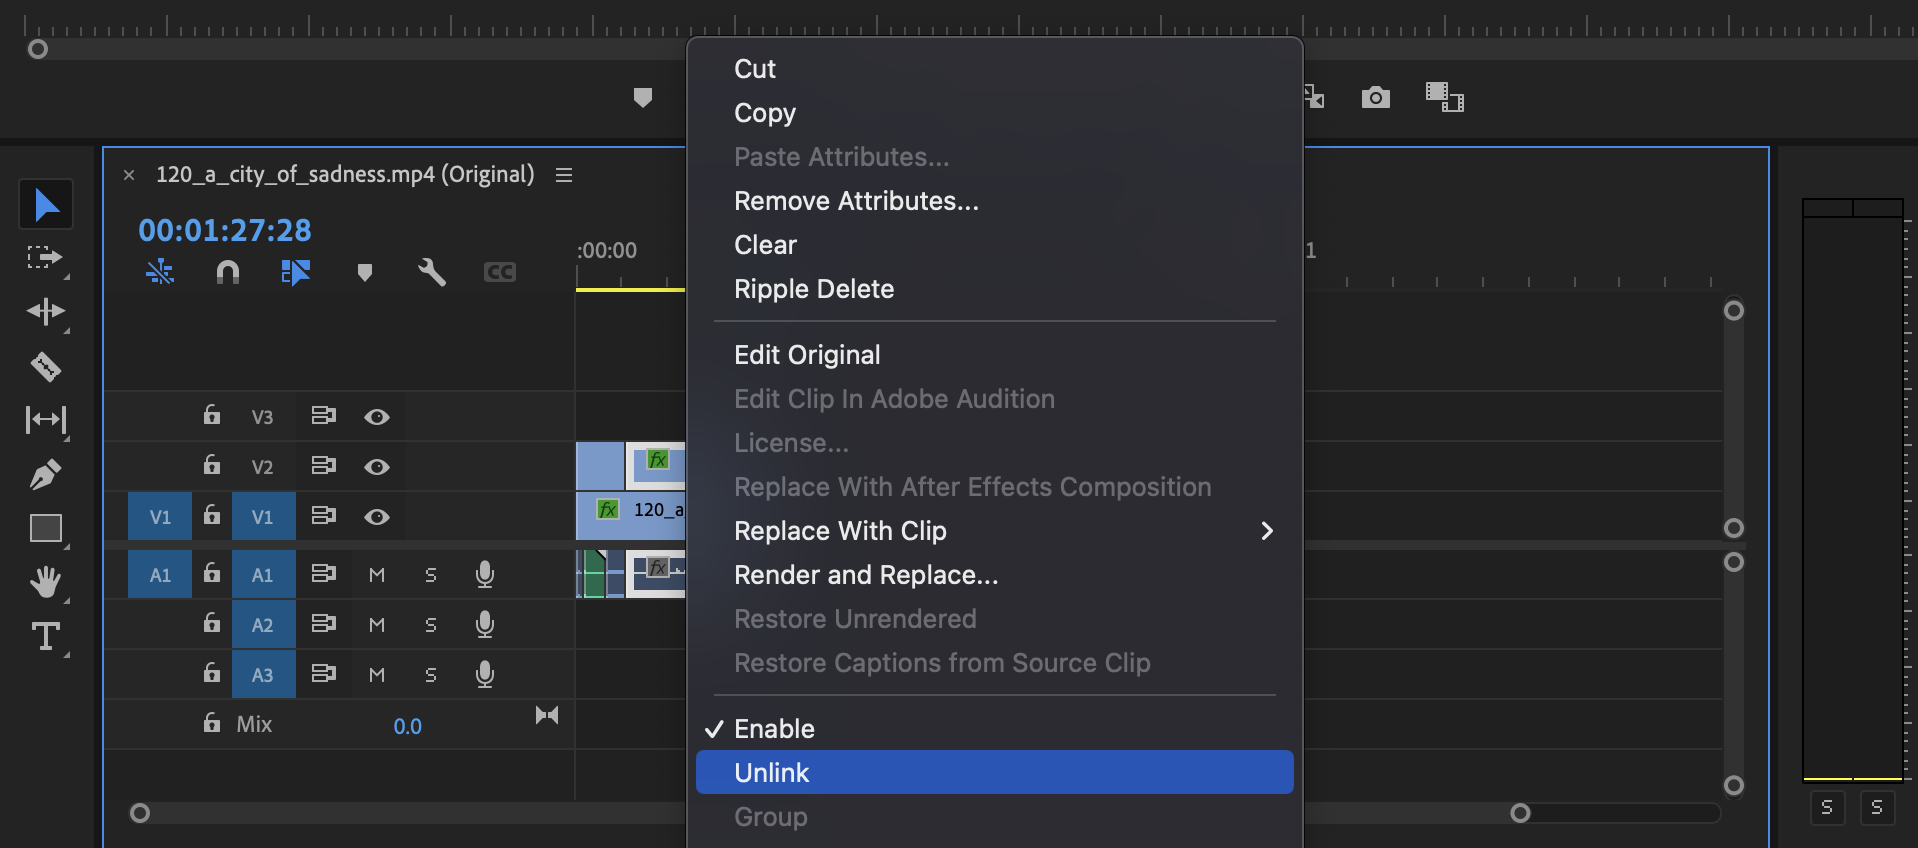
Separating the audio and visual tracks allows a film editor to pair a film clip with audio captured at a different point in time or in a different setting (and vice versa). In Premiere, you can "unlink" the audio from the visual tracks by right clicking the clip in your timeline and selecting "unlink."
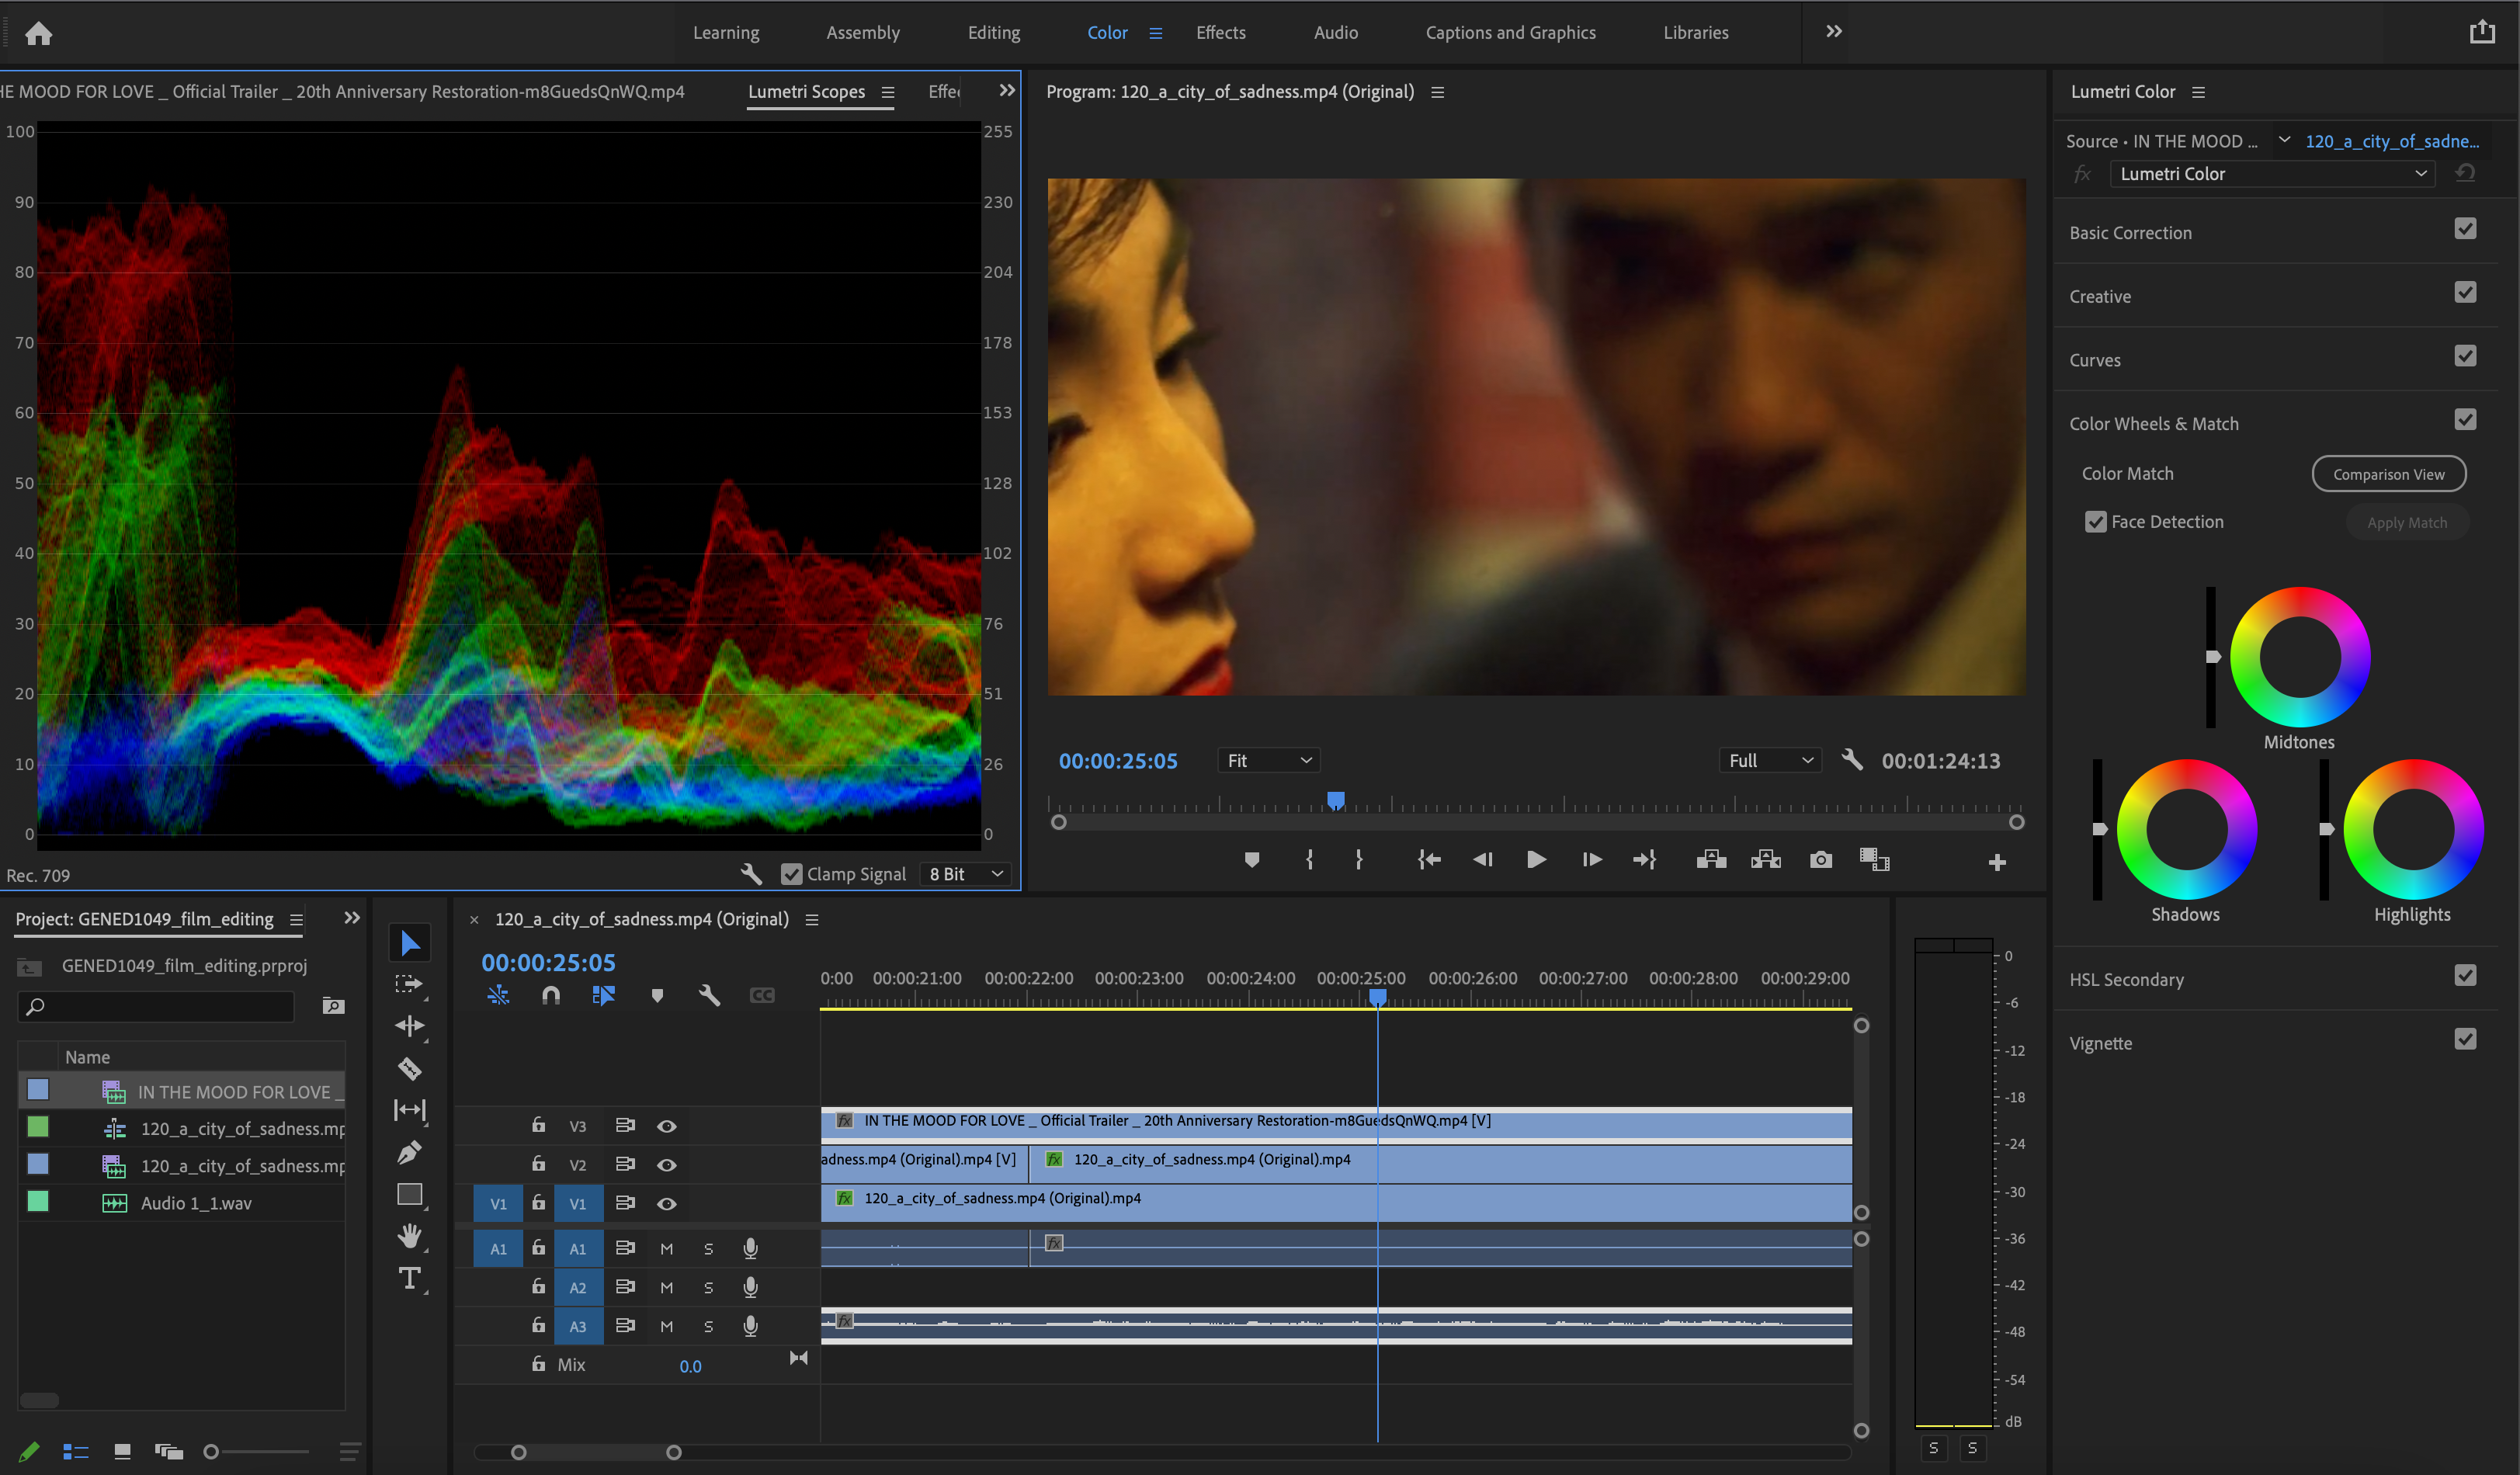
### Changing the color and/or speed of clips
You might find that you want to do color correction or to speed up or slow down an existing clip. These effects can foreground details in a scene in a visually compelling manner. In the clip from *In the Mood for Love* below, you can see that the red levels are quite high. Using the color grading workflow in Premiere helps you see these features in a different way than you would if you were watching the film.
## Resources for Adobe Premiere
[Setting up your Premiere project](https://hackmd.io/KyU9PqgJSZOPXd2bt9FPGw?both)
#### Premiere Keyboard Shortcuts
| Result | Mac OS | Windows |
| -------- | -------- | -------- |
| New Project | Opt+Cmd+N | Ctrl+Alt+N |
| Save | Cmd+S | Ctrl+S |
| Selection | V | V |
| Blade/Cut | C | C |
| In Point | I | I |
| Out Point | O | O |
| Play/Pause | Space | Space |
| Stop | K | K |
| Snap to Playhead (on/off) | S | S |
## Some Models
[Supercut of Ozu’s films](https://vimeo.com/55956937)
[Putting Ozu’s Tokyo Story on Zoom](https://www.youtube.com/watch?v=Gv0uVQ4o0_0)
[Every Frame a Painting about Kurosawa](https://www.youtube.com/watch?v=doaQC-S8de8)
 Sign in with Wallet


