## Objectives
- Sign up for **Webex** - take a tour!
- Register a new custom **Webex** 'integration' type application with Cisco
- Walk-through a sample application demonstrating how to authenticate with the **Webex** OAuth2 API from a browser-based JavaScript application
> Download the complete sample code project for this tutorial on GitHub.com [CiscoDevNet/webex-teams-auth-sample](https://github.com/CiscoDevNet/webex-teams-auth-sample)
## Overview
[**Webex**](https://www.webex.com/products/teams/index.html) is a cloud service providing persistent chat, room-based collaboration, WebRTC video conferencing, and more. Developers can easily integrate solutions with **Webex** via the [Webex REST API](https://developer.webex.com/docs/getting-started) - for example to add **Webex** messaging features to an app user interface, or to automate sending **Webex** messages to rooms based on business system or real-world events.
Application developers integrating with **Webex** that wish to use OAuth/SSO for authenticating users and performing API requests on their behalf must register their app via the Cisco **Webex for Developers** portal - defining the application name, permissions, and [OAuth2](https://datatracker.ietf.org/doc/html/rfc6749) redirect URL (more on this later). During registration, the system generates a **Client ID** and **Client Secret** pair, which are later used by the application to access the **Webex** OAuth2 authentication service. During this tutorial, you will create a new custom app registration, and generate a **Client ID** and **Secret**.
In this tutorial, we will examine a small sample HTML/JavaScript application that demonstrates how to perform a **Webex** OAuth2 authentication. We'll walk through some of the key concepts and code details, then use the app to generate a **Webex** API access token.
> Note, if your application does not need to 'impersonate' end users, and will only be performing **Webex** API calls on its own behalf, you may want to create a [**Webex 'bot'**](https://developer.webex.com/docs/bots), and use its access token, rather than implementing OAuth.
## Step 1: Sign up for **Webex** and take a tour
> If you already have a **Webex** account, skip to **Step 2**.
1. Sign-up for a [**Webex** account](https://cart.webex.com/sign-up). Note: you will need to access your email account, as **Webex** will send a 'You have a Cisco **Webex** account' email message with a 'Create Password' verification link - this must be completed in order to login to **Webex**.
2. Log in to [**Webex**](https://www.webex.com) and take a quick look around. Feel free to create a new space and invite a friend (note: they will need to complete the email verification step too.)
3. For more information on **Webex** features and benefits, check out: [https://www.webex.com/team-collaboration.html](https://www.webex.com/team-collaboration.html)
## Step 2: Registering a custom **Webex** integration
**Webex** developers can define new integrated applications by logging into the Cisco [Webex for Developers](https://developer.webex.com/?utm_source=Llab2&utm_medium=step2&utm_campaign=spark) web portal and providing a couple of details. Creating an app registration accomplishes a few things:
* Generates a unique application **Client ID** and **Client Secret**, needed to access the Webex authentication service
* Identifies the application's defined **scopes** (**Webex** service permissions)
* Specifies a **Redirect URI** for the application, where **Webex** OAuth2 authentication responses will be sent
> For more details on **Webex** OAuth2 authentication, see [Webex for Developers - Apps & OAuth](https://developer.webex.com/authentication.html?utm_source=Llab2&utm_medium=step2&utm_campaign=spark)
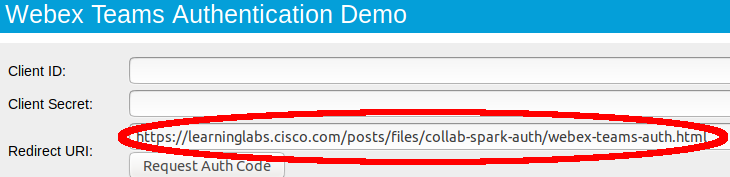
**1)** Determine the app's **Redirect URI**. The **Webex** OAuth2 flow will redirect the user's browser to a number of different sites and URLs during the authentication sequence. When complete, **Webex** will need a way to send the browser back to the custom web app (with the OAuth2 authentication code attached.) This is done by specifying a unique **Redirect URL** URL which points back to the web application. In our case, the URL for the web page itself will be re-used as the **Redirect URI**:
* Click on this link to open the [sample app](https://developer.cisco.com/learning/posts/files/collab-spark-auth/webex-teams-auth.html) in a new tab
* Copy the **Redirect URI** field value to the clipboard (the sample app detects this URL automatically)
**2)** Navigate to the **Webex for Developers** application registration page:
* Open a new browser tab, and navigate to the [Webex for Developers](https://developer.webex.com) page.
* If you like, click **Go to Docs** and take a tour of the **Webex** API docs.
* Log in.
* Once logged in, click on your avatar and select [My Webex Apps](https://developer.webex.com/my-apps)
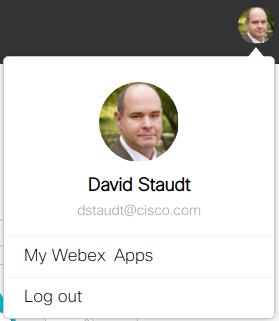.
* In the **Create a new App** page, click **Create an Integration**.
**3)** Complete the **New Integration** form with the following details, and then click **Add Integration**:
* **Integration Name** - Enter any application name you like (e.g., 'test app').
* **Icon** - Upload an icon image or choose one of the defaults (note the size requirements).
* **Description** - Enter any description you like.
* **Redirect URI(s)s** - Paste or enter the **Redirect URI** that was displayed in the sample app (see above).
* **Scopes** - Check the scope: `spark:rooms_read`.
**4)** Check the confirmation message, and note your application's generated **Client ID**, **Client Secret**, and the **OAuth Authorization URL**. You will use these later to perform the **Webex** authentication request. You can use this [note-box page](https://developer.cisco.com/learning/posts/files/collab-webex-auth/notebox.html) to copy/paste into temporarily.
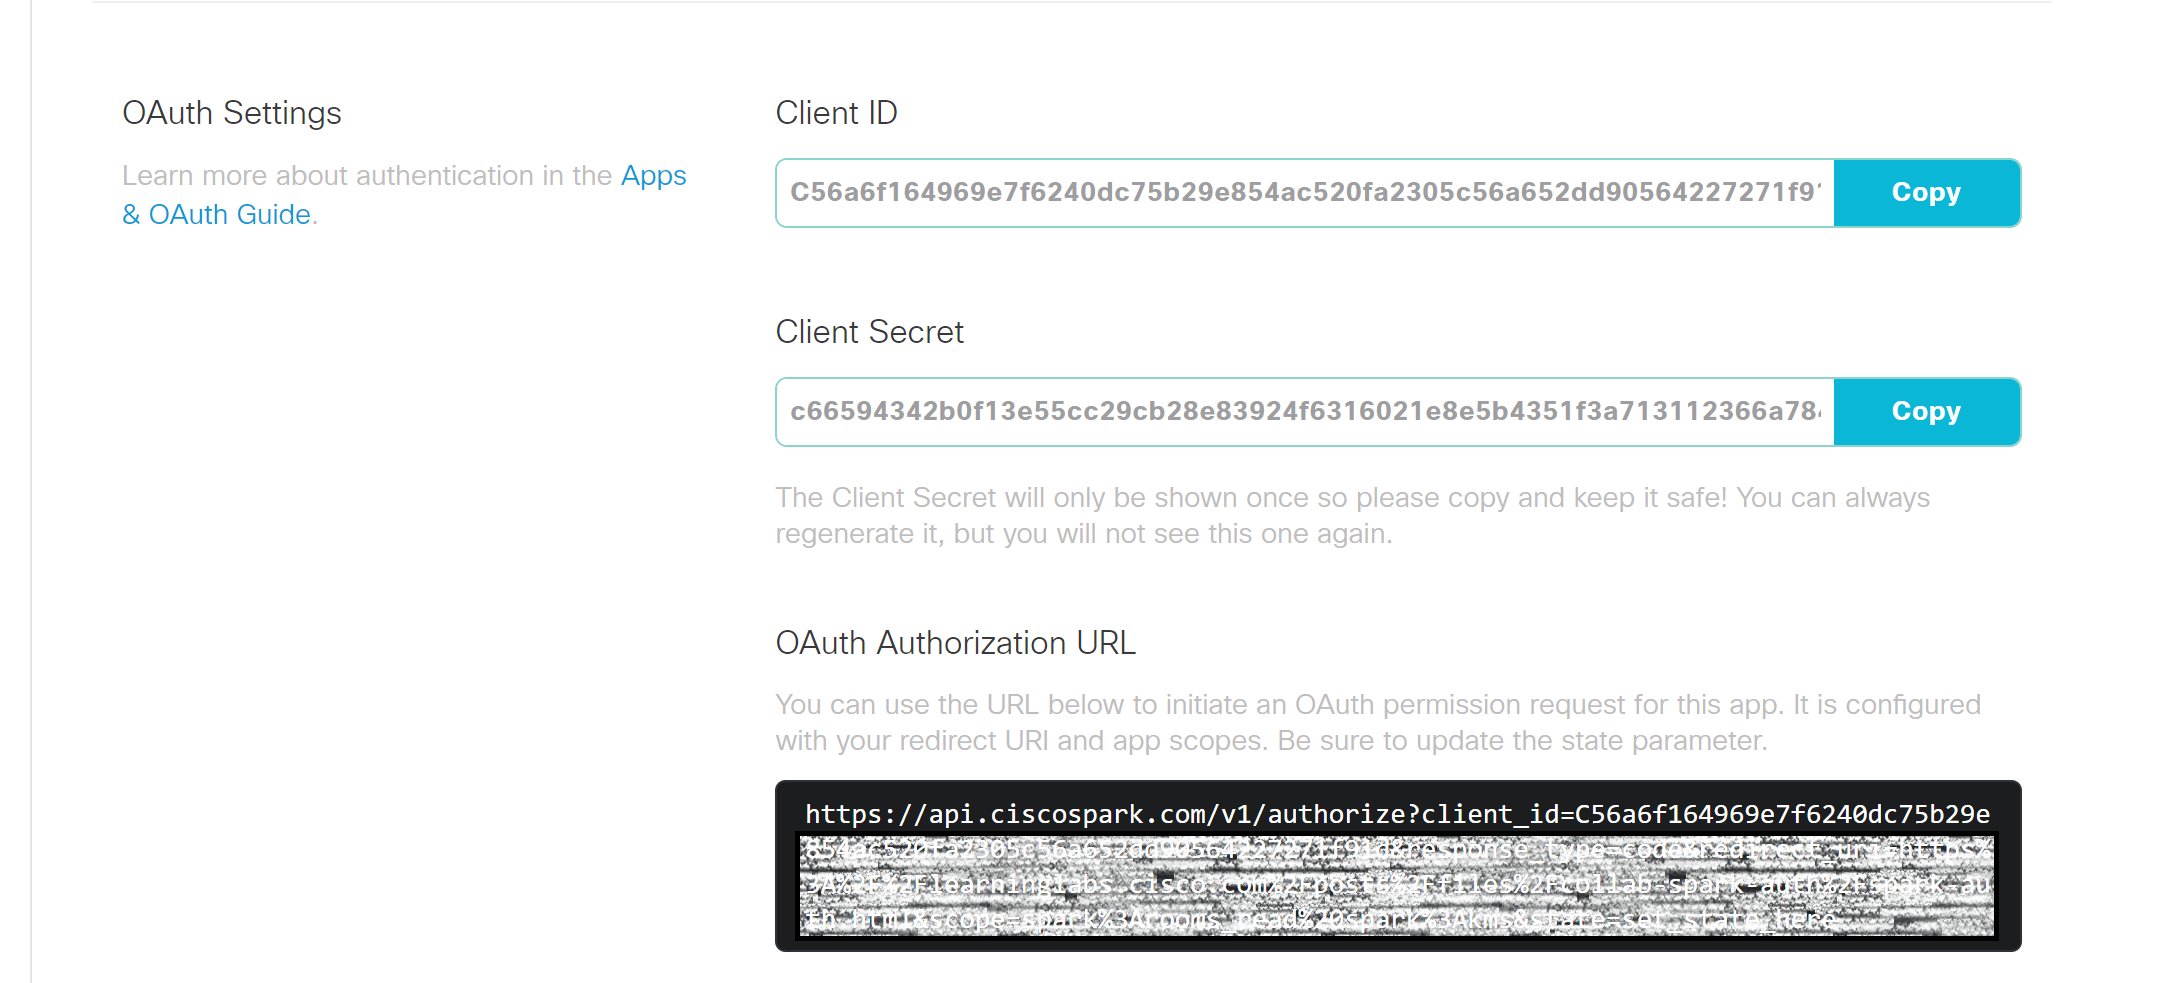
> Note: For production apps, record your **Client ID** and **Client Secret** in a safe place. The **Client Secret** will not be displayed again (though you can generate a new one).
## Step 3: Exploring the Webex sample oauth app code
> The complete sample code for this project is available on GitHub: [CiscoDevNet/webex-teams-auth-sample](https://github.com/CiscoDevNet/webex-teams-auth-sample)
Let's take a look at the source code of the sample app, and see how it works:
* Click here to open the sample code [GitHub source page](https://github.com/CiscoDevNet/webex-teams-auth-sample/blob/master/webex-teams-auth.html)
To complete the **Webex** authentication sequence, the application performs three main steps:
1. Builds an auth code request URL for the **Webex** OAuth2 `/authorize` service by concatenating your app's registration details, the requested **Webex** API permission scopes, and some other fixed fields. The app then redirects the browser to the auth code URL, where the user interactively logs in to **Webex**:
```javascript
//Build the request URL. The base URL and next 4 items are typically always the same for Webex Teams web apps
var requestUrl = 'https://webexapis.com/v1/authorize?' + //Webex Teams OAuth2 base URL
'response_type=code&' + // Requesting the OAuth2 'Authentication Code' flow
'scope='+ encodeURIComponent('spark:rooms_read') + '&' + // Requested permission, i.e. Webex room info
// The following items are provided by the developer in the source code/config or generated dynamically at run time
'state=' + encodeURIComponent(randomString(63)) + '&' + // Random string for OAuth2 nonce replay protection
'client_id=' + encodeURIComponent(appClientId) + '&' + // The custom app Client ID
'redirect_uri=' + encodeURIComponent(appRedirectUri); // The custom app's Redirect URI
window.location = requestUrl; // Redirect the browser to the OAuth2 kickoff URL
```
([view on GitHub](https://github.com/CiscoDevNet/webex-teams-auth-sample/blob/master/webex-teams-auth.html#L33))
2. After **Webex** authenticates the user, the service redirects the browser back to the application's registered **Redirect URI** (in this case, the same URL as the original sample app page) attaching the requested OAuth2 auth code as a URL parameter. When the page's `window.onload` event fires, it checks for the presence of the auth code URL parameter, and displays it in the 'Auth Code' input field:
```javascript
var params = parseQueryStr(window.location.search.substring(1)); // Parse the query string params into a dictionary
if (params['code']) { // If the query param 'code' exists, then...
document.getElementById('code').value = params['code']; // Display the auth code
document.getElementById('tokenButton').removeAttribute('hidden'); // Reveal the 'Request Access Token' button
}
```
([view on GitHub](https://github.com/CiscoDevNet/webex-teams-auth-sample/blob/master/webex-teams-auth.html#L49))
3. Finally, the app creates a JavaScript XMLHttpRequest object, builds a JSON request object (which includes the obtained auth code), the app **Redirect URI**, and some other fixed fields. It then submits the request to the Webex `/access_token` service to exchange for a **Webex** API access token. If successful (`xhttp.status == 200`), the access token is displayed in the 'Access Token' field:
```javascript
xhttp = new XMLHttpRequest(); // Create an AJAX HTTP request object
xhttp.onreadystatechange = function() { // Define a handler, which fires when the request completes
if (xhttp.readyState == 4) { // If the request state = 4 (completed)...
if (xhttp.status == 200) { // And the status = 200 (OK), then...
var authInfo = JSON.parse(xhttp.responseText); // Parse the JSON response into an object
document.getElementById('token').value = authInfo['access_token']; // Retrieve the access_token field, and display it
} else alert('Error requesting access token: ' + xhttp.statusText)
}
}
xhttp.open('POST', 'https://webexapis.com/v1/access_token', true); // Initialize the HTTP request object for POST to the access token URL
// Build the HTML form request body
var body = 'grant_type=authorization_code&'+ // This is an OAuth2 Authorization Code request
'redirect_uri='+encodeURIComponent(appRedirectUri)+'&'+ // Same custom app Redirect URI
'code='+encodeURIComponent(document.getElementById('code').value)+'&'+ // User auth code retrieved previously
'client_id='+encodeURIComponent(appClientId)+'&'+ // The custom app Client ID
'client_secret='+encodeURIComponent(appClientSecret); // The custom app Client Secret
xhttp.setRequestHeader('Content-Type', 'application/x-www-form-urlencoded'); // Sending the content as URL-encoded form data
xhttp.send(body); // Execute the AJAX HTTP request
```
([view on GitHub](https://github.com/CiscoDevNet/webex-teams-auth-sample/blob/master/webex-teams-auth.html#L66))
## Step 4: Retrieve a **Webex** access token
We should now be ready to try out the sample app using your new **Webex** application registration info to log in and generate an access token:
1. Make sure the following are ready:
* **Webex** user account email and password
* Application **Client ID**
* Application **Client Secret**
* Application **Redirect URI**
* The authentication [sample app](https://developer.cisco.com/learning/posts/files/collab-spark-auth/webex-teams-auth.html) is open
2. Using the sample app, login and request the **Webex** auth code:
* Copy and paste the application **Client ID**, into the appropriate field (Client Secret is not needed in this step)
* Click **Request Auth Code**, then follow the directions shown in the sample app to view/confirm the requested application permissions, and log in. When finished, the sample app page should reload and populate the 'Auth Code' field.
3. Exchange the auth code for the **Webex** API access token:
* Copy and paste the application **Client ID** (once again), and **Client Secret** into the appropriate fields
* Click **Request Access Token**
The access token should be displayed in the 'Access Token' box.
Note that (while not displayed in this sample app), some additional info - such as token expiration info and a refresh token - is also included in the response. For example:
```json
{
"access_token": "XXXXX"
"expires_in": 1209599
"refresh_token": "YYYY"
"refresh_token_expires_in": 7775082
}
```
This info shows that the **Webex** API access token expires in just under 14 days (1209599 seconds.) After that time, the application can use the `refresh_token` to obtain a new access token. The refresh token itself is good for about 90 days, renewed whenever it is used to retrieve an access token.
> See the [Integrations and OAuth](https://developer.webex.com/docs/integrations) page for more details on refresh tokens.
## Step 5: Check your work!
Let's take the access token you just retrieved and test it using the **Webex** interactive documentation to see if it is working as expected. You can use this [note-box page](https://developer.cisco.com/learning/posts/files/collab-webex-auth/notebox.html) to copy/paste the access token from the sample app form into temporarily.
**1)** Use the access token to list your **Webex** rooms.
* Navigate to the **Webex** interactive documentation page for [**List Rooms**](https://developer.webex.com/docs/api/v1/rooms/list-rooms).
* Make sure you are logged in, and have enabled the .
* In the **Headers** section, note the `Authorization` field. This field contains the string `Bearer`, a space, and then an access token. By default, the interactive documentation automatically populates the field with your personal developer token based on your login. In this case we want to replace that default token with the access token generated using the OAuth sample app.
* Toggle **Use personal access token** to clear the pre-populated access token.
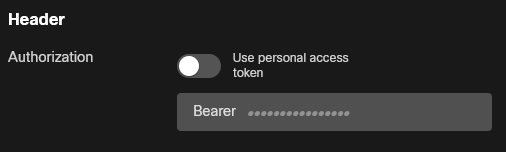
* Paste the access token from Step 4 after `Bearer`, followed by a space.
* Be sure and preserve capitalization and the space after `Bearer`.
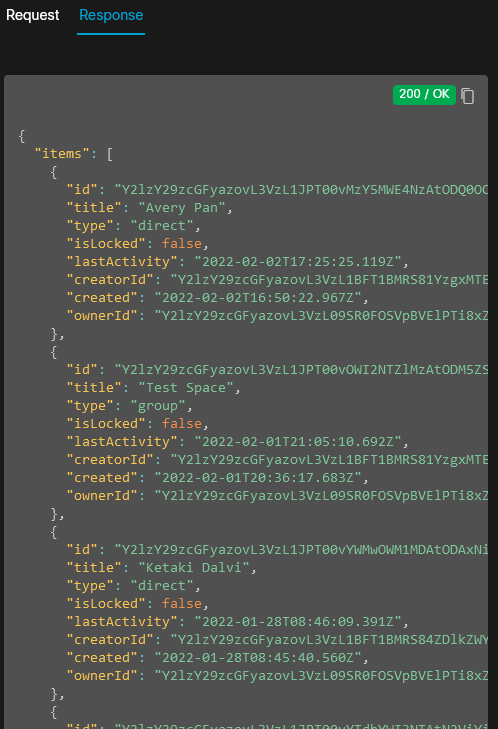
* Click 
* **Results:** If all went well, in the response output window you should see a `Response 200/OK` result, and a JSON-format array of room details:
**2)** Try to access data from the **Webex** `/people/me` resource
* Visit the **Webex** interactive documentation page for **Get My Own Details** for ['me'](https://developer.webex.com/docs/api/v1/people/get-my-own-details), i.e. the user associated with the access token
* As above, toggle **Use personal access token** to clear the pre-populated access token, and paste the access token obtained via the sample app.
* Click 
* **Results:** In this test, the expected result is actually a failure response, i.e. a `Response 403/Forbidden` message:
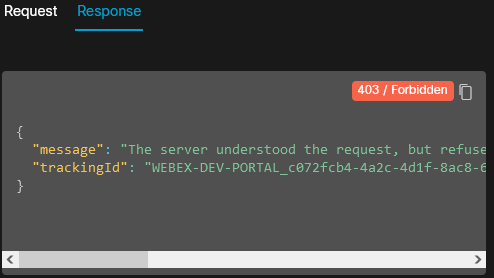
Note, an 'Forbidden' result is expected here, because when the sample app obtained its access token from the **Webex** service, it only requested the `spark:rooms_read` authorization scope. This means that the access token returned by **Webex** will only allow read (**GET**) requests from the `/rooms` API resource. As the test above attempts to read info from the `/people` resource, the request is rejected.
If desired, the sample app could be updated to also include the `spark:people_read` scope to allow making API requests for the `/people` resource by updating this line of code:
```javascript
'scope='+ encodeURIComponent('spark:rooms_read spark:people_read') + '&' +
```
([view on GitHub](https://github.com/CiscoDevNet/webex-teams-auth-sample/blob/master/webex-teams-auth.html#L36))
 Sign in with Wallet


