# Robocon Advanced Tutorial - FreeRTOS
> Author: Danny Lau(kkdlau@connect.ust.hk) & Chalex(cwchanbm@connect.ust.hk)
[TOC]
## Background
### `HAL_Delay()`
Back in tutorial, we have asked you to avoid using `HAL_Delay()`.
The reason for that being `HAL_Delay()` will freeze your entire program and not executing any code during that time.
These is not only not efficient as you are wasting your computational power during that frozen period, it could cause serious bugs if not used properly.
One example of dangerous use of `HAL_Delay()` would be about performing PID on your motor. Imagine if all of a sudden you freeze the entire program with `HAL_Delay()` while you are controlling the motor, the motor might go crazy.
### `HAL_GetTick()`
To tackle some of the problem with `HAL_Delay()`, you might have used `HAL_GetTick()` and while loops to enclose the code segment to continuously execute your code.
```c=
uint32_t last_ticks = HAL_GetTick();
const uint32_t exec_ticks = 100;
while (HAL_GetTick() - last_ticks < exec_ticks) {
/**
* Code here will be executed continuously
* for greater or equal than 100 ticks
*/
}
```
Another usage of `HAL_GetTick()` with if statements you may do is to schedule codes being executed within a while loop (e.g. send CAN cmds to the ESCs for every 2ms).
```c=
volatile uint32_t last_ticks = HAL_GetTick();
const uint32_t interval_ticks = 100;
while (1) {
if (HAL_GetTick() - last_ticks > interval_ticks) {
/**
* Code here will be executed once for every 100
* ticks
*/
last_ticks = HAL_GetTick();
}
}
```
Some of you may even combine the 2 above usages and use `HAL_GetTick()` to act as a non-freezing `HAL_Delay()`.
```c=
volatile uint32_t last_ticks = HAL_GetTick();
const uint32_t exec_ticks = 100;
while (1) {
while (HAL_GetTick() - last_ticks < exec_ticks) {
/**
* Code here will be executed normally until the 100 ticks hit
*/
}
last_ticks = HAL_GetTick();
delayed_function(); // Will be executed for every 100 ticks
}
```
> **Assumption**:
> The code in the while loop takes less or equal than 1 tick to be executed.
#### Problems
Although these ways of using `HAL_GetTick()` are functional, there are several problems with this implementation:
1. Incomprehensible: It looks ugly
2. Error-Prone: You might have bugs if you got multiple `last_ticks` name
3. Unmanageable: You have to care about code and runtime management once there are multiple of these
### Our Solution
**Multi-Threaded Programming** with RTOS(Real-Time Operating System).
## Terminology / Concept
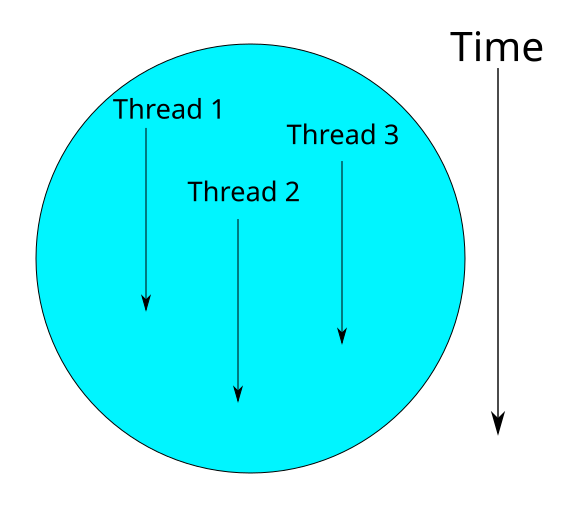
### Thread
A thread is a function that will take a considerable amoount of time to execute, or even never reaching the end of execution (i.e. never die). A thread can run with other threads concurrently, or scheduled such that they run in a specific order. In RTOS, thread is also called a **task**.
### Single-core processor
Some of you guys might know a lot about computers and so have heard of the concept of cores in CPUs. For example, you could be using an Intel I7 Processor with 4 cores or an Apple M1 Max with 10 cores.
Similarld to the world of computers, embedded system MCUs also have the concept of cores. However, most of the MCUs that we will be using are single-core processor. This means that there can only have 1 thread running on the MCU concurrently.
### Scheduling
To have multiple tasks handled on the same MCU while running 1 concurrent task, we need a way of scheduling. It essentially means we have to allocate tasks with the MCU to optimize tasks handling.

For example, at t = 0, $P_2$ is executing on MCU, and at time = 1, $P_2$ gives up the execution on MCU and $P_5$ starts executing on MCU. By switching in between different tasks in a split of time, MCU can perform multi-threading and you won't notice that there is a pause for the tasks.
However, there is a problem - $P_1$ takes lots of time to execute. And if $P_1$ is scheduled to run at t = 0, then other tasks which only requires less MCU cycle has to wait for $P_1$. In fact, it will be better for $P_2$ and $P_4$ to execute first such that the average waiting time can be minimize.
Therefore, we introduce scheduling algorithm to solve this kind of problem. In Robocon, we use priority-based scheduling algorithm. Each thread is given with a **priority**, and the threads are executed according to the priority.
**The priority is ranging from 1 to 4**, where 4 is the highest priority. We assign the thread according to the importance of the task.
For example, we usually give peripheral communication the highest priority because we don't want the robot disconnect with the controller. On the other hand, if we have a logging thread, we want it to have a lower priority as it is not a main task to be handled.
### Interrupt
Threads will keep switching such that tasks can execute concurrently. When a thread needs to execute, an **interrupt signal** will be generated, MCU will receive the interrupt signal and **pause the current thread**. After that **an interrupt handler is called** and it will **wake up another thread** to execute.
Interrupt mechanism allows us to pause the current thread (you can generate interrupt signal in our program), and switch to another thread.
### Inter-thread Communication
In RTOS, some of the inter-thread communication is done by using a shared queue (**thread-safe**). While thread A is pushing data into the queue, and thread B is also taking data from the queue.

**In most the case**, you can make a global variable and share the variable for different threads, but this is not a **thread-safe** approach. In some cases, for example, thread A is reading the variable, and thread B is writing the variable. The order of r/w matters as different orders will lead to different execution result. Therefore, sharing global variable is **not thread-safe** but it works for most of the cases.
## Programming in FreeRTOS
### Thread Structure
```c=
void led_blinky(void *par) {
GPIO led = (GPIO)par;
uint32_t last_ticks = get_ticks();
uint32_t interval = 100;
led_init(led);
while (1) {
delay_until(last_ticks, interval);
gpio_toggle(led);
}
}
```
Threads are implemented as C functions. The only thing special about them is their prototype, which must **return void** and **take a void pointer parameter**.
:::info
**Void Pointer**
A void pointer doesn't mean a pointer that points to void type data. Instead, it means a pointer that points any type of data.
Example(You can't run this code in the board):
```c=
#include <stdio.h>
float increment(void* v) {
// void pointer can cast whatever type of pointer you want
return *((float*)v) + 1.0f;
}
int main(void) {
float f = 1.0f;
// you don't need type casting in here
printf("%f + 1 = %f", f, increment(&f));
return 0;
}
```
:::
Each task has an entry point, and will run forever within an infinite loop afterwards, meaning it will never stop or exit. They must not contain a `return` statement and must not be allowed to execute past the end of the function. If a task is no longer required, it should instead be explicitly deleted by calling `vTaskDelete(NULL)`.
> However, in Robocon, we seldom delete tasks as it is often not necessary.
### Create Thread Control Struct
Before creating a thread, we have to create a thread control struct to manage all thread-related information regarding the thread. To create the control struct, use `DEFINE_THREAD`:
```c
// os.h
DEFINE_THREAD(TaskName, Function)
```
For example, we have a thread function `led_blinky`, which is in charge of controlling LED, so we can create a thread control struct:
```c
DEFINE_THREAD(led_task, led_blinky);
```
### Create Thread
After we have created a thread control struct, we can create a thread instance and add it to the schedular:
```c
os_create_thread(ThreadControlStruct, Parameter, Priority)
```
#### Example
```c
os_create_thread(led_task, LED1, 1);
```
As we have discussed before, we are using a priority-based scheduling algorithm to schedule the execution order of each thread, therefore we have to assign priority to each thread.
Apart from that, since each thread has a void pointer parameter, that means a thread accepts a parameter. Therefore, we can pass the parameter when we create the thread. In this example, `LED1` is passed to `led_blinky`, and we can receive `LED1` by `par`.
If you want to pass data to the thread after the initialization of the thread, you should **use thread-safe approachs** as we discussed before, or use global variables in simple cases.
We won't discuss the details of using queue at this point since you won't need it for most of the time. However, **I do encourage you to learn more** if you have time. You can read the code (e.g. `adc_board.h`) and understand how to use it. I have also put down references as they are written by the officials and the concepts are explained very clearly.
### Complete Example
```c=
#include "main.h"
#include "board.h" // a header file with all pin layout
void led_blinky(void *par) {
GPIO led = (GPIO)par;
uint32_t last_ticks = get_ticks();
uint32_t interval = 100;
led_init(led);
while (1) {
delay_until(last_ticks, interval);
gpio_toggle(led);
}
}
DEFINE_THREAD(led_task, led_blinky);
int main(void) {
led_init(LED1); // in fact it just GPIO_init
os_create_thread(led_task, LED1, 1);
os_tasks_start();
while (1) {} // Never reach here
}
```
## In-class Activity
Let's have a taste of programming with RTOS - we used LED thread as the example and we mentioned inter-thread communication. In the Robocon library, we pre-defined `buttons_handler` thread, which is in charge of updating physical buttons on the board, and remote controllers.
```c=
// controller.c
void buttons_handler(void *par) {
uint32_t last_ticks = get_ticks();
board_buttons_init();
rc_construct_buttons(&cp, cp_listeners);
rc_construct_buttons(&garuda, gar_listeners);
/*--- main board btn listeners ---*/
BTN_MID.button_clicked_listener = btn_mid_listener;
BTN_DOWN.button_clicked_listener = btn_down_listener;
BTN_UP.button_clicked_listener = btn_up_listener;
/*--- end of main board btn listeners ---*/
while (1) {
delay_until(last_ticks, RC_DELAY);
board_buttons_update();
rc_buttons_update(&cp);
rc_buttons_update(&garuda);
}
}
```
It's time to read the library on your own and try to understand the library. `buttons_handler` involves two important C Programming skills: **Function Pointer** and **X-Macro**. Make sure you have learned these two concepts before you start reading the button library. If you have any question, feel free to ask us. Don't be shy to ask questions, asking questions don't mean you are stupid lol.
After reading the library, try to program the button thread to control the LED thread. There are no restrictions on what you should program, as long as you are using the button thread to control the LED thread then it will be ok.
### Example
- When Button 1 is pressed, lights up the LED in sequence
- LED1 -> LED2 -> LED3 -> turn off all LEDs -> LED1 -> LED2 ...
- When Button 1 is not pressed, turns off all LEDs.
## References
* Please be reminded that we have modified the names and usage of the main function in FreeRTOS, you can learn the concepts from online but not the exact usage in Robocon.
* [Mastering the FreeRTOS™ Real Time Kernel](https://www.freertos.org/fr-content-src/uploads/2018/07/161204_Mastering_the_FreeRTOS_Real_Time_Kernel-A_Hands-On_Tutorial_Guide.pdf): A very good document for understanding and learning FreeRTOS. We provieded some higher-level functions such that you can start with RTOS easily. If you have difficulty on using the higher-level functions, reading this document may give you better understanding since you will understand how we implement those functions.
* [Inter-task Communication Using Queue](https://www.freertos.org/Embedded-RTOS-Queues.html)
 Sign in with Wallet


