# Interplanetary File System (IPFS).
:::info
#### Table of Contents
[TOC]
:::
# Licence.
```
Copyright (C) DECENTRALIZED CLIMATE FOUNDATION A.C.
Permission is granted to copy, distribute and/or modify this document
under the terms of the GNU Free Documentation License, Version 1.3
or any later version published by the Free Software Foundation;
with no Invariant Sections, no Front-Cover Texts, and no Back-Cover Texts.
A copy of the license is included in the section entitled "GNU
Free Documentation License".
```
## Preface.
Since the advent of the blockchain, several alternative solution for de-centralized system, have been proposed for various purposes. This vigorous and enthusiastic support from the community is strengthening the notion of de-centralized system. Here are some prominent contributions. Interplanetary File System IPFS, that aims to address a de-centralized data storage problem and a hashgraph, that aims to solve the decentralized consensus problem.
## Decentralized model for file system.
Think about this, a blockchain is fundamentally a decentralized system. Alternatively, a decentralized peer-to-peer system can be realized independent of a blockchain.
Interplanetary Files System (IPFS), is a fine example of such a system. IPFS is a decentralized model for file transfer in contrast to centralize namespace and transfer provided by HTTP family of protocols. HTTP or Hypertext Transfer Protocol operates in a centralized hierarchical namespace.
For example, a website is identified by http://www.facebook.com, where each item is resolved hierarchically by the Domain Name Service, DNS. Peer-to-peer transfer of data is not new, it has been an age-old quest. Recall the Napster and Gnutella media sharing services, and the Bittorrent service that is underlying many of our current data seeming services. Juan Benet, the creator of IPFS, described IPFS it is whitepaper as Content Addressed, Versioned, P2P file system.
Once again, similar to Bitcoin, IPFS leverages, combined many successful peer-to-peer system ideas. These ideas are:
1. Global distributed file system, IPFS is about distribution decentralization.
2. Content-based identification using secure hash of contents as a file location identifier, and resolving locations using Distributed Hash Table (DHT).
3. Block exchanges using popular Bittorrent based peer-to-peer file distribution protocol.
4. Incentivized block exchange using Bitswap protocol.
5. Merkel DAG, Directed Acyclic Graph, version-based organization of files, similar to Git version control system.
6. Finally, self-certification of storage node servers for security.

Img. 1 High level view of the architecture of IPFS.
Files are located in a distributed system. A distributed hash table maintains a location of the files. Application use the hash as the key in the DHT that returns the location of the file. Once the location of the file is determined, the peer-to-peer transport takes place. Ilustrated in Img. 2.

Img. 2 Hash Table.
The nodes of computers that hold the decentralized file objects that formed the global file system. They hold the objects that formed the files to be exchanged. Nodes are identified by cryptographic hashes of its public key. This is similar to blockchain nodes. File objects are identified by a secure hash and any object may contain sub-objects, each with its own hash that is used in the creation of the root hash of the object. Ilustrated in Img. 3

Img. 3 Distribution.
In the current world wide web protocol, we typically refer to a web resource or a data by the server on which they are stored. For example, https://www.unam.edu.na/ actually refers to the server on which the UNAM page is hosted, and to a particular directory and file on that server. This is a centralized approach. IPFS offers a decentralized solution for this. IPFS identify the resources? with hash. Instead of identifying the resource by its location as an HTTP, IPFS identifies the resource by its content or by the secure hash of its contents. In this case, the file is addressed by a universally unique identifier instead of by its location.
## How to install IPFS.
### Linux.
1. Open the terminal and update the system packages:
```linux
sudo apt-get update
```
2. Download the IPFS package from the IPFS downloads page:
```linux
wget https://dist.ipfs.io/go-ipfs/v0.10.0/go-ipfs_v0.10.0_linux-amd64.tar.gz
```
3. Extract the downloaded package:
```linux
tar xvfz go-ipfs_v0.10.0_linux-amd64.tar.gz
```
4. Navigate to the newly extracted directory:
```linux
cd go-ipfs
```
5. Run the installation script:
```linux
sudo ./install.sh
```
6. Verify that IPFS has been installed successfully:
```linux
ipfs --version
```
7. If the installation was successful, initialize the IPFS node:
```linux
ipfs init
```
8. To verify that the node has started successfully, run the following command:
```linux
ipfs daemon
```
9. If the node has started successfully, you can use the IPFS client to add and download files:
```linux
ipfs add <path to file>
ipfs cat <hash of file>
```
### Windows.
1. Download IPFS: The first thing you need to do is download IPFS from the official IPFS website. You can do so from the following link: https://dist.ipfs.io/#go-ipfs
2. Unzip the downloaded file: Once you have downloaded the IPFS file, you need to unzip it to a convenient location on your computer.
3. Add the IPFS path to the Path: To use IPFS from any command line directory, you need to add the path of the IPFS executable file to the system environment variable called "Path". To do this, follow these steps:
a. Click the Windows "Start" button and type "Edit the system environment variables" in the search box.
b. Select the option "Edit the system environment variables".
c. On the "Advanced" tab, click the "Environment Variables" button.
d. Look for the environment variable called "Path" in the list of system variables and click the "Edit" button.
e. Click the "New" button and add the full path of the IPFS folder you unzipped earlier (e.g. "C:\ipfs").
f. Click "OK" to save the changes.
4. Start the IPFS daemon: Open a command line window and execute the following command to start the IPFS daemon:
```linux
ipfs daemon
```
### macOS.
1.- The corresponding **.dmg** file for Mac can be downloaded from the following link:

[Click to go to IPFS downloads](https://github.com/ipfs/ipfs-desktop/releases)
**2.-** Open the **ipfs-desktop.dmg** file
**3.-** Drag the IPFS icon into the Applications folder:
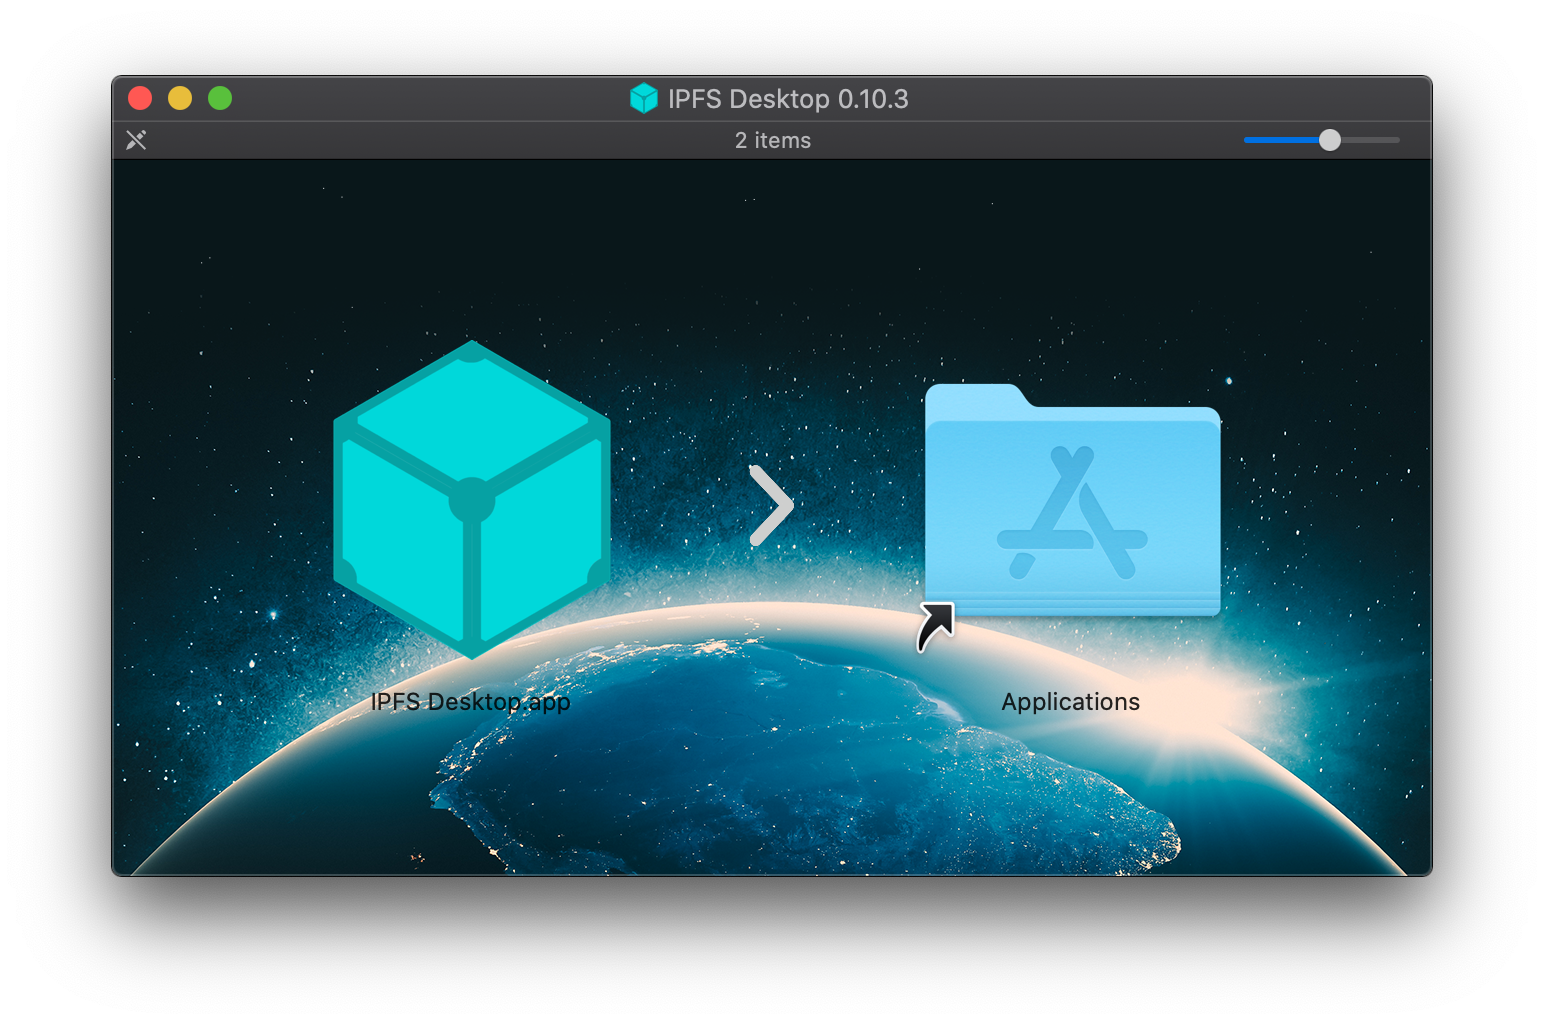
**4.-** Open your Applications folder and open the IPFS Desktop application.
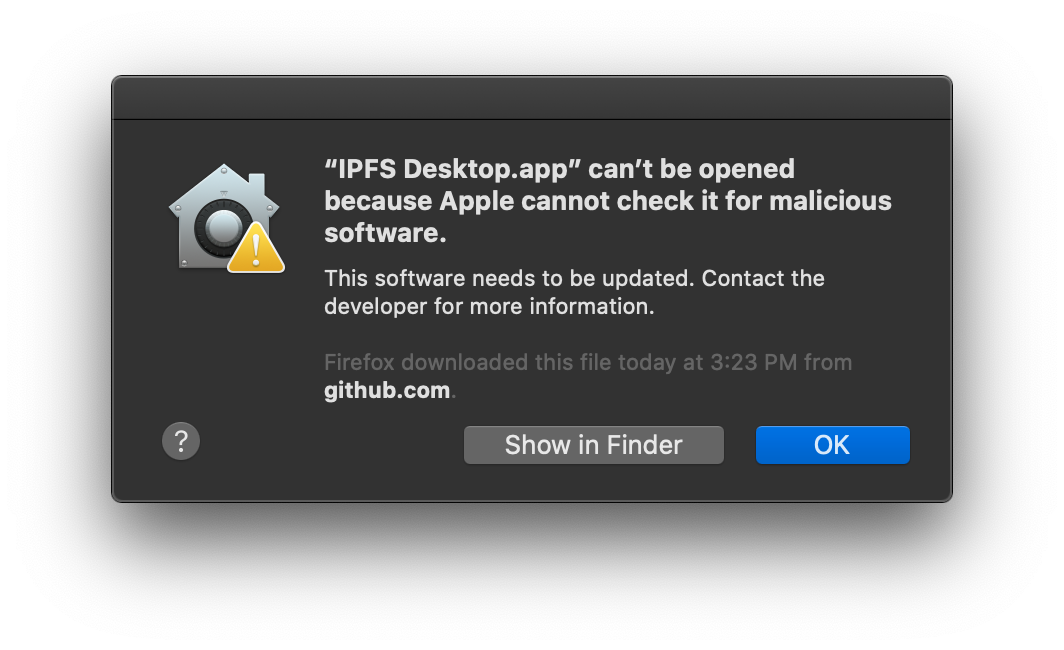
**5.-** You may get a warning saying IPFS Desktop.app can't be opened. Click Show in Finder:
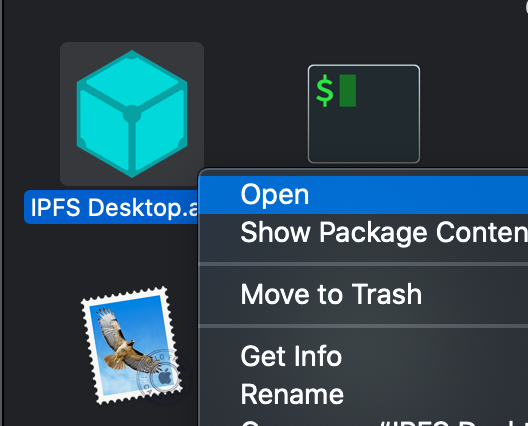
**6.-** Find IPFS Desktop.app in your Applications folder.
**7.-** Hold down the control key, click IPFS Desktop.app, and click Open:
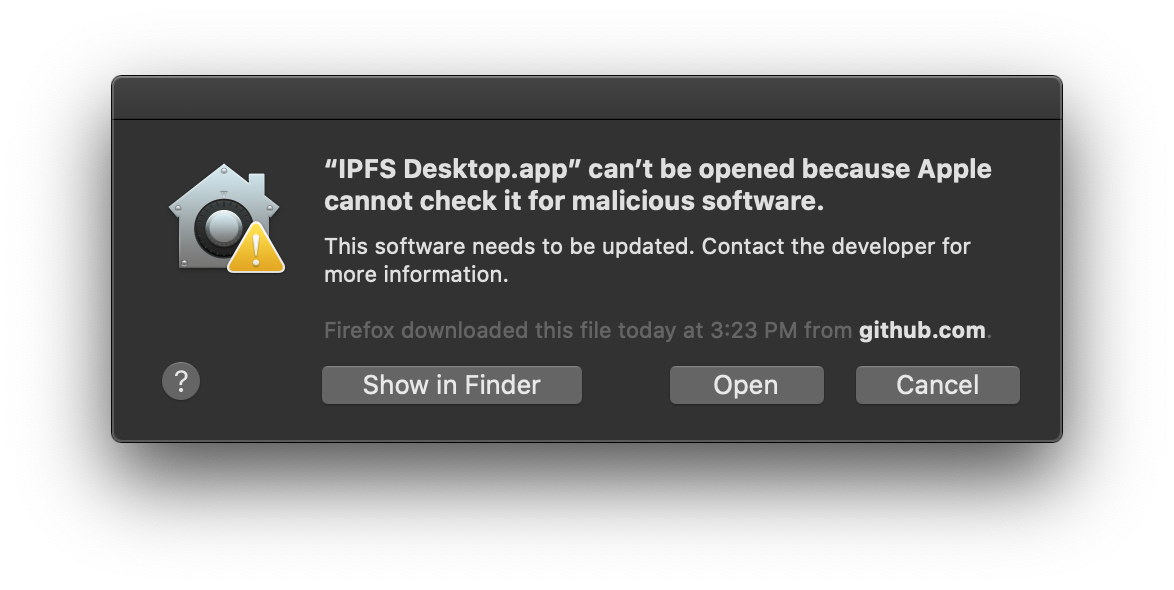
**8.-** Click Open in the new window:
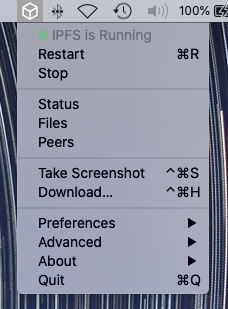
**9.-** You can now find an IPFS icon in the status bar
### ChromeOS.
#### In the Chrome Store:
In this section we will be able to visualize the installation on Chromebook through its extension and the terminal.
* **1.-** "We search for the Chrome Web Store on Google and in the search bar we type 'IPFS', and the first option appears, which we click on."
[Click to go to IPFS downloads](https://chrome.google.com/webstore/detail/ipfs-companion/nibjojkomfdiaoajekhjakgkdhaomnch?hl=es)

* **2.-** Here we can click on the install button (note that I already have it installed), but once it's installed, the next step would be to configure IPFS in the terminal.

#### From the terminal:
IPFS is initialized:


With this, we already have IPFS installed and configured on our computer, and we can now access the Chrome extension to work on it.

## How to create a node on Interplanetary File System.
To create a node in IPFS, you first need to have IPFS installed on your computer. Once installed, you can create a node with the following code in the command line:
```linux
ipfs init
```
This command will initialize a new IPFS node on your computer.
Then, you can add a file to the IPFS node with the following command:
```linux
ipfs add <path to file>
```
This command will add the specified file to the IPFS node and assign it a unique CID (Content Identifier) address that can be used to access the file from any other instance of IPFS.
To share the file with other nodes on the IPFS network, you can use the command:
```linux
ipfs pin add <CID of file>
```
This command will "pin" the file to your IPFS node, ensuring that it remains available even if the original node that added it is disconnected.
Finally, you can access the file from any other IPFS node on the network using the CID address of the file. For example:
```linux
ipfs cat <CID of file>
```
## Example how Interplanetary File System Works.
To create a node in IPFS, you first need to have IPFS installed on your computer. Once installed, you can create a node with the following code in the command line:
```linux
ipfs init
```
Next, create a simple text file named "example.txt" and add its contents to it:
```bash
echo "This is an example file added to IPFS" > example.txt
```
Then, add the file to the IPFS node with the following command:
```csharp|
ipfs add example.txt
```
This command will return a CID, which is the unique identification of the contents of the file added to IPFS. The CID will look like this:
```bash
QmWYD8AaKjJXzU6gFy6aCbw6enCLhq6LxJ6fLdFKeN7yN5
```
Finally, you can get the contents of the added file using your CID with the following command:
```bash
ipfs cat QmWYD8AaKjJXzU6gFy6aCbw6enCLhq6LxJ6fLdFKeN7yN5
```
This command will return the contents of the "example.txt" file you added earlier.
# OrbitDB
### Introduction
OrbitDB is a high-performance distributed database built on top of the decentralized InterPlanetary File System (IPFS) network. IPFS is a peer-to-peer networking protocol that enables users to store and share files in a decentralized and censorship-resistant manner.
OrbitDB employs concepts from traditional decentralized databases such as database replication and conflict resolution, but implements them in a distributed and censorship-resistant manner. This means that data is stored on multiple nodes in the network, increasing the availability and durability of the data, and making the database more resistant to censorship attacks and data loss.
Additionally, OrbitDB uses cryptographic techniques to ensure that stored data is secure and private. Each node on the network has a public and private key, and information stored in OrbitDB is encrypted and digitally signed using these keys.
OrbitDB is especially useful for decentralized applications (dApps) that require immutable and highly available data storage. For example, it could be used to store medical records, financial data, or cryptocurrency transaction histories.
In summary, OrbitDB is a distributed, secure, and censorship-resistant database that utilizes the decentralized IPFS network to provide a high availability and privacy data storage solution for decentralized applications.
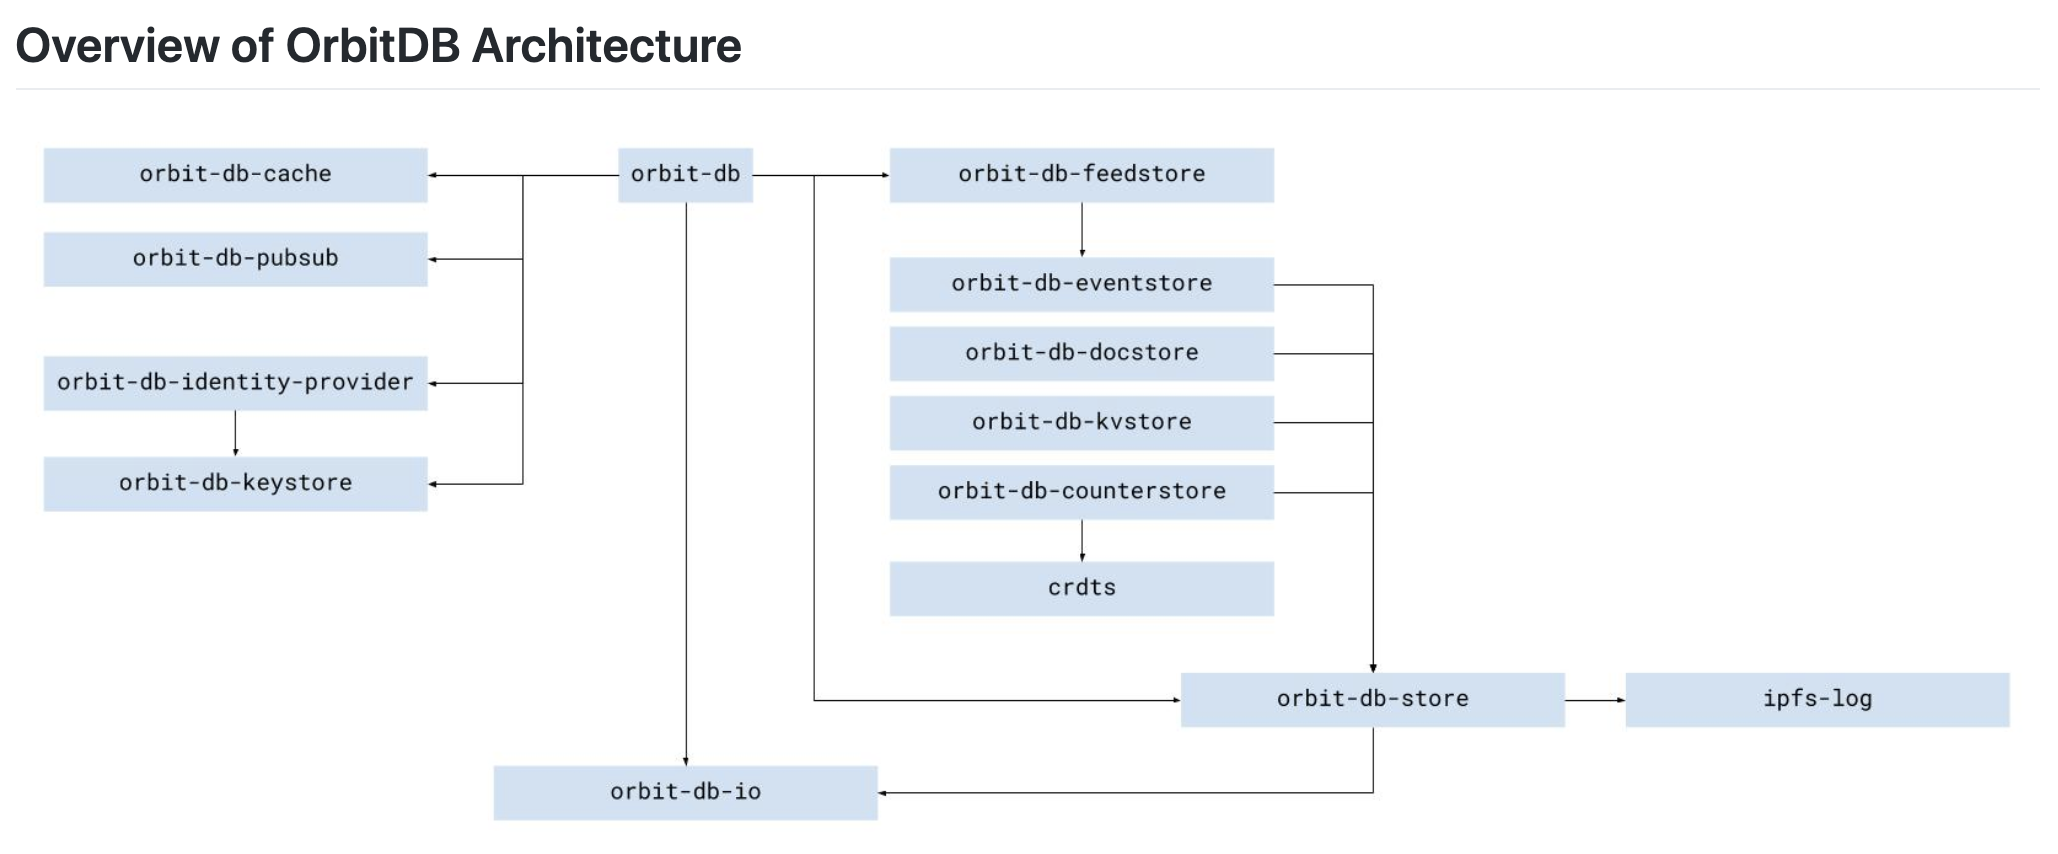
### Architecture
The architecture of OrbitDB consists of several key components:
Database: The database is where data is stored. It is a key-value database, which means that data is stored as key-value pairs. Each key is unique and is used to access its corresponding value.
Store: The Store is an abstraction of a database and provides an easy-to-use interface for interacting with the underlying database. Each Store has an associated type that determines how data is stored and accessed.
IPFS: OrbitDB uses IPFS as its underlying network for communication and data storage. IPFS provides a distributed and censorship-resistant network that allows nodes to store and share files on the network.
Peers: Nodes on the network are called peers and are responsible for storing and sharing data. Each peer has its own copy of the database and communicates with other peers on the network to maintain data consistency.
EventLog: The EventLog is a log of events that is used to maintain a history of updates made to the database. Each time an update is made, it is recorded as an event in the EventLog. EventLogs are also replicated on the network, allowing peers to maintain data consistency.
AccessController: The AccessController is used to control access to the database. It allows developers to define access rules and control who can read and write data to the database.
In summary, the architecture of OrbitDB is based on a distributed key-value database that is stored on multiple nodes in the IPFS network. EventLogs are used to maintain data consistency, and the AccessController is used to control access to the database. The combination of these components provides a decentralized, censorship-resistant, and highly available data storage solution for decentralized applications.
### Mounting a node of Orbitdb.
#### Windows.
1. Start IPFS:
Open a terminal window and run the following command to start the IPFS daemon:
```linux
ipfs daemon
```
This will start the IPFS daemon and create a node on your system.
2. Start an instance of OrbitDB:
Open a terminal window and run the following commands to install OrbitDB-CLI:
```linux
npm install orbit-db-cli -g
```
Next, start an instance of OrbitDB by running the following command:
```linux
orbitdb daemon
```
3. Create a database:
Open another terminal window and run the following command to create a database in OrbitDB:
```linux
orbitdb create /orbitdb/Qmabc123/my-database --type keyvalue --write
```
This command creates a new database named "my-database" at address "/orbitdb/Qmabc123". The "--type keyvalue" option specifies that this is a key-value database.
4. Store and retrieve data:
To store data in the database, run the following command in the same terminal window:
```linux
orbitdb put /orbitdb/Qmabc123/my-database hello world
```
To retrieve the data from the database, run the following command
```linux
orbitdb get /orbitdb/Qmabc123/my-database
```
5. Share the database:
To share the database with other nodes, run the following command:
```linux
orbitdb access /orbitdb/Qmabc123/my-database --write
```
This grants write permissions for the database to all nodes on the IPFS network.
#### Linux.
1. Download and install IPFS: The first thing you need to do is download and install IPFS on your Linux machine. You can download it from the official IPFS website or by using the command line with the following command:
```linux
$ wget https://dist.ipfs.io/go-ipfs/v0.10.0/go-ipfs_v0.10.0_linux-amd64.tar.gz
$ tar xvfz go-ipfs_v0.10.0_linux-amd64.tar.gz
$ cd go-ipfs
$ sudo ./install.sh
```
2. Start the IPFS daemon: Once you have installed IPFS, you need to start it in daemon mode using the following command:
```linux
$ ipfs daemon
```
3. Download and install Node.js: Next, you need to download and install Node.js on your machine. You can do this using the following command:
```linux
$ sudo apt-get install nodejs
```
4. Download and install npm: You also need to download and install npm, the Node.js package manager, using the following command:
```linux
$ sudo apt-get install npm
```
5. Install OrbitDB: Now that you have Node.js and npm installed on your machine, you can install OrbitDB using the following command:
```linux
$ npm install orbit-db
```
6. Start an instance of OrbitDB: Finally, you can start an instance of OrbitDB using the following example code:
```linux
const IPFS = require('ipfs')
const OrbitDB = require('orbit-db')
const ipfs = await IPFS.create()
const orbitdb = await OrbitDB.createInstance(ipfs)
const db = await orbitdb.log('my-database')
db.events.on('replicated', (address) => {
console.log(`replicated ${address}`)
})
await db.load()
await db.add('hello, world!')
```
#### ChromeOS.
1. First, make sure you have IPFS installed on your system. You can download the ChromeOS version of IPFS from the official website: https://dist.ipfs.io/#go-ipfs
2. Extract the downloaded file into your home directory and rename it to 'ipfs'.
3. Open a terminal and navigate to the directory where you extracted the file. Execute the following command to give execute permission to the 'ipfs' file:
```linux
chmod +x ipfs
```
4. You can now start the IPFS daemon by running the following command:
```linux
./ipfs daemon
```
Note that this will start the daemon in the background and continue running until you stop it.
5. You can now install OrbitDB by running the following command:
```linux
npm install orbit-db ipfs
```
6. Once the installation is complete, you can create a new instance of IPFS in your Node.js application:
```linux
const IPFS = require('ipfs-core')
const ipfs = await IPFS.create()
```
7. You can now create a new OrbitDB database using the IPFS instance you just created:
```linux
const orbitdb = require('orbit-db')
const db = await orbitdb.create('database-name', 'type-of-database', { ipfs: ipfs })
```
Make sure to replace database-name with the name you want to give your database and type-of-database with the type of database you want to create, such as 'eventlog', 'docstore', 'keyvalue', etc.
9. You can now interact with your database using the methods provided by OrbitDB. For example, to add a new item to your database, you can use the following code:
```linux|
await db.put({ _id: '1', value: 'Hello, world!' })
```
And to read all items from the database, you can use the following code:
```linux
const result = db.iterator({ limit: -1 }).collect()
console.log(result)
```
#### macOS.
In macOS:
1. Firstly, make sure you have IPFS installed on your system. If you don't have it, you can download it from the official website: https://dist.ipfs.io/#go-ipfs
2. Open a terminal and run the following command to install OrbitDB:
```linux
npm install orbit-db ipfs
```
4. Start the IPFS daemon by running the following command in a separate terminal:
```linux
ipfs daemon
```
5. In another terminal, create a new IPFS instance in your Node.js application:
```linux
const IPFS = require('ipfs-core')
const ipfs = await IPFS.create()
```
6. Now you can create a new OrbitDB database using the IPFS instance you just created:
```linux
const orbitdb = require('orbit-db')
const db = await orbitdb.create('database-name', 'type-of-database', { ipfs: ipfs })
```
Make sure to replace database-name with the name you want to give your database and type-of-database with the type of database you want to create, such as 'eventlog', 'docstore', 'keyvalue', etc.
Now you can interact with your database using the methods provided by OrbitDB. For example, to add a new item to your database, you can use the following code:
```linux
await db.put({ _id: '1', value: 'Hello, world!' })
```
And to read all the items in the database, you can use the following code:
```linux
const result = db.iterator({ limit: -1 }).collect()
console.log(result)
```
## Contacto y Desarrolladores.
> Work developed in collaboration with the [Decentralized Climate Foundation](https://decentralizedclimate.org).
Owner:
- [Omar Octavio Huerta Valdez](ohuerta@decentralizedcliamte.org)
Collaborator:
- [Gustavo Bermudez](nizaries44@gmail.com)
---
## References
The following resources were selected to provide an overview of the topic of Interplanetary File System. I would like to acknowledge the authors of the various web articles, videos, and papers for their insightful discussions and analytics which help formed the basis for some sections of the lessons and modules.
**Title of resource:** [**What is the InterPlanetary File System?**](https://themerkle.com/what-is-the-interplanetary-file-system/)
Resource type: website
Description: In the world of blockchain and cryptocurrency, decentralization is key. This often leads to some new and exciting innovations, to say the least. The Interplanetary File System is one of those innovations which more people should pay attention to.
**Title of resource:** [**IPFS Alpha Demo**](https://www.youtube.com/watch?v=8CMxDNuuAiQ)
Resource type: video (18:50)
Description: An overview and demo of the go-ipfs alpha.
**Title of resource:** [**IPFS white paper**](https://ipfs.io/ipfs/QmR7GSQM93Cx5eAg6a6yRzNde1FQv7uL6X1o4k7zrJa3LX/ipfs.draft3.pdf)
Resource type: white paper
Description: The InterPlanetary File System (IPFS) is a peer-to-peer distributedfile system that seeks to connect all computing devices with the same system of files.
**IPFS:** [**Command line quick start**](https://docs.ipfs.tech/how-to/command-line-quick-start/#take-your-node-online)
 Sign in with Wallet


