# Celo Development 201 - Intro to NFT Contract Development
In this learning module, you will learn fundamental knowledge about NFTs and how to write and deploy your own NFT contract to the Alfajores testnet of the Celo blockchain.
### Prerequisites
In order to successfully follow this learning module, you should have:
- Basic understanding of Solidity and blockchain concepts.
- Access to a modern web browser.
### Tech Stack
In this tutorial, we will use the following tools and technologies:
- [Remix IDE](https://remix.ethereum.org/) - A web-based Solidity development environment.
- [Metamask](https://metamask.io/) - A browser extension that allows you to interact with the Celo and Ethereum blockchain.
- [ERC-721](https://eips.ethereum.org/EIPS/eip-721) - A standard for NFTs.
After finishing this learning module, you will be able to mint your own NFTs:
## 1. Introduction
This first section of the learning module will give you a theoretical introduction to blockchain-based tokens.
Blockchain tokens are a new technological building block (like websites were for the internet) created by blockchain technology that enables a decentralized, ownable internet (web3).
In the context of web3, tokens usually represent ownership. Tokens can represent ownership of anything: art, reputation, items in a video game, shares in a company, voting rights, or currencies.
The revolutionary innovation of blockchain technology is that it allows data to be stored publicly in an immutable (unchangeable) way.
This new form of data storage allows us to keep track of ownership and enable truly ownable digital items for the first time.
Blockchain Technology was originally invented to keep track of the ownership of Bitcoin, a decentralized digital currency and fungible token.
### 1.1 Fungible and non-fungible tokens
Assets like money: Bitcoin or a one-dollar bill, for example, are fungible. Fungible means that all assets are the same and are interchangeable. Assets like art, collectibles, or houses are non-fungible; they are all different and not interchangeable.
We can divide tokens into these two types: fungible tokens, where all tokens are the same, and non-fungible tokens (NFTs), where every token is unique.
### 1.2 Token standard
The behavior of a token is specified in its smart contract (token contract). The contract could, for example, include the functionality to transfer a token or check for its owner.
If everybody created their own token contracts with different behavior and naming conventions, it would make it very hard for people to build contracts or applications that are able to interact with each other.
The Ethereum community has developed token standards that define how a developer can create tokens that are interoperable (able to work with others) with other contracts, products, and services. Contracts developed under these standards need to include a certain set of functions and events.
Since Celo is an EVM compatible layer one scaling solution that allows writing contracts in Solidity, we can make use of Ethereum's token standards, contracts, and much of its tooling.
The most popular token standards are the ERC20 for fungible tokens and the ERC721 for non-fungible tokens. In this course, we will learn how to create and interact with NFTs, tokens created with the ERC721 token standard.
The ERC777 is a fungible token standard, like the ERC20, that includes more advanced features like hooks while remaining backward compatible with ERC20. Learn more about the ERC777 in its <a href="https://eips.ethereum.org/EIPS/eip-777" target="_blank">EIP (Ethereum improvement proposal)</a>.
The ERC1155 is a multi-token standard that allows a single contract to manage different types of tokens, such as fungible, non-fungible, or semi-fungible tokens.
Learn more about the ERC1155 in its <a href="https://eips.ethereum.org/EIPS/eip-1155" target="_blank">EIP</a>.
## 2. Interface
ERC721 is a standard for token contracts that manage non-fungible tokens (NFTs) on the Celo and Ethereum blockchain.
Each non-fungible token is unique and not interchangeable. NFTs can have different properties, behavior, or rights. Non-fungible tokens are used to represent ownership of unique digital and physical assets like art, collectibles, or real estate.
If you want to know more about the ERC721 token standard, have a look at the specifications in its <a href="https://eips.ethereum.org/EIPS/eip-721" target="_blank">Ethereum improvement proposal</a>.
The ERC721 standard is more complex than the ERC20 standard, and it features optional extensions. ERC721 compliant contracts must, at a minimum, implement the ERC721 and ERC165 interfaces, which we will look at in this section.
The interface implementation we are going to look at, is part of the open-source contract library provided by <a href="https://github.com/OpenZeppelin/openzeppelin-contracts/blob/master/contracts/token/ERC721/IERC721.sol" target="_blank">OpenZeppelin</a>.
```
// SPDX-License-Identifier: MIT
// OpenZeppelin Contracts v4.4.0 (token/ERC721/IERC721.sol)
pragma solidity ^0.8.0;
import "@openzeppelin/contracts@4.4.0/utils/introspection/IERC165.sol";
/**
* @dev Required interface of an ERC721 compliant contract.
*/
interface IERC721 is IERC165 {
/**
* @dev Emitted when `tokenId` token is transferred from `from` to `to`.
*/
event Transfer(address indexed from, address indexed to, uint256 indexed tokenId);
/**
* @dev Emitted when `owner` enables `approved` to manage the `tokenId` token.
*/
event Approval(address indexed owner, address indexed approved, uint256 indexed tokenId);
/**
* @dev Emitted when `owner` enables or disables (`approved`) `operator` to manage all of its assets.
*/
event ApprovalForAll(address indexed owner, address indexed operator, bool approved);
/**
* @dev Returns the number of tokens in ``owner``'s account.
*/
function balanceOf(address owner) external view returns (uint256 balance);
/**
* @dev Returns the owner of the `tokenId` token.
*
* Requirements:
*
* - `tokenId` must exist.
*/
function ownerOf(uint256 tokenId) external view returns (address owner);
/**
* @dev Safely transfers `tokenId` token from `from` to `to`, checking first that contract recipients
* are aware of the ERC721 protocol to prevent tokens from being forever locked.
*
* Requirements:
*
* - `from` cannot be the zero address.
* - `to` cannot be the zero address.
* - `tokenId` token must exist and be owned by `from`.
* - If the caller is not `from`, it must be have been allowed to move this token by either {approve} or {setApprovalForAll}.
* - If `to` refers to a smart contract, it must implement {IERC721Receiver-onERC721Received}, which is called upon a safe transfer.
*
* Emits a {Transfer} event.
*/
function safeTransferFrom(
address from,
address to,
uint256 tokenId
) external;
/**
* @dev Transfers `tokenId` token from `from` to `to`.
*
* WARNING: Usage of this method is discouraged, use {safeTransferFrom} whenever possible.
*
* Requirements:
*
* - `from` cannot be the zero address.
* - `to` cannot be the zero address.
* - `tokenId` token must be owned by `from`.
* - If the caller is not `from`, it must be approved to move this token by either {approve} or {setApprovalForAll}.
*
* Emits a {Transfer} event.
*/
function transferFrom(
address from,
address to,
uint256 tokenId
) external;
/**
* @dev Gives permission to `to` to transfer `tokenId` token to another account.
* The approval is cleared when the token is transferred.
*
* Only a single account can be approved at a time, so approving the zero address clears previous approvals.
*
* Requirements:
*
* - The caller must own the token or be an approved operator.
* - `tokenId` must exist.
*
* Emits an {Approval} event.
*/
function approve(address to, uint256 tokenId) external;
/**
* @dev Returns the account approved for `tokenId` token.
*
* Requirements:
*
* - `tokenId` must exist.
*/
function getApproved(uint256 tokenId) external view returns (address operator);
/**
* @dev Approve or remove `operator` as an operator for the caller.
* Operators can call {transferFrom} or {safeTransferFrom} for any token owned by the caller.
*
* Requirements:
*
* - The `operator` cannot be the caller.
*
* Emits an {ApprovalForAll} event.
*/
function setApprovalForAll(address operator, bool _approved) external;
/**
* @dev Returns if the `operator` is allowed to manage all of the assets of `owner`.
*
* See {setApprovalForAll}
*/
function isApprovedForAll(address owner, address operator) external view returns (bool);
/**
* @dev Safely transfers `tokenId` token from `from` to `to`.
*
* Requirements:
*
* - `from` cannot be the zero address.
* - `to` cannot be the zero address.
* - `tokenId` token must exist and be owned by `from`.
* - If the caller is not `from`, it must be approved to move this token by either {approve} or {setApprovalForAll}.
* - If `to` refers to a smart contract, it must implement {IERC721Receiver-onERC721Received}, which is called upon a safe transfer.
*
* Emits a {Transfer} event.
*/
function safeTransferFrom(
address from,
address to,
uint256 tokenId,
bytes calldata data
) external;
}
```
### 2.1 IERC721 Functions
Contracts compliant with the ERC20 standard have to implement the following functions:
#### 2.1.1 balanceOf
The function `balanceOf` (line 30) returns the amount of tokens owned by the account with the address `owner`.
#### 2.1.2 ownerOf
The function `ownerOf` (line 39) returns the address `owner` of the account that holds the token with the id `tokenId`.
#### 2.1.3 safeTransferFrom
The function `safeTransferFrom` (line 55) transfers the ownership of a token with the id `tokenId` from the account with the address `from` to the account with the address `to`.
The function `safeTransferFrom` (line 137) is almost identical to the function `safeTransferFrom` (line 55) .The only difference is that this function has a non-empty payload `data`.
A smart contract must implement the ERC721TokenReceiver Interface if it is to receive a transfer. This will ensure that the contract can handle ERC721 token transfers and prevent the tokens from being locked in a contract that can't.
#### 2.1.4 transferFrom
The function `transferFrom` (line 55) transfers the ownership of a token with the id `tokenId` from the account with the address `from` to the account with the address `to`.
**It is recommended to use safeTransferFrom instead of transferFrom whenever possible.**
The `transferFrom` function is not secure because it doesn’t check if the smart contract that is the recipient of the transfer has implemented the ERC721TokenReceiver interface and is capable of handling ERC721 tokens.
#### 2.1.5 approve
The function `approve` (line 94) gives the account with the address `to` the permission to manage the token with the id `tokenId` on behalf of the account calling the function.
#### 2.1.6 getApproved
The function `getApproved` (line 103) returns the address `operator` of the account that is approved to manage the token with the id `tokenId`.
#### 2.1.7 setApprovalForAll
The function `setApprovalForAll` (line 115) gives or removes the permission (`_approved`) to the account with the address `operator` to manage all tokens of the account calling the function.
#### 2.1.8 isApprovedForAll
The function `getApproved` (line 103) returns the boolean true if the account with the address `operator` is approved to manage all tokens of the account with the address `owner`.
### 2.2 IERC721 Events
ERC721 contracts must also emit the following events:
#### 2.2.1 Transfer
The `Transfer` event (line 15) must be emitted when the token with the id `tokenId` is transferred from the account with the address `from` to the account with the address `to`.
#### 2.2.2 Approval
The `Approval` event (line 20) must be emitted when the account with the address `owner` approves the account with the address `spender` to manage the token with the id `tokenId` on its behalf.
#### 2.2.3 ApprovalForAll
The `ApprovalForAll` event (line 25) must be emitted when the account with the address `owner` gives or removes the permission (`_approved`) of the account with the address `operator` to manage all its tokens.
### 2.3 IERC165
In addition to the ERC721 interface, ERC721 compliant contracts must also implement the ERC165 interface.
With the implementation of the ERC165 interface, contracts can declare the support of specific interfaces. A contract that wants to interact with another contract can then query if the other contract supports this interface before making a transaction e.g., sending tokens to it that they might not support.
Our IERC721 interface here imports (line 6) and inherits (line 11) from the IERC165 interface.
This is how <a href="https://github.com/OpenZeppelin/openzeppelin-contracts/blob/master/contracts/utils/introspection/IERC165.sol" target="_blank">OpenZeppelins implementation</a> of the ERC165 interface looks like:
```
interface IERC165 {
function supportsInterface(bytes4 interfaceId) external view returns (bool);
}
```
For example, the ERC165 identifier for the ERC721 interface as specified in the EIP721 is “0x80ac58cd”. Learn how to calculate an interface identifier and more about the ERC165 in its <a href="https://eips.ethereum.org/EIPS/eip-165" target="_blank">improvement proposal</a>.
### 2.4 Other interfaces
The <a href="https://eips.ethereum.org/EIPS/eip-721#specification" target="_blank">IERC721TokenReceiver</a> interface must be implemented to accept safe transfers.
There are two optional extensions for ERC721 contracts specified in the EIP721:
IERC721Enumerable enables a contract to publish its complete list of tokens and make them discoverable.
IERC721Metadata enables a contract to associate additional information to a token. We will have a more detailed look into this in the next section.
## 3. Metadata Interface
The metadata extension is optional. It allows us to add additional information to our ERC721 tokens. We can specify a name, a symbol, and a URI (Uniform Resource Identifier) that can point to a file where we can add even more information in the form of a JSON.
```
// SPDX-License-Identifier: MIT
// OpenZeppelin Contracts v4.4.0 (token/ERC721/extensions/IERC721Metadata.sol)
pragma solidity ^0.8.0;
import "@openzeppelin/contracts@4.4.0/token/ERC721/IERC721.sol";
/**
* @title ERC-721 Non-Fungible Token Standard, optional metadata extension
* @dev See https://eips.ethereum.org/EIPS/eip-721
*/
interface IERC721Metadata is IERC721 {
/**
* @dev Returns the token collection name.
*/
function name() external view returns (string memory);
/**
* @dev Returns the token collection symbol.
*/
function symbol() external view returns (string memory);
/**
* @dev Returns the Uniform Resource Identifier (URI) for `tokenId` token.
*/
function tokenURI(uint256 tokenId) external view returns (string memory);
}
```
### 3.1 ERC721 Metadata Functions
#### 3.1.1 name
The function `name` (line 16) returns the name of the token collection. A token collection means all tokens created with your ERC721 token contract implementation. Every token in this collection will have this name, regardless of its tokenId.
#### 3.1.2 symbol
The function `symbol` (line 21) returns the symbol of the token collection.
#### 3.1.3 tokenURI
The function `tokenURI` (line 26) returns the URI for the token with the id `tokenId`. In this case, it's not the URI of the whole collection but of an individual token in the collection.
### 3.2. ERC721 Metadata JSON Schema
The file that the tokenURI points to should conform to the Metadata JSON Schema as it is specified in the <a href="https://eips.ethereum.org/EIPS/eip-721#specification" target="_blank">EIP-721</a>.
```
{
"title": "Asset Metadata",
"type": "object",
"properties": {
"name": {
"type": "string",
"description": "Identifies the asset to which this NFT represents"
},
"description": {
"type": "string",
"description": "Describes the asset to which this NFT represents"
},
"image": {
"type": "string",
"description": "A URI pointing to a resource with mime type image/* representing the asset to which this NFT represents. Consider making any images at a width between 320 and 1080 pixels and aspect ratio between 1.91:1 and 4:5 inclusive."
}
}
}
```
The root element must be of the type object. This root object should have properties with the keys: name, description, and image that should be all of the type string.
The ERC721 standard is pretty flexible, the tokenURI does not need to point to a JSON document, and the JSON does not need to have all properties and often has additional properties.
## 4. Token Creation
In this contract, we use an ERC721 token contract implementation from OpenZeppelin.
```
// SPDX-License-Identifier: MIT
pragma solidity ^0.8.2;
import "@openzeppelin/contracts@4.4.0/token/ERC721/ERC721.sol";
import "@openzeppelin/contracts@4.4.0/access/Ownable.sol";
contract MyToken is ERC721, Ownable {
constructor() ERC721("MyToken", "MTK") {}
function _baseURI() internal pure override returns (string memory) {
return "https://ipfs.io/ipfs/QmUYLUKwqX6CaZxeiYGwmAYeEkeTsV4cHNZJmCesuu3xKy/";
}
function safeMint(address to, uint256 tokenId) public onlyOwner {
_safeMint(to, tokenId);
}
}
```
Test this contract in the [Remix IDE](https://remix.ethereum.org/).
Have a look at OpenZepplins implementation of a <a href="https://github.com/OpenZeppelin/openzeppelin-contracts/blob/master/contracts/token/ERC721/ERC721.sol" target="_blank">ERC721 contract</a>. Apart from the functionality specified in the ERC721 standard, the contract provides additional functions, which we will see in a bit.
### 4.1 myToken
We create our own contract called MyToken (line 7), which inherits (line 7) the functionality from the OpenZepplin `ERC721` token contract implementation and `Ownable` that we imported (line 4). `Ownable` (line 7) is a contract module that provides a basic access control mechanism that allows an owner to have exclusive access to specific functions. In this contract, we add the inherited `onlyOwner` modifier to the `_safeMint()` function and restrict access to this function to the "owner".
This ERC721 implementation makes use of the IERC721Metadata extension that is specified in the EIP. Our contract inherits the functions `name()` and `symbol()`
and has a constructor that allows their values to be set during the deployment of the contract (line 8).
In this case, we are going to use the default values. We name our token the same as the contract `"MyToken"` and make `"MTK"` its symbol.
#### 4.1.1 Base URI
With an ERC721 contract, we are able to mint various tokens, each with its own tokenId. As we saw in the IERC721Metadata interface, each token can have its own `tokenURI`, which typically points to a JSON file to store metadata like name, description, and image link.
If a contract mints multiple tokens, ERC721 implementations often use the same URI as a base (`baseURI`) for all tokens and only differentiate them by adding their unique `tokenId` at the end via concatenation. In the next part, we will see what this looks like in practice.
In this example, we are storing our data on IPFS — more on that in the next section. Our baseURI is <a href="https://ipfs.io/ipfs/QmUYLUKwqX6CaZxeiYGwmAYeEkeTsV4cHNZJmCesuu3xKy/" target="_blank">https://ipfs.io/ipfs/QmUYLUKwqX6CaZxeiYGwmAYeEkeTsV4cHNZJmCesuu3xKy/</a> (line 11).
Through concatenation the tokenURI for the token with the id 0 would be <a href="https://ipfs.io/ipfs/QmUYLUKwqX6CaZxeiYGwmAYeEkeTsV4cHNZJmCesuu3xKy/0" target="_blank">https://ipfs.io/ipfs/QmUYLUKwqX6CaZxeiYGwmAYeEkeTsV4cHNZJmCesuu3xKy/0</a> , the tokenURI for the token with the id 1 would be <a href="https://ipfs.io/ipfs/QmUYLUKwqX6CaZxeiYGwmAYeEkeTsV4cHNZJmCesuu3xKy/1" target="_blank">https://ipfs.io/ipfs/QmUYLUKwqX6CaZxeiYGwmAYeEkeTsV4cHNZJmCesuu3xKy/1</a>, and so on.
When using IPFS and you run into "504 Gateway Time-out" errors, you might have to wait and retry until the data is available.
#### 4.1.2 safeMint
With the safeMint function (line 14), we enable the owner to create new tokens with a dedicated token id after contract deployment.
The safeMint function is part of the ERC721 implementation of OpenZeppelin and lets us safely mint a token with the id `tokenId` to the account with the address `to`. For access control, we use the `onlyOwner` modifier from the Ownable access control contract module that we imported (line 5).
In the next section, we will see how we can create and host the metadata for our NFTs.
## 5. Metadata IPFS
In this section, we will create our metadata and store it in a decentralized way.
IPFS ( InterPlanetary File System) is a peer-to-peer network for storing files in a distributed way. [Pinata.cloud](https://www.pinata.cloud/) is a pinning service that allows users to easily host files on the IPFS network.
We want to host our images and the JSON files with their metadata on IPFS.
### 5.1 Create Image Folder
In this example, we will create metadata for three tokens. As you can see below, we create three images that we stored in a folder.
```
geo-img
├── geo_1.png
├── geo_2.png
├── geo_3.png
```
### 5.2 Register on Pinata
Now, we want to host these images somewhere so we can point to them in the metadata of our tokens. Let's do it in a decentralized way and use Pinata to host them on IPFS.
First you need an account on Pinata. Go to <a href="https://app.pinata.cloud/register" target="_blank">Pinata.cloud</a> and create an account. On Pinata you can upload up to 1 GB of data for free.
Once you have signed up, you should be in the Pin Manager view.
<img src="https://i.imgur.com/yKpD65m.png" alt="Pin Manager Pinata" width="300"/>
### 5.3 Upload Images to IPFS
Click on the upload button and upload the folder with your images.
Once you've uploaded your folder, you should see the name of your folder and the CID (content identifier) associated with it. If the content in the folder changes, the CID will also change.
To access your folder on IPFS, enter this address "https://ipfs.io/ipfs/" and add your CID. For our current example, you can access your folder by using:
<a href="https://ipfs.io/ipfs/QmTJok2tju9zstjtAqESdZxTiUiFCBAyApHiDVj4maV75P" target="_blank">
https://ipfs.io/ipfs/QmTJok2tju9zstjtAqESdZxTiUiFCBAyApHiDVj4maV75P
</a>
You can access a specific image by using:
<a href="https://ipfs.io/ipfs/QmTJok2tju9zstjtAqESdZxTiUiFCBAyApHiDVj4maV75P/geo_1.png" target="_blank">
https://ipfs.io/ipfs/QmTJok2tju9zstjtAqESdZxTiUiFCBAyApHiDVj4maV75P/geo_1.png
</a>
### 5.4 Create JSON files
We create another folder where we store three JSON files.
```
geo-json
├── 0
├── 1
├── 2
```
Inside the JSON files, create the metadata for the tokens, like name, description, and image.
For the image URL, we are going to use the URL of our images on IPFS. You can add additional data if you like; in this example, we added some unique attributes for each token.
This is how the JSON for the first token could look:
```
{
"name": "Geometry#0",
"description": "Geometry is an NFT collection for educational purposes.",
"image": "https://ipfs.io/ipfs/QmTJok2tju9zstjtAqESdZxTiUiFCBAyApHiDVj4maV75P/geo_1.png
",
"attributes": [
{ "trait_type": "background", "value": "cyan" },
{ "trait_type": "color", "value": "red" },
{ "trait_type": "shape", "value": "circle" }
]
}
```
This is how the JSON for the second token could look:
```
{
"name": "Geometry#1",
"description": "Geometry is an NFT collection for educational purposes.",
"image": "https://ipfs.io/ipfs/QmTJok2tju9zstjtAqESdZxTiUiFCBAyApHiDVj4maV75P/geo_2.png",
"attributes": [
{ "trait_type": "background", "value": "magenta" },
{ "trait_type": "color", "value": "green" },
{ "trait_type": "shape", "value": "square" }
]
}
```
As shown above, the folder in this example is called "geo-json". Inside this folder, we have three JSON files.
The first JSON file is called "0", the second JSON file is called "1", and the third JSON file is called "2".
Make sure that your JSON files don't have a file ending and are named like their corresponding tokenIds.
In the pin manager on pinata.cloud, click on the upload button and upload the folder with your JSON files.
To access your folder on IPFS, enter this address "https://ipfs.io/ipfs/" and add your CID.
For our current example, you can access your folder by using:
<a href="https://ipfs.io/ipfs/QmVrsYxXh5PzTfkKZr1MfUN6PotJj8VQkGQ3kGyBNVKtqp" target="_blank">
https://ipfs.io/ipfs/QmVrsYxXh5PzTfkKZr1MfUN6PotJj8VQkGQ3kGyBNVKtqp
</a>
This will become our baseURI.
You can access a specific JSON file then by just adding a slash and the tokenId by using:
<a href="https://ipfs.io/ipfs/QmVrsYxXh5PzTfkKZr1MfUN6PotJj8VQkGQ3kGyBNVKtqp/0" target="_blank">
https://ipfs.io/ipfs/QmVrsYxXh5PzTfkKZr1MfUN6PotJj8VQkGQ3kGyBNVKtqp/0
</a>
In the contract, replace the baseURI with your own baseURI. In this example, the baseURI consists of the URL
"https://ipfs.io/ipfs/", the CID containing the JSON files, and a slash at the end "/".
An individual tokenURI will now be created for each token by adding the tokenId to the baseURI — exactly what we did manually in the example above to access the JSON file.
## 6. Deploy to Testnet
In this final section of this tutorial, we will create a Metamask wallet, deploy our contract to the Celo testnet Alfajores with the Remix IDE, and mint our first NFT.
```
// SPDX-License-Identifier: MIT
pragma solidity ^0.8.2;
import "@openzeppelin/contracts@4.4.0/token/ERC721/ERC721.sol";
import "@openzeppelin/contracts@4.4.0/access/Ownable.sol";
contract Geometry is ERC721, Ownable {
constructor() ERC721("Geometry", "GEO") {}
function _baseURI() internal pure override returns (string memory) {
return "https://ipfs.io/ipfs/QmVrsYxXh5PzTfkKZr1MfUN6PotJj8VQkGQ3kGyBNVKtqp/";
}
function safeMint(address to, uint256 tokenId) public onlyOwner {
_safeMint(to, tokenId);
}
}
```
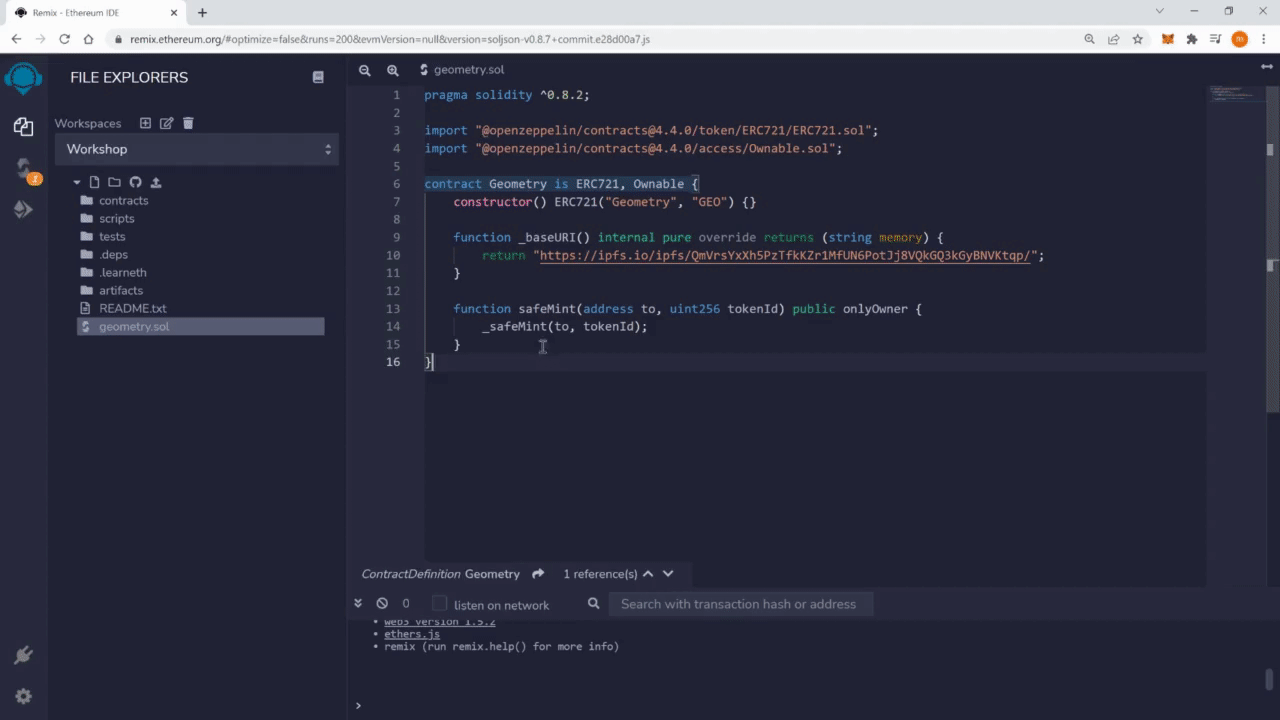
Copy this contract to the [Remix IDE](https://remix.ethereum.org/).
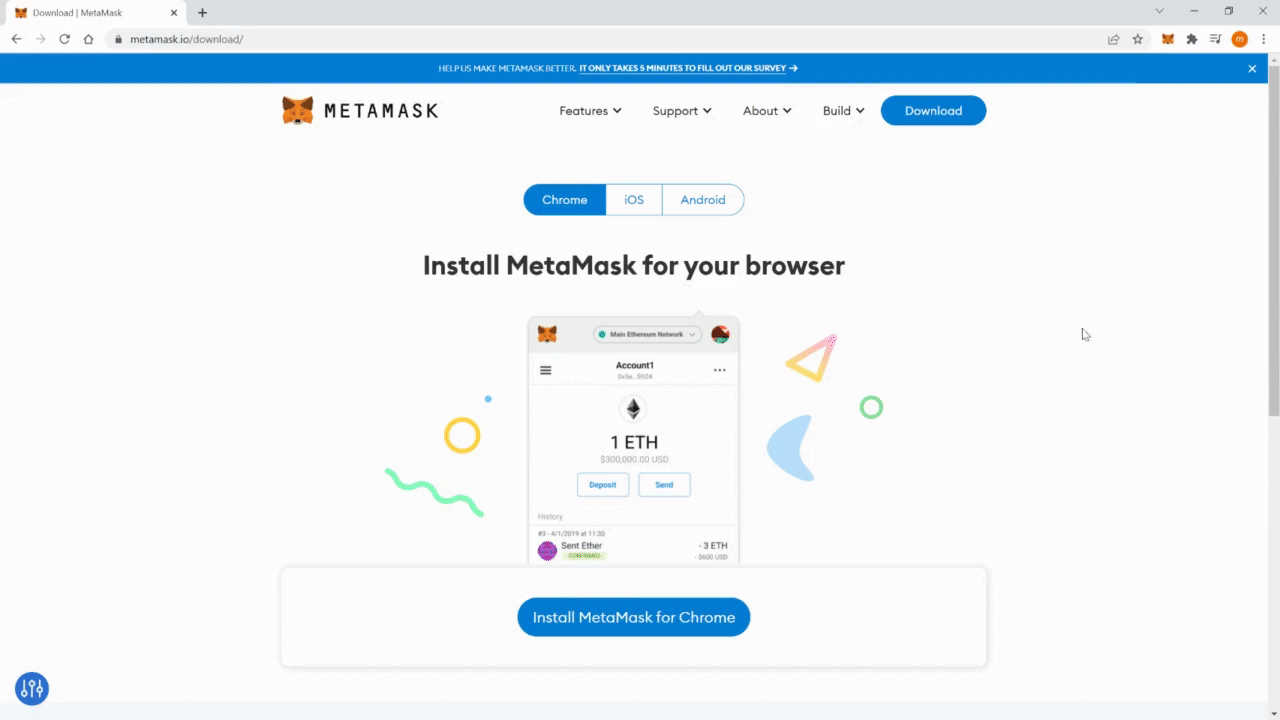
### 6.1 Install Metamask
1. Go to [metamask.io](https://metamask.io/).
2. Click on the download button, then click on install for your browser (e.g., Chrome) and add the extension to your browser.
3. Create a wallet as described.
### 6.2 Connect Metamask to Alfajores
1. Click on "Ethereum Mainnet" in your MetaMask extension, then click on "Add Network".
2. Enter the data provided in this [Celo documentation](https://docs.celo.org/getting-started/wallets/using-metamask-with-celo/manual-setup). Make sure to choose the data for the Alfajores Testnet.
This GIF demonstrates how to connect to the testnet:
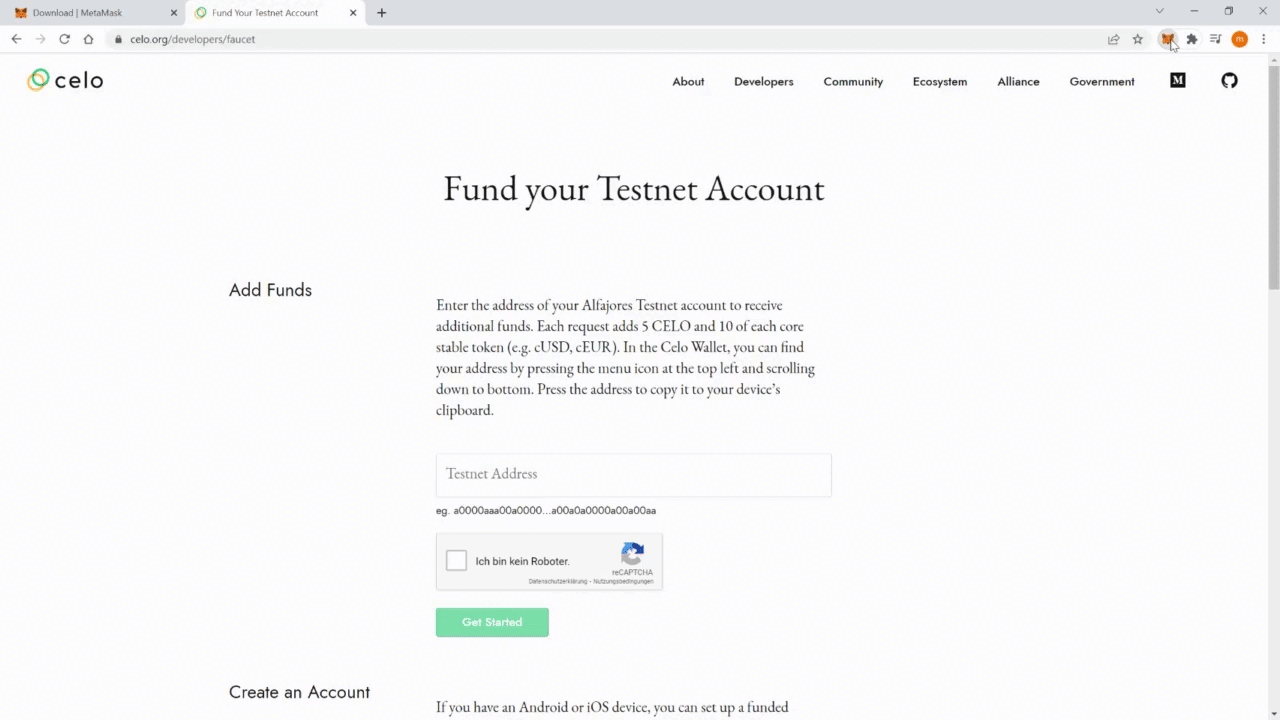
### 6.3 Get Alfajores Testnet Tokens
1. Go to the Alfajores testnet faucet [https://celo.org/developers/faucet](https://celo.org/developers/faucet).
2. Enter your wallet address, confirm the captcha, and click on "Done".
3. When you open your MetaMask extension, you should be able to see the Celo tokens you have received. To see the cUSD tokens, click on assets, then click on the "Import tokens" link, and enter "0x874069Fa1Eb16D44d622F2e0Ca25eeA172369bC1" as the "Token Contract Address".
You should now have a balance of 5 Celo tokens and 10 cUSD tokens on the Alfajores testnet.
This GIF demonstrates how to get tokens from the faucet:
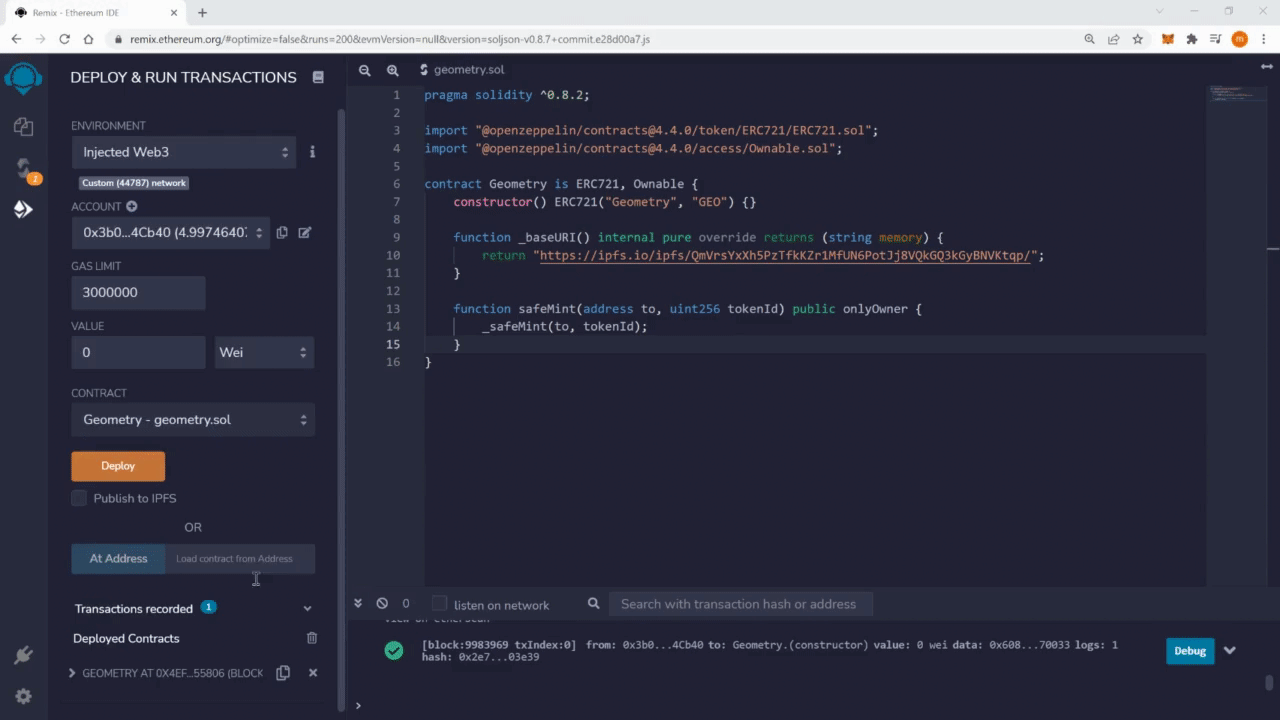
### 6.4 Deploy Contract to Alfajores
1. Compile your contract in Remix.
2. Go to the deploy tab, change the "ENVIRONMENT" to "Injected Web3" and confirm.
3. Select the right contract ("Geometry"), click on "Deploy" and confirm the transaction.
Your contract should appear in the "Deployed Contracts" section.
This GIF demonstrates how to deploy the contract:
### 6.5 Mint an NFT
1. Expand your contract in the IDE so you can see the buttons for the functions.
2. Expand the input fields next to the safeMint button. Enter the Celo address of the account connected to Remix in the "to:" input field. Enter "0" in the input field "tokenID:". Click on transact.
3. In the Metamask click on assets, then click on the "Import tokens" link, and paste the address of your contract in the input field. You can set decimals to 0.
You should now see the name of the symbol of your token contract (e.g., GEO) in your "Assets" view in the Metamask. You should have one of these tokens.
This GIF demonstrates how to mint an NFT:

That's it! You can now create your own NFT contracts and mint your own NFTs on the Alfajores testnet.
You can now continue to the next learning module, which will teach you how to do [NFT Contract Development with Hardhat](https://hackmd.io/exuZTH2hTqKytn2vxgDmcg).
 Sign in with Wallet


