---
tags: linux2022
---
# 2022q1 Homework1 (lab0)
contributed by < `blueskyson` >
## 開發環境
```shell
$ gcc --version
gcc (Ubuntu 9.3.0-17ubuntu1~20.04) 9.3.0
$ lscpu
Architecture: x86_64
CPU op-mode(s): 32-bit, 64-bit
Byte Order: Little Endian
Address sizes: 39 bits physical, 48 bits virtual
CPU(s): 12
On-line CPU(s) list: 0-11
Thread(s) per core: 2
Core(s) per socket: 6
Socket(s): 1
NUMA node(s): 1
Vendor ID: GenuineIntel
CPU family: 6
Model: 165
Model name: Intel(R) Core(TM) i7-10750H CPU @ 2.60GHz
Stepping: 2
CPU MHz: 2600.000
CPU max MHz: 5000.0000
CPU min MHz: 800.0000
BogoMIPS: 5199.98
Virtualization: VT-x
L1d cache: 192 KiB
L1i cache: 192 KiB
L2 cache: 1.5 MiB
L3 cache: 12 MiB
NUMA node0 CPU(s): 0-11
```
## lab0-c 開發過程
參考[你所不知道的 C 語言:linked list 和非連續記憶體](https://hackmd.io/@sysprog/c-linked-list#Linked-list-%E5%9C%A8-Linux-%E6%A0%B8%E5%BF%83%E5%8E%9F%E5%A7%8B%E7%A8%8B%E5%BC%8F%E7%A2%BC)實作
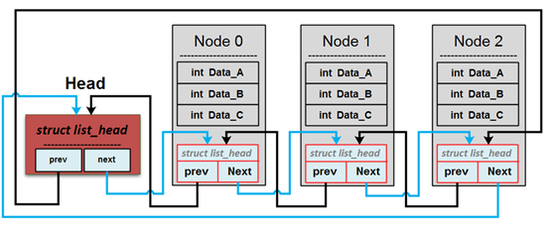
以下開發過程以 Head 表示佇列的頭,以 Node 表示 `element_t` 結構體。
### q_new
首先 `malloc` 一個 `struct list_head *head` 作為佇列的 Head,並檢查 `head` 是否為 `NULL`。接下來我把 `head->prev` 和 `head->next` 初始化為 `head`,`INIT_LIST_HEAD` 函式已經實作了前述初始化。
```c
struct list_head *q_new()
{
struct list_head *head = malloc(sizeof(struct list_head));
if (!head)
return NULL;
INIT_LIST_HEAD(head);
return head;
}
```
參考 [kdnvt](https://hackmd.io/@5ux520T8Sd-OoYfdxZR55Q/SyzDKJ9y9),若 malloc `head` 失敗,`head` 本身就會指向 `NULL`。所以程式碼還能改得更短:
```c
struct list_head *q_new()
{
struct list_head *head = malloc(sizeof(struct list_head));
if (head)
INIT_LIST_HEAD(head);
return head;
}
```
### q_free
首先確認傳入的 `struct list_head *l` 是否為 `NULL`。接下來使用 `list_for_each_entry_safe` 走訪佇列中所有 Node,使用 `list_del` 將 `node` 從佇列移除並且 `free` 掉 `node->value` 和 `node` 本身。最後 `free` 掉 `l`,即佇列的 Head。
```c
void q_free(struct list_head *l)
{
if (!l)
return;
element_t *node, *tmp;
list_for_each_entry_safe (node, tmp, l, list) {
list_del(&node->list);
free(node->value);
free(node);
}
free(l);
}
```
### q_insert_head
檢查 Head 是否為 `NULL`。`malloc` 一個 `element_t *node` 作為即將插入佇列的 Node,並檢查 `node` 是否為 `NULL`。接下來透過 `strdup` 將字元陣列 `s` 複製到 `node->value`。最後呼叫 `list_add` 將 `node` 插入佇列的開頭。
```c
bool q_insert_head(struct list_head *head, char *s)
{
if (!head)
return false;
element_t *node = malloc(sizeof(element_t));
if (!node)
return false;
node->value = strdup(s);
if (!node->value) {
free(node);
return false;
}
list_add(&node->list, head);
return true;
}
```
### q_insert_tail
檢查 Head 是否為 `NULL`。`malloc` 一個 `element_t *node` 作為即將插入佇列的 Node,並檢查 `node` 是否為 `NULL`。接下來透過 `strdup` 將字元陣列 `s` 複製到 `node->value`。最後呼叫 `list_add_tail` 將 `node` 插入佇列的尾端。
```c
bool q_insert_tail(struct list_head *head, char *s)
{
if (!head)
return false;
element_t *node = malloc(sizeof(element_t));
if (!node)
return false;
node->value = strdup(s);
if (!node->value) {
free(node);
return false;
}
list_add_tail(&node->list, head);
return true;
}
```
### q_remove_head
檢查 Head 是否為 `NULL`、檢查佇列中是否有 Node。透過 `list_entry` 取得佇列的第一個 Node,然後用 `list_del` 移除此 Node。接下來檢查 `sp` 是否為 `NULL` 以及 `bufsize` 是否為 0,使用 `strncpy` 把 Node 的字元陣列複製到 `sp` 中。
改進:
- 以 `list_empty(head)` 替換 `head == head->next`
- 以 `list_first_entry(head, element_t, list)` 替換 `list_entry(head->next, element_t, list)`
```c
if (!head || list_empty(head))
return NULL;
element_t *node = list_first_entry(head, element_t, list);
list_del(head->next);
if (sp && bufsize) {
strncpy(sp, node->value, bufsize - 1);
sp[bufsize - 1] = '\0';
}
return node;
}
```
### q_remove_tail
檢查 Head 是否為 `NULL`、檢查佇列中是否有 Node。透過 `list_entry` 取得佇列的最後一個 Node,然後用 `list_del` 移除此 Node。接下來檢查 `sp` 是否為 `NULL` 以及 `bufsize` 是否為 0,使用 `strncpy` 把 Node 的字元陣列複製到 `sp` 中。
改進:
- 以 `list_empty(head)` 替換 `head == head->next`
- 以 `list_last_entry(head, element_t, list)` 替換 `list_entry(head->prev, element_t, list)`
```c
element_t *q_remove_tail(struct list_head *head, char *sp, size_t bufsize)
{
if (!head || list_empty(head))
return NULL;
element_t *node = list_last_entry(head, element_t, list);
list_del(head->prev);
if (sp && bufsize) {
strncpy(sp, node->value, bufsize - 1);
sp[bufsize - 1] = '\0';
}
return node;
}
```
### q_size
檢查 Head 是否為 `NULL`,接下來透過 `list_for_each` 走訪整個佇列以計算 Node 的數量。
```c
int q_size(struct list_head *head)
{
if (!head)
return 0;
int len = 0;
struct list_head *li;
list_for_each (li, head)
len++;
return len;
}
```
### q_delete_mid
宣告 `struct list_head *slow = head->next, *fast =slow->next`,`slow` 每次會指向 `slow` 的下一個 `list_head`,而 `fast` 會指向 `fast` 的下下個 `list_head`,所以當 `fast` 指向 `head` 時,`slow` 正好在佇列正中間的 Node。然後,透過 `list_entry` 得到 `slow` 所在的 Node 的位址、透過 `list_del` 把 slow 從佇列中移除,最後 `free` 掉這個 Node 的所有資料。
改進:
- 以 `list_empty(head)` 替換 `head == head->next`
```c
bool q_delete_mid(struct list_head *head)
{
if (!head || list_empty(head))
return false;
// find the middle node
struct list_head *slow = head->next, *fast = slow->next;
while (fast != head) {
fast = fast->next;
if (fast != head) {
fast = fast->next;
slow = slow->next;
}
}
element_t *node = list_entry(slow, element_t, list);
list_del(slow);
free(node->value);
free(node);
return true;
}
```
### q_delete_dup
確認佇列的 Head 是否為 `NULL`。在 `list_for_each_entry_safe` 的每次迭代,`prev_value` 會指向前一個未重複的字串,若 `prev_value` 所儲存的字串與 `node->value` 一模一樣,代表字串重複,將當前的 Node 從佇列移除;反之將 `prev_value` 指向 `node->value`。
```c
bool q_delete_dup(struct list_head *head)
{
if (!head)
return false;
element_t *node, *tmp;
char *prev_value = "";
list_for_each_entry_safe (node, tmp, head, list) {
if (strcmp(prev_value, node->value) == 0) {
list_del(&node->list);
free(node->value);
free(node);
} else {
prev_value = node->value;
}
}
return true;
}
```
[#73](https://github.com/sysprog21/lab0-c/pull/73) 修正了評分程式的 bug,我上面的 `q_delete_dup` 不能通過測試,所以我修正了程式碼:
```c
bool q_delete_dup(struct list_head *head)
{
if (!head)
return false;
element_t *node, *tmp;
char *prev_value = "";
bool only_one = true;
list_for_each_entry_safe (node, tmp, head, list) {
if (strcmp(prev_value, node->value) == 0) {
only_one = false;
list_del(&node->list);
free(node->value);
free(node);
} else {
prev_value = node->value;
if (!only_one) {
element_t *del = list_last_entry(&node->list, element_t, list);
list_del(&del->list);
free(del->value);
free(del);
only_one = true;
}
}
}
// If tail nodes are duplicated
if (!only_one) {
element_t *del = list_last_entry(head, element_t, list);
list_del(&del->list);
free(del->value);
free(del);
only_one = true;
}
return true;
}
```
### q_swap
確認佇列的 Head 是否為 `NULL`。用 `first` 和 `second` 指向一對連續的 `list_head`,操作 `first->prev`、`first`、`second`、`second->next` 的指標來達成 swap,最後將 `first`、`second` 指向下一對連續的 `list_head`。
```c
void q_swap(struct list_head *head)
{
if (!head)
return;
struct list_head *first = head->next, *second = first->next;
while (first != head && second != head) {
first->prev->next = second;
second->prev = first->prev;
first->prev = second;
first->next = second->next;
second->next->prev = first;
second->next = first;
// point to next pair
first = first->next;
second = first->next;
}
}
```
改進:
- 參考 [SmallHanley](https://hackmd.io/@SmallHanley/linux2022-lab0) 的作法,用 list.h 的 API 取代所有指標操作。
```c
void q_swap(struct list_head *head)
{
if (!head)
return;
struct list_head *first;
list_for_each (first, head) {
if (first->next == head) {
break;
}
list_del(first);
list_add(first, first->next);
}
}
```
### q_reverse
首先確認佇列的 Head 是否為 `NULL`。接下來宣告 `struct list_head *prev, *node` 代表 circular linked list 中的任兩個連續的 `list_head`,接下來透過 `do while` 迴圈,把 `prev->prev` 與 `prev->next` 指向的位址對調,然後把 `prev` 和 `node` 指向下兩個連續的 `list_head`,直到所有 `list_head` 的 `prev` 和 `next` 指向的位址都被對調。
```c
void q_reverse(struct list_head *head) {
if (!head)
return;
struct list_head *prev = head, *node = head->next;
do {
prev->next = prev->prev;
prev->prev = node;
prev = node;
node = node->next;
} while (prev != head);
}
```
圖示:
**尚未反轉的佇列**
```graphviz
digraph ele_list {
rankdir=LR;
node[shape=record];
e1 [label="<top>Head |{<left>prev|<right>next}", style="bold", pos="0,0!"];
e2 [label="<top>Node 1|{<left>prev|<right>next}", style="bold", pos="0,1!"];
e3 [label="<top>Node 2|{<left>prev|<right>next}", style="bold"];
e4 [label="<top>...|{<left>|<right>}", style="bold"];
e5 [label="<top>Node N|{<left>prev|<right>next}", style="bold"];
e1:left:s -> e5:s;
e2:left -> e1:top;
e3:left -> e2:top;
e4:left -> e3:top;
e5:left -> e4:top;
e5:right -> e1:s;
e1:right -> e2:top;
e2:right -> e3:top;
e3:right -> e4:top;
e4:right -> e5:top;
}
```
**Step 0: 反轉 Head**
```graphviz
digraph ele_list {
rankdir=LR;
node[shape=record];
e1 [label="<top>Head |{<left>prev|<right>next}", style="bold"];
e2 [label="<top>Node 1|{<left>prev|<right>next}", style="bold"];
e3 [label="<top>Node 2|{<left>prev|<right>next}", style="bold"];
e4 [label="<top>...|{<left>|<right>}", style="bold"];
e5 [label="<top>Node N|{<left>prev|<right>next}", style="bold"];
e1:left:n -> e2:left:nw [color=red];
e2:left -> e1:top;
e3:left -> e2:top;
e4:left -> e3:top;
e5:left -> e4:top;
e5:right -> e1:s;
e1:right -> e5 [color=red];
e2:right -> e3:top;
e3:right -> e4:top;
e4:right -> e5:top;
p [label="prev", style=dashed, color=grey];
p -> e1:n [style=dashed, color=grey];
n [label="node", style=dashed, color=grey];
n -> e2:n [style=dashed, color=grey];
}
```
**Step 1: 反轉 Node 1**
```graphviz
digraph ele_list {
rankdir=LR;
node[shape=record];
e1 [label="<top>Head |{<left>prev|<right>next}", style="bold"];
e2 [label="<top>Node 1|{<left>prev|<right>next}", style="bold"];
e3 [label="<top>Node 2|{<left>prev|<right>next}", style="bold"];
e4 [label="<top>...|{<left>|<right>}", style="bold"];
e5 [label="<top>Node N|{<left>prev|<right>next}", style="bold"];
e1:left:n -> e2 [color=blue];
e2:left:s -> e3:left:s [color = red];
e3:left -> e2:top;
e4:left -> e3:top;
e5:left -> e4:top;
e5:right -> e1:s;
e1:right:s -> e5:left:s [color=blue];
e2:right:w -> e1:right:e [color=red];
e3:right -> e4:top;
e4:right -> e5:top;
p [label="prev", style=dashed, color=grey];
p -> e2:n [style=dashed, color=grey];
n [label="node", style=dashed, color=grey];
n -> e3:n [style=dashed, color=grey];
}
```
**Step N: 反轉 Node N**
```graphviz
digraph ele_list {
rankdir=LR;
node[shape=record];
e1 [label="<top>Head |{<left>prev|<right>next}", style="bold"];
e2 [label="<top>Node 1|{<left>prev|<right>next}", style="bold"];
e3 [label="<top>Node 2|{<left>prev|<right>next}", style="bold"];
e4 [label="<top>...|{<left>|<right>}", style="bold"];
e5 [label="<top>Node N|{<left>prev|<right>next}", style="bold"];
e1:left -> e2:left:s [color=blue];
e2:left -> e3:left:s [color=blue];
e3:left -> e4:left:s [color=blue];
e4:left -> e5:left:s [color=blue];
e5:left -> e1:top:e [color=red];
e5:right:s -> e4:right:e [color=red];
e1:right -> e5:top:w [color=blue];
e2:right:w -> e1:right:e [color=blue];
e3:right:w -> e2:right:e [color=blue];
e4:right:w -> e3:right:e [color=blue];
p [label="prev", style=dashed, color=grey];
p -> e5:n [style=dashed, color=grey];
n [label="node", style=dashed, color=grey];
n -> e1:n [style=dashed, color=grey];
}
```
### q_sort
實作 merge sort。想法:在排序過程中把佇列的 Head 斷開、把所有 Node 當作 singly-linked list,當排序完成,再把佇列恢復成 circular doubly-linked list。
:::warning
注意連字號擺放位置: singly-linked, doubly-linked
:notes: jserv
:::
首先讓最後一個 Node 的 `next` 指向 `NULL`,將 `&(head->next)` 傳入遞迴函式 `sort_recur`。在 `sort_recur` 中,以傳入的 list 少於兩個 Node 作為中止條件,若此段 list 的長度大於等於兩個 Node,則把它平分成 `left`、`right` 左右兩段,呼叫 `sort_recur(&left)`, `sort_recur(&right)` 進入下一層遞迴。當 `sort_recur` 回傳後,用 `strcmp()` 比較字串長度及大小,把 `left` 及 `right` 的所有 Node 由小到大排序。
當 `sort_recur` 的遞迴結束,佇列已經排序完成,但是所有 `list_head` 的 `prev` 都亂指一通,所以我再用一個 `while` 迴圈來把 `prev` 指向前一個 Node 的,然後再讓最後一個 Node 的 `next` 指向 Head,至此佇列便恢復成 circular doubly linked list。
```c
void sort_recur(struct list_head **phead)
{
// terminal condition
if (*phead == NULL || (*phead)->next == NULL)
return;
// find the middle node
struct list_head *slow = *phead, *fast = slow->next;
while (fast != NULL) {
fast = fast->next;
if (fast != NULL) {
fast = fast->next;
slow = slow->next;
}
}
// split list
struct list_head *left = *phead, *right = slow->next;
slow->next = NULL;
sort_recur(&left);
sort_recur(&right);
// merge splited lists
struct list_head dummy_head;
struct list_head *cursor = &dummy_head;
while (true) {
if (left == NULL) {
cursor->next = right;
break;
} else if (right == NULL) {
cursor->next = left;
break;
}
char *leftval = list_entry(left, element_t, list)->value;
char *rightval = list_entry(right, element_t, list)->value;
if (strcmp(leftval, rightval) <= 0) {
cursor->next = left;
left = left->next;
} else {
cursor->next = right;
right = right->next;
}
cursor = cursor->next;
}
*phead = dummy_head.next;
}
void q_sort(struct list_head *head)
{
if (!head || head == head->next)
return;
// treat the queue as a singly linked list
// let the last node's next point to NULL
head->prev->next = NULL;
sort_recur(&(head->next));
// turn the list back to doubly circular linked list
struct list_head *prev = head, *node = head->next;
while (node) {
node->prev = prev;
prev = node;
node = node->next;
}
// link head and the last node
prev->next = head;
head->prev = prev;
}
```
`sort_recur` 應用 pointer-to-pointer 與 dummy_head 使程式碼精簡。
圖示如下:
**尚未排序的佇列**
```graphviz
digraph ele_list {
rankdir=LR;
node[shape=record];
e1 [label="<top>Head |{<left>prev|<right>next}", style="bold", pos="0,0!"];
e2 [label="<top>dolphin|{<left>prev|<right>next}", style="bold", pos="0,1!"];
e3 [label="<top>bear|{<left>prev|<right>next}", style="bold"];
e4 [label="<top>...|{<left>|<right>}", style="bold"];
e5 [label="<top>gerbil|{<left>prev|<right>next}", style="bold"];
e1:left:s -> e5:s;
e2:left -> e1:top;
e3:left -> e2:top;
e4:left -> e3:top;
e5:left -> e4:top;
e5:right -> e1:s;
e1:right -> e2:top;
e2:right -> e3:top;
e3:right -> e4:top;
e4:right -> e5:top;
}
```
**前處理:** 把佇列視為 singly linked list,讓最後一個 Node 的 `next` 指向 `NULL`。
```graphviz
digraph ele_list {
rankdir=LR;
node[shape=record];
e1 [label="<top>Head |{<left>prev|<right>next}", style="bold", pos="0,0!", color=grey];
e2 [label="<top>dolphin|{<left>prev|<right>next}", style="bold", pos="0,1!"];
e3 [label="<top>bear|{<left>prev|<right>next}", style="bold"];
e4 [label="<top>...|{<left>|<right>}", style="bold"];
e5 [label="<top>gerbil|{<left>prev|<right>next}", style="bold"];
NULL [label=NULL, style="bold", color=red, fontcolor=red];
e1:left:s -> e5:s [color=grey];
e2:left -> e1:top [color=grey];
e3:left -> e2:top [color=grey];
e4:left -> e3:top [color=grey];
e5:left -> e4:top [color=grey];
e5:right -> NULL [color=red];
e1:right -> e2:top [color=grey];
e2:right -> e3:top;
e3:right -> e4:top;
e4:right -> e5:top;
}
```
**Merge sort:** 示意圖摘自 [你所不知道的 C 語言:linked list 和非連續記憶體](https://hackmd.io/YA7RMqd6RE2UL8OmmjU9PQ?view#Merge-Sort-%E7%9A%84%E5%AF%A6%E4%BD%9C)
```graphviz
digraph G {
compound=true
node[shape=box, height=.1];sorted_1 sorted_2 sorted_3 sorted_4 sorted_5 sorted_6 sorted_7 sorted_8;
node[shape=record, height=.1];input result
divide_41 divide_42 divide_21 divide_22 divide_23 divide_24
merge_21 merge_22 merge_23 merge_24 merge_41 merge_42;
input[label="<f0>2|<f1>5|<f2>4|<f3>6|<f4>8|<f5>1|<f6>7|<f7>3"]
result[label="<f0>1|<f1>2|<f2>3|<f3>4|<f4>5|<f5>6|<f6>7|<f7>8"]
divide_41[label="<f1>2|<f2>5|<f3>4|<f4>6"]
divide_42[label="<f1>8|<f2>1|<f3>7|<f4>3"]
divide_21[label="<f0>2|<f1>5"]
divide_22[label="<f0>4|<f1>6"]
divide_23[label="<f0>8|<f1>1"]
divide_24[label="<f0>7|<f1>3"]
sorted_1[label="1"]
sorted_2[label="2"]
sorted_3[label="3"]
sorted_4[label="4"]
sorted_5[label="5"]
sorted_6[label="6"]
sorted_7[label="7"]
sorted_8[label="8"]
merge_21[label="<f0>2|<f1>5"]
merge_22[label="<f0>4|<f1>6"]
merge_23[label="<f0>1|<f1>8"]
merge_24[label="<f0>3|<f1>7"]
merge_41[label="<f1>2|<f2>4|<f3>5|<f4>6"]
merge_42[label="<f1>1|<f2>3|<f3>7|<f4>8"]
subgraph cluster_0 {
style=filled;
color="#ef6548";
label="divide";
divide_pad[label="----------------------", style=invis]
divide_pad -> divide_23[style=invis]
input -> divide_41
input -> divide_42
divide_41 -> divide_21
divide_41 -> divide_22
divide_42 -> divide_23
divide_42 -> divide_24
}
divide_21:f0 -> sorted_2
divide_21:f1 -> sorted_5
divide_22 -> sorted_4
divide_22 -> sorted_6
divide_23:f0 -> sorted_8
divide_23:f1 -> sorted_1
divide_24:f0 -> sorted_7
divide_24:f1 -> sorted_3
subgraph cluster_1 {
style=filled;
color="#a6cee3";
label="sorted lists";
sorted_1;
sorted_2;
sorted_3;
sorted_4;
sorted_5;
sorted_6;
sorted_7;
sorted_8;
}
sorted_2 -> merge_21:f0
sorted_5 -> merge_21:f1
sorted_4 -> merge_22:f0
sorted_6 -> merge_22:f1
sorted_8 -> merge_23:f1[constraint=false]
sorted_1 -> merge_23:f0
sorted_7 -> merge_24:f1
sorted_3 -> merge_24:f0
subgraph cluster_2 {
style=filled;
color="#b2df8a";
label="merge";
merge_pad[label="--------------------", style=invis]
rank=same; merge_41; merge_pad; merge_42
rank=same; merge_41; merge_42; merge_pad;
merge_22 -> merge_pad[style=invis]
merge_23 -> merge_pad[style=invis]
merge_pad -> result[style=invis]
merge_21 -> merge_41
merge_22 -> merge_41
merge_23 -> merge_42
merge_24 -> merge_42
merge_41 -> result
merge_42 -> result
}
}
```
**完成排序的佇列:** 此時所有 Node 的 `next` 按照順序連接,但是 `prev` 亂指一通。
```graphviz
digraph ele_list {
rankdir=LR;
node[shape=record];
e1 [label="<top>Head |{<left>prev|<right>next}", style="bold", pos="0,0!"];
e2 [label="<top>bear|{<left>prev|<right>next}", style="bold", pos="0,1!"];
e3 [label="<top>dolphin|{<left>prev|<right>next}", style="bold"];
e4 [label="<top>...|{<left>|<right>}", style="bold"];
e5 [label="<top>vulture|{<left>prev|<right>next}", style="bold"];
NULL [label=NULL, style="bold"];
e1:left:s -> e4:right:s [color=grey];
e2:left:s -> e4:s [color=grey];
e3:left:s -> e4:sw [color=grey];
e5:left:s -> e4:se [color=grey];
e5:right -> NULL;
e1:right -> e2;
e2:right -> e3:left;
e3:right -> e4:left;
e4:right -> e5:left;
}
```
**讓佇列恢復成 circular doubly linked list**
```graphviz
digraph ele_list {
rankdir=LR;
node[shape=record];
e1 [label="<top>Head |{<left>prev|<right>next}", style="bold", pos="0,0!"];
e2 [label="<top>bear|{<left>prev|<right>next}", style="bold", pos="0,1!"];
e3 [label="<top>dolphin|{<left>prev|<right>next}", style="bold"];
e4 [label="<top>...|{<left>|<right>}", style="bold"];
e5 [label="<top>vulture|{<left>prev|<right>next}", style="bold"];
e1:left:s -> e5:s [color=red];
e2:left -> e1:top [color=red];
e3:left -> e2:top [color=red];
e4:left -> e3:top [color=red];
e5:left -> e4:top [color=red];
e5:right -> e1:s [color=red];
e1:right -> e2:top;
e2:right -> e3:top;
e3:right -> e4:top;
e4:right -> e5:top;
}
```
## 研讀 [list_sort.c](https://github.com/torvalds/linux/blob/master/lib/list_sort.c)
**閱讀時間點:** Latest commit [9dbbc3b](https://github.com/torvalds/linux/commit/9dbbc3b9d09d6deba9f3b9e1d5b355032ed46a75) on Jul 8, 2021
`list_sort` 實做為 $2:1$ 的 balanced merge,即,假設現在有兩個長度為 $2^k$ 的 pending sublist (正等著被 merge),如果這兩個 sublist 後面還有 $2^k$ 以上個元素,就馬上 merge 這兩個 sublist 成為 $2^{k+1}$ 長度的 list,如此一來合併後的 list 與剩下的 $2^k$ 個元素數量正好為 $2:1$。
這樣做的好處是,當 cache 容納得下 $3*2^k$ 個元素時,可以避免 cache thrashing。這個實作沒有比 bottom-up merge sort 好,但是可以減少 $0.2*n$ 次比較,所以當 L1 cache 可以容納 $3*2^k$ 個元素時此作法會比較快。
:::info
既然 $2:1$ balanced merge sort 可以減少 $0.2*n$ 次比較,不知道為什麼註解說 bottom-up merge sort 要比 $2:1$ balance merge sort 好,$0.2*n$ 這個數字怎麼來的也不知道。需要計算數學與設計實驗測量 branch、cache miss 數量。
> 快去讀論文!
> :notes: jserv
:::
為了找到更詳細的資料,我查看了 list_sort.c 的 commit 紀錄,發現 $2:1$ merge 的實作在 [b5c56e0](https://github.com/torvalds/linux/commit/b5c56e0cdd62979dd538e5363b06be5bdf735a09) 引入,commit 訊息解釋了為何要如此實作,並提供三個參考資料:
Bottom-up Mergesort: A Detailed Analysis
Wolfgang Panny, Helmut Prodinger
Algorithmica 14(4):340--354, October 1995
https://doi.org/10.1007/BF01294131
https://citeseerx.ist.psu.edu/viewdoc/summary?doi=10.1.1.6.5260
The cost distribution of queue-mergesort, optimal mergesorts, and
power-of-two rules
Wei-Mei Chen, Hsien-Kuei Hwang, Gen-Huey Chen
Journal of Algorithms 30(2); Pages 423--448, February 1999
https://doi.org/10.1006/jagm.1998.0986
https://citeseerx.ist.psu.edu/viewdoc/summary?doi=10.1.1.4.5380
Queue-Mergesort
Mordecai J. Golin, Robert Sedgewick
Information Processing Letters, 48(5):253--259, 10 December 1993
https://doi.org/10.1016/0020-0190(93)90088-q
https://sci-hub.tw/10.1016/0020-0190(93)90088-Q
稍後詳閱。
### 參數欄位
```c=
__attribute__((nonnull(2,3)))
void list_sort(void *priv, struct list_head *head, list_cmp_func_t cmp)
{
```
第一行 `__attribute__((nonnull(2,3)))` 是告訴 gcc 這個函式應該具有什麼屬性,在編譯時期就可以檢查程式碼的正確性,詳情在下方[\_\_attribute\_\_ 的作用](https://hackmd.io/0oQNR91SSRKprDpLbObf6w?view#__attribute__-%E7%9A%84%E4%BD%9C%E7%94%A8)說明。
參數說明:
- `@priv`: private data,`list_sort()` 並不會直接操作,只會把 `priv` 傳遞給 `@cmp`,如果 `@cmp` 不需要使用 `priv`,可以直接傳入 `NULL` 作為 `priv`,但是 `@cmp` 仍必須讓第一個參數去接收 `priv`。(可以參考 [linux/drivers/gpu/drm/i915/gvt/debugfs.c](https://github.com/torvalds/linux/blob/57fa2369ab17d67e6232f85b868652fbf4407206/drivers/gpu/drm/i915/gvt/debugfs.c) 如何使用 `list_sort` 以及 `mmio_offset_compare`)
- `@head`:要排序的串列的 Head。
- `@cmp`:元素比較函數,為 function pointer,其型態 `list_cmp_func_t` 宣告如下:
```c
typedef int __attribute__((nonnull(2,3))) (*list_cmp_func_t)(void *,
const struct list_head *, const struct list_head *);
```
`@cmp` 的回傳值必須是 `int` 型態,`@cmp` 的第一個參數(型態為 `void*`)負責接收 `@priv`。第二、三個參數 `@a`、`@b` 為串列的 Node 的 `list_head`。如果 `@a` 應該排在 `@b` 之後,`@cmp` 必須回傳 > 0(例如 `@a > @b`,並且升冪排序);反之,如果 `@a` 應該排在 `@b` 之前(即順序不變),`@cmp` 必須回傳 <= 0。`list_sort` 是 stable sort,因此不需要區分 `@a < @b` 和 `@a == @b` 的情況。
:::info
這裡原文提到 "This is compatible with two styles of @cmp function ... e.g. `plug_ctx_cmp()` in block/blk-mq.c." 但是在 [block/blk-mq.c](https://github.com/torvalds/linux/blob/a12821d5e012a42673f6fe521971f193441d8aa4/block/blk-mq.c) 裡根本沒有 `plug_ctx_cmp()`,我也不知道是什麼機制允許 `@cmp` 為兩個參數的 function pointer,或許我理解錯 "two styles of @cmp function" 的意思?
:::
### 初始化 merge sort
```c=4
struct list_head *list = head->next, *pending = NULL;
size_t count = 0; /* Count of pending */
if (list == head->prev) /* Zero or one elements */
return;
/* Convert to a null-terminated singly-linked list. */
head->prev->next = NULL;
```
首先檢查 list 是否至少有兩個 Node,接下來讓最後一個 Node 的 `next` 指向 `NULL`,使其變成 singly linked list。`prev` 指標不再指向前一個 Node,而是另有用途。
```graphviz
digraph ele_list {
rankdir=LR;
node[shape=record];
e2 [label="<top>Node 1|{<left>prev|<right>next}", style="bold", pos="0,1!"];
e3 [label="<top>Node 2|{<left>prev|<right>next}", style="bold"];
e4 [label="<top>...|{<left>|<right>}", style="bold"];
e5 [label="<top>Node N|{<left>prev|<right>next}", style="bold"];
NULL [label=NULL, style="bold", color=red, fontcolor=red];
e3:left -> e2:top;
e4:left -> e3:top;
e5:left -> e4:top;
e5:right -> NULL [color=red];
e2:right -> e3:top;
e3:right -> e4:top;
e4:right -> e5:top;
p [label="pending", style=dashed, color=grey];
p -> NULL:n [style=dashed, color=grey];
l [label="list", style=dashed, color=grey];
l -> e2:n [style=dashed, color=grey];
}
```
### 走訪整個 list 同時執行 merge sort
```c=12
do {
size_t bits;
struct list_head **tail = &pending;
/* Find the least-significant clear bit in count */
for (bits = count; bits & 1; bits >>= 1)
tail = &(*tail)->prev;
/* Do the indicated merge */
if (likely(bits)) {
struct list_head *a = *tail, *b = a->prev;
a = merge(priv, cmp, b, a);
/* Install the merged result in place of the inputs */
a->prev = b->prev;
*tail = a;
}
/* Move one element from input list to pending */
list->prev = pending;
pending = list;
list = list->next;
pending->next = NULL;
count++;
} while (list);
```
參照上方 do while 迴圈與註解可以看出 merge sort 實做的一些想法:
- `pending` 是已經排序好但尚未被 merge 的 sublists 的 list,亦稱為 "list of list"。
- 每個排序好的 sublist 的長度正好為 $2^k$。
`bits` 用於判斷何時必須 merge 相鄰的若干個 Node,其目的是檢查目前的 sublist 是否湊滿 $2^k$ 個 Node,若目前有 $2^k$ 個 Node,`if(likely(bits))` 就會成立(`likely()` 用於優化編譯後的組合語言,稍後在[ likely 與 unlikely 巨集](https://hackmd.io/0oQNR91SSRKprDpLbObf6w?view#likely-%E8%88%87-unlikely-%E5%B7%A8%E9%9B%86)解釋),並呼叫 `merge` 來合併最新的兩個 pending sublists,然後讓 `list` 指向下一個 Node;若不到 $2^k$ 能 `merge`,就只讓 `list` 指向下一個 Node。
`for (bits = count; bits & 1; bits >>= 1)` 會持續將 `bits` 右移,直到遇到由右向左數來的的第一個 clear bit,若 for 迴圈完畢後 `bits` 仍不為 0,就 merge 兩個長度一樣的 pending sublists。只閱讀程式碼太抽象,我列舉 `count` 等於 0 到 11 的狀態:
| count(十進位) | count(二進位) | 所有 sublist 的狀態 |
| --------------- | ------------------- |:------------------------ |
| 0 | $0000$ | [1] |
| 1 | $000\color{red}{1}$ | [1,1] |
| 2 (merge) | $0010$ | [1,1,1] -> [2,1] |
| 3 | $00\color{red}{11}$ | [2,1,1] |
| 4 (merge) | $0100$ | [2,1,1,1] -> [2,2,1] |
| 5 (merge) | $010\color{red}{1}$ | [2,2,1,1] -> [4,1,1] |
| 6 (merge) | $0110$ | [4,1,1,1] -> [4,2,1] |
| 7 | $0\color{red}{111}$ | [4,2,1,1] |
| 8 (merge) | $1000$ | [4,2,1,1,1] -> [4,2,2,1] |
| 9 (merge) | $100\color{red}{1}$ | [4,2,2,1,1] -> [4,4,1,1] |
| 10 (merge) | $1010$ | [4,4,1,1,1] -> [4,4,2,1] |
| 11 (merge) | $10\color{red}{11}$ | [4,4,2,1,1] -> [8,2,1,1] |
上表中第一個欄位是 `count` 在 do while 迴圈中每一次迭代的值(0 到 n-1),後面緊接著 (merge) 代表在該次迭代中有呼叫 `merge` 來合併 sublist。
第二個欄位是以二進位表示 `count`,可以注意到由右到左的連續 set bits 被標記為紅色,代表被 for 迴圈右移而被移除。
第三個欄位為每次 do while 迴圈迭代完成後,所有 pending sublist 的狀態,每個以逗號隔開的數字代表該 sublist 的 Node 數量,所有數字加起來會等於 `count+1`,箭號代表 merge 後 pending lists 變為箭號後的狀態。舉 `count == 5` 為例,`[2,2,1,1]` 代表第一、二個 Node 屬於第一個 sublist,第三、四個 Node 屬於第二個 sublist,第五個 Node 自成第三個 sublist,第六個 Node 自成第四個 sublist。此時因為第一、二個 sublist 長度皆為 $2^1$,且第一、二個 sublist 後面的 Node 數量也為 $2^1$ 個,符合 $2:1$ balanced merge,所以 merge 這兩個 sublist,因此狀態變為 `[4,1,1]`。
解釋完 `bits` 的奧妙機制後,接下來談實作上如何是如何儲存 pending sublist 狀態,最關鍵的手法是利用 `prev` 指向每個 sublist 的第一個 Node。在每次 do while 迭代,`list` 會指向第 `count` 個 Node,`pending` 會指向前一個 Node,indirect pointer `tail` 會指向 `&pending` 並在 `bits` 向右移時,一直指向 `tail = &(*tail)->prev` 藉以把自己移動到可能將被 merge 的 sublist,在 sublist 被 merge 後更新 `prev`。
圖示:
**執行完 count = 0 的迭代:**
Node 1 自成一個 sublist,所以所有 sublists 的狀態為 `[1]`。
```graphviz
digraph ele_list {
rankdir=LR;
node[shape=record];
e2 [label="<top>Node 1|{<left>prev|<right>next}", style="bold"];
e3 [label="<top>Node 2|{<left>prev|<right>next}", style="bold"];
e4 [label="<top>Node 3|{<left>prev|<right>next}", style="bold"];
e5 [label="<top>...|{<left>|<right>}", style="bold"];
e6 [label="<top>Node N|{<left>prev|<right>next}", style="bold"];
NULL [label=NULL, style="bold"];
NULL [label=NULL, style="bold"];
subgraph cluster_0 {
style=filled;
color="#a6cee3";
label="sublist 1";
e2;
}
e2:left -> NULL [color=red];
e3:left:n -> e2:top;
e4:left:n -> e3:top;
e5:left:n -> e4:top;
e6:left:n -> e5:top;
e2:right -> NULL [color=red];
e3:right -> e4;
e4:right -> e5;
e5:right -> e6;
e6:right:s -> NULL:sw;
p [label="pending", style=dashed, color=grey];
p -> e2:nw [style=dashed, color=grey];
l [label="list", style=dashed, color=grey];
l -> e3:nw [style=dashed, color=grey];
}
```
**count = 1**
此時 Node 1 自成一個 sublist、Node 2 也自成一個 sublist,sublists 的狀態為 `[1,1]`。
```graphviz
digraph ele_list {
rankdir=LR;
node[shape=record];
e2 [label="<top>Node 1|{<left>prev|<right>next}", style="bold"];
e3 [label="<top>Node 2|{<left>prev|<right>next}", style="bold"];
e4 [label="<top>Node 3|{<left>prev|<right>next}", style="bold"];
e5 [label="<top>...|{<left>|<right>}", style="bold"];
e6 [label="<top>Node N|{<left>prev|<right>next}", style="bold"];
NULL [label=NULL, style="bold"];
NULL [label=NULL, style="bold"];
subgraph cluster_0 {
style=filled;
color="#a6cee3";
label="sublist 1";
e2;
}
subgraph cluster_1 {
style=filled;
color="#a6cee3";
label="sublist 2";
e3;
}
e2:left -> NULL;
e3:left:n -> e2 [color=red];
e4:left:n -> e3;
e5:left:n -> e4;
e6:left:n -> e5;
e2:right -> NULL;
e3:right -> NULL:sw [color=red];
e4:right -> e5;
e5:right -> e6;
e6:right -> NULL;
p [label="pending", style=dashed, color=grey];
p -> e3:nw [style=dashed, color=grey];
l [label="list", style=dashed, color=grey];
l -> e4:n [style=dashed, color=grey];
}
```
**count = 2**
此時 Node 3 也自成一個 sublist,sublists 的狀態為 `[1,1,1]`。我們發現 Node 1 與 Node 2 為首的 sublist 長度都為 $2^0$,且後面有一個 Node 3,形成 $2:1$,我們 merge 以 Node 1 和 Node 2 為首的 sublists,讓狀態變成 `[2,1]`。長度為 2 的 sublist 即為下圖綠色區域,Node 1、Node 2 是排序好的 singly linked list。
```graphviz
digraph ele_list {
rankdir=LR;
node[shape=record];
e2 [label="<top>Node 1|{<left>prev|<right>next}", style="bold"];
e3 [label="<top>Node 2|{<left>prev|<right>next}", style="bold"];
e4 [label="<top>Node 3|{<left>prev|<right>next}", style="bold"];
e5 [label="<top>...|{<left>|<right>}", style="bold"];
e6 [label="<top>Node N|{<left>prev|<right>next}", style="bold"];
NULL [label=NULL, style="bold"];
NULL [label=NULL, style="bold"];
subgraph cluster_0 {
style=filled;
color="#b2df8a";
label="sublist 1";
e2;e3;
}
subgraph cluster_1 {
style=filled;
color="#a6cee3";
label="sublist 2";
e4;
}
e2:left -> NULL [color=red];
e4:left:n -> e2 [color=red];
e5:left:n -> e4;
e6:left:n -> e5;
e2:right -> e3 [color=red];
e3:right -> NULL;
e4:right -> NULL [color=red];
e5:right -> e6;
e6:right -> NULL;
p [label="pending", style=dashed, color=grey];
p -> e4:nw [style=dashed, color=grey];
l [label="list", style=dashed, color=grey];
l -> e5:n [style=dashed, color=grey];
}
```
**count = 3**
sublists 的狀態為 `[2,1,1]`。
```graphviz
digraph ele_list {
rankdir=LR;
node[shape=record];
l1 [label="<top>Node 1, 2|{<left>|<right>}", style="bold"];
e4 [label="<top>Node 3|{<left>prev|<right>next}", style="bold"];
e5 [label="<top>Node 4|{<left>prev|<right>next}", style="bold"];
e6 [label="<top>...|{<left>|<right>}", style="bold"];
e7 [label="<top>Node N|{<left>prev|<right>next}", style="bold"];
NULL [label=NULL, style="bold"];
NULL [label=NULL, style="bold"];
subgraph cluster_0 {
style=filled;
color="#b2df8a";
label="sublist 1";
l1;
}
subgraph cluster_1 {
style=filled;
color="#a6cee3";
label="sublist 2";
e4;
}
subgraph cluster_2 {
style=filled;
color="#a6cee3";
label="sublist 3";
e5;
}
l1:right -> NULL;
l1:left -> NULL;
e4:left:n -> l1;
e5:left:n -> e4 [color=red];
e6:left:n -> e5;
e7:left:n -> e6;
e4:right -> NULL;
e5:right -> NULL [color=red];
e6:right -> e7;
e7:right -> NULL;
p [label="pending", style=dashed, color=grey];
p -> e5:nw [style=dashed, color=grey];
l [label="list", style=dashed, color=grey];
l -> e6:nw [style=dashed, color=grey];
}
```
**count = 4**
sublist 2 與 sublist 3 長度都為 $2^0$,且後面有 Node 5 形成 $2:1$,我們 merge sublist 2 和 sublist 3,讓狀態由 `[2,1,1,1]` 變成 `[2,2,1]`。
```graphviz
digraph ele_list {
rankdir=LR;
node[shape=record];
l1 [label="<top>Node 1, 2|{<left>|<right>}", style="bold"];
e4 [label="<top>Node 3|{<left>prev|<right>next}", style="bold"];
e5 [label="<top>Node 4|{<left>prev|<right>next}", style="bold"];
e6 [label="<top>Node 5|{<left>prev|<right>next}", style="bold"];
e7 [label="<top>...|{<left>|<right>}", style="bold"];
e8 [label="<top>Node N|{<left>prev|<right>next}", style="bold"];
NULL [label=NULL, style="bold"];
NULL [label=NULL, style="bold"];
subgraph cluster_0 {
style=filled;
color="#b2df8a";
label="sublist 1";
l1;
}
subgraph cluster_1 {
style=filled;
color="#b2df8a";
label="sublist 2";
e4;e5;
}
subgraph cluster_2 {
style=filled;
color="#a6cee3";
label="sublist 3";
e6;
}
l1:right -> NULL;
l1:left -> NULL;
e4:left:s -> l1 [color=red];
e6:left:n -> e4:w [color=red];
e7:left:n -> e6;
e8:left:n -> e7;
e4:right -> e5;
e5:right -> NULL;
e6:right -> NULL [color=red];
e7:right -> e8;
e8:right -> NULL;
p [label="pending", style=dashed, color=grey];
p -> e6:nw [style=dashed, color=grey];
l [label="list", style=dashed, color=grey];
l -> e7:nw [style=dashed, color=grey];
}
```
**count = 5...N** 省略
由上方的圖示可以看出 `prev` 串連了每個 sublist 的第一個 Node,透過 `tail = &pending` 以及執行若干次 `tail = &(*tail)->prev` 定位到指定的 sublist。
### merge 剩餘的 sublist,並重建構 `prev`,恢復成 circular doubly-linked list
前面的 do while 迴圈執行結束後會留下許多長度為 $2^k$ 且由大到小排序的 pending sublist,舉 n = 15 為例,do while 結束後會留下 [8,4,2,1] 4 個 sublist,此時我們需要透過以下 for 迴圈達成:[8,4,2,1] -> [8,4,3] -> [8,7]。最後呼叫 `merge_all` 來合併剩餘的 [8,7],並且將整個 list 恢復成 circular doubly linked list。
```c=35
/* End of input; merge together all the pending lists. */
list = pending;
pending = pending->prev;
for (;;) {
struct list_head *next = pending->prev;
if (!next)
break;
list = merge(priv, cmp, pending, list);
pending = next;
}
/* The final merge, rebuilding prev links */
merge_final(priv, cmp, head, pending, list);
}
```
### `__attribute__` 的作用
前面閱讀 `list_sort` 原始碼時,在函數的開頭使用了 `__attribute__((nonnull(2,3)))`。為了釐清它的作用,尋找第一手材料,首先進入 gcc 9.x 的 [onlinedocs](https://gcc.gnu.org/onlinedocs/gcc-9.4.0/gcc/),找到第 6 章 [Extensions to the C Language Family](https://gcc.gnu.org/onlinedocs/gcc-9.4.0/gcc/C-Extensions.html#C-Extensions),找到 [6.33 Declaring Attributes of Functions](https://gcc.gnu.org/onlinedocs/gcc-9.4.0/gcc/Function-Attributes.html#Function-Attributes):
在 GNU C 和 C++ 中,您可以使用 Function Attributes(以下簡稱"屬性")為函式指定某些屬性,這些屬性可以幫助編譯器優化函式,或更仔細地檢查程式碼的正確性。您還可以使用屬性來控制函式的 memory placement、code generation options 和 call/return conventions。許多 attribute 是 target-specific 的,例如許多 target 支援定義 interrupt handler functions 的屬性,這些函式通常必須使用特定的 register 來執行和回傳,此類屬性與其對應的 target 將在 6.33 的每個小節描述。但是大部分 target 都支援相當多屬性了,這些通用的屬性在 [6.33.1 Common Function Attributes](https://gcc.gnu.org/onlinedocs/gcc-9.4.0/gcc/Common-Function-Attributes.html#Common-Function-Attributes) 描述。
屬性由函數宣告中的 `__attribute__` 關鍵字引入,接著用雙括號括起想要使用的屬性,若想要指定多個屬性,就在雙括號內用逗點分隔它們,或者在一個屬性之後緊跟另一個。有關屬性語法的確切規則,請參閱 [6.39 Attribute Syntax](https://gcc.gnu.org/onlinedocs/gcc-9.4.0/gcc/Attribute-Syntax.html#Attribute-Syntax)。如果兩個屬性互相不兼容,編譯器會直接忽略屬性並產生警告。
GCC 還支援 [6.34 Variable Attributes](https://gcc.gnu.org/onlinedocs/gcc-9.4.0/gcc/Variable-Attributes.html#Variable-Attributes)、[6.35 Type Attributes](https://gcc.gnu.org/onlinedocs/gcc-9.4.0/gcc/Type-Attributes.html#Type-Attributes)、[6.36 Label Attributes](https://gcc.gnu.org/onlinedocs/gcc-9.4.0/gcc/Label-Attributes.html#Label-Attributes")、[6.37 Enumerator Attributes](https://gcc.gnu.org/onlinedocs/gcc-9.4.0/gcc/Enumerator-Attributes.html#Enumerator-Attributes)、[6.38 Statement Attributes](https://gcc.gnu.org/onlinedocs/gcc-9.4.0/gcc/Statement-Attributes.html#Statement-Attributes)。
讀到這裡我們已經完全瞭解 Function Attributes 的目的與語法,接下來閱讀它如何去搭配 `nonnull` 屬性。在 [6.33.1 Common Function Attributes](https://gcc.gnu.org/onlinedocs/gcc-9.4.0/gcc/Common-Function-Attributes.html#Common-Function-Attributes) 找到 `nonnull` 的段落:`nonnull` 屬性可以應用於使用至少一個 pointer 作為參數的函式,它表示傳入該欄位的參數必須不為 `NULL`,例如以下函式的宣告:
```c
void *my_memcpy (void *dest, const void *src, size_t len)
__attribute__((nonnull (1, 2)));
```
宣告表明第 1、2 個參數不能為 `NULL`,也就是 `dest` 和 `src` 為 non-null。如果編譯器確定在標記為 non-null 的參數槽中傳遞了 `NULL`,並且編譯時啟用了 `-Wnonnull` 選項,就會發出警告,見 [Warning Options](https://gcc.gnu.org/onlinedocs/gcc-9.4.0/gcc/Warning-Options.html#Warning-Options)。除非啟用了 `-fno-delete-null-pointer-checks` 選項,否則編譯器還可以根據某些 non-null 參數進行優化。此外啟用 `-fisolate-erroneous-paths-attribute` 選項以使 GCC 把任何傳遞 `NULL` 到 non-null 函數的呼叫轉換為 *traps*,請參閱 [Optimize Options](https://gcc.gnu.org/onlinedocs/gcc-9.4.0/gcc/Optimize-Options.html#Optimize-Options)。
:::info
我不知道 GCC 的 "trap" 是什麼東西,查不到解釋。
> 就是你在計算機組織課程學到的 trap, interrupt, exception
> :notes: jserv
:::
如果沒有在 `nonnull` 填入 *arg-index*,則所有 pointer 參數都被標記為 non-null,例如:
```c
void *my_memcpy (void *dest, const void *src, size_t len)
__attribute__((nonnull));
```
### likely 與 unlikely 巨集
在 list_sort 實作中,某些 if 條件判斷會被包在 `likely` 與 `unlikely` 巨集中,其宣告在 [linux/compiler.h](https://github.com/torvalds/linux/blob/master/include/linux/compiler.h),這個巨集有兩種實現(摘錄自 compiler.h、compiler_types.h 與 compiler_attributes.h,忽略其餘無關的程式碼)。
實作一:
```c
// compiler_attributes.h
#define __aligned(x) __attribute__((__aligned__(x)))
#define __section(section) __attribute__((__section__(section)))
```
```c
// compiler_types.h
struct ftrace_branch_data {
const char *func;
const char *file;
unsigned line;
union {
struct {
unsigned long correct;
unsigned long incorrect;
};
struct {
unsigned long miss;
unsigned long hit;
};
unsigned long miss_hit[2];
};
};
struct ftrace_likely_data {
struct ftrace_branch_data data;
unsigned long constant;
};
```
```c
// compiler.h
#if defined(CONFIG_TRACE_BRANCH_PROFILING) \
&& !defined(DISABLE_BRANCH_PROFILING) && !defined(__CHECKER__)
#define likely_notrace(x) __builtin_expect(!!(x), 1)
#define unlikely_notrace(x) __builtin_expect(!!(x), 0)
void ftrace_likely_update(struct ftrace_likely_data *f, int val,
int expect, int is_constant);
#define __branch_check__(x, expect, is_constant) ({ \
long ______r; \
static struct ftrace_likely_data \
__aligned(4) \
__section("_ftrace_annotated_branch") \
______f = { \
.data.func = __func__, \
.data.file = __FILE__, \
.data.line = __LINE__, \
}; \
______r = __builtin_expect(!!(x), expect); \
ftrace_likely_update(&______f, ______r, \
expect, is_constant); \
______r; \
})
/*
* Using __builtin_constant_p(x) to ignore cases where the return
* value is always the same. This idea is taken from a similar patch
* written by Daniel Walker.
*/
#ifndef likely
#define likely(x) (__branch_check__(x, 1, __builtin_constant_p(x)))
#endif
#ifndef unlikely
#define unlikely(x) (__branch_check__(x, 0, __builtin_constant_p(x)))
#endif
```
實作二:
```c
#else
#define likely(x) __builtin_expect(!!(x), 1)
#define unlikely(x) __builtin_expect(!!(x), 0)
#define likely_notrace(x) likely(x)
#define unlikely_notrace(x) unlikely(x)
#endif
```
觀察上述兩種實作,可以得知以下資訊:當 `CONFIG_TRACE_BRANCH_PROFILING` 被定義時才會採用實作一,否則採用實作二。兩種實作的關鍵都是 `__builtin_expect(!!(x), expect);`。
實作一雖然看起寫很多行看起來很複雜,但仔細看看可以發現它比實作二多做了三件事:
- 初始化一個 `static struct ftrace_likely_data ______f`,將 `__func__`、`__FILE__`、`__LINE__` 放入 `______f` 中對應的成員。`__aligned` 與 `__section` 是用 macro 再包裝的 [Variable Attributes](https://gcc.gnu.org/onlinedocs/gcc/Common-Variable-Attributes.html#Common-Variable-Attributes)。
- 呼叫 `__builtin_expect(!!(x), expect)` 並把回傳值儲存到 `______r`。
- 呼叫 `ftrace_likely_update(&______f, ______r, expect, is_constant)`,由函式的名子與傳入參數可以得知 `ftrace_likely_update` 用於追蹤每次執行 `likely` 當前所在的函式、原始碼檔名、行號、`__builtin_expect` 的回傳值、預期為 1 或 0、以及傳入的 `x` 是否為常數。
由此推論實作一是用來給開發者分析 likely 與 unlikely 的發生頻率是否如預期所想,畢竟把一個相對不常成立的條件放到 `likely` 會降低效能,有這麼一個 trace 工具很合理,此外 `likely_notrace` 不會追蹤上述資訊。
關於 `__func__`、`__FILE__`、`__LINE__` 參見 [Standard Predefined Macros](https://gcc.gnu.org/onlinedocs/cpp/Standard-Predefined-Macros.html#Standard-Predefined-Macros)。關於 `__builtin_constant_p`、`__builtin_expect` 參見 [Other Built-in Functions Provided by GCC](https://gcc.gnu.org/onlinedocs/gcc/Other-Builtins.html)。
Built-in Function: `long builtin_expect (long exp, long c)`
您可以使用 __builtin_expect 為編譯器提供分支預測的資訊,一般來說您更應該要使用 profile feedback(-fprofile-arcs),因為寫程式的人在預測程式實際執行方式出了名的不準。`builtin_expect` 的回傳值是 `exp` 的值,必須是一個 integral expression,並且預期 `exp == c`。
```c
if (__builtin_expect (x, 0))
foo ();
```
上方程式碼表示 `x` 較可能為 0,因此 `foo` 不應該常被執行。
```c
if (__builtin_expect (ptr != NULL, 1))
foo (*ptr);
```
若想要判斷浮點數,可以改用上方的寫法,判斷浮點數的指標是否為 `NULL`。
期望 `__builtin_expect` 的 `exp` 為 1 的機率由 GCC 的 `builtin-expect-probability` 參數控制,預設為 90%。您還可以使用 `__builtin_expect_with_probability` 自行指定機率。如果在迴圈內使用此 built-in,則機率會影響優化過後的迭代次數。
## 引入 list_sort.c 到 lab-0
我在 queue.c 中使用前置處理器來切換自己實做的排序與 list_sort。如果有 `#define USE_LINUX_LIST_SOR`,就會編譯 `#ifdef` 和 `#else` 之間的程式碼;否則編譯 `#else` 和 `#endif` 之間的程式碼。詳細在:[blueskyson/lab0-c@24782f7](https://github.com/blueskyson/lab0-c/commit/24782f71f33e3f7c4d3abd1d62f64464286f281d)。
我修改後的 queue.c 如下:
```c
// in queue.c
#define USE_LINUX_LIST_SORT // use linux list_sort
#ifdef USE_LINUX_LIST_SORT
#define likely(x) __builtin_expect(!!(x), 1)
#define unlikely(x) __builtin_expect(!!(x), 0)
typedef int __attribute__((nonnull(2, 3))) (*list_cmp_func_t) ();
__attribute__((nonnull(2, 3, 4)))
static struct list_head *merge()
__attribute__((nonnull(2, 3, 4, 5)))
static void merge_final()
__attribute__((nonnull(2, 3)))
void list_sort()
// custom compare function
static int compare()
// call list_sort
void q_sort(struct list_head *head)
{
if (!head)
return;
list_sort(NULL, head, compare);
}
#else
// do top down merge sort
void sort_recur(struct list_head **phead)
// my merge sort implementation
void q_sort(struct list_head *head)
#endif
```
## 比較自己的 sort 與 list_sort 效能落差
打算用 `perf `測試排序 100、1k、10k、100k、1000k 個 Node 的 branches, instructions, context-switches。每筆測試使用 `perf` 重複 10 次,最後畫成表格或折線圖分析我的 sort 與 list_sort 的差異。
使用 `perf` 有個缺點,`sort` 前後的 `ih RAND number` 和 `free` 的過程也會被一併記錄下來,所以用 `perf` 只能看出誰好誰壞,無法單獨計算 `q_sort` 函式耗用的資源。
### 測試腳本
參考 [Linux 效能分析工具: Perf](http://wiki.csie.ncku.edu.tw/embedded/perf-tutorial) 來設定 `perf`。
在 lab0-c 新增 perf-traces 目錄,目錄結構如下:
```
perf-traces/
├── 1000000.cmd
├── 100000.cmd
├── 10000.cmd
├── 1000.cmd
└── 100.cmd
```
`num.cmd` 代表排序 `num` 個隨機字串,例如:
```cmd
# 100.cmd, sort 100 RAND strings
option fail 0
option malloc 0
new
ih RAND 100
sort
free
```
接下來我寫了一個 bash script 來執行效能測試,這個腳本會讓 `perf` 對每個 `qtest -v 0 -f perf-traces/$i.cmd` 重複執行十次,並將輸出儲存在 `perf-traces/$i_report`。腳本內容如下:
```bash
# perf-test.sh
declare -a traces=("100" "1000" "10000" "100000" "1000000")
for i in "${traces[@]}"
do
perf stat --repeat 10 -o perf-traces/"$i"_report \
-e branches,instructions,context-switches \
./qtest -v 0 -f perf-traces/"$i".cmd
done
```
詳細在:[blueskyson/lab0-c@299c0b2](https://github.com/blueskyson/lab0-c/commit/299c0b2c0ca3394a3a00b97515b670e5ad8ec32a)。
接下來執行:
```bash
$ make
$ ./perf-test.sh
```
就能得到類似以下的報告:
```
Performance counter stats for './qtest -v 0 -f perf-traces/100.cmd' (10 runs):
28,4176 branches ( +- 0.56% )
141,1366 instructions # 1.14 insn per cycle ( +- 0.57% )
0 context-switches
0.0005918 +- 0.0000304 seconds time elapsed ( +- 5.14% )
```
最後我將報告整理成表格。
### 用 perf 測量效能
**我實作的 sort**
| node num | time (ms) | branches | instructions | contex-switches |
|:-------- | --------------- | --------- | ------------ | --------------- |
| 100 | 0.5918 (±5.14%) | 284176 | 1411366 | 0 |
| 1000 | 0.8602 (±0.72%) | 758525 | 3574613 | 0 |
| 10000 | 5.5165 (±1.43%) | 5830672 | 26608412 | 0 |
| 100000 | 77 (±2.19%) | 59741126 | 270658689 | 1 |
| 1000000 | 1195 (±0.34%) | 630086164 | 2844184459 | 39 |
**list_sort**
| node num | time (ms) | branches | instructions | contex-switches |
|:-------- | --------------- | --------- | ------------ | --------------- |
| 100 | 0.5774 (±4.01%) | 285063 | 1419843 | 0 |
| 1000 | 0.8351 (±1.16%) | 747332 | 3557516 | 0 |
| 10000 | 4.9556 (±0.27%) | 571656 | 26554288 | 0 |
| 100000 | 67 (±1.32%) | 58440294 | 270425912 | 5 |
| 1000000 | 1012 (±0.52%) | 614368417 | 2840187614 | 34 |
由上兩表可以看出 `list_sort` 在任何情況下,平均執行時間 (上表的 time (ms)) 都比較少,在 node num 為 100 以外的情況下 branch 和 instructions 也都比較低。這說明了 list_sort 在 node num 大於 100 時使用比我的 merge sort 還要少的指令、更快的完成排序。
### 測量 `q_sort` 的 Wall Clock Time
因為我想得知 `q_sort` 函式在這兩種實作確切的執行時間,我將測試用的 cmd 檔的 `sort` 改成 `time sort`。並且修改 console.c 的 `do_time` 使得顯示的執行時間顯示到小數點後第六位:
```c
// in console.c do_time()
report(1, "%.6f", delta); // %.3f to %.6f
```
然後執行以下 bash 腳本:
```bash
# perf-test.sh
declare -a traces=("200000" "400000" "600000" "800000" "1000000")
for i in "${traces[@]}"
do
./qtest -v 1 -f perf-traces/"$i".cmd > perf-traces/dump.txt
done
```
得到一連串執行時間:
```bash
$ ./perf-test.sh
0.121041
0.355911
0.483806
0.7128ㄕ
0.934433
```
畫成表格:
| node num | my sort time | list_sort time | list_sort time 是 my sort 的多少 |
|:-------- | ------------ | -------------- | -------------------------------- |
| 200k | 121.04 | 108.78 | 89.87% |
| 400k | 355.91 | 266.27 | 74.81% |
| 600k | 483.81 | 423.91 | 87.61% |
| 800k | 712.89 | 636.96 | 89.34% |
| 1000k | 934.43 | 761.94 | 81.54% |
將兩者的執行時間畫成圖表:
:::spoiler python script
```python
import plotly.express as px
import plotly.graph_objs as go
def readfile(fname):
arr = []
file = open(fname, "r")
while True:
line = file.readline()
if not line:
break
arr.append(round(float(line) * 1000, 2))
return arr
fig = go.Figure()
fig.update_layout(
title="Execution Time",
xaxis_title="node number",
yaxis_title="time (ms)",
template="plotly_white"
)
xtics = [200000, 400000, 600000, 800000, 1000000]
arr1 = readfile("dump.txt")
arr2 = readfile("dump1.txt")
fig.add_trace(go.Scatter(x=xtics, y=arr1, mode='markers+text', \
text=arr1, textposition="top right", name="my sort"))
fig.add_trace(go.Scatter(x=xtics, y=arr2, mode='markers+text', \
text=arr2, textposition="bottom right", name="list_sort"))
fig.show()
```
:::

接下來我把 sort 的所有執行時間同除以 node 數量為 200k 的執行時間,讓第一次執行時間固定為 1.0,然後與 $O(Nlog_2N)$、$O(n)$ 的圖表比較:
:::spoiler python script
```python
base1 = arr1[0]
base2 = arr2[0]
for i in range(5):
arr1[i] = round(arr1[i] / base1, 2)
arr2[i] = round(arr2[i] / base2, 2)
fig = go.Figure()
fig.update_layout(
title="Execution Time",
xaxis_title="node number",
yaxis_title="time (ms)",
template="plotly_white"
)
fig.add_trace(go.Scatter(x=xtics, y=arr1, mode='markers+text', \
text=arr1, textposition="top right", name="my sort"))
fig.add_trace(go.Scatter(x=xtics, y=arr2, mode='markers+text', \
text=arr2, textposition="bottom right", name="list_sort"))
nlog2n = [i * math.log(i, 2) for i in range(1, 11)]
fig.add_trace(go.Scatter(x=xtics, y=nlog2n, mode='lines', \
line=dict(dash='dash'), name="O(n * log2 n)"))
fig.add_trace(go.Scatter(x=xtics, y=list(range(1,6)), mode='lines', \
line=dict(dash='dash'), name="O(n)"))
fig.show()
```
:::

## 在 qtest 提供新的命令 shuffle
首先我觀察 qtest 添加指令的機制,發現 `ADD_COMMAND` 巨集定義如下:
```c
#define ADD_COMMAND(cmd, msg) add_cmd(#cmd, do_##cmd, msg)
```
前置處理器會把 `cmd` 字串串接為 "do_"`cmd`,自動產生 do_ 開頭的函式名稱,透過 `add_cmd` 將這個 do_ 函式和函式說明串接到 console.c 的 `cmd_list`。我在 qtest.c 的 `console_init` 中添加以下程式碼,並且寫了一個 `do_shuffle` 函式:
```c
bool do_shuffle()
{
return show_queue(3);
}
static void console_init()
{
ADD_COMMAND(shuffle, "| Do Fisher-Yates shuffle");
}
```
這樣便新增了一個 `shuffle` 指令,功能與 `show` 一樣。接下來模仿 `do_sort`,在執行 shuffle 之前檢查佇列並發出警告訊息,再執行 `q_shuffle`。
```c
bool do_shuffle()
{
if (!l_meta.l)
report(3, "Warning: Calling shuffle on null queue");
error_check();
int cnt = q_size(l_meta.l);
if (cnt < 2)
report(3, "Warning: Calling shuffle on single node");
error_check();
q_shuffle(l_meta.l);
show_queue(3);
return !error_check();
}
```
### `q_shuffle` 實作
我的想法是按照 [Fisher–Yates shuffle](https://en.wikipedia.org/wiki/Fisher%E2%80%93Yates_shuffle#The_modern_algorithm) 提供的演算法:
```bash
-- To shuffle an array a of n elements (indices 0..n-1):
for i from n−1 downto 1 do
j ← random integer such that 0 ≤ j ≤ i
exchange a[j] and a[i]
```
我一開始想透過操作上述 pseudo code 的 `a[j]` 和 `a[i]` 的 `prev` 與 `next` 來達成 shuffle,但發現如果 `i == j + 1` 時會有例外狀況需要另行處理。後來想到可以直接對調 `a[i]` 和 `a[j]` 的 `value` 就好,這樣就不用判斷例外,而且可以可以用較少的指標操作(完全不用 `list_add`、`list_del`)完成交換。
此外我參考 [XOR Linked List](https://hackmd.io/@kenjin/xor_llist#C-Implementation) 定義 `XOR` 巨集來交換 `value` 指向的位址,只是覺得這樣比較帥,不知道與宣告 `char *tmp` 比起來有哪些優缺點。詳細變更見:[blueskyson/lab0-c@10acbd9](https://github.com/blueskyson/lab0-c/commit/10acbd9fde08ce5cad4a648a905ef5fbbd5f6728)。
```c
#include <stdint.h>
/* For swapping two strings in q_shffle */
#define XOR(a, b) (char *)((intptr_t)(a)^(intptr_t)(b))
void q_shuffle(struct list_head *head)
{
int len = q_size(head);
if (len < 2)
return;
for (struct list_head *p1 = head->prev; len > 1; len--, p1 = p1->prev) {
int n = rand() % len;
if (n == len - 1)
continue;
struct list_head *p2 = head->next;
for (int i = 0; i < n; i++, p2 = p2->next);
char **v1 = &list_entry(p1, element_t, list)->value;
char **v2 = &list_entry(p2, element_t, list)->value;
*v1 = XOR(*v1, *v2);
*v2 = XOR(*v1, *v2);
*v1 = XOR(*v1, *v2);
}
}
```
## 用 Valgrind 排除 qtest 實作的記憶體錯誤
執行 `make valgrind` 後,並沒有顯示任何 memory leak 的報告,輸出如下:
```bash
$ make valgrind
# Explicitly disable sanitizer(s)
make clean SANITIZER=0 qtest
make[1]: Entering directory '/home/lin/Desktop/sysprog2022/lab0-c'
rm -f qtest.o report.o console.o harness.o queue.o random.o dudect/constant.o dudect/fixture.o dudect/ttest.o linenoise.o .qtest.o.d .report.o.d .console.o.d .harness.o.d .queue.o.d .random.o.d .dudect/constant.o.d .dudect/fixture.o.d .dudect/ttest.o.d .linenoise.o.d *~ qtest /tmp/qtest.*
rm -rf .dudect
rm -rf *.dSYM
(cd traces; rm -f *~)
CC qtest.o
CC report.o
CC console.o
CC harness.o
CC queue.o
CC random.o
CC dudect/constant.o
CC dudect/fixture.o
CC dudect/ttest.o
CC linenoise.o
LD qtest
make[1]: Leaving directory '/home/lin/Desktop/sysprog2022/lab0-c'
cp qtest /tmp/qtest.scGuNm
chmod u+x /tmp/qtest.scGuNm
sed -i "s/alarm/isnan/g" /tmp/qtest.scGuNm
scripts/driver.py -p /tmp/qtest.scGuNm --valgrind
--- Trace Points
+++ TESTING trace trace-01-ops:
# Test of insert_head and remove_head
--- trace-01-ops 5/5
+++ TESTING trace trace-02-ops:
# Test of insert_head, insert_tail, remove_head, remove_tail, and delete_mid
--- trace-02-ops 6/6
+++ TESTING trace trace-03-ops:
# Test of insert_head, insert_tail, reverse, and remove_head
--- trace-03-ops 6/6
+++ TESTING trace trace-04-ops:
# Test of insert_head, insert_tail, size, swap, and sort
--- trace-04-ops 6/6
+++ TESTING trace trace-05-ops:
# Test of insert_head, insert_tail, remove_head, reverse, size, swap, and sort
--- trace-05-ops 6/6
+++ TESTING trace trace-06-ops:
# Test of insert_head, insert_tail, delete duplicate, and sort
--- trace-06-ops 6/6
+++ TESTING trace trace-07-string:
# Test of truncated strings
--- trace-07-string 6/6
+++ TESTING trace trace-08-robust:
# Test operations on empty queue
--- trace-08-robust 6/6
+++ TESTING trace trace-09-robust:
# Test remove_head with NULL argument
--- trace-09-robust 6/6
+++ TESTING trace trace-10-robust:
# Test operations on NULL queue
--- trace-10-robust 6/6
+++ TESTING trace trace-11-malloc:
# Test of malloc failure on insert_head
--- trace-11-malloc 6/6
+++ TESTING trace trace-12-malloc:
# Test of malloc failure on insert_tail
--- trace-12-malloc 6/6
+++ TESTING trace trace-13-malloc:
# Test of malloc failure on new
--- trace-13-malloc 6/6
+++ TESTING trace trace-14-perf:
# Test performance of insert_tail, reverse, and sort
--- trace-14-perf 6/6
+++ TESTING trace trace-15-perf:
# Test performance of sort with random and descending orders
# 10000: all correct sorting algorithms are expected pass
# 50000: sorting algorithms with O(n^2) time complexity are expected failed
# 100000: sorting algorithms with O(nlogn) time complexity are expected pass
--- trace-15-perf 6/6
+++ TESTING trace trace-16-perf:
# Test performance of insert_tail
--- trace-16-perf 6/6
+++ TESTING trace trace-17-complexity:
# Test if time complexity of q_insert_tail, q_insert_head, q_remove_tail, and q_remove_head is constant
Probably constant time
ERROR: Probably not constant time
Probably constant time
ERROR: Probably not constant time
--- trace-17-complexity 0/5
--- TOTAL 95/100
make: *** [Makefile:68: valgrind] Error 1
```
我再參考 [2020leon](https://hackmd.io/@6649/linux2022-lab0#%E4%BF%AE%E6%AD%A3%E9%8C%AF%E8%AA%A4%EF%BC%88-Valgrind-%EF%BC%89),執行 `valgrind ./qtest -f ./traces/trace-eg.cmd` 也完全沒有如預期輸出任何錯誤訊息。
接著我再按照 lab-0 的作業說明,測試了一個明顯會 memory leak 的程式:
```c
// test valgrind
#include <stdlib.h>
void func(void) {
char *buff = malloc(10);
}
int main(void) {
func();
return 0;
}
```
輸出顯示 valgrind 是正常的,可以抓出 memory leak。
```
$ gcc -g test.c
$ valgrind -q --leak-check=full ./a.out
==14940== 10 bytes in 1 blocks are definitely lost in loss record 1 of 1
==14940== at 0x483B7F3: malloc (in /usr/lib/x86_64-linux-gnu/valgrind/vgpreload_memcheck-amd64-linux.so)
==14940== by 0x10915E: func (test.c:3)
==14940== by 0x109172: main (test.c:6)
==14940==
```
為何沒有任何 memory leak 還需要再探討。
### Massif 視覺化
```
$ valgrind --tool=massif ./qtest -f traces/trace-01-ops.cmd
$ massif-visualizer massif.out.*
```

 Sign in with Wallet


