# [kubernetes]kubernetes學習筆記 (二)
###### tags `kubernetes`
-----
#### 7.k8s的数据存储
- Volume是Pod中能够被多个容器访问的共享目录,它被定义在Pod上,然后被一个Pod里面的多个容器挂载到具体的文件目录下,kubernetes通过Volume实现同一个Pod中不同容器之间的数据共享以及数据的持久化存储。Volume的生命周期不和Pod中的单个容器的生命周期有关,当容器终止或者重启的时候,Volume中的数据也不会丢失。
- kubernetes的Volume支持多种类型,比较常见的有下面的几个:
- 简单存储:EmptyDir、HostPath、NFS。
- 高级存储:PV、PVC。
- 配置存储:ConfigMap、Secret。
##### 7.1.EmptyDir
- 它是最基础的volume类型,一个EmptyDir就是Host 上的一个空目录,当pod被分配到 Node时创建,它的初始内容为空,当pod 被销毁时,EmptyDir中的数据也会永久删除
- EmptyDir的用途如下:
- 临时空间,例如用于某些应用程序运行时所需的临时目录,且无须永久保留。
- 一个容器需要从另一个容器中获取数据的目录(多容器共享目录)。
- 创建volume-emptydir.yaml,内容如下:(一个容器从一个容器中获取数据的目录(多容器共享目录)),可以在/var/lib/kubelet 下查看到,这是k8s的工作目录
```yaml
apiVersion: v1
kind: Pod
metadata:
name: volume-emptydir
namespace: dev
spec:
containers:
- name: nginx
image: nginx:1.17.1
imagePullPolicy: IfNotPresent
ports:
- containerPort: 80
volumeMounts: # 将logs-volume挂载到nginx容器中对应的目录,该目录为/var/log/nginx
- name: logs-volume
mountPath: /var/log/nginx
- name: busybox
image: busybox:1.30
imagePullPolicy: IfNotPresent
command: ["/bin/sh","-c","tail -f /logs/access.log"] # 初始命令,动态读取指定文件
volumeMounts: #将logs-volume挂载到busybox容器中的对应目录,该目录为/logs
- name: logs-volume
mountPath: /logs
volumes: # 声明volume,name为logs-volume,类型为emptyDir
- name: logs-volume
emptyDir: {}
```
- 查看pod
```shell
kubectl get pod volume-emptydir -n dev -o wide
```

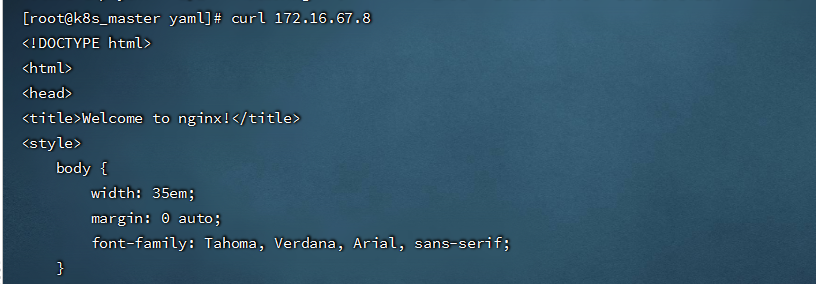
- 访问pod中的 nginx
```shell
curl 172.16.67.8
```
- 查看指定容器的标准输出:
```shell
kubectl logs -f volume-emptydir -n dev -c busybox
```

##### 7.2.HostPath
- HostPath就是将Node主机中的一个实际目录挂载到Pod中,以供容器使用,这样的设计就可以保证Pod销毁了,但是数据依旧可以保存在Node主机上。
- 创建volume-hostpath.yaml文件,内容如下:
```yaml
apiVersion: v1
kind: Pod
metadata:
name: volume-hostpath
namespace: dev
spec:
containers:
- name: nginx
image: nginx:1.17.1
imagePullPolicy: IfNotPresent
ports:
- containerPort: 80
volumeMounts: # 将logs-volume挂载到nginx容器中对应的目录,该目录为/var/log/nginx
- name: logs-volume
mountPath: /var/log/nginx
- name: busybox
image: busybox:1.30
imagePullPolicy: IfNotPresent
command: ["/bin/sh","-c","tail -f /logs/access.log"] # 初始命令,动态读取指定文件
volumeMounts: # 将logs-volume挂载到busybox容器中的对应目录,该目录为/logs
- name: logs-volume
mountPath: /logs
volumes: # 声明volume,name为logs-volume,类型为hostPath
- name: logs-volume
hostPath:
path: /opt/logs/nginx
type: DirectoryOrCreate # 目录存在就使用,不存在就先创建再使用
```
type的值的说明:
- DirectoryOrCreate:目录存在就使用,不存在就先创建后使用。
- Directory:目录必须存在。
- FileOrCreate:文件存在就使用,不存在就先创建后使用。
- File:文件必须存在。
- Socket:unix套接字必须存在。
- CharDevice:字符设备必须存在。
- BlockDevice:块设备必须存在。
查看pod
```shell
kubectl get pod volume-hostpath -n dev -o wide
```

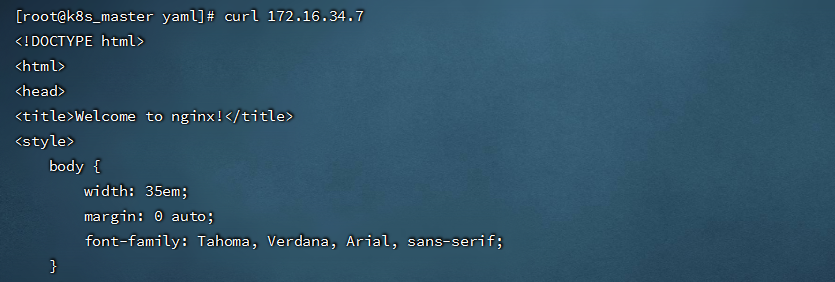
- 访问Pod中的Nginx:
```shell
curl 172.16.34.7
```
- 去node节点找到hostPath映射的目录(我是在node01上,如果在此目录中创建文件,到容器中也是可以看到的。)

##### 7.3.NFS
- HostPath虽然可以解决数据持久化的问题,但是一旦Node节点故障了,Pod如果转移到别的Node节点上,又会出现问题,此时需要准备单独的网络存储系统,比较常用的是NFS
- NFS是一个网络文件存储系统,可以搭建一台NFS服务器,然后将Pod中的存储直接连接到NFS系统上,这样,无论Pod在节点上怎么转移,只要Node和NFS的对接没有问题,数据就可以成功访问。
###### 7.3.1.安装NFS服务
- 下载软件包
```shell
yum install -y nfs-utils rpcbind
```
- 准备一个共享目录:
```shell
mkdir -pv /opt/data
```
- vim /etc/exports,将共享目录以读写权限暴露给`172.16.8.0/24`网段中的所有主机:
```shell
/opt/data 172.16.8.0/24(rw,no_root_squash)
#加载配置
exportfs -r
#启动nfs服务
systemctl start rpcbind
systemctl enable rpcbind
systemctl start nfs-server
systemctl enable nfs-server
```
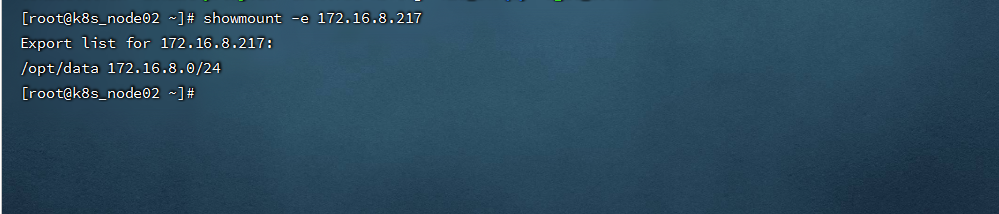
- K8s node上安装nfs-utils ,但并不启动服务
```shell
yum -y install nfs-utils
#查看NFS挂载情况(-d:仅显示已被NFS客户端加载的目录; -e:显示NFS服务器上所有的共享目录。)
showmount -e 172.16.8.217
```
- 挂载到nfs上 (这步可以不用操作)
```shell
mount -t nfs 172.16.8.217:/opt/data /mnt
```
###### 7.3.2.pod挂载案例
- 创建volume-nfs.yaml文件,内容如下:
```yaml
apiVersion: v1
kind: Pod
metadata:
name: volume-nfs
namespace: dev
spec:
containers:
- name: nginx
image: nginx:1.17.1
imagePullPolicy: IfNotPresent
ports:
- containerPort: 80
volumeMounts: # 将logs-volume挂载到nginx容器中对应的目录,该目录为/var/log/nginx
- name: logs-volume
mountPath: /var/log/nginx
- name: busybox
image: busybox:1.30
imagePullPolicy: IfNotPresent
command: ["/bin/sh","-c","tail -f /logs/access.log"] # 初始命令,动态读取指定文件
volumeMounts: # 将logs-volume挂载到busybox容器中的对应目录,该目录为/logs
- name: logs-volume
mountPath: /logs
volumes: # 声明volume
- name: logs-volume
nfs:
server: 172.16.8.217 # NFS服务器地址
path: /opt/data/nfs # 共享文件路径
```
- 在NFS服务器上查看 文件共享情况

###### 7.3.3.NFS+StorageClass实现动态存储
- nfs-provisioner是一个自动配置卷程序,它使用现有的和已配置的 NFS 服务器来支持通过持久卷声明动态配置
```
wget http://oss.linuxtxc.com/nfs-provisoner.zip
```
- 下载的nfs-provisoner.yaml,内容如下
```yaml
apiVersion: v1
kind: ServiceAccount
metadata:
name: nfs-client-provisioner
# replace with namespace where provisioner is deployed
namespace: kube-system
---
kind: ClusterRole
apiVersion: rbac.authorization.k8s.io/v1
metadata:
name: nfs-client-provisioner-runner
rules:
- apiGroups: [""]
resources: ["persistentvolumes"]
verbs: ["get", "list", "watch", "create", "delete"]
- apiGroups: [""]
resources: ["persistentvolumeclaims"]
verbs: ["get", "list", "watch", "update"]
- apiGroups: ["storage.k8s.io"]
resources: ["storageclasses"]
verbs: ["get", "list", "watch"]
- apiGroups: [""]
resources: ["events"]
verbs: ["create", "update", "patch"]
---
kind: ClusterRoleBinding
apiVersion: rbac.authorization.k8s.io/v1
metadata:
name: run-nfs-client-provisioner
subjects:
- kind: ServiceAccount
name: nfs-client-provisioner
# replace with namespace where provisioner is deployed
namespace: kube-system
roleRef:
kind: ClusterRole
name: nfs-client-provisioner-runner
apiGroup: rbac.authorization.k8s.io
---
kind: Role
apiVersion: rbac.authorization.k8s.io/v1
metadata:
name: leader-locking-nfs-client-provisioner
# replace with namespace where provisioner is deployed
namespace: kube-system
rules:
- apiGroups: [""]
resources: ["endpoints"]
verbs: ["get", "list", "watch", "create", "update", "patch"]
---
kind: RoleBinding
apiVersion: rbac.authorization.k8s.io/v1
metadata:
name: leader-locking-nfs-client-provisioner
# replace with namespace where provisioner is deployed
namespace: kube-system
subjects:
- kind: ServiceAccount
name: nfs-client-provisioner
# replace with namespace where provisioner is deployed
namespace: kube-system
roleRef:
kind: Role
name: leader-locking-nfs-client-provisioner
apiGroup: rbac.authorization.k8s.io
---
apiVersion: apps/v1
kind: Deployment
metadata:
name: nfs-client-provisioner
labels:
app: nfs-client-provisioner
# replace with namespace where provisioner is deployed
namespace: kube-system
spec:
replicas: 1
strategy:
type: Recreate
selector:
matchLabels:
app: nfs-client-provisioner
template:
metadata:
labels:
app: nfs-client-provisioner
spec:
serviceAccountName: nfs-client-provisioner
containers:
- name: nfs-client-provisioner
image: quay.io/external_storage/nfs-client-provisioner:latest
volumeMounts:
- name: nfs-client-root
mountPath: /persistentvolumes
env:
- name: PROVISIONER_NAME
value: k8s-sigs.io/nfs-subdir-external-provisioner
- name: NFS_SERVER
value: 192.168.1.211
- name: NFS_PATH
value: /opt/data/nfs
volumes:
- name: nfs-client-root
nfs:
server: 192.168.1.211
path: /opt/data/nfs
---
apiVersion: storage.k8s.io/v1
kind: StorageClass
metadata:
name: nfs-storageclass
#annotations:
# storageclass.kubernetes.io/is-kube-system-class: "true" #设置为默认的sc
provisioner: k8s-sigs.io/nfs-subdir-external-provisioner # or choose another name, must match deployment's env PROVISIONER_NAME'
reclaimPolicy: Retain # 默认为delete
parameters:
archiveOnDelete: "true" #启用归档,当删除pvc时,后端数据会归档保留
```
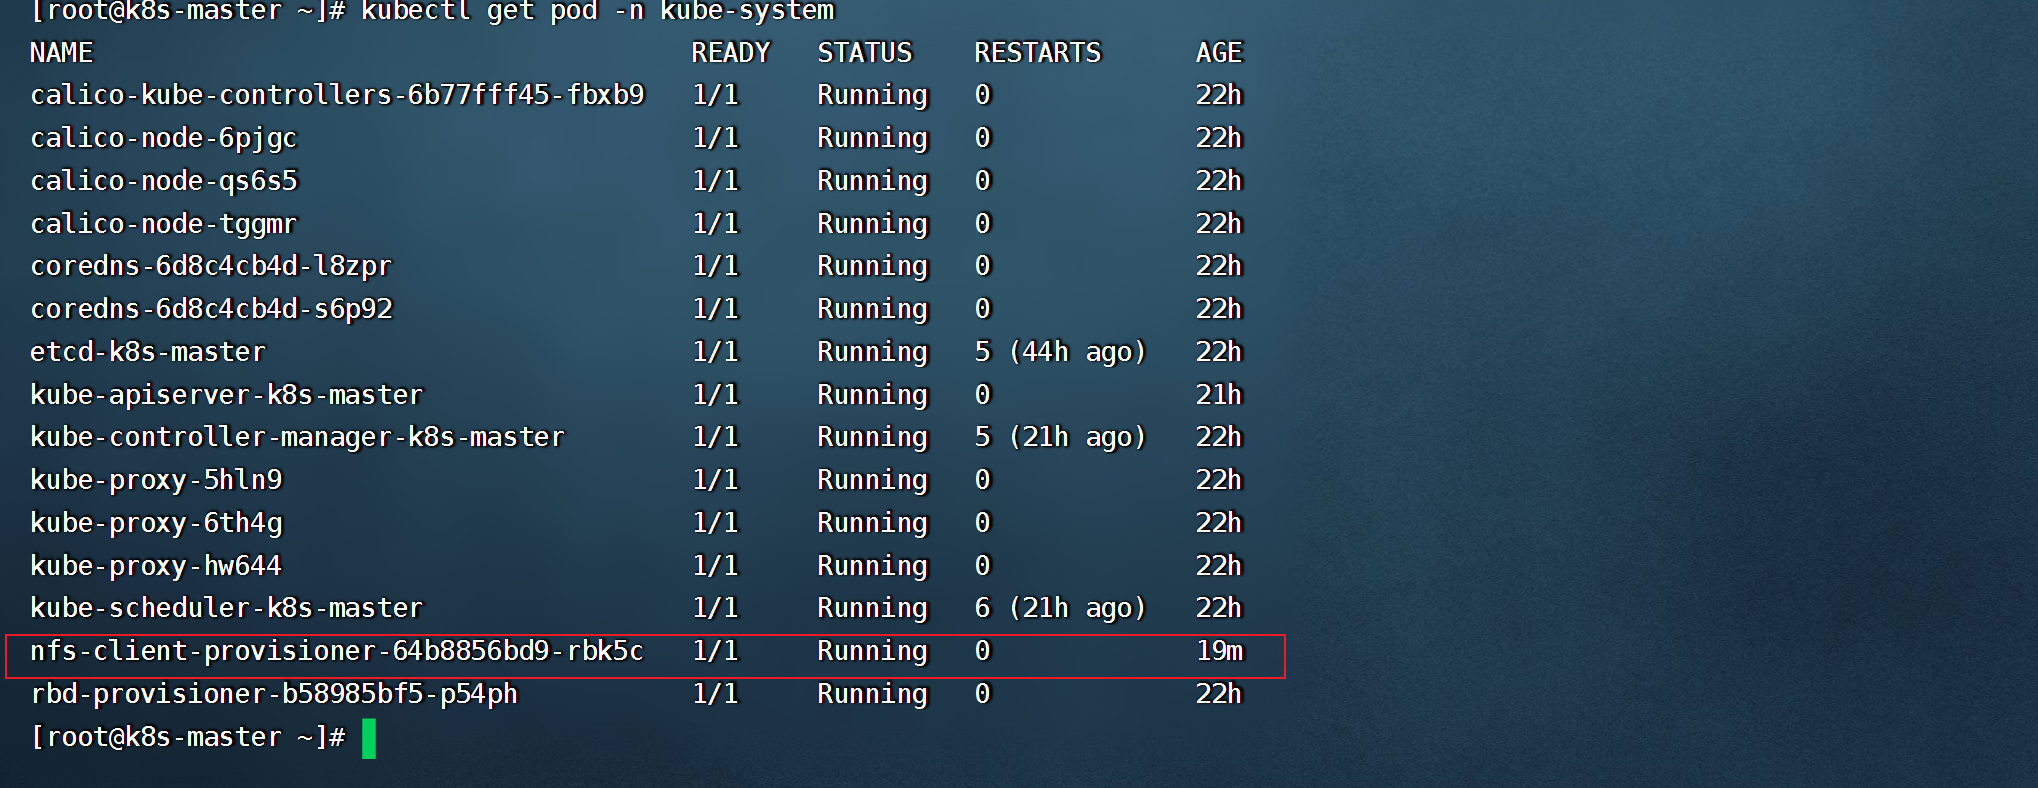
- kubectl apply -f nfs-provisoner.yaml 后,查看pod情况
- 创建statefulset文件 statefulset-mysql.yaml,可直接挂载storageclass,内容如下:
```yaml
apiVersion: v1
kind: Service
metadata:
name: mysql-headless
labels:
statefulset: mysql
spec:
ports:
- port: 3306
protocol: TCP
targetPort: 3306
selector:
statefulset: mysql
type: ClusterIP
clusterIP: None
---
apiVersion: apps/v1
kind: StatefulSet
metadata:
name: statefulset-mysql
spec:
replicas: 2
selector:
matchLabels:
statefulset: mysql
serviceName: mysql-headless
template:
metadata:
labels:
statefulset: mysql
spec:
containers:
- name: mysql01
image: mysql:8.0
imagePullPolicy: IfNotPresent
env:
- name: MYSQL_ROOT_PASSWORD
value: root123456
ports:
- containerPort: 3306
volumeMounts:
- name: nfs-mysql-data
mountPath: /var/lib/mysql
subPath: mysql
volumeClaimTemplates:
- metadata:
name: nfs-mysql-data
annotations:
volume.beta.kubernetes.io/storage-class: "nfs-storageclass"
gcp-auto-backup: "yes"
spec:
accessModes: [ "ReadWriteOnce" ]
resources:
requests:
storage: 5Gi
```
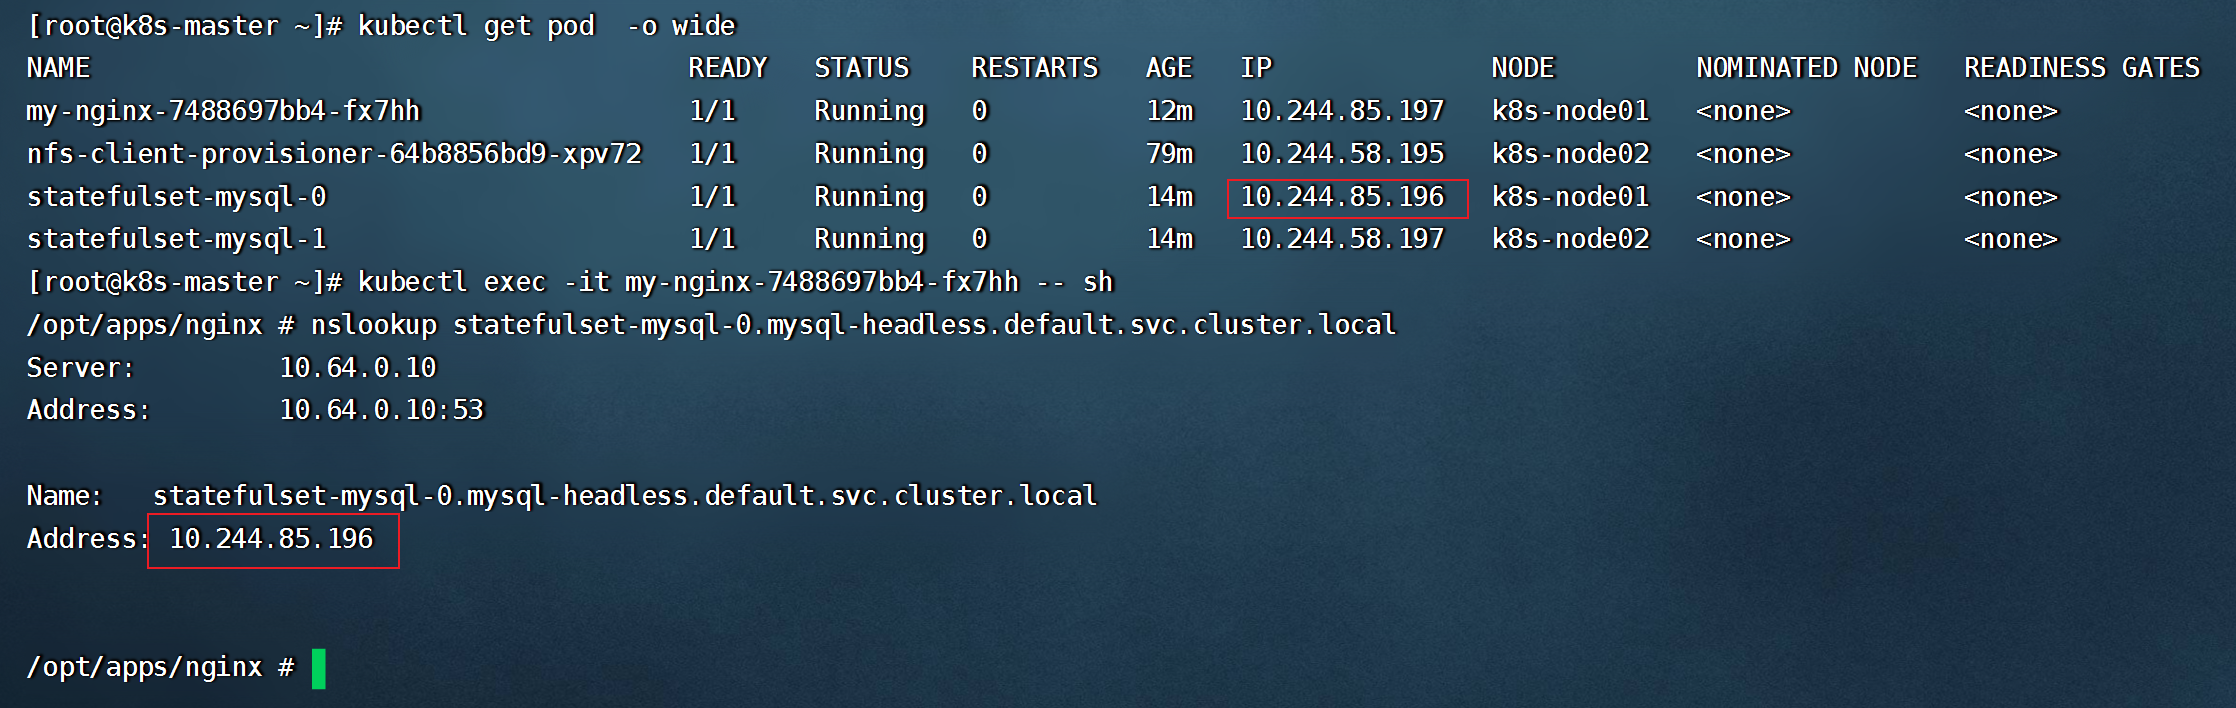
- 查看statefulset创建情况,它的每个副本都是独立的,并且使用独立的存储

```shell
#pod 与存储都会以名称+序号,顺序创建排列
kubectl get pvc
```

- 测试mysql-headless是否可以正常使用(headless服务的域名格式为:"主机名.headless service名.namespace名.svc.cluster.local")
- 使用 nfs-storageclass创建 PVC
```yaml
kind: PersistentVolumeClaim
apiVersion: v1
metadata:
name: nfs-pvc01
annotations:
volume.beta.kubernetes.io/storage-class: "nfs-storageclass"
spec:
accessModes:
- ReadWriteOnce
resources:
requests:
storage: 5Gi
```
##### 7.4.PV与PVC
###### 7.4.1.PV(Persistent Volume)
- 是持久化卷的意思,是对底层的共享存储的一种抽象。它和底层具体的共享存储技术有关,并通过插件完成和共享存储的对接。(它没有namespace区别的划分)
```shell
pv的关键配置参数说明:
存储类型:底层实际存储的类型,kubernetes支持多种存储类型,每种存储类型的配置有所不同。
存储能力(capacity):目前只支持存储空间的设置(storage=1Gi),不过未来可能会加入IOPS、吞吐量等指标的配置。
访问模式(accessModes):
用来描述用户应用对存储资源的访问权限,访问权限包括下面几种方式:
ReadWriteOnce(RWO):读写权限,但是只能被单个节点挂载。
ReadOnlyMany(ROX):只读权限,可以被多个节点挂载。
ReadWriteMany(RWX):读写权限,可以被多个节点挂载。
需要注意的是,底层不同的存储类型可能支持的访问模式不同。
回收策略( persistentVolumeReclaimPolicy):
当PV不再被使用之后,对其的处理方式,目前支持三种策略:
Retain(保留):保留数据,需要管理员手动清理数据。
Recycle(回收):清除PV中的数据,效果相当于rm -rf /volume/*。
Delete(删除):和PV相连的后端存储完成volume的删除操作,常见于云服务器厂商的存储服务。
需要注意的是,底层不同的存储类型可能支持的回收策略不同。
存储类别(storageClassName):PV可以通过storageClassName参数指定一个存储类别。
具有特定类型的PV只能和请求了该类别的PVC进行绑定。
未设定类别的PV只能和不请求任何类别的PVC进行绑定。
状态(status):一个PV的生命周期,可能会处于4种不同的阶段。
Available(可用):表示可用状态,还未被任何PVC绑定。
Bound(已绑定):表示PV已经被PVC绑定。
Released(已释放):表示PVC被删除,但是资源还没有被集群重新释放。
Failed(失败):表示该PV的自动回收失败。
```
- 创建pv-nfs.yaml,内容如下(使用的之前创建的NFS服务):
```shell
apiVersion: v1
kind: PersistentVolume
metadata:
name: pv1
spec:
nfs: # 存储类型吗,和底层正则的存储对应
path: /opt/data/pv1
server: 172.16.8.217
capacity: # 存储能力,目前只支持存储空间的设置
storage: 1Gi
accessModes: # 访问模式
- ReadWriteMany
persistentVolumeReclaimPolicy: Retain # 回收策略
---
apiVersion: v1
kind: PersistentVolume
metadata:
name: pv2
spec:
nfs: # 存储类型吗,和底层正则的存储对应
path: /opt/data/pv2 ## 共享文件路径
server: 172.16.8.217
capacity: # 存储能力,目前只支持存储空间的设置
storage: 2Gi
accessModes: # 访问模式
- ReadWriteMany
persistentVolumeReclaimPolicy: Retain # 回收策略
---
apiVersion: v1
kind: PersistentVolume
metadata:
name: pv3
spec:
nfs: # 存储类型吗,和底层正则的存储对应
path: /opt/data/pv3
server: 172.16.8.217
capacity: # 存储能力,目前只支持存储空间的设置
storage: 3Gi
accessModes: # 访问模式
- ReadWriteMany
persistentVolumeReclaimPolicy: Retain # 回收策略
```
- 查看PV
```shell
kubectl get pv
```

###### 7.4.2.PVC(Persistent Volume Claim)
- 是资源的申请,用来声明对存储空间、访问模式、存储类别需求信息,下面是PVC的资源清单文件:
```shell
apiVersion: v1
kind: PersistentVolumeClaim
metadata:
name: pvc
namespace: dev
spec:
accessModes: #访问模式
- ReadWriteMany
selector: # 采用标签对PV选择
storageClassName: # 存储类别
resources: # 请求空间
requests:
storage: 5Gi
```
PVC的关键配置参数说明:
- 访客模式(accessModes):用于描述用户应用对存储资源的访问权限。
- 用于描述用户应用对存储资源的访问权限:
- 选择条件(selector):通过Label Selector的设置,可使PVC对于系统中已存在的PV进行筛选。
- 存储类别(storageClassName):PVC在定义时可以设定需要的后端存储的类别,只有设置了该class的pv才能被系统选出。
- 资源请求(resources):描述对存储资源的请求。
- 创建pvc-test.yaml,内容如下:
```shell
apiVersion: v1
kind: PersistentVolumeClaim
metadata:
name: pvc1
namespace: dev
spec:
accessModes: # 访客模式
- ReadWriteMany
resources: # 请求空间
requests:
storage: 1Gi
---
apiVersion: v1
kind: PersistentVolumeClaim
metadata:
name: pvc2
namespace: dev
spec:
accessModes: # 访客模式
- ReadWriteMany
resources: # 请求空间
requests:
storage: 1Gi
---
apiVersion: v1
kind: PersistentVolumeClaim
metadata:
name: pvc3
namespace: dev
spec:
accessModes: # 访客模式
- ReadWriteMany
resources: # 请求空间
requests:
storage: 5Gi
```
- 查看PVC
```shell
kubectl get pvc -n dev -o wide
#pvc3未绑定,是因为没有满足需求的pv
```

- 查看PV
```
kubectl get pv
```

###### 7.4.3.创建pod使用PVC
- 创建pvc-pod.yaml文件,内容如下:
```shell
apiVersion: v1
kind: Pod
metadata:
name: pod1
namespace: dev
spec:
containers:
- name: busybox
image: busybox:1.30
command: ["/bin/sh","-c","while true;do echo pod1 >> /root/out.txt; sleep 10; done;"]
volumeMounts:
- name: volume
mountPath: /root/
volumes:
- name: volume
persistentVolumeClaim:
claimName: pvc1
readOnly: false
---
apiVersion: v1
kind: Pod
metadata:
name: pod2
namespace: dev
spec:
containers:
- name: busybox
image: busybox:1.30
command: ["/bin/sh","-c","while true;do echo pod1 >> /root/out.txt; sleep 10; done;"]
volumeMounts:
- name: volume
mountPath: /root/
volumes:
- name: volume
persistentVolumeClaim:
claimName: pvc2
readOnly: false
```
- 查看NFS服务器上共享的的目录

- 资源释放:
- 用户删除PVC来释放PV。
- 当存储资源使用完毕后,用户可以删除PVC,和该PVC绑定的PV将会标记为“已释放”,但是还不能立刻和其他的PVC进行绑定。通过之前PVC写入的数据可能还留在存储设备上,只有在清除之后该PV才能再次使用。
- 资源回收:
- kubernetes根据PV设置的回收策略进行资源的回收。
- 对于PV,管理员可以设定回收策略,用于设置与之绑定的PVC释放资源之后如何处理遗留数据的问题。只有PV的存储空间完成回收,才能供新的PVC绑定和使用。
创建PVC后一直绑定不了PV的原因
- ①PVC的空间申请大小比PV的空间要大。
- ②PVC的storageClassName和PV的storageClassName不一致。
- ③PVC的accessModes和PV的accessModes不一致。
###### 7.4.4.使用glusterfs 创建 pv,并挂载使用
```shell
#glusterfs分布式存储部署
wget http://oss.linuxtxc.com/%E7%AC%94%E8%AE%B0/%E5%88%86%E5%B8%83%E5%BC%8F%E6%96%87%E4%BB%B6%E7%B3%BB%E7%BB%9Fglusterfs%E5%AE%89%E8%A3%85%E6%96%87%E6%A1%A3.md
#kubernetes 所有节点都安装 glusterfs客户端
yum install -y glusterfs glusterfs-fuse
```
- 创建glusterfs的endpoints
```yaml
apiVersion: v1
kind: Namespace
metadata:
name: app
---
apiVersion: v1
kind: Endpoints
metadata:
name: glusterfs-cluster
namespace: app
subsets:
- addresses:
- ip: 172.16.8.212
- ip: 172.16.8.213
- ip: 172.16.8.214
ports:
- port: 49152
protocol: TCP
```
- 创建pv使用glusterfs
```yaml
apiVersion: v1
kind: PersistentVolume
metadata:
name: glusterfs-pv01
spec:
capacity:
storage: 1Gi
accessModes:
- ReadWriteMany
glusterfs:
endpoints: glusterfs-cluster
path: app-data #创建的存储卷
readOnly: false
---
apiVersion: v1
kind: PersistentVolume
metadata:
name: glusterfs-pv02
spec:
capacity:
storage: 2Gi
accessModes:
- ReadWriteMany
glusterfs:
endpoints: glusterfs-cluster
path: app-data #创建的存储卷
readOnly: false
```
- 创建PVC
```yaml
apiVersion: v1
kind: PersistentVolumeClaim
metadata:
name: glusterfs-pvc01
namespace: app
spec:
accessModes:
- ReadWriteMany
resources:
requests:
storage: 2Gi
```
- 创建使用Glusterfs卷的应用
```yaml
apiVersion: apps/v1
kind: Deployment
metadata:
name: nginx-deployment
namespace: app
spec:
replicas: 2
selector:
matchLabels:
name: nginx
template:
metadata:
labels:
name: nginx
spec:
containers:
- name: nginx
image: nginx
ports:
- containerPort: 80
volumeMounts:
- name: nginxglusterfs
mountPath: "/usr/share/nginx/html"
volumes:
- name: nginxglusterfs
persistentVolumeClaim:
claimName: glusterfs-pvc
```
- 查看容器是否成功挂载
```shell
kubectl exec -it deployment-glu-pv-9fb5fb64-kl48h -n app mount | grep app-data
```

##### 7.5.configmap
- ConfigMap是一种API对象,用来将非加密数据保存到键值对中。可以用作环境变量、命令行参数或者存储卷中的配置文件。
- ConfigMap可以将环境变量配置信息和容器镜像解耦,便于应用配置的修改。如果需要存储加密信息时可以使用Secret对象。
###### 7.5.1.使用命令行创建
```shell
(1)使用目录创建
kubectl create configmap configmap名 --from-file=/path (--from-file,指定在目录下的所有文件都会被用在ConfigMap里面创建一个键值对,键的名字就是文件名,值就是文件的内容)
(2)使用文件创建
kubectl create configmap configmap名 --from-file=./file1 --from-file=./file2 (--from-file,可以使用多次,同样键为文件名,值为文件中的内容)
(3)通过key-value字符串创建
kubectl create configmap configmap名 --from-literal=key1=123 --from-literal=key2=234
(4)通过env文件创建
kubectl create configmap configmap名 --from-env-file=env.txt
其中,env.txt的文件格式为:
key1=***
key2=***
```
- 使用ConfigMap有以下几个限制条件:
- ConfigMap必须在pod之前创建
- configmap受namespace的限制,只能相同namespace的pod才可以引用
###### 7.5.2.通过Volume 方式挂载
- 将ConfigMap中的内容挂载为容器内部的文件或目录
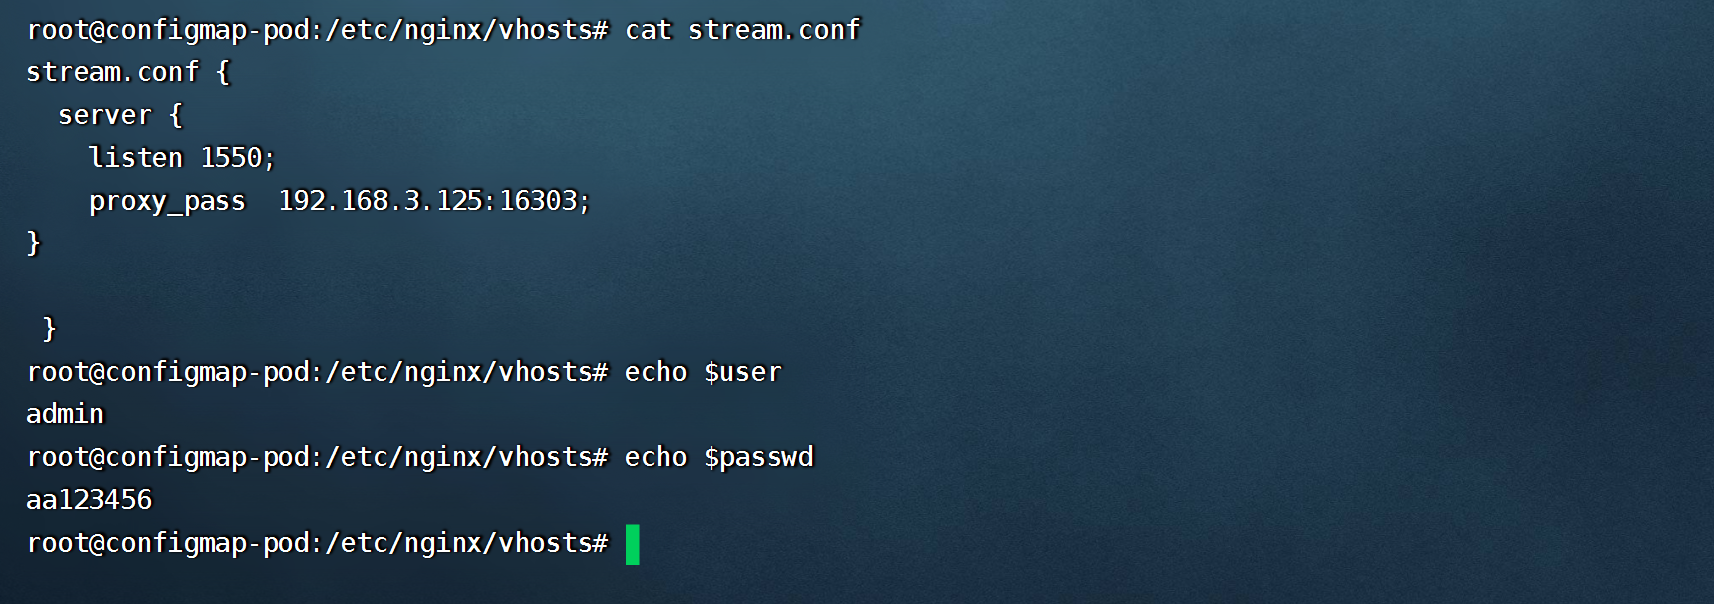
- 创建 configmap-nginx.yaml,内容如下:
```yaml
apiVersion: v1
kind: ConfigMap
metadata:
name: configmap-nginx
data:
user: admin
passwd: aa123456
stream.conf: |
stream.conf {
server {
listen 1550;
proxy_pass 192.168.3.125:16303;
}
}
```
```
#data为3,表示有三个可调用数据
kubectl get cm
```

- 将configmap中的配置通过volume挂载
```yaml
apiVersion: v1
kind: Pod
metadata:
name: configmap-pod
spec:
containers:
- name: nginx
image: nginx:1.17.1
env:
- name: user
valueFrom:
configMapKeyRef:
name: configmap-nginx
key: user
- name: passwd
valueFrom:
configMapKeyRef:
name: configmap-nginx
key: passwd
volumeMounts:
- name: config #要挂载的volumes名
mountPath: /etc/nginx/vhosts #没有则会自动创建,目录下有文件则会覆盖掉
readOnly: true
volumes:
- name: config
configMap:
defaultMode: 640 #挂载配置后默认的文件权限
name: configmap-nginx #指的是要从哪个configmap里读取数据
items:
- key: stream.conf
path: stream.conf #挂载到容器后的文件名
```
```shell
kubectl exec -it configmap-pod /bin/sh
```
###### 7.5.3.通过SubPath 使原目录文件不被覆盖
- 创建 configmap-php.yaml,内容如下:
```yaml
apiVersion: v1
kind: ConfigMap
metadata:
name: configmap-php
namespace: web
data:
index.php: |
<?php
echo phpversion();
?>
```
```shell
kubectl get cm -n web
```

- 创建 volume-configmap-php.yaml,内容如下
```yaml
apiVersion: v1
kind: Pod
metadata:
name: pod-configmap-php
namespace: web
spec:
containers:
- name: nginx
image: nginx:1.17.1
volumeMounts:
- name: config
mountPath: /usr/share/nginx/html/index.php
subPath: index.php #与configmap中的key相同
volumes:
- name: config
configMap:
defaultMode: 640 #挂载配置后默认的文件权限
name: configmap-php #指的是要从哪个configmap里读取数据
```
```shell
kubectl exec -it pod-configmap-php -n web /bin/sh
```

- 只覆盖指定的文件
```yaml
apiVersion: v1
kind: Pod
metadata:
name: nginx-configmap
namespace: app
spec:
containers:
- name: nginx
image: nginx:1.17.1
command: [ "/bin/sh", "-c", "sleep 3600" ]
volumeMounts:
- name: config
mountPath: /etc/nginx/nginx.conf
subPath: nginx.conf #subPath:要覆盖文件的相对路径
volumes:
- name: config
configMap:
name: configmap-nginx #configMap的名称
items: #用于只挂载configmap中特定的key
- key: nginx.conf #ConfigMap中key的名称
path: nginx.conf # 此处的path相当于 mv nginx.conf nginx.conf
```
###### 7.5.4.使用ENV方式挂载
```yaml
#创建configmap
---
apiVersion: v1
kind: ConfigMap
metadata:
name: test-config
namespace: apps
data:
special.level: first
special.type: testfile
```

- 创建config-env.yaml
```yaml
apiVersion: v1
kind: Pod
metadata:
name: testpod
namespace: apps
spec:
containers:
- name: busybox
image: busybox
command: [ "/bin/sh", "-c", "echo $(LEVEL) $(TYPE)" ]
env:
- name: LEVEL
valueFrom:
configMapKeyRef:
name: test-config
key: special.level
- name: TYPE
valueFrom:
configMapKeyRef:
name: test-config
key: special.type
```
- 验证挂载

##### 7.6.Secret
- 跟configMap非常类似的对象,它主要是用于存储敏感信息,例如密码,密钥,证书等等。
- Secret有三种类型:
- Opaque
- kubernetes.io/dockerconfigjson
- ServiceAccount
###### 7.6.1.Opaque
- base64 编码格式的 Secret,用来存储密码、密钥等;但数据也可以通过base64 –decode解码得到原始数据,所有加密性很弱。
```shell
#使用命令行 创建secret
(1)kubectl create secret generic db-user-pass --from-file=./username.txt --from-file=./password.txt
(2)kubectl create secret generic db-user-pass --from-literal=username=admin --from-literal=password=1f2d1e2e67df
#手动创建base64加密
echo -n 'admin' | base64
echo -n '1f2d1e2e67df' | base64
#解密
echo 'MWYyZDFlMmU2N2Rm' | base64 --decode
```
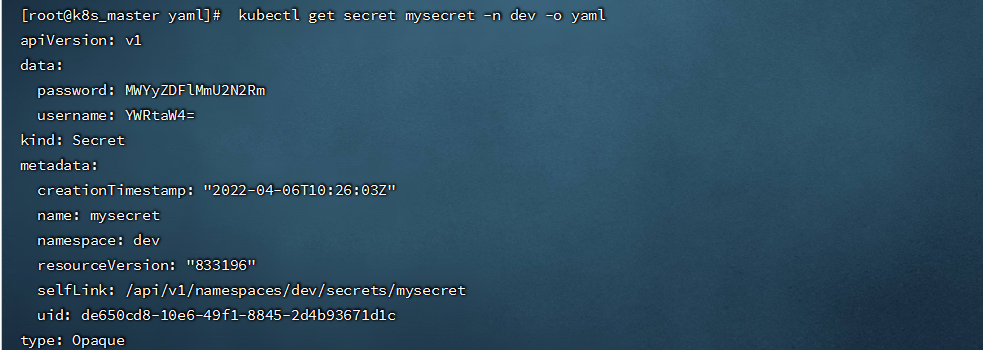
- 创建 secret-opaque.yaml,内容如下:
```shell
apiVersion: v1
kind: Secret
metadata:
name: mysecret
namespace: dev
type: Opaque
data:
username: YWRtaW4= #修改为base64加密后的
password: MWYyZDFlMmU2N2Rm
```
```shell
kubectl get secret mysecret -n dev -o yaml
```
- 也可以将一个非 base64 编码的字符串直接放入 Secret 中, 当创建或更新该 Secret 时,此字段将被编码。
```yaml
apiVersion: v1
kind: Secret
metadata:
name: web-secret
namespace: web
type: Opaque
stringData:
config.yaml: |
apiUrl: "https://my.api.com/api/v1"
username: admin
password: 123456
```
- 创建pod-secret.yaml,将secert 挂载到 pod中,内容如下:
```yaml
apiVersion: v1
kind: Pod
metadata:
name: pod-secret
namespace: dev
spec:
containers:
- name: nginx
image: nginx:1.17.1
volumeMounts:
- name: config
mountPath: /secret/config
readOnly: true
volumes:
- name: config
secret:
secretName: mysecret
```
```shell
kubectl exec -it pod-secret -n dev /bin/sh
```
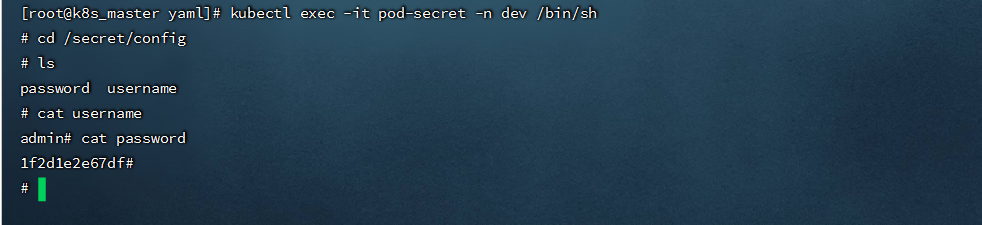
- 只挂载Secret中特定的key
```yaml
apiVersion: v1
kind: Pod
metadata:
name: pod-secret-01
namespace: dev
spec:
containers:
- name: nginx
image: nginx:1.17.1
volumeMounts:
- name: secret
mountPath: /opt
readOnly: true
volumes:
- name: secret
secret:
secretName: mysecret
items:
- key: username
path: cert/username #username 将存储在/opt/cert/username 下
```
```shell
kubectl exec -it pod-secret-01 -n dev /bin/sh
```

- 将Secret设置为环境变量
```yaml
apiVersion: v1
kind: Pod
metadata:
name: secret-env-pod
spec:
containers:
- name: redis
image: redis
env:
- name: SECRET_USERNAME
valueFrom:
secretKeyRef:
name: mysecret
key: username
- name: SECRET_PASSWORD
valueFrom:
secretKeyRef:
name: mysecret
key: password
```
###### 7.6.2.kubernetes.io/dockerconfigjson
- 用来存储私有docker registry的认证信息。
```shell
kubectl create secret docker-registry harbor-key-secret --docker-server=harbor.linuxtxc.com:9090 --docker-username=admin --docker-password=Harbor123
```
- 在创建 Pod 的时候,通过 imagePullSecrets 来引用刚创建的 myregistrykey
```yaml
apiVersion: v1
kind: Pod
metadata:
name: java-demo
spec:
containers:
- name: tomcat
image: harbor.linuxtxc.com:9090/txcrepo/tomcat-demo:v1
imagePullSecrets:
- name: harbor-key-secret
```
###### 7.6.3.ServiceAccount
- 用来访问Kubernetes API,由Kubernetes自动创建,并且会自动挂载到Pod的 /run/secrets/kubernetes.io/serviceaccount 目录中。
- 每个namespace下有一个名为default的默认的ServiceAccount对象,这个ServiceAccount里有一个名为Tokens的可以作为Volume一样被Mount到Pod里的Secret,当Pod启动时这个Secret会被自动Mount到Pod的指定目录下,用来协助完成Pod中的进程访问API Server时的身份鉴权过程。
```shell
#创建一个sa 名称为admin
kubectl create serviceaccount admin -n dev
```
- 如果一个Pod在定义时没有指定spec.serviceAccountName属性,则会默认赋值为default,可进行如下指定
```yaml
apiVersion: v1
kind: Pod
metadata:
name: sa-demo
namespace: dev
labels:
app: myapp
release: canary
spec:
containers:
- name: myapp
image: nginx:1.17.2
ports:
- name: nginx-port
containerPort: 80
serviceAccountName: admin #此处指令为指定sa的名称
```
##### 7.7.GlusterFS+Heketi实现volume动态扩容
- SC:是StorageClass的缩写,表示存储类;这种资源主要用来对pv资源的自动供给提供接口;所谓自动供给是指用户无需手动创建pv,而是在创建pvc时对应pv会由persistentVolume-controller自动创建并完成pv和pvc的绑定;使用sc资源的前提是对应后端存储必须支持restfull类型接口的管理接口,并且pvc必须指定对应存储类名称来引用SC;简单讲SC资源就是用来为后端存储提供自动创建pv并关联对应pvc的接口;
- Heketi是一个提供RESTful API管理GlusterFS卷的框架,便于管理员对GlusterFS进行操作:
```shell
#yum下载
#wget https://mirrors.aliyun.com/centos/7/storage/x86_64/gluster-9/Packages/h/heketi-9.0.0-1.el7.x86_64.rpm
wget http://oss.linuxtxc.com/deploy/rpm/heketi-9.0.0-1.el7.x86_64.rpm
#wget https://mirrors.aliyun.com/centos/7/storage/x86_64/gluster-9/Packages/h/heketi-client-9.0.0-1.el7.x86_64.rpm
wget http://oss.linuxtxc.com/deploy/rpm/heketi-client-9.0.0-1.el7.x86_64.rpm
```
###### 7.7.1.安装 heketi
```shell
#安装rpm包,我只在master上安装
yum -y install heketi-9.0.0-1.el7.x86_64.rpm
yum -y install heketi-client-9.0.0-1.el7.x86_64.rpm
```
- 修改service文件
```shell
vim /usr/lib/systemd/system/heketi.service
......................
[Unit]
Description=Heketi Server
[Service]
Type=simple
WorkingDirectory=/var/lib/heketi
EnvironmentFile=/etc/heketi/heketi.json
User=root
ExecStart=/usr/bin/heketi --config=/etc/heketi/heketi.json
Restart=on-failure
StandardOutput=syslog
StandardError=syslog
[Install]
WantedBy=multi-user.target
```
- 修改heketi配置文件
```shell
vim /etc/heketi/heketi.json
.............................
#修改端口,防止端口冲突
"port": "18080",
......
#允许认证
"use_auth": true,
......
#admin用户的key改为adminkey
"key": "adminkey"
#普通用户的key改为userkey
"key": "userkey"
......
#修改执行插件为ssh,并配置ssh的所需证书,注意要能对集群中的机器免密ssh登陆,使用ssh-copy-id把pub key拷到每台glusterfs服务器上
"executor": "ssh",
"sshexec": {
"keyfile": "/etc/heketi/heketi_key",
"user": "root",
"port": "22",
"fstab": "/etc/fstab"
},
......
# 定义heketi数据库文件位置
"db": "/var/lib/heketi/heketi.db"
......
#调整日志输出级别
"loglevel" : "warning"
```
- 配置ssh密钥
```shell
[root@k8s-master heketi]# ssh-keygen -f /etc/heketi/heketi_key -t rsa -N ''
[root@k8s-master heketi]# ssh-copy-id -i /etc/heketi/heketi_key.pub 172.16.8.212
[root@k8s-master heketi]# ssh-copy-id -i /etc/heketi/heketi_key.pub 172.16.8.213
[root@k8s-master heketi]# ssh-copy-id -i /etc/heketi/heketi_key.pub 172.16.8.214
```
- 验证登录
```shell
ssh -i /etc/heketi/heketi_key root@172.16.8.212
```

- 启动heketi
```shell
systemctl start heketi
systemctl enable heketi
```
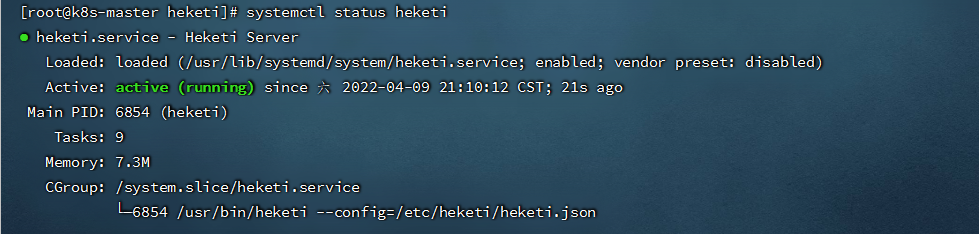
- 查看heketi服务状态
```shell
systemctl status heketi
```
###### 7.7.2.heketi添加glusterfs
- Heketi添加cluster
```shell
heketi-cli --user admin --server http://172.16.8.124:18080 --secret adminkey --json cluster create
.................................
{"id":"7a263332ed6bc432f7fa81e65e021542","nodes":[],"volumes":[],"block":true,"file":true,"blockvolumes":[]}
```

- 将所有glusterfs节点作为node添加到cluster
```shell
[root@k8s-master heketi]# heketi-cli --server http://172.16.8.124:18080 --user "admin" --secret "adminkey" node add --cluster "7a263332ed6bc432f7fa81e65e021542" --management-host-name 172.16.8.212 --storage-host-name 172.16.8.212 --zone 1
[root@k8s-master heketi]# heketi-cli --server http://172.16.8.124:18080 --user "admin" --secret "adminkey" node add --cluster "7a263332ed6bc432f7fa81e65e021542" --management-host-name 172.16.8.213 --storage-host-name 172.16.8.213 --zone 1
[root@k8s-master heketi]# heketi-cli --server http://172.16.8.124:18080 --user "admin" --secret "adminkey" node add --cluster "7a263332ed6bc432f7fa81e65e021542" --management-host-name 172.16.8.214 --storage-host-name 172.16.8.214 --zone 1
注:要保存每个glusterfs节点ID
```

- 添加device,volume是基于device创建的,目前heketi仅支持使用裸分区或裸磁盘(未格式化)添加为device,不支持文件系统,所以每个glusterfs节点上要有未格式化的磁盘
```shell
[root@k8s-master heketi]# heketi-cli --server http://172.16.8.124:18080 --user "admin" --secret "adminkey" --json device add --name="/dev/sdb" --node "3aee8b6287717c18c72fbcc547e8bff4"
[root@k8s-master heketi]# heketi-cli --server http://172.16.8.124:18080 --user "admin" --secret "adminkey" --json device add --name="/dev/sdb" --node "833b827e2d72c73a597c7d82a5ebdbc5"
[root@k8s-master heketi]# heketi-cli --server http://172.16.8.124:18080 --user "admin" --secret "adminkey" --json device add --name="/dev/sdb" --node "968afeb52b8924cac7ffac6db3963e03"
```

- 创建一个大小为2G,副本为2的volume
```shell
[root@k8s-master dev]# heketi-cli --server http://172.16.8.124:18080 --user "admin" --secret "adminkey" volume create --size 2 --replica 2
#通过下面信息,可以看到Heketi创建了名为vol_15249e32eb410cabe764e4a06e254a7e的数据卷。
```

###### 7.7.3.创建资源使用volume
- 创建storageclass-glusterfs.yaml,内容如下:
```yaml
apiVersion: v1
kind: Secret
metadata:
name: heketi-secret
namespace: app
data:
# echo -n "mypassword" | base64 / base64 encoded "password"
key: bXlwYXNzd29yZA==
type: kubernetes.io/glusterfs
---
apiVersion: storage.k8s.io/v1beta1
kind: StorageClass
metadata:
name: glusterfs
provisioner: kubernetes.io/glusterfs
allowVolumeExpansion: true
parameters:
resturl: "http://172.16.8.124:18080"
clusterid: "7a263332ed6bc432f7fa81e65e021542"
restauthenabled: "true"
restuser: "admin"
#secretNamespace: "default"
#secretName: "heketi-secret"
restuserkey: "adminkey"
gidMin: "40000"
gidMax: "50000"
volumetype: "replicate:2"
reclaimPolicy: Recycle #默认为delete(删除),当前设置的策略为Recycle(保留)
```
```shell
kubectl get storageclass -n app
```

- 创建glusterfs-pvc.yaml内容如下:
```yaml
kind: PersistentVolumeClaim
apiVersion: v1
metadata:
name: glusterfs-pvc
namespace: app
annotations:
volume.beta.kubernetes.io/storage-class: "glusterfs"
spec:
accessModes:
- ReadWriteMany
resources:
requests:
storage: 2Gi
```
```shell
kubectl get pvc -n app
#有绑定的volume才算创建成功,同时PV也会自动创建
```

- 创建 mysql-deployment.yaml,内容如下:
```yaml
apiVersion: apps/v1
kind: Deployment
metadata:
name: mysql
namespace: app
spec:
selector:
matchLabels:
name: mysql
template:
metadata:
labels:
name: mysql
spec:
containers:
- name: mysql
image: mysql:5.7
imagePullPolicy: IfNotPresent
env:
- name: MYSQL_ROOT_PASSWORD
value: root123456
ports:
- containerPort: 3306
volumeMounts:
- name: glusterfs-mysql-data
mountPath: "/var/lib/mysql"
volumes:
- name: glusterfs-mysql-data
persistentVolumeClaim:
claimName: glusterfs-pvc
readOnly: false
```
- 查看volume挂载情况
```shell
kubectl exec -it mysql-5b94895868-n6xld -n app mount | grep 172
```

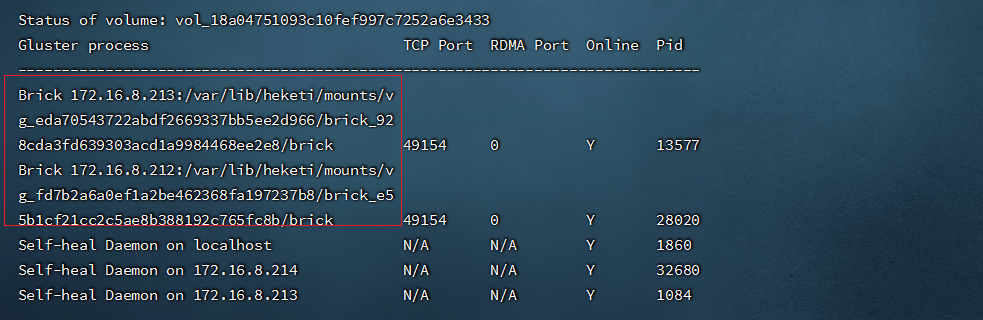
- 查看glusterfs集群状态
```shell
gluster volume status
```
###### 7.7.4.动态修改PVC
- 查看当前PVC容量

```shell
#修改yaml配置
vim glusterfs-pvc.yaml
kubectl apply -f glusterfs-pvc.yaml
```
- 再次查看 PVC
```shell
kubectl get pvc -n app
```

##### 7.8.ceph+storageclass
---
###### 7.8.1.rbd + storageclass
- 实现动态存储 (可自动创建PV)
- 在ceph集群中操作
```shell
#创建pool池
ceph osd pool create kube 32 32
#查看所有池
ceph osd lspools
#创建用户kubernetes,pool为刚创建的池
ceph auth get-or-create client.kube mon 'allow r' osd 'allow class-read object_prefix rbd_children, allow rwx pool=kube' -o /etc/ceph/ceph.client.kube.keyring
#删除用户
#ceph auth del client.kube
#获取用户的key,并使用base64转换,
ceph auth get-key client.admin | base64
ceph auth get-key client.kube | base64
#查看用户秘钥
#ceph auth get-key client.admin
#查询用户权限
#ceph auth get client.admin
#查看全部用户
#ceph auth list
#将文件传到k8s master节点上
(创建pod时,kubelet需要使用rbd命令去检测和挂载pv对应的ceph image,所以要在所有的worker节点安装ceph客户端ceph-common。将ceph的ceph.client.admin.keyring和ceph.conf文件拷贝到master的/etc/ceph目录下,我是将ceph安装在k8s集群中的,所以省略这步操作)
scp -rp /etc/ceph/{ceph.client.kubernetes.keyring,ceph.client.admin.keyring,ceph.conf} root@192.168.1.211:/etc/ceph/
```
- gcr.io提供的kube-controller-manager容器镜像未打包ceph-common组件,缺少了rbd命令,因此无法通过rbd命令为pod创建rbd image,我们需要在kubernetes集群中安装rbd-provisioner
```yaml
kind: ClusterRole
apiVersion: rbac.authorization.k8s.io/v1
metadata:
name: rbd-provisioner
rules:
- apiGroups: [""]
resources: ["persistentvolumes"]
verbs: ["get", "list", "watch", "create", "delete"]
- apiGroups: [""]
resources: ["persistentvolumeclaims"]
verbs: ["get", "list", "watch", "update"]
- apiGroups: ["storage.k8s.io"]
resources: ["storageclasses"]
verbs: ["get", "list", "watch"]
- apiGroups: [""]
resources: ["events"]
verbs: ["create", "update", "patch"]
- apiGroups: [""]
resources: ["services"]
resourceNames: ["kube-dns", "coredns"]
verbs: ["list", "get"]
- apiGroups: [""]
resources: ["endpoints"]
verbs: ["get", "list", "watch", "create", "update", "patch"]
---
kind: ClusterRoleBinding
apiVersion: rbac.authorization.k8s.io/v1
metadata:
name: rbd-provisioner
subjects:
- kind: ServiceAccount
name: rbd-provisioner
namespace: kube-system
roleRef:
kind: ClusterRole
name: rbd-provisioner
apiGroup: rbac.authorization.k8s.io
---
apiVersion: rbac.authorization.k8s.io/v1
kind: Role
metadata:
name: rbd-provisioner
namespace: kube-system
rules:
- apiGroups: [""]
resources: ["secrets"]
verbs: ["get"]
- apiGroups: [""]
resources: ["endpoints"]
verbs: ["get", "list", "watch", "create", "update", "patch"]
---
apiVersion: rbac.authorization.k8s.io/v1
kind: RoleBinding
metadata:
name: rbd-provisioner
namespace: kube-system
roleRef:
apiGroup: rbac.authorization.k8s.io
kind: Role
name: rbd-provisioner
subjects:
- kind: ServiceAccount
name: rbd-provisioner
namespace: kube-system
---
apiVersion: apps/v1
kind: Deployment
metadata:
name: rbd-provisioner
namespace: kube-system
labels:
app: rbd-provisioner
spec:
replicas: 1
selector:
matchLabels:
app: rbd-provisioner
strategy:
type: Recreate
template:
metadata:
labels:
app: rbd-provisioner
spec:
nodeSelector:
app: rbd-provisioner
containers:
- name: rbd-provisioner
image: "quay.io/external_storage/rbd-provisioner:latest"
volumeMounts:
- name: ceph-conf
mountPath: /etc/ceph
env:
- name: PROVISIONER_NAME
value: ceph.com/rbd
serviceAccount: rbd-provisioner
volumes:
- name: ceph-conf
hostPath:
path: /etc/ceph
tolerations:
- key: "node-role.kubernetes.io/master"
operator: "Exists"
effect: "NoSchedule"
- key: "node-role.kubernetes.io/control-plane"
operator: "Exists"
effect: "NoSchedule"
---
apiVersion: v1
kind: ServiceAccount
metadata:
name: rbd-provisioner
namespace: kube-system
```
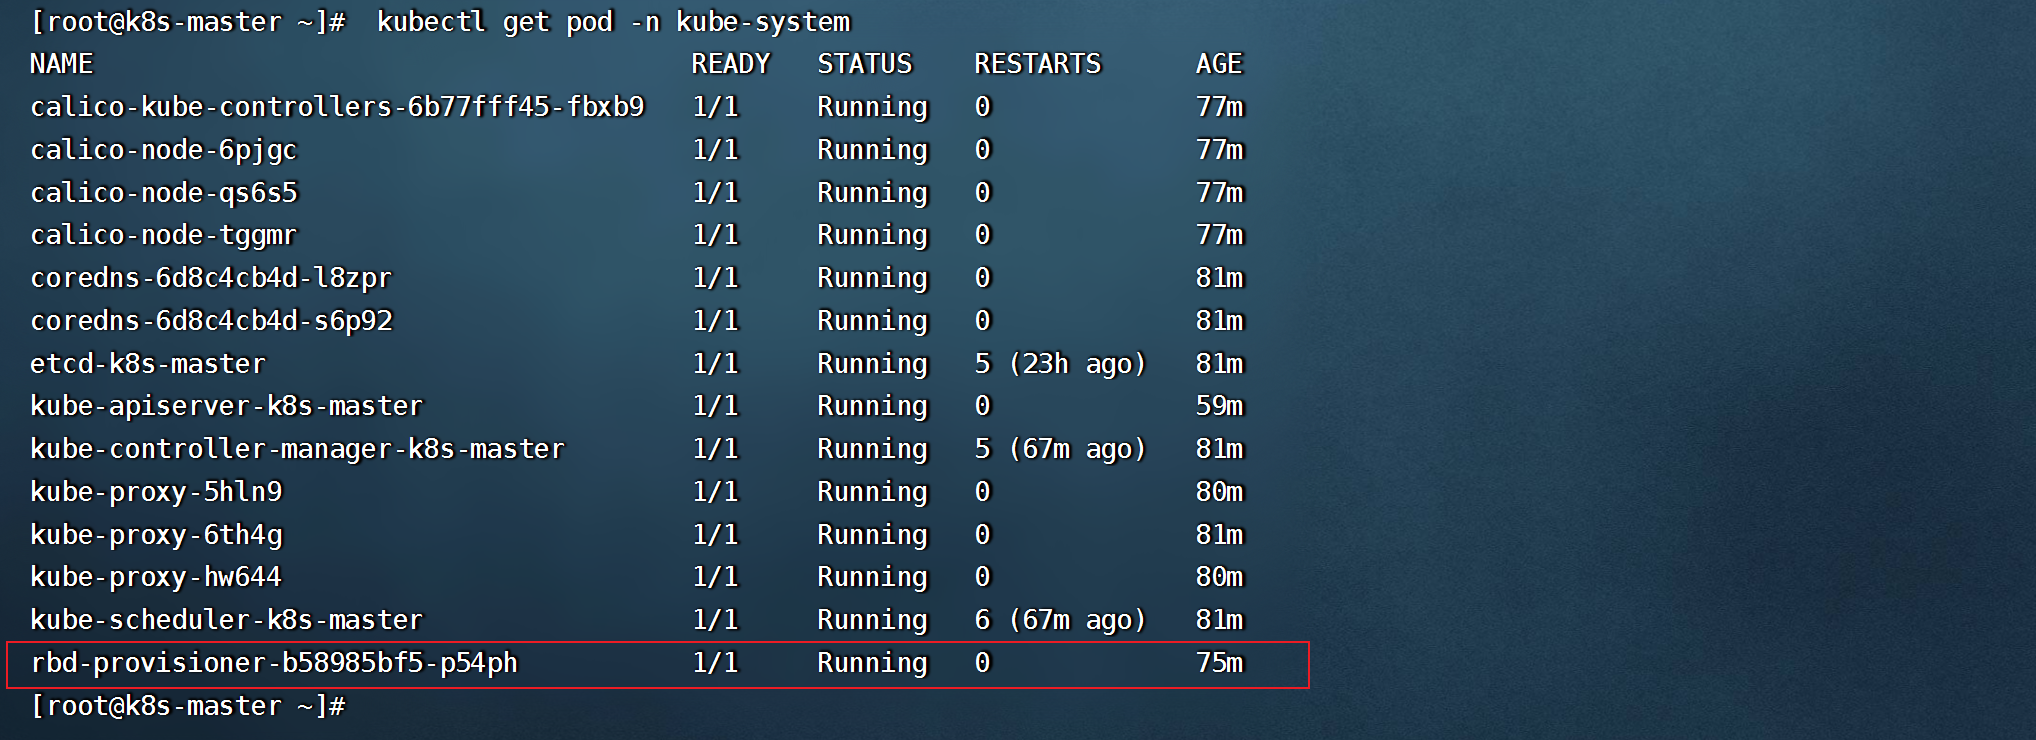
- 查看rbd-provisioner pod启动情况
- 创建secret
```shell
#在k8s集群中创建secret(key为上面转换的获得的值)
kubectl create secret generic ceph-secret-admin --from-literal=key='QVFETkVLeGk4LzBLQUJBQXlmcGVhSzc2cCtPb1M5Und4WjBrU0E9PQ==' --type=kubernetes.io/rbd -n kube-system
kubectl create secret generic ceph-secret-kubernetes --from-literal=key='QVFBMnRxNWlNTEYzRWhBQWl4dHg0OVRIRkhKbUJ2QWQyb2FQWkE9PQ==' --type=kubernetes.io/rbd
## 在k8s集群每个节点安装(下载ceph的源)
yum -y install ceph-common
```
- 创建 yaml/ceph-storageclass.yaml,内容如下:
```yaml
apiVersion: storage.k8s.io/v1
kind: StorageClass
metadata:
name: ceph-storageclass-rbd
annotations:
storageclass.beta.kubernetes.io/is-default-class: "true"
provisioner: ceph.com/rbd
allowVolumeExpansion: true #是否支持扩展
parameters:
monitors: 192.168.1.211:6789,192.168.1.15:6789,192.168.1.49:6789
adminId: admin
adminSecretName: ceph-secret-admin
adminSecretNamespace: "kube-system"
pool: kube_pool
userId: kubernetes
userSecretName: ceph-secret-kubernetes
#userSecretNamespace: "kube-system"
fsType: ext4
imageFormat: "2"
imageFeatures: "layering"
reclaimPolicy: Retain #默认为delete(删除),还有当前设置的策略为Retain(保留)
```
- statefulset挂载storageclass
```yaml
apiVersion: apps/v1
kind: StatefulSet
metadata:
name: statefulset-mysql
spec:
replicas: 2
selector:
matchLabels:
statefulset: mysql
serviceName: mysql-headless
template:
metadata:
labels:
statefulset: mysql
spec:
containers:
- name: mysql01
image: mysql:8.0
imagePullPolicy: IfNotPresent
env:
- name: MYSQL_ROOT_PASSWORD
value: root123456
ports:
- containerPort: 3306
volumeMounts:
- name: ceph-mysql-data
mountPath: /var/lib/mysql
subPath: mysql
volumeClaimTemplates:
- metadata:
name: ceph-mysql-data
annotations:
volume.beta.kubernetes.io/storage-class: "ceph-storageclass-rbd"
gcp-auto-backup: "yes"
spec:
accessModes: [ "ReadWriteOnce" ]
resources:
requests:
storage: 5Gi
```
- 使用ceph-storageclass-rbd创建 PVC
```yaml
kind: PersistentVolumeClaim
apiVersion: v1
metadata:
name: ceph-pvc01
annotations:
volume.beta.kubernetes.io/storage-class: "ceph-storageclass-rbd"
spec:
accessModes:
- ReadWriteOnce
resources:
requests:
storage: 5Gi
```
###### 7.8.2.cephfs + storageclass
- 在ceph集群中操作
```
#创建pool
ceph osd pool create cephfs_data 32
ceph osd pool create cephfs_metadata 32
#创建cephfs存储
ceph fs new cephfs cephfs_metadata cephfs_data
##删除cephfs
#ceph fs rm cephfs --yes-i-really-mean-it
#删除pool
#ceph osd pool delete cephfs-data cephfs-data --yes-i-really-really-mean-it
#ceph osd pool delete cephfs-data cephfs-data --yes-i-really-really-mean-it
#查看admin用户的key
ceph auth get-key client.admin
```
- 在k8s集群中创建secret
```shell
kubectl create secret generic ceph-admin --type="kubernetes.io/rbd" --from-literal=key=AQDNEKxi8/0KABAAyfpeaK76p+OoS9RwxZ0kSA== --namespace=kube-system
```
- 创建cephfs-storageclass.yaml,内容如下:
```yaml
kind: StorageClass
apiVersion: storage.k8s.io/v1
metadata:
name: cephfs-storageclass
annotations:
storageclass.beta.kubernetes.io/is-default-class: "true"
provisioner: ceph.com/cephfs
parameters:
monitors: 192.168.1.211:6789,192.168.1.15:6789,192.168.1.49:6789
adminId: admin
adminSecretName: cephfs-secret-admin
adminSecretNamespace: kube-system
claimRoot: /volumes/kubernetes
reclaimPolicy: Retain #默认为delete(删除),还有当前设置的策略为Retain(保留)
```
- 创建cephfs-pvc01,内容如下:
```yaml
kind: PersistentVolumeClaim
apiVersion: v1
metadata:
name: cephfs-pvc01
spec:
accessModes:
- ReadWriteOnce
storageClassName: cephfs-storageclass
resources:
requests:
storage: 1Gi
```
----
#### 8.k8s的安全认证
##### 8.1.概念描述
● API Server是访问和管理资源对象的唯一入口。任何一个请求访问API Server,都要经过下面的三个流程:
○ ① Authentication(认证):身份鉴别,只有正确的账号才能通过认证。
○ ② Authorization(授权):判断用户是否有权限对访问的资源执行特定的动作。
○ ③ Admission Control(注入控制):用于补充授权机制以实现更加精细的访问控制功能。
UserAccount:用于限制用户账号对 kubernetes集群资源访问的权限
ServiceAccount:用于为Pod的服务进程在访问kubernetes时提供身份标识。
API Server目前支持的几种授权策略
● AlwaysDeny:表示拒绝所有请求,一般用于测试。
● AlwaysAllow:允许接收所有的请求,相当于集群不需要授权流程(kubernetes默认的策略)。
● ABAC:基于属性的访问控制,表示使用用户配置的授权规则对用户请求进行匹配和控制。
● Webhook:通过调用外部REST服务对用户进行授权。
● Node:是一种专用模式,用于对kubelet发出的请求进行访问控制。
● RBAC:基于角色的访问控制(kubeadm安装方式下的默认选项)。
● RBAC(Role Based Access Control) : 基于角色的访问控制,主要是在描述一件事情:给哪些对象授权了哪些权限。
● RBAC涉及到了下面几个概念:
○ 对象:User、Groups、ServiceAccount。
○ 角色:代表着一组定义在资源上的可操作的动作(权限)的集合。
○ 绑定:将定义好的角色和用户绑定在一起。
● RBAC引入了4个顶级资源对象:
○ Role、ClusterRole:角色,用于指定一组权限。
○ RoleBinding、ClusterRoleBinding:角色绑定,用于将角色(权限的集合)赋予给对象。
##### 8.2.Role、ClusterRole
- Role的资源清单文件:
```yaml
# Role只能对命名空间的资源进行授权,需要指定namespace
apiVersion: rbac.authorization.k8s.io/v1
kind: Role
metadata:
name: authorization-role
namespace: dev
rules:
- apiGroups: ["","apps"] # 支持的API组列表,""空字符串,表示核心API群
resources: ["pods",] # 支持的资源对象列表
verbs: ["get","watch","list"]
```
- ClusterRole的资源清单文件:
```yaml
# ClusterRole可以授予整个集群范围内资源访问权限、与非资源类型进行授权
apiVersion: rbac.authorization.k8s.io/v1
kind: ClusterRole
metadata:
name: authorization-clusterrole
rules:
- apiGroups: ["","apps"] # 支持的API组列表,""空字符串,表示核心API群
resources: ["pods","deployment"] # 支持的资源对象列表
verbs: ["get","watch","list"]
```
```yaml
rules中的参数说明:
apiGroups:
#支持的API组列表。
"","apps","autoscaling","batch"。""表示核心组,如pods,namespace、pod、pv、pvc等
resources:
#支持的资源对象列表。 "services","endpoints","pods","secrets","configmaps","crontabs","deployments","jobs","nodes","rolebindings","clusterroles","daemonsets","replicasets","statefulsets","horizontalpodautoscalers","replicationcontrollers","cronjobs"。
verbs:
#对资源对象的操作方法列表。
"get", "list", "watch", "create", "update", "patch", "delete", "exec"。
```
- 查看资源的组
```shell
kubectl api-resources | grep deployment
#下图中的app 便为资源的组
```

##### 8.3.RoleBinding、ClusterRoleBinding
- 角色绑定用来把一个角色绑定到一个目标对象上,绑定目标可以是User、Group或者ServiceAccount。
- RoleBinding的资源清单文件:
```yaml
# RoleBinding可以将同一namespace中的subject对象绑定到某个Role下,则此Subject具有该Role定义的权限
apiVersion: rbac.authorization.k8s.io/v1
kind: RoleBinding
metadata:
name: authorization-role-binding
namespace: dev
subjects:
- kind: User
name: test
apiGroup: rbac.authorization.k8s.io
roleRef:
apiGroup: rbac.authorization.k8s.io
kind: Role
name: authorization-role
```
- ClusterRoleBinding的资源清单文件:
```yaml
# ClusterRoleBinding在整个集群级别和所有namespaces将特定的subject与ClusterRole绑定,授予权限
apiVersion: rbac.authorization.k8s.io/v1
kind: ClusterRoleBinding
metadata:
name: authorization-clusterrole-binding
subjects:
- kind: User
name: test
apiGroup: rbac.authorization.k8s.io
roleRef:
apiGroup: rbac.authorization.k8s.io
kind: ClusterRole
name: authorization-clusterrole
```
- RoleBinding引用ClusterRole进行授权
- RoleBinding可以引用ClusterRole,对属于同一命名空间内ClusterRole定义的资源主体进行授权。
- 一种很常用的做法是,集群管理员为集群范围预定义好一组规则(ClusterRole),然后在多个命名空间中重复使用这些ClusterRole。这样可以大幅度提高授权管理工作效率,也使得各个命名空间下的基础性授权规则和使用体验保持一致。
```yaml
# 虽然authorization-clusterrole是一个集群角色,但是因为使用了RoleBinding
# 所以test用户只能读取dev命名空间中的资源
apiVersion: rbac.authorization.k8s.io/v1
kind: RoleBinding
metadata:
name: authorization-clusterrole-binding
namespace: dev
subjects:
- kind: User
name: test
apiGroup: rbac.authorization.k8s.io
roleRef:
apiGroup: rbac.authorization.k8s.io
kind: ClusterRole
name: authorization-clusterrole
```
##### 8.4.引用集群默认的clusterole
```shell
kubectl get clusterrole | grep admin
#admin 具有单个namespace的所有权限
#cluster-admin 具有对整个k8s集群的操作权限
#检查serviceaccount 是否绑定权限成功
kubectl auth can-i --as=system:serviceaccount:app-team1:cicd-token get pods -n app-team1
```

##### 8.5.RBAC案例
- 创建一个只能管理dev命名空间下Pods资源的账号。
```shell
#创建用户的私钥
cd /etc/kubernetes/pki
umask 077;openssl genrsa -out devuser.key 2048
#创建证书签署请求(O:组名 CN:用户名)
openssl req -new -key devuser.key -out devuser.csr -subj "/CN=devuser/O=devgroup"
#签署证书(我们使用的是kubeadm安装的集群,CA相关证书位于/etc/kubernetes/pki/ 目录下
openssl x509 -req -in devuser.csr -CA ca.crt -CAkey ca.key -CAcreateserial -out devuser.crt -days 3650
#设置集群、用户、上下文信息(不设置--kubeconfig,如--kubeconfig=devuser.config,则会默认放在家目录下的./kube 中)
kubectl config set-cluster kubernetes --embed-certs=true --certificate-authority=/etc/kubernetes/pki/devuser.crt --server=https://172.16.8.124:6443 --kubeconfig=devuser.config
kubectl config set-credentials devuser --embed-certs=true --client-certificate=devuser.crt --client-key=devuser.key --kubeconfig=devuser.config
kubectl config set-context devuser@kubernetes --cluster=kubernetes --user=devuser --kubeconfig=devuser.config
#切换账号到devuser
kubectl config use-context devuser@kubernetes
```
```shell
#查看(当前还没有权限执行当前操作,还需要对用户授权)
kubectl get pods -n dev
```

- 如果要使用linux的普通用户管理集群
```shell
[root@k8s_master ~]# useradd devuser
[root@k8s_master ~]# mkdir /home/devuser/.kube
[root@k8s_master ~]# cp .kube/config /home/devuser/.kube/
[root@k8s_master ~]# chown -R devuser:devuser /home/devuser/
```
- 查看管理账号,并切换
```shell
#输出合并后的kubeconfig的内容,格式为 YAML,密文内容不会显示(--kubeconfig,可以指定只显示某个账户的kubeconfig内容,不指定则显示.kube/config中的账号)
kubectl config view --kubeconfig=devuser.config
#切回admin账户
kubectl config use-context kubernetes-admin@kubernetes
```
- 创建Role和RoleBinding,为devuser授权
- 创建dev-role.yaml文件,内容如下:
```yaml
apiVersion: rbac.authorization.k8s.io/v1
kind: Role
metadata:
name: dev-role
namespace: dev
rules:
- apiGroups: ["","apps"] # 支持的API组列表,""空字符串,表示核心API群,如nodes,pod,service等,可通过kubectl api-resources 查看
resources: ["pods","deployment"] # 支持的资源对象列表
verbs: ["get","watch","list"]
---
kind: RoleBinding
apiVersion: rbac.authorization.k8s.io/v1
metadata:
name: authorization-role-binding
namespace: dev
subjects:
- kind: User
name: devuser
apiGroup: rbac.authorization.k8s.io
roleRef:
kind: Role
name: dev-role
apiGroup: rbac.authorization.k8s.io
```
- 也可以直接引用k8s集群自带的 ClusterRole
```yaml
kind: RoleBinding
apiVersion: rbac.authorization.k8s.io/v1
metadata:
name: authorization-role-binding
namespace: dev
subjects:
- kind: User
name: devuser
apiGroup: rbac.authorization.k8s.io
roleRef:
kind: ClusterRole
name: admin
apiGroup: rbac.authorization.k8s.io
```
```shell
#切换成 devuser,再次查看
kubectl config use-context devuser@kubernetes --kubeconfig=devuser.config
kubectl get pods -n dev
#上面这是将kubeconfig信息放在 ~/.kube/config中的情况下,也可以指定文件进行操作,如(将文件传到k8s节点依然可以使用下面方式操作):
kubectl get pods -n dev --kubeconfig=devuser.config
```

##### 8.6.准入控制
- 通过了前面的认证和授权之后,还需要经过准入控制通过之后,API Server才会处理这个请求。
- 准入控制是一个可配置的控制器列表,可以通过在API Server上通过命令行设置选择执行哪些注入控制器。
```shell
vim /etc/kubernetes/manifests/kube-apiserver.yaml
..............
--enable-admission-plugins=NamespaceLifecycle,LimitRanger,ServiceAccount,PersistentVolumeLabel,DefaultStorageClass,ResourceQuota,DefaultTolerationSeconds
```
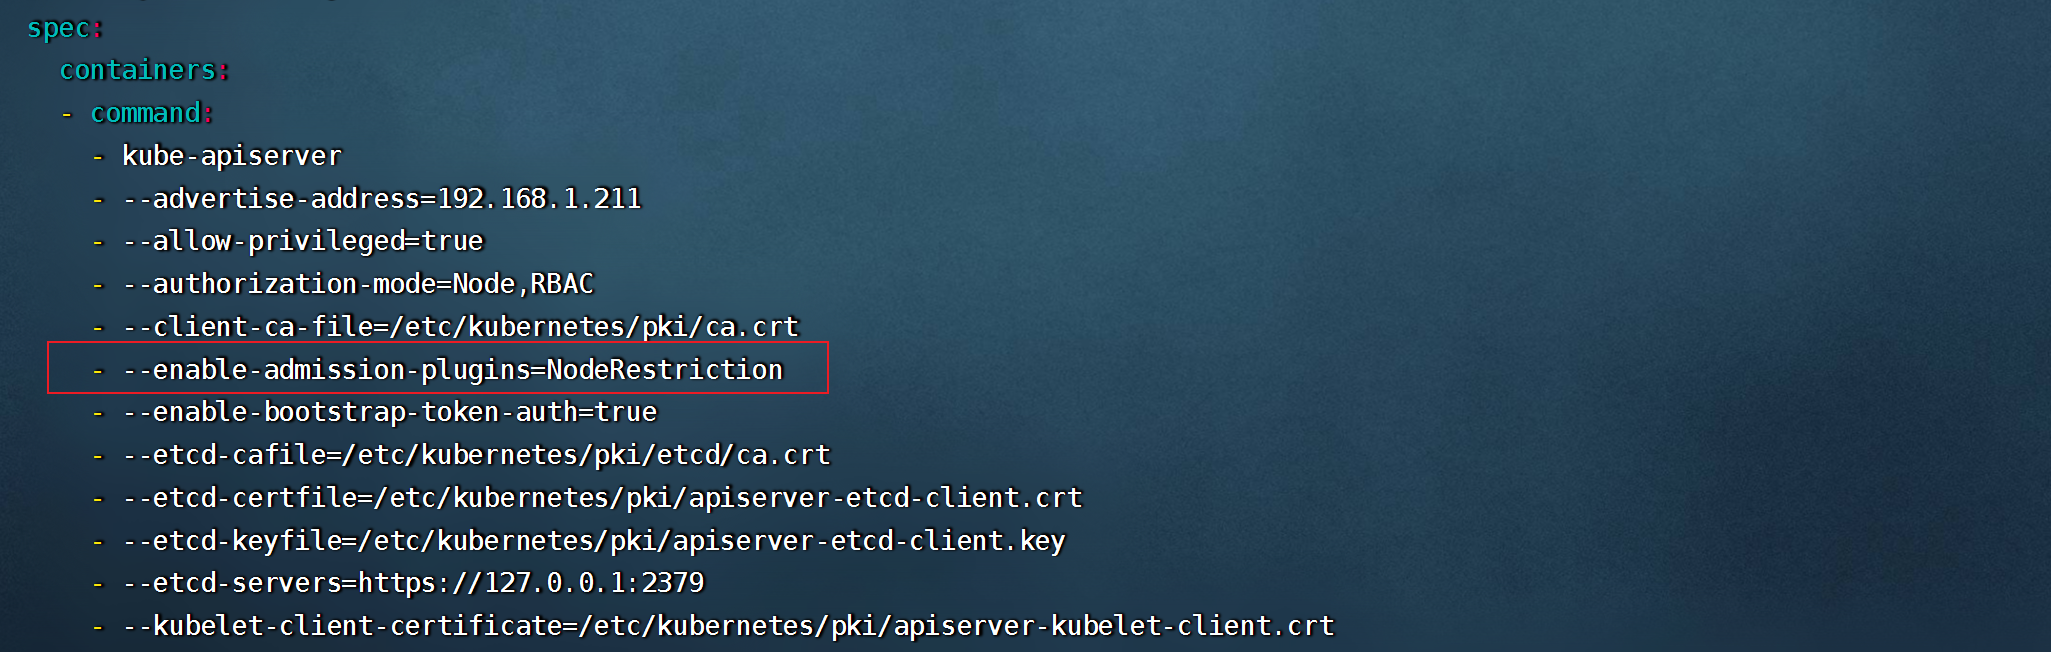
- 只有当所有的注入控制器都检查通过之后,API Server才会执行该请求,否则返回拒绝。
- 当前可配置的Admission Control(准入控制)
○ AlwaysAdmit:允许所有请求。
○ AlwaysDeny:禁止所有请求,一般用于测试。
○ AlwaysPullImages:在启动容器之前总去下载镜像。
○ DenyExecOnPrivileged:它会拦截所有想在Privileged Container上执行命令的请求。
○ ImagePolicyWebhook:这个插件将允许后端的一个Webhook程序来完成admission controller的功能。
○ Service Account:实现ServiceAccount实现了自动化。
○ SecurityContextDeny:这个插件将使用SecurityContext的Pod中的定义全部失效。
○ ResourceQuota:用于资源配额管理目的,观察所有请求,确保在namespace上的配额不会超标。
○ LimitRanger:用于资源限制管理,作用于namespace上,确保对Pod进行资源限制。
○ InitialResources:为未设置资源请求与限制的Pod,根据其镜像的历史资源的使用情况进行设置。
○ NamespaceLifecycle:如果尝试在一个不存在的namespace中创建资源对象,则该创建请求将被拒 绝。当删除一个namespace时,系统将会删除该namespace中所有对象。
○ DefaultStorageClass:为了实现共享存储的动态供应,为未指定StorageClass或PV的PVC尝试匹配默认StorageClass,尽可能减少用户在申请PVC时所需了解的后端存储细节。
○ DefaultTolerationSeconds:这个插件为那些没有设置forgiveness tolerations并具有notready:NoExecute和unreachable:NoExecute两种taints的Pod设置默认的“容忍”时间,为5min。
○ PodSecurityPolicy:这个插件用于在创建或修改Pod时决定是否根据Pod的security context和可用的 PodSecurityPolicy对Pod的安全策略进行控制
----
 Sign in with Wallet
Connect another wallet
Sign in with Wallet
Connect another wallet