# 109-2 加課 OpenCV
###### tags:`python lecture` `i2trc2`
# What is OpenCV?
Open Source Computer Vision Library (OpenCV),是一個跨平台的電腦視覺庫。以 C++ 撰寫,包含許多複雜的影像處理演算法,可以用來處理 2D 影像。(3D 影像處理可以參考 [OpenGL](https://zh.wikipedia.org/wiki/OpenGL)) ,OpenCV 提供許多不同語言的介面,例如:Python, Java, MATLAB 等
:::warning
- 不重新 [造輪子](https://zh.wikipedia.org/wiki/%E9%87%8D%E9%80%A0%E8%BD%AE%E5%AD%90),學習使用現有的模組 (library/module)
- 跟 [document](https://docs.opencv.org/master/d6/d00/tutorial_py_root.html) 成為好朋友
:::
### Install
```bash
pip install opencv-python
```
## 基本操作
1. import
要用 module 之前就要先 import ,就跟 C++ 要 include 類似
```python=
import cv2
```
3. 讀圖片 `mat = cv2.imread(filename)` [reference](https://docs.opencv.org/master/d4/da8/group__imgcodecs.html#ga288b8b3da0892bd651fce07b3bbd3a56)
注意檔名 (filename) 要包含路徑喔!
:::warning
#### 檔案系統中檔名的意義
一個完整的檔案名稱,包含檔案的**位置**、**檔案名稱**及**附檔名**,例如:
```
/home/vincent/lecture/test.py # 絕對路徑
./lecture/test.py # 相對路徑
lecture/test.py # 相對路徑
```
如果不特別標示的話一般來說就是指相對路徑,也就是 `./` 可以省略。
- `/`: 根目錄 (root)
- `./`: 目前目錄
- `../`: 上一層目錄
- `~/`: 家目錄 (home)
:::
2. 印圖片出來`cv2.imshow(title, mat)` [reference](https://docs.opencv.org/master/d7/dfc/group__highgui.html#ga453d42fe4cb60e5723281a89973ee563)
執行完這行後, openCV 會建立一個
- 讓視窗可以自由縮放大小 `cv2.namedWindow('th1', cv2.WINDOW_NORMAL)`
- 等待與讀取使用者按下的按鍵,設定為 0 就表示持續等待至使用者按下按鍵為止 `cv2.waitKey(0)`
- 關閉所有 OpenCV 的視窗`cv2.destroyAllWindows()`
:::danger
### imshow 在 colab 中的問題
Colab 中封鎖了 `cv2.imshow()` 的使用,因為它會導致 Jupyter session crash:

因此他告訴你要另外用一個叫做 `cv2_imshow()` 的東西取代
:::
### 讀進來的圖片的本質長什麼樣子?
試試看:
```python=
print(mat.shape)
print(type(mat))
```
- 圖片由那些維度所構成?
- 圖片是陣列? 是幾維陣列?
- 每個像素的數值範圍是多少?
<height, width, channel>
### 練習:
- 試著將 colab 掛載 (mount) 到你自己的雲端上 ([教學](https://hackmd.io/GGtwQ-rnTZiIrTYQkuxggw?both#%E9%80%A3%E7%B5%90-google-drive))
- 安裝 opencv python module
執行指令用驚嘆號
```bash
!pip install opencv-python
```
- 然後顯示出一張圖片 (自己找一張照片存到雲端上你創的新資料夾)
P.S. 建議用英文檔名
- import
- imread
- imshow
- 試著回答上面的問題,你讀進來的圖片長什麼樣子?
## 色域轉換 (converting color space)
1. 色域轉換 `mat = cv2.cvtColor(img, cv2.COLOR_BGR2GRAY)`
- 參數改成其他的可以轉換成其他顏色空間,轉換表: [參考資料](https://docs.opencv.org/3.4/d8/d01/group__imgproc__color__conversions.html)
- EX: `cv2.COLOR_BGR2HSV` 代表從 BGR 轉換成 HSV
2. 轉灰階
- EX. `mat = cv2.cvtColor(img, cv2.COLOR_BGR2GRAY)`
- 可以注意一下 `mat` 的 shape 發生了什麼變化
3. 二值化 `cv2.threshold(img, 127, 255, cv2.THRESH_BINARY)`
二值化也有好幾種方法,可以參考 [這裡](https://docs.opencv.org/master/d7/d4d/tutorial_py_thresholding.html)
## 切割圖片 (cropping)
圖片其實就是一個多維陣列 (numpy array),因此就跟 numpy array 一樣,可以用 indexing 的方式取值
簡單的例子:
```python=
arr = np.arange(10)
print(arr[5:10])
# [5 6 7 8 9]
```
試試看:
```python=
arr = np.arange(100).reshape((10, 10))
print(arr)
print(arr[5:10])
print(arr[4:7, 4:7])
```
### 練習
在你剛剛讀進來的圖片中,正中間取一個寬度 `w`, 高度 `h` 的長方形,並且顯示出來。
Tips:
- 你需要知道在 X、Y 方向的圖片起點跟終點座標,如何計算?

## 遮罩 (Masking)
只取出你要的部分
這個在很多應用上常常會需要,你只想要圖片中的某個東西,其他全部變成黑色或填成白色之類的,總之你只想要對某個部分做處理。
通常對於這樣的需求,我們會先準備一個跟原本的 `mat` 相同大小的遮罩 (mask),然後利用這個遮罩對影像做各種操作,例如說
- And 運算: example
```python=
img = cv2.imread('./input.bmp')
mask = np.zeros(img.shape[:2], dtype=np.uint8)
mask = cv2.rectangle(mask, (0, 0), (30, 30), 255, cv2.FILLED)
# mask[0:30, 0:30] = 255 # This also works!
res = cv2.bitwise_and(img, img, mask=mask)
cv2_imshow(mask)
cv2_imshow(res)
```
- [drawing a rectangle](https://docs.opencv.org/master/d6/d6e/group__imgproc__draw.html#ga07d2f74cadcf8e305e810ce8eed13bc9)
## 基本影像處理
### 模糊化 [Smoothing Image](https://docs.opencv.org/master/d4/d13/tutorial_py_filtering.html)
各種模糊處理主要的差異在 Kernel 不一樣,不同的 Kernel 會有不同的特性。
- Averaging
[`dst = cv.blur( src, ksize[, dst[, anchor[, borderType]]] )`](https://docs.opencv.org/master/d4/d86/group__imgproc__filter.html#ga8c45db9afe636703801b0b2e440fce37)
Example: 用大小為 5x5 的 kernel 做 average smoothing
```python=
blur = cv.blur(img, (5,5))
```
- Gaussian Blurring (Gaussian Distribution)
[`dst = cv.GaussianBlur( src, ksize, sigmaX[, dst[, sigmaY[, borderType]]] )`](https://docs.opencv.org/master/d4/d86/group__imgproc__filter.html#gaabe8c836e97159a9193fb0b11ac52cf1)
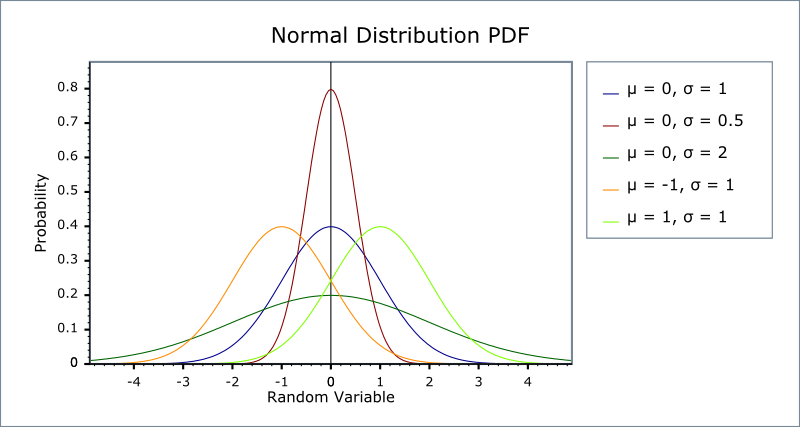
什麼是 Gaussian Distribution 咧? 又稱為常態分佈,安捏懂了拔

- kernel size 必須是**正**整數且為**奇數**
kernel 的標準差
- sigmaX: X 方向標準差
- sigmaY: 若沒有給,則預設跟 sigmaX 一樣
- 若 sigmaX 及 sigmaY 皆為 0 則由電腦自行計算
Example:
```python=
blur = cv.GaussianBlur(img,(5,5),0)
```
> Gaussian blurring is highly effective in removing Gaussian noise from an image.
- Median Blurring (啊就取中間值啦)
計算在 kernel 範圍內的 中間值,並用該值取代該點。
[`dst = cv.medianBlur( src, ksize[, dst] )`](https://docs.opencv.org/master/d4/d86/group__imgproc__filter.html#ga564869aa33e58769b4469101aac458f9)
- kernel size 必須是**正**整數且為**奇數**
> This is highly effective against **salt-and-pepper noise** in an image.
- Bilateral Filtering
一個能夠濾掉雜訊又能保留邊緣特徵的演算法
[`dst = cv.bilateralFilter( src, d, sigmaColor, sigmaSpace[, dst[, borderType]] )`](https://docs.opencv.org/master/d4/d86/group__imgproc__filter.html#ga9d7064d478c95d60003cf839430737ed)
### 幾何轉換 [Geometric Transformations of Images](https://docs.opencv.org/master/da/d6e/tutorial_py_geometric_transformations.html)
- 比例縮放 (Scale)
[`dst = cv.resize( src, dsize[, dst[, fx[, fy[, interpolation]]]] )`](https://docs.opencv.org/master/da/d54/group__imgproc__transform.html#ga47a974309e9102f5f08231edc7e7529d)
- dsize: 給定要 resize 的大小
- fx, fy: scale 的比例,EX. 0.5 表示每隔兩個像素材取值
- interpolation: 插值的方法 [列表](https://docs.opencv.org/master/da/d54/group__imgproc__transform.html#ga5bb5a1fea74ea38e1a5445ca803ff121)
Example:
```python=
res = cv.resize(img,(2*width, 2*height), interpolation = cv.INTER_CUBIC)
```
- 旋轉 (rotate)
[`dst = cv2.cv.rotate( src, rotateCode[, dst] )`](https://www.geeksforgeeks.org/python-opencv-cv2-rotate-method/)
```python=
rot = cv2.rotate(img, cv2.ROTATE_90_CLOCKWISE)
```
:::info
一般來說,大部分的旋轉縮放都可以用 [`warpAffine()`](https://docs.opencv.org/master/da/d54/group__imgproc__transform.html#ga0203d9ee5fcd28d40dbc4a1ea4451983) 做到,只要提供一個 2x3 的 transformation matrix,這個 matrix 包含 translation 及 rotation 的資訊。
$\rightarrow$ [完整的解釋](https://docs.opencv.org/master/d4/d61/tutorial_warp_affine.html)
Example:
```python=
rot_mat = cv.getRotationMatrix2D( center, angle, scale )
warp_rotate_dst = cv.warpAffine(warp_dst, rot_mat,
(warp_dst.shape[1], warp_dst.shape[0]))
```
甚至還可以改變視角 [`warpPerspective()`](https://docs.opencv.org/master/da/d54/group__imgproc__transform.html#gaf73673a7e8e18ec6963e3774e6a94b87)
其實還有很多神奇的 function 你可以自己去 [挖掘](https://docs.opencv.org/master/da/d54/group__imgproc__transform.html)
:::
### 形態學(Morphology)應用
- 侵蝕(Erosion)

- 膨脹(Dilation)

- 關閉(Closing)
先做膨脹,再做侵蝕,填補洞

- 開啟(Opening)
先做侵蝕,再做膨脹,把太小的弄不見

```python=
kernel = np.ones((5,5), np.uint8) # kernel
dilation_img = cv2.dilate(img, kernel, iterations = 1) # dilation 運算
erosion_img = cv2.erode(img, kernel, iterations = 1) # erosion 運算
opening = cv.morphologyEx(img, cv.MORPH_OPEN, kernel) # open
closing = cv.morphologyEx(img, cv.MORPH_CLOSE, kernel) # close
```
[reference1](https://sites.google.com/a/ms.ttu.edu.tw/cse2012dance-robot/yan-jiu-cheng-guo/opencv-ruan-ti-she-ji/qin-shi-yu-peng-zhang), [reference2](https://medium.com/%E9%9B%BB%E8%85%A6%E8%A6%96%E8%A6%BA/%E5%BD%A2%E6%85%8B%E5%AD%B8-morphology-%E6%87%89%E7%94%A8-3a3c03b33e2b), [其他的型態學運算](https://docs.opencv.org/master/d9/d61/tutorial_py_morphological_ops.html)
## 找邊界
在很多應用中,常常會需要用到影像的邊界資訊, openCV 當然也有提供相對應的 function,關於 contours [這邊](https://docs.opencv.org/master/d4/d73/tutorial_py_contours_begin.html) 有完整的說明
- [`contours, hierarchy = cv.findContours( image, mode, method[, contours[, hierarchy[, offset]]])`](https://docs.opencv.org/master/d3/dc0/group__imgproc__shape.html#gadf1ad6a0b82947fa1fe3c3d497f260e0)
- 偵測到的 contour 會以 list of points 的型式儲存在 `contours` 裡面
- `hierarchy` 用來記錄找到的 contours 之間的關係,並且如何記錄會根據你給的 method 的方法不同而不同, [這裡](https://docs.opencv.org/master/d9/d8b/tutorial_py_contours_hierarchy.html) 有詳細的解釋。
hierarchy 是一個 2-D array ,格式是這樣:
[[Next, Previous, First_Child, Parent]...]
- `RETR_LIST`: 找出所有的 contours ,並且忽略 hierarchy 的差異
- `RETR_EXTERNAL`: 只看最外層的
- `RETR_CCOMP`:
- `RETR_TREE`
- 要不要簡化找到的點
- `cv.CHAIN_APPROX_NONE`: 不簡化
- `cv.CHAIN_APPROX_SIMPLE`: 簡化重複的點跟線
- [`cv2.drawContours()`](https://docs.opencv.org/master/d6/d6e/group__imgproc__draw.html#ga746c0625f1781f1ffc9056259103edbc)
- [`retval = cv.boundingRect( array )`](https://docs.opencv.org/master/d3/dc0/group__imgproc__shape.html#ga103fcbda2f540f3ef1c042d6a9b35ac7)
找到可以包住給定的 contour 的矩形
- [`retval = cv.contourArea( contour[, oriented] )`](https://docs.opencv.org/master/d3/dc0/group__imgproc__shape.html#ga2c759ed9f497d4a618048a2f56dc97f1)
計算給定的 contour 面積 (回傳浮點數)
Example:
```python=
contours, hierarchy = cv2.findContours(img,
cv2.RETR_EXTERNAL, cv2.CHAIN_APPROX_NONE)
# Draw all contours
# -1 signifies drawing all contours
cv2.drawContours(img, contours, -1, (0, 255, 0), 3)
```
 Sign in with Wallet
 Sign in with Wallet