# WEEK 0 - INTRODUCTION AND REFRESHING
###### tags: `WEB` `JS` `DIGITALIZE` `BACKEND`
## INTRODUCTION
Javascript Stack that is used for easier and faster deployment of full-stack web applications.
The four open-source technologies in the MERN stack include MongoDB, Express, React and Node.JS which are all open source technologies that you can use to build your next full-stack application.
The acronym “MERN” stands for MongoDB, Express, React and Node.JS.
### NODEJS
### EXPRESS JS
### MONGODB
### REACTJS
## ENVIRONEMENT SETUP
* **IDE or a text editor**: VSCode.
Download: https://code.visualstudio.com/
Feel free to use any IDE or editor you prefer.
* **NODEJS Installation**:
Download: https://nodejs.org/en/download/
LTS version is recommended, after installation, check it by execute the following command in CMD:
`node -v`
Note: `npm` tool will be installed along with Nodejs, check it by execute the following command:
`npm -v`
* **Install EXPRESS JS**:
`npm install express`
* **Install MONGODB Locally**:
Download: https://www.mongodb.com/try/download/community
Once you complete the installation, Navigate to MongoDB installation directory and from `bin` directory open CMD and try the following command to check installation:
`start mongo.exe`
or from anywhere:
`C:\Program Files\MongoDB\Server\6.0.2\bin\mongo.exe`
## JS & ES6
* **let vs var**
The let keyword allows you to declare a variable with *block scope* while `var` is `function scoped`.
Example:
```
let x = 10;
// Here x is 10
{ // block of code
let x = 2;
// Here x is 2
} // x declared inside the block garbeged here
// Here x is 10, X here is called
console.log(x)
```
* **const**
Constants are similar to let variables, except that the value cannot be changed.
Example: using var
```
var x = 10;
x = 11;
console.log(x)
```
Example: using const
```
const x = 10;
x = 11;
console.log(x) // will give the error (Uncaught TypeError: Assignment to constant variable.)
```
* **Arrow functions**
Example:
```
// ES5
var mul = function(x, y) {
return x * y;
}
// ES6
const mul = (x, y) => x * y;
```
* **Template Literals**
Template literals are enclosed by the backtick (` `) character instead of double or single quotes.
Examples:
```
`Hello World!` // Single line
```
Used for Multi-line strings
```
\```
console.log(`string text line 1
string text line 2`);
\```
```
Expression interpolation
```
let a = 5;
let b = 10;
// using single quotes
console.log('Fifteen is ' + (a + b) + ' and\nnot ' + (2 * a + b) + '.');
// "Fifteen is 15 and
// not 20."
using template literals
let a = 5;
let b = 10;
console.log(`Fifteen is ${a + b} and
not ${2 * a + b}.`);
// "Fifteen is 15 and
// not 20."
```
* **Ternary operator**
The conditional (ternary) operator is the only JavaScript operator that takes three operands: a condition followed by a question mark (?), then an expression to execute if the condition is truthy followed by a colon (:), and finally the expression to execute if the condition is falsy. This operator is frequently used as a shortcut for the if statement.
Example:
```
let age = 26;
let beverage = (age >= 18) ? "Beer" : "Juice";
console.log(beverage); // "Beer"
```
Also used for handling null values
Example:
```
let greeting = person => {
let name = person ? person.name : `stranger`
return `Howdy, ${name}`
}
console.log(greeting({name: `Alice`})); // "Howdy, Alice"
console.log(greeting(null)); // "Howdy, stranger"
```
* **The For/Of Loop**
for/of lets you loop over data structures that are iterable such as Arrays, Strings, Maps, NodeLists, and more.
Example:
```
const cars = ["BMW", "Volvo", "Mini"];
let text = "";
for (let x of cars) {
text += x + " ";
}
```
* **Spread Operator**
Spread syntax (...) allows an iterable such as an array expression or string to be expanded in places where zero or more arguments (for function calls) or elements (for array literals) are expected, or an object expression to be expanded in places where zero or more key-value pairs (for object literals) are expected.
```
function sum(x, y, z) {
return x + y + z;
}
const numbers = [1, 2, 3];
console.log(sum(...numbers));
// expected output: 6
```
* **Rest Parameters**
The rest parameter syntax allows us to represent an indefinite number of arguments as an array. With the help of a rest parameter a function can be called with any number of arguments, no matter how it was defined.
Example:
```
// ES6 rest parameter
function fun(...input){
let sum = 0;
for(let i of input){
sum+=i;
}
return sum;
}
console.log(fun(1,2)); //3
console.log(fun(1,2,3)); //6
console.log(fun(1,2,3,4,5)); //15
```
* **Destructuring**
The destructuring assignment syntax is a JavaScript expression that makes it possible to unpack values from arrays, or properties from objects, into distinct variables.
Example:
```
let a, b, rest;
[a, b] = [10, 20]; // assignement
console.log(a);
// expected output: 10
console.log(b);
// expected output: 20
[a, b, ...rest] = [10, 20, 30, 40, 50]; // extract values to variables
console.log(rest); // check values or rest array
// expected output: Array [30,40,50]
```
* **Array functions**
Most medthods used:
1. Array.prototype.find()
Syntax: `array.find(callback(currentValue, index, arr),thisValue)`
Example:
```
var arr=[5,22,19,25,34];
var result=arr.find(x=>x>20);
console.log(result);
```
* **Promises**
A Promise is an object representing the eventual completion or failure of an asynchronous operation.
Essentially, a promise is a returned object to which you attach callbacks, instead of passing callbacks into a function.
In ES6, Promises are a way to implement async programming. A Promise will become a container for future value. Like if you order any food on any site to deliver it to your place that order record will be the promise and the food will be the value of that promise
Example:
```
let p = new Promise((resolve,reject)=>{
// pending code
let x = 5;
let y = 5;
let z = x + y;
if(z == 10)
{
resolve('ok');
}
else{
reject('error');
}
})
// using the promise
console.log("start")
p.then((val)=>{ // Resolved
console.log(val)
}).catch((err)=>{ //rejected
console.log(err)
})
```
States of Promises:
First of all, a Promise is an object. There are 3 states of the Promise object:
* Pending: Initial State, before the Promise succeeds or fails.
* Resolved: Completed Promise
* Rejected: Failed Promise, throw an error
Example:
```
const myFirstPromise = new Promise((resolve, reject) => {
const condition = true;
if(condition) {
setTimeout(function(){
resolve("Promise is resolved!"); // fulfilled
}, 300);
} else {
reject('Promise is rejected!');
}
});
// Usage of above promise as following
myFirstPromise
.then((successMsg) => {
console.log(successMsg);
})
.catch((errorMsg) => {
console.log(errorMsg);
});
```
A bit complex example:
```
const demoPromise= function() {
myFirstPromise
.then((successMsg) => {
console.log("Success:" + successMsg);
})
.catch((errorMsg) => {
console.log("Error:" + errorMsg);
})
}
demoPromise();
```
**Chaining in promises**
Sometimes we need to call multiple asynchronous requests, then after the first Promise is resolved (or rejected), a new process will start to which we can attach it directly by a method called chaining.
Example:
```
const helloPromise = function() {
return new Promise(function(resolve, reject) {
const message = `Hi, How are you!`;
resolve(message)
});
}
```
We chain this promise to our earlier “myFirstPromise” operation like so:
```
const demoPromise= function() {
myFirstPromise
.then(helloPromise)
.then((successMsg) => {
console.log("Success:" + successMsg);
})
.catch((errorMsg) => {
console.log("Error:" + errorMsg);
})
}
demoPromise();
```
Output:
```
Hi, How are you!
```
**Async/Await:**
Await is basically syntactic sugar for Promises. It makes your asynchronous code look more like synchronous/procedural code, which is easier for humans to understand.
Syntax of Async and Await:
```
async function printMyAsync(){
await printString("one")
await printString("two")
await printString("three")
}
```
Let's take an example to understand the Async and Await with our demoPromise:
```
async function demoPromise() {
try {
let message = await myFirstPromise;
let message = await helloPromise();
console.log(message);
}catch((error) => {
console.log("Error:" + error.message);
})
}
Usage of async function as follow:
(
async ()=>{
await demoPromise()
}
)
```
* **Classes**
**The class** function basically creates a template that we can use to create objects later
Example:
```
class User{
constructor(name, email, phone)
{
this.name = name;
this.email = email;
this.phone = phone;
}
getPhone()
{
return this.phone;
}
}
// Usage of User class
let user = new User("Fadi","fadi@email.com","077xxxxxxxx");
user.getPhone();
```
**The constructor()** method is a special method called when an instance of the User class is created.
**Static methods:**
A static method is a function that is bound to the class, not an object. A static method cannot be called from an instance of the class. Here’s an example:
```
class User{
constructor(name, email, phone)
{
this.name = name;
this.email = email;
this.phone = phone;
}
getPhone() // getter
{
return this.phone;
}
// static method
static descr()
{
return "This class used for representing User information";
}
setPhone(newPhone)
{
this.phone = newPhone;
}
}
// Usage of User class
let user = new User("Fadi","fadi@email.com","077xxxxxxxx");
user.getPhone();
// use static method, it should be accessed via class name.
User.descr();
```
**Inheritance**
Classes can also inherit from other classes. The class being inherited from is called the parent, and the class inheriting from the parent is called the child. In our example, another class, let’s say Administrator, can inherit the properties and methods of the User class:
```
class Admin extends User{
constructor(name, email, phone, role)
{
super(name, email, phone);
this.role = role;
}
// append new method
getRole()
{
return this.role;
}
}
// Usage of Admin class as follow
let admin = new Admin("Fadi", "fadi@email.com","077xxxxxxxx","ReadOnly");
```
* **Modules**
Modules help you to write code in your module and expose only those parts of the code that should be accessed by other parts of your code.

Example:
Create a JS file named "math.js" and write the following code:
```
export let sum = (a, b) => {return a + b;}
export let mul = (a, b) => {return a * b;}
```
in another js file(module), you can use function "sumAll" with importing it from it's module as following:
```
import {sum} from './math.js';
console.log(sum(5,2))
```
Notes:
- ES6 module doesn't work everywhere yet!, a common way of using it is to transpile into ES5 and that what we will learn in the next topics.
- Modules must be included in your HTML with type="module", which can be an inline or external script tag.
- Everything inside an ES6 module is private by default.
- Public variables, functions and classes are exposed using export.
- Exposed modules are called into other modules using import.
**Importing ways**
Import Individually:
```
import {sum} from './math.js';
```
**import multiple modules at once**
```
import {sum, mul} from './math.js';
```
**You can import modules as aliases**
```
import * as math from './math.js';
console.log(math.sum(1, 12)); // 13
```
**Default import**
First, you must export the function sum() as default, then:
```
import math from './math.js';
console.log(math.sum(4, 2)); // 6
```
## HTTP
HTTP, or HyperText Transfer Protocol, is a widely-accepted protocol for how messages are transfered back and forth across the internet. Typically, information online is passed between a client (user) and a server.

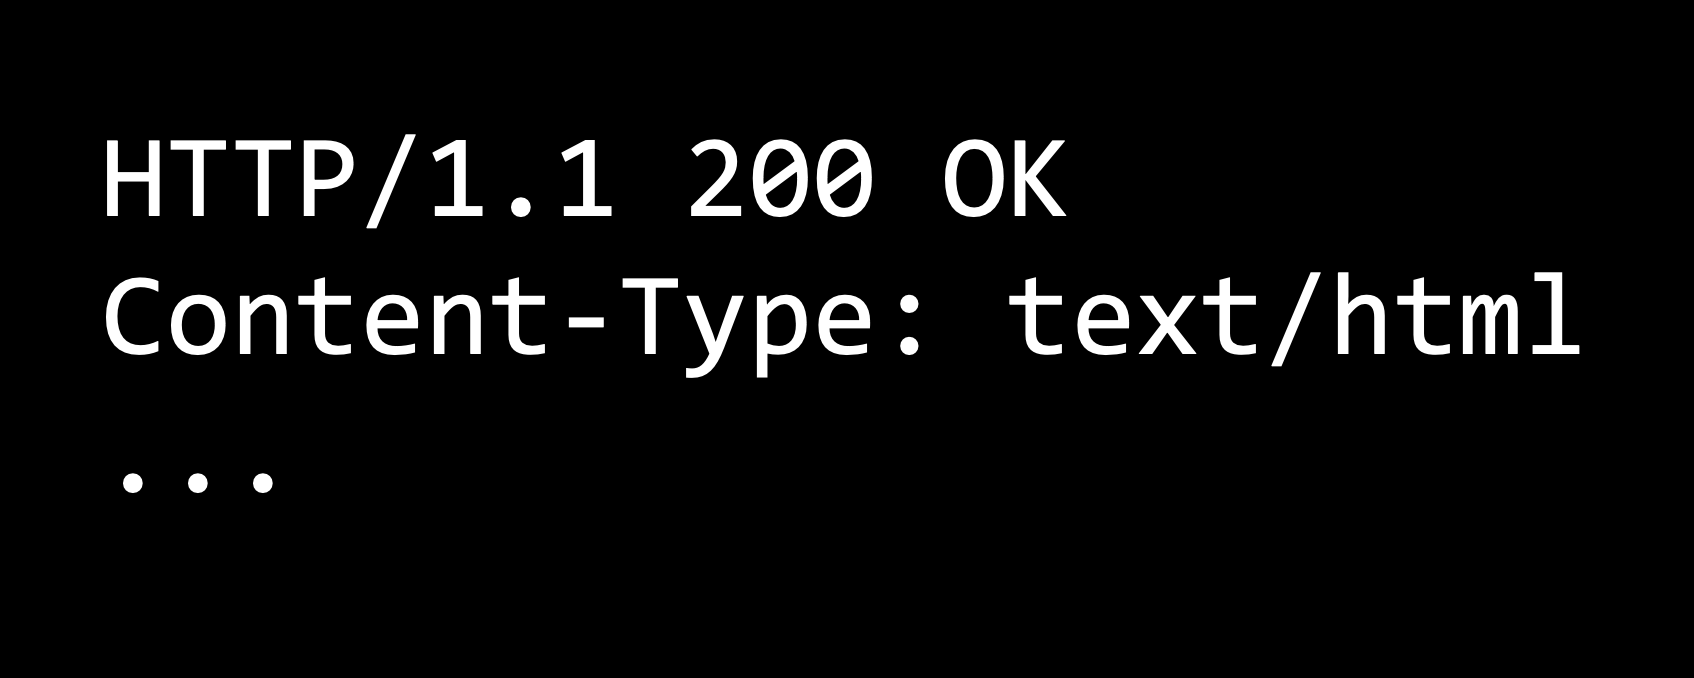
In this protocol, the client will send a request to the server, that might look something like the one below. In the example below, GET is simply a type of request, one of three we’ll discuss in this course. The / typically indicates that we’re looking for the website’s home page, and the three dots indicate that we could be passing in more information as well.

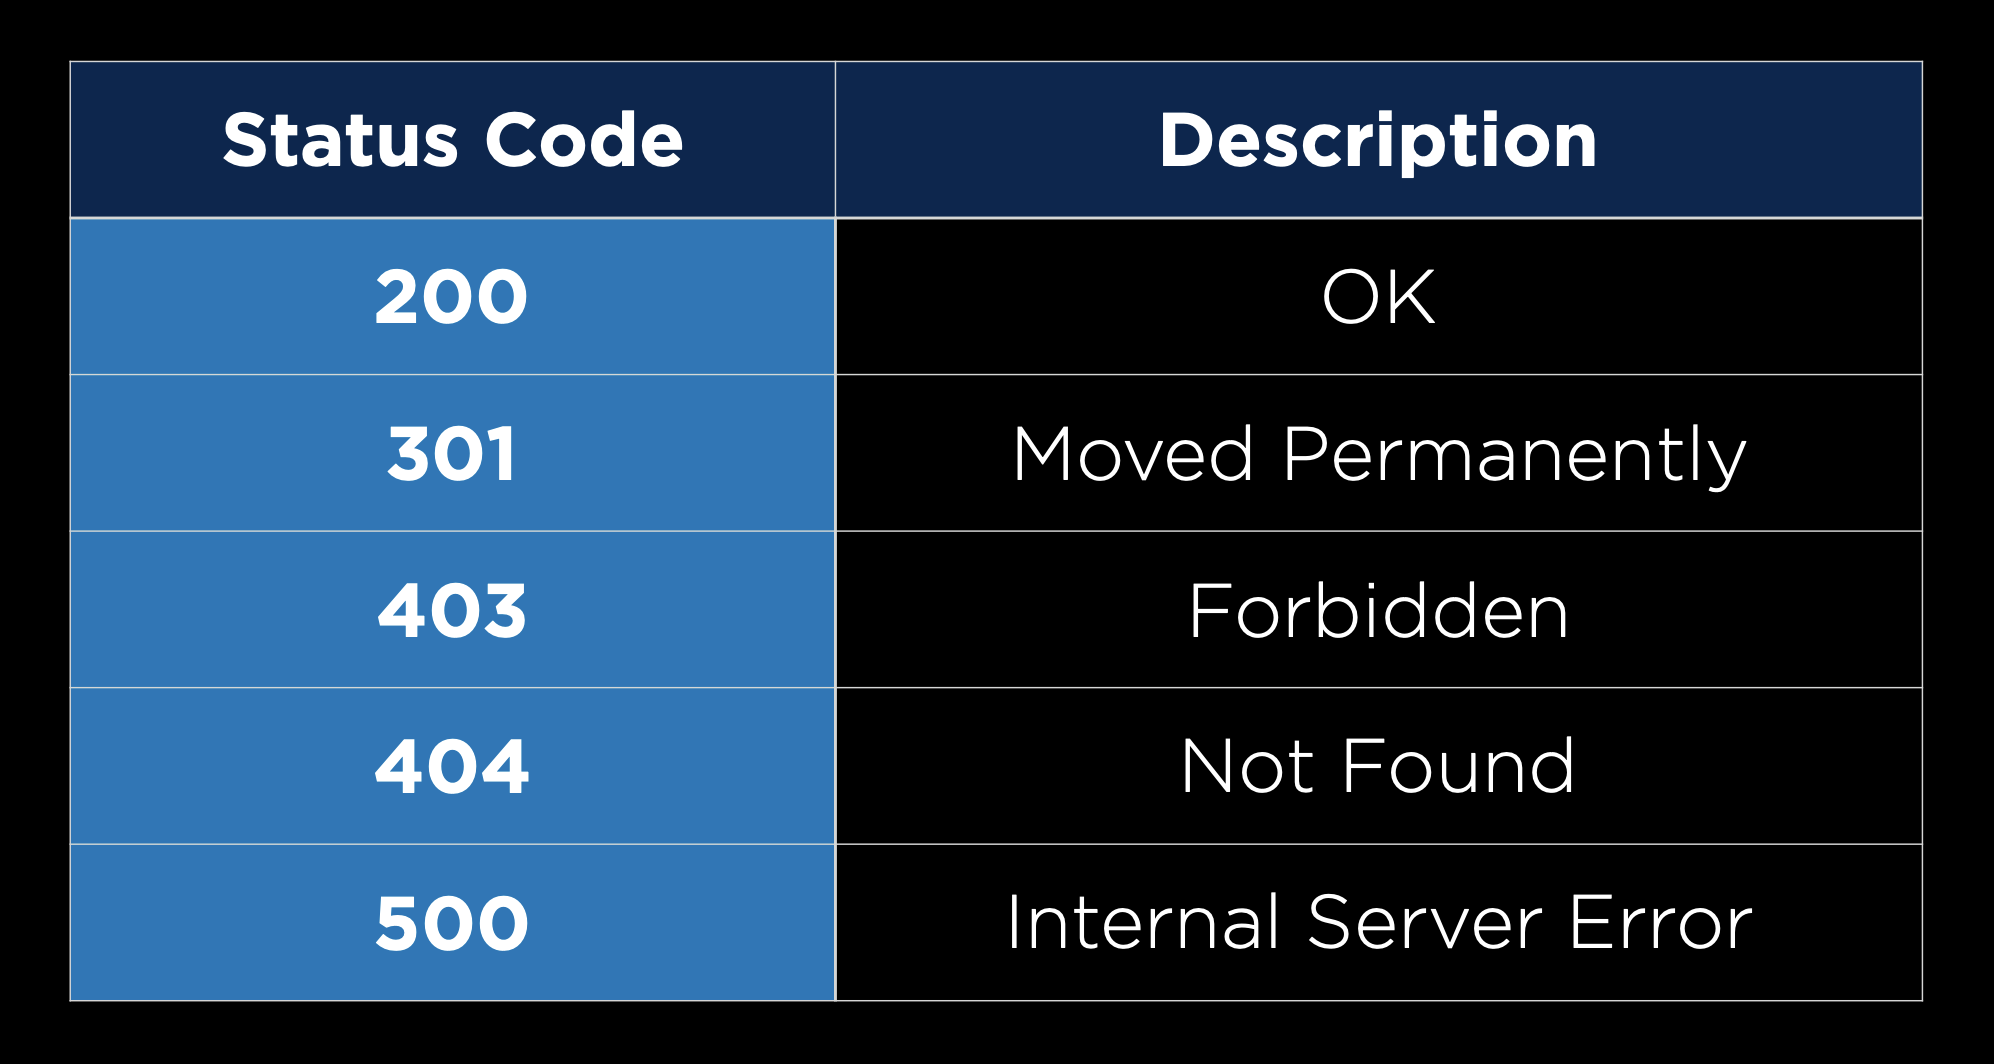
After receiving a request, a server will then send back an HTTP response, which might look something like the one below. Such a response will include the HTTP version, a status code (200 means OK), a description of the content, and then some additional information.
200 is just one of many status codes, some of which you may have seen in the past:
## Git
Git is a command line tool that will help us with version control in several different ways:
- Allowing us to keep track of changes we make to our code by saving snapshots of our code at a given point in time.

- Allowing us to easily synchronize code between different people working on the same project by allowing multiple people to pull information from and push information to a repository stored on the web.
- Allowing us to make changes to and test out code on a different branch without altering our main code base, and then merging the two together.
- Allowing us to revert back to earlier versions of our code if we realize we’ve made a mistake.
In the above explanations, we used the word repository, which we haven’t explained yet. A Git repository is a file location where we’ll store all of the files related to a given project. These can either be remote (stored online) or local (stored on your computer).
### Github
GitHub is a website that allows us to store Git repositories remotely on the web.
Let’s get started by creating a new repository online:
Make sure that you have a GitHub account set up. If you don’t have one yet, you can make one here.
Click the + in the top-right corner, and then click “New repository”
Create a repository name that describes your project
(Optional) Provide a description for your repository
Choose whether the repository should be public (visible to anyone on the web) or private (visible just to you and others you specifically grant access)
(Optional) Decide whether you want to add a README, which is a file describing your new repository.

Once we have a repository, we’ll probably want to add some files to it. In order to do this, we’ll take our newly created remote repository and create a copy, or clone, of it as a local repository on our computer.
1. Make sure you have git installed on your computer by typing git into your terminal. If it is not installed, you can download it here.
2. Click the green “Clone or Download” button on your repository’s page, and copy the url that pops down. If you didn’t create a README, this link will appear near the top of the page in the “Quick Setup” section.

3. In your terminal, run git clone <repository url>. This will download the repository to your computer. If you didn’t create a README, you will get the warning: You appear to have cloned into an empty repository. This is normal, and there’s no need to worry about it.

4. Run ls, which is a command that lists all files and folders in your current directory. You should see the name of the repository you’ve just cloned.
5. Run cd <repository name> to change directory into that folder.
6. Run touch <new file name> to create a new file in that folder. You can now make edits to that file. Alternatively, you can open the folder in your text editor and manually add new files.
7. Now, to let Git know that it should be keeping track of the new file you’ve made, Run git add <new file name> to track that specific file, or git add . to track all files within that directory.

### Commits
* Now, we’ll start to get into what Git can be really useful for. After making some changes to a file, we can commit those changes, taking a snapshot of the current state of our code. To do this, we run: git commit -m "some message" where the message describes the changes you just made.
* After this change, we can run git status to see how our code compares to the code on the remote repository
* When we’re ready to publish our local commits to Github, we can run git push. Now, when we go to GitHub in our web browser, our changes will be reflected.
* If you’ve only changed existing files and not created new ones, instead of using git add . and then git commit..., we can condense this into one command: git commit -am "some message". This command will commit all the changes that you made.
* Sometimes, the remote repository on GitHub will be more up to date than the local version. In this case, you want to first commit any changes, and then run git pull to pull any remote changes to your repository.
## REFERNECES
https://developer.mozilla.org/en-US/docs/Web/HTTP/Overview
 Sign in with Wallet
Connect another wallet
Sign in with Wallet
Connect another wallet