# TinyML hands-on examples: TensorFlow Lite Micro
> Based on:
> * https://github.com/tinyMLx/courseware
> * https://blog.tensorflow.org/2019/11/how-to-get-started-with-machine.html
:::info
The code used in this Lab is [in the repository ](https://www.dropbox.com/sh/js02q9io7s234bi/AAC5HRJx1c8cPS4-k2WE-vl6a?dl=0)
:::
In this lab we will see two practical example using TinyML with two different platforms.
The first lab will work at a lower level using TensorFlow Lite Micro, the second one will use a cloud platform called EdgeImpulse that allows to develop TinyML applications without writing a single line of code.
# Lab 1: TensorFlow Lite Micro
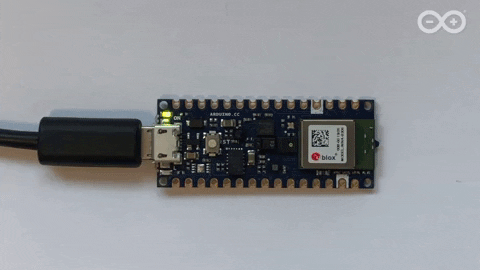
[Arduino](https://www.arduino.cc/) is one of the main actors in making Machine Learning available on simple devices. In this first lab, we will work on how to install and run [TensorFlow Lite Micro](https://www.tensorflow.org/lite/microcontrollers/overview ) examples on a [Arduino Nano 33 BLE Sense](https://store.arduino.cc/nano-33-ble-sense).
This board is one of the most used devices for TinyML experiments. It has an [Arm Cortex-M4](https://developer.arm.com/Processors/Cortex-M4) microcontroller running at 64 MHz with 1MB Flash memory and 256 KB of RAM.

It also has a variety of onboard sensors meaning potential for various Tiny ML applications:

As the name suggests, it has Bluetooth LE connectivity so you can send data (or inference results) to a laptop, mobile app or other BLE boards and peripherals. Connecting the BLE Sense board over USB is an easy way to capture data and add multiple sensors to single board computers without the need for additional wiring or hardware — a nice addition to a Raspberry Pi, for example.
To program this board, you can use the [Arduino Web Editor](https://create.arduino.cc/editor) or install the [Arduino IDE](https://www.arduino.cc/en/main/software).

The inference examples for TensorFlow Lite for Microcontrollers are packaged and available through the Arduino Library manager. For example, the `micro_speech` allows to recognize, using TensorFlow Lite Micro, voice keywords. It has a simple vocabulary of “yes” and “no”.
{%youtube z0pEGtAXN-g %}
<!--
-->
Remember this model is running locally (no Internet connection) on a microcontroller with only 256KB of RAM, so don’t expect commercial ‘voice assistant’ level accuracy.
Regarding power use, the figures below show the evolution when "thinking" and when showing the results with the LED on.


## Training a TensorFlow Lite Micro model for Arduino
:::info
Based on:
https://blog.tensorflow.org/2019/11/how-to-get-started-with-machine.html
:::
This section describes the steps to deploy on a Nano 33 the TinyML code necessary to "understand" some specific movements. The objective is to detail the process involved so that all the necessary elements, from the creation of the dataset to the final deployment on the HW are shown.
:::danger
DISCLAIMER:
This experiment is simply an example on how to use ML to perform a task. It is oriented to **non-experts** on neural networks and the Tensorflow framework.
Training neural network models is a long and difficult process, easily full of frustration...
:::
This example relates to what is known as **predictive maintenance**. The idea is to recognize a pair of movements that are supposed to indicate the regular movement of a machine and alert when a non-standard movement is detected
We’ll capture motion data from the Arduino Nano 33 BLE Sense board, import it into TensorFlow to train a model, and deploy the resulting classifier onto the board.
## Setting up the Arduino IDE
Following the steps below sets up the Arduino IDE application used to both upload inference models to your board and download training data from it in the next section. There are a few more steps involved than using Arduino Create web editor because we will need to download and install the specific board and libraries in the Arduino IDE.
* In the Arduino IDE menu select Tools > Board > Boards Manager…
* Search for “Nano BLE” and press install on the board
* When it’s done close the Boards Manager window

* Now go to the Library Manager Tools > Manage Libraries…
* Search for and install the `Arduino_TensorFlowLite` library
* Next search for and install the `Arduino_LSM9DS1` library:

Finally, plug the micro USB cable into the board and your computer and:
* Choose the board Tools > Board > Arduino Nano 33 BLE
## Streaming sensor data from the Arduino board
First, we need to capture some training data. You can capture sensor data logs from the Arduino board.
We’ll be using a pre-made sketch `IMU_Capture.ino` which does the following:
* Monitor the board’s accelerometer and gyroscope
* Trigger a sample window on detecting significant linear acceleration of the board
* Sample for one second at 119Hz, outputting CSV format data over USB
* Loop back and monitor for the next gesture
:::info
The sensors we choose to read from the board, the sample rate, the trigger threshold, and whether we stream data output as CSV, JSON, binary or some other format are all customizable in the sketch running on the Arduino. There is also scope to perform signal preprocessing and filtering on the device before the data is output to the log. For now, you can just upload the sketch and get to sampling.
:::
## Visualizing live sensor data log from the Arduino board
With that done, we can now visualize the data coming off the board. We’re not capturing data yet — this is just to give you a feel for how the sensor data capture is triggered and how long a sample window is. This will help when it comes to collecting training samples.
* In the Arduino IDE, open the Serial Plotter Tools > Serial Plotter
* If you get an error that the board is not available, reselect the port:
* Tools > Port > portname (Arduino Nano 33 BLE)
* Pick up the board and test different movements possibilities
* You should see a live graph of the sensor data capture:
{%youtube 2K2heDnBCCs %}
## Capturing gesture training data
To capture data as a CSV log to upload to TensorFlow, you can use Arduino IDE > Tools > Serial Monitor to view the data and export it to your desktop machine:
* Reset the board by pressing the small white button on the top
* Pick up the board in one hand (picking it up later will trigger sampling)
* In the Arduino IDE, open the Serial Monitor Tools > Serial Monitor
* Make the movement you would like to be recognized
* Repeat the movement capture step 10 or more times to gather more data
* Copy and paste the data from the Serial Console to a text file
* Clear the console window output and repeat all the steps above, this time with another movement to be recognized
Note the first line of your two csv files should contain the fields aX,aY,aZ,gX,gY,gZ.

:::info
Linux tip: if you prefer you can redirect the sensor log output from the Arduino straight to a .csv file on the command line. With the Serial Plotter / Serial Monitor windows closed use:
$ cat /dev/cu.usbmodem[nnnnn] > sensorlog.csv
:::
In this example we recorded two movements: `lateral.csv` and `updown.csv`
## Training in TensorFlow
We’re going to use [Google Colab](https://colab.research.google.com/) to train our machine learning model using the data we collected from the Arduino board in the previous section. Colab provides a [Jupyter notebook](https://jupyter.org) that allows us to run our TensorFlow training in a web browser. *A locally running Jupyter notebook could obviously used, too.*
:::info
Let's start first with a [**simple NN example with Tensorflow and Keras**](https://drive.google.com/file/d/1Otw_RTT7mmpfvymIjHrp80TOR4NaBljj/view?usp=sharing).
:::
Ok, let's continue!
The Colab will guide you through the following steps to train the model:
* Setup Python Environment
* Upload the movements data
* Parse and prepare the data
* Build & Train the Model
* Convert the Trained Model to TensorFlow Lite
* Encode the Model in an Arduino Header File
The final step generates the `model.h` file to download and include in our Arduino IDE gesture classifier project in the next section.
[
](https://colab.research.google.com/drive/1QUDPaVpqZIlLiJYwtp8iCXKt72yylVqz)
[Upload the shared file: `arduino_tinyml_seminar.ipynb` ](https://www.dropbox.com/sh/6zhgyfs9znmgeca/AADbIlVtpS50Kg5A2glqG1lka?dl=0)
## Classifying IMU Data
Now, by combining in a project the `model.h` file we just trained and downloaded from Colab in the previous section and the `IMU_Classifier.ino` file, we obtain our movement classifier.
* Upload the sketch: Sketch > Upload
* Open the Serial Monitor: Tools > Serial Monitor
* Perform some gestures
* The confidence of each gesture will be printed to the Serial Monitor (0 = low confidence, 1 = high confidence)

Congratulations, you’ve just trained your first TinyML application for Arduino!
 Sign in with Wallet
Connect another wallet
Sign in with Wallet
Connect another wallet