# Leading Vocal Production Activities
Any performance that utilizes **the voice** stands to benefit from vocal production activities. Whether one is speaking on a podcast, presenting information in a video essay, or delivering a speech to peers, practicing vocal production before a performance can help one better articulate their ideas for their audience to understand. This work is not about putting on the voice of someone you think is a good speaker, or trying to sound like someone you aren't. Instead, this work aims to find the voice that is unique to each one of us, and clarify the choices we make in speaking to push our narrative forward.
The following exercises are intended to help students discover their natural, well-produced voice. These exercises can help students find clarity in their vocal choices, and experiment with different tools used to enhance their performance. These exercises are intended to be led by a leader, and so they will be written from the voice of the leader, like a script of sorts. However, the scripts do not need to be followed exactly. Feel free to play with the words in your own voice, finding the trajectory that makes sense for you!
In reality, you will likely not need to do each and every one of the following exercises with your students. However, you can pick and choose from these to create a unique curriculum according to the students' needs. A good warm-up (for non-actors) will last between 5-7 minutes.
## Tips for Safe Language
The exercises can be tricky when you are telling others what to do with their body. This applies to anyone, but can get particularly sensitive between certain gender roles. In order to avoid instructing or telling someone what they should do with their own body, here are a few options to consider in adjusting your lanuage:
1. **Using inviting language rather than commanding language.** (e.g. "I invite you to tuck your tailbone under" vs. "Tuck your tail bone under.")
2. **Using "I" language to describe what your body is doing, and encourage others to follow along at the beginning of the exercise.** (e.g. I am now tucking my tailbone under)
3. **Using *present continuous* verbs to describe the body, without referring to whose body it is.** (e.g. The tailbone tucking under, relaxing each vertebrae one at a time)
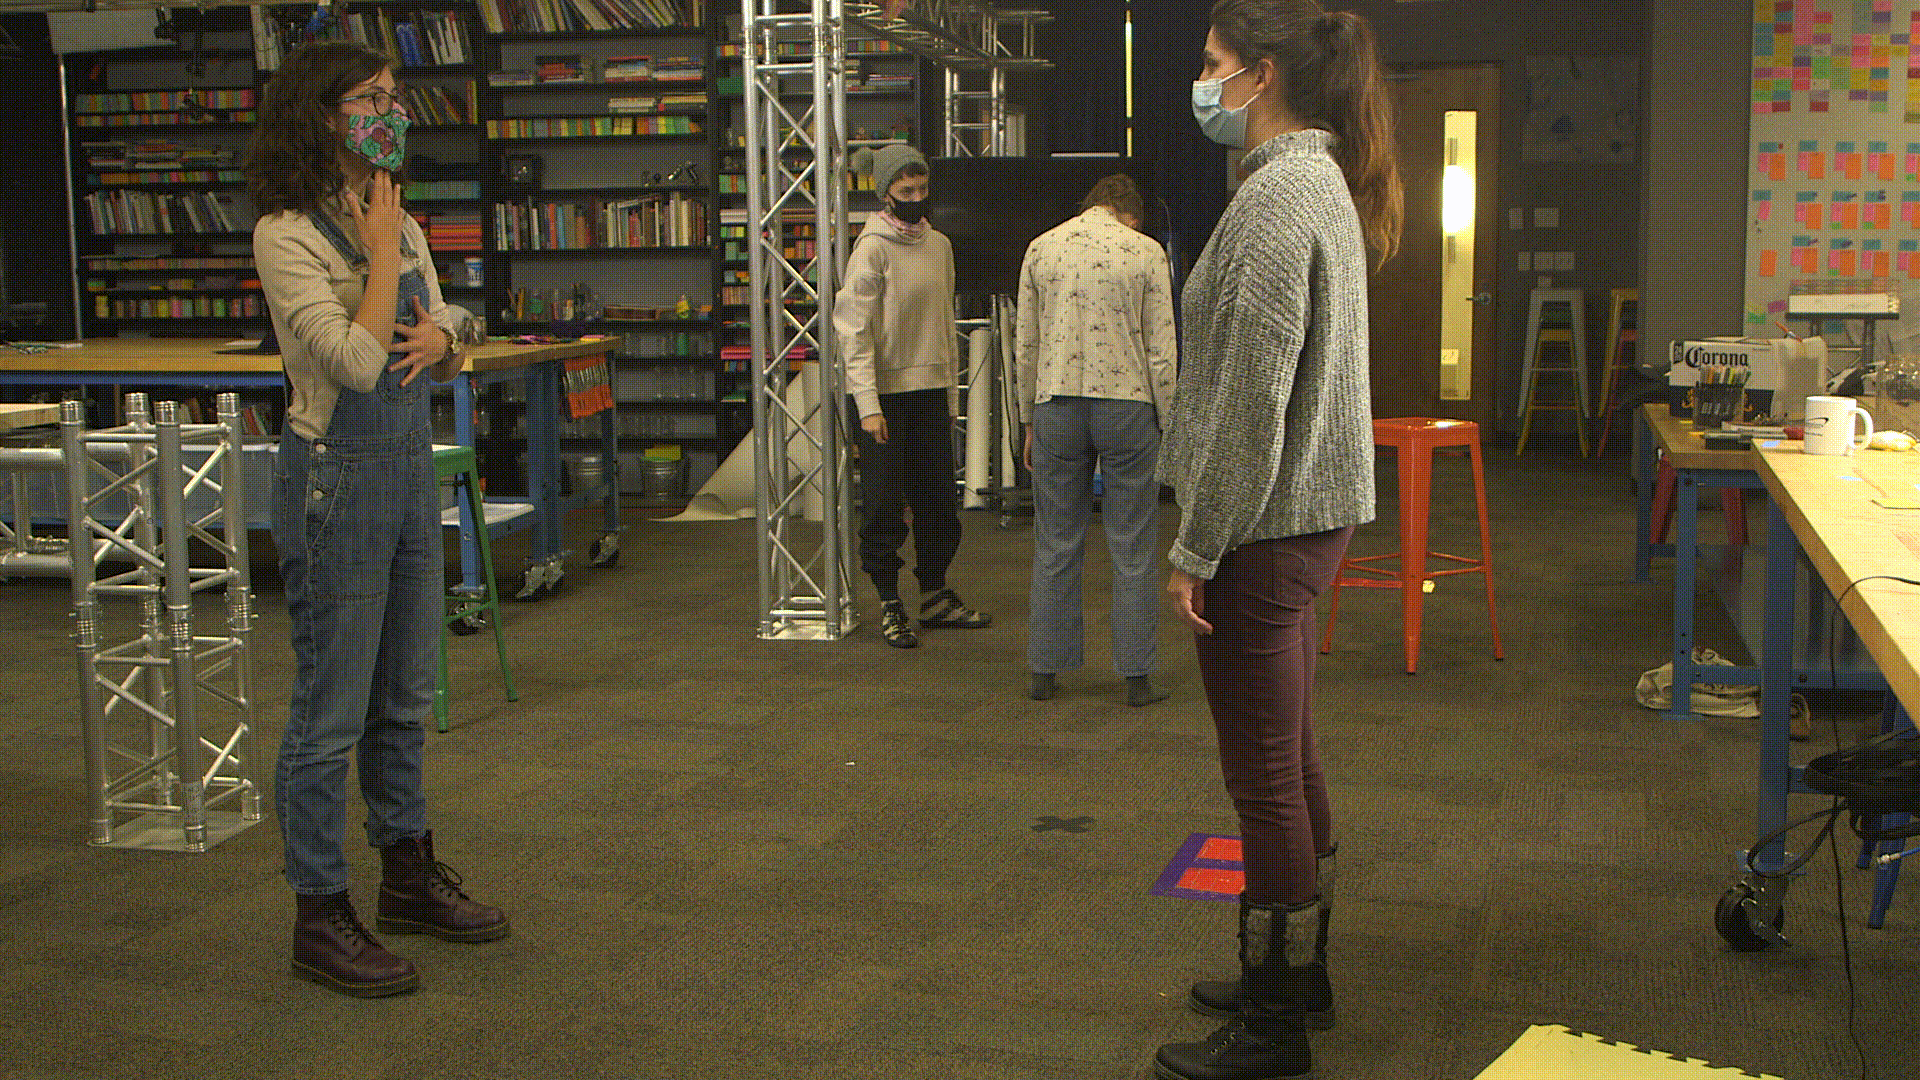
## Casting the Role of Teacher
What kind of persona is necessary to be the most effective teacher of this work? Depending on who you are working with and in what context, you might consider which **you** needs to show up today. Do you need to be the high status, serious teacher? Do you need to be the friendly, goofy teacher? Do you need to mimic your students? What kind of authority do your students need to buy into this work? These are some things to think about and pay attention to when you are preparing to lead this work.
## Part 1: Spine & Breath
We start with the spine & the breath because all vocal production requires alignment in in the body. If our body is our instrument, we want to create clear pathways for our voice to move through, otherwise it can get stuck in motion.
---
When the ***spine*** is out of alignment, its ability to support the body is diminished and muscles intended for other uses must provide that support. If the lower spine is weak, the abdominal muscles are employed in holding up the body, they are not free to respond to breathing needs. While it is not necessary to provide this information to students, sometimes students have better "buy-in" to a foreign activity when they understand the mechanics of why it matters.
| Activity | What to say| What to look for |
| -------- | -------- | -------- |
| Spinal Rolls | "Finding a neutral stance, with the feet hips-width apart, allowing the shoulders and arms to hang loosely down by the side. Keeping a slight bend in the knees and starting with the top of the head, I'm beginning to roll down through the spine, one vertebra at a time, until the hands brush the floor. I invite you to take your time, making sure you're paying attention to each and every vertebra as they release down one by one. When the hands reach the floor, I let the head and neck hang loose, and take 3 deep breaths here to make sure I've released all the tension. Slowly, starting with the tail bone tucking under, I roll back up again, vertabra by vertabra, the head always coming up last. I also invite you to try humming softly as you rise. When finished, I invite you to repeat once more on your own." | Check to see if students are breathing. If they seem to be holding their breath, remind them of the importance of breath and invite them to take their time rolling down and up.
---
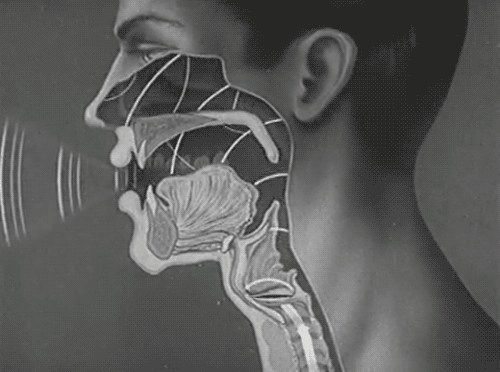
***Breath*** is the source of our vocal sound — there is no one way to breathe that is correct for all purposes. Our aims of vocal production will change the breathing techniques we might want to use. Not only does breathing help us produce sounds, but it is also a great tool for relaxation and "dropping in" to our performance.
| Activity | What to say | What to look for |
| ---------------------------------- | ------------------------------------------------------------------------------------------------------------------------------------------------------------------------------------------------------------------------------------------------------------------------------------------------------------------------------------------------------------------------------------------------------------------------------------------------------------------------------------------------------------------------------------------------------------------- | ------------------------------------------------------------------------------------------------------------------------------------------------------------------------------------------------------------------------- |
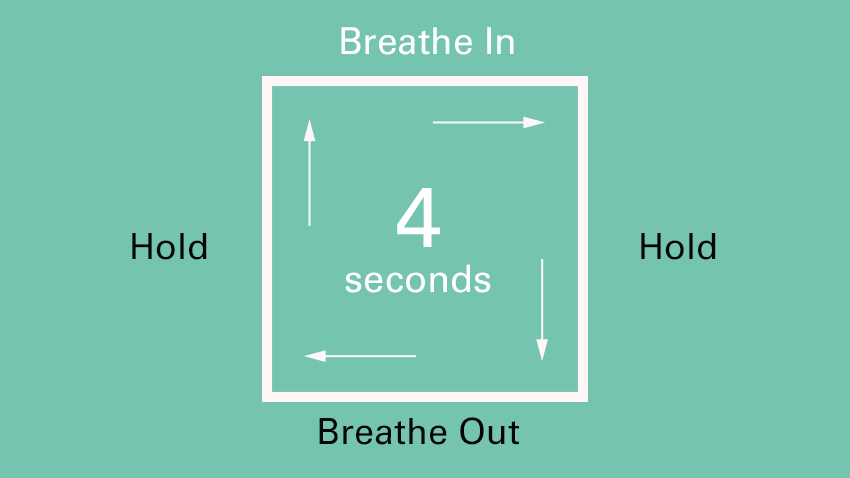
| Boxed Breathing (for relaxation) | "Standing easily with a long spine and relaxed muscles, allowing awareness to move inward and down so that the focus rests deep inside the center of the body. In a moment, I'm going to invite you to exhale all of your breath, and on the next inhale, breathing in using a full four seconds to reach the maximum, holding for four seconds, exhaling on four seconds to release all of the breath, holding for another four seconds, and repeat. This is called boxed breathing. Now let's begin. Exhaling all the air out of the lungs, breathing in for 1,2,3,4 - holding for 1,2,3,4 - exhaling 1,2,3,4 holding for 1,2,3,4" (repeat). | Notice how others' bodies are reacting to their breath. Are they shrugging their shoulders? Are they raising their eyebrows? Invite them to relax their body, and perhaps put one hand on their belly while they breathe. |
| Timed Diaphragmatic Breath Control | "I'd like to tell you about the diaphragm, a muscle below the lungs that helps you inhale and exhale. It is a thin, dome shaped muscle that expands and contracts rhythmically and continually. Some people are natural belly breathers, meaning they involve more of their diaphragm when they breathe, and some people are chest breathers, meaning they use less of their diaphragm. There is no wrong way to breathe! Today, I invite you to practice belly breathing, which is typically used in theatre and music spaces to increase oxygen to the lungs. Standing easily with a long spine and relaxed muscles, I place one hand on my upper chest and the other just below my rib cage. This allows me to feel my diaphragm move as I breathe. Breathing in slowly through the nose, I feel my stomach move out against my hand. The hand on my chest should remain as still as possible. In a moment, I'll invite you to exhale all of your breath, and on the next inhale, breathing in a full 5 seconds to reach the maximum, then breathing out on a full 5 seconds as well. Then I will invite you to do the same with 10 seconds. Lets begin. Exhaling all the air out, breathing in 1,2,3,4,5 - breathing out 1,2,3,4,5." (repeat with 10)"| Notice the movement of others' chest and belly. If you see their chest moving, invite them to minimize their chest movement as much as possible, and lower their breath into their belly (diaphragm). |
| Humming | "Now I'll invite you to bring voice into the breath through a hum. In a moment I'll ask you to find a neutral hum at a neutral pitch and neutral volume. (Demonstrate). Using my hands, I'll invite you to adjust the pitch and volume of of your hum. When my hands go higher, your pitch goes higher. When my hands go lower, your pitch goes lower. When my hands get wider, your volume gets louder. When my hands get closer together, your volume get softer."" |
### Boxed Breathing
## Humming
Humming can be a great way to warm up the the voice and safely play with volume and pitch. Invite your participants to find a nice, comfortable hum. Allow everyone to hold this hum for approximately 30 seconds. Pause, and introduce your hands as the humming conductors. Your hands serve two functions:
1. When your hands get futher apart from each other, participants should increase the volume of their hum. When they get closer together, they should decrease the volume.
2. When your hands raise higher toward the cieling, participants should raise the pitch of their hum higher. When they get lower towards the ground, they should lower the pitch of their hum.
See the activity in action:
<iframe width="560" height="315" src="https://player.vimeo.com/video/637151325" title=" frameborder="0" allow="accelerometer; autoplay; clipboard-write; encrypted-media; gyroscope; picture-in-picture" allowfullscreen></iframe>
## Articulation
Articulation refers to the formation of clear and distinct sounds in speech. Articulation helps to add clarity to your words so that your audience doesn't miss a sound. The voice is the channel for your message!
| Activity | What to say| What to look for |
| -------- | -------- | -------- |
| Plosives | Plosives are obstructions or "stops" that disrupt the flow of breath and sound. They are released with a slight explosive force. For this exercise you will repeat after me:| Notice how others' mouths are moving. Practicing this plosives exercise requires gross movement of the mouth, and so if their mouth seems relatively shut, remind them that plosives slight explosive sounds that require full use of their mouth! |
{%youtube S_GT0K--qXk %}
Plosives:
Pa (Pa) Papa — Ba (Ba) Baby
Pa (Pa) Papa — Ba (Ba) Baby
Pa (Pa) Papa — Ba (Ba) Baby
Pa (Pa) Papa — Ba (Ba) Baby
Pa-pa-pa-ba-ba-ba
Pa-pa-pa-ba-ba-ba
Ta (Ta) Tater — Da (Da) Daddy
Ta (Ta) Tater — Da (Da) Daddy
Ta (Ta) Tater — Da (Da) Daddy
Ta (Ta) Tater — Da (Da) Daddy
Ta-ta-ta-da-da-da
Ta-ta-ta-da-da-da
Pa-pa-pa-ba-ba-ba, Ta-ta-ta-da-da-da
Ka (Ka) Kick — Ga (Ga) Gag
Ka (Ka) Kick — Ga (Ga) Gag
Ka (Ka) Kick — Ga (Ga) Gag
Ka (Ka) Kick — Ga (Ga) Gag
Ka-ka-ka-ga-ga-ga
Ka-ka-ka-ga-ga-ga
Pa-pa-pa-ba-ba-ba, Ta-ta-ta-da-da-da, Ka-ka-ka-ga-ga-ga
**Design Questions:** How might we adjust these exercises for working with microphones?
## Speed
One of the most common issues in vocal performance is speed. Even though public speaking may look like a monologue, it’s actually a conversation. The audience is responding, questioning, and commenting, but it’s all happening in their head. This silent internal response process is necessary for them to feel engaged, but they won’t have the time to do it if they are trying to keep up with your speed.
| Activity | What you say | What to look for |
| ----------- | ---------------------------------------------------------------------------------------------------------------------------- | ---------------- |
| Tongue Twisters | Repeat after me, paying close attention to each and every sound. Take your time and notice how each sound shapes in your mouth. Paying attention to the shape of our words can help bring our awareness to speaking in a way that forces us to slow down: | |
| Turtle Talk | Choose one tongue twister and say it normally. Then, slow it down slightly. Slow it down until it is no longer recognizable. | |
Tongue Twisters:
* ***Cinnamon aluminum linoleum***
* ***A big black bug bit a big blue bear made a big blue bear bleed blood***
* ***A proper cup of coffee in a proper copper coffee pot***
 Sign in with Wallet
Connect another wallet
Sign in with Wallet
Connect another wallet