# 充分利用 Angular DI : private provider 概念
###### 2020.07.27
###### tags: `自主學習` `翻譯` `Angular`
---
原始文章
[Make the most of Angular DI: private providers concept](https://indepth.dev/private-providers/)
---
<br/>
我們可以在 app 中傳遞任何資料,並且在任何層級轉換資料以及替換資料。
所以我們可以藉由<font color="red">清楚的資料流</font>以及<font color="red">鬆耦合</font>來讓架構較為簡單並且更有彈性。
這也會讓<font color="red">測試</font>以及<font color="red">替換 dependencies</font>比較容易。
(作者認為在 Angular app 中使用 DI 用得太客氣,通常都只用來注入服務或是提供一些 global 的資料。)
本文會展示另一種使用 DI 來處理資料的方式。目的是簡化使用 DI 的 Components, Directives 和 Services。
<br>
## Angular 中典型的 DI 模式
作者看了許多 angular app 程式,認為大部分 app 中,DI 的使用大概都限於幾種情形:
1. 取得一些 Angular 物件實體,像是 <code>ChangeDetectorRef</code>, <code>ElementRef</code>。
2. 取得一個 Service 並用在 Component。
3. 取得一個 global 設定藉由 token。例如定義一個 <code>API_URL</code> 的token,然後在 app 其他地方藉由 DI 取得。
一些開發者會將已經存在的 global token 轉換為較方便的格式。例如 [@ng-web-apis/common](https://github.com/ng-web-apis/common) 這個套件中的 <code>WINDOW</code> token。
Angular 有一個 [<code>DOCUMENT</code>](https://angular.io/api/common/DOCUMENT) token 來取得一個 page 物件。這樣你的 component 就不用依賴 global 物件。這樣方便測試,並且不會在 SSR 的時候有錯誤。
如果你希望方便取得 <code>window</code> 物件,可以建立一個這樣的 token:
``` javascript=1
import {DOCUMENT} from '@angular/common';
import {inject, InjectionToken} from '@angular/core';
export const WINDOW = new InjectionToken<Window>(
'An abstraction over global window object',
{
factory: () => {
const {defaultView} = inject(DOCUMENT);
if (!defaultView) {
throw new Error('Window is not available');
}
return defaultView;
},
},
);
```
當某個地方用 DI 第一次要求 <code>WINDOW</code> 這個 token,Angular 會執行一個 token factory。他會取得 <code>DOCUMENT</code> 物件並且連結從中到 window 物件。
> 如果不確定是否了解 DI,試試 [angular.institute](https://angular.institute/welcome) 的第一個免費章節。
> 有許多關於 DI 的資訊以及如何使用得更有效率。
>
<br>
## Private providers
作者團隊頻繁地使用 DI 並且注意到一件事:透過 DI 取得得資料,在使用前常常需要轉換。換句話說,Component 會依賴某種資料類型,但是注入的卻是另外一種,所以需要在 Component 內轉換他。
來想想一個有影響的例子:
(這是 Erin Coughlan 在 Angular Connect conference 中報告的 "The Architecture of Components" 中的案例,可以在[這裡](https://youtu.be/6Zfk0OcFGn4?list=PLAw7NFdKKYpE-f-yMhP2WVmvTH2kBs00s)看)
我們現在有:
- 一個顯示資訊的 <code>organization</code> Component
- 從路由取得的 <code>ID</code> 參數
- OrganizationService,根據 <code>ID</code> 取得資料的 Observable
想要做的是:
從路由取得 ID,呼叫 Service 的方法傳入 ID,然後取得一個含有 organization 資訊的資料流,最後將資訊顯示在 Component。
來看看三種解決方案:
## 1. 你不應該這樣做
``` javascript=1
@Component({
selector: 'organization',
templateUrl: 'organization.template.html',
styleUrls: ['organization.style.less'],
changeDetection: ChangeDetectionStrategy.OnPush,
})
export class OrganizationComponent implements OnInit {
organization: Organization;
constructor(
private readonly activatedRoute: ActivatedRoute,
private readonly organizationService: OrganizationService,
) {}
ngOnInit() {
this.activatedRoute.params
.pipe(
switchMap(params => {
const id = params.get('orgId');
return this.organizationService.getOrganizationById$(id);
}),
)
.subscribe(organization => {
this.organization = organization;
});
}
}
```
然後在範本中這樣使用他:
``` html=1
<p *ngIf="organization">
{{organization.name}} from {{organization.city}}
</p>
```
這樣的程式可以運行,但是有幾個問題:
- <code>organization</code> 屬性沒有在 Component 建立時被定義。這就是為什麼我們有時候可能會得到 <code>undefined</code>。如果我們使用 non-strict TypeScript,我們就破壞了類型 (<font color="red">按</font> : 嚴格的類型不應該包含 undefined 的情形)。或者我們也可以寫這樣的類型:<code>organization?: Organization</code>,但是就需要增加一些檢查 (<font color="red">按</font> : 檢查是否 undefined)。
- 這樣的程式比較難維持。例如,下次多一個然後我們在 <code>ngOnInit()</code> 多加入一個 subscription,就會變得更難閱讀和理解,因為隱含的變數以及不清楚的資料流。
- 在使用 <code>OnPush</code> 策略時,可能會在變更偵測以及更新元件時碰上一些問題。
<br>
## 2. 這樣做比較好
(上述 Youtube 中,) Erin 在他的演講中的範例看起來像這樣:
``` javascript=1
@Component({
selector: 'organization',
templateUrl: 'organization.template.html',
styleUrls: ['organization.style.less'],
changeDetection: ChangeDetectionStrategy.OnPush,
})
export class OrganizationComponent {
readonly organization$: Observable<Organization> = this.activatedRoute.params.pipe(
switchMap(params => {
const id = params.get('orgId');
return this.organizationService.getOrganizationById$(id);
}),
);
constructor(
private readonly activatedRoute: ActivatedRoute,
private readonly organizationService: OrganizationService,
) {}
}
```
並且在範本中這樣使用:
``` html=1
<p *ngIf="organization$ | async as organization">
{{organization.name}} from {{organization.city}}
</p>
```
這樣的程式沒有上述的缺點,看起來更整齊,並且沒有不必要的屬性。如果將來想要增加一個類似的 stream,只要單純增加另一個,不用動到之前的程式。
換句話說,資料 stream 更清楚。我們只需要一個在 Component 建立時就被建立的 stream。當發送資料時,範本中就會顯示資訊。
<br>
## 3. 試試更酷的方式:private provider
以上述 2. 的方案而言。
實際上 Component 並不依賴 <code>router</code> 甚至 <code>OrganizationService</code>,Component 依賴的是 <code>organization$</code>。但是在 DI 樹中並沒有這樣的東西,所以我們必須在元件內做資料轉換。
如果我們在資料進入元件前就對它做轉換呢?讓我們為元件寫一個 <code>Provider</code>,在其中做所有的資料轉換。
為了方便,可以將 providers 放在一個分開的檔案中,檔案結構如下:
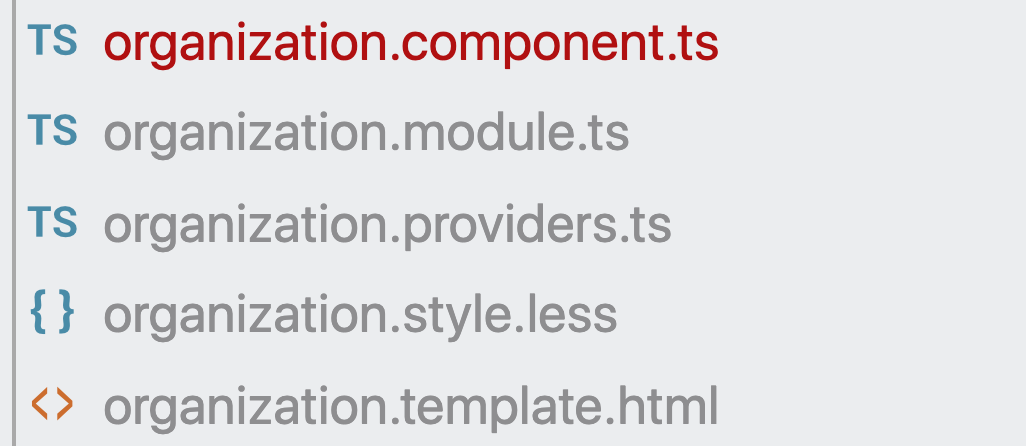
所以我們現在有 <code>organization.providers.ts</code> 檔案,裡面有轉換資料的 <code>Provider</code> 和一個 <code>injection token</code>。
``` javascript=1
// token to access a stream with the information you need
export const ORGANIZATION_INFO = new InjectionToken<Observable<Organization>>(
'A stream with current organization information'
);
export const ORGANIZATION_PROVIDERS: Provider[] = [
{
provide: ORGANIZATION_INFO,
deps: [ActivatedRoute, OrganizationService],
useFactory: organizationFactory,
},
];
export function organizationFactory(
{ params }: ActivatedRoute,
organizationService: OrganizationService
): Observable<Organization> {
return params.pipe(
switchMap((params) => {
const id = params.get('orgId');
return organizationService.getOrganizationById$(id);
})
);
}
```
我們為 Component 定義 <code>providers</code> 陣列。<code>ORGANIZATION_INFO</code> 這個 token 從轉換資料的 factory 中取得資料。
> 關於 DI 的筆記: <code>deps</code> 讓我們能從 DI 樹中取得某些實體,並將它們作為參數放入 <code>factory</code>。用這種方式可以從 DI 取得任何實體,甚至可以使用 <code>DI decorators</code>。例子如下:
``` javascript=1
{
provide: ACTIVE_TAB,
deps: [
[new Optional(), new Self(), RouterLinkActive],
],
useFactory: activeTabFactory,
}
```
回到正題,我們必須在 Component 中設定 providers:
``` javascript=1
@Component({
..
providers: [ORGANIZATION_PROVIDERS],
})
```
現在可以在 Component 中這樣取得它:
``` javascript=1
@Component({
selector: 'organization',
templateUrl: 'organization.template.html',
styleUrls: ['organization.style.less'],
changeDetection: ChangeDetectionStrategy.OnPush,
providers: [ORGANIZATION_PROVIDERS],
})
export class OrganizationComponent {
constructor(
@Inject(ORGANIZATION_INFO) readonly organization$: Observable<Organization>,
) {}
}
```
整個 class 變成只剩一行資料注入的程式。
範本沒變,如上述 2.:
``` html=1
<p *ngIf="organization$ | async as organization">
{{organization.name}} from {{organization.city}}
</p>
```
這種方式能帶來什麼?
1. 清楚的 dependencies:一個 Component 沒有注入任何不需要的資料。只有一個範本中需要顯示的資料實體。
2. 可測試性:我們能簡單地測試一個 provider,因為它的 factory 只是一個 function。這也讓我們容易去測試 Component:在測試中,我們不需要建立一個 DI 樹然後取代一堆物件實體。只要傳入有 stub data 的 <code>ORGANIZATION_INFO</code> token。
(<font color="red">按</font>:[關於 stub data](https://kojenchieh.pixnet.net/blog/post/75411592))
3. 可擴展:如果你希望你的 Component 使用另外一種資料類型,只需要變更一行程式。如果需要變更資料轉換的邏輯,只要變更 factory。如果需要新的資料,就增加另外一個 token,因為 <code>providers</code> 陣列中可以放無限個 token。
作者在使用這種方式後,許多 Component 和 Directive 看起來更清楚與簡單。將 "資料轉換邏輯" 與 "資料呈現" 分開,更容易修改邏輯或是擴充功能。也較容易抓到 bug,因為能夠定義有問題的區域:問題發生在資料轉換或是資料呈現。
>作者的 [Jamigo.app](https://jamigo.app/) 大量使用這種方式。如果有興趣了解更多的話,去[這個 Tweet](https://twitter.com/Waterplea/status/1276122426481483777)按讚,他的朋友 Alex 會寫更多相關文章。
<br>
## 結論
以上敘述的方式無法修正全部的設計上問題。你不應該在任何小的案例中加入 providers:有時候如果在 class method 中轉換資料或是使用 Angular Pipe,反而程式會比較乾淨。
不過,作者希望這種 <code>private providers</code> 的方式,能夠幫助簡化有很多 dependencies 的 Component,或是在漸進式的重構龐大的邏輯時,有另外一種思考方向。