
# React | Deployment
## Learning Goals
After this lesson, you will be able to:
- Understand the difference between development, staging and production.
- Deploy a React application online.
## Workflow
Deployment should be treated as part of the development workflow, not as an afterthought.
When developing a web site or an application, the deployment workflow should be split into 3 different environments: Development, Staging and Production.
- **Development** is where developers test their work locally. This is a sandbox, something for developers to play around with without doing any serious damage.
- **Staging** - Staging is a test environment that mocks the real production environment. This is on a remote server such as Heroku or AWS. It is meant to mimic the production environment so you can catch any production related bugs before the app is deployed.
- **Production** - This is the real deal, the website that your users will actually see.

In this case the workflow might look like this:
- Developers work on bugs and features on their own separate git branches. Tiny updates can be added directly to the stable development branch.
- Once features are implemented, they are merged into the staging branch and deployed to the Staging environment for quality assurance and testing.
- After testing is complete, feature branches are merged into the development branch.
- On the release date, the development branch is merged into production and then deployed to the Production environment.
## Introduction
Depending on the type of application you have and what it does, you can choose different services to host it. For example, a client application such as a portfolio doesn't really need a custom backend. It just needs a server to host the static files.
<div style="margin: 50px auto; min-height: 100px;">
<img style="float: left;" src="https://s3-eu-west-1.amazonaws.com/ih-materials/uploads/upload_f861c1f3073e13eafd52ad1704427e25.png">
</div>
For this scenario [Github pages](https://pages.github.com/) is perfect, because it lets us push our code directly to a server using git repositories.
<div style="margin: 50px auto; min-height: 100px;">
<img style="float: left" width="350" src="https://s3-eu-west-1.amazonaws.com/ih-materials/uploads/upload_788898ea19304c521e348bc2755db363.png">
</div>
On the other hand, our app is more complex: we have our Node/Express backend and a frontend side (client) built in React. Github pages won't let us change the backend (not the purpose of the platform) so we need a different service. We'll use [Heroku](https://www.heroku.com/).
### Heroku
In this learning unit we are going to deploy our *Project management* full-stack application. We have the express server, connected to a mongo database, and a React client.
#### Prerequisites
We should have:
- A Heroku account created
## Bundle the React App
In order to create a production-optimized version of our client-side React code we let heroku build it during the deploy. We do that by simply adding `"build": "cd client && npm install && npm run build"` to the `"scripts"` section of our project's `package.json` file (**not** the `package.json` inside `client`). The `"scripts"` section should then look like this:
```js
...
"scripts": {
"start": "node ./bin/www",
"dev": "DEBUG=project-management-server:* nodemon ./bin/www",
"dev-windows": "nodemon ./bin/www",
"build": "cd client && npm install && npm run build"
},
...
```
Now, for our app to also serve the files generated by this `build` command correctly to our users we will want to change the line where by default our app serves the `public` folder – instead it should serve `/client/build`. This will serve all javascript and CSS files that React generated during the build. Thus, change `app.js` such that the line with `express.static` becomes:
```js
//app.js
...
app.use(express.static(path.join(__dirname, '/client/build')));
...
```
Also whenever the user's browser is not requesting any of our own API routes or any static javascript or CSS file we assume it wants our server to return the whole React app (e.g. on the `/` root route of our app). To make it accessible we send the generated `index.html` in this case. Let's do that by adding at the very end of `app.js` **just before** `module.exports` the following lines;
```js
// app.js
...
app.use((req, res, next) => {
// If no routes match, send them the React HTML.
res.sendFile(__dirname + "/client/build/index.html");
});
module.exports = app; // this will already be in your file
```
Next, run:
```
$ heroku config:get MONGODB_URI
```
We should be able to see our brand new database's connection string.
This string and its name is also visible in our Heroku app, under the *Settings* tab and inside `Reveal Config Vars`. We should have something like this:
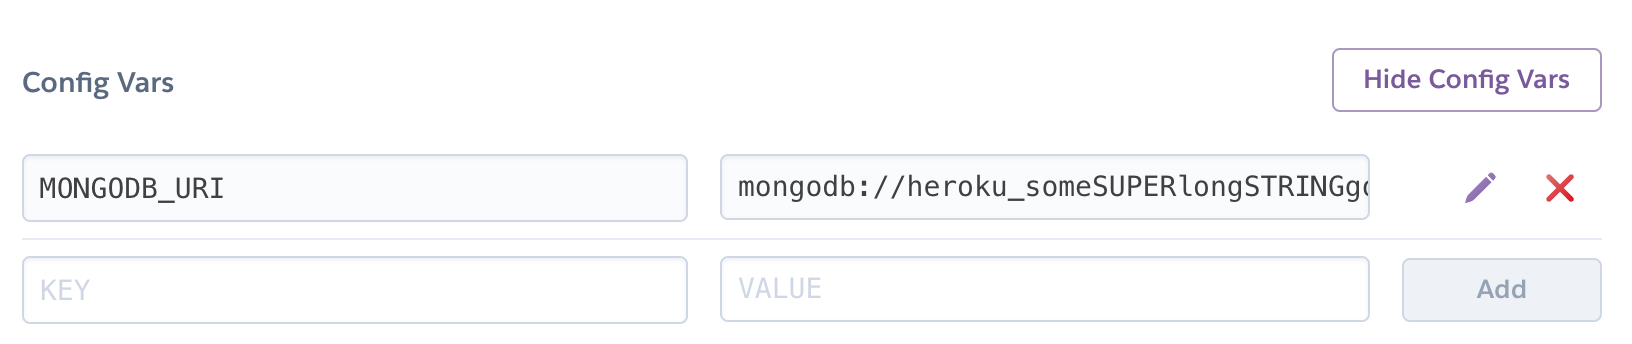
We know we **must never publish any sensitive data** (such as database connection, passwords, or other personal information) within our applications. To enable the database connection we should use *Environment variables* instead.
### Backend Environment Variables
The server is almost ready for deploy. We just need to configure the database connection and have it pointing to the [MLab](https://mlab.com/) service we will use with Heroku.
#### Local setup
First let's define an environment configuration file containing our database URI.
Inside `.env` file, paste the db connection string:
```text
MONGODB_URI=mongodb://localhost/project-management-api
```
If your database is named differently, change the name.
Now inside the `app.js`, we need to point to **`MONGODB_URI`**, using `process.env`, which is possible on the server side thanks to `dotenv` npm package that is already installed in our project.
:::info
If you don't have the `dotenv` package for some reason, run
```bash
$ npm install --save dotenv
```
and require it on the top of `app.js` using:
```js
require('dotenv').config();
```
:::
Now change the current connection to:
```js
// app.js
...
mongoose
.connect(process.env.MONGODB_URI) // this is the line that changes.
.then(x => {
console.log(`Connected to Mongo! Database name: "${x.connections[0].name}"`)
})
.catch(err => {
console.error('Error connecting to mongo', err)
});
...
```
If we start the server with `npm run dev`, our application should work normally, pointing to the local database because we have configured the `MONGODB_URI` env variable in `.env`. On heroku it will instead pick up the `MONGODB_URI` env variable there (which you can look at by using the `heroku config` command.)
 Sign in with Wallet
Connect another wallet
Sign in with Wallet
Connect another wallet