# Transformer implementation using pytorch
###### tags: `NLP`
## Chapter 1. Training Tokenizer from scratch
### Intro.
為什麼你會需要tokenizer呢? 因為transformer的models很常用到subword tokenization的演算法,而且他們常常需要訓練來去辨識文字的部分,舉例來說像是大家再用的文集。
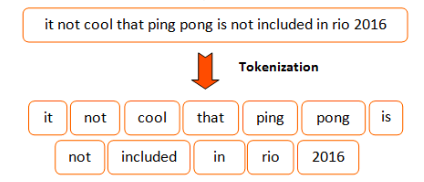
tokenizer所做的事情呢,就是將原本文字的資訊,轉換成token的形式,方便我們在往後做運算的動作。
但是,以英文來說,我們就會遇到一個問題,就是像「cat、cats」這些詞,會被分成兩種不一樣的token,但以語意的角度來說他們是非常相似的。
因此,我們必須利用subtoken的方式,來更深層的分析我們的每一個字。
### Subtoken Tokenizaion
為了要解決上述所與到的問題,最近的實作已經提升到了「Subtoken」的tokenization。
**Subtoken**是延伸前面的分割方式,但更提升了一個層次。它更加的去理解一個字,不論是文法上的、邏輯上的子物件(sub-components)。
舉例來說,像是之前的「cats」、「cat」,像這樣的字首可以代表「subtoken」的字,除此之外這樣的方式也可以抽取出"XXing"、"XXed"這些詞語。
你可能會想說,這樣的subtokens架構利用許多小元件的組成,用來訓練機器學習的model。
但相對的,當一個token被分解成許多的subtokens,Model Input 的量就會隨之變大,這會導致非線性的複雜度大於Input 序列的長度。

在tokenization的演算法中,我們可以看之中幾個sub-tokens演算法。
- [Byte Pair Encoding (BPE) - Neural Machine Translation of Rare Words with Subword Units (Sennrich et al., 2015)](https://arxiv.org/abs/1508.07909)
- [Word Piece - Japanese and Korean voice search (Schuster, M., and Nakajima, K., 2015)](https://research.google/pubs/pub37842/)
- [Unigram Language Model - Subword Regularization: Improving Neural Network Translation Models with Multiple Subword Candidates (Kudo, T., 2018)](https://arxiv.org/abs/1804.10959)
- [Sentence Piece - A simple and language independent subword tokenizer and detokenizer for Neural Text Processing (Taku Kudo and John Richardson, 2018)](https://arxiv.org/abs/1808.06226)
**@huggingface/tokenizers library**
除了transformers的library, @huggingface 提供一個可訓練的、迅速的tokenization函字庫。
我們在這邊,設計了一個library讓它可以提供所有需要的blocks來創造出適用的 end-to-end tokenizer。在這邊,提供了幾個不同的components。
- Normalizer : 執行所有最初input字串的轉換。
- PreTokenizer : 管控初始字串的切割。
- Model : 管控所有的subtoken的發現與產生,在這個部分是可訓練的,而且相當的依靠input data。
- Post-Processor : 提供進階的特徵架構,而且是可以與一些Transformer為基底的models相容。舉例來說,BERT會將tokenized的句子外面包覆的[CLS]、[SEP]的token。
- Decoder : 主要的目的就是將token mapping回原本的字串。一般decoder會伴隨著PreTokenizer而做選擇。
- Trainer : 提供可相容的訓練給每一個model。
在這邊,是我們以下應用的原件:
- Normalizer : Lowercase、Unicode(NFD、NFKD、NFC、NFKC)、Bert、Strip
- PreTokenizer : ByterLevel、WhitespaceSplit、CharDelimiterSplit、Metaspace
- Model : WordLevel、BPE、WordPiece
- Post-Processor : BertProcessor
- Decoder : WordLevel、BPE、WordPiece
這些 blocks 可以用來做出的tokenization pipelines。
這邊,利用[the file from Peter Norving](https://www.google.com/url?sa=t&rct=j&q=&esrc=s&source=web&cd=1&cad=rja&uact=8&ved=2ahUKEwjYp9Ppru_nAhUBzIUKHfbUAG8QFjAAegQIBhAB&url=https%3A%2F%2Fnorvig.com%2Fbig.txt&usg=AOvVaw2ed9iwhcP1RKUiEROs15Dz)來做練習。
這個檔案中包括大約130000行的純文字,用來丟到library中來產生tokenizer。
下載tokenizers。
```python=
!pip install tokenizers
```
```python=
BIG_FILE_URL = 'https://raw.githubusercontent.com/dscape/spell/master/test/resources/big.txt'
# 這邊,先把資料儲存在其他的地方先
from requests import get
with open('big.txt','wb') as big_f: #'wb' 的意思就是 write with binary
response = get(BIG_FILE_URL, ) # write 假如文件存在,會先把文件刪掉
if response.status_code == 200:
big_f.write(response.content)
else:
print("Unable to get the file : {}".format(response.reason))
```
```python=
# 在這邊為了方便,利用tokenizer來達到高等的分類來封裝給pipeline做各種有名的tokenization 演算法。
# 底下所述的所有部分都可以用**ByteLevelBPETokenizer的class**做代替
from tokenizers import Tokenizer
from tokenizers.decoders import ByteLevel as ByteLevelDecoder
from tokenizers.models import BPE
from tokenizers.normalizers import Lowercase, NFKC, Sequence
from tokenizers.pre_tokenizers import ByteLevel
#首先,先開一個空的Byte-Pair Encodeing model (一個尚未被訓練的model)
tokenizer = Tokenizer(BPE())
#這邊用到的是unicode-標準化、lower-casing
#Sequence Normalizer允許我們去合併多個Normalizer,並讓它按照順序執行。
tokenizer.normalizer = Sequence([
NFKC(),
Lowercase()
])
tokenizer.pre_tokenizer = ByteLevel()
tokenizer.decoder = ByteLevelDecoder()
```
到這邊,這是你第一個tokenizer,利用```tokenizer```。
當然,這邊目前只是基礎,如果你想在```Trainer```中看到```add_special_tokens```、```special_tokens```參數,目前來說這個過程是相當類似的。
先把我們的model儲存,以後可以用到。
```python=
#這邊,可以看到產生出來的output檔案
tokenizer.model.save('.')
```
接下來,載入訓練的model並搭配剛剛訓練的tokenizer。
```python=
#裡用簡單的input試試看tokenizer。
tokenizer.model = BPE('vocab.json', 'merges.txt')
encoding = tokenizer.encode("This is a simple input to be tokenized")
print("Encoding string: []".format(encoding.tokens))
decoded = tokenizer.decode(encoding.ids)
print("Decoded string: []".formate(decoded))
```
(PS. 在這邊提出幾個對於 transformers model 有用的參數與特性總整理)
- normalized_string : 經過**標準化**的Input字串(lower-casing、unicode、stripping)
- original_str : 原始提供的字串。
- tokens : 利用string所產生出來的代碼(代號)tokens。
- input_ids : 利用整數所表示的tokens。
- attention_mask : 當input已經被tokenizer所填滿,他會是一個全部為1的向量。相反的,如果沒有,他會是0。
- special_token_mask : 如果input是像是[CLS]、[SEP]、[MASK]、[PAD]這類標示性的token,在vector中會填補1進去。
- type_ids: 當你的input是由多個part所組成,這會變成一個向量給那些token所屬的片段座儲存。
- overflowing : 當你的子部分因未超過長度而被去頭去尾(舉BERT來說,每個sequence上限是512),它就會裝下那些剩餘的部分。
---
## Chapter 2. Train a language model
### 先來點介紹
在這裡,我們可以看到如何在語言的modeling的問題中 利用Transformers 的 model。
- 一般的語言模型 : 用來預測句子中下一項的token。為了預防model作弊,我們會給他一個attention mask,用來預防它偷看其他後面的token。

- 遮蔽式的語言模型 : 用來預測句子中被[MASK]的input。因為它可以讀取整個句子,這樣的model可以用來作為預測的值。

### 實作時間
這邊會做的實例示範如何將```Trainer```API用來訓練model。
#### 準備資料、資料預處裡
在這邊的每個練習中,我們利用**Wikitext 2**作為練習。
```python=
from datasets import load_dataset
datasets = load_dataset('wikitext','wikitext-2-raw-v1')
```
這邊,你也可以用你自己的dataset的txt檔案,作為輸入。
再來,我們來看看裡面的元素是甚麼。
```python=
datasets["train"][10]
```
為了去了解我們的資料到底長甚麼樣子,利用下面的function,讓他隨機選取資料庫。
```python=
from datasets import ClassLabel
import random
import pandas as pd
from Ipython.display import display, HTML
def show_random_elements(dataset, num_examples=10):
assert num_example <= len(dataset), "Can't pick mopre elements than there are in the datasets."
picks = []
for _ in range(num_example):
pick = random.randint(0,len(datasets-1))
while pick in picks:
pick = random.randint(0,len(dataset)-1)
picks.append(pick)
df = pd.DataFrame(dataset[picks])
for column, typ in dataset.features.items():
if isinstan(typ, ClassLabel):
df[column] = df[column].transform(lambda i:typ.names[i])
display(HTML(df.to_html))
```
我們來看看經過這個function後,我們的結果變得如何。
```python=
show_random_elements(datasets["train"])
```

從這邊,我們可以看到,有些包含了整個完整的段落,有些只有幾行空白的。
---
### Part萬
對於,一般的語言的模型,我們會將整個文字輸入近來,並專注於他們的tokenized。
接著,分割成指定的序列長度。
藉由這樣的方式,模型會接收到一個連續的字串像這樣:
```part of text 1```
or
```end of text 1 [BOS_TOKEN] beginning of text 2```
看他們是否延伸到原始的字串。
這些labels同樣的,會被作為相同的inputs,往右邊移動。
在這邊,利用[`gpt2`](https://huggingface.co/gpt2)的架構。
[這裡](https://huggingface.co/models?filter=causal-lm)
,有些checkpoints可以提供你做為其他的選擇,再訓練時,可以換成你自己訓練的checkpoint。
```python=
model_checkpoint = "gpt2"
tokenizer_checkpoint = "sgugger/gpt2-like-tokenizer"
```
為了要去tokenize所有的文字,在訓練的過程中,有著相同的詞彙,在這邊我們必須下載一個預先訓練好的tokenizer。
這樣可以全部交給```AutoTokenizer```來完成。
```python=
from transformers import AutoTokenizer
tokenizer = AutoTokenizer.from_pretrained(tokenizer_checkpoint)
```
我們可以呼叫tokenizer給所有的文字。
這是一個非常簡單,利用Datasets資料庫中[`map`](https://huggingface.co/docs/datasets/package_reference/main_classes.html#datasets.Dataset.map)的方式。
首先,先定義一個function來呼叫tokenizer給我們的文字。
```python=
def tokenize_function(examples):
return tokenizer(examples["text"])
```
接著,我們將它應用在分開我們的```datasets```物件上,利用```batched = True```以及四個步驟用來加速預處理的部分。
我們不需要```text```中,column的部分,因此我們將它去除。
```python=
tokenized_datasets = datasets.map(tokenize_function, batched = True, num_proc =4, remove_columns=["text"])
```
如果我們現在來看看我們的datasets,我們會看到text已經被```inputs_ids```model所取代。
```python=
tokenized_datasets["train"][1]
```
現在,我們來看比較複雜的部份,我們需要去專注在文字上,接著分割成許多指定大小為```block_size```的許多小塊。
為此,我們再次用到了```map```的方式,利用```batcged = Ture```。
這樣,可以讓我們選擇examples在datasets中的數量,透過回傳不一樣的收到的examples數。
藉由這樣的方式,我們可以從一堆的examples中創造一個新的samples。
首先,我們利用預先訓練好的model,抓一下最大長度的值。
但,可能同時也要考慮到GPU的RAM大小,因此在這邊我們先設定block_size = 128。
```python=
#block_size = tokenizer.model_max_length
block_size = 128
#殘酷二選一,因為顯卡RAM不夠。
```
接下來,利用預處裡的function,將文字分群。
```python=
def group_texts(examples):
# 連結所有的文字
concatenate_examples = {k: sum(examples[k], []) for k in examples.keys()}
total_length = len(concatenate_examples[list(examples.keys())[0]])
# 小題醒,我們可以加入一個paddinng,如果說我們的model必須支持它而不是drop,
# 在這邊你可以調整成你所需要的樣子。
total_length = (total_length// block_size) * block_size
# 利用 max_len,分成許多chunks
result = {
k: [t[i: i+block_size] for i in range(0,total_length, block_size)]
for k,t in concatenate_examples.items()
}
result["labels"] = result["input_ids"].copy()
return result
```
第一個重點,先複製inputs給其他label。
這是因為 transformers 資料庫中的model,可以應用在「自動往右邊移」,因此這邊不需要自己手動設定。
除此之外,利用```map```的方式傳送1000個範例的batch,作為預處理的function。
在這邊,藉由調整傳遞的更高的bacth size,訓練的效果也會因此改變(當然也會變得更慢)。
其實,也可以選擇用多工處理來加速。
```python=
lm_datasets = tokenized_datasets.map(
group_texts,
batched = True,
batch_size = 1000,
num_proc=4
)
```
接著,檢查看看datasets有沒有改變。
經過延伸拓展到其他的字詞之後,新的samples包含許多的chunks(一塊塊)的```block_size```的相近的token。
```python=
tokenizer.decode(lm_datasets["train"][1]["input_ids"])
```
```
' the " Nameless ", a penal military unit serving the nation of Gallia during the Second Europan War who perform secret black operations and are pitted against the Imperial unit " Calamaty Raven ". \\n The game began development in 2010, carrying over a large portion of the work done on Valkyria Chronicles II. While it retained the standard features of the series, it also underwent multiple adjustments, such as making the game more forgiving for series newcomers. Character designer Raita Honjou and composer Hitoshi Sakimoto both returned from previous entries, along with Valkyria Chronicles II director Takeshi Ozawa. A large'
```
現在,資料已經清乾淨了,我們準備將```Trainer```做實體化。
首先,我們先創建一個model,利用相同的參數作為我們的checkpoints,但利用隨機的權重實體化。
```python=
from transformers import AutoConfig, AutoModelForCasualLM
config = AutoConfig.from_pretrained(moedl_checkpoint)
model = AutoModelForCasualLM.from_config(config)
```
接著,我們需要些```Training Arugments```。
```python=
from transformer import Trainer, TrainingArguments
training_args = TrainingArguments(
"test-clm",
evalutation = "epoch",
learning_rate = 2e-5,
weight_deacy = 0.01,
push_to_hub = True,
push_to_hub_model_id = f"{model_checkpoint}-wikitext2"
)
```
最後的兩個arguments是去設定說,把model去push到[Hub](https://huggingface.co/models)上,在訓練結束的時候。
如果你沒有按照以上的指示去做,可以去除後面的這兩行,又或者可以將```push_to_hub_model_id```改成其他的自定義。
我們將所有東西傳遞給```Trainer```的class。
```python=
trainer = Trainer(
model=model,
args = training_args,
train_dataset = lm_datasets["trian"],
eval_dataset = lm_datasets["validation"],
)
```
接下來,我們訓練我們的model。
```python=
trainer.train()
```

當我們的訓練結束時,我們可以去評估我們的model,並且抓取他的困難點(perplexity)利用validation像這樣。
```python=
import math
eval_results = trainer.evaluate()
print(f"Perplexity: {math.exp(eval_results['eval_loss']):.2f}")
```

在這邊,我們的perplexity仍然很高,主要是因為我們資料量較少,epochs數也很少。
在真正LM的訓練,我們需要更龐大的資料量與更多的epochs。
在這邊,我們可以利用著個指令來上船我們的訓練。
```python=
trainer.push_to_hub()
```
這個model可以分享給任何人。
他們可以用identifier來進行載入,舉例來說```your-username/the-name-you-picked"```。
```python=
from transformers import AutoModelForCasualLM
model = AutoModelForCasualLM.from_pretrained("gary/my-awesome-model")
```
### Part兔
對於遮蔽式的模型(masked modeling---MLM),我們會利用相同的方式,外加一個步驟。
我們會隨機遮蔽一些token,並利用[MASK]代替,並且將標籤調整為只能包含masked的tokens,(因為我們不需要去預測其他的non-masked的tokens)。
如果你像要自己訓練一個tokenizer,你在輸入資料時,記得```[MASK]```的token是屬於特殊tokens。
在這邊我們利用[`bert-base-cased`](https://huggingface.co/bert-based-cased)的模型進行訓練。
在這邊,你可以選擇任何一個其他的checkpoints用來訓練[here](https://huggingface.co/models?filter=masked-lm)。
像是tokenizer,可以換成你所訓練的checkpoints。
```python=
model_checkpoint = "bert-base-cased"
tokenizer_checkpoint = "sgugger/bert-like-tokenizer"
```
我們可以應用相同的tokenize的function像之前一樣,我們只需要去更新我們所選的checkpoint。
```python=
tokenizer = AutoTokenizer.from_pretrained(tokenizer_checkpoint)
tokenized_datasets = datasets.map(tokenize_function)
```
像之前一樣,將文字之間做分群的動作,並且每一群的大小為```block_size```。
你可以跳過這格步驟,如果你的資料是由獨立的句子所組成。
```python=
lm_datasets = tokenized_datasets.map(
group_texts,
batched = True,
batch_size = 1000,
num_proc = 4
)
```
其他部分都很相似,除了兩個部分。
第一個,我們用一個適合的model給我們的masked LM。
```python=
from transformers import AutoConfig, AutoModelForMaskedLM
config = AutoConfig.from_pretrained(model_checkpoint)
model = AutoModelForMaskedLM.from_config(config)
```

接著,我們重新定義```TrainingArguments```:
```python=
training_args = TrainingArguments(
"test-clm",
evaluation_strategy = "epoch",
learning_rate = 2e-5,
weight_decay = 0.01,
push_to_hub = True,
push_to_hub_model_id = f"{model_checkpoint}-wikitext2"
)
```
像之前一樣,最後兩個arguments是用來設定所有的東西,在訓練結束時,讓我們可以push我們的model到[Hub](https://huggingface.co/models)上。
如果你沒有按照步驟安裝的話,你可以將這兩行去掉,又或者你可以按找你的篇好更改```push_to_hub_model_id```的位置。
終於,我們使用特殊的```data_collator```
資料對照組。
```data_collator```其實就是一個function,是負責接收samples和將他們綁成tensor。
在先前的範例中,因為沒有特別要用到,所以我們設定他為default。
這邊,我們像要做到的是隨機的遮起來(random masking)。
我們可以在預處裡的時候(像是tokenization的時候),但這樣的話tokens會永遠被同樣的方式做mask。
利用```data_collato```時做隨機的動作,我們可以確保每次的隨機遮蔽是用新的方式的。
為了讓我們自己做masking,在函式庫中有提供一個```DataCollatorForLanguageModeling```。
我們可以這樣來調整masking的機率。
```python=
from transformers import DataCollatorForLanguageModeling
data_collator = DataCollatorForLanguageModeling(tokenizer, mlm_probability = 0.15)
```
接下來,我們要做的只剩下把資料傳給```Trainer```。
```python=
trainer = Trainer(
model = model,
args = training_args,
train_dataset = lm_datasets["train"]
eval_dataset = lm_datasets["validation"]
data_collator = data_collator
)
```
```python=
trainer.train()
```

像之前一樣,我們用validation來評量我們的model。
這次的perplexity比起之前CLM,低了許多,是因為我們只預測了被遮起來的tokens(也就是總共的15%)並且可以運用其他的tokens,
對於model來說,這是一件簡單的工作。
```python=
eval_results = trainer.evaluate()
print(f"Perplexity: {math.exp(eval_results['eval_loss']):.2f}")
```

在這裡,我們的perploxity仍然很高,因為我們用的datasets較少,訓練的epochs也沒有很多。
像是真正的LM訓練,你會需要更大的資料量和epochs。
你也可以考慮把你的訓練結過push到hub上,利用這個指令。
```python=
trainer.push_to_hub()
```
你可以分享你的model,並且可以選擇你所喜好的名字與資料夾。
```python=
from transformers import AutoModelForMaskedLM
model = AutoModelForMaskedLM.from_pretrained("sgugger/my-model")
```
---
## Chapter 3. Text Classification on GLUE
### 前情提要
如果你是利用colab,你可能會需要續安裝```Transformers```或```Datasets```。
```python=
pip install datasets transformers
```
如果你在本地端開啟這個notebook,請確認你的環境有安裝好最新版本的libraries。
為了要可以分享你的model、產生結果像是下面途中的API一樣,以下有幾個步驟必須跟著做。
首先,你必須儲存來自Hugging Face網站的一個認證的token,接著執行下面的程式並輸入你的使用者名稱與密碼。
```python=
!huggingface-cli login
```
接下來,將安裝Git-LFS和設定Git如果你沒有設定過的話。
執行以下的程式碼。
```python=
!pip install hf-lfs
!git config --global user.email "you@example.com"
!git config --global user.name "Your Name"
```
請確認你的Transformer版本是至少4.8.1
```python=
import transformer
print(transformer.__version__)
```
這裡你可以看到notebook的版本來達到分散式的效果GPU、TPU。
---
### 如何fine-tuning一個文字分類的model
在這個notebook,我們會看到如何fine-tune其中一種Transformers model,[GLUE Benchmark](https://gluebenchmark.com/)來做文字分類的工作。

在GLUE Benchmark是利用九個不同的分類器來做句子的分類或是用來配對的。
- [CoLA](https://nyu-mll.github.io/CoLA/) Corpus of Linguistic Acceptability。 定義一個句子的**文法**是否正確。
- [MNLI](https://arxiv.org/abs/1704.05426) Multi-Genre Natural Language Inference。 定義一個一個句子的矛盾、不真實的假設。
- [MRPC](https://www.microsoft.com/en-us/download/details.aspx?id=52398) Microsoft Research Paraphrase Corpus 定義一個句子是否是來自其他的倒裝。
- [QNLI](https://rajpurkar.github.io/SQuAD-explorer/) Question-answering Natural Language Inference 定義一個問題是否為問題的答案。
- [QQP](https://www.quora.com/share/First-Quora-Dataset-Release-Question-Pairs) Quora Question Pairs2 定義兩個問題是否語意上相同。
- [RTE](https://aclweb.org/aclwiki/Recognizing_Textual_Entailment) 定義一個句子是否包含給定的假設。
- [SST-2](https://nlp.stanford.edu/sentiment/index.html) 定義句子中是否包含負面的情緒。
- [STS-B](http://ixa2.si.ehu.eus/stswiki/index.php/STSbenchmark) 定義兩個句子之間的相似程度1-5。
- [WNLI](https://cs.nyu.edu/~davise/papers/WinogradSchemas/WS.html) 定義一個句子是否有代名詞,並且分析代名詞是否有被包含。
我們會看到如何簡單的載入資料,給每一個訓練的API,讓他可以fine-tune這些model。
每一個工作都是用他的縮寫命名,利用```mnli-mm```代表配對錯誤的MNLI(因此在相同的訓練下的```mnli```會產生出不同的驗證、測試集)
```python=
GLUE_TASKS = ["cola", "mnli", "mnli-mm", "mrpc", "qnli", "qqp", "rte", "sst2", "stsb", "wnli"]
```
這個notebook是用來建立並執行任何上述所說的功能,利用個種在[Model Hub](https://huggingface.co/models)model checkpoint。
依照你所使用的GPU及Modle,你可能需要去調整每個batch size,去避免跑出out of memory的ERROR。
首先,設定三個參數,接下來的notebook跑起來就會順暢許多。
```python=
task = "cola"
model_checkpoint = "distilbert-base-uncased"
batch_size = 16
```
---
### 輸入資料
在這邊,我們用到的是[🤗 Datasets](https://github.com/huggingface/datasets)的資料庫,來下載我們的資料,並且獲取我們所需要的矩陣,用來評估的(用來比較我們的model與其他model間的基準)。
這邊,利用function```load_dataset```和```load_metric```。
```python=
from datasets import load_dataset, load_matric
```
除了```mnli-mm```作為special code以外,我們可以直接傳遞我們的工作名稱給這些function。
```load_dataset```可以做為資料庫的catche(快取),用來避免下次你要執行這個cell的時候要再重新下載一次。
```python=
actual_task = "mnli" if task == "mnli-mm" else task
dataset = load_dataset("glue", actual_task)
metric = load_metric('glue',actual_task)
```
這個```dataset```的物件是[`DatasetDict`](https://huggingface.co/docs/datasets/package_reference/main_classes.html#datasetdict),其中包括一個訓練的key、validation、測試集(有著多個keys給配對錯誤的validation、再`mnli`中的特殊案例。)
```python=
dataset
```
`DatasetDict({'train': Dataset(features: {'sentence': Value(dtype='string', id=None), 'label': ClassLabel(num_classes=2, names=['unacceptable', 'acceptable'], names_file=None, id=None), 'idx': Value(dtype='int32', id=None)}, num_rows: 8551), 'validation': Dataset(features: {'sentence': Value(dtype='string', id=None), 'label': ClassLabel(num_classes=2, names=['unacceptable', 'acceptable'], names_file=None, id=None), 'idx': Value(dtype='int32', id=None)}, num_rows: 1043), 'test': Dataset(features: {'sentence': Value(dtype='string', id=None), 'label': ClassLabel(num_classes=2, names=['unacceptable', 'acceptable'], names_file=None, id=None), 'idx': Value(dtype='int32', id=None)}, num_rows: 1063)})`
如果要存取一個物件,你就會需要先選擇一個片段,並放入index中。
```python=
dataset["train"][0]
```

為了要去理解我們的資料長甚麼形狀,接下來的function可以讓我們隨機展示資料集中的例子。
```python=
import datasets
import random
import pandas as pd
from IPython.display import display, HTML
def show_random_elements(dataset, num_examples=10):
assert num_examples <= len(dataset), "Can't pick more elements than there are in the dataset."
picks = []
for _ in range(num_examples):
pick = random.randint(0, len(dataset)-1)
while pick in picks:
pick = random.randint(0, len(dataset)-1)
picks.append(pick)
df = pd.DataFrame(dataset[picks])
for column, typ in dataset.features.items():
if isinstance(typ, datasets.ClassLabel):
df[column] = df[column].transform(lambda i: typ.names[i])
display(HTML(df.to_html()))
```
```python=
show_random_elements(dataset["train"])
```

這個矩陣是[`datasets.Metric`](https://huggingface.co/docs/datasets/package_reference/main_classes.html#datasets.Metric)的其中一個例子。

你可以利用呼叫`compute`最直接的方式在你的預測、標籤,並回傳一個公定的(metric)值給dictionary。
```python=
import numpy as np
fake_preds = np.random.randint(0,2,size=(64,))
fake_labels = np.random.randint(0,2,size=(64,))
metric.compute(predictions=fake_preds, reference - fake_labels)
```
`{`matthews_correlation`: -0.12156862745098039}`
筆記筆記 : `load_metric` 對應你的工作,已經載入了適當的公定值,也就是
- for CoLA: [Matthews Correlation Coefficient](https://en.wikipedia.org/wiki/Matthews_correlation_coefficient)
- for MNLI (matched or mismatched): Accuracy
- for MRPC: Accuracy and [F1 score](https://en.wikipedia.org/wiki/F1_score)
- for QNLI: Accuracy
- for QQP: Accuracy and [F1 score](https://en.wikipedia.org/wiki/F1_score)
- for RTE: Accuracy
- for SST-2: Accuracy
- for STS-B: [Pearson Correlation Coefficient](https://en.wikipedia.org/wiki/Pearson_correlation_coefficient) and [Spearman's_Rank_Correlation_Coefficient](https://en.wikipedia.org/wiki/Spearman%27s_rank_correlation_coefficient)
- for WNLI: Accuracy
因此,公定(metric)的物件可以用來計算那些對於你的任務所需要的物件。
---
### 準備資料
在我們將這些文字丟給我們的model之前,我們需要去處理他們。
這是利用Transformers中的 Tokenizer,將所有的input轉乘token的型態,最後把它傳給一個model。
為了要做這件事,我們必須先實體化我們的tokenizer利用`AutoTokenizer.from_pretrained`方式,讓我們確保:
- 我們可以得到一個tokenizer是對應model架構所需要的。
- 我們下載的詞彙是用來做預訓練作為這次的checkpoint。
這個詞彙可以做快取,讓我們假如要使用的時候不需要再重新下載一次。
```python=
from transformers import AutoTokenizer
tokenizer = AutoTokenizer.from_pretrained(model_checkpoint, use_fast=True)
```

上面利用呼叫`use_fast = True`來用其中一種來自於Tokenizers library的fast tokenizers。
其中fast tokenizers對於大部分的model都是可以的,但如果你因此報錯的話,也可以把這行刪掉。
你可以直接呼叫tokenizer在一個句子中或一對句子。
像這樣
```python=
tokenizer("Hello, this is one sentence !", "And this is the sentence goes with it.")
```

基於你所選擇的model,執行上面的程式碼後,你可以看到不一樣的回傳值。
不論我們在這邊做了甚麼(只要知道token是一定要的,我們晚點會實體化它),如果你有興趣的話你在這邊可以學到更多[this tutorial](https://huggingface.co/transformers/preprocessing.html)。
為了去回應我們的資料庫,我們因此需要每一個包含句子的columns的名字。
以下一個dictionary紀錄每個columns對應的名字。
```python=
task_to_keys = {
"cola": ("sentence",None),
"mnli": ("premise", "hypothesis"),
"mnli-mm" : ("premise", "hypothesis"),
"mrpc": ("sentence1","sentence2"),
"qnli": ("question", "sentence"),
"qqp": ("question1", "question2"),
"rte": ("sentence1", "sentence2"),
"sst2": ("sentence", None),
"stsb": ("sentence1", "sentence2"),
"wnli": ("sentence1", "sentence2"),
}
```
檢查一下當前的dataset:
```python=
sentence1_key, sentence2_key = task_to_keys[task]
if sentence2_key is None:
print(f"Sentence: {dataset['train'][0][sentence1_key]}")
else:
print(f"Sentence 1: {dataset['train'][0][sentence1_key]}")
print(f"Sentence 2: {dataset['train'][0][sentence2_key]}")
```

我們也可以寫一個function讓我們預處理我們的samples。
我們將他們傳給`tokenizer`,利用判斷是`truncation=True`。
這樣可以確保說長度超過我們的model限制的句子,可以經過去頭去尾的方式被model接收。
```python=
def preprocess_function(examples):
if sentence2_key is None:
return tokenizer(examples[sentence1_key],truncation=True)
return tokenizer(examples[sentence1_key], examples[sentence2_key], truncation = True)
```
這個function一個到多個的例子。
在多個examples的情況下,我們的tokenizer會回傳一列的lists給每一個key。
```python=
preprocess_function(dataset['train'][:5])
```

為了將這個function應用在資料集中,我們只需要用到`map`的方式在我們所創的`dataset`物件上。
這會利用那個function在所有經過分割的`dataset`的物件上,因此在我們的trainning、validation、testing資料集上,可以先被預處理,利用簡單的一個指令。
```python=
encoded_dataset = dataset.map(preprocess_function, batched = True)
```

甚至可以更好,我們的結果是裡用Datasets library來做快取的,這樣可以避免每次花費時間在這個相同步驟。
這著Datasets library一般是夠聰明去偵測你的map function是否有改變。
舉例來說,他會適當的偵測你在呼叫第一個cell的時候,是否有改變其他的task。
當你使用快取資料夾時,Datasets會警告你,你可以利用`load_from_cache_file = False`來指定說不用到快取中的資料夾,並強制重新整個預先處裡的過程。
可能需要筆記一下,我們傳遞`batched = True`利用相近text的batches來做編碼。
這是為了提升整個fast tokenizer的好處,我們可以提早的載入資料,也就是在我們使用multi-threading時,可以正確的處理這些資料。
---
### Fine-Tuning The Model
現在我們的資料準備好惹,我們可以下載預先訓練好的model並fine-tune它。
由於我們的所有任務都是要去做句子的分類,我們利用`AutoModelForSequenceClassification`的class。
如同tokenizer一樣,利用`from_pretrained`的方式,下載快取的model讓我們使用。
在這邊唯一要做的就是有一個明確的標籤對應我們的問題(也就是兩個,除了STS-B,也就是回歸的問題和MNLI我們會出現三個labels。
```python=
from tranformers import AutoModelForSequenceClassification, TrainingArguments, Trainer
num_labels = 3 if task.startswith("mnli") else 1 if task=="stsb" else 2
model = AutoModelForSequenceClassification.from_pretrained(model_checkpiont, num_labels = num_labels)
```
`Some weights of the model checkpoint at distilbert-base-uncased were not used when initializing DistilBertForSequenceClassification: ['vocab_transform.weight', 'vocab_transform.bias', 'vocab_layer_norm.weight', 'vocab_layer_norm.bias', 'vocab_projector.weight', 'vocab_projector.bias']`
`- This IS expected if you are initializing DistilBertForSequenceClassification from the checkpoint of a model trained on another task or with another architecture (e.g. initializing a BertForSequenceClassification model from a BertForPretraining model).
``- This IS NOT expected if you are initializing DistilBertForSequenceClassification from the checkpoint of a model that you expect to be exactly identical (initializing a BertForSequenceClassification model from a BertForSequenceClassification model).
Some weights of DistilBertForSequenceClassification were not initialized from the model checkpoint at distilbert-base-uncased and are newly initialized: ['pre_classifier.weight', 'pre_classifier.bias', 'classifier.weight', 'classifier.bias']
You should probably TRAIN this model on a down-stream task to be able to use it for predictions and inference.`
其中的警告是在告訴我們,我們正在丟掉一些權重質(`vocab_transform`和`vocab_layer_norm`的layer)。
這是很正常的,因為我們去除掉用來預訓練在語言模型目的的開頭,取而代之的是一個新的開頭讓我們不需要去預先訓練權重,因此這邊的警告說在使用他之前需要fine-tune這個model,正是我們要做做的事。
為了要去實體化一個trainer,我們要多做兩件事情。
最重要的是[`TrainingArguments`](https://huggingface.co/transformers/main_classes/trainer.html#transformers.TrainingArguments),也就是一個class包含許多的屬性用來個人化我們的訓練。
其中包含了資料夾的名字,會被用來做model的儲存點和有選擇的加入其他的參數。
```python=
metric_name = "pearson" if task == "stsb" else "matthews_correlation" if task == "cola" else "accuracy"
model_name = model_checkpoint.split("/")[-1]
args = TrainingArguments(
"test-glue",
evaluation_strategy = "epoch",
save_strategy = "epoch",
learning_rate=2e-5,
per_device_train_batch_size=batch_size,
per_device_eval_batch_size=batch_size,
num_train_epochs=5,
weight_decay=0.01,
load_best_model_at_end=True,
metric_for_best_model=metric_name,
push_to_hub=True,
push_to_hub_model_id=f"{model_name}-finetuned-{task}",
)
```
這邊,我們設一個evaluation在最後的每個epoch,調整learning rate,利用`batch_size`來定義notebook最上方和自定義epochs的數量直到權重值下降。
因為最好的model不一定會在最後的訓練中表現最好,我們在訓練的最後需要要求我們的`Trainer`來載入最好的mode並且儲存。
最後兩個判斷式是用來設定讓我們可以把最終的model push到[Hub](https://huggingface.co/models)的東西。
如果你不想要的話,可以把後面的兩句去除,或者你可以將`push_to_hub_model_id`改成你喜歡的東西。
最後一件事,當你在定義`Trainer`時,你就是在定義如何去計算predictions的metrics。
我們需要來定義一個function,也就是利用先前載入的`metric`,唯一我們要做的預處理的步驟就是將預測的logits(我們剛剛擠壓最後一個axis給STS-B的案例?)的argmax取出。
```python=
def compute_metrics(eval_pred):
predictions, labels = eval_pred
if task != "stsb":
predictions = np.argmax(predictions, axis=1)
else:
predictions = predictions[:, 0]
return metric.compute(predictions=predictions, references=labels)
```
接著,我們需要去伴隨我們的datasets傳遞給`Trainer`:
```python=
validation_key = "validation_mismatched" if task == "mnli-mm" else "validation_matched" if task == "mnli" else "validation"
trainer = Trainer(
model,
args,
train_dataset=encoded_dataset["train"],
eval_dataset=encoded_dataset[validation_key],
tokenizer=tokenizer,
compute_metrics=compute_metrics
)
```
你可能會想說為什麼要伴隨`tokenizer`一起傳遞,尤其是我們已經預處理好我們的資料了。
這是因為我們最後會一次用到,用來讓我們的所有蒐集來的samples利用padding達到長度相同,但伴隨的我們需要知道models偏好的padding(像是左邊還右邊,哪一個token)。
`Tokenizer`有一個pad的方式幫我們把東西都弄對,並且在`Trainer`會用到它。
你可以去客製這個部份,透過定義和傳遞你自己的`data_collector`,也就是讓你接收samples像是上面看過得dictionaries而且會回傳一個dictionary的tensor。
現在你可以finetune我們的model透過呼叫`train`的方式:
```python=
trainer.train()
```

接著,我們檢查`evaluate`的方式,讓我們的`Trainer`去適當的reload最好的model(最後一個例外)。
```python=
trainer.evaluate()
```

你可以拿去跟[GLUE Benchmark leaderboard](https://gluebenchmark.com/leaderboard)做比較。
最後你可以透過下面的指令來上傳你的model。
```python=
trainer.push_to_hub()
```
你現在可以分享你的model給任何人,而且他們可以利用舉例來說用`"your-username/the-name-you-picked"`作為identufier讓他們也可以載入。
像這樣:
```python=
from transformers import AutoModelSequenceClassification
model = AutoModelForSequenceClassification.from_pretrained("sgugger/my-model")
```
### Hyperparameter Search
我們的`Trainer`支持激活參數(hyper parameter),利用[optuna](https://optuna.org/) 或 [Ray Tune](https://docs.ray.io/en/latest/tune/)。
在這個最後的小章節中,你需要去下載這些libraries,只需要執行下面的指令就行了。
```python=
! pip install optuna
! pip install ray[tune]
```
在激活參數的搜尋時,`Trainer`會跑許多的訓練,因此需要透過model來定義一個function(讓他在每次執行時,能夠重新初始化),讓他不只是在做傳遞的動作而已。
我們可以利用下面的function。
```python=
def model_init():
return AutoModelForSequneceClassification.from_pretrained(model_checkpoint, num_labels = num_labels)
```
接下來,我們可以像之前一樣來實體化我們的`Trainer`。
```python=
trainer = Trainer(
model_init=model_init,
args=args,
train_dataset=encoded_dataset["train"],
eval_dataset=encoded_dataset[validation_key],
tokenizer=tokenizer,
compute_metrics=compute_metrics
)
```

我們這次使用的方法是`hyperparameter_search`。
記得,他可能需要花一段時間執行完。
你可以試試看利用其他好的激活參數在一部分的訓練資料集上,只要將`train_dataset`。
```python=
train_dataset = encoded_dataset["train"].shard(index=1, num_shard=10)
```
取出1/10的資料集。
接下來,有了最佳的激活參數後,可以訓練了。
```python=
best_run = trainer.hyperparmeter_search(n_trails=10, direction="maximize")
```

這個`hyperparameter_search`的方式回傳一個`BestRun`,其中包括objective最大值和他所使用的激活參數。
```python=
best_run
```

你可以個人化你的objective去利用`compute_objective`的function最大化`hyperparemeter_serch`去最大化,而且你可以去自訂搜尋的空間,透過傳遞`hp_space`的判斷式去`hyperparameter_search`。
可以看 [forum post](https://discuss.huggingface.co/t/using-hyperparameter-search-in-trainer/785/10) 找到更多的例子重。
為了去重新產生最佳訓練,只要去設定在`Trainer`之前`TrainingArguments`中的激活參數。
```python=
for n, v in best_run.hyperparameters.items():
setattr(trainer.args, n, v)
trainer.train()
```

---
## Chapter 4. Question Answering Squad
### 準備
如果你是利用colab的notebook所開啟,你可能需要下載 Transformers 和 Datasets。
可以執行以下的指令。
```python=
!pip install datasets transformers
```
如果你是在本地端開啟notebook,請確認你的環境有下載最新版本的libraries。
為了可以將你的model分享給其他人,並且產生像下方利用介面API所產生的結果圖片,在這邊還有一些步驟要做。
首先,你需要去儲存一個認證的token在huggin face網站(如果你沒有的話),接著執行下面的指令,並輸入你的帳號及密碼。
```python=
!hugginface-cli login
```
接著,你必須下載Git-LFS 並設定。
如果尚未安裝的話,也請執行以下的指令。
```python=
!apt install git-lfs
!git config --global user.email "you@example.com"
!git config --global user.name "Your Name"
```
最後檢查Transformers的版本至少有4.8.1。
```python=
import transformers
print(transformers.__version__)
```
除此之外,你可以利用這個notebook,利用分散式的多個GPU、TPU,來fine-tune你的model。[here](https://github.com/huggingface/transformers/tree/master/examples/question-answering).
---
### Fine-tuning a model on a question-answering task
在這個notebook,我們可以看到如何fine-tune屬於Transformer中的問與答model,也就是摘要出一個對應問題的答案。
我們會看到如何從這類的任務中,簡單的載入一個資料庫,並使用`Trainer`的API來fine-tune我們的model。

**小叮嚀**:這個Notebook會finetune我們的問答models,讓這些問題答案是利用文字的子字串,而並非產生新的文字。
這個notebook是利用任意一個問題回答的任務搭配著相同格式的SQUAD來執行的,利用任意一個在[Model Hub](https://huggingface.co/models)的checkpoint,只要是有著token classification 開頭和fast tokenizer的model都可以(如果不確定,可以檢查這裡[this table](https://huggingface.co/transformers/index.html#bigtable))。
如果你選擇的是其他的資料集,那麼可能需要一些微調。
依照你的model和所使用的GPU,你可能會需要調整batch的大小預防記憶體不足。
設定好這三個參數後,剩下的部分理論上就會跑得很順暢。
```python=
# This flag is the difference between SQUAD v1 or 2 (if you're using another dataset, it indicates if impossible
# answers are allowed or not).
squad_v2 = False
model_checkpoint = "distilbert-base-uncased"
batch_size = 16
```
### Loading the dataset
我們利用 [🤗 Datasets](https://github.com/huggingface/datasets)的library來下載資料庫和獲得我們用來評估所需要的matric(用來比較我們的model)。
我們可以利用簡單的function來執行,`load_data`、`load_metric`。
```python=
from datasets import load_dataset, load_metric
```
在這邊的範例中,我們利用 [SQUAD dataset](https://rajpurkar.github.io/SQuAD-explorer/)。
這個使用`Datasets`library的notebook理論上,可以處理任何問與答的dataset。
如果擬利用的是你自己的csv、JSON格式的dataset,你可以看看這裡,可能可以幫助你在調整column的名稱成可以訓練的狀態。
```python=
datasets = load_dataset("squad_v2" if squad_2 else "squad")
```
這個`datasets`的原件是源自於 [`DatasetDict`](https://huggingface.co/docs/datasets/package_reference/main_classes.html#datasetdict),其中包含一個給training的key,以及一個validation和test。

我們可以從這個訓練中看到,validation和test資料集都有一列給context(語意),也就是問題與對應問題的答案。
為了要去存取準確的元件,你需要先做切割的動作,再給它一個index。
```python=
datasets["train"][0]
```

我們可以看到答案都是按照他們起始的字串和完整的字串的位置而做顯示,也就是我們上面所說的context的子字串。
為了來理解以上的資料長什麼形狀,我們利用以下的function來展示其中的一些隨機選取的範例。
```python=
from datasets import ClassLabel, Sequence
import random
import pandas as pd
from IPython.display import display, HTML
def show_random_elements(dataset, num_examples=10):
assert num_examples <= len(dataset), "Can't pick anymore elements than there are in the dataset."
picks = []
for _ in range(num_examples):
pick = random.randint(0, len(dataset)-1)
while pick in picks:
pick = random.randint(0, len(dataset-1))
picks.append(pick)
df = pd.DataFrame(dataset[picks])
for column, typ in dataset.features.items():
if isinstance(typ, ClassLabel):
df[column] = df[column].transform(lambda i: typ.names[i])
elif isinstance(typ, Sequence) and isinstance(typ.feature, ClassLabel):
df[column] = df[column].transform(lambda x: [typ.feature.names[i] for i in x])
display(HTML(df.to_html()))
show_random_elements(datasets["train"])
```

---
### Preprocessing the training data
在我們再輸入文字給model之前,我們需要去預處理他們,跟其他的訓練一樣。
這是利用🤗 Transformers `Tokenizer`,讓他們可以將input做tokenize,也就是model可以接受的格式。
為了要做到以上的事情,我們先利用`AutoTokenizer.from_pretrained`的方式來具體化我們的tokenizer,並且確保:
- 我們找到一個對應的tokenizer,是model可以接受的。
- 我們下載下來的單字詞彙會在特殊的checkpoint用到。
這邊,單字詞彙會被快取(cached),因此不需要再重新下載一次這個cell。
```python=
from transformer import AutoTokeninzer
tokenizer = AutoTokenizer.from_pretrained(model_checkpoint)
```
接下來的"斷言"是用來確保我們的tokenizer是從🤗 Tokenizers library的Fast Tokenizers(以Rust為背景)。
這些Fast Tokenizers對於大多數的model都適用,而且我們會需要用到一些特殊的特徵讓我們可以做預處理。
```python=
import transformers
assert isinstance(tokenizer, transformers.PreTrainedTokenizerFast)
```
在這邊,我們可以看到tokenizer是否與model相容[big table of models](https://huggingface.co/transformers/index.html#bigtable)。
你可以在問與答的兩個句子中,直接的呼叫這個tokenizer。
```python=
tokenizer("What is your name?", "My name is Sylvian.")
```
依照你所選擇的模型,你會看到許多在dictionary
回傳的不同的keys。
不論我們在這邊做了多少,你可以在這邊學到更多[this tutorial](https://huggingface.co/transformers/preprocessing.html)
現在在問答題的資料預處理中最大的問題是如何去解決每個長篇幅的文件。
我們通常會去簡短他們成小部分的任務,但在這邊,移除任何一個句子的部分很可能會失去掉原先的用意。
為了解決這樣的問題,我們會允許在我們的資料集中其中的一個範例去產生出多個的input features,每一個的長度都會比model最常的長度還要短(又或是把限制的長度設為激活參數的一部分)。
除此之外,如果我們的答案屬於我們切割的長字串,我們會允許一些部分的features進行重疊,可以產生出另外一個激活參數`doc_stride`:
```python=
max_length = 384 #特徵值的最大長度
doc_stride = 128 #這是在調整context的兩個部分的距離
```
舉裡來說,我們來找一個dataset的long example:
```python=
for i, example in enumerate(datasets["train"]):
if len(tokenizer(example["question"], example["context"])["input_ids"])
break
example = datasets["train"][i]
```
沒有任何的字串切割,我們可以得到底下的input的長度。
```python=
len(tokenizer(example["question"], example["context"])["input_ids"])
```
如果我們在這邊進行去頭去尾,我們就會失去它的原始資訊。
```python=
len(tokenizer(example["question"], example["context"], max_length=max_length, truncation="only_second")["input_ids"])
```
筆記:
我們不會想要做去頭去尾。
現在,我們的tokenizer可以自動的回傳一串被固定最大長度的特徵值,並且利用`overlap`的方式,利用`return_overflowing_tokens=True`並傳遞他的stride。
```python=
tokenized_example = tokenizer(
example["question"],
example["context"],
max_length=max_length,
truncation="only_second",
return_overflowing_tokens=True,
stride=doc_stride
)
```
接著,我們就有不只一列的`input_ids`,而是一堆
```python=
[len(x) for x in tokenized_example["inputs_ids"]]
```
如果我們將她進行docode,
```python=
for x in tokenized_example["input_ids"][:2]:
print(tokenizer.decode(x))
```
現在,我們可以把所有東西進入一個function,我們會需要應用在我們的訓練資料集上。
如果出現了不可以的答案,我們會設定cls的索引,給定他初始點與終點。
我們也可以簡單的去除這些範例,利用設定`allow_impossible_answers`是`False`。
當我們完成了複雜的預處理,我們在這邊簡單的做處理:
```python=
def prepare_train_features(examples):
# Some of the questions have lots of whitespace on the left, which is not useful and will make the
# truncation of the context fail (the tokenized question will take a lots of space). So we remove that
# 在truncuation之前,我們要做的是去掉多餘的空白鍵。
# left whitespace
examples["question"] = [q.lstrip() for q in examples["question"]]
# lstrip()的function可以做到去除字串頭尾多餘的空白
# Tokenize our examples with truncation and padding, but keep the overflows using a stride. This results
# in one example possible giving several features when a context is long, each of those features having a
# context that overlaps a bit the context of the previous feature.
tokenized_examples = tokenizer(
examples["question" if pad_on_right else "context"],
examples["context" if pad_on_right else "question"],
truncation="only_second" if pad_on_right else "only_first",
max_length=max_length,
stride=doc_stride,
return_overflowing_tokens=True,
return_offsets_mapping=True,
padding="max_length",
)
# Since one example might give us several features if it has a long context, we need a map from a feature to
# its corresponding example. This key gives us just that.
sample_mapping = tokenized_examples.pop("overflow_to_sample_mapping")
# The offset mappings will give us a map from token to character position in the original context. This will
# help us compute the start_positions and end_positions.
offset_mapping = tokenized_examples.pop("offset_mapping")
# Let's label those examples!
tokenized_examples["start_positions"] = []
tokenized_examples["end_positions"] = []
for i, offsets in enumerate(offset_mapping):
# We will label impossible answers with the index of the CLS token.
input_ids = tokenized_examples["input_ids"][i]
cls_index = input_ids.index(tokenizer.cls_token_id)
# Grab the sequence corresponding to that example (to know what is the context and what is the question).
sequence_ids = tokenized_examples.sequence_ids(i)
# One example can give several spans, this is the index of the example containing this span of text.
sample_index = sample_mapping[i]
answers = examples["answers"][sample_index]
# If no answers are given, set the cls_index as answer.
if len(answers["answer_start"]) == 0:
tokenized_examples["start_positions"].append(cls_index)
tokenized_examples["end_positions"].append(cls_index)
else:
# Start/end character index of the answer in the text.
start_char = answers["answer_start"][0]
end_char = start_char + len(answers["text"][0])
# Start token index of the current span in the text.
token_start_index = 0
while sequence_ids[token_start_index] != (1 if pad_on_right else 0):
token_start_index += 1
# End token index of the current span in the text.
token_end_index = len(input_ids) - 1
while sequence_ids[token_end_index] != (1 if pad_on_right else 0):
token_end_index -= 1
# Detect if the answer is out of the span (in which case this feature is labeled with the CLS index).
if not (offsets[token_start_index][0] <= start_char and offsets[token_end_index][1] >= end_char):
tokenized_examples["start_positions"].append(cls_index)
tokenized_examples["end_positions"].append(cls_index)
else:
# Otherwise move the token_start_index and token_end_index to the two ends of the answer.
# Note: we could go after the last offset if the answer is the last word (edge case).
while token_start_index < len(offsets) and offsets[token_start_index][0] <= start_char:
token_start_index += 1
tokenized_examples["start_positions"].append(token_start_index - 1)
while offsets[token_end_index][1] >= end_char:
token_end_index -= 1
tokenized_examples["end_positions"].append(token_end_index + 1)
return tokenized_examples
```
這個function可以應付一個或多個例子。
在多個範例的狀況下,tokenizer會回傳一個list給每一個key。
```python=
features = prepare_train_features(datasets['train'][:5])
```
將這個function應用在所有資料集的句子中,我們只會用到最初創建的`dataset`中的`map`。
這會讓我們將function應用在所有的`dataset`並做切割的動作,因此我們的training、validation、testing data,可以利用一個簡單的指令做預處理。
因此,當我們重新執行不同的samples時,我們必須移除掉以前的columns。
```python=
tokenized_datasets = datasets.map(prepare_train_features, batched=True, remove_columns=datasets["train"].column_names)
```
更好的是,這些結果是被自動快取到🤗Datasets的Library,去避免再次花費時間來執行notebook。
🤗 Datasets的library一般可以自動的去偵測function在傳遞到map時是否有被更動過。
舉例來說,他會適當的偵測先前的cell有變更過,並重新執行。
當他使用快取資料時,🤗 Datasets 會警告你,你可以利用 `load_from_cache_file = False`讓你的快取部會強制其他的預處理被應用。
記得,我們傳遞`batched = True`去將我們的文字綁在一起。
這會提升整個整的fast tokenizer的優勢,也就是使用多個節點去對待當前batch中的文字。
---
### Fine-tuning
現在,我們的資料準備好可以訓練了,我們需要下載預先訓練好的model,並進行fine-tune。
因為我們做的是問與答的任務,我們使用`AutoModelForQuestionAnswering`的class。
像是tokenizer一樣,從`from_pretrained`方式可以自動下載我們的model到我們的快取中。
```python=
from transformers import AutoModelForQuestionAnswering, TrainingArguments, Trainer
model = AutoModelForQustionAnswering.from_pretrained(model_checkpoint)
```
這邊的警告是在告訴我們正在丟失一些權重質(`vocab_transform`和`vocab_layer_norm`的layers)和隨機初始的其他參數(像是`pre_classifier`和`classifier`)。
這是非常正常的,因為我們要去除掉開頭,也就是用在masked language modeling 來做預先訓練的model,並用新的head來做替代,也就是還沒有被預先訓練過的權重,所以才會跳出警告。
而且,這個警告也就是我們所要做的唷。
為了要實體化`trainer`,我們需要去另外定義三個東西。
最重要的就是,[`TrainingArguments`](https://huggingface.co/transformers/main_classes/trainer.html#transformers.TrainingArguments),就是一個class其中包括所有的訓練中可以自訂的參數。
他需要另外一個folder name,也就是晚點會被用來儲存model checkpoints所用到,並且所有的判斷式是可以自訂的。
```python=
model_name = model_checkpoint.split("/")[-1]
args = TrainingArguments(
f"test-squad",
evaluation_strategy = "epoch",
learning_rate=2e-5,
per_device_train_batch_size=batch_size,
per_device_eval_batch_size=batch_size,
num_train_epochs=3,
weight_decay=0.01,
push_to_hub=True,
push_to_hub_model_id=f"{model_name}-finetuned-squad",
)
```
在這邊,我們設定每次epoch結束就會做一次evaluation,調整learning rate,我們可以利用notebook最上面定義的`batch_size`和自訂訓練中epochs數,就像權重遞減一樣。
最後面的兩個判斷式是用來設定把model上傳到[Hub](https://huggingface.co/models)。
如果你沒有按照上面的安裝的話,你可以將那兩行刪掉,或是如果你想改名的話,你可以把`push_to_hub_model_id`改成你喜歡的。
接下來,你會需要一個data collator,用來將處裡的examples綁再一起,以下就是他如何做使用。
```python=
from transformers import default_data_collator
data_collator = default_data_collator
```
在下一個章節,我們會評估model和運算出我們的metrics。
我們在這邊要做的就是把Datasets傳遞給我們的`Trainer`。
```python=
trainer = Trainer(
model,
args,
train_dataset=tokenized_datasets["train"],
eval_dataset=tokenized_datasets["validation"],
data_collator=data_collator,
tokenizer=tokenizer,
)
```
接著,我們可以利用`train`的方式來finetune我們的model。
```python=
trainer.train()
```

因為這個訓練有點久,我們先將model存下來,預防說我們需要重新開始。
```python=
trainer.save_model("test-squad-trained")
```
### Evaluation
如果要來做model的評估,我們還會需要再做一些東西,我們需要將model的預測map回到context的部分。
這個model本身從開始到編列位置的過程中會預測logits。
如果我們拿一把validation dataloader,以下就是我們的output model會給你的。
```python=
import torch
for batch in trainer.get_eval_dataloader():
break
batch = {k: v.to(trainer.args.device) for k, v in batch.items()}
with torch.no_grad():
output = trainer.model(**batch)
output.keys()
```

這個model的output是一個像是dictionary的object,其中包括loss、起始和終止的logits。
我們不需要loss給我們的predictions,我們來看一下logits。
```python=
output.start_logits.shape, output.end_logits.shape
```

我們讓每一個token和feature都有了一個屬於自己的logit。
最明顯去從每一個feature預測每一個答案的方法就是將start logits中的最大值作為初始點,並也將end logits中的最大值設為終止點。
```python=
output.start_logits.argmax(dim=-1), output.end_logits.argmax(dim=-1)
```
