# 2022-09-29 Precmed Tutorial
This is an editable hackpad for all related notes for the tutorial for the precmed introductory session on Thursday 29th September.
Precmed Server - https://precmed.leeds.ac.uk/
## Introduction
The Precmed server provides access to a Jupyter notebook and RStudio development environments.
**The server is only accessible from campus and cannot be reached when off the wired University network**.
## Jupyter Notebook
Jupyter notebooks are a web-based interactive computational platform for creating notebook documents (that combine code, markdown text and graphics).
The Jupyter notebook has two main interfaces:
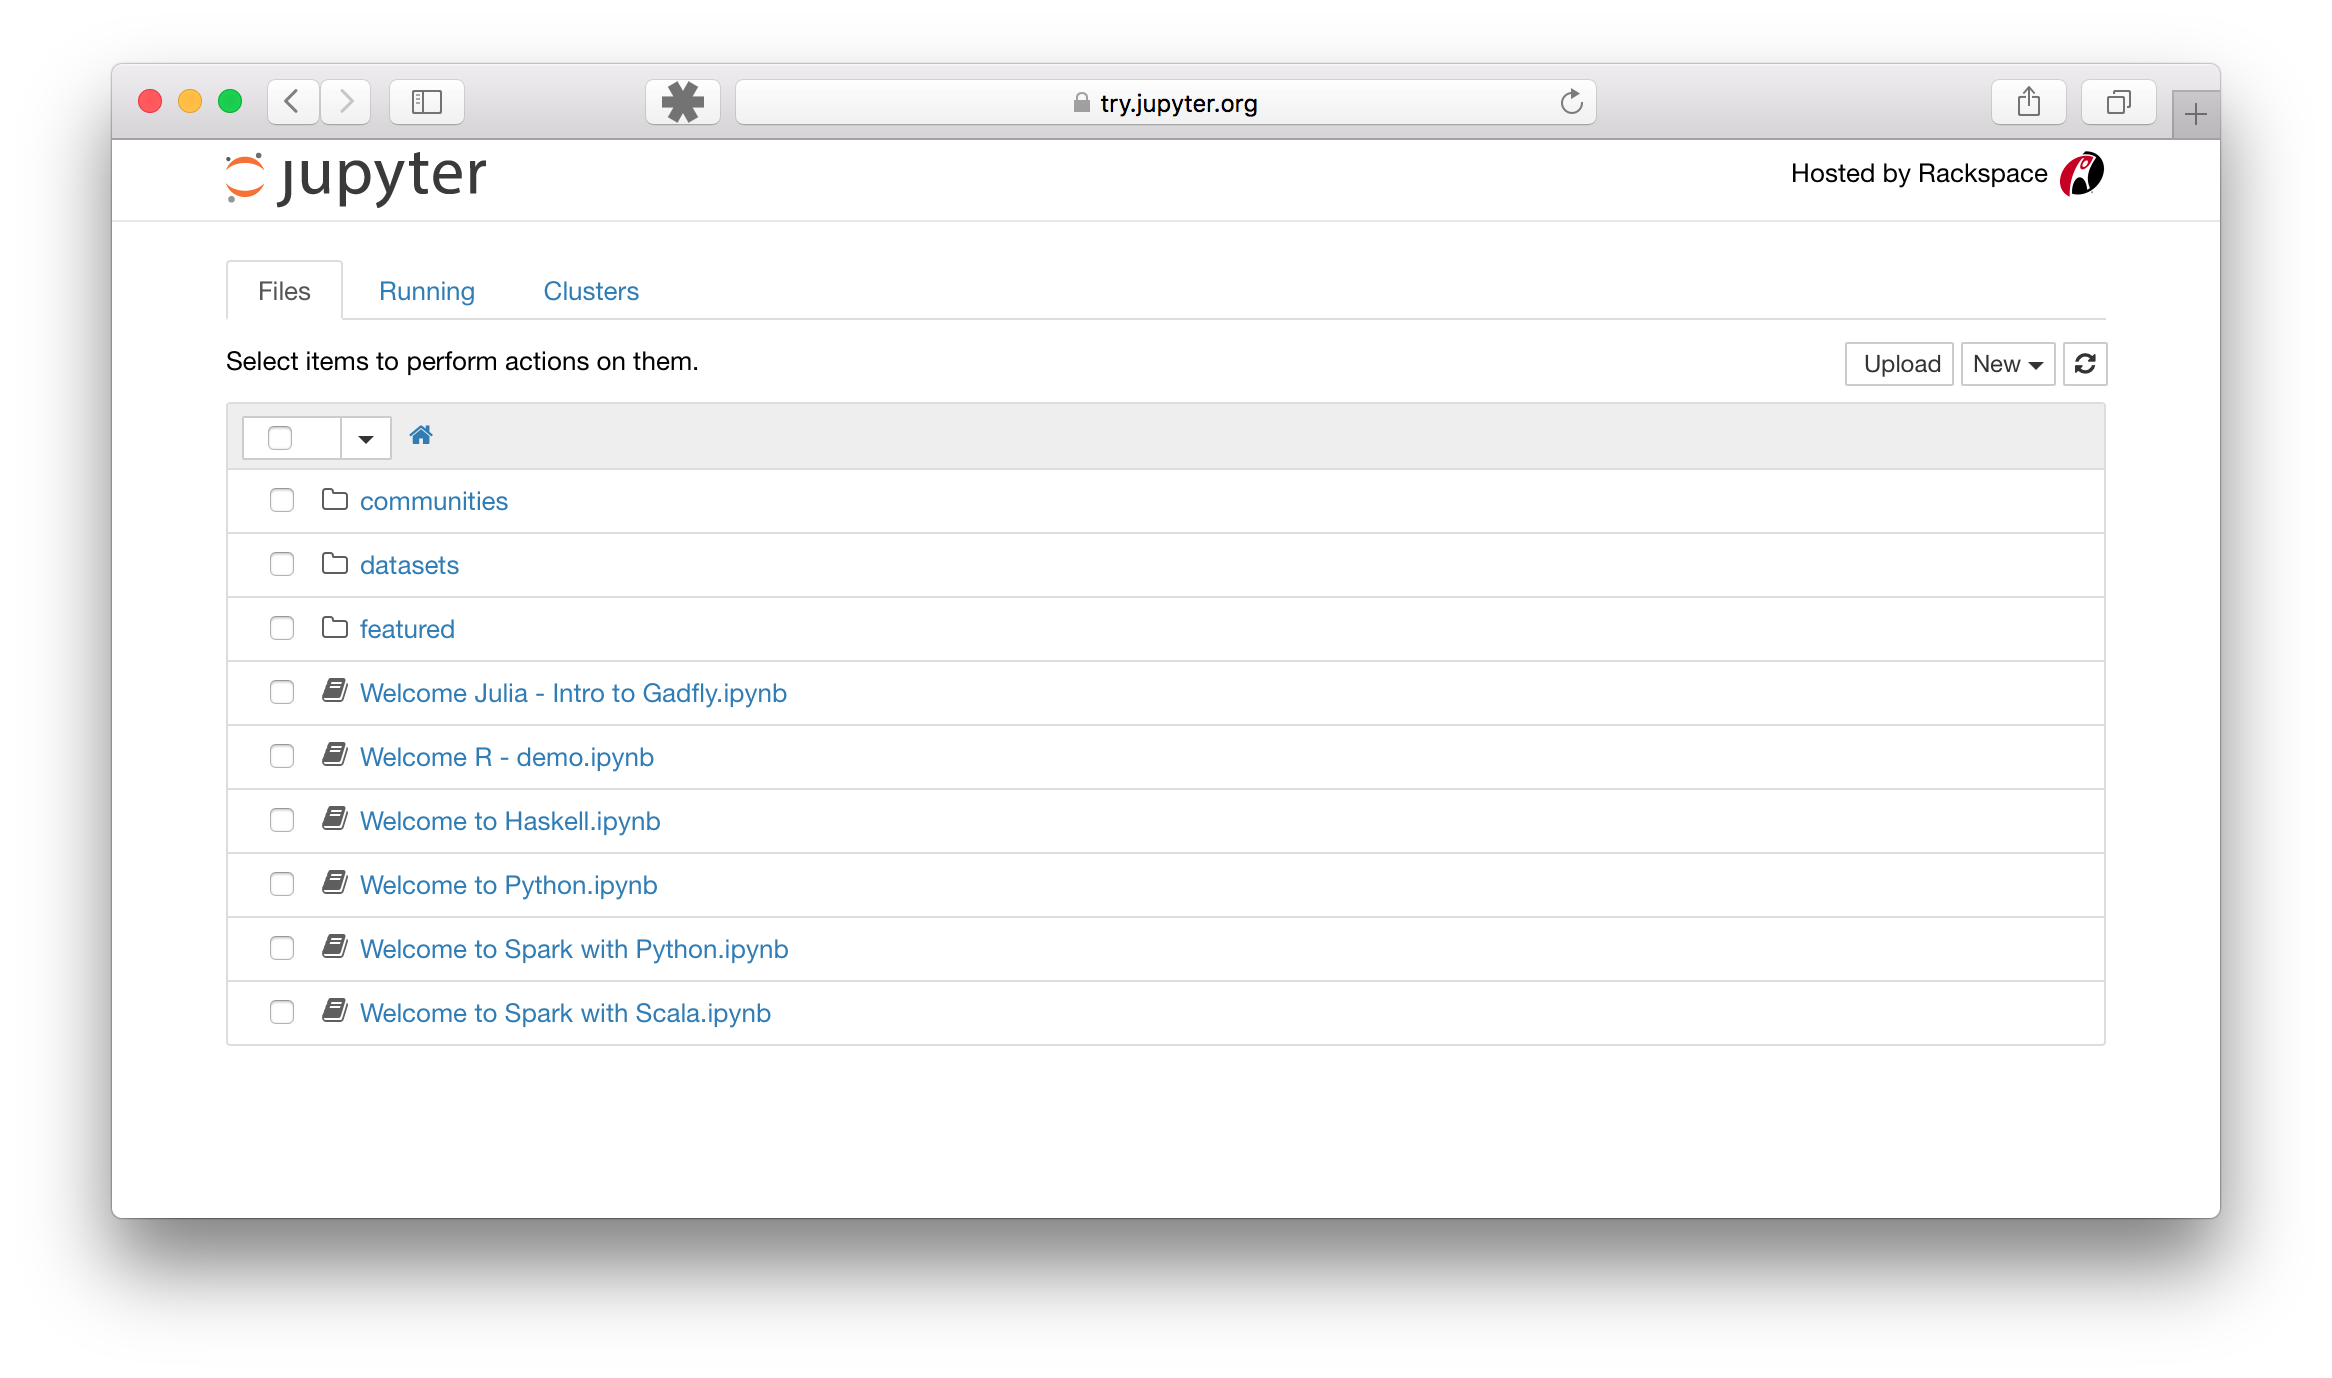
1. **The notebook dashboard**
The notebook dashboard allows you to navigate the filesystem of the machine you're running Jupyter on. You can browse through files and folders and create new notebooks or folders from this interface.
2. **The notebook editor**
The notebook editor mode allows you to directly edit and run notebook files. This is the main interface you will use when writing Python code.

- [Jupyter Notebook documentation](https://docs.jupyter.org/en/latest/start/index.html)
## RStudio
RStudio is an integrated development environment (IDE) for the R language. Unlike the Jupyter notebook RStudio has a single interface that contains multiple panes.
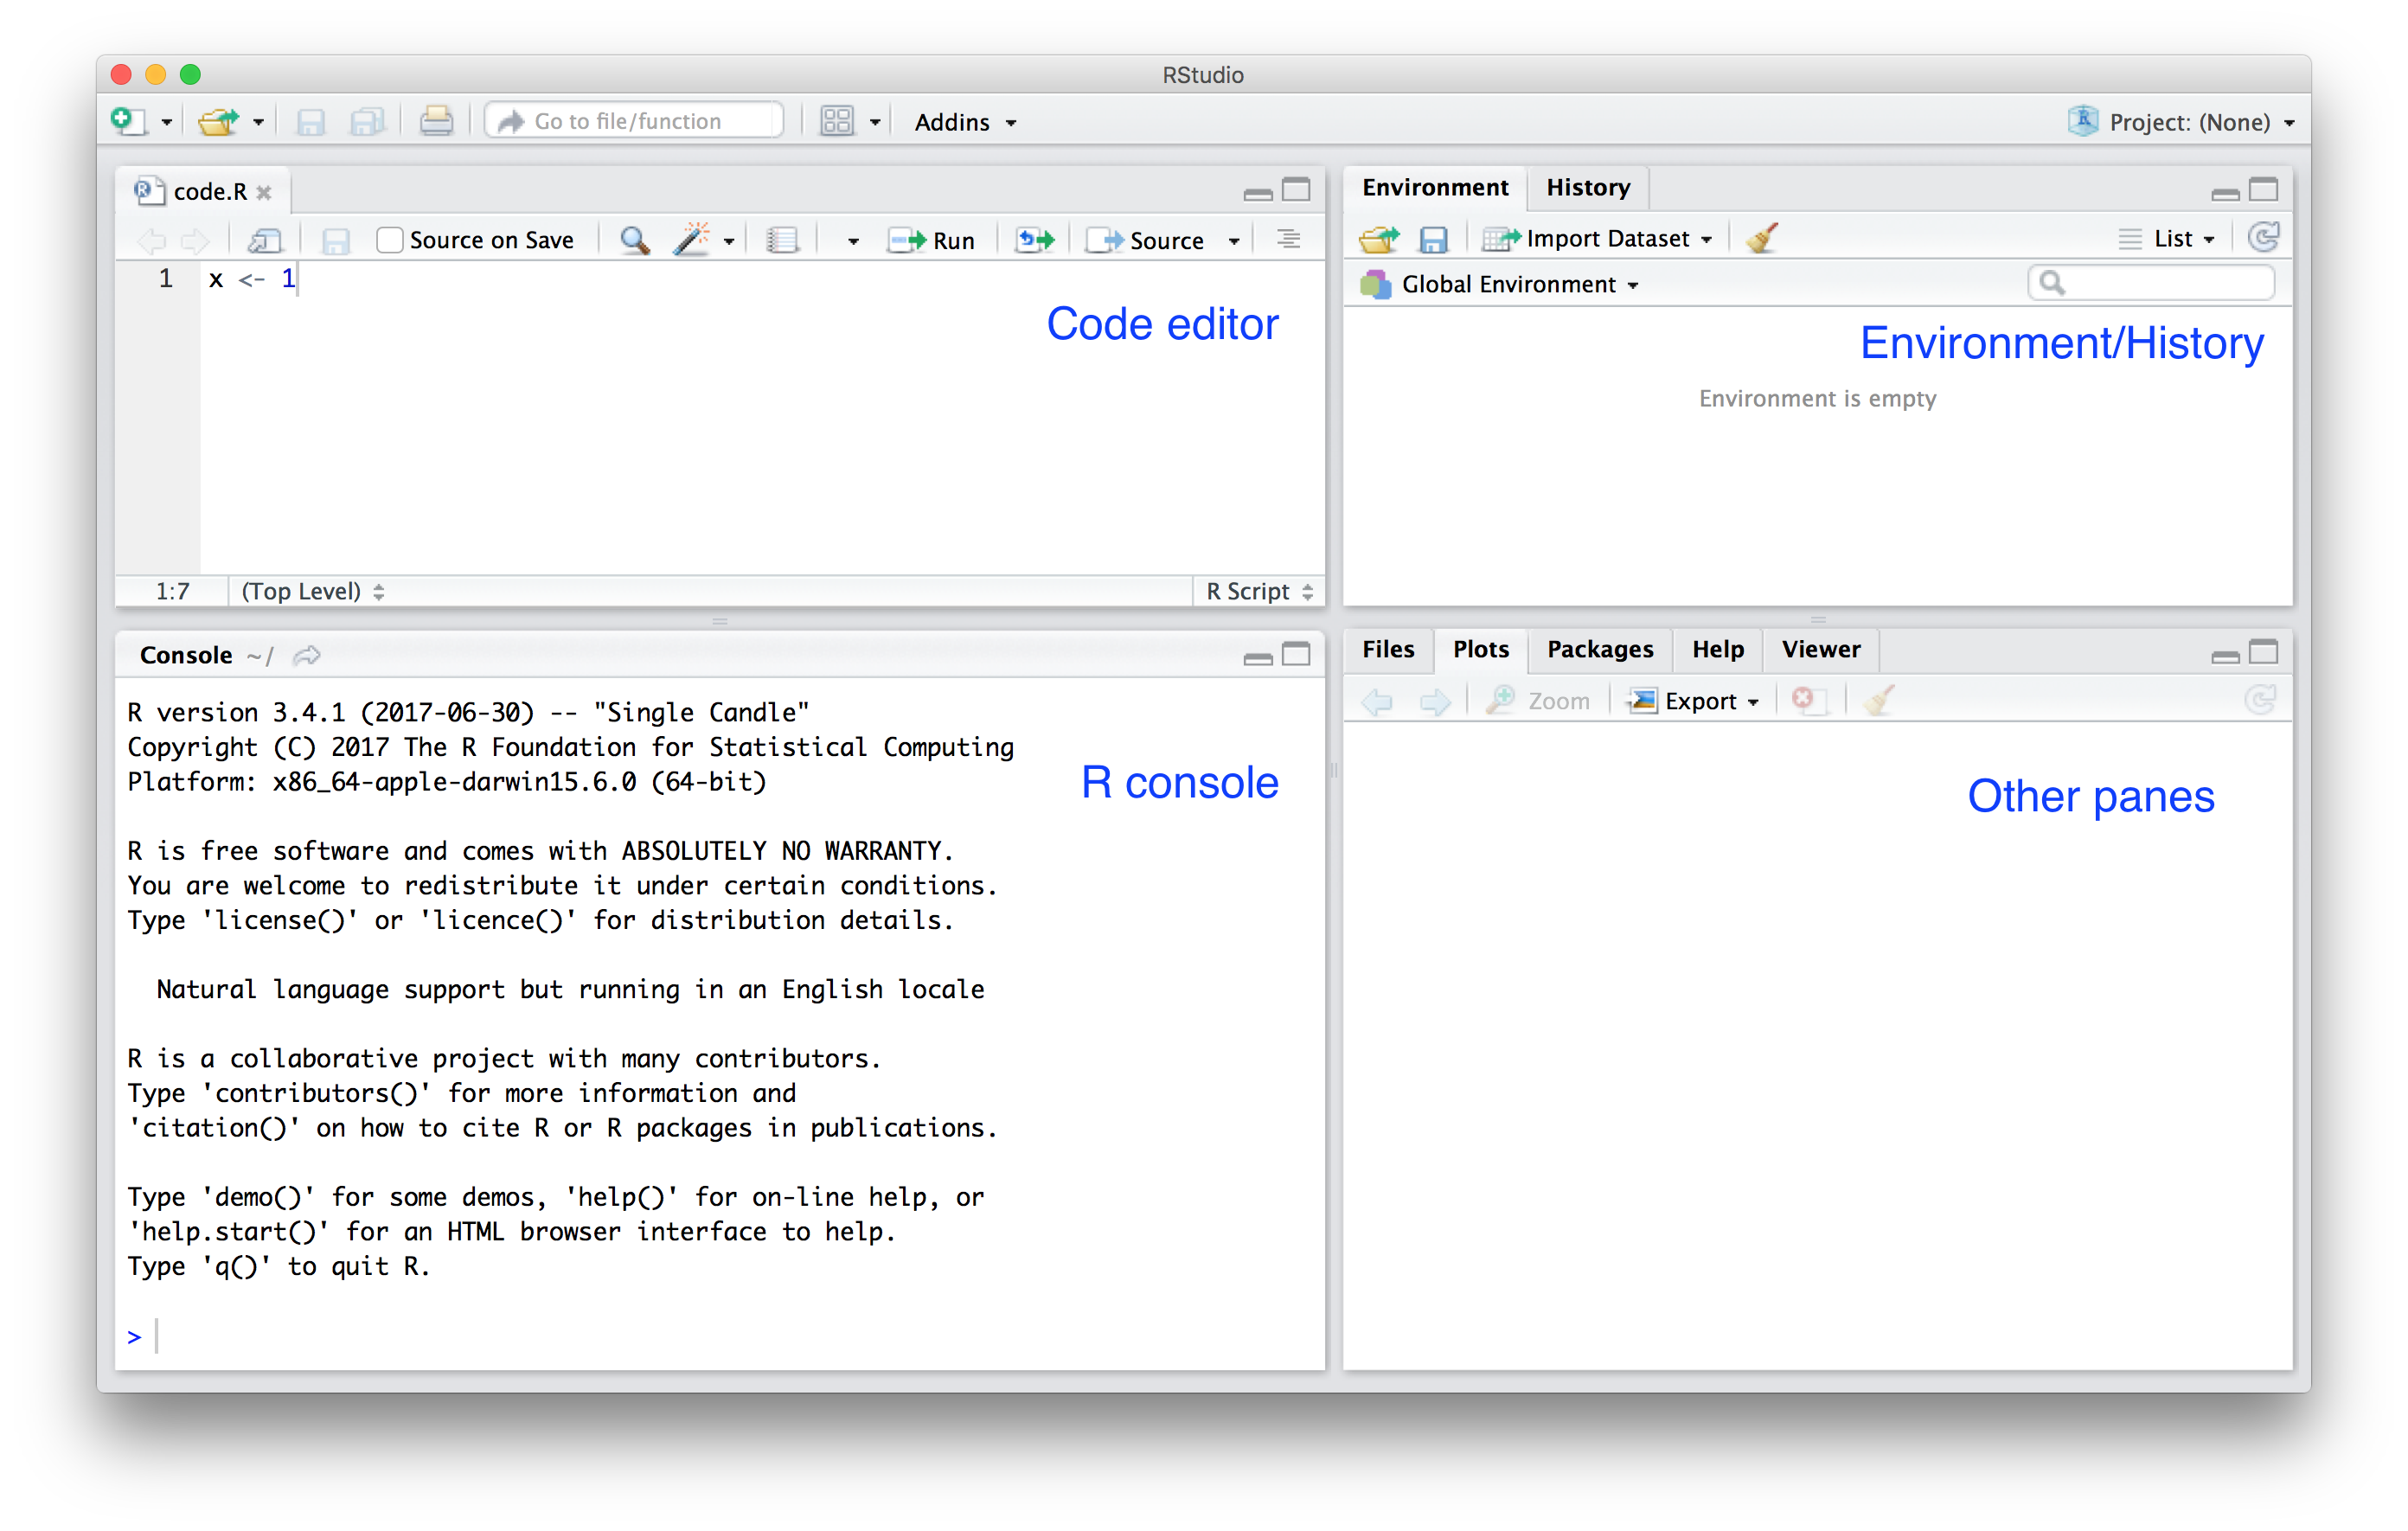
Image taken from [Introduction to Data Science](https://rafalab.github.io/dsbook/getting-started.html) by Rafael A. Irizarry.
The top left is the code editor, here you can open text files and write code contents within them. You can also run the contents of a file, or run the file line by line.
In the bottom left is the R console, where you can directly run lines of R within the R development environment.
In the top right hand side is the Environment/History pane, this displays details about variables that exist within the current R session as well as loaded packages. You can also view the history of commands run in the R console by clicking the History tab.
Finally, in the bottom right is the Other panes section, this includes a number of tabs that includes a File explorer (Files), a list of plots generated in the session (Plots), details of available packages to install (Packages), a browser of R help pages (Help) and a generic Viewer tool (Viewer).
## Linux Shell
List of common Linux commands:
- pwd: this prints working directory, showing where we are.
- ls: lists contents of a directory
- clear: clears the screen
- cd: change directory
- mkdir: make a directory
- rm: delete something
- Note to recursively delete a directory, you can use `rm -r something`
- touch: create/update a file (you may never need this)
- nano: edit a file. Help shown at the bottom, `^` means the Control key.
- Control-C: interrupt the current running command
- cp: copy
- mv: move/rename
- ssh: secure shell - connect to another machine
## Further reading
- Carpentries Intro to Unix Shell - https://swcarpentry.github.io/shell-novice/
- Carpentries Python Intro - https://swcarpentry.github.io/python-novice-gapminder/
- Carpentries R Intro - https://swcarpentry.github.io/r-novice-gapminder/
# Additional Notes and Q&A
Feel free to add your own questions in this section.
## How do I connect to the VPN?
There's a KnowledgeBase article describing how you connect to the VPN (which lets you get to some campus-only things from off campus):
https://it.leeds.ac.uk/it?id=kb_article&sysparm_article=KB0014410
## Conda environments in Jupyter
There are also different environments within Jupyter, which have different software available.
When you create a new notebook, you can select which environment it's created in, and there are a number available:
- root (a fairly stock Python3 environment with standard additional packages over just picking Python3)
- R-base (R 3.6.1)
- R4-base (R 4.1.3)
- python27 (Python 2.7, but you really don't want that!)
## What can I do if precmed isn't working?
Try https://precmed-test.leeds.ac.uk
This is a clone of precmed, and you're free to use either. If we were going to do an update or tweak to precmed, we do it here first.
## How do I connect to the HPC ARC4?
You can connect to the HPC using the terminal on precmed, just by doing:
`ssh arc4`
This however doesn't work quite the same on other systems. General documentation for the HPC systems is available here:
https://arcdocs.leeds.ac.uk
The specific notes on logging in the HPC is here:
https://arcdocs.leeds.ac.uk/getting_started/logon.html
Note "off campus" in this documentation means not using the wired network, so if you're on campus but using eduroam, please follow the off campus instructions.
## Can I really not use spaces in filenames on Linux?
Since by default you're using spaces to separate items, items with spaces in need extra effort to us:
`mkdir spaced thing`
This is interpreted as make two directories, one called spaced, and one called thing. If you're stubborn, you can force this one of two ways:
`mkdir spaced\ thing`
`mkdir "spaced thing"`
Your life is a lot easier if you just use dashes or underscores (`-` or `_`) instead of spaces.
# Notes on what we have run on the HPC
Make a directory in /nobackup for ourselves:
`mkdir /nobackup/$USER`
Go there:
`cd /nobackup/$USER`
Write a little python script:
```
mkdir precmed-eg
cd precmed-eg
nano helloworld.py
```
Into this we're going to put:
```
print("Hello, world!")
```
Save and quit: Control-O, Control-X
Now we're going to write a job submission file:
`nano job_sub.sh`
Into this we're going to write the instructions to the scheduler to define our job:
```
# My first job submission
# My Name, 2022-09-29
# Run this job in the current directory
#$ -cwd
# Request some time, (min 15mins, max 48hrs) (hh:mm:ss)
#$ -l h_rt=00:15:00
# Request some RAM for the job per core (default 1G)
#$ -l h_vmem=1G
# Specify that we want an email about out job's progress
#$ -m bea
# What code to run
# Load a recent python3 and associated modules
module add anaconda
python helloworld.py
```
Submit the job the the schedueler where it'll wait for an indeterminate amount of time:
`qsub job_sub.sh`
That'll run, although you could use `qstat` to see it in the queue if you were wanting to peek. Once it's completed it'll write out output files into the current directory, which you should see at the end. Unique job ID is included in these job files, helping you tie up the output with the run
 Sign in with Wallet
Connect another wallet
Sign in with Wallet
Connect another wallet