## 简介
为啥采用hugo,不采用hexo框架?
问题很好,没办法解释,两个框架都使用过,个人感觉hexo在主题上更丰富些,hugo在维护上更方便点,所以还是用回了hugo
文章搬运再修饰了脚本控制部分 : https://letere-gzj.github.io/hugo-stack/ (啥?喷我搬运!人家已经写得非常好了,艺术品欣赏就好何必自己欺骗自己说是自己的呢🤡)
## 环境准备
### 安装git
- 前往【[Git官网](https://git-scm.com/)】,下载安装程序
- 一直点下一步,默认安装即可

### 安装hugo
官网:**[The world’s fastest framework for building websites | Hugo (gohugo.io)](https://gohugo.io/)**
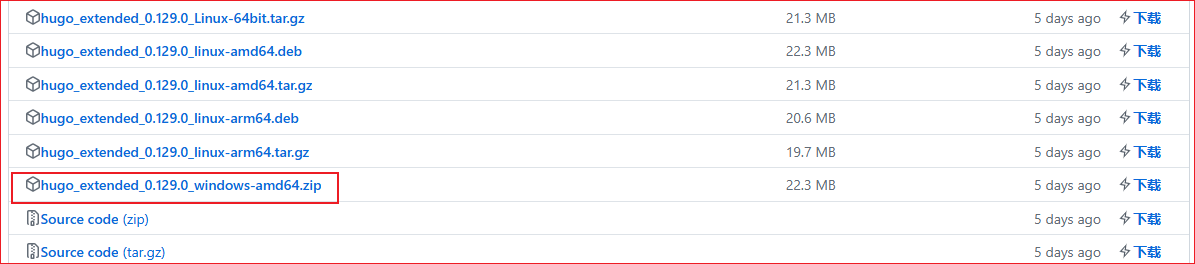
- 前往【[Hugo Github Tags](https://github.com/gohugoio/hugo/tags)】,选择对应版本下载,下载后解压即可
- Windows下载版本:**hugo_extended_xxxxx_windows_amd64.zip**
## 搭建博客
### 创建博客
- (1)在**hugo.exe**所在文件夹的地址栏敲打cmd,然后Enter唤起命令行
[](https://letere-gzj.github.io/hugo-stack/p/hugohugo--github-免费部署自己的博客/1启动cmd.png)
- (2)敲打命令`hugo new site xxxx`创建hugo文件
[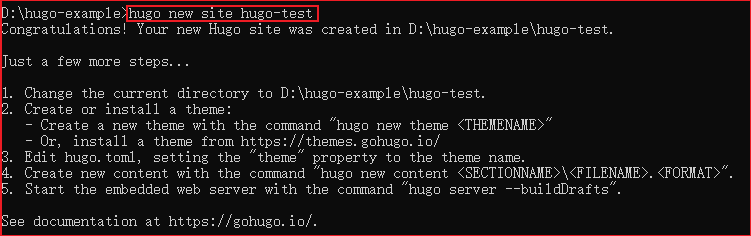](https://letere-gzj.github.io/hugo-stack/p/hugohugo--github-免费部署自己的博客/2newSite.png)
- (3)敲打命名`cd xxxx`切换目录,并把**hugo.exe**复制到刚生成的文件夹中
[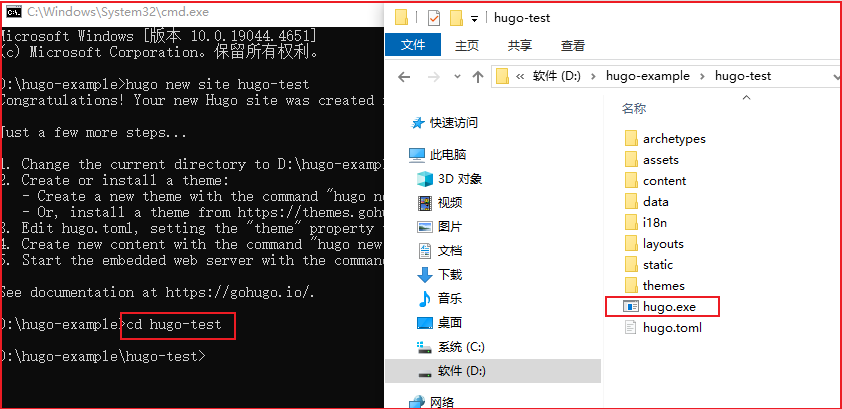](https://letere-gzj.github.io/hugo-stack/p/hugohugo--github-免费部署自己的博客/3cd.png)
目录结构:
```
.
├── archetypes # 存放文章模板
├── config.toml # 简单的配置文件
├── content # 存放文章
├── data # 存放生成静态页面时的配置文件
├── layouts # 存放页面布局的模板
├── static # 存放图片等静态内容
└── themes # 存放下载的主题
```
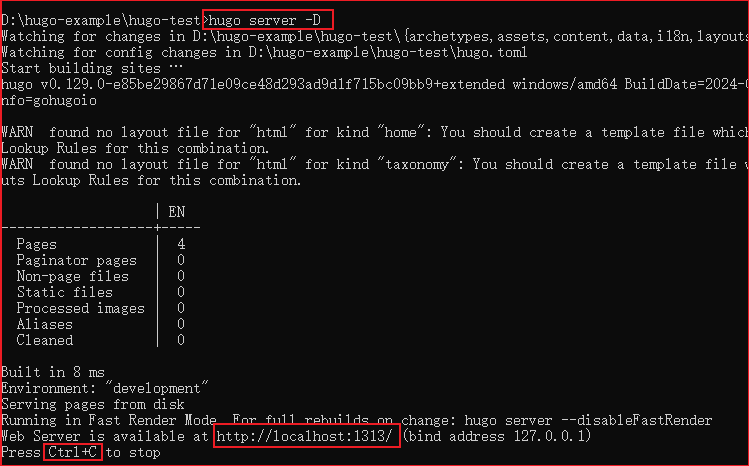
- (4)敲打命令`hugo server -D`启动服务,访问[http://localhost:1313](http://localhost:1313/),Ctrl+C停止服务 **(hugo默认是没有主题的,需要进行主题配置)**
[](https://letere-gzj.github.io/hugo-stack/p/hugohugo--github-免费部署自己的博客/4server.png)
[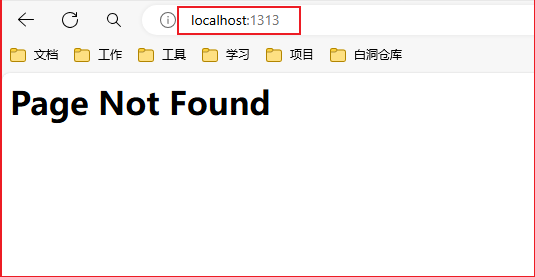](https://letere-gzj.github.io/hugo-stack/p/hugohugo--github-免费部署自己的博客/5pageNotFind.png)
------
### 配置主题
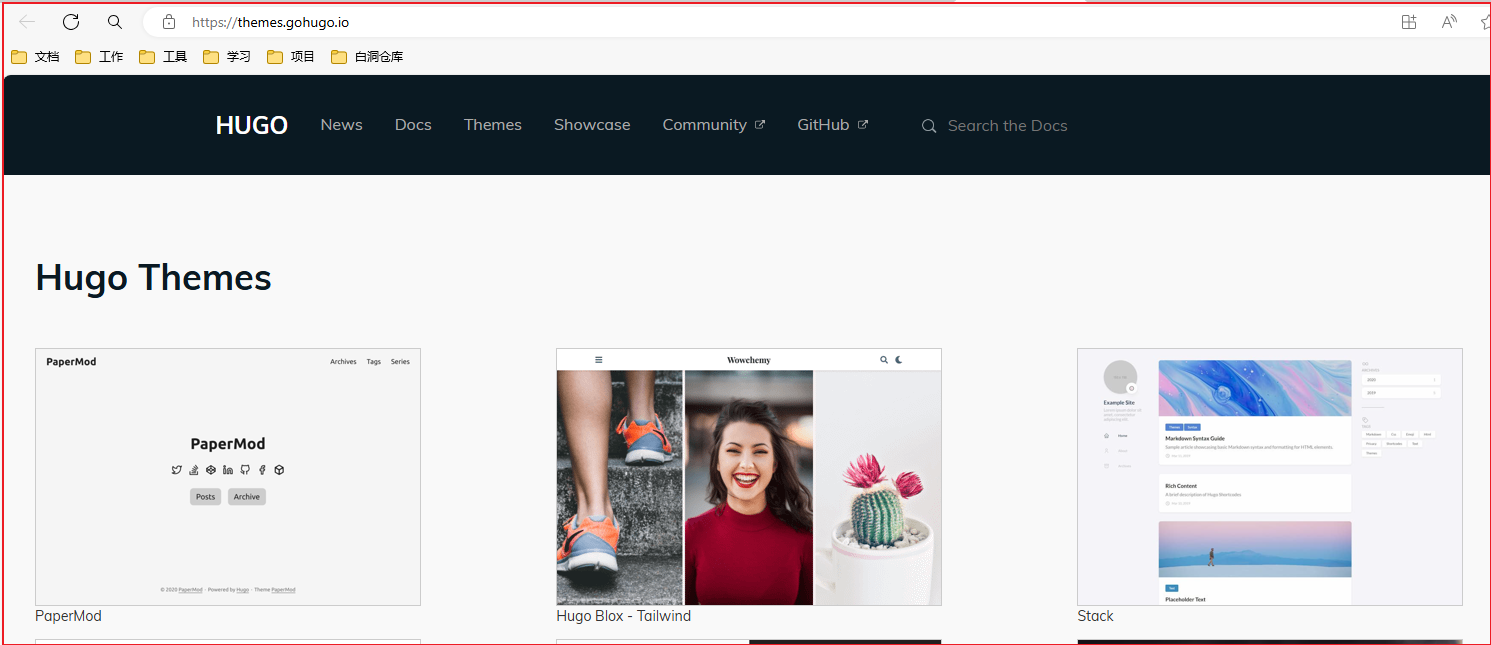
- (1)前往【[Hugo Themes](https://themes.gohugo.io/)】,查找自己喜欢的主题,进行下载
[](https://letere-gzj.github.io/hugo-stack/p/hugohugo--github-免费部署自己的博客/1.1hugo主题下载.png)
- (2)这边以【[Stack主题](https://github.com/CaiJimmy/hugo-theme-stack/tags)】为例,将下载好的主题解压,放到`/themes`文件夹中
[](https://letere-gzj.github.io/hugo-stack/p/hugohugo--github-免费部署自己的博客/1.2主题解压.png)
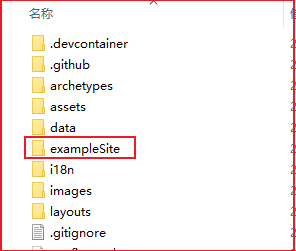
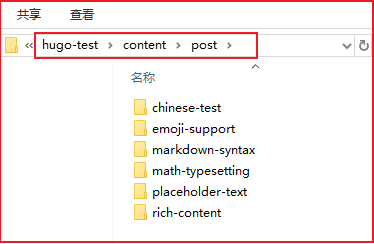
- (3)将`exampleSite`样例数据中的 **Content** 和 **hugo.yaml** 复制到主文件夹中,并删掉`hugo.toml`和`content/post/rich-content`
[](https://letere-gzj.github.io/hugo-stack/p/hugohugo--github-免费部署自己的博客/1.3主题复制1.png)
[](https://letere-gzj.github.io/hugo-stack/p/hugohugo--github-免费部署自己的博客/1.4主题复制2.png)
- (4)修改 **hugo.yaml** 中的 **theme**,将他修改为跟主题文件夹同名
[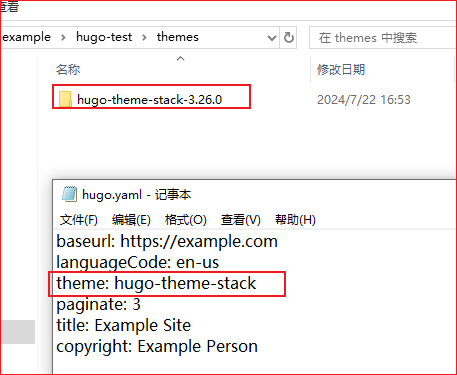](https://letere-gzj.github.io/hugo-stack/p/hugohugo--github-免费部署自己的博客/1.5主题名修改.png)
- (5)再次启动hugo服务,查看主题,具体主题配置修改 **hugo.yaml**,这里不细说,感兴趣可自行查找相关文章
[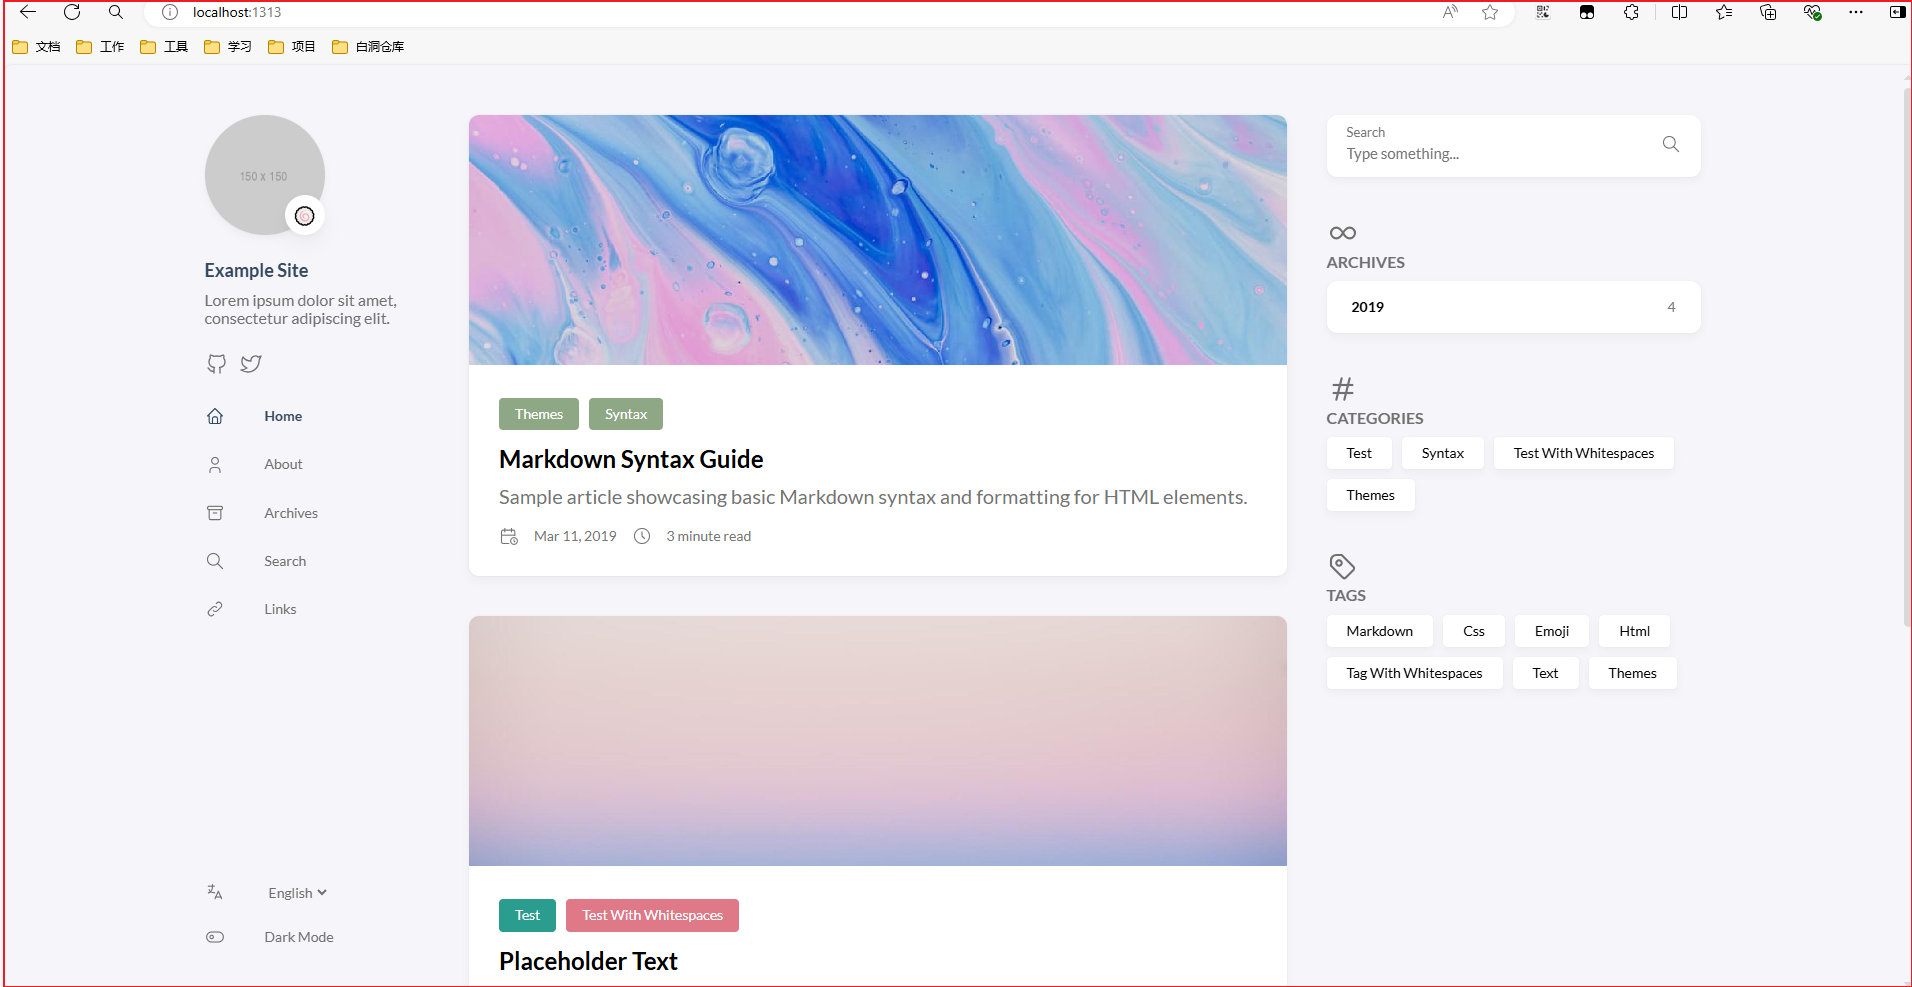](https://letere-gzj.github.io/hugo-stack/p/hugohugo--github-免费部署自己的博客/stack主题.png)
------
## Github部署
### 常规部署
- (1)前往【[Github官网](https://github.com/)】,创建仓库 **{github用户名}.github.io**
[](https://letere-gzj.github.io/hugo-stack/p/hugohugo--github-免费部署自己的博客/github仓库创建.png)
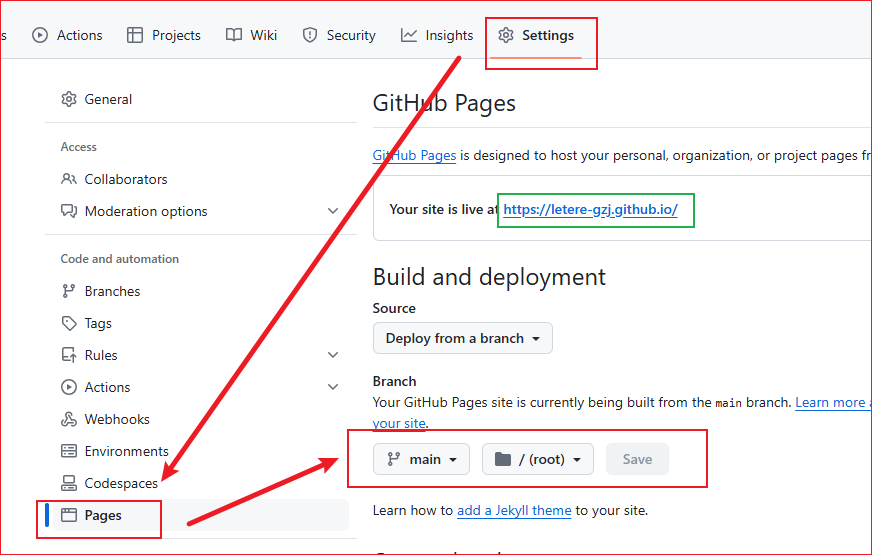
- (2)前往`Setting -> Pages -> Branch`选择main分支,然后保存,会自动开启 **https://{github用户名}.github.io** 的地址,这地址也是以后访问博客的地址
[](https://letere-gzj.github.io/hugo-stack/p/hugohugo--github-免费部署自己的博客/githubPage启动.png)
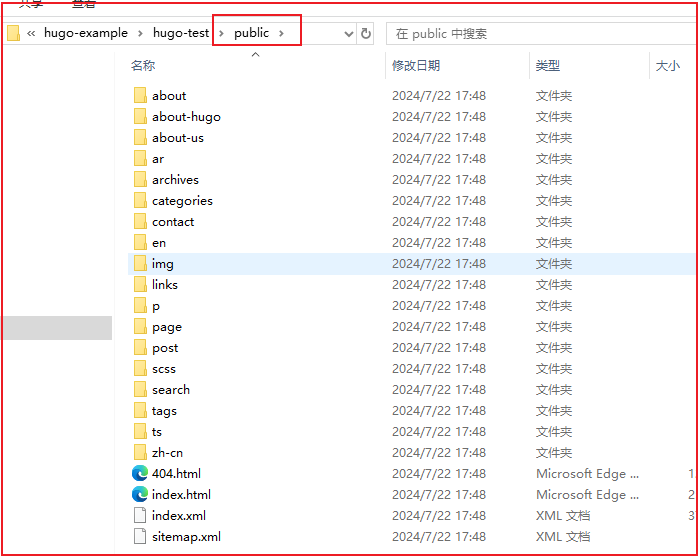
- (3)回到hugo文件中,执行命令`hugo -D`,会生成 **public** 静态资源文件夹
[](https://letere-gzj.github.io/hugo-stack/p/hugohugo--github-免费部署自己的博客/生成静态文件.png)
- (4)在 **public** 执行以下命令上传到github仓库上,第一次上传可能需要输入账号密码
```shell
git init
git add .
git commit -m "first commit"
git branch -M main
git remote add origin {你的github仓库地址}
git push -u origin main
```
- (5)上传成功后访问 **https://{github用户名}.github.io**,成功搭建属于自己的Hugo博客
### Github Action自动部署
- (1)Github创建一个新的仓库,用于存放Hugo的主文件
- (2)前往`Setttings -> Developer Settings -> Personal access tokens`,创建一个token(classic)
[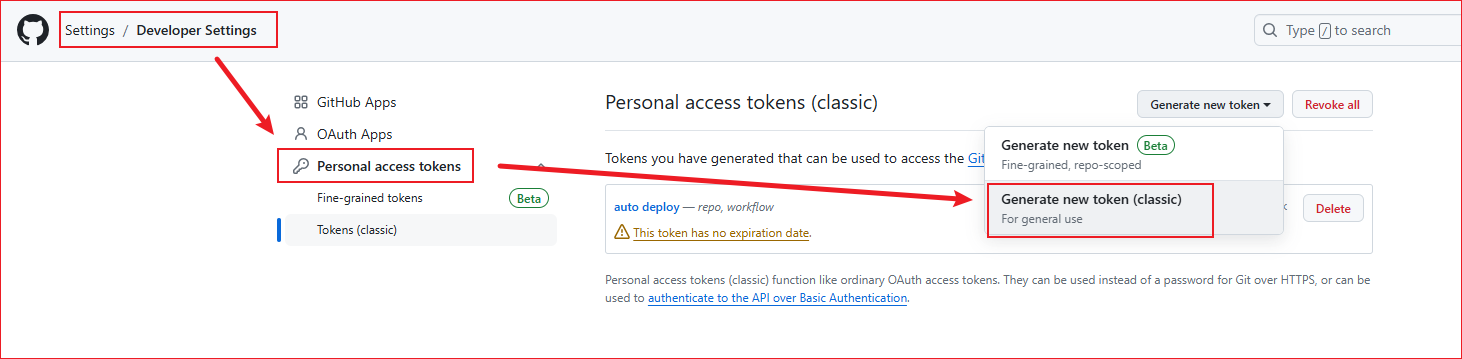](https://letere-gzj.github.io/hugo-stack/p/hugohugo--github-免费部署自己的博客/createToken1.png)
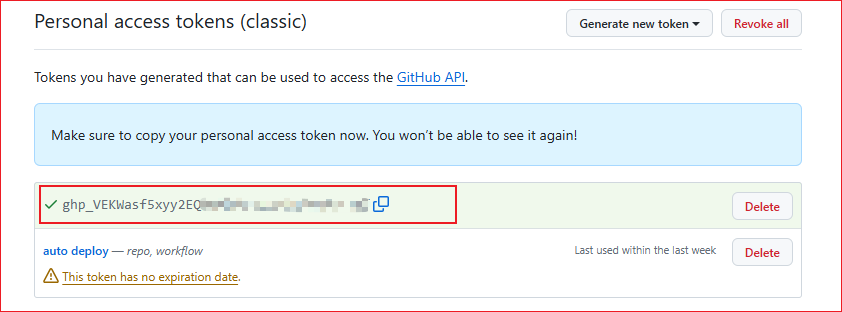
- (3)token选择永不过期,并勾选 **repo** 和 **workflow** 选项
[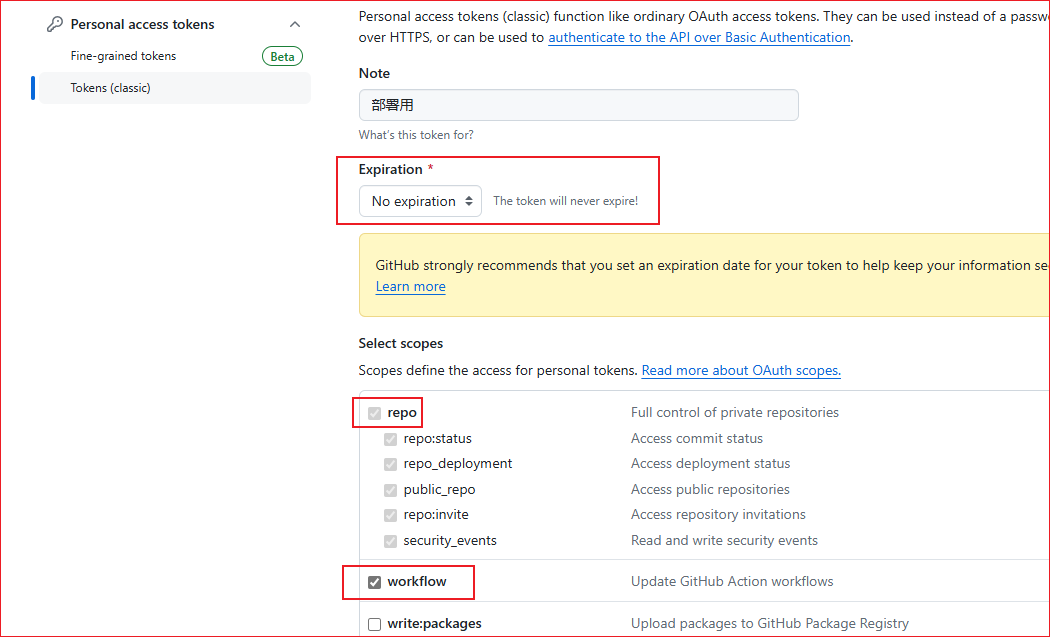](https://letere-gzj.github.io/hugo-stack/p/hugohugo--github-免费部署自己的博客/createToken2.png)
- (4)为保证安全,将生成的token,保存的仓库的变量中,前往`Settings -> Secrets and variables -> Actions`中设置
[](https://letere-gzj.github.io/hugo-stack/p/hugohugo--github-免费部署自己的博客/createToken3.png)
[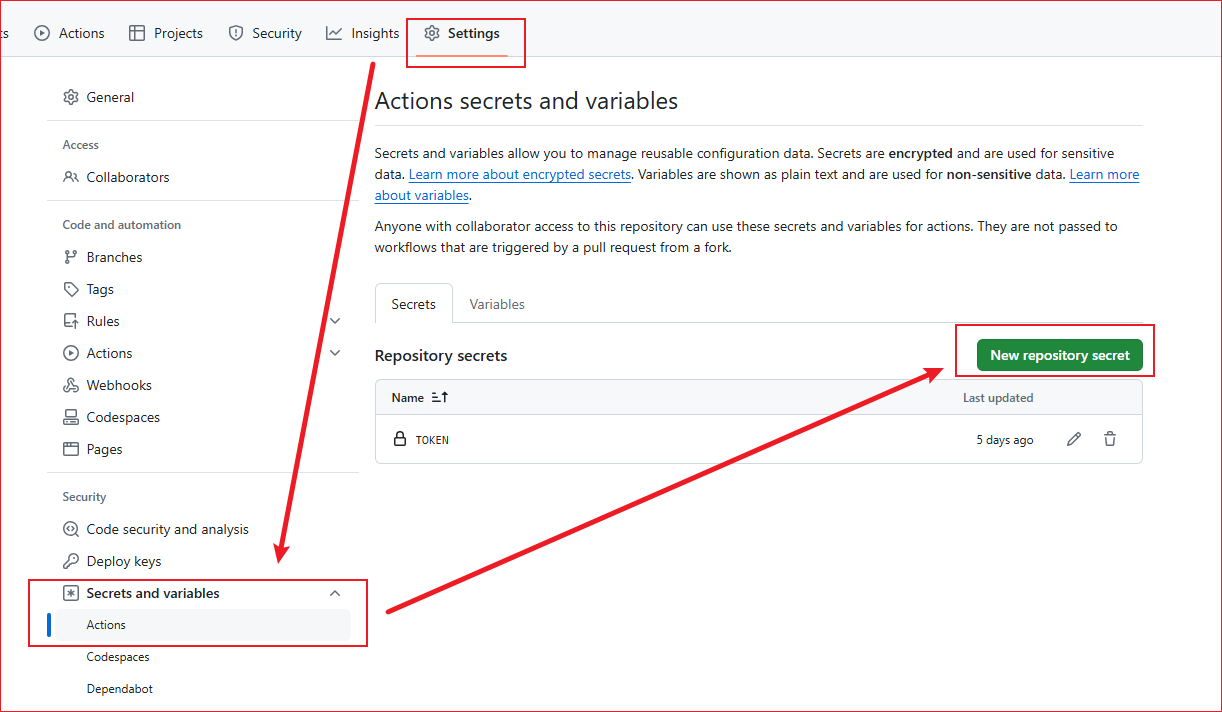](https://letere-gzj.github.io/hugo-stack/p/hugohugo--github-免费部署自己的博客/setToken1.png)
- (5)在hugo主文件创建一个`.github/workflows/xxxx.yaml`文件,将以下内容复制进去,想具体了解更多,可查看【[Github Action文档](https://docs.github.com/zh/actions)】
```yaml
name: deploy
# 代码提交到main分支时触发github action
on:
push:
branches:
- main
jobs:
deploy:
runs-on: ubuntu-latest
steps:
- name: Checkout
uses: actions/checkout@v4
with:
fetch-depth: 0
- name: Setup Hugo
uses: peaceiris/actions-hugo@v3
with:
hugo-version: "latest"
extended: true
- name: Build Web
run: hugo -D
- name: Deploy Web
uses: peaceiris/actions-gh-pages@v4
with:
PERSONAL_TOKEN: ${{ secrets.你的token变量名 }}
EXTERNAL_REPOSITORY: 你的github名/你的仓库名
PUBLISH_BRANCH: main
PUBLISH_DIR: ./public
commit_message: auto deploy
```
- (6)在hugo主文件创建`.gitignore`文件,来避免提交不必要的文件
```shell
# 自动生成的文件
public
resources
.hugo_build.lock
# hugo命令
hugo.exe
```
- (7)将hugo的主文件上传到仓库,上传成功后会触发Github Action,来自动部署你的静态页面
```shell
git init
git add .
git commit -m "first commit"
git branch -M main
git remote add origin {你的github仓库地址}
git push -u origin main
```
[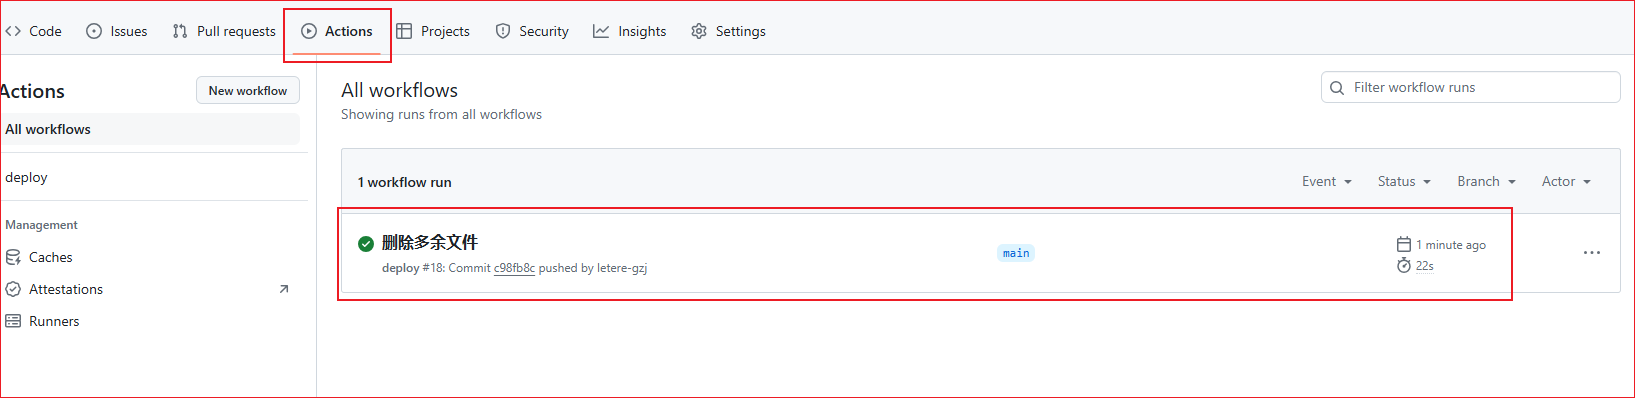](https://letere-gzj.github.io/hugo-stack/p/hugohugo--github-免费部署自己的博客/githubActionRun.png)
### 脚本控制部署
做GitHub action自动化流程控制任务时,发现上传文件的时候并不符合,既然依旧需要git push进行上传,何不用脚本来进行编写控制能,还省去一堆麻烦
#### shell脚本
```shell
//删除public文件夹
rf -rf D:\hugo\qingjiegong\public
//hugo生成站点文件
hugo -D
//GitHub上传更新
cd public
git init
git add .
git commit -m "update"
//git branch -M master //master还是main分支看自己部署时的存放路径
//git remote add origin https://你的GitHub仓库名.git
//git push -u origin master
git push
```
#### bat脚本
Windows系统采用bat脚本,文件后缀名为.bat
```powershell
//删除public文件夹
rd /s /q D:\hugo\qingjiegong\public
//hugo生成站点文件
hugo -D
//GitHub上传更新
cd public
git init
git add .
git commit -m "update"
//git branch -M master //master还是main分支看自己部署时的存放路径
//git remote add origin https://你的GitHub仓库名.git
//git push -u origin master
git push
```
## 音乐播放器设置
### 引入音乐播放器
- 【[Aplayer官方文档](https://aplayer.js.org/#/zh-Hans/)】
| 名称 | 默认值 | 描述 |
| :-------------- | :--------------------------------- | :----------------------------------------------------------- |
| container | document.querySelector(’.aplayer') | 播放器容器元素 |
| fixed | false | 开启吸底模式, [详情](https://aplayer.js.org/#/home?id=fixed-mode) |
| mini | false | 开启迷你模式, [详情](https://aplayer.js.org/#/home?id=mini-mode) |
| autoplay | false | 音频自动播放 |
| theme | ‘#b7daff’ | 主题色 |
| loop | ‘all’ | 音频循环播放, 可选值: ‘all’, ‘one’, ’none’ |
| order | ’list’ | 音频循环顺序, 可选值: ’list’, ‘random’ |
| preload | ‘auto’ | 预加载,可选值: ’none’, ‘metadata’, ‘auto’ |
| volume | 0.7 | 默认音量,请注意播放器会记忆用户设置,用户手动设置音量后默认音量即失效 |
| audio | - | 音频信息, 应该是一个对象或对象数组 |
| audio.name | - | 音频名称 |
| audio.artist | - | 音频艺术家 |
| audio.url | - | 音频链接 |
| audio.cover | - | 音频封面 |
| audio.lrc | - | [详情](https://aplayer.js.org/#/home?id=lrc) |
| audio.theme | - | 切换到此音频时的主题色,比上面的 theme 优先级高 |
| audio.type | ‘auto’ | 可选值: ‘auto’, ‘hls’, ’normal’ 或其他自定义类型, [详情](https://aplayer.js.org/#/home?id=mse-support) |
| customAudioType | - | 自定义类型,[详情](https://aplayer.js.org/#/home?id=mse-support) |
| mutex | true | 互斥,阻止多个播放器同时播放,当前播放器播放时暂停其他播放器 |
| lrcType | 0 | [详情](https://aplayer.js.org/#/home?id=lrc) |
| listFolded | false | 列表默认折叠 |
| listMaxHeight | - | 列表最大高度 |
| storageName | ‘aplayer-setting’ | 存储播放器设置的 localStorage key |
- (1)在博客主目录中创建文件`layouts\partials\footer\custom.html`,此文件为Stack主题作者留给我们加入自定义组件用的文件(可以查看主题源码同路径文件找到) 
- (2)查看官方文档,引入对应的脚本,css到`custom.html`中,页面最下面就会出现音乐播放器
```html
<!-- 【custom.html】 -->
<link rel="stylesheet" href="https://cdn.jsdelivr.net/npm/aplayer/dist/APlayer.min.css">
<div id="aplayer"></div>
<script src="https://cdn.jsdelivr.net/npm/aplayer/dist/APlayer.min.js"></script>
<script>
const ap = new APlayer({
container: document.getElementById('aplayer'),
audio: []
});
</script>
```
[](https://letere-gzj.github.io/hugo-stack/p/hugoaplayer--pjax-引入音乐播放放器并实现音乐不中断功能/音乐播放器引入2.png)
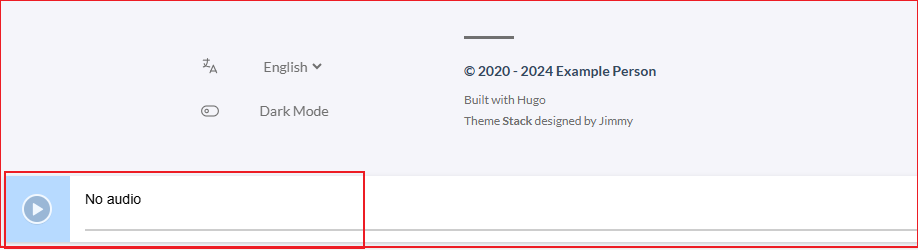
- (3)修改 **ap对象** 配置,改成吸底模式
```html
const ap = new APlayer({
...,
// 吸底模式
fixed: true
});
```
[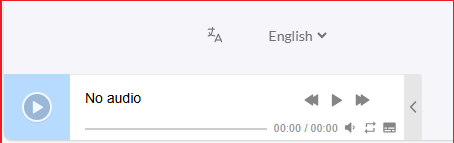](https://letere-gzj.github.io/hugo-stack/p/hugoaplayer--pjax-引入音乐播放放器并实现音乐不中断功能/音乐播放器引入3.png)
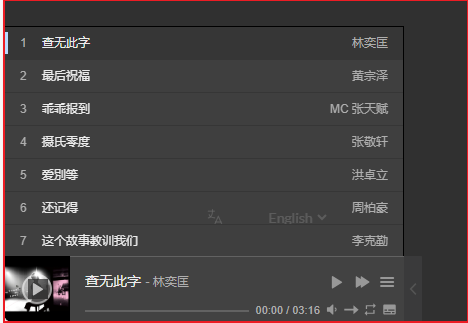
- (4)填写 audio 数组,引入歌曲,封面和歌词
- **lrcType** 的值具体看【[文档](https://aplayer.js.org/#/zh-Hans/?id=歌词)】
- 歌曲,封面,歌词支持远程链接 or 本地路径
- 若想通过本地路径引入,请将资源文件放在`static`文件夹下,通过hugo方法`{{ .Site.Home.Permalink }}`,获取网站主路径来拼接文件路径,进行引入
```html
const staticDir = {{ .Site.Home.Permalink }}
const ap = new APlayer({
...,
lrcType: 3,
audio: [
{
name: 'name', // 歌名
artist: 'artist', // 歌手
url: 'url.mp3', // 歌曲路径
cover: 'cover.jpg', // 封面路径
lrc: 'lrc.lrc', // 歌词路径
},
{
// 本地路径引入写法(有子目录就在staticDir后面继续拼接)
name: 'name',
artist: 'artist',
url: staticDir + 'url.mp3',
cover: staticDir + 'cover.jpg',
lrc: staticDir + 'lrc.lrc',
}
]
});
```
[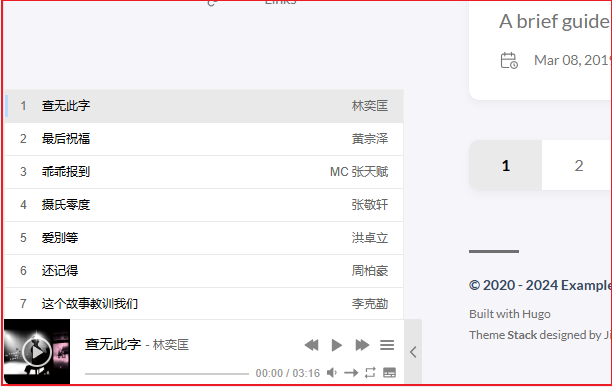](https://letere-gzj.github.io/hugo-stack/p/hugoaplayer--pjax-引入音乐播放放器并实现音乐不中断功能/音乐播放器引入4.png)
***到这一步音乐播放器已经引入完了***
### 音乐播放器样式切换
- (1)通过阅读Stack主题的源码可以看到,主题样式的切换是通过`[data-scheme="light/darck"] {...}`
- (2)所以我们可以准备两种Aplayer的css,用`[data-scheme="light"]{ 亮的css样式 }`包裹亮的,用`[data-scheme="dark"]{ 暗的css样式 }`包裹暗的,这里直接给各位准备好了
- [aplayer-light.scss](https://letere-gzj.github.io/hugo-stack/p/hugoaplayer--pjax-引入音乐播放放器并实现音乐不中断功能/aplayer-light.scss)(Ctrl+S保存)
- [aplayer-dark.scss](https://letere-gzj.github.io/hugo-stack/p/hugoaplayer--pjax-引入音乐播放放器并实现音乐不中断功能/aplayer-dark.scss)(Ctrl+S保存)
- (3)在博客主目录中创建文件`assets\scss\custom.scss`,此文件为Stack主题作者留给我们加入自定义样式用的文件(可以查看主题源码同路径文件找到) 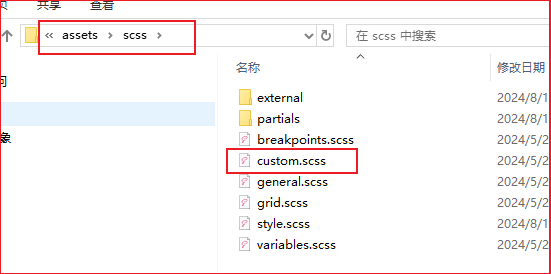
- (4)将上述两个scss文件放到跟 **custom.scss**同目录下,并通过`@import`来进行引入文件
```scss
/**
* 【custom.scss】
*/
@import "aplayer-light.scss";
@import "aplayer-dark.scss";
```
- (5)因为音乐播放器的css改为我们本地文件引入了,所以 **custom.html** 中的link标签可以将它注释掉或者删掉了
```html
<!-- custom.html -->
...
<!-- <link rel="stylesheet" href="https://cdn.jsdelivr.net/npm/aplayer/dist/APlayer.min.css"> -->
```
[](https://letere-gzj.github.io/hugo-stack/p/hugoaplayer--pjax-引入音乐播放放器并实现音乐不中断功能/播放器样式切换2.png)
***到这一步样式随主题切换已经完成了***
------
### 音乐播放进度保留
- (1)实现思路:页面切换前,把歌曲的 **歌曲序号**,**播放时长**,**播放状态** 记录下来;在页面切换加载完之后,我们调用Aplayer的接口切换歌曲,调整时长,并选择播放or暂停
- (2)通过`console.log(ap)`打印ap对象,或者官方文档,可以找到我们需要的参数
- **list.index**:歌曲序号
- **audio.currentTime**:播放时长
- **paused** :播放状态(是否暂停) 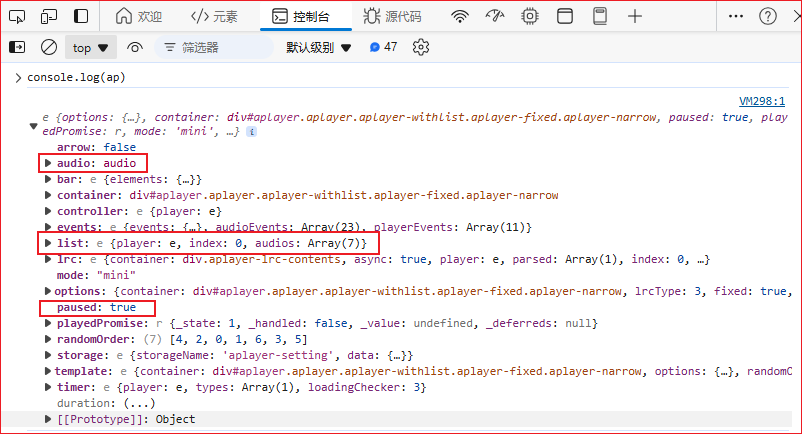
- (3)通过【[官方文档](https://aplayer.js.org/#/zh-Hans/?id=api)】可以查找到我们需要调用的接口
- **ap.list.switch(index: number)**:切换歌曲
- **ap.seek(time: number)**:调整时长
- **ap.play()**:播放歌曲
- (4)需要的东西已经找齐,只需在 **custom.html** 加入以下代码即可
```html
<!-- 【custom.html】 -->
...
<script>
...
/**
* 页面销毁前监听
*/
window.onbeforeunload = () => {
// 将播放信息用对象封装,并存入到localStorage中
const playInfo = {
index: ap.list.index,
currentTime: ap.audio.currentTime,
paused: ap.paused
};
localStorage.setItem("playInfo", JSON.stringify(playInfo));
};
/**
* 页面加载后监听
*/
window.onload = () => {
// 从localStorage取出播放信息
const playInfo = JSON.parse(localStorage.getItem("playInfo"));
if (!playInfo) {
return;
}
// 切换歌曲
ap.list.switch(playInfo.index);
// 等待500ms再执行下一步(切换歌曲需要点时间,不能立马调歌曲进度条)
setTimeout(() => {
// 调整时长
ap.seek(playInfo.currentTime);
// 是否播放
if (!playInfo.paused) {
ap.play()
}
}, 500);
};
</script>
```
### 引入PJAX
#### 基本引入
- (1)PJAX主要分为两个版本,**带JQuery** 和 **不带JQuery**的,下面我演示的是不带JQuery版本的
- 【[defunkt/jquery-pjax](https://github.com/defunkt/jquery-pjax)】(带JQuery)
- 【[MoOx/pjax](https://github.com/MoOx/pjax)】(不带JQuery)
- (2)分析页面元素,看哪些是需要我们重新加载的,可以发现是**左侧边栏**,**中间内容**,**右侧边栏** 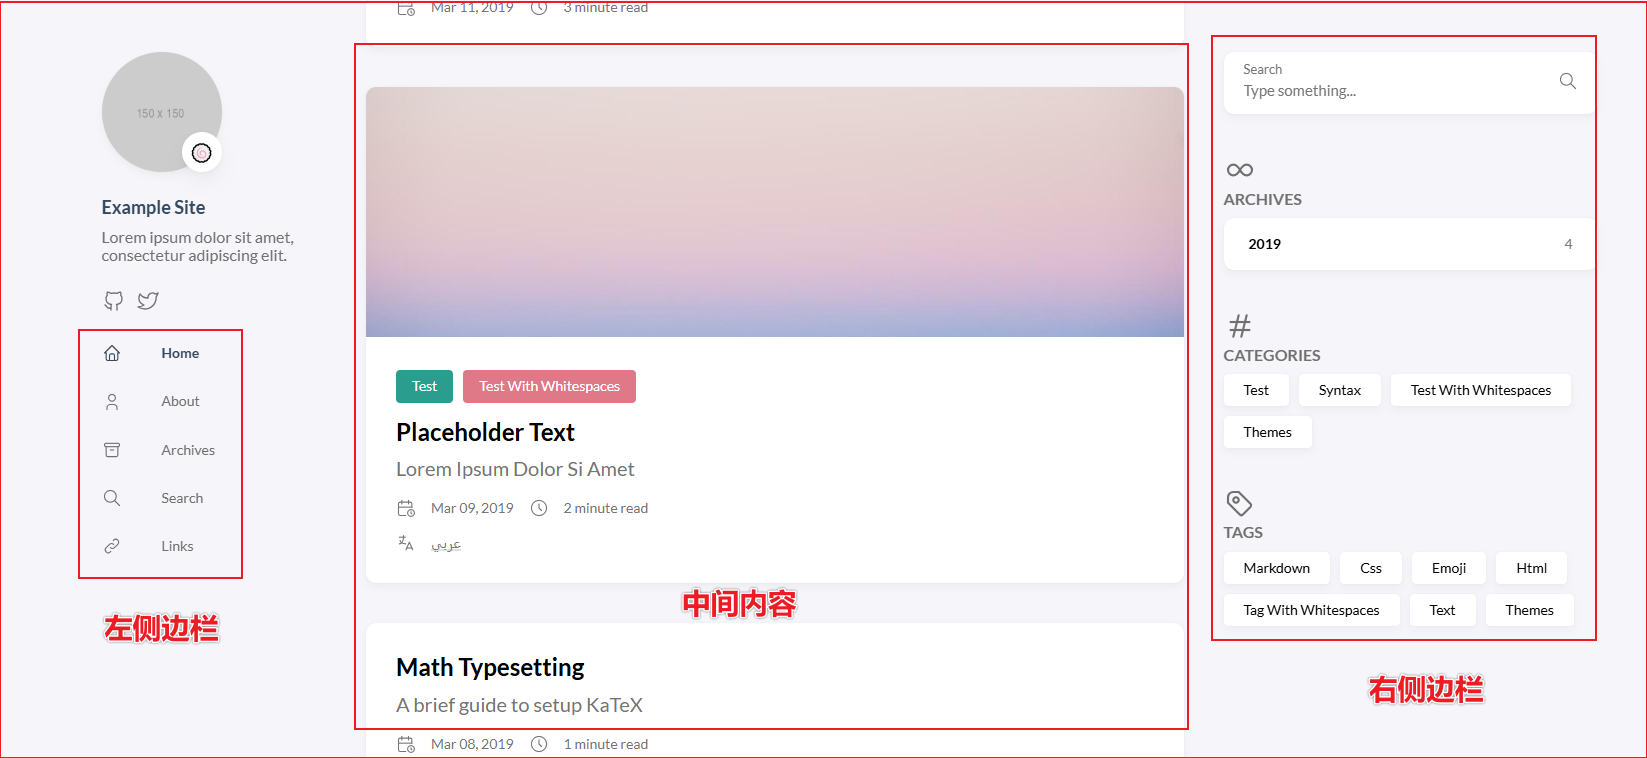
- (3)查看页面源代码,可以发现这些元素都被一个`<div class="main-container">...</div>`包裹着,所以我们将着元素定为要刷新的对象 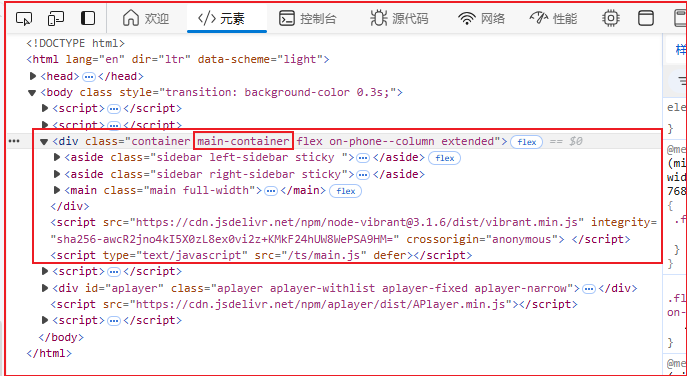
- (4)根据官方文档,在 **custom.html** 加入以下代码来引入PJAX
```html
<!-- 【custom.html】 -->
...
<script src="https://cdn.jsdelivr.net/npm/pjax/pjax.min.js"></script>
<script>
var pjax = new Pjax({
selectors: [
".main-container"
]
})
</script>
```
***这样算是已经基本引入了PJAX,但也带来了不少问题,我们一步一步进行修复***
------
#### 文章样式修复
- (1)随便点进其中一篇文章,可以发现文章内容的样式丢失,缺少文章该有的边框 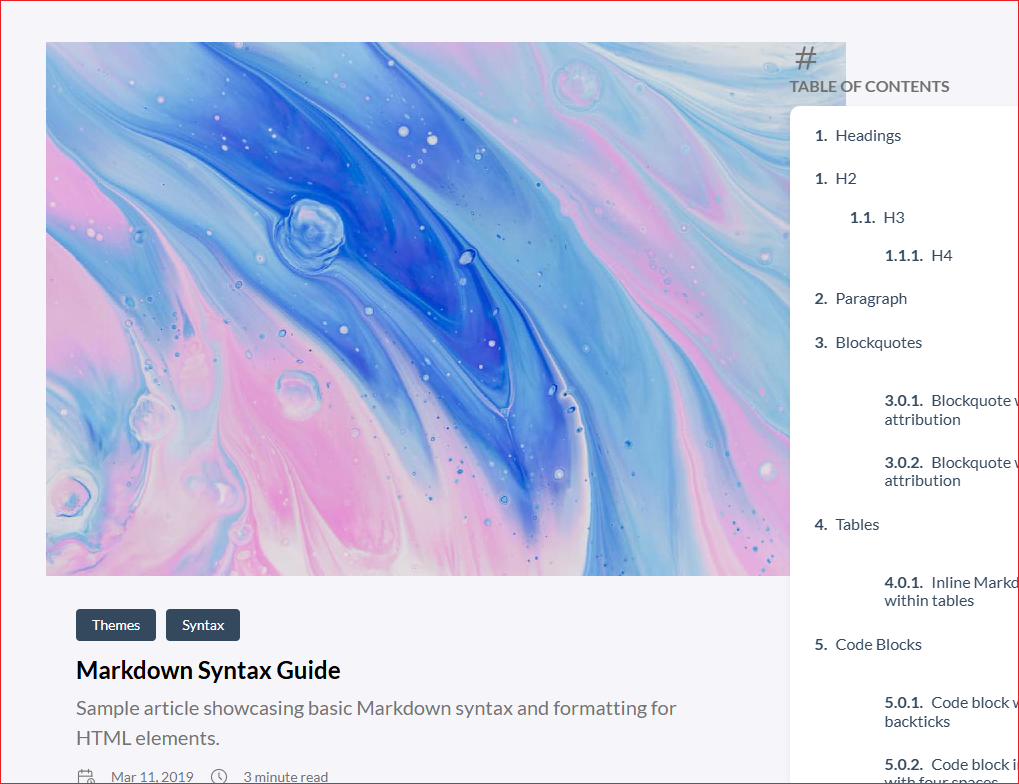
- (2)通过手动刷新,对比页面元素发现,决定文章样式的是`<body>` 标签中的class名: **article-page**,存在此class名就会识别到文章该有的css 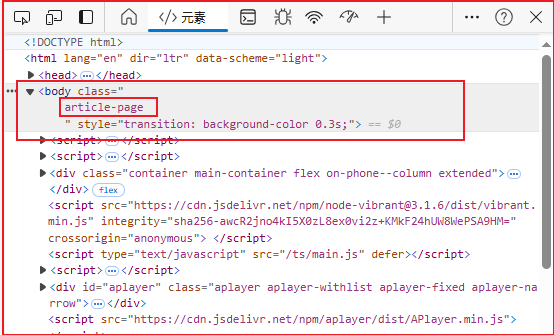
- (3)因为`<body>`内包含整个页面的所有内容,包括我们的音乐播放器,所以不能让PJAX监听`<body>`标签
- 阅读官方文档发现,官方提供了数据预处理方法,让我们处理数据
- 我们通过预处理数据,获取到新页面的className,然后我们手动将这className设置到`<body>`上
```html
<!-- 【custom.html】 -->
...
<script>
...
pjax._handleResponse = pjax.handleResponse;
pjax.handleResponse = function(responseText, request, href, options) {
if (request.responseText.match("<html")) {
// 将新页面的html字符串解析成DOM对象
let newDom = new DOMParser().parseFromString(responseText, 'text/html');
// 获取新页面中body的className,并设置回当前页面
let bodyClass = newDom.body.className;
document.body.setAttribute("class", bodyClass)
// 放行pjax处理
pjax._handleResponse(responseText, request, href, options);
} else {
// handle non-HTML response here
}
}
</script>
```
***这样我们切页面后,都会自动把body中的className更新,就不会丢失样式了***
------
#### 主题切换修复
- (1)当我们切换页面后,点击左下角切换主题颜色的按钮,会发现没有效果,主题颜色切换失效了 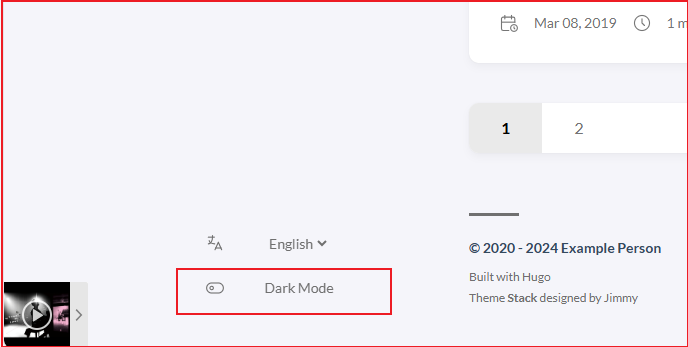
- (2)阅读Stack主题源码`\assets\ts\colorScheme.ts`发现,在脚本初始化时,会给元素绑定一个点击事件。但因为页面切换了,替换了该元素,但没有该元素重新绑定点击事件,导致点击主题切换失效 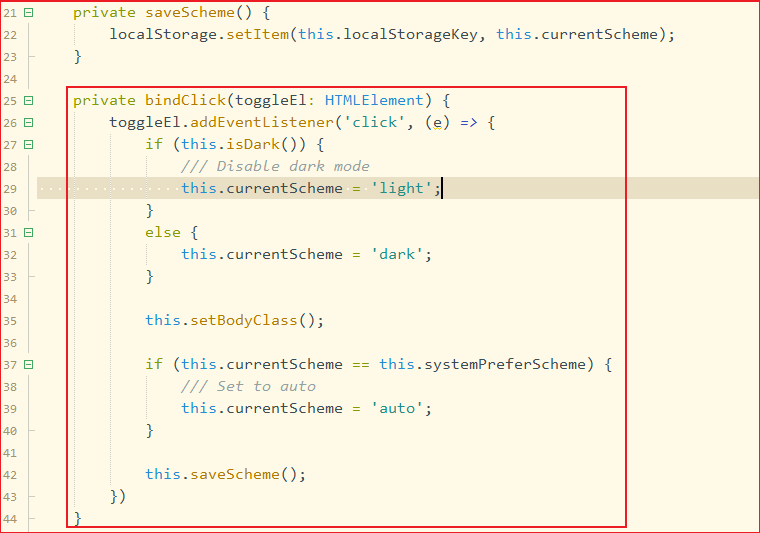
- (3)解决思路:在PJAX切换完页面后,重新执行一遍`colorScheme.ts`的初始化,使元素重新绑定点击事件。
- 阅读源码,发现`colorScheme.ts`被`main.ts`引用,在`main.ts`中执行了初始化,并且`main.ts`生成了个全局变量 **Stack**
- 所以在PJAX执行完后,使用全局变量 **Stack** ,执行里面的初始化方法,重新执行一遍脚本,来绑定点击事件
- 阅读PJAX文档,发现官方也提供了PJAX执行完后的事件,我们执行监听这个事件,**Stack** 执行初始化就好 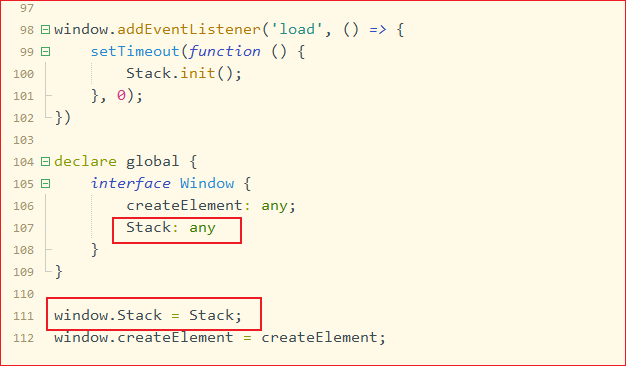 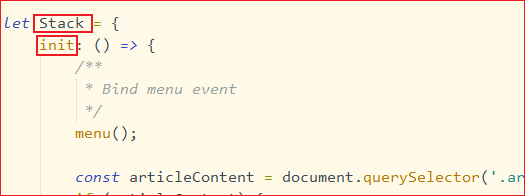
```html
<!-- 【custom.html】 -->
...
<script>
...
document.addEventListener('pjax:complete', () => {
// Stack脚本初始化
window.Stack.init();
})
</script>
```
***这样元素的点击事件重新绑定,主题颜色就能正常切换了***
------
#### 文章搜索修复
- (1)使用文章搜索功能时,输入关键词,无任何搜索记录,搜索功能失效 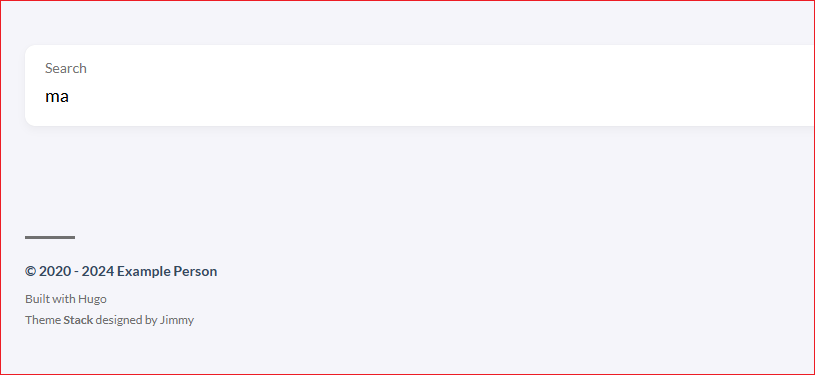
- (2)查看`layouts\ts\search.tsx`文件,发现情况和上面的`colorScheme.ts`类似,存在绑定事件 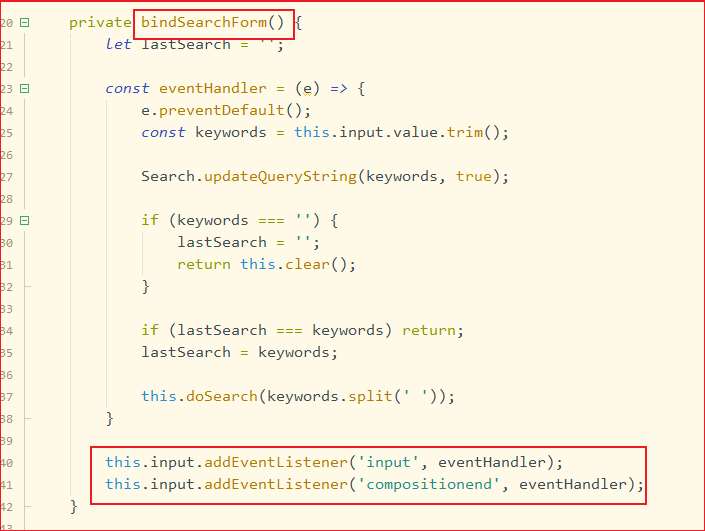
- (3)解决思路类似上面的,把 **search.tsx** 初始化内容,封装为一个函数,并把函数 **export** 出来,由 **main.ts** 引入这个函数,并放到 **Stack.init()** 的方法中,利用此方法来重新初始化搜索脚本 - ***(以下操作请复制同路径同名文件到自己主目录下修改,不要在主题源码中修改)*** 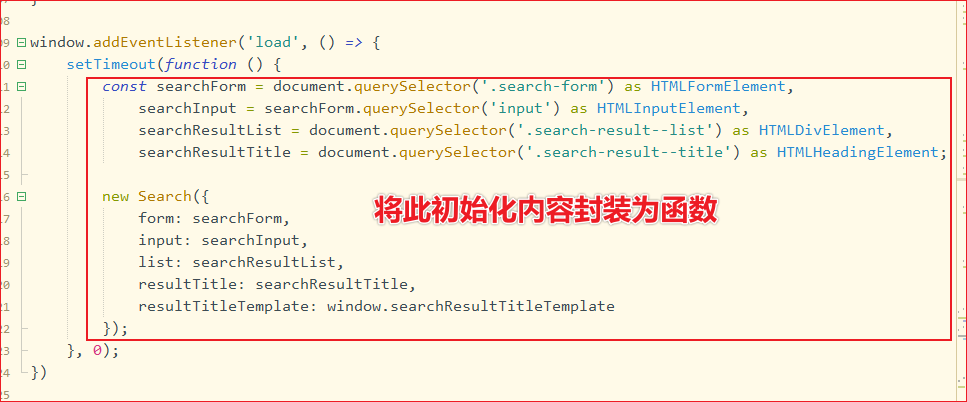
```html
/**
* 【search.tsx】
* 记得把window.addEventListener('load' ...这部分代码注释掉
* 初始化工作交给Stack.init()处理了,不需要这个了
*/
...
function searchInit() {
let search = document.querySelector('.search-result');
if (search) {
const searchForm = document.querySelector('.search-form') as HTMLFormElement,
searchInput = searchForm.querySelector('input') as HTMLInputElement,
searchResultList = document.querySelector('.search-result--list') as HTMLDivElement,
searchResultTitle = document.querySelector('.search-result--title') as HTMLHeadingElement;
new Search({
form: searchForm,
input: searchInput,
list: searchResultList,
resultTitle: searchResultTitle,
resultTitleTemplate: window.searchResultTitleTemplate
});
}
}
export {
searchInit
}
```
- (4)**tsx** 类型的文件引入方式有点特殊,需要我们修改以下 **main.ts** 的引入方式,修改`layouts\partials\footer\components\script.html`,改法参考`layouts\page\search.html`,把`"JSXFactory" "createElement"`补充上就好  
[](https://letere-gzj.github.io/hugo-stack/p/hugoaplayer--pjax-引入音乐播放放器并实现音乐不中断功能/文章搜索修复6.png)
***这样search.tsx能正常初始化,文章搜索功能恢复***
------
#### 搜索内容跳转修复
- (1)虽然文章搜索已经修复了,但搜索出来的内容并没有被PJAX识别到,导致PJAX没有拦截,进而导致页面刷新了
- (2)阅读 **search.tsx** 源码可知,搜索内容的数据,是通过React.render,动态渲染回页面的,这些没有触发PJAX,所以PJAX没有识别到。阅读PJAX文档,官方提供给了我们重新解析数的方法,所以在React.render之后,我调用PJAX方法,重新解析页面即可 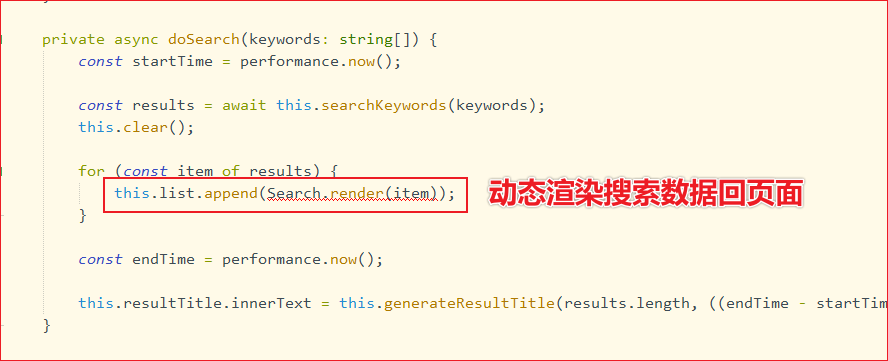
```tsx
/**
* 【search.tsx】
*/
private async doSearch(keywords: string[]) {
...
/*
方法末尾,让pjax重新解析文档数据,识别动态渲染的数据
虽然当前文件没有pjax对象,但最后静态页面会生成一个整体的js文件
pjax对象那时就能识别到,就可成功调用
*/
pjax.refresh(document);
}
```
***这样动态渲染出的页面数据就能被PJAX识别到,就不会刷新页面跳转了***
------
#### 文章评论修复
- (1)如果博客有开启评论功能的话,会发现评论的脚本不生效了
- (2)由于每个人使用的评论种类各不相同,所以这边也是简单说一下。PJAX官方文档也有说如何处理:
- 用一个`<div class=js-Pjax></div>`来包裹一个`<script></script>`
- 在`<script>`标签中,通过`document.createElement('script')`形式,创建对应的评论脚本内容
- pjax对象通过 **.js-Pjax** 被识别到此内容,进行脚本执行 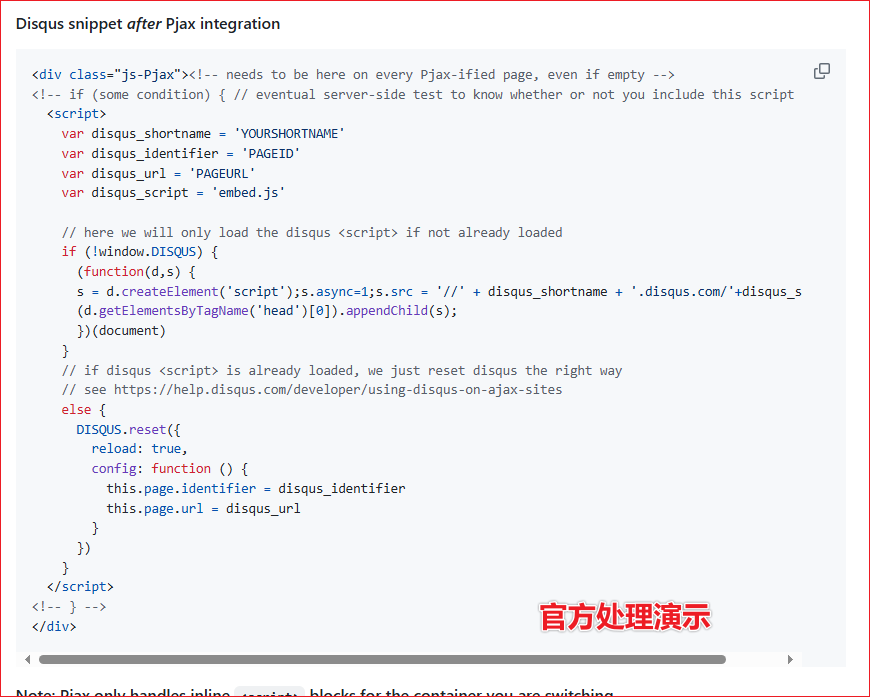
```html
<!-- custom.html -->
...
<script>
var pjax = new Pjax({
selectors: [
...
".js-Pjax"
]
})
</script>
<div class="js-Pjax">
<script>
// TODO: 判断当前是否是文档,且是否开启评论功能
(function() {
let script = document.createElement('script');
// 将对应评论的脚本内容填进去
script.setAttribute('key', 'value');
...
// 寻找合适的元素,添加脚本进去
document.querySelector('xxx').appendchild(script)
})(document)
</script>
<div>
```
***这样PJAX会自动加载我们的评论脚本***
------
## 引入进度条
- (1)由于使用了PJAX后,无法得知页面的加载情况是否完成,所以引入一个伪进度条,来显示页面内容进度
- (2)前往【[topbar](https://buunguyen.github.io/topbar/)】,点击下载zip包,将解压后的 **topbar.min.js** 放到`assets\js\topbar.min.js` 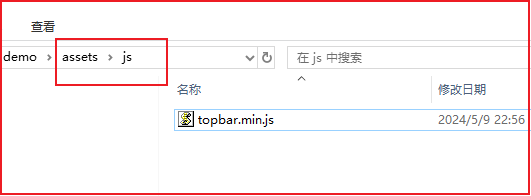
- (3)通过监听PJAX两个事件 **pjax:send** 和 **pjax:complete** 实现伪进度条
```html
<!--custom.html-->
...
{{ with resources.Get "js/topbar.min.js" }}
<!-- 引入本地JS脚本 -->
<script src={{ .Permalink }}></script>
{{ end }}
<script>
// 修改进度条颜色
topbar.config({
barColors: {
'0': 'rgba(255, 255, 255, 1)', // 进度0%白色
'1.0': 'rgba(0, 149, 234, 1)' // 进度100%蓝色
}
})
document.addEventListener('pjax:send', () => {
// 显示顶部进度条
topbar.show();
})
document.addEventListener('pjax:complete', () => {
....
// 隐藏顶部进度条
topbar.hide();
})
</script>
```
[](https://letere-gzj.github.io/hugo-stack/p/hugoaplayer--pjax-引入音乐播放放器并实现音乐不中断功能/引入进度条2.png)
***这样伪进度条就成功引入了,能大概知道页面的加载情况了***
## 配置页面项目
官方文档:https://stack.jimmycai.com/config/menu
如果添加的是自己博客的一个页面,可以在这个页面的 md 文件的 Front Matter 中添加以下内容:
```yaml
menu:
main:
name: # 名称
weight: -90
params:
icon: # 图标名称
```
如果不是博客的一个页面,那么在 theme文件夹的config.yaml 中的 menu 部分下添加以下代码:
```yaml
menu:
main:
- identifier:
name:
url:
weight:
params:
icon:
newTab:
```
> `identifier`: 项目名
>
> `name`: 显示名称
>
> `url`: 链接
>
> `weight`: 优先级,数值越低优先级越大
>
> params:
>
> `icon`: 自定义图标
>
> `newTab`: 是否在新标签页打开
> icon图标存放在`根目录\assets\icons`文件夹下
## 全局配置
### 零碎玩意
在 `/assets/scss/custom.scss` 中加入以下代码:
```scss
// 页面基本配色
:root {
// 全局顶部边距
--main-top-padding: 30px;
// 全局卡片圆角
--card-border-radius: 25px;
// 标签云卡片圆角
--tag-border-radius: 8px;
// 卡片间距
--section-separation: 40px;
// 全局字体大小
--article-font-size: 1.8rem;
// 行内代码背景色
--code-background-color: #f8f8f8;
// 行内代码前景色
--code-text-color: #e96900;
// 暗色模式下样式
&[data-scheme="dark"] {
// 行内代码背景色
--code-background-color: #ff6d1b17;
// 行内代码前景色
--code-text-color: #e96900;
}
}
//------------------------------------------------------
// 修复引用块内容窄页面显示问题
a {
word-break: break-all;
}
code {
word-break: break-all;
}
//---------------------------------------------------
// 文章内容图片圆角阴影
.article-page .main-article .article-content {
img {
max-width: 96% !important;
height: auto !important;
border-radius: 8px;
}
}
//------------------------------------------------
// 文章内容引用块样式
.article-content {
blockquote {
border-left: 6px solid #358b9a1f !important;
background: #3a97431f;
}
}
// ---------------------------------------
// 代码块基础样式修改
.highlight {
max-width: 102% !important;
background-color: var(--pre-background-color);
padding: var(--card-padding);
position: relative;
border-radius: 20px;
margin-left: -7px !important;
margin-right: -12px;
box-shadow: var(--shadow-l1) !important;
&:hover {
.copyCodeButton {
opacity: 1;
}
}
// keep Codeblocks LTR
[dir="rtl"] & {
direction: ltr;
}
pre {
margin: initial;
padding: 0;
margin: 0;
width: auto;
}
}
// light模式下的代码块样式调整
[data-scheme="light"] .article-content .highlight {
background-color: #fff9f3;
}
[data-scheme="light"] .chroma {
color: #ff6f00;
background-color: #fff9f3cc;
}
//-------------------------------------------
// 设置选中字体的区域背景颜色
//修改选中颜色
::selection {
color: #fff;
background: #34495e;
}
a {
text-decoration: none;
color: var(--accent-color);
&:hover {
color: var(--accent-color-darker);
}
&.link {
color: #4288b9ad;
font-weight: 600;
padding: 0 2px;
text-decoration: none;
cursor: pointer;
&:hover {
text-decoration: underline;
}
}
}
//-------------------------------------------------
//文章封面高度更改
.article-list article .article-image img {
width: 100%;
height: 150px;
object-fit: cover;
@include respond(md) {
height: 200px;
}
@include respond(xl) {
height: 305px;
}
}
//---------------------------------------------------
// 全局页面布局间距调整
.main-container {
min-height: 100vh;
align-items: flex-start;
padding: 0 15px;
gap: var(--section-separation);
padding-top: var(--main-top-padding);
@include respond(md) {
padding: 0 37px;
}
}
//--------------------------------------------------
//页面三栏宽度调整
.container {
margin-left: auto;
margin-right: auto;
.left-sidebar {
order: -3;
max-width: var(--left-sidebar-max-width);
}
.right-sidebar {
order: -1;
max-width: var(--right-sidebar-max-width);
/// Display right sidebar when min-width: lg
@include respond(lg) {
display: flex;
}
}
&.extended {
@include respond(md) {
max-width: 1024px;
--left-sidebar-max-width: 25%;
--right-sidebar-max-width: 22% !important;
}
@include respond(lg) {
max-width: 1280px;
--left-sidebar-max-width: 20%;
--right-sidebar-max-width: 30%;
}
@include respond(xl) {
max-width: 1453px; //1536px;
--left-sidebar-max-width: 15%;
--right-sidebar-max-width: 25%;
}
}
&.compact {
@include respond(md) {
--left-sidebar-max-width: 25%;
max-width: 768px;
}
@include respond(lg) {
max-width: 1024px;
--left-sidebar-max-width: 20%;
}
@include respond(xl) {
max-width: 1280px;
}
}
}
//-------------------------------------------------------
//全局页面小图片样式微调
.article-list--compact article .article-image img {
width: var(--image-size);
height: var(--image-size);
object-fit: cover;
border-radius: 17%;
}
```
### 菜单栏圆角
在 `/assets/scss/custom.scss` 中加入以下代码:
```scss
// 菜单栏样式
// 下拉菜单改圆角样式
.menu {
padding-left: 0;
list-style: none;
flex-direction: column;
overflow-x: hidden;
overflow-y: scroll;
flex-grow: 1;
font-size: 1.6rem;
background-color: var(--card-background);
box-shadow: var(--shadow-l2); //改个阴影
display: none;
margin: 0; //改为0
border-radius: 10px; //加个圆角
padding: 30px 30px;
@include respond(xl) {
padding: 15px 0;
}
&,
.menu-bottom-section {
gap: 30px;
@include respond(xl) {
gap: 25px;
}
}
&.show {
display: flex;
}
@include respond(md) {
align-items: flex-end;
display: flex;
background-color: transparent;
padding: 0;
box-shadow: none;
margin: 0;
}
li {
position: relative;
vertical-align: middle;
padding: 0;
@include respond(md) {
width: 100%;
}
svg {
stroke-width: 1.33;
width: 20px;
height: 20px;
}
a {
height: 100%;
display: inline-flex;
align-items: center;
color: var(--body-text-color);
gap: var(--menu-icon-separation);
}
span {
flex: 1;
}
&.current {
a {
color: var(--accent-color);
font-weight: bold;
}
}
}
}
```
### 滚动条
在 `/assets/scss/custom.scss` 中加入以下代码:
```scss
//将滚动条修改为圆角样式
//菜单滚动条美化
.menu::-webkit-scrollbar {
display: none;
}
// 全局滚动条美化
html {
::-webkit-scrollbar {
width: 20px;
}
::-webkit-scrollbar-track {
background-color: transparent;
}
::-webkit-scrollbar-thumb {
background-color: #d6dee1;
border-radius: 20px;
border: 6px solid transparent;
background-clip: content-box;
}
::-webkit-scrollbar-thumb:hover {
background-color: #a8bbbf;
}
}
```
### 加载进度条
在 `/layouts/partials/footer/custom.html` 中加入以下代码:
```html
<script src="https://npm.elemecdn.com/nprogress@0.2.0/nprogress.js" crossorigin="anonymous"></script>
<link rel="stylesheet" href="https://npm.elemecdn.com/nprogress@0.2.0/nprogress.css" crossorigin="anonymous" />
<script>
NProgress.start();
document.addEventListener("readystatechange", () => {
if (document.readyState === "interactive") NProgress.inc(0.8);
if (document.readyState === "complete") NProgress.done();
});
</script>
```
### 深色模式开关图标
不太喜欢默认图标,默认图标不够直观,当然你可以不换
我选取了 [Tabler Icons](https://tablericons.com/) 中的 `sun-high` 和 `moon-stars` 这两个图标
在 `/assets/scss/partials/sidebar.scss` 第 154~180 行中将图标名进行修改,最终效果:
```scss
/* .\assets\scss\partials\sidebar.scss Line 154*/
[data-scheme="dark"] {
#dark-mode-toggle {
color: var(--accent-color);
font-weight: 700;
.icon-tabler-sun-high {
display: none;
}
.icon-tabler-moon-stars {
display: unset;
}
}
}
#dark-mode-toggle {
margin-top: auto;
color: var(--body-text-color);
display: flex;
align-items: center;
cursor: pointer;
gap: var(--menu-icon-separation);
.icon-tabler-moon-stars {
display: none;
}
}
```
在 `/layouts/partials/sidebar/left.html` 第 91~97 行中将图标名进行修改,最终效果:
```html
<!---.\layouts\partials\sidebar\left.html Line 91--->
{{ if (default false .Site.Params.colorScheme.toggle) }}
<li id="dark-mode-toggle">
{{ partial "helper/icon" "sun-high" }}
{{ partial "helper/icon" "moon-stars" }}
<span>{{ T "darkMode" }}</span>
</li>
{{ end }}
```
### 修改布局
在 `/assets/scss/grid.scss` 中修改 `left-sidebar` 和 `right-sidebar` 的描述:
```scss
.left-sidebar {
order: -3;
// max-width: var(--left-sidebar-max-width);
max-width: 10%;
}
.right-sidebar {
order: -1;
// max-width: var(--right-sidebar-max-width);
max-width: 20%;
/// Display right sidebar when min-width: lg
@include respond(lg) {
display: flex;
}
}
```
把正文的占比改到了 70%, 原来的只有 50% 左右
## 页面
### 显示语言和复制按钮
在 `/assets/ts/custom.ts` 中加入以下代码:
```tsx
// 显示语言和复制按钮
const highlights = document.querySelectorAll('.article-content div.highlight');
const copyText = `📄拷贝`,
copiedText = `已拷贝!`;
highlights.forEach(highlight => {
const copyButton = document.createElement('button');
copyButton.innerHTML = copyText;
copyButton.classList.add('copyCodeButton');
highlight.appendChild(copyButton);
const codeBlock = highlight.querySelector('code[data-lang]');
// 获取语言
const lang = codeBlock.getAttribute('data-lang');
if (!codeBlock) return;
copyButton.addEventListener('click', () => {
navigator.clipboard.writeText(codeBlock.textContent)
.then(() => {
copyButton.textContent = copiedText;
setTimeout(() => {
copyButton.textContent = copyText;
}, 1000);
})
.catch(err => {
alert(err)
console.log('Something went wrong', err);
});
});
// Add language code button
const languageButton = document.createElement('button');
languageButton.innerHTML = lang.toUpperCase()+' ';
languageButton.classList.add('languageCodeButton');
highlight.appendChild(languageButton);
});
new StackColorScheme(document.getElementById('dark-mode-toggle'));
```
在 `/assets/scss/custom.scss` 中加入以下代码(可按需自行修改):
```scss
//代码复制按钮
.article-content .copyCodeButton {
position: absolute;
top: 10px;
right: 18px;
border-radius: 12px;
opacity: 1;
color: #ffffffad;
background: none;
border: none;
padding: 0;
font-weight: 500;
}
.article-content .languageCodeButton {
position: absolute;
border: none;
top: 9px;
right: 69px;
border-radius: 12px;
opacity: 1;
padding: 0 5px;
background: 0;
color: #ffffffad;
font-family: lato;
font-size: 1.5rem;
}
```
### 首页欢迎横幅
在 `/layouts/index.html` 的 `<section class="article-list">` 前添加以下代码:
```html
<!-- 首页欢迎字幅 -->
<div class="welcome">
<p style="font-size: 2rem; text-align: center; font-weight: bold">
<span class="shake">👋</span>
<span class="jump-text1" > Welcome</span>
<span class="jump-text2"> To </span>
<span class="jump-text3" style="color:#e99312">Xa</span><span class="jump-text4" style="color:#e99312">l</span><span class="jump-text5" style="color:#e99312">a</span><span class="jump-text6" style="color:#e99312">o</span><span class="jump-text7" style="color:#e99312">k</span><span class="jump-text8" style="color:#e99312">'s</span>
<span class="jump-text9" style="color:#e99312">Blog</span>
</p>
</div>
<!-- 首页欢迎字幅 -->
```
在 `/assets/scss/custom.scss` 中加入以下代码:
```scss
//首页欢迎板块样式
.welcome {
color: var(--card-text-color-main);
background: var(--card-background);
box-shadow: var(--shadow-l2);
border-radius: 30px;
display: inline-block;
}
// 👋emoji实现摆动效果
.shake {
display: inline-block;
animation: shake 1s;
animation-duration: 1s;
animation-timing-function: ease;
animation-delay: 0s;
animation-iteration-count: 1;
animation-direction: normal;
animation-fill-mode: none;
animation-play-state: running;
animation-name: shake;
animation-timeline: auto;
animation-range-start: normal;
animation-range-end: normal;
animation-delay: 2s;
@keyframes shake {
0% {
transform: rotate(0);
}
25% {
transform: rotate(45deg) scale(1.2);
}
50% {
transform: rotate(0) scale(1.2);
}
75% {
transform: rotate(45deg) scale(1.2);
}
100% {
transform: rotate(0);
}
}
}
// 实现字符跳动动画
.jump-text1 {
display: inline-block;
animation: jump 0.5s 1;
}
.jump-text2 {
display: inline-block;
animation: jump 0.5s 1;
animation-delay: 0.1s;
}
.jump-text3 {
display: inline-block;
animation: jump 0.5s 1;
animation-delay: 0.2s;
}
.jump-text4 {
display: inline-block;
animation: jump 0.5s 1;
animation-delay: 0.3s;
}
.jump-text5 {
display: inline-block;
animation: jump 0.5s 1;
animation-delay: 0.4s;
}
.jump-text6 {
display: inline-block;
animation: jump 0.5s 1;
animation-delay: 0.5s;
}
.jump-text7 {
display: inline-block;
animation: jump 0.5s 1;
animation-delay: 0.6s;
}
.jump-text8 {
display: inline-block;
animation: jump 0.5s 1;
animation-delay: 0.7s;
}
.jump-text9 {
display: inline-block;
animation: jump 0.5s 1;
animation-delay: 0.9s;
}
@keyframes jump {
0% {
transform: translateY(0);
}
50% {
transform: translateY(-20px);
}
100% {
transform: translateY(0);
}
}
```
## 网站的搜索引擎优化(SEO)
本网站使用Hugo搭建,而且使用的stack主题支持自动生成基于Open Graph协议(OG协议)的标签,此处记录一下如何在Hugo搭建的网站中做搜索引擎优化(SEO)。
### 引言
到本系列的[第三篇文章](https://jinli.io/p/个人网站的建立过程三hugo主题stack的使用与优化/)为止,我们已经建立了一个可以依靠域名和HTTPS协议访问的中英双语个人网站。但是,如果我们试图在搜索引擎上搜索我们的网站,就会发现我们网站上的什么内容都不会出现在搜索引擎上。
这是因为我们的网站并没有被搜索引擎收录,也没有与外界的网站建立连接。因此,想要让其他人能在搜索引擎上发现我们的网站,我们就需要将网站提交给搜索引擎。同时,也可以做一些搜索引擎优化(SEO),以让搜索引擎获得关于我们网站的更详细的信息,这有助于提升我们的网站在搜索引擎中的排名。
### 开启Open Graph
Open Graph(开放图谱)协议,简称OG协议,是Facebook在2010年公布的一项协议,用来标记网页内容。简单来讲,OG协议就是嵌在网页头部的一些标签,这些标签标记了网页的标题、描述等特征,使得网页成为一个“富媒体对象”,可以被其他社交网站引用。
很多搜索引擎都支持OG协议,在网页中使用OG协议的标签,就更有利于提升我们的网页在搜索引擎中的排名。
OG协议的标签在网页中通常表示为类似下面所示的格式:
```
<meta property="og:title" content="The Rock" />
<meta property="og:type" content="video.movie" />
<meta property="og:url" content="https://www.imdb.com/title/tt0117500/" />
<meta property="og:image" content="https://ia.media-imdb.com/images/rock.jpg" />
```
stack主题提供了对OG协议的支持,只需要在网站根目录下的`config/_default/params.en.yaml`和`config/_default/params.zh-cn.yaml`配置文件中开启即可:
```yaml
opengraph:
twitter:
# Your Twitter username
site: JinliCyou
# Available values: summary, summary_large_image
card: summary_large_image
```
这样,Hugo在生成和部署网站时就会在网页HTML文件中自动嵌入OG标签。
### 谷歌搜索优化
在将我们的站点信息提交给谷歌时,谷歌需要验证我们对网站的所有权。验证方式有好几种,例如
- 在网站根目录下放一个谷歌生成的验证文件
- 在网页HTML文件头部嵌入谷歌生成的特定标签
- 使用谷歌分析的Tracking ID(或者Measurement ID)
由于stack主题集成了对谷歌分析的支持,这里我们使用第三种验证方式。
#### 开启谷歌分析
[谷歌分析](https://analytics.google.com/analytics/web/provision/#/provision)(Google Analytics)是一个分析网站流量的工具,用它可以统计网站的访问量等信息。
1. 首先前往谷歌分析官网注册谷歌分析的账号,也可以直接用已有的谷歌账号登录。现在的谷歌分析一般是谷歌分析4(Google Analytics 4),使用Measurement ID而非之前的Tracking ID来跟踪网站。
2. 获取Measurement ID。具体可参见谷歌分析的[帮助文档](https://support.google.com/analytics/answer/9539598)。下面是具体操作:
- 在用户首页找到“Admin“选项,新建一个“Property”,按照说明填入必要的信息。
- 然后点击“Property”这一列中的“Data Streams”选项。
- 点击“Add stream”,选择“Web”,填入你的网站域名和网站名字。
- 再在“Property”页面点击刚添加的stream,就能看到一个以“G-”开头的Measurement ID。记录下你的网站的Measurement ID。
3. 在网站根目录下的`config/_default/config.yaml`配置文件中找到“googleAnalytics"配置项,填入你的Measurement ID。
```
# GA Tracking ID
googleAnalytics: G-measuremntID
```
#### 提交站点地图
站点地图(Site Map)是一个存储有站点网页信息的XML数据文件,通常命名为`sitemap.xml`,将它提交给搜索引擎,搜索引擎将可以获取我们网站的网页信息。
Hugo会在生成和部署网站时在`public`文件夹下自动生成`sitemap.xml`文件。
我们把站点地图提交到谷歌搜索,具体说明可参见谷歌站长页面的[说明](https://developers.google.com/search/docs/beginner/get-started),下面是具体操作:
1. 登录谷歌搜索控制台(Google Search Console)https://search.google.com/search-console,可以使用在谷歌分析注册的账号。
2. 点击左上角的“Add property”,选择右侧的“URL prefix”方式,输入以https开头的网站网址。在验证所有权的选项中选择“Google Analytics”,点击验证。如果你在上一步开启谷歌分析后使用Hugo重新部署了网站的话,就可以直接验证通过。
3. 提交站点地图文件`sitemap.xml`。在左侧菜单栏点击“Sitemaps”选项,然后在添加站点地图的页面填入`sitemap.xml`所在的URL。例如对于本站,由于是双语站点,Hugo在部署网站时会生成3个`sitemap.xml`文件,分别是`/public/sitemap.xml`、`/public/zh-cn/sitemap.xml`以及`/public/en/sitemap.xml`。
注意,添加sitemap时不要漏了路径开头的斜杠`/`,即使网站域名后面已经有一个斜杠了,也不能省略。如下图所示 
提交成功之后“status”会显示“success”。
Hugo生成的3个站点地图中,`/public/sitemap.xml`中的内容其实是指向`/public/zh-cn/sitemap.xml`和`/public/en/sitemap.xml`的,所以我们只提交一个`/public/sitemap.xml`就可以。
一般在站点地图成功提交之后大约1到2天后,就可以看到自己的网站已经被谷歌收录了。可以在谷歌搜索框中输入`site:xxx.com`来查看某个网站是否被谷歌搜索收录。
### 百度搜索优化
针对百度搜索的优化是在[百度资源搜索平台](https://ziyuan.baidu.com/)上完成的。
1. 前往[百度资源搜索平台](https://ziyuan.baidu.com/),登录百度账号。
2. 点击“链接提交”,然后点击"添加站点"。输入你的网站域名,同样需要验证站点的所有权,这里选择下载验证文件,然后把验证文件放在网站`public`文件夹内。点击“验证”即可。
3. 然后点击左侧菜单栏“资源提交”中的“普通收录”,在资源提交的页面下选择“sitemap”,输入`sitemap.xml`所在的URL就可以了。
不过在百度提交sitemap有两个限制:
- 不允许提交索引型sitemap
- 对新账号每天只允许提交一个sitemap文件
 Sign in with Wallet
Connect another wallet
Sign in with Wallet
Connect another wallet