# 資料應用
# 一、雲端簡易辨識應用
## 使用資源
lambda.zip: https://github.com/EISCFCU/ntue_cloud-database/blob/main/DetectLabel-96c34899-e979-4c92-b71c-be97f0a9983d.zip
### 使用平台:AWS Academy Learner Lab-Foundation Services
# 實施架構
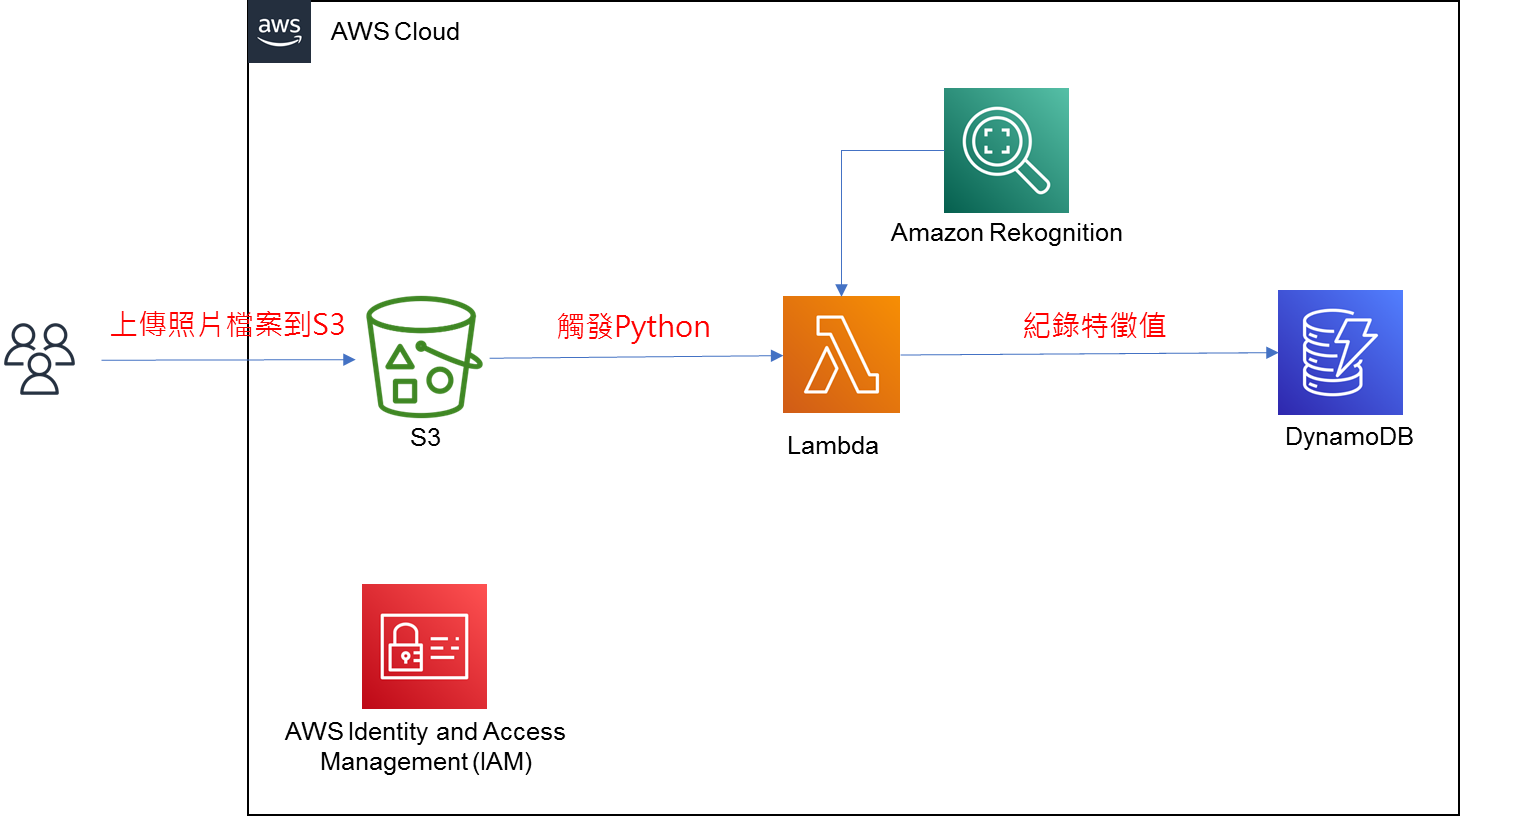
# 操作步驟
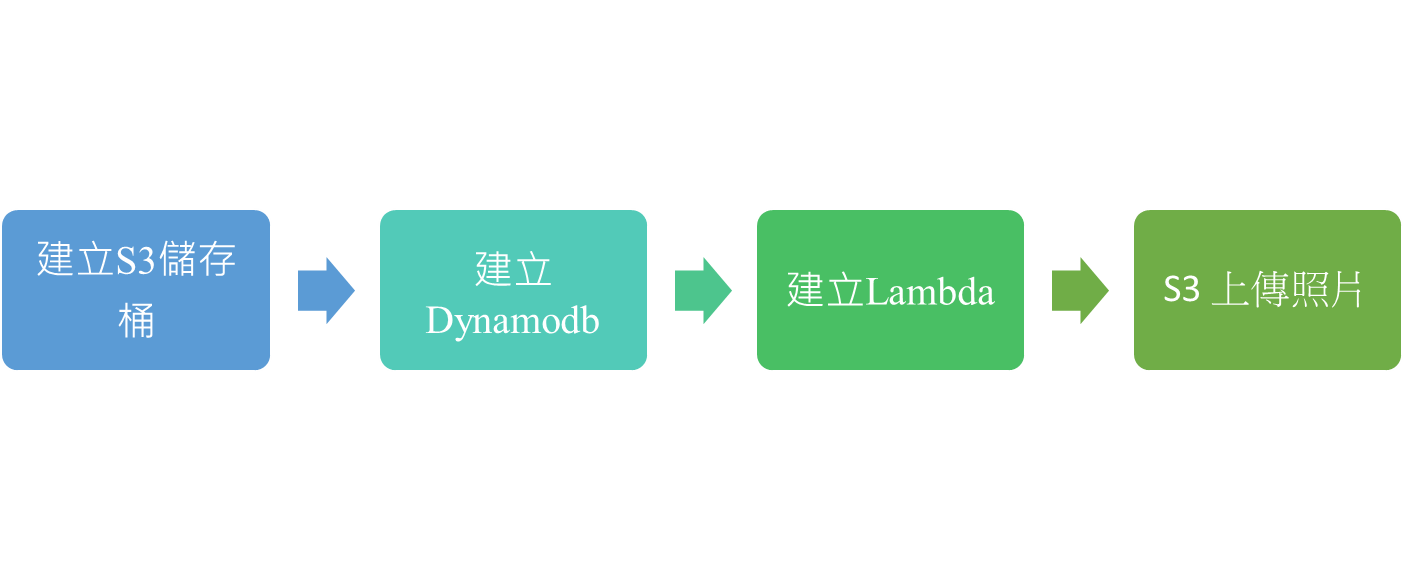
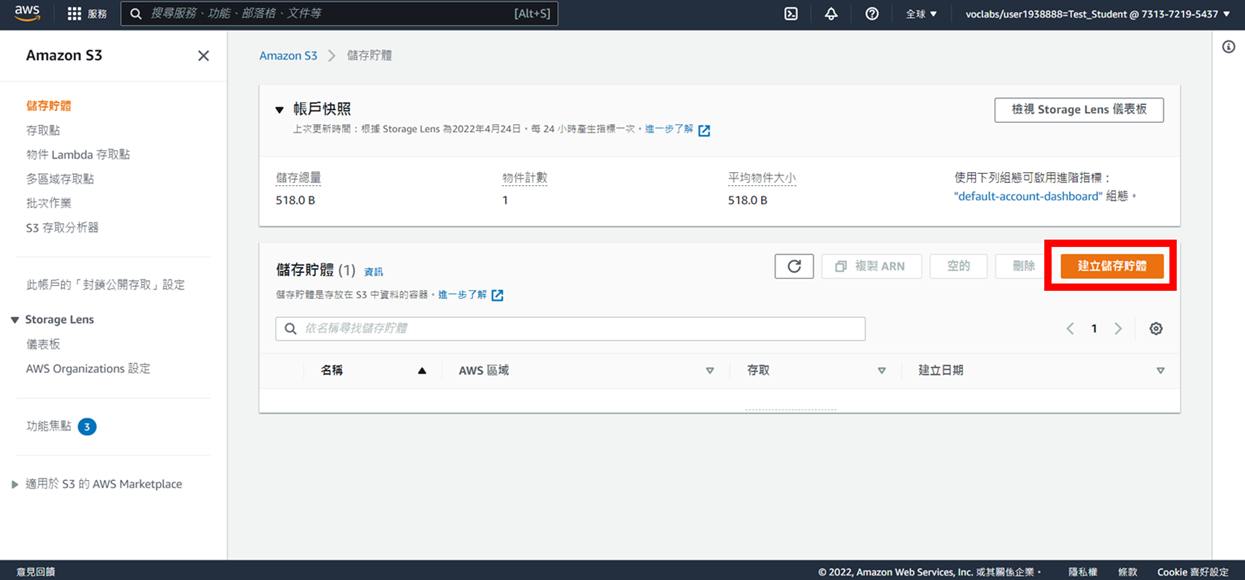
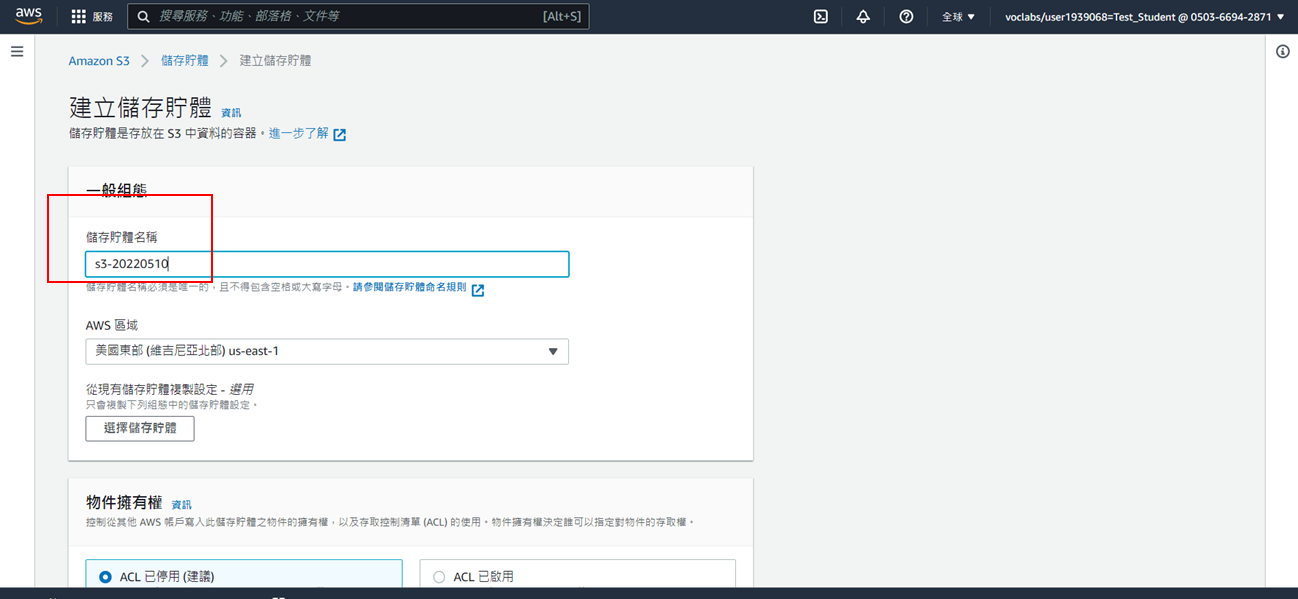
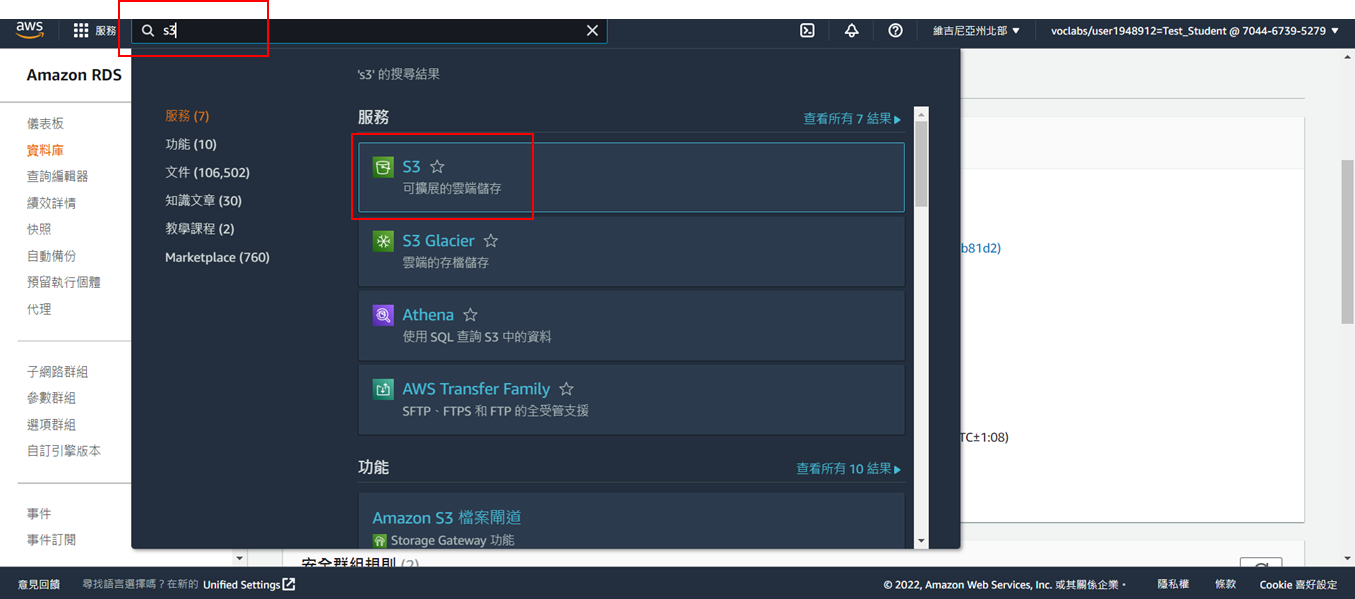
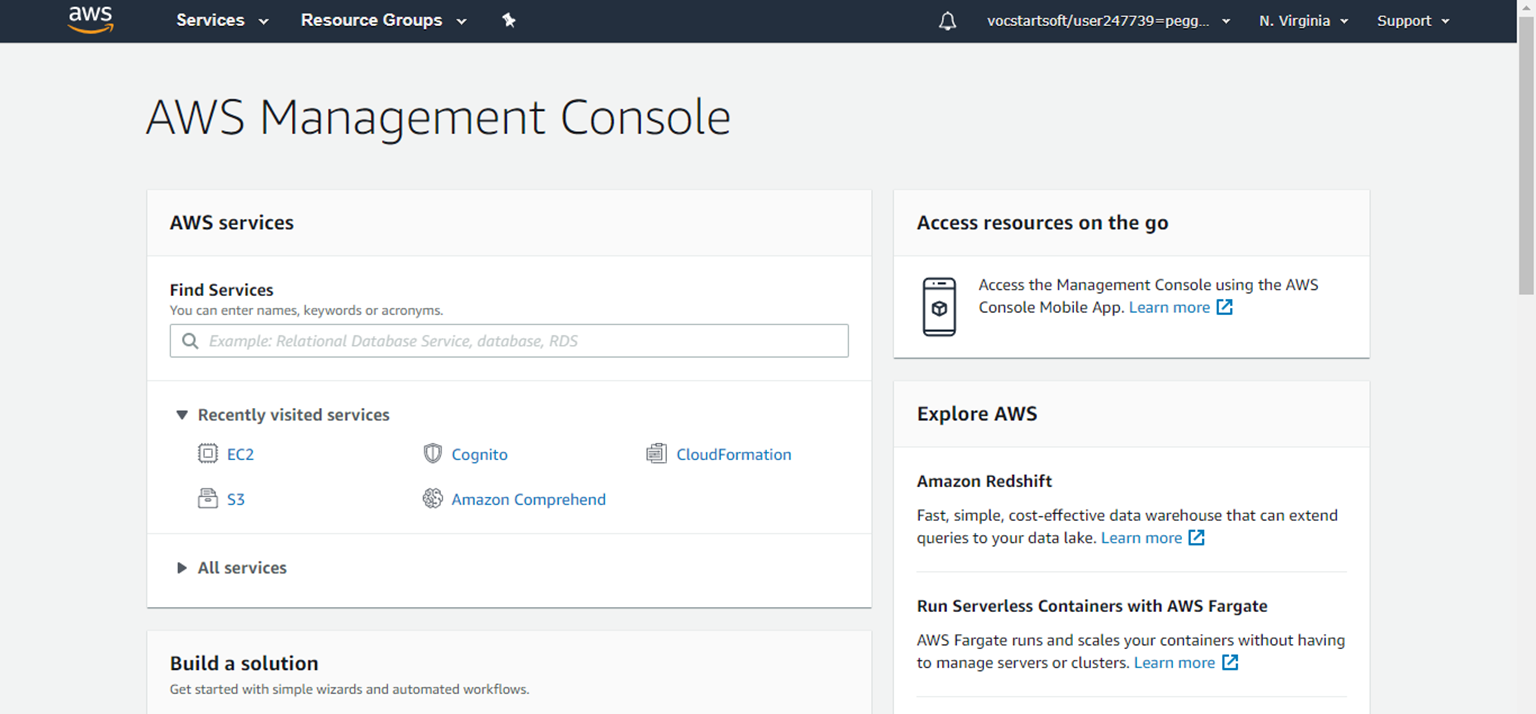
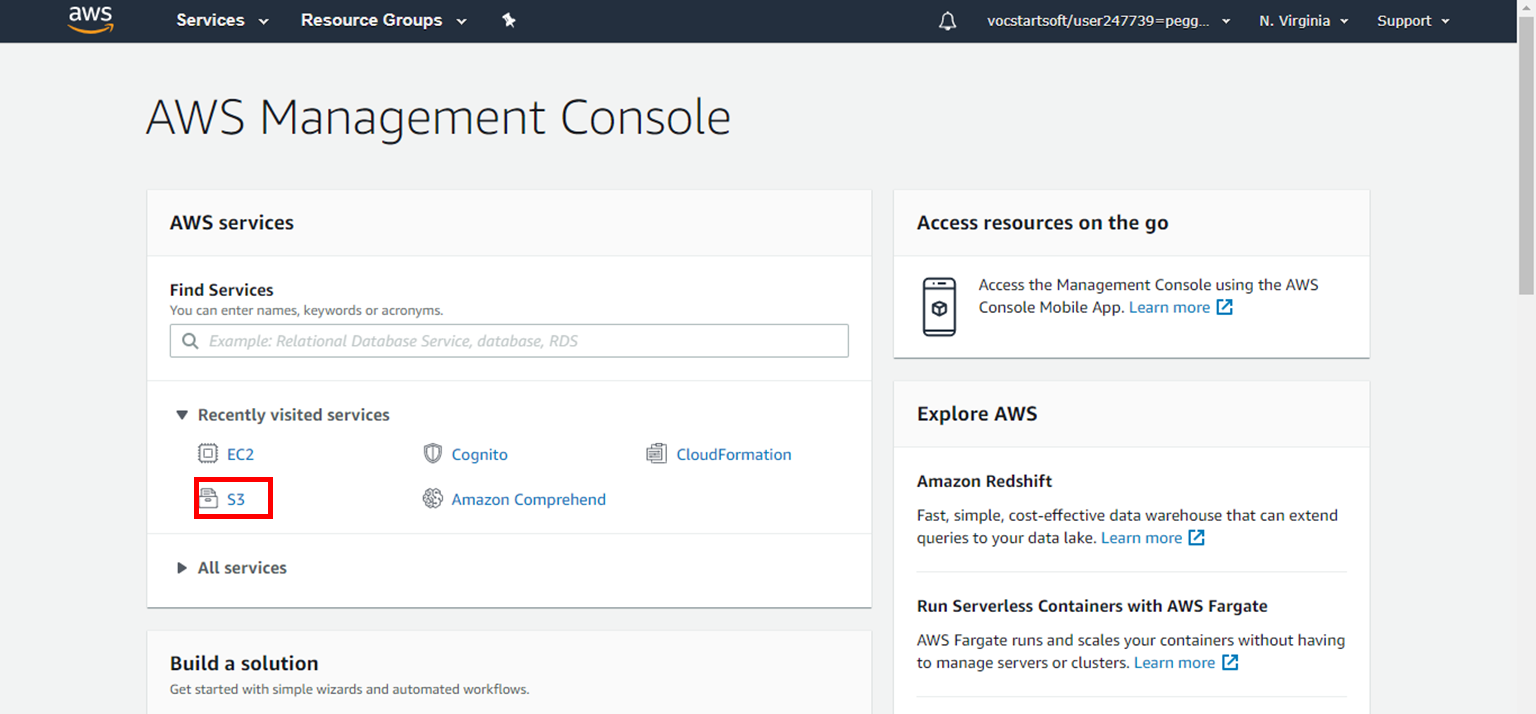
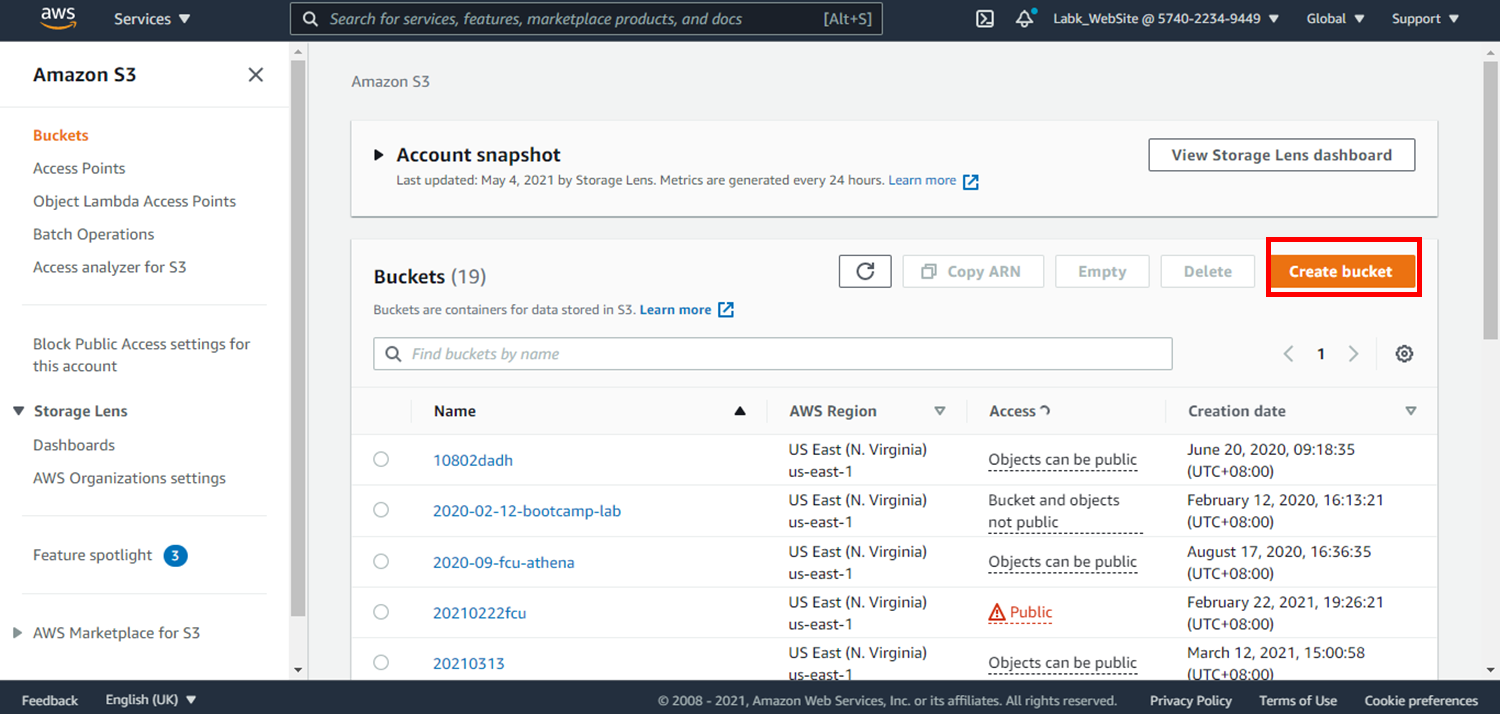
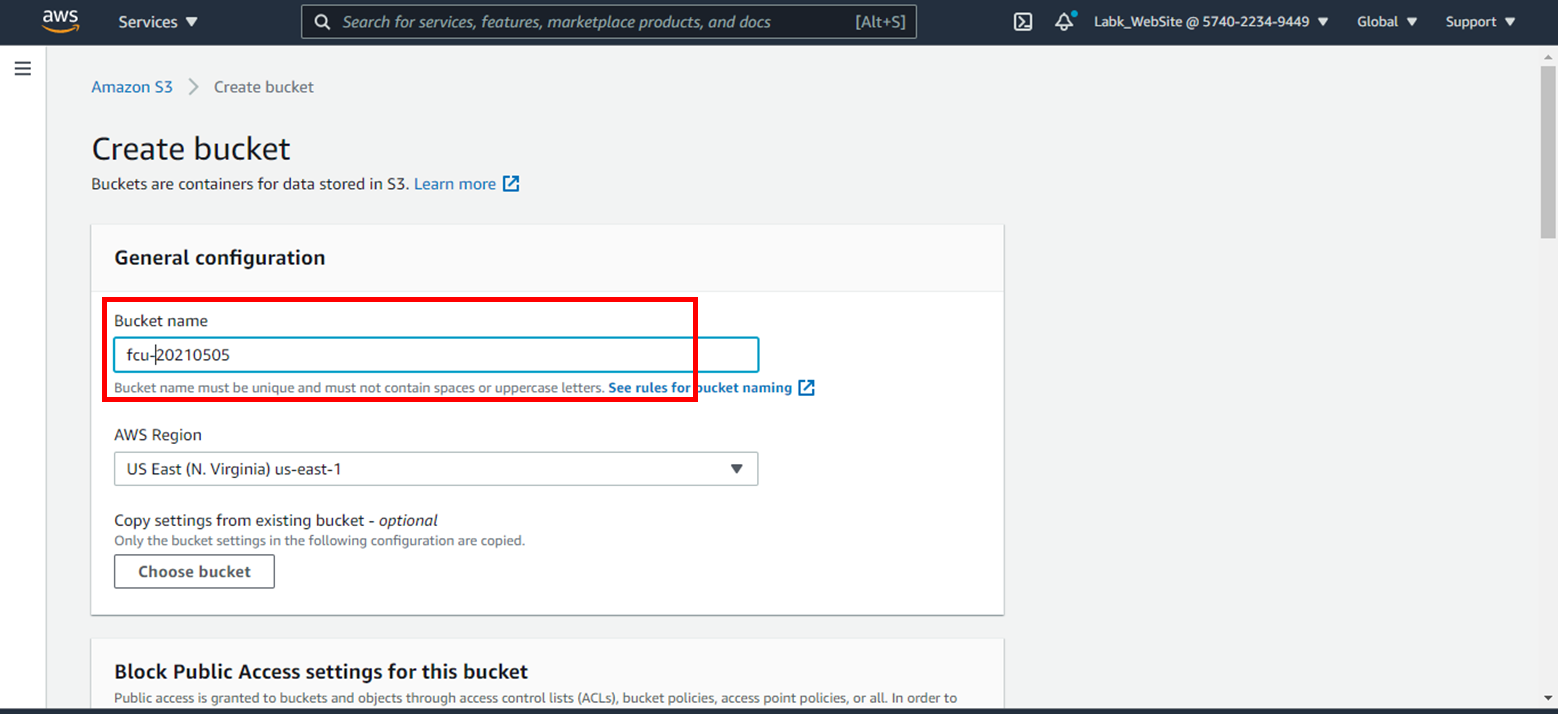
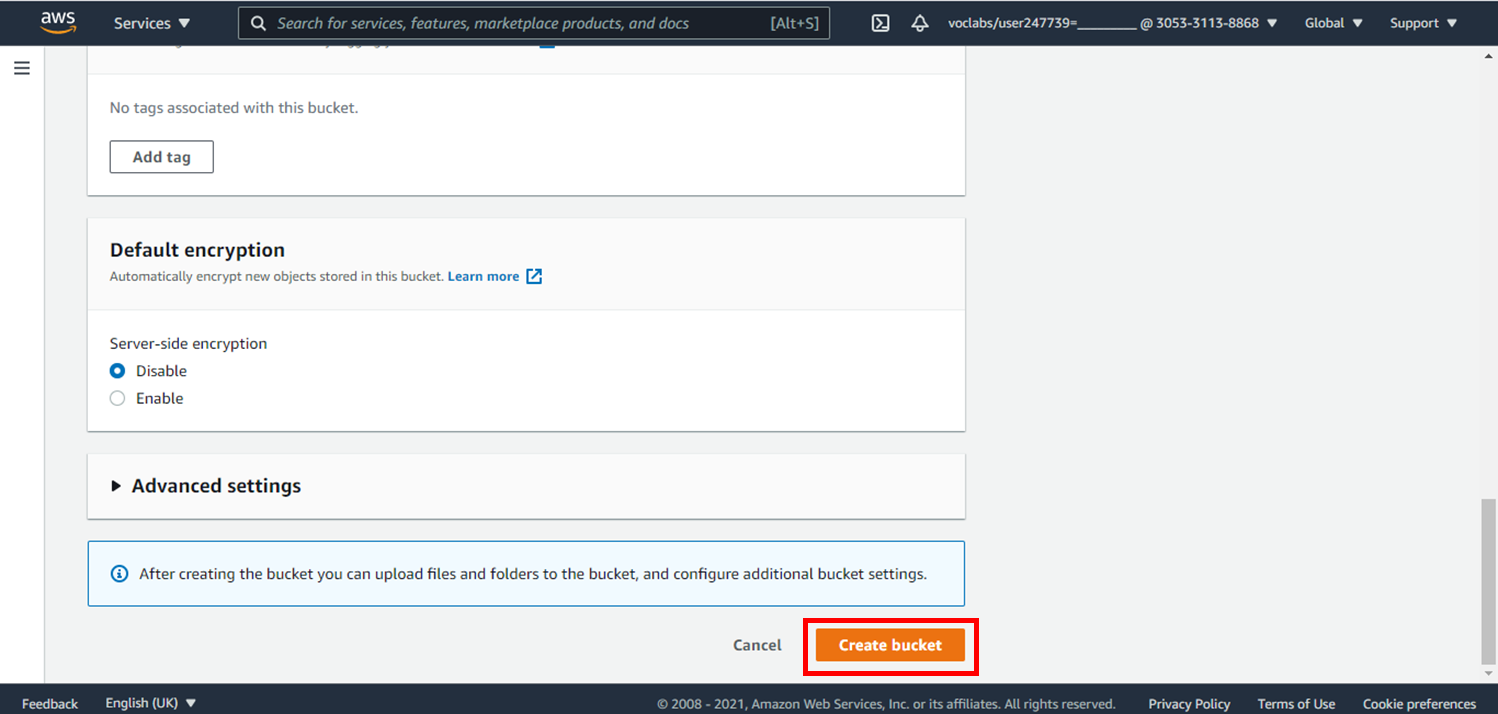
# 步驟1:建立儲存桶(S3)
1. 搜尋S3
2. 點選**建立儲存貯體**
3. 輸入儲存貯體名稱(自訂)
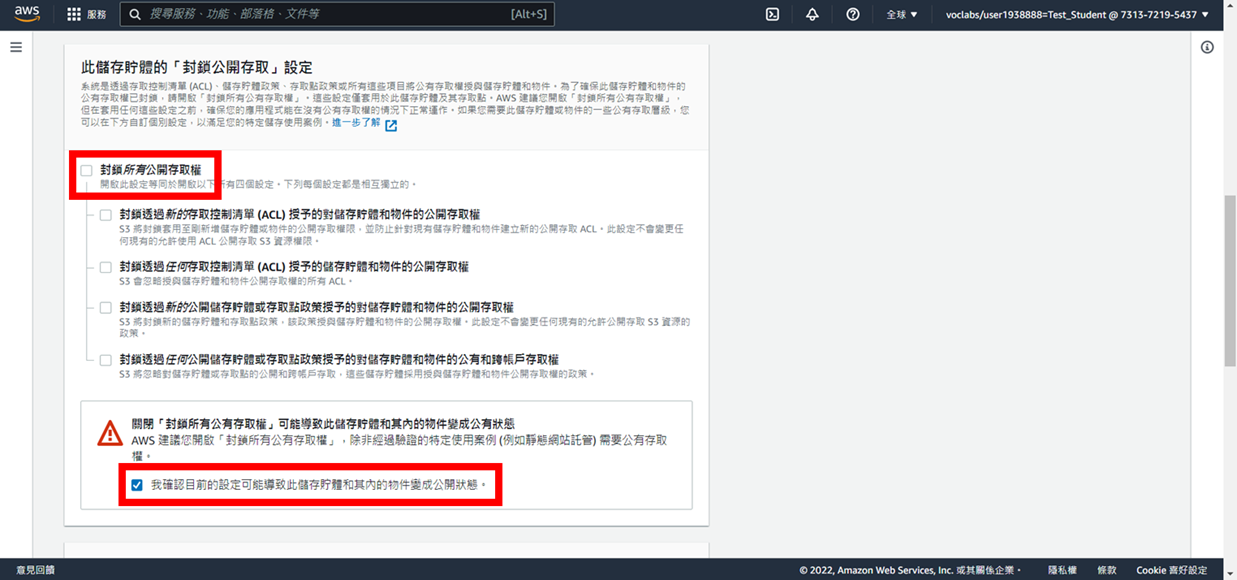
4. 取消勾選封鎖,並勾選我確認…
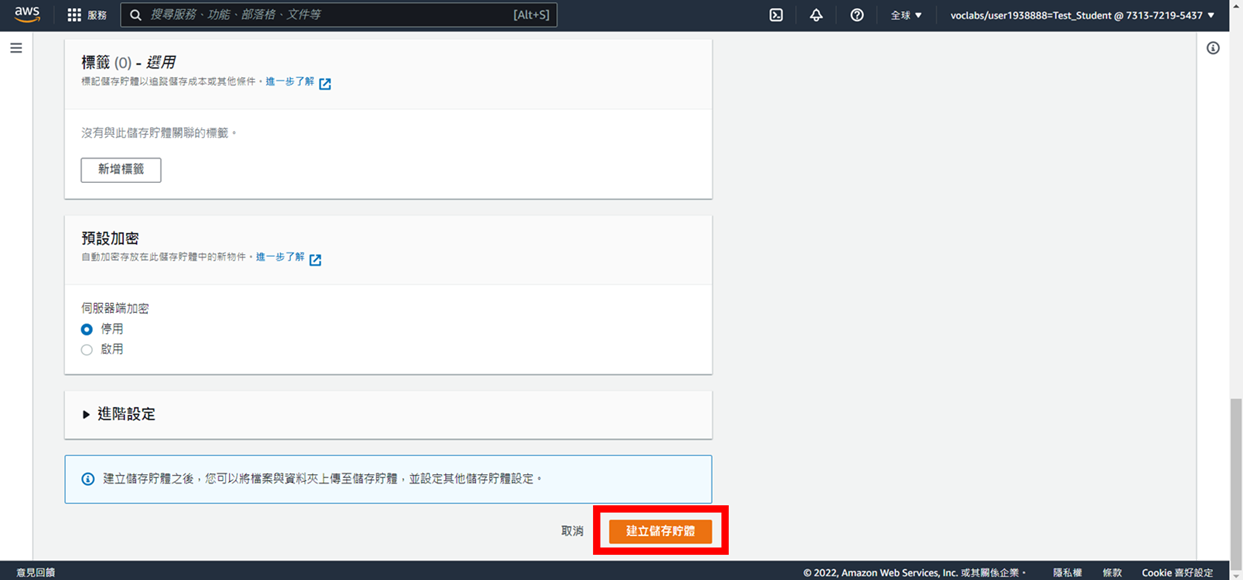
5. 點選**建立儲存貯體**
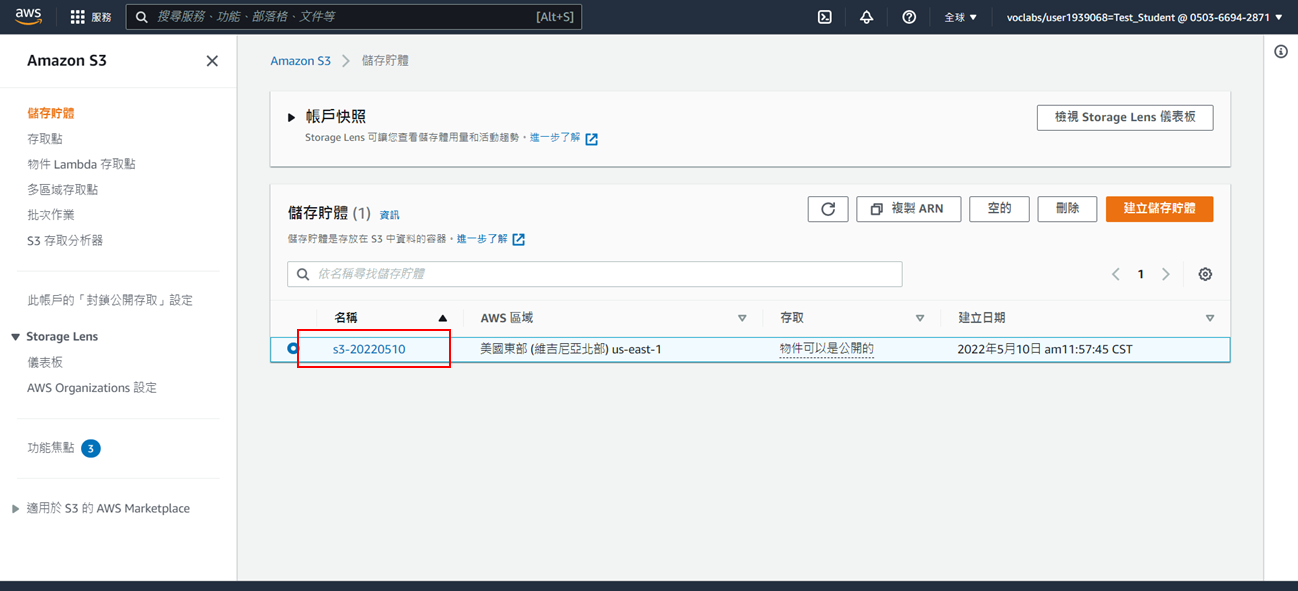
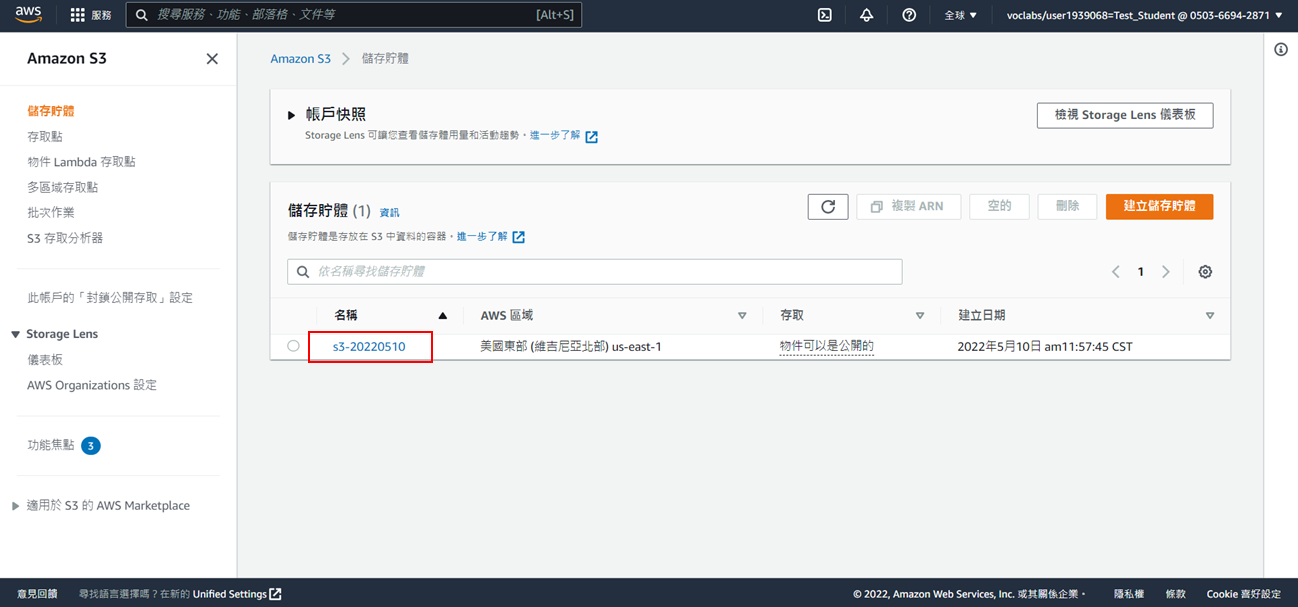
6. 成功建立儲存貯體
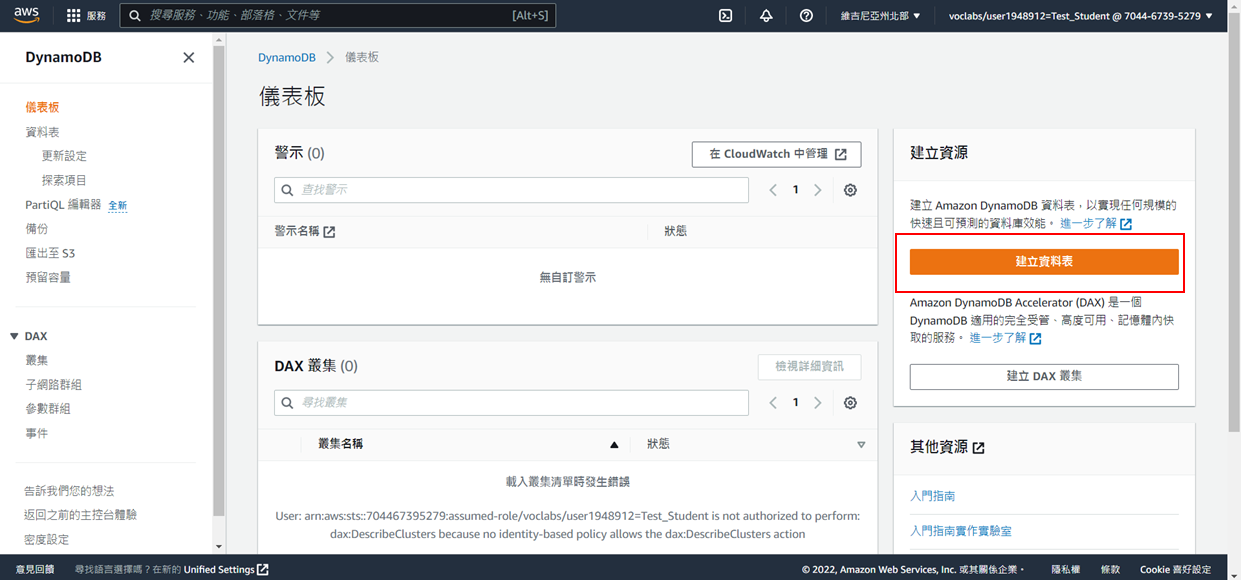
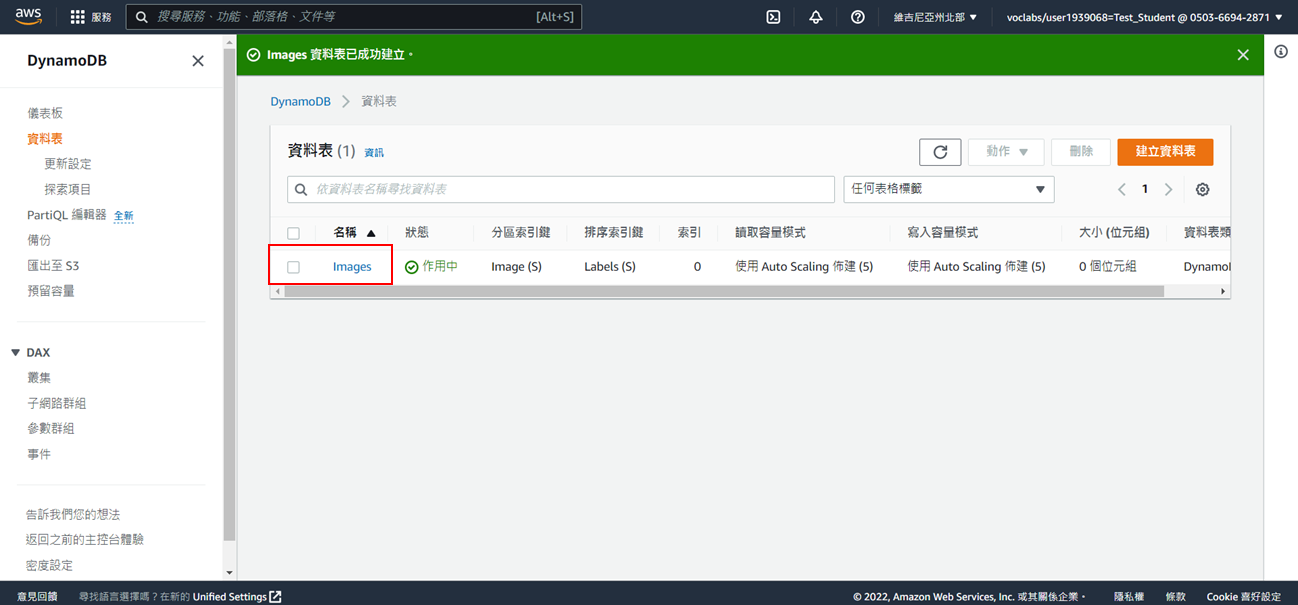
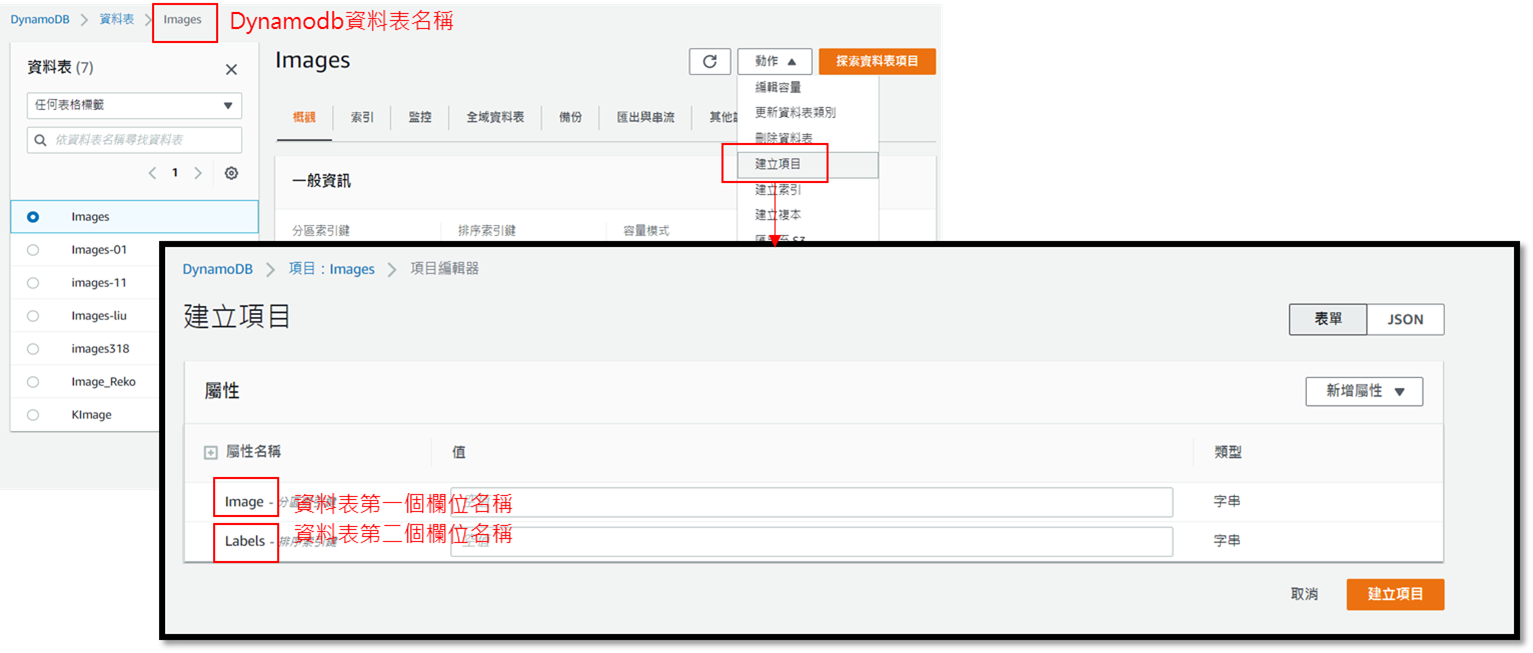
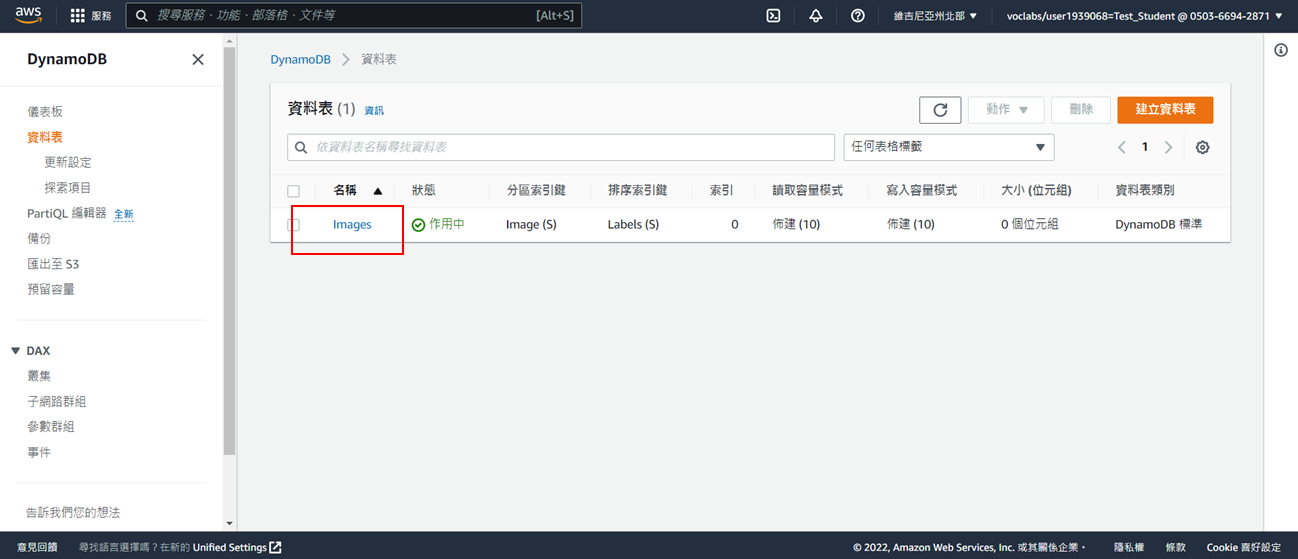
# Step2:建立No sql 資料庫(Dynamodb)
1. 搜尋Dynamodb
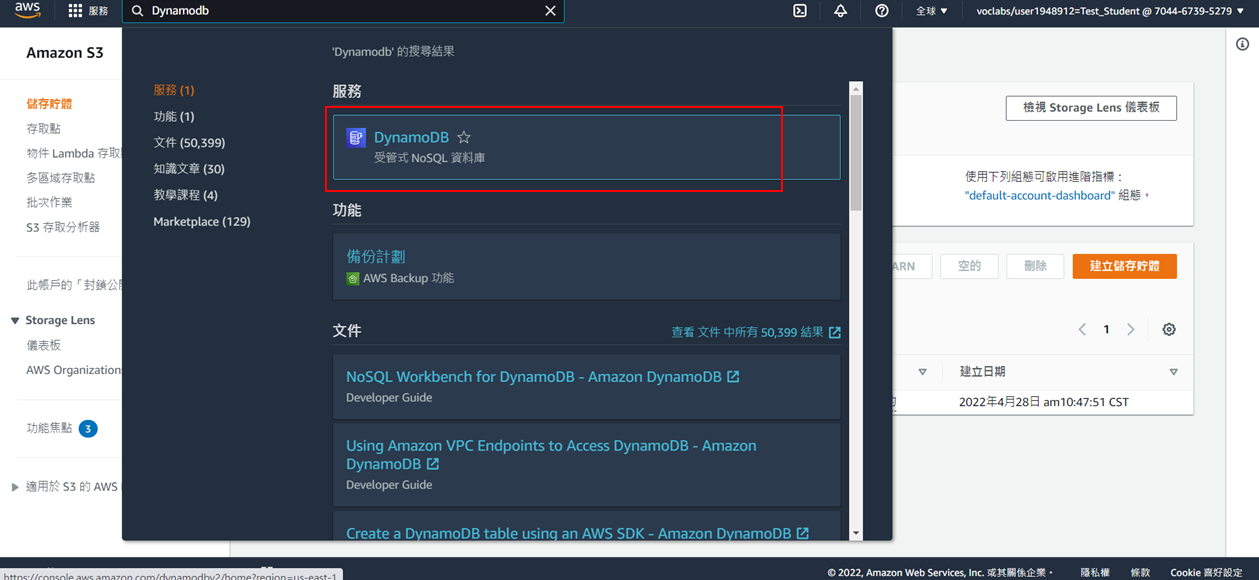
2. 點選**建立資料表**
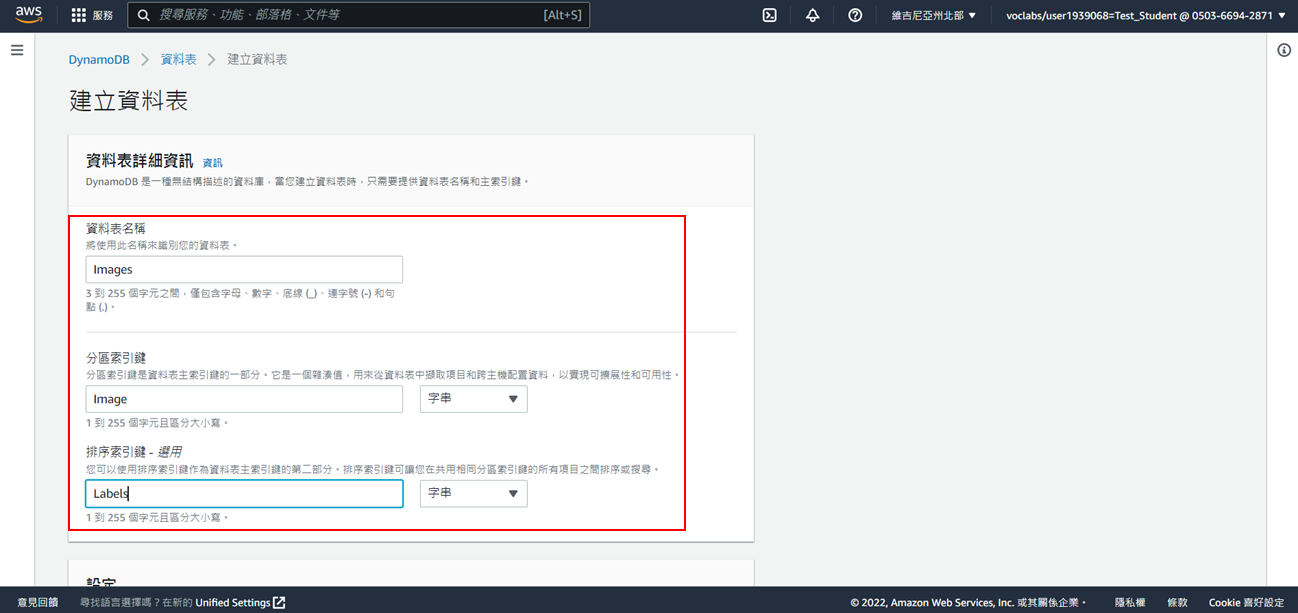
3. 輸入
* 資料表名稱: `Images`
* 分區索引: `Image`(字串)
* 排序索引:`Labels`(字串)
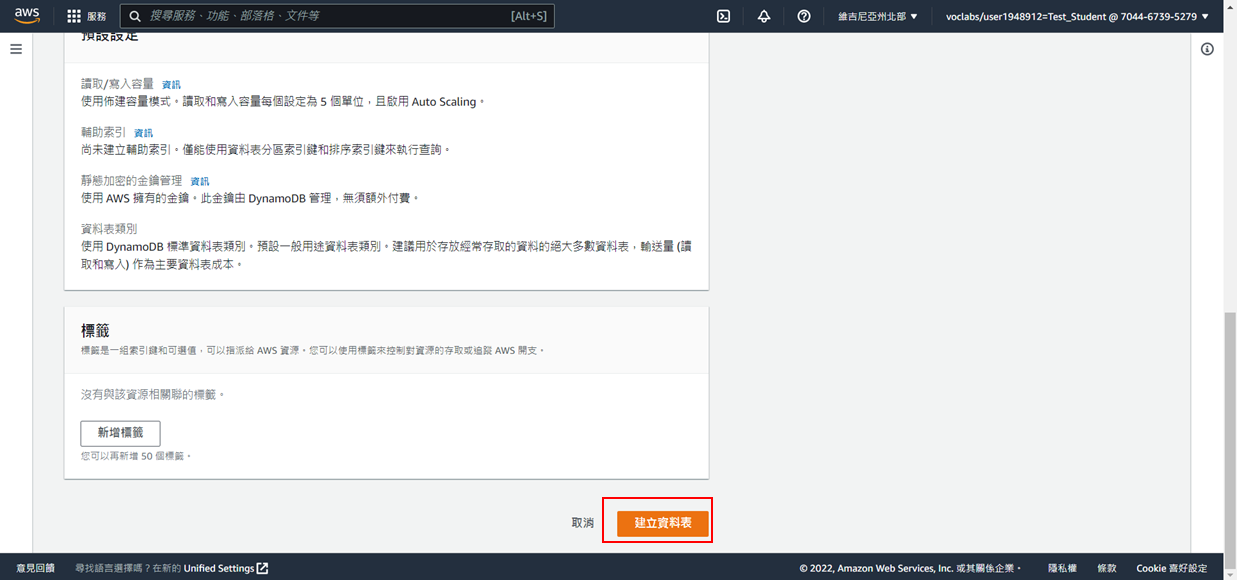
4. 點選**建立資料表**
5. 成功建立Images資料表(狀態:作用中)
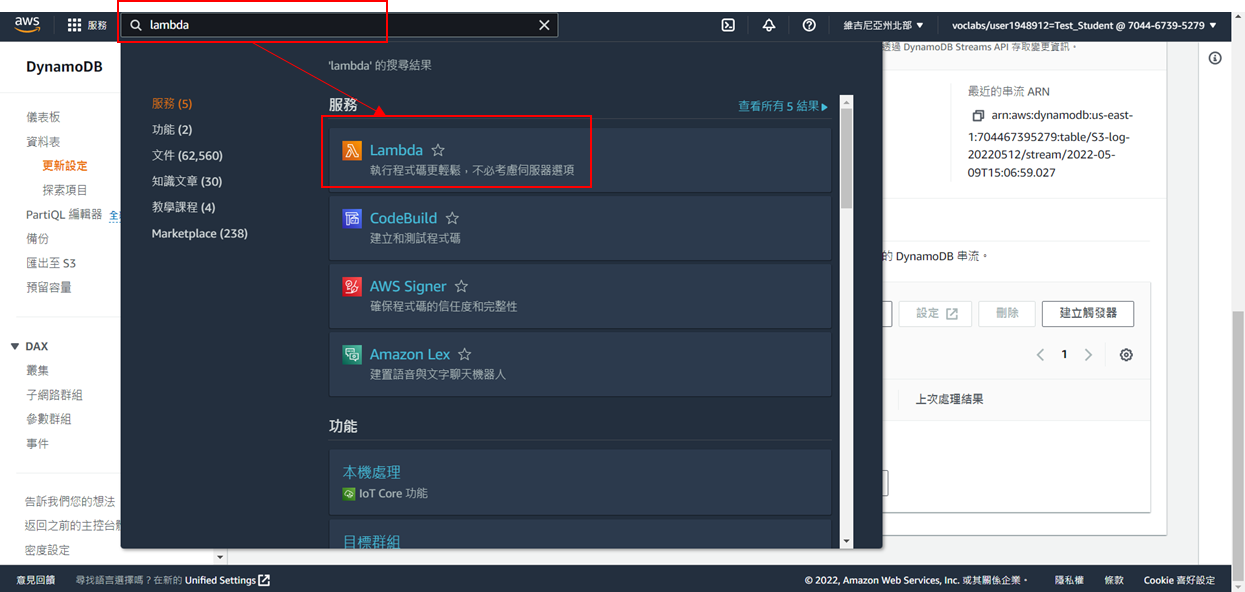
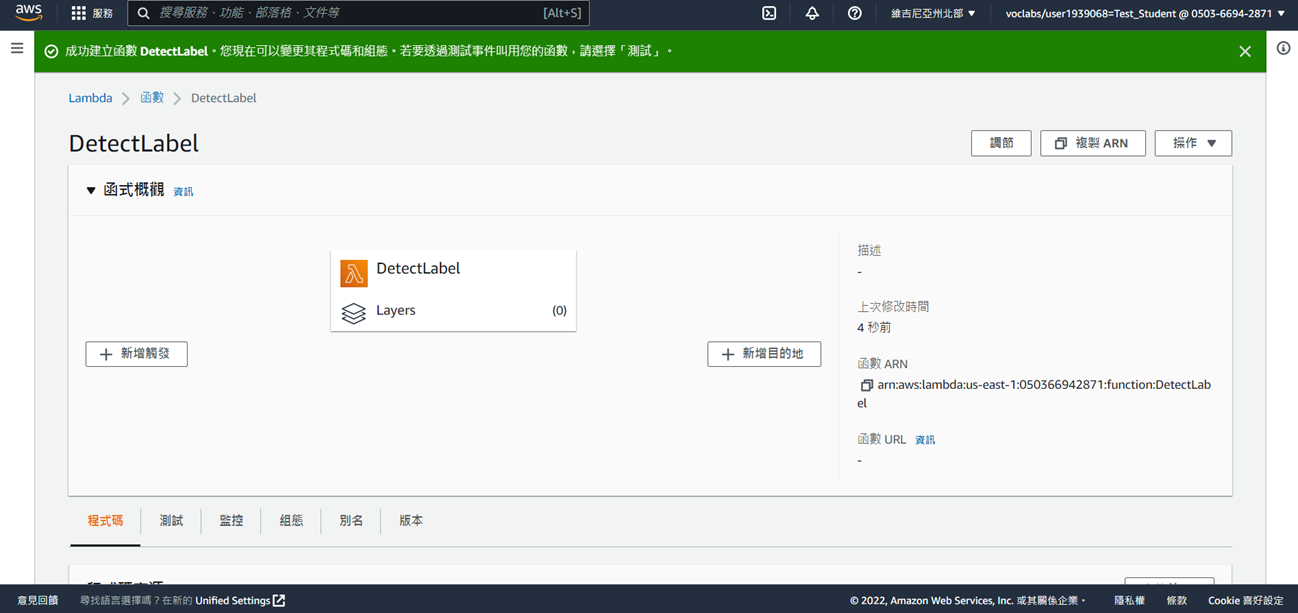
# Step3:建立 Lambda
1. 搜尋Lambda 並點選
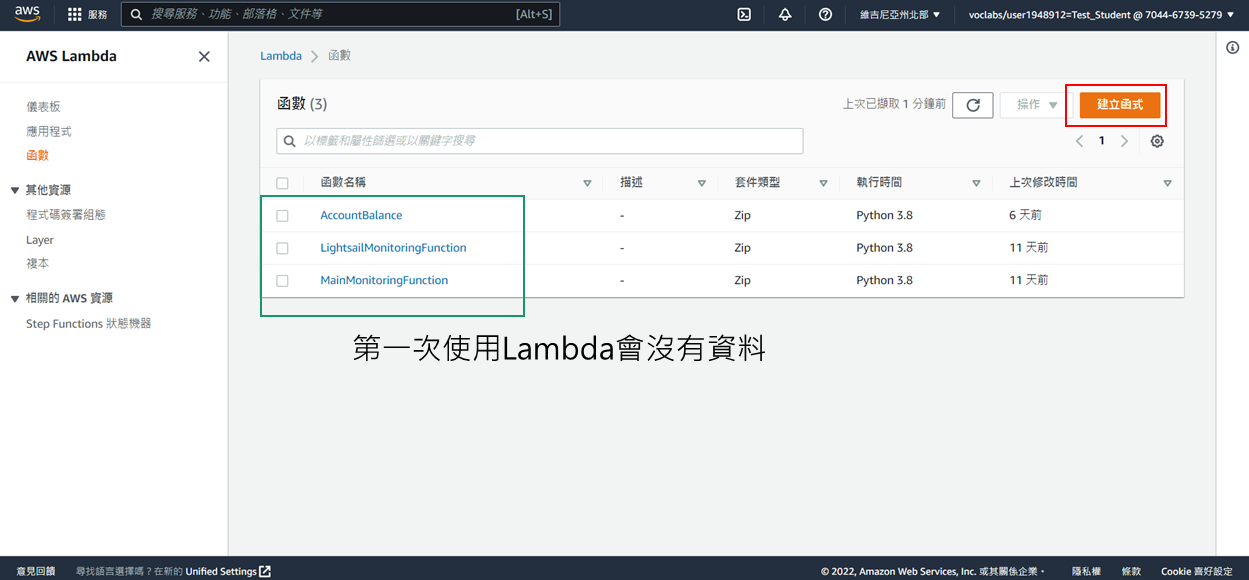
2. 點選**建立函式**
3. 點選從頭開始撰寫
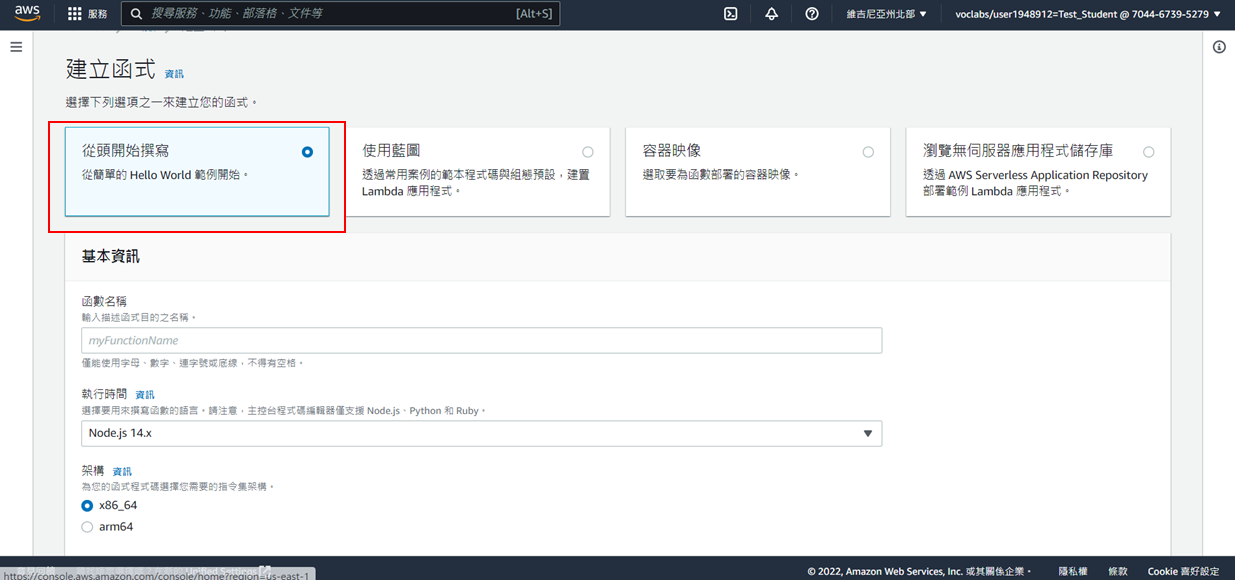
4. 函數名稱自訂
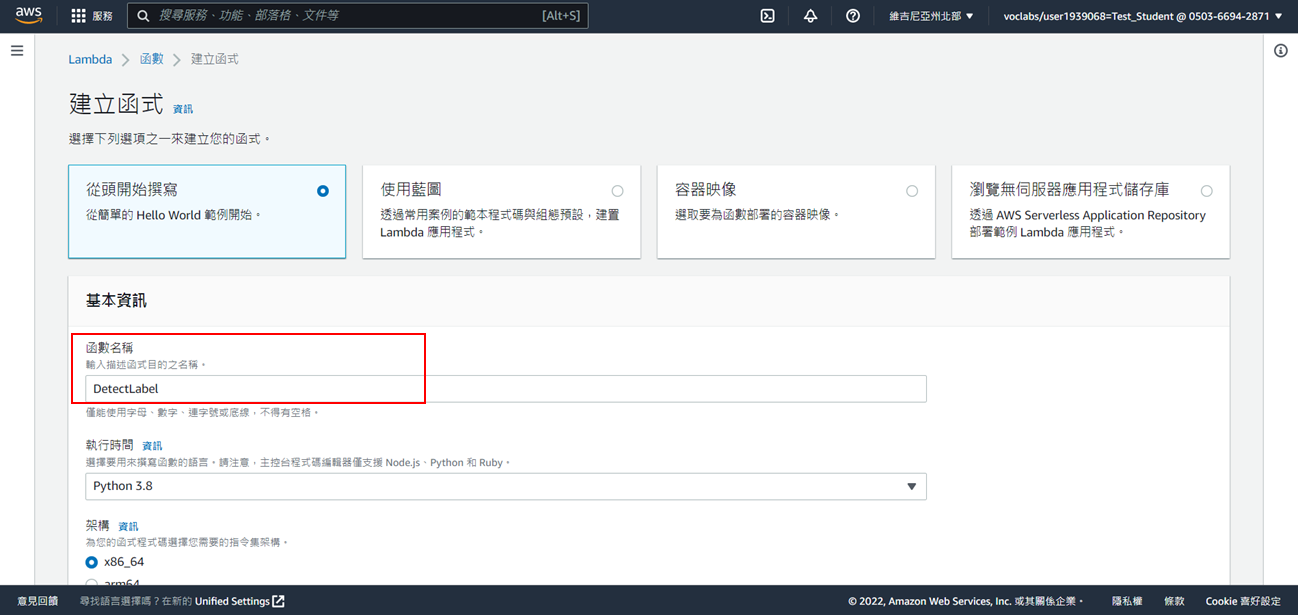
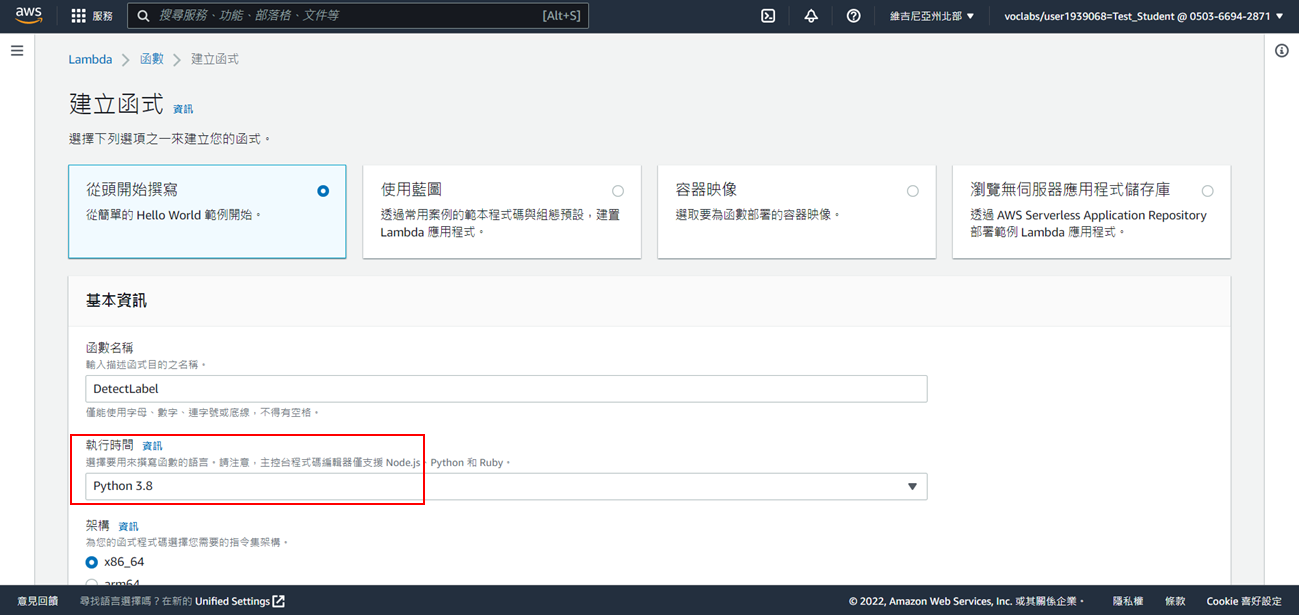
5. 執行時間:Python3.12
6. 選擇使用現有的角色:**LabRole**
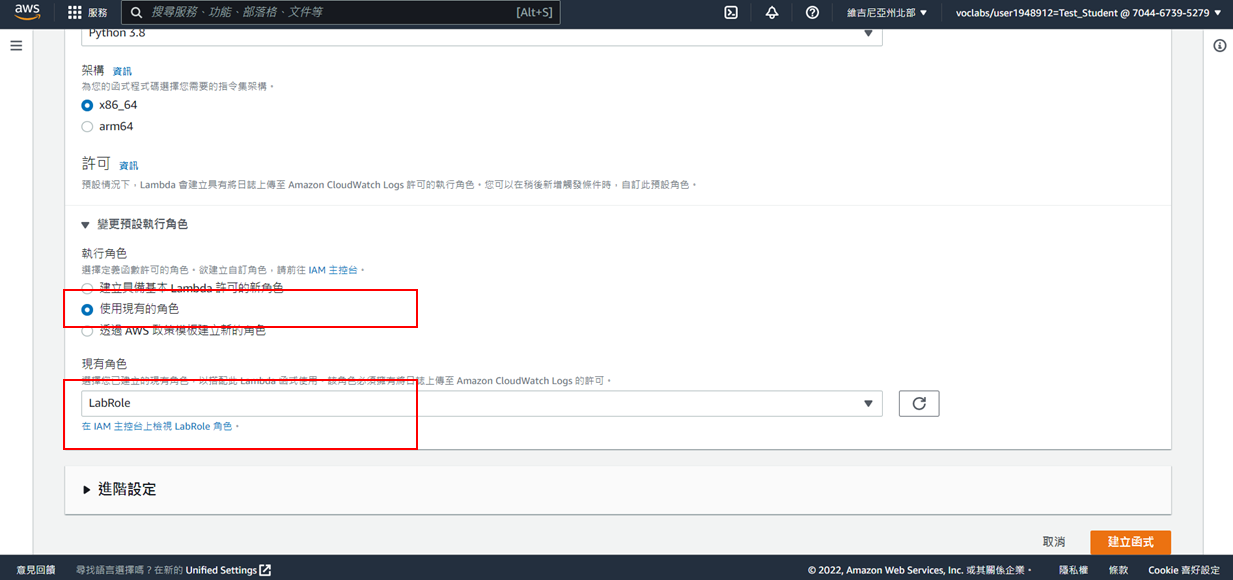
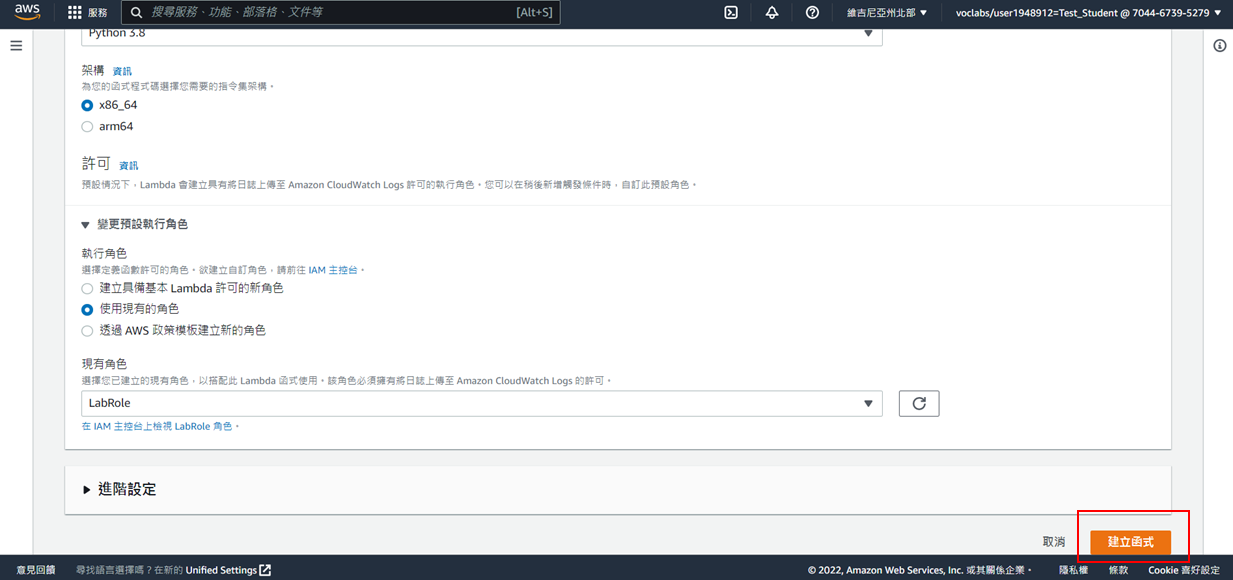
7. 點選**建立函式**
8. 成功建立函式
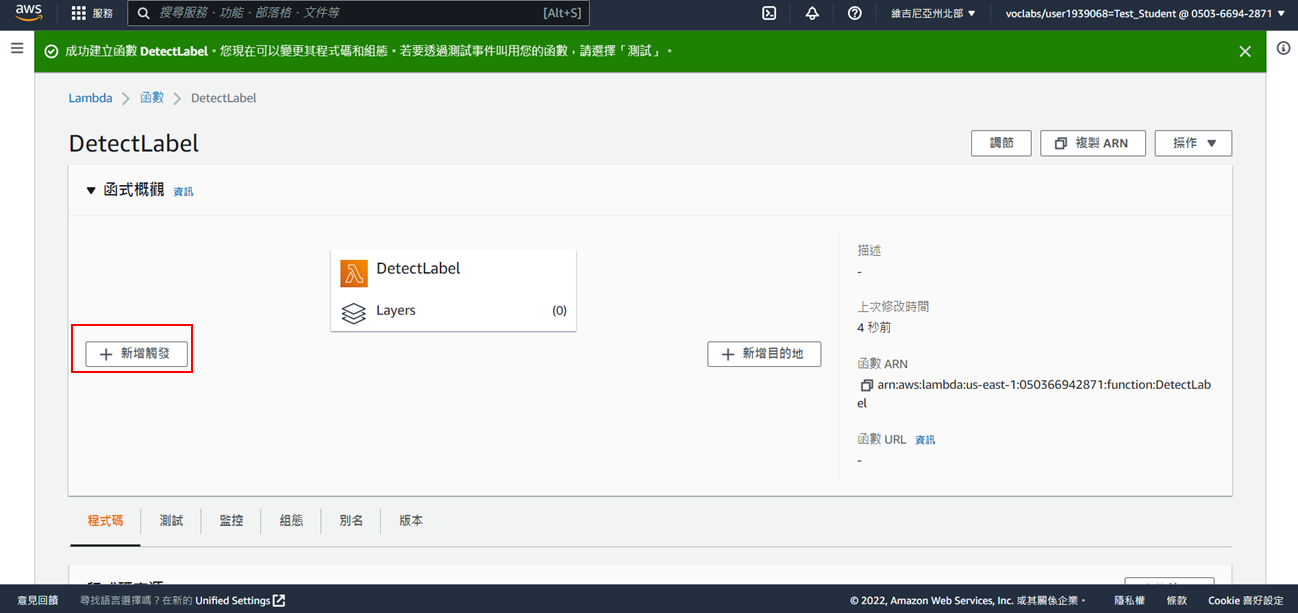
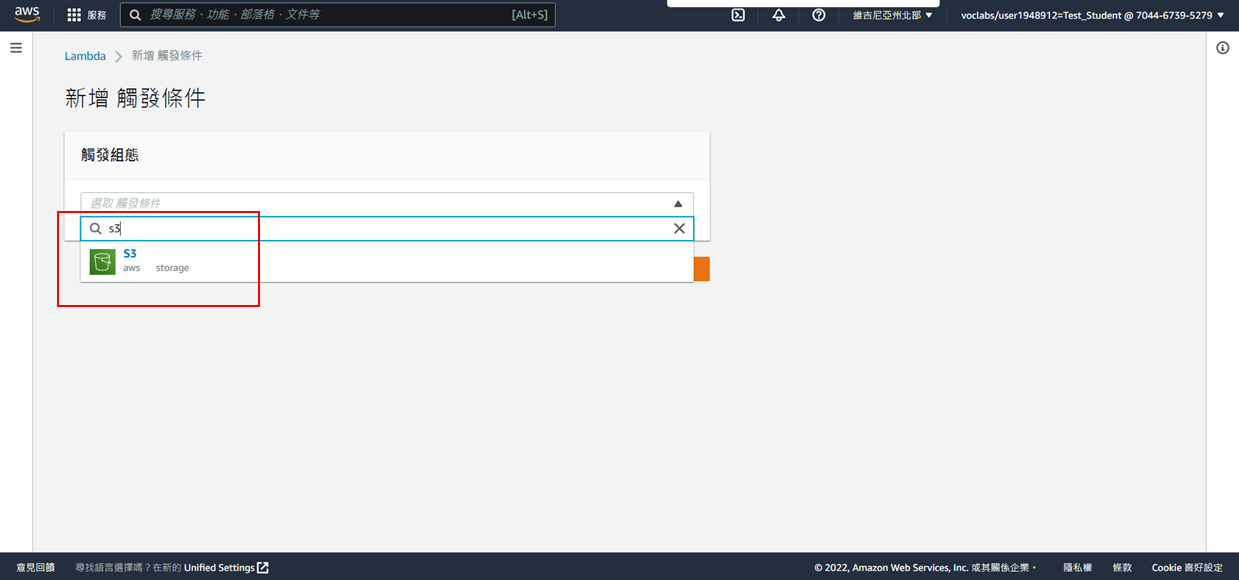
9. 點選**新增觸發**
10. 選擇S3
11. 選擇步驟1建立的S3
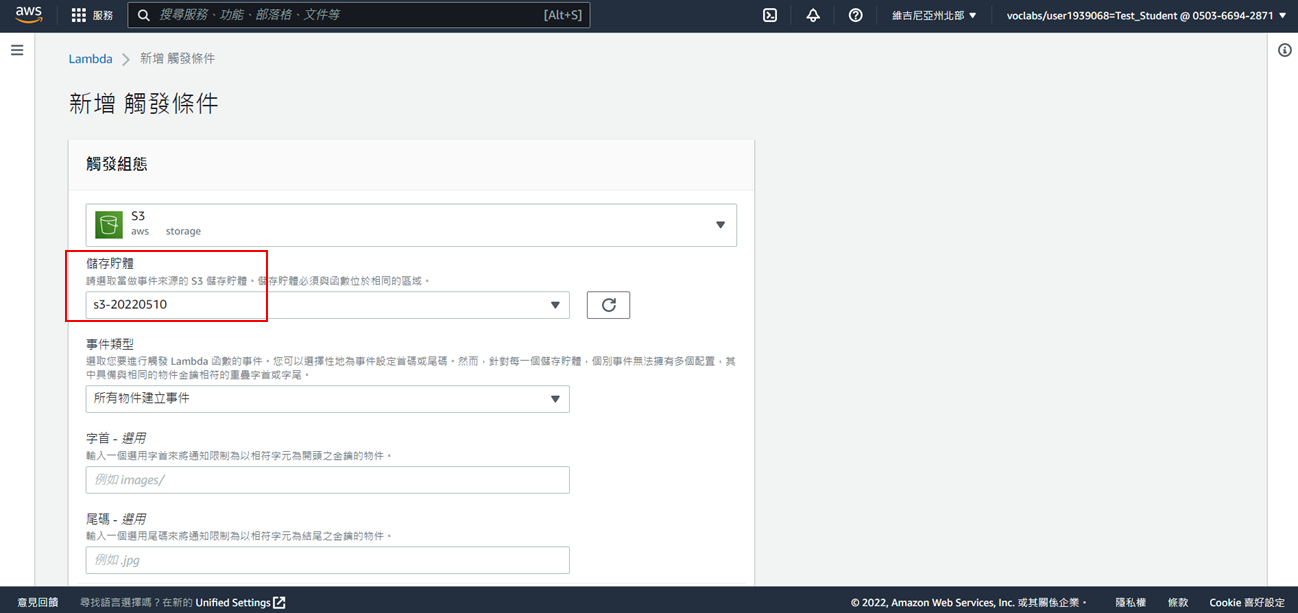
12. 勾選我確認

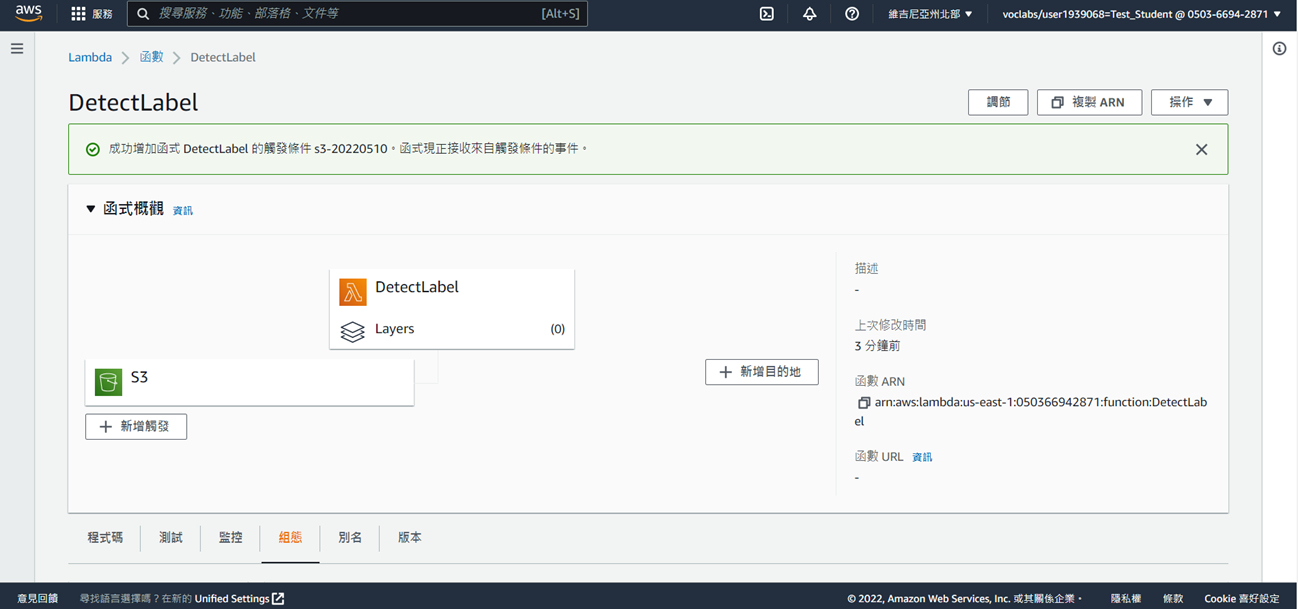
13. 點選**新增**
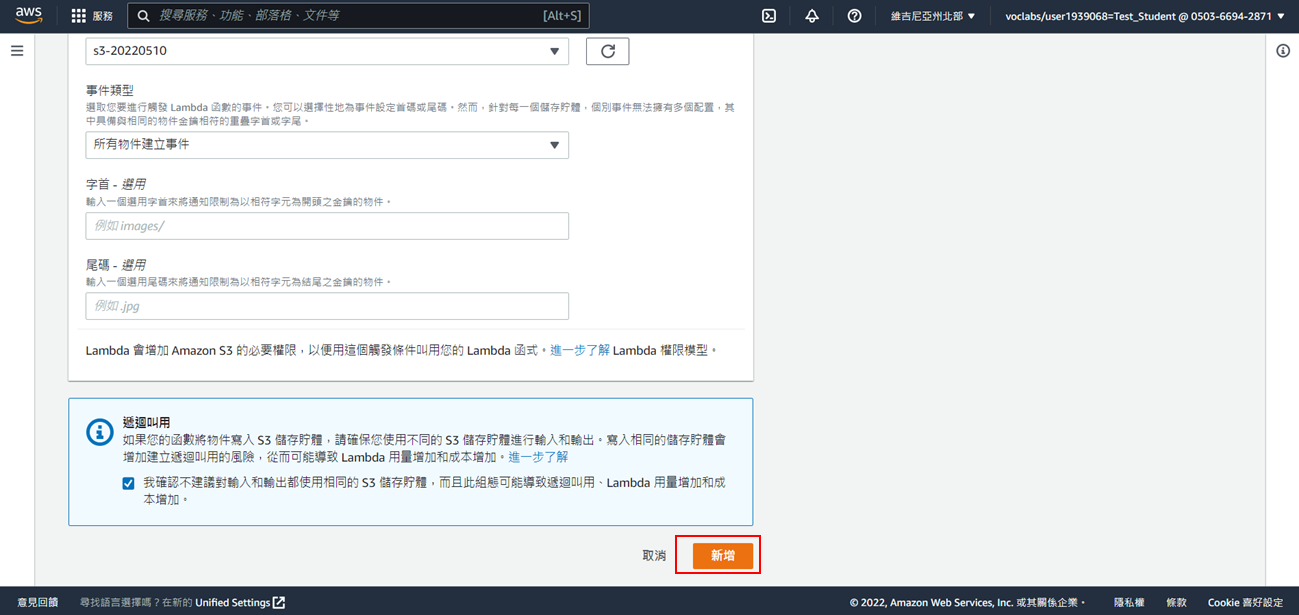
14. 完成觸發設定
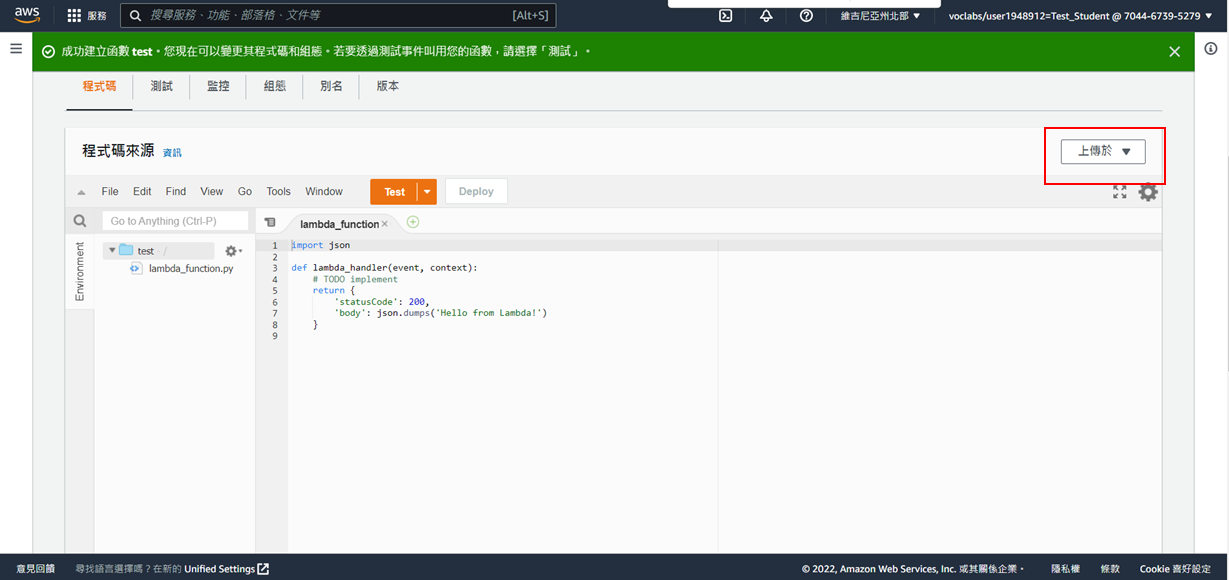
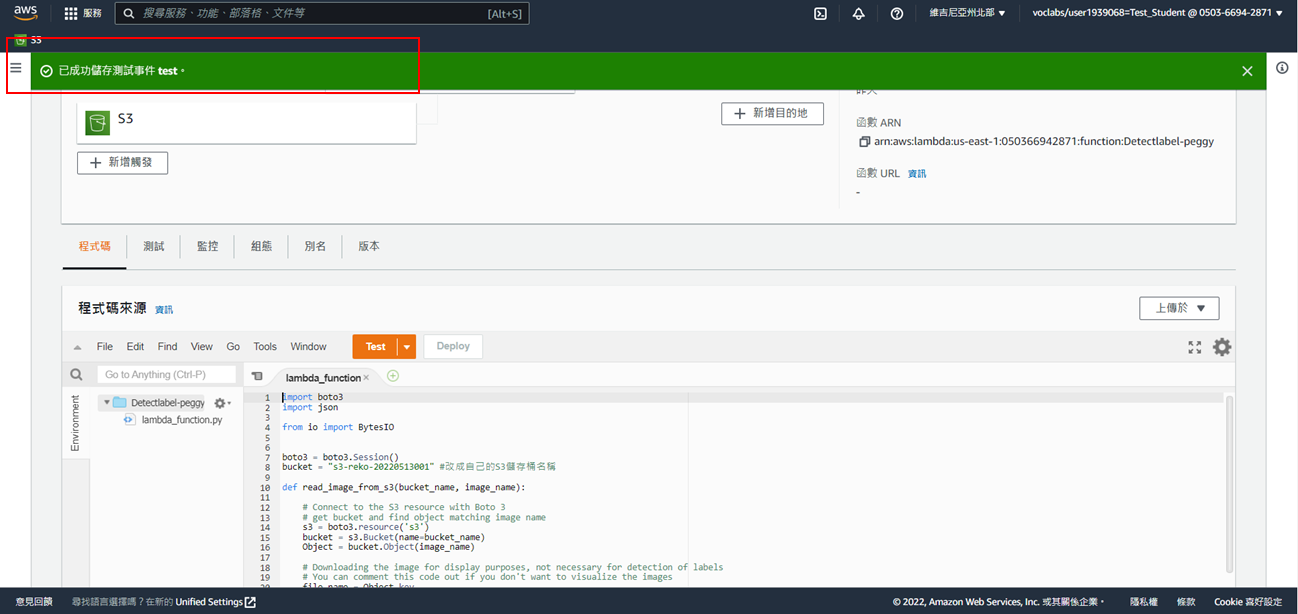
15. 往下滑動視窗,點選**程式碼**

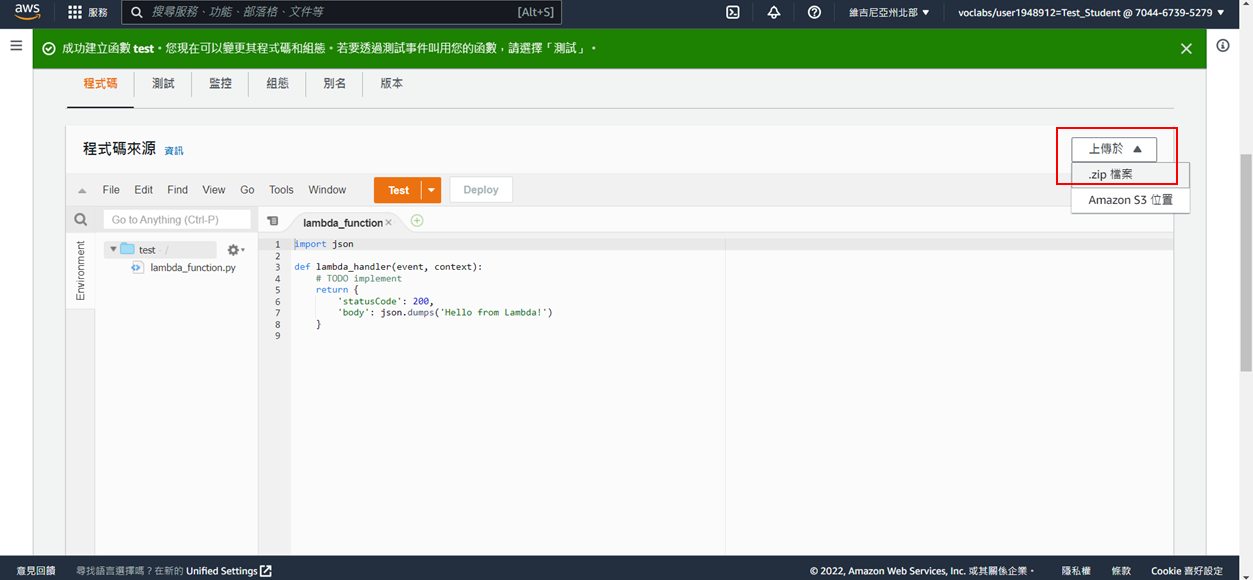
16. 點開**上傳於**,並下載檔案:
檔案連結: https://github.com/EISCFCU/ntue_cloud-database/blob/main/DetectLabel-96c34899-e979-4c92-b71c-be97f0a9983d.zip
17. 選擇剛剛下載的.zip 檔案
18. 選擇**上傳**
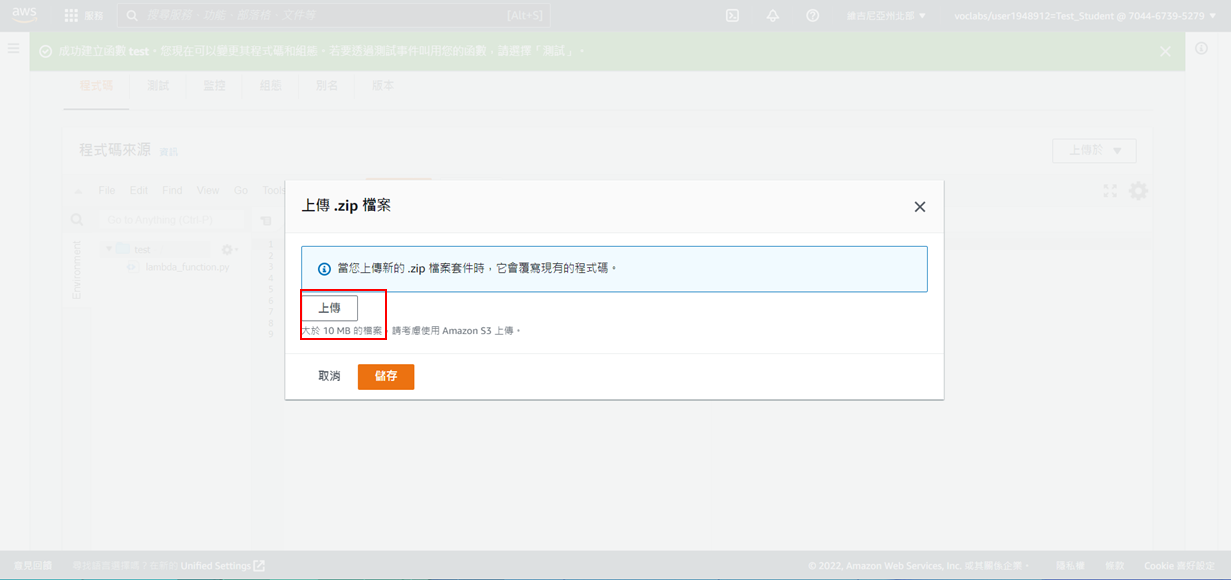
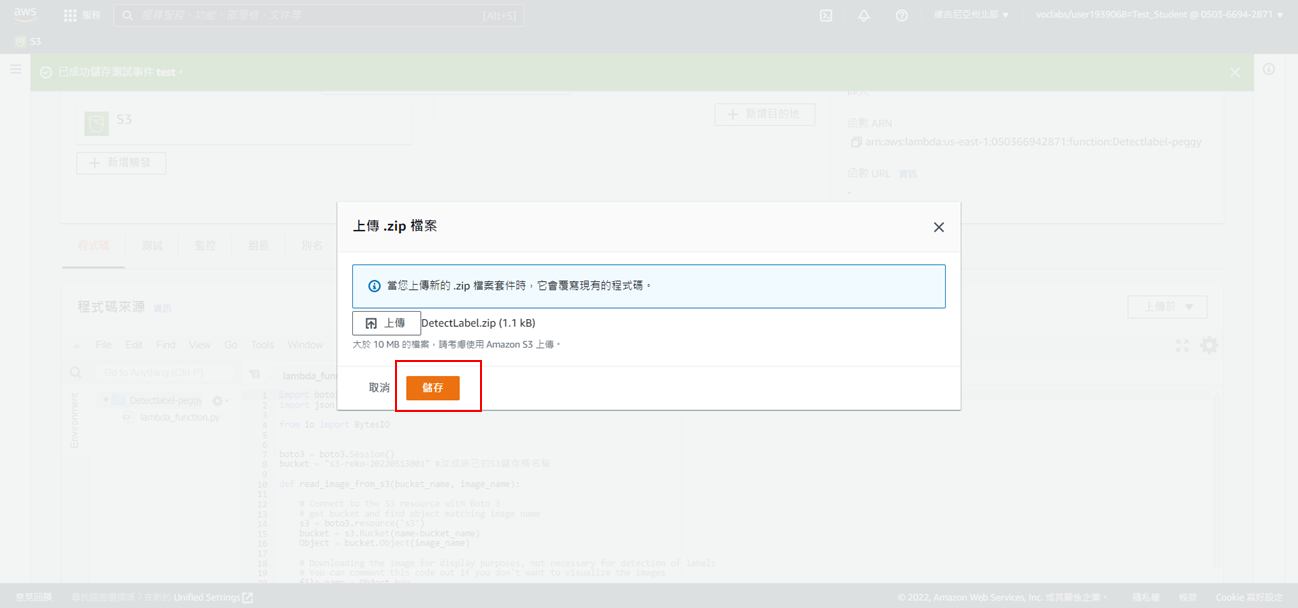
19. 選擇**儲存**
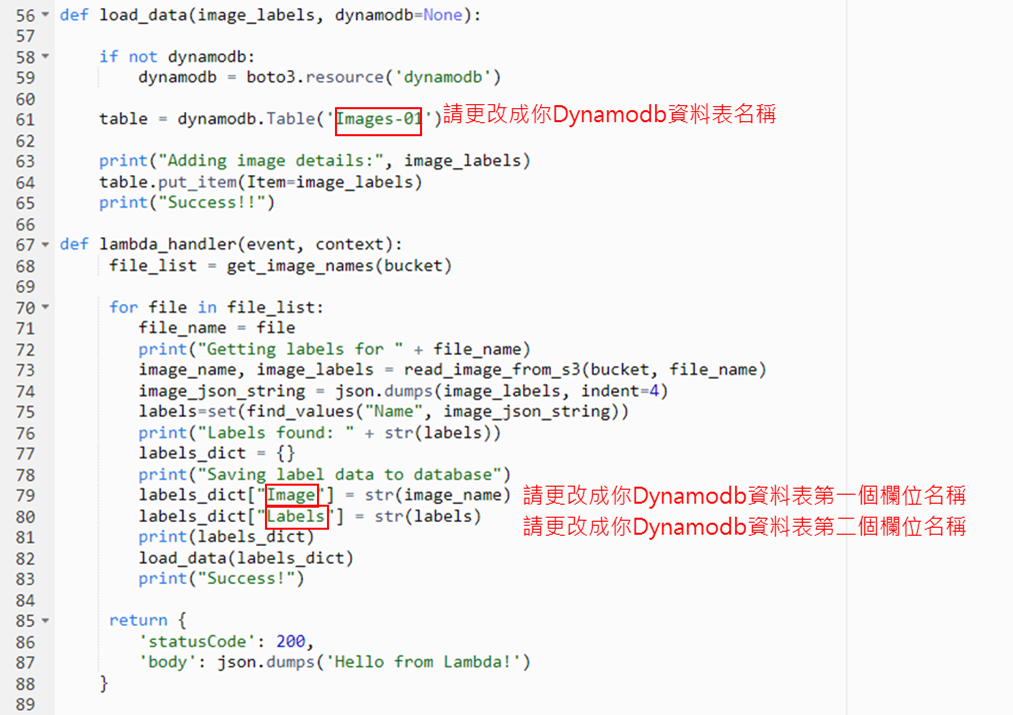
20. 更改第8行資料(S3名稱)
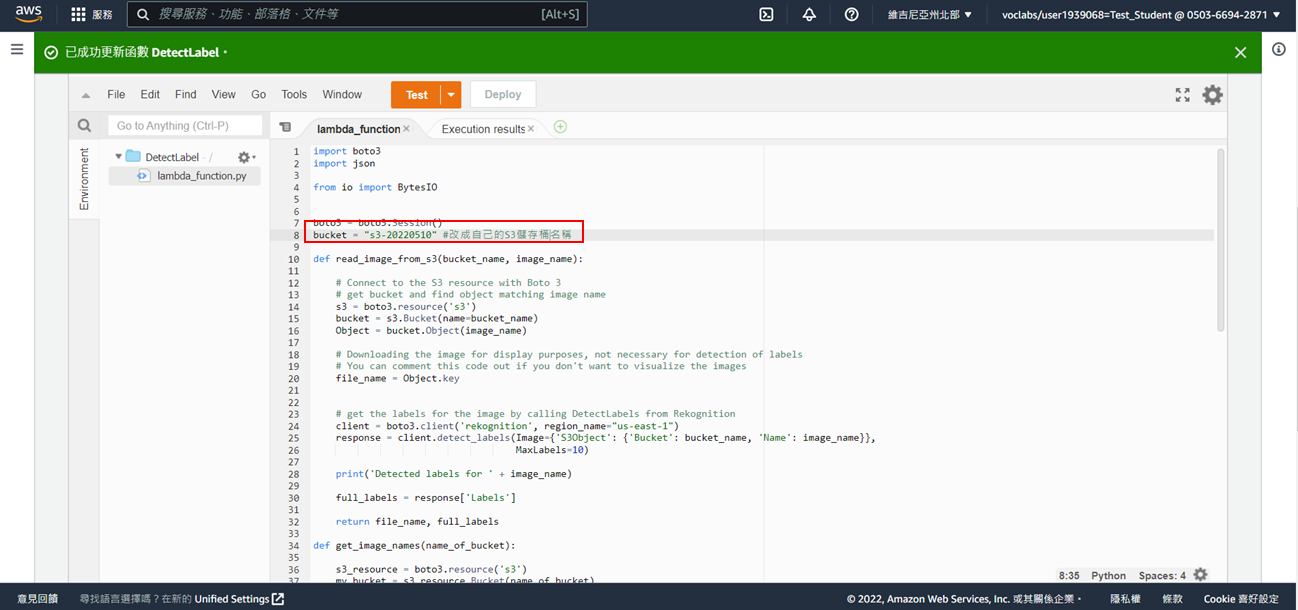
**註:對照一下步驟2所建的Dynamodb資料表名稱是否為Image, 分區索引:Image(字串) ,排序索引:Labels(字串)**
如果不是,請更正以下資訊
**如何查詢Dynamdb資料表欄位:**
21. 點選**Deploy**

22. 點選**Test**

23. 輸入事件名稱:**test**
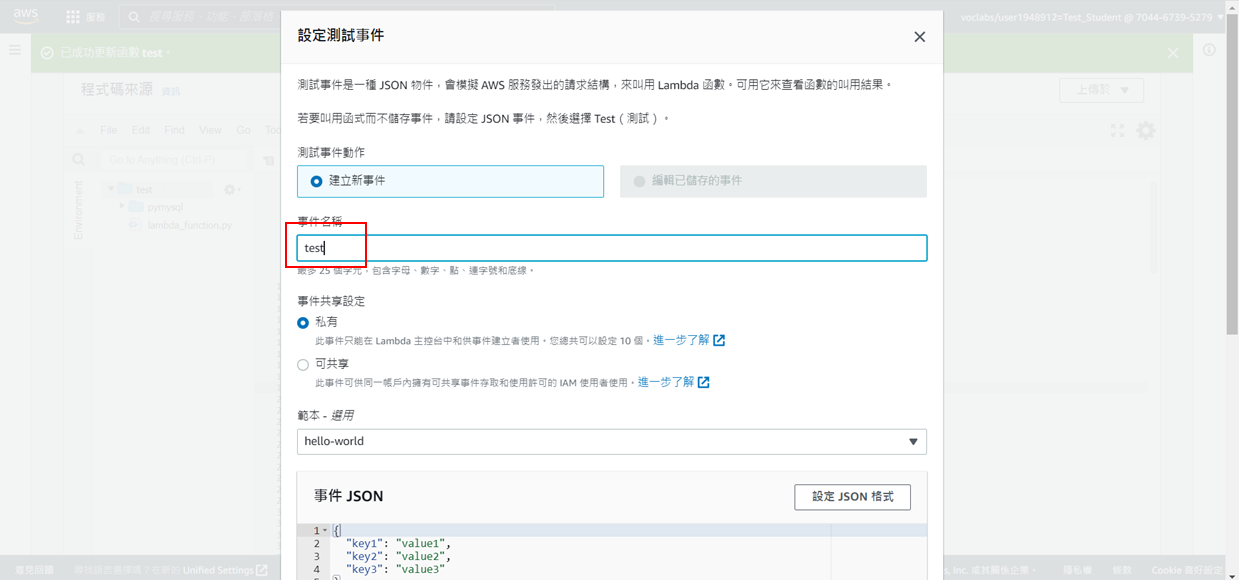
24.貼上測試語法(請先將原始資料刪除後再貼上)

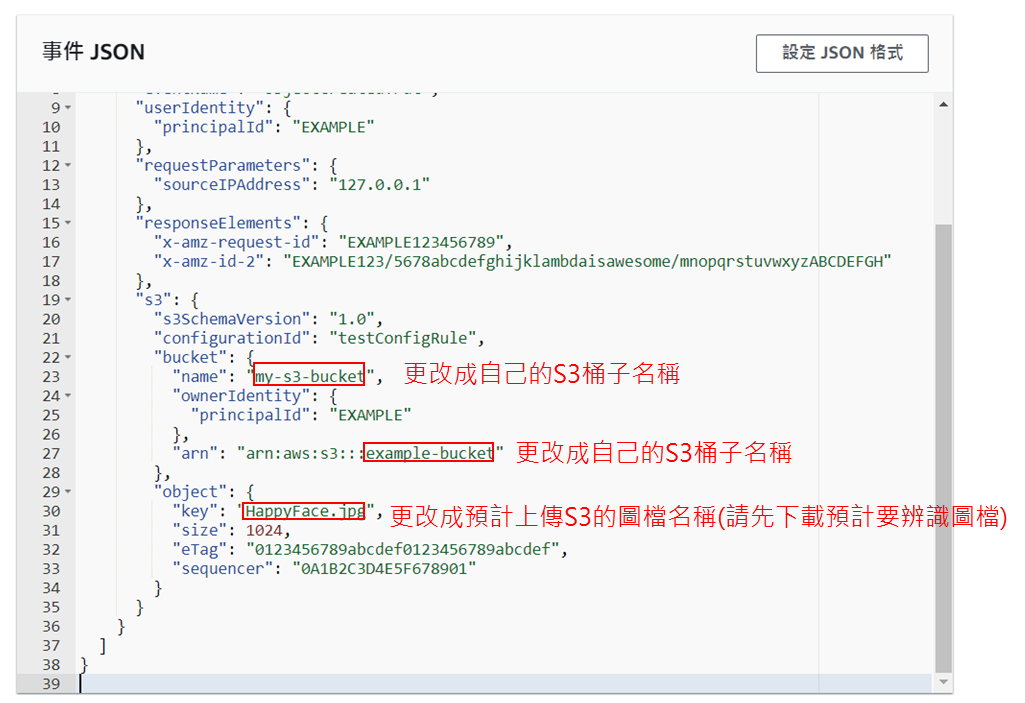
25. 修改23、27行的s3 bucket name及30行的object name
```
{
"Records": [
{
"eventVersion": "2.0",
"eventSource": "aws:s3",
"awsRegion": "us-east-1",
"eventTime": "1970-01-01T00:00:00.000Z",
"eventName": "ObjectCreated:Put",
"userIdentity": {
"principalId": "EXAMPLE"
},
"requestParameters": {
"sourceIPAddress": "127.0.0.1"
},
"responseElements": {
"x-amz-request-id": "EXAMPLE123456789",
"x-amz-id-2": "EXAMPLE123/5678abcdefghijklambdaisawesome/mnopqrstuvwxyzABCDEFGH"
},
"s3": {
"s3SchemaVersion": "1.0",
"configurationId": "testConfigRule",
"bucket": {
"name": "my-s3-bucket",
"ownerIdentity": {
"principalId": "EXAMPLE"
},
"arn": "arn:aws:s3:::example-bucket"
},
"object": {
"key": "HappyFace.jpg",
"size": 1024,
"eTag": "0123456789abcdef0123456789abcdef",
"sequencer": "0A1B2C3D4E5F678901"
}
}
}
]
}
```
26. 點選**儲存**

27. 成功儲存測試事件
28. 點選**組態**,選取**一般組態**

29. 點選**編輯**

30. 把3秒改成10秒,按下儲存

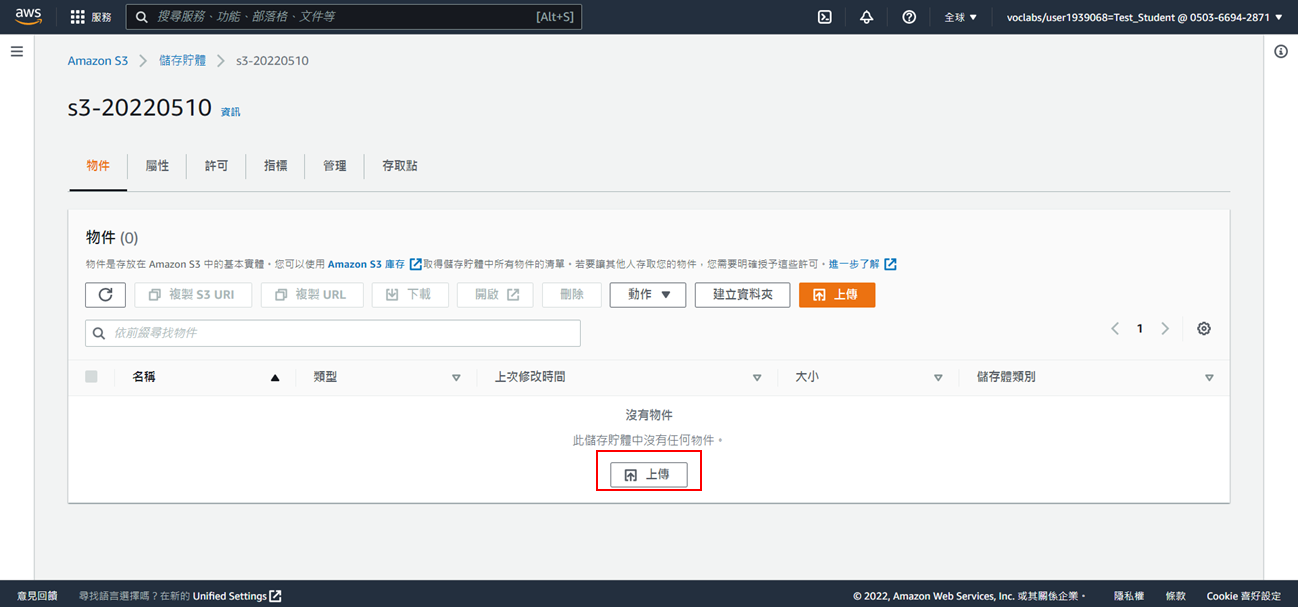
# Step4: S3 上傳圖檔
1. 搜尋S3 並點選
2. 點選步驟1新增的S3
3. 點選**上傳**
4. 點選**新增檔案**
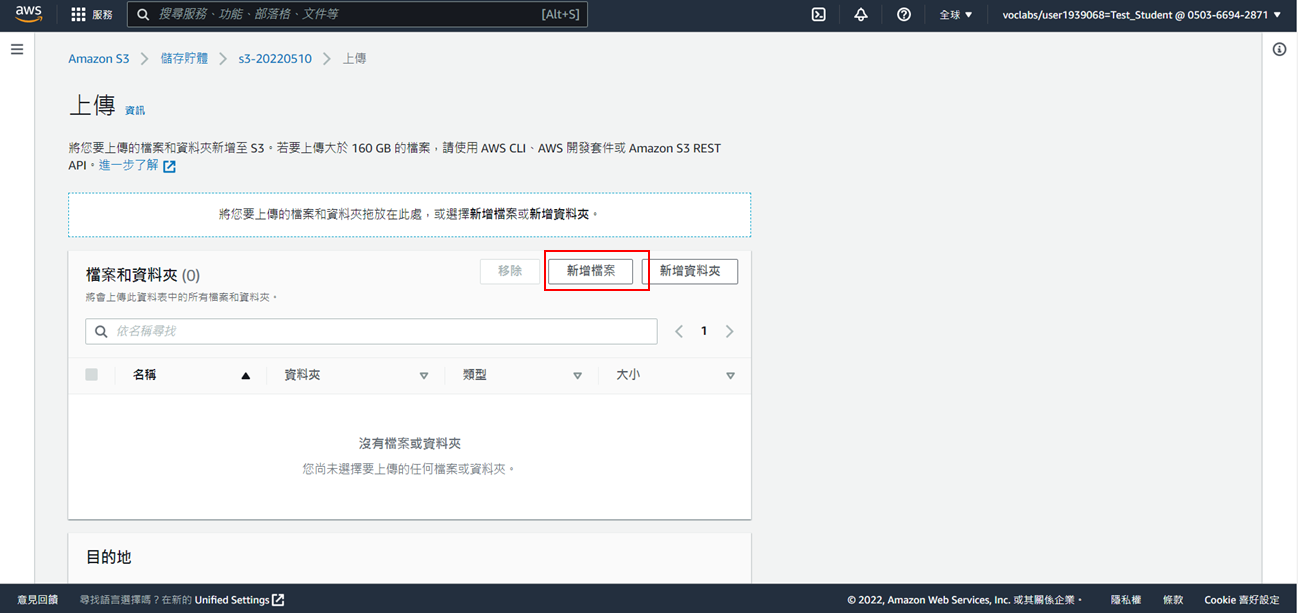
5. 點選**上傳**
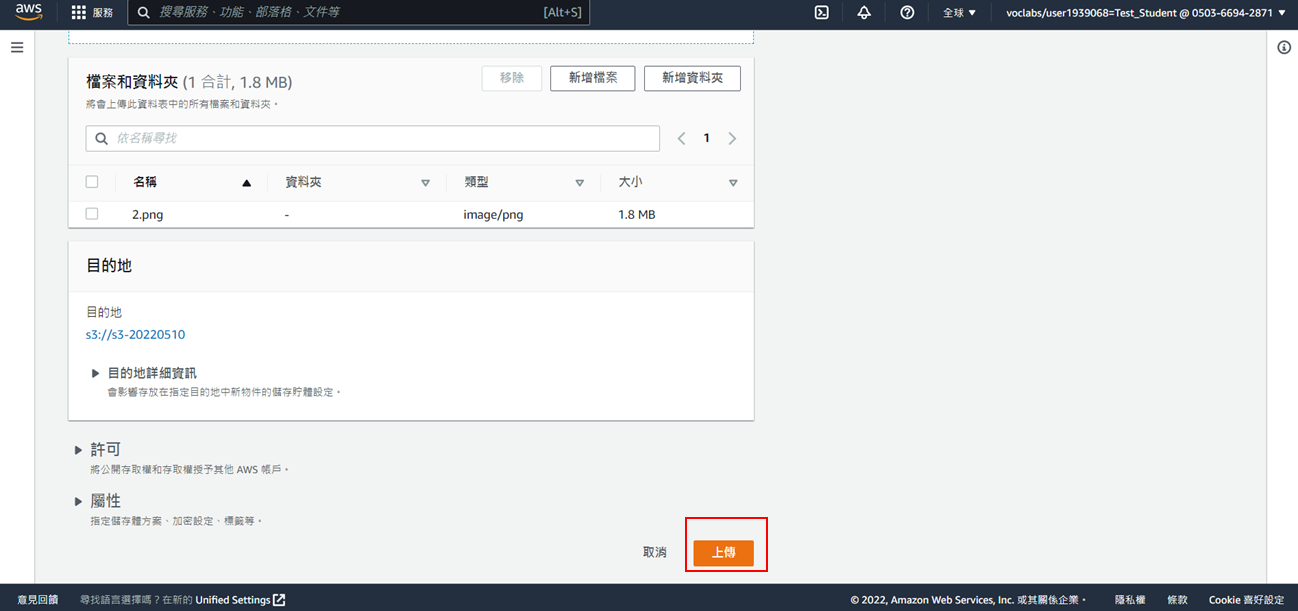
6. 成功上傳
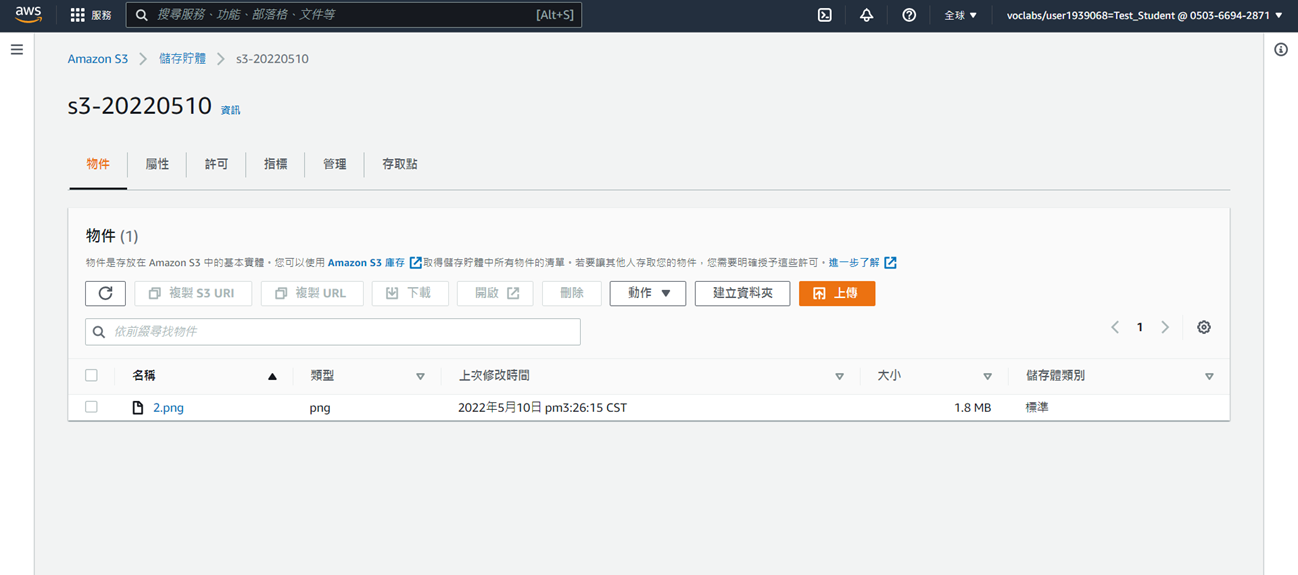
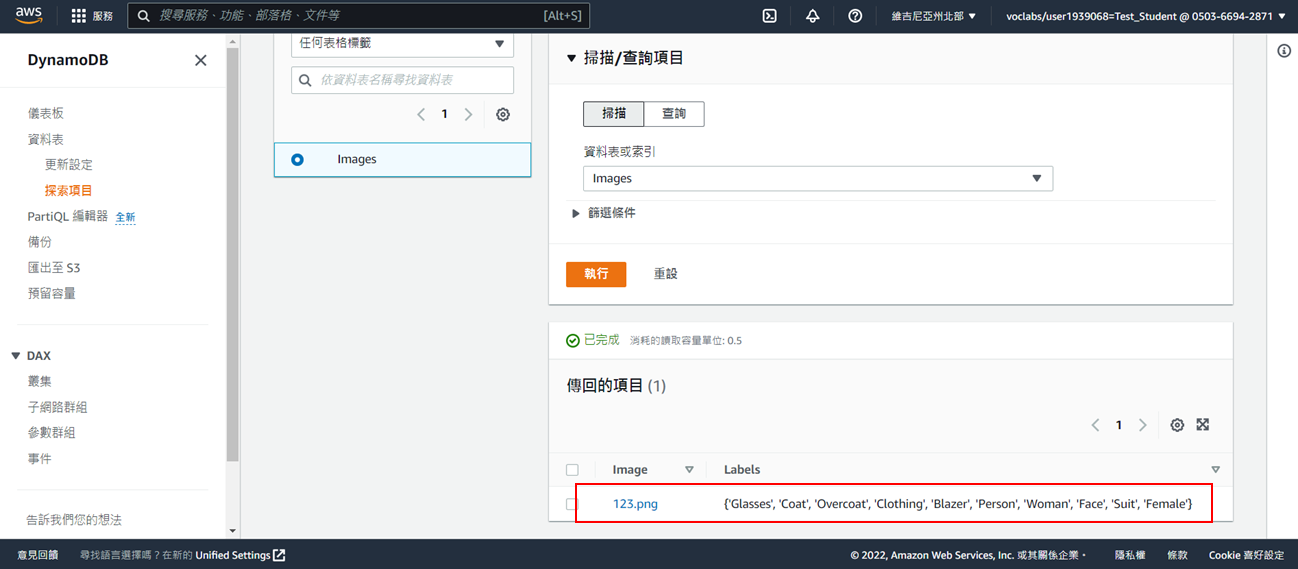
# 查看Dynamodb
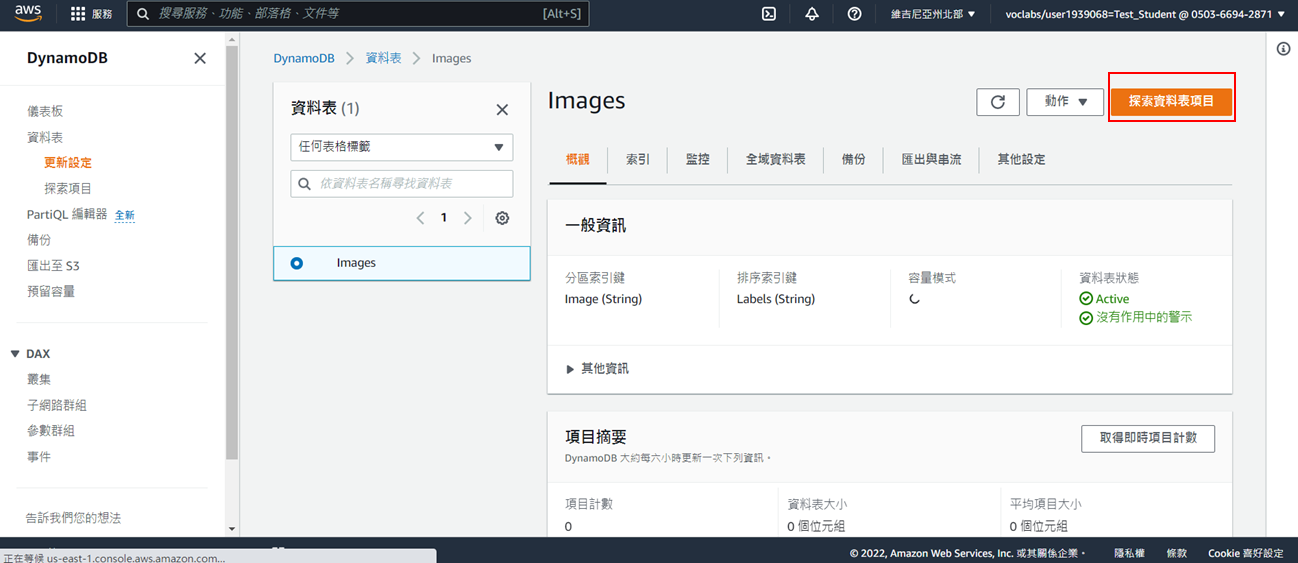
1. 點選步驟2建立的Dynamodb資料表
2. 點選**探索資料表項目**
3. 查看結果
----
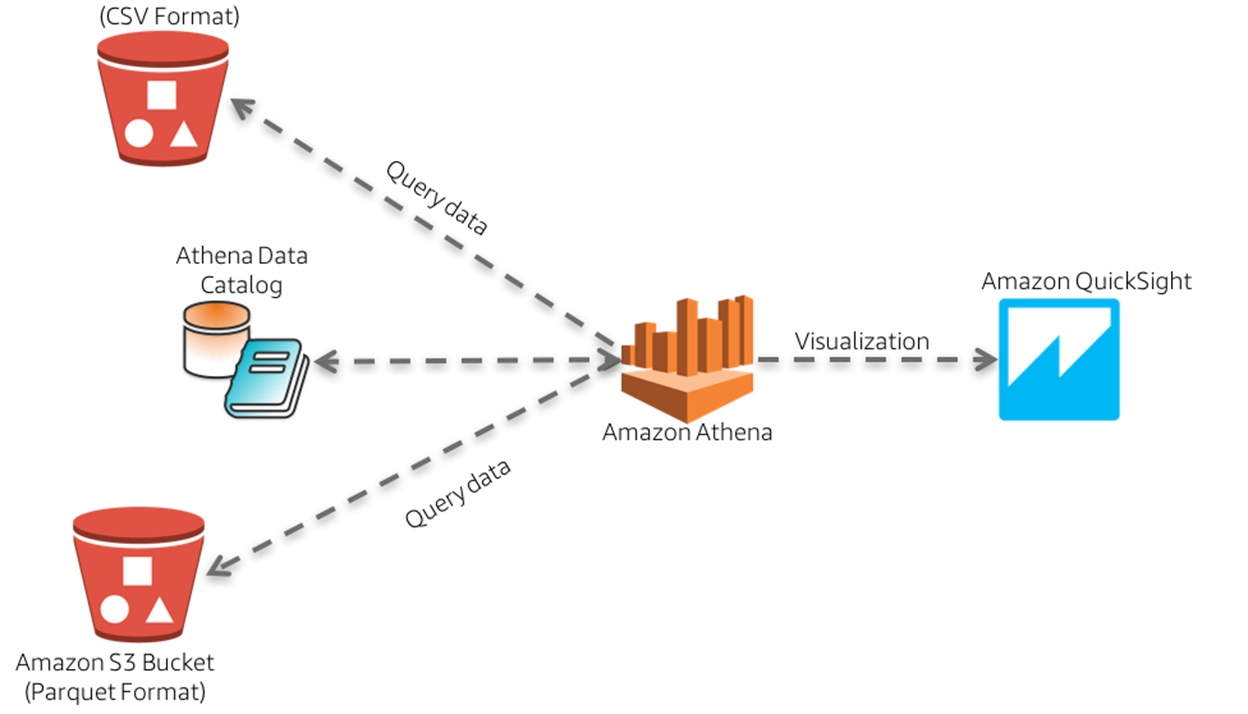
# 資料視覺化
## 實施架構
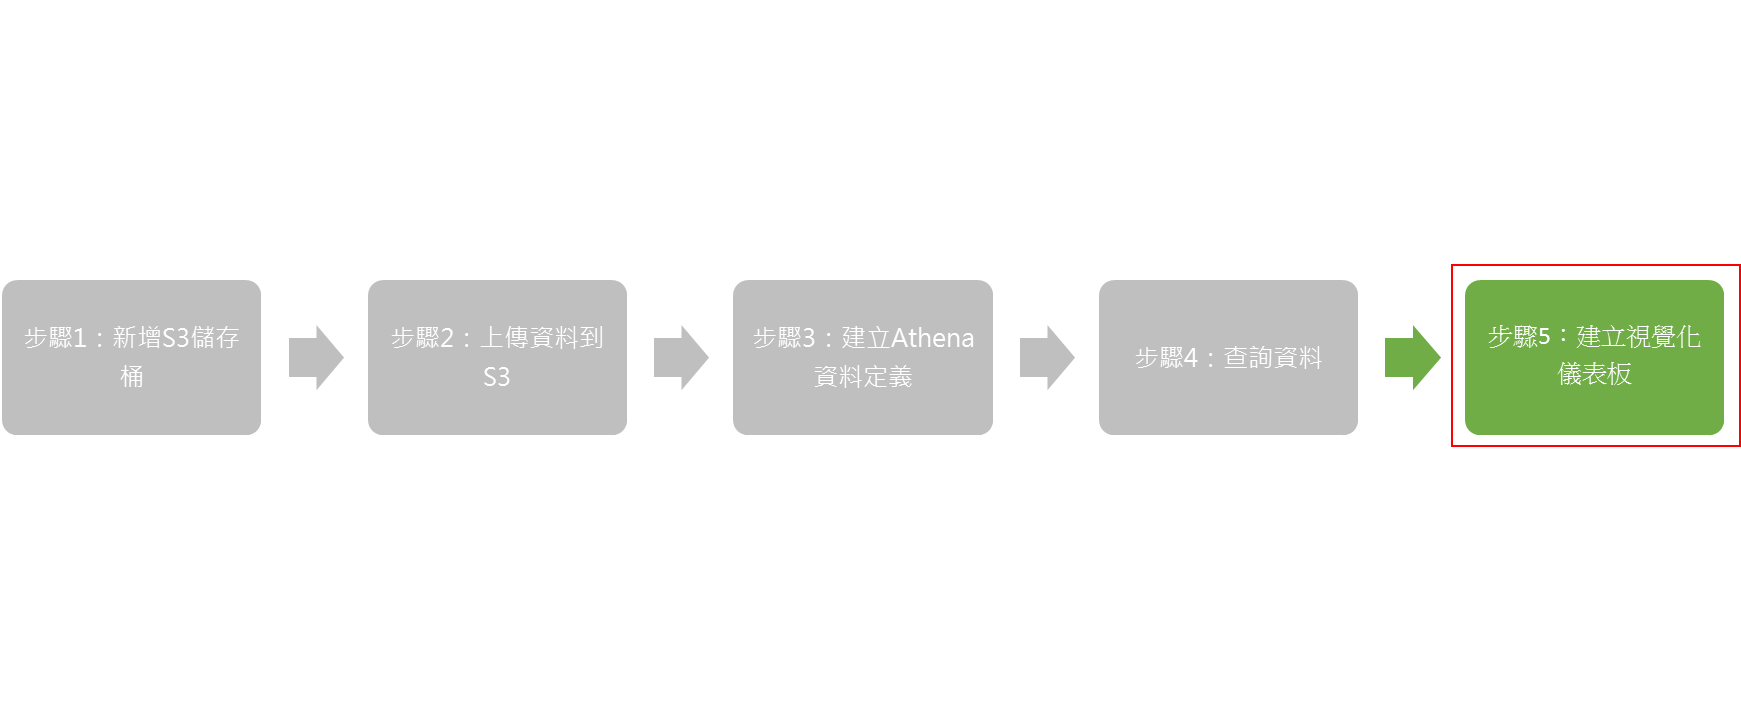
## 操作步驟
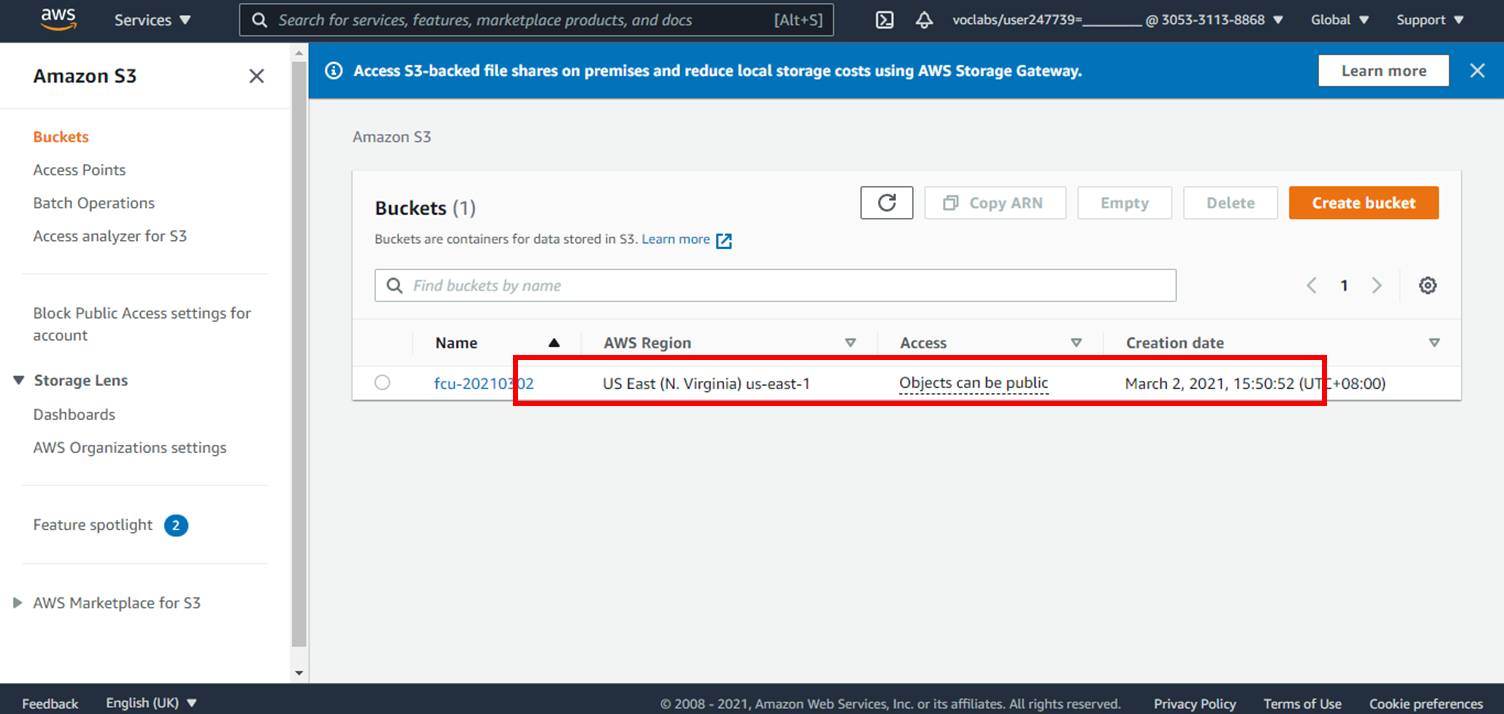
# 步驟1:新增S3儲存桶
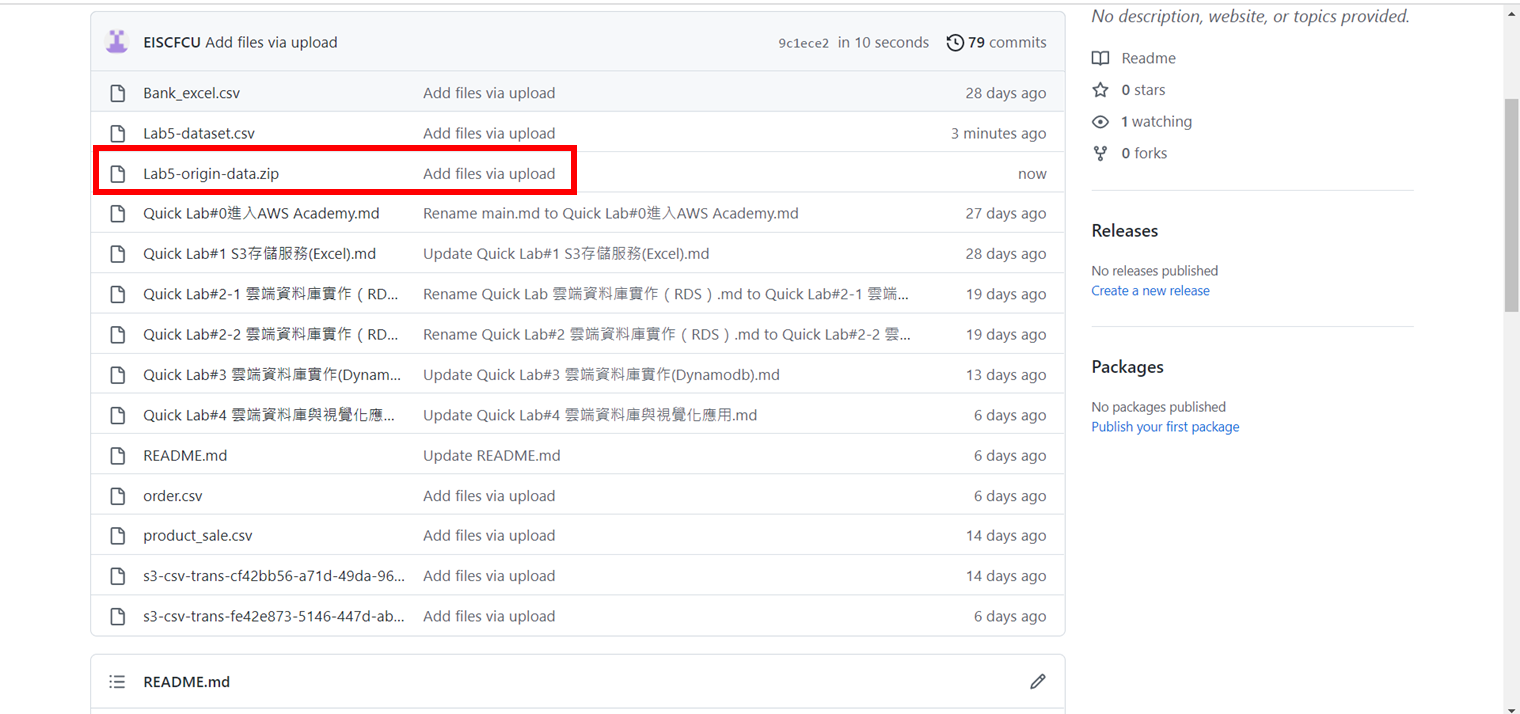
1. 下載Github資料並解壓縮
https://github.com/EISCFCU/ntue_cloud-database/blob/main/Lab5-origin-data.zip
2.登入AWS Management Console
3.點選**S3**
4.點選**Create bucket**
5.輸入Bucket Name(唯一;名稱自訂)
6.點選**Create Bucket**
7.完成名為fcu-20210302(名稱自訂)的Bucket新增
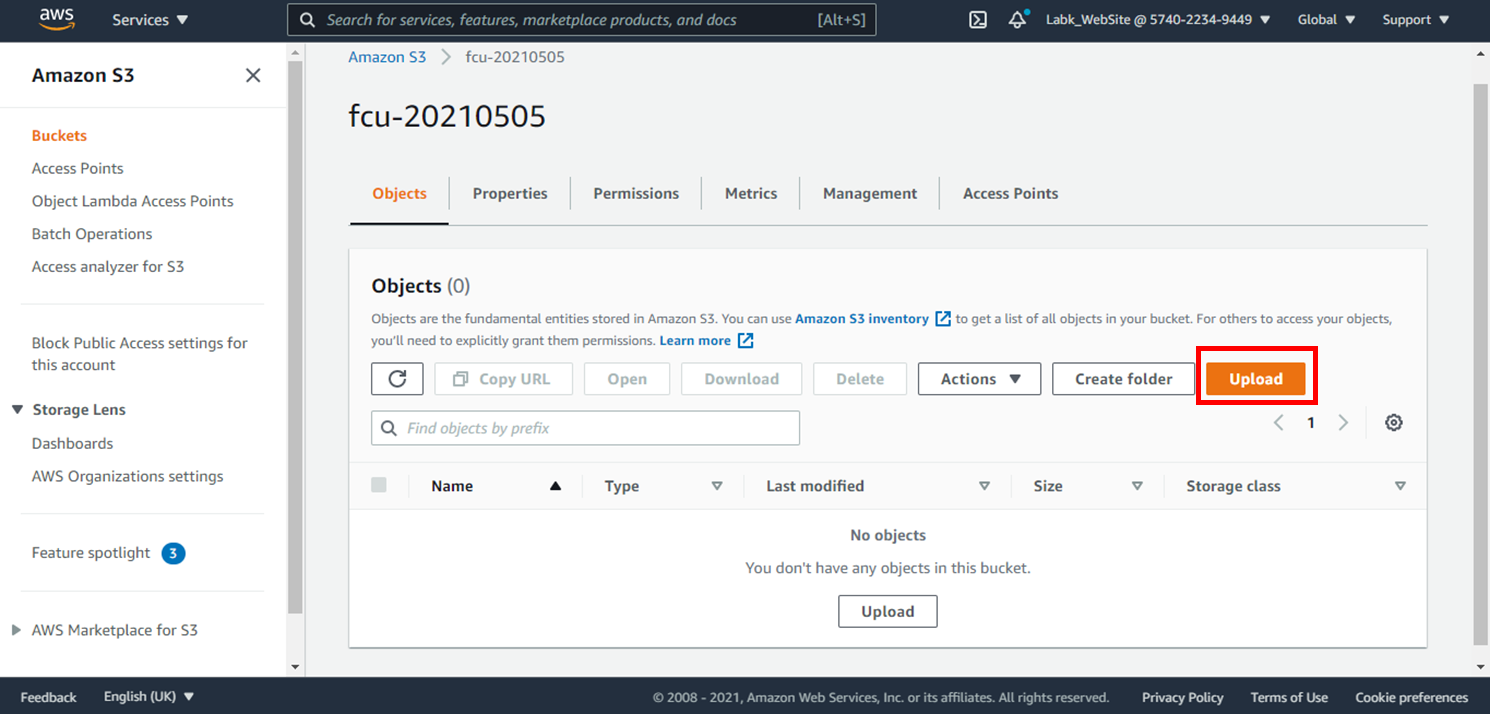
# 步驟2:上傳資料到S3
1.點選fcu-20210505(名稱自訂)的Bucket name

2.點選**Upload**
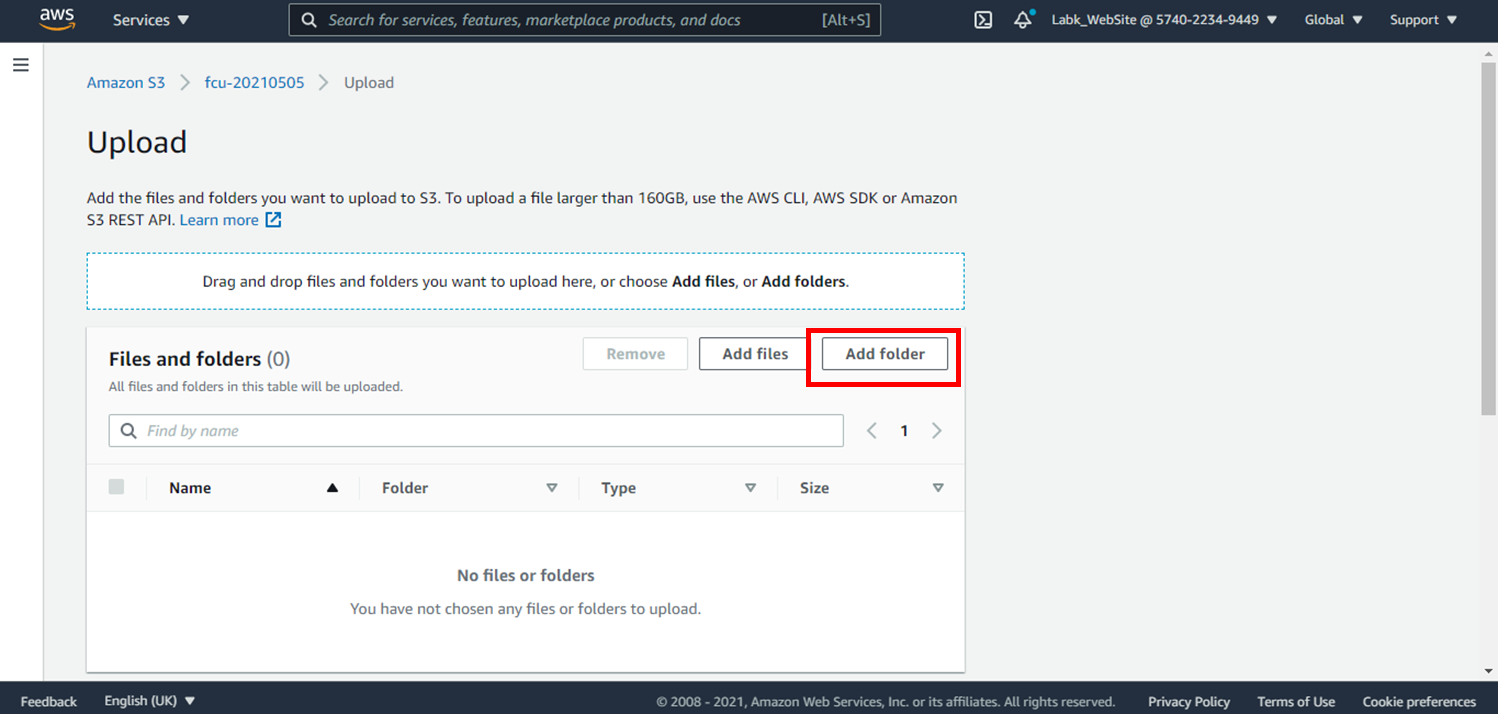
3.點選**Add folder**
4.點選**上傳**

5.點選上傳
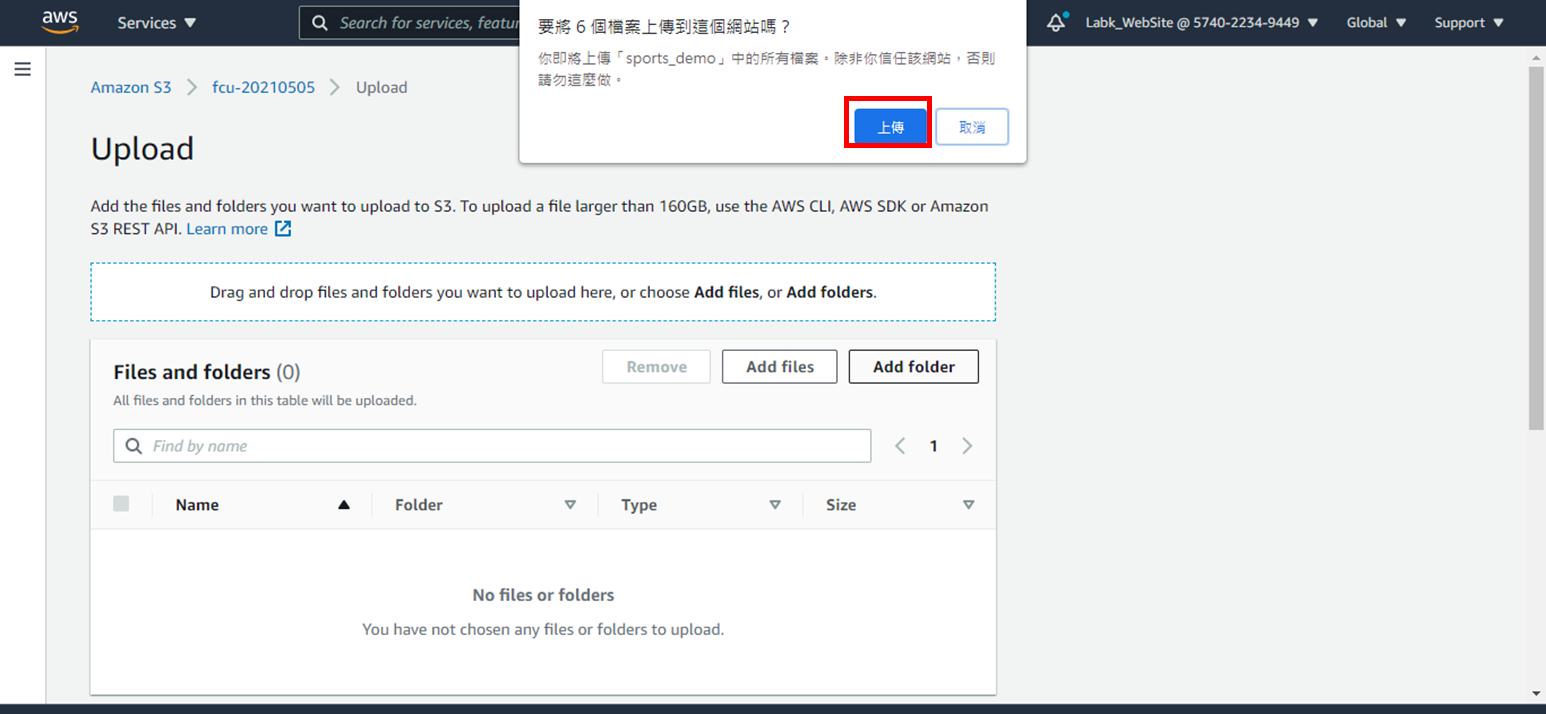
6.點選**Upload**上傳
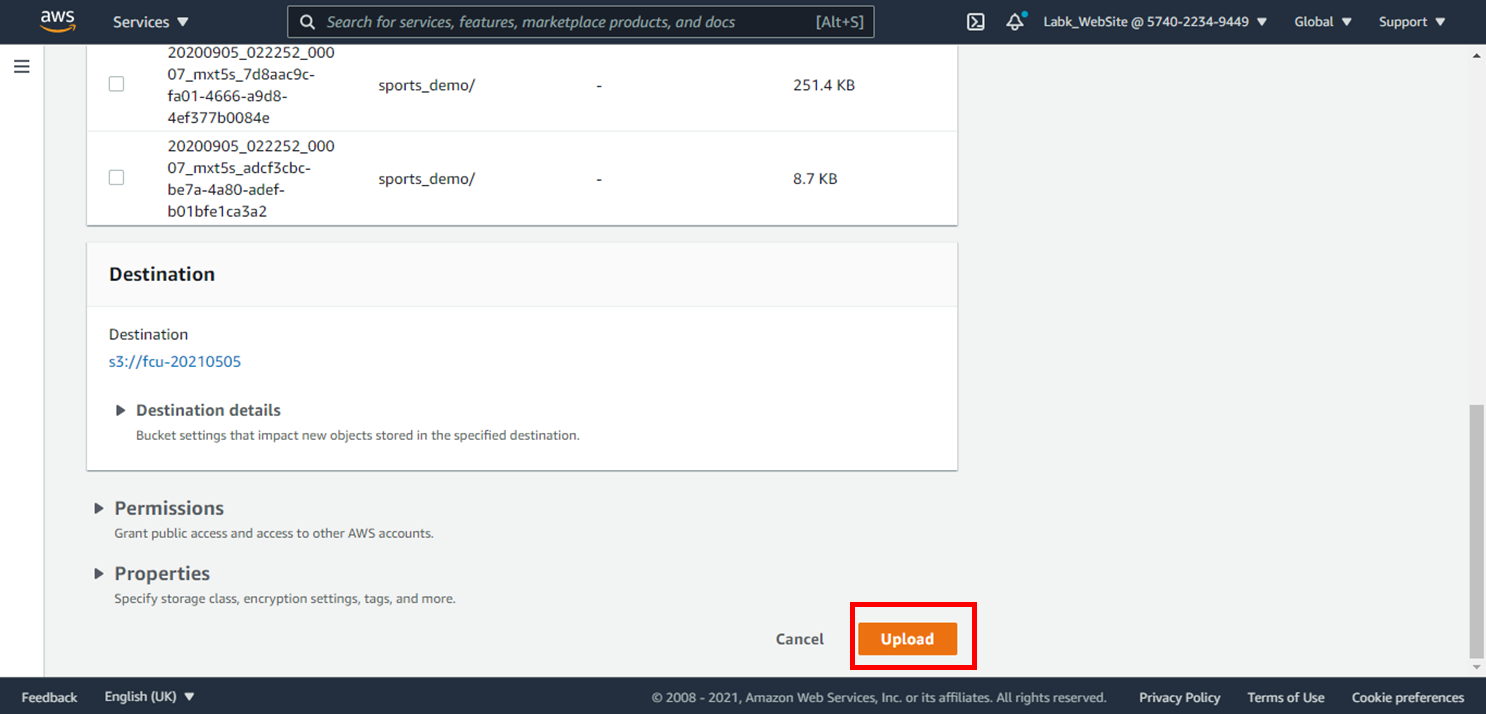
7.等待資料上傳
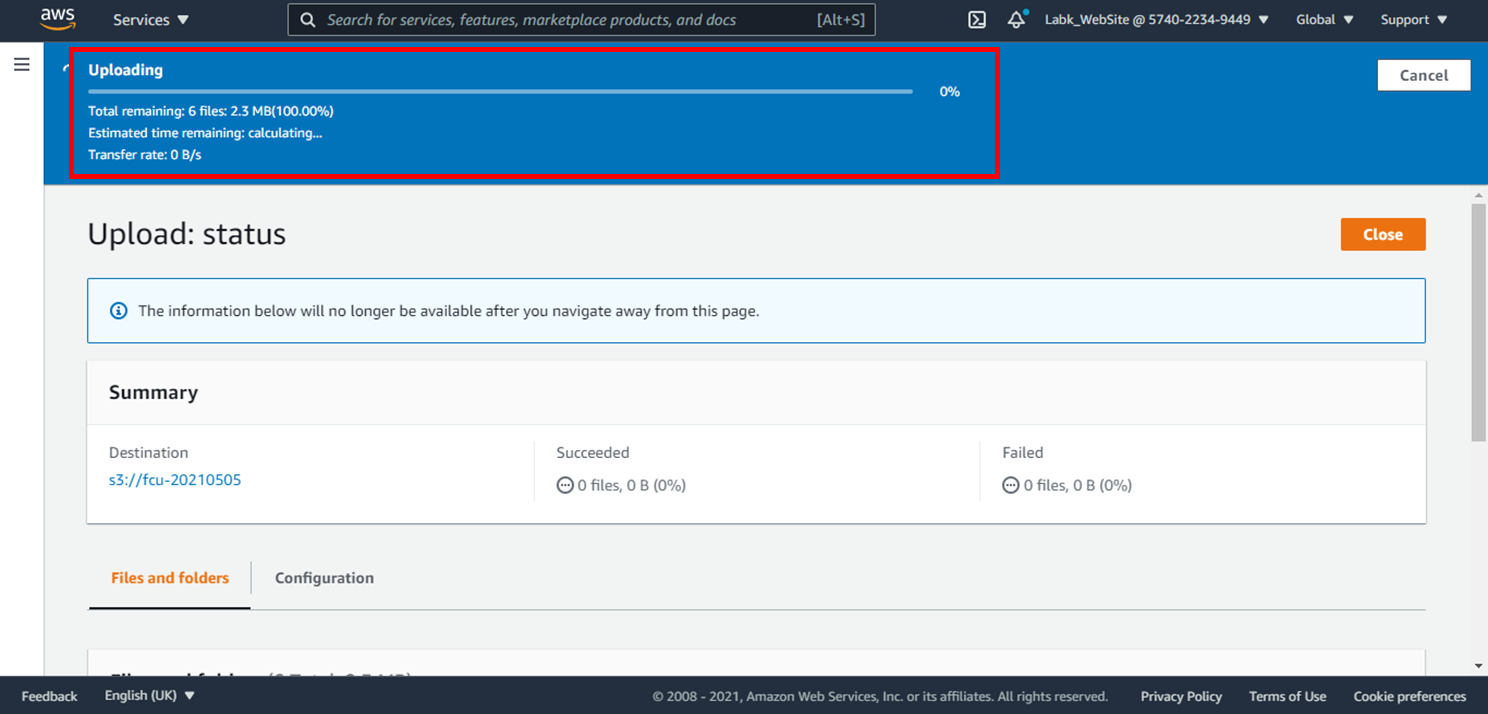
8.資料上傳成功
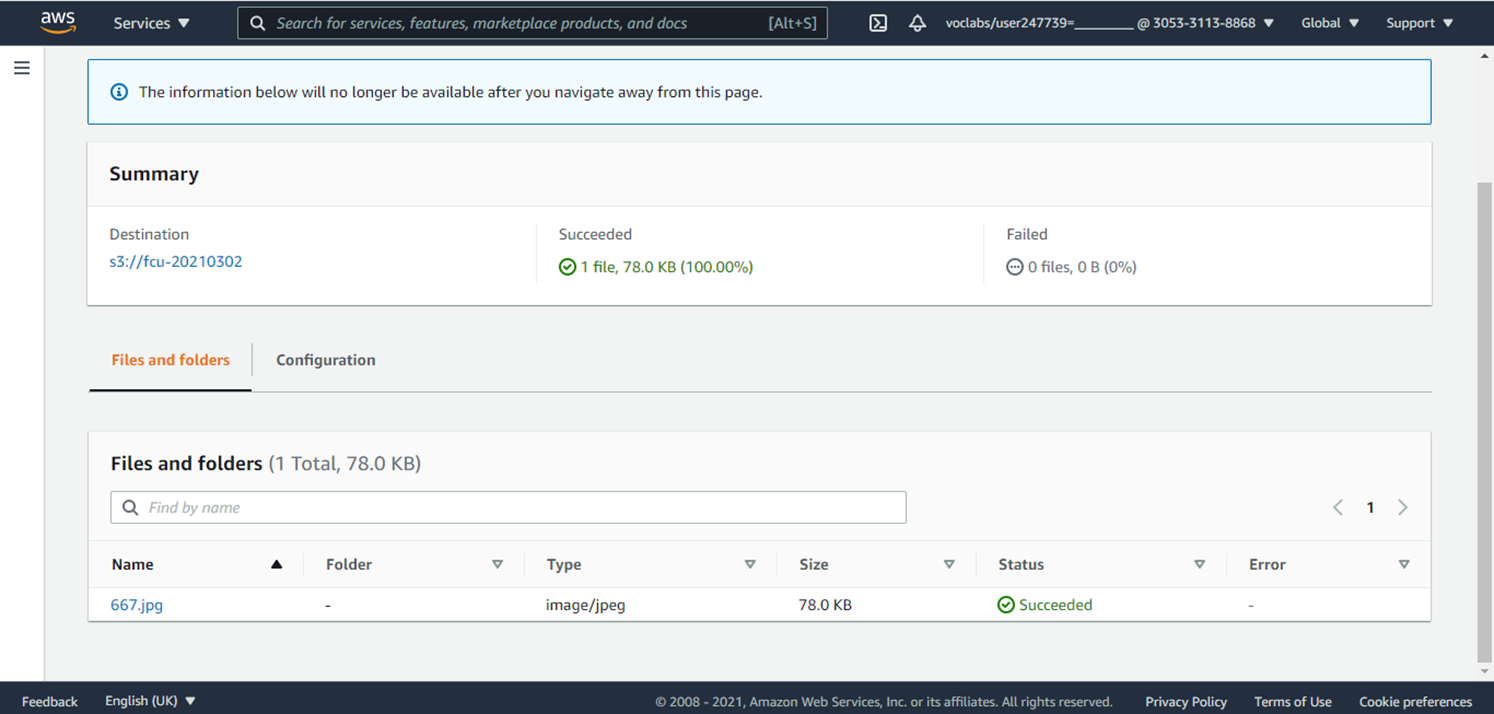
9.記錄S3 Destination(步驟3會用到)
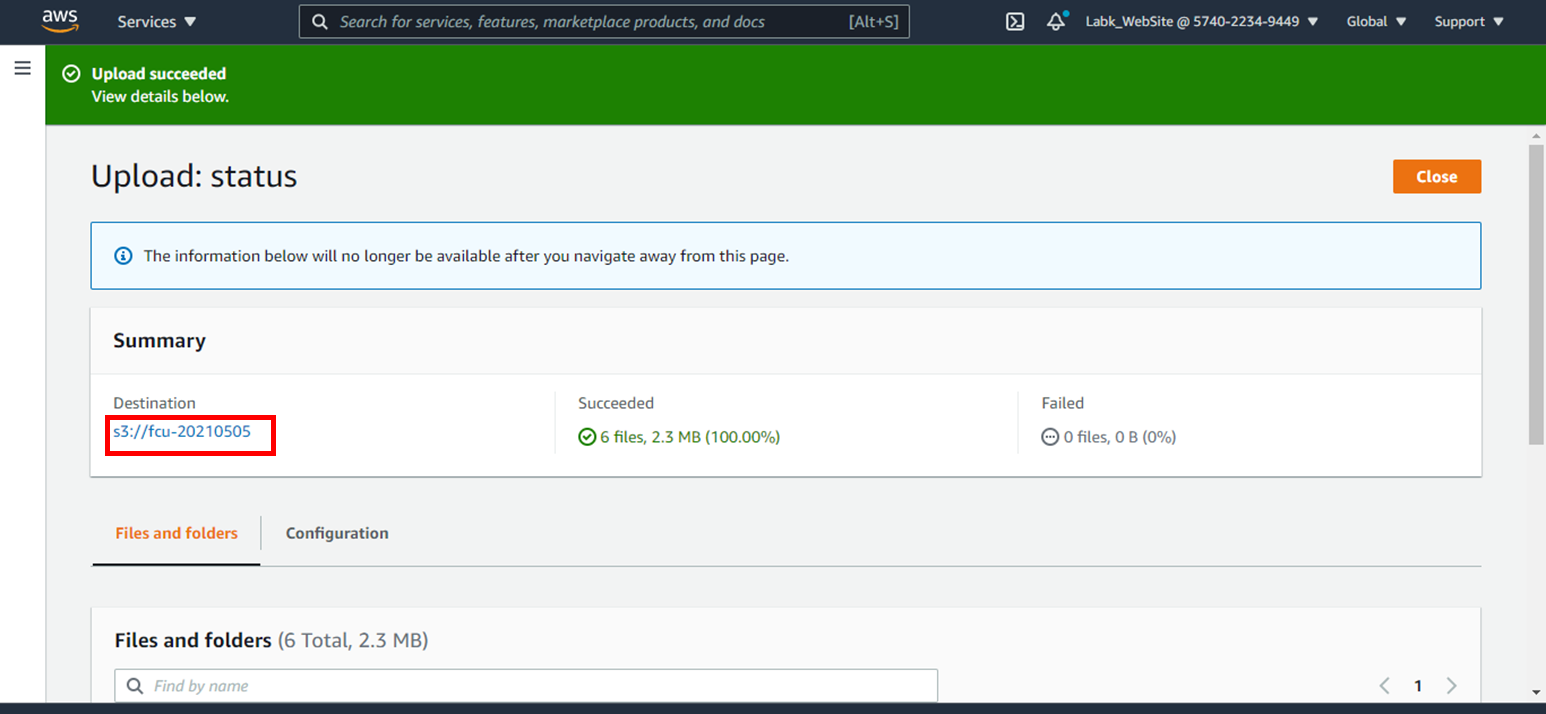
10.點選**Exit**
# 步驟3:建立Athena資料定義
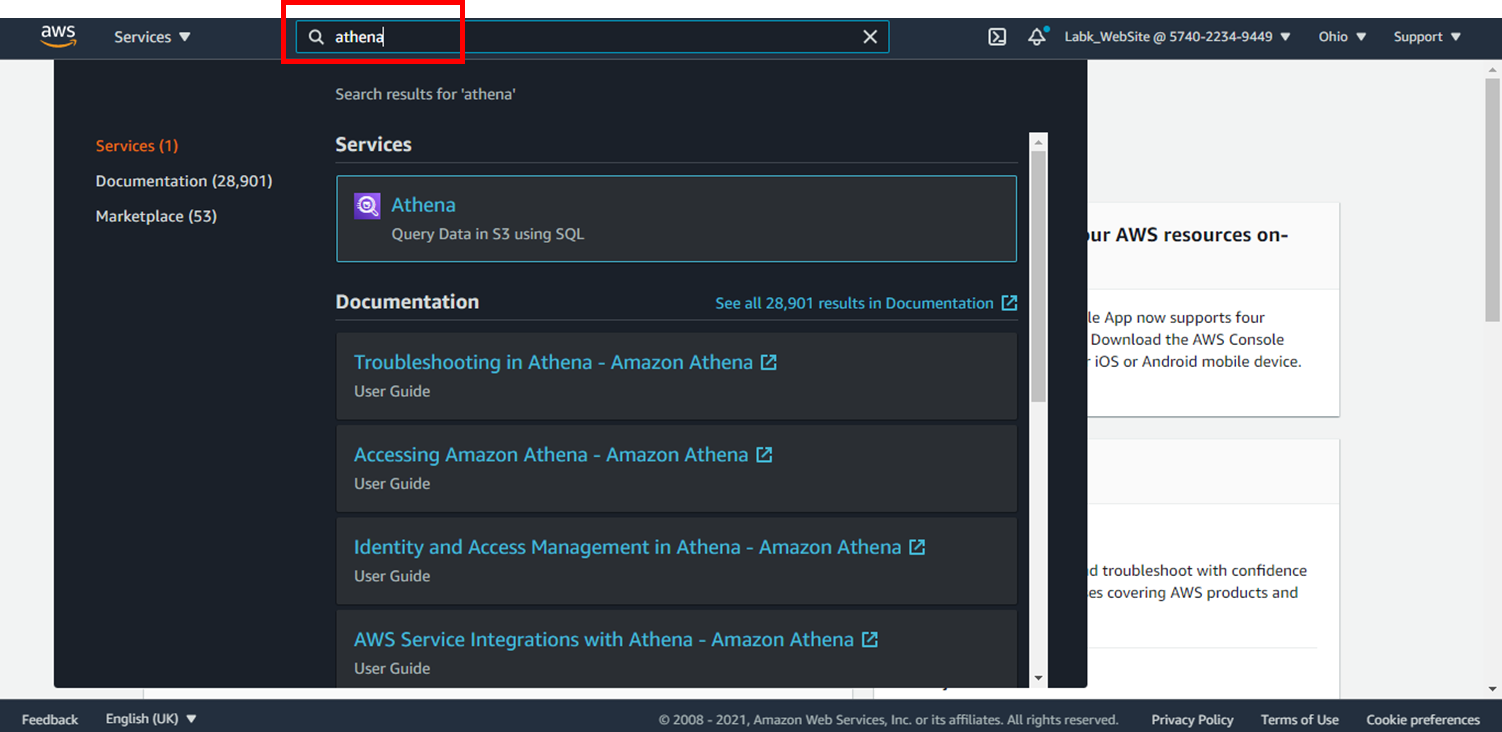
1.搜尋Athena 並點選
2.點選**編輯設定**

3.選擇S3路徑


4.複製 SQL語法 貼在New query 1 此動作在做新增資料表與欄位
```
CREATE EXTERNAL TABLE `aws-rekognition`(
`agelow` int,
`agehigh` int,
`emot1-value` string,
`emot1-cofindence` float,
`emot2-value` string,
`emot2-cofindence` float,
`gender` string,
`gender-cofindence` float,
`smile` boolean,
`smile-cofindence` float,
`eyeglasses` boolean,
`eyeglasses-cofindence` float,
`beard` boolean,
`beard-cofindence` string,
`mustache` boolean,
`mustache-cofindence` float,
`uploadtime` timestamp)
ROW FORMAT DELIMITED
FIELDS TERMINATED BY '\;'
STORED AS INPUTFORMAT
'org.apache.hadoop.mapred.TextInputFormat'
OUTPUTFORMAT
'org.apache.hadoop.hive.ql.io.HiveIgnoreKeyTextOutputFormat'
LOCATION
's3://fcu-rekognition/txt'
TBLPROPERTIES (
'has_encrypted_data'='false',
'transient_lastDdlTime'='1637836051')
```
6.第26行改為自己的s3 URL 紅框指令表示為將S3資料匯入切割

7.忘記S3 URL可以回到S3 Copy S3 URL


8.點選**執行**

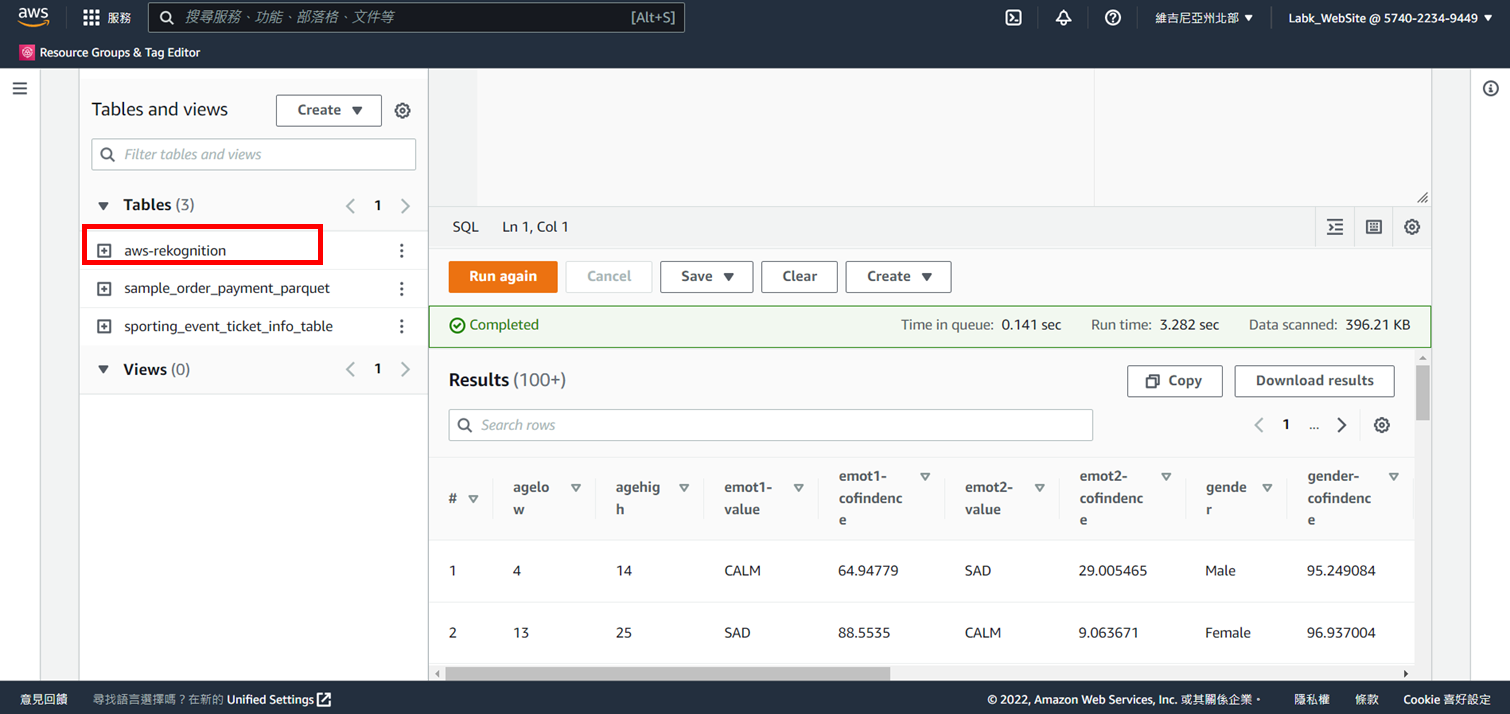
9.即新增一個資料表 名為aws-rekognition
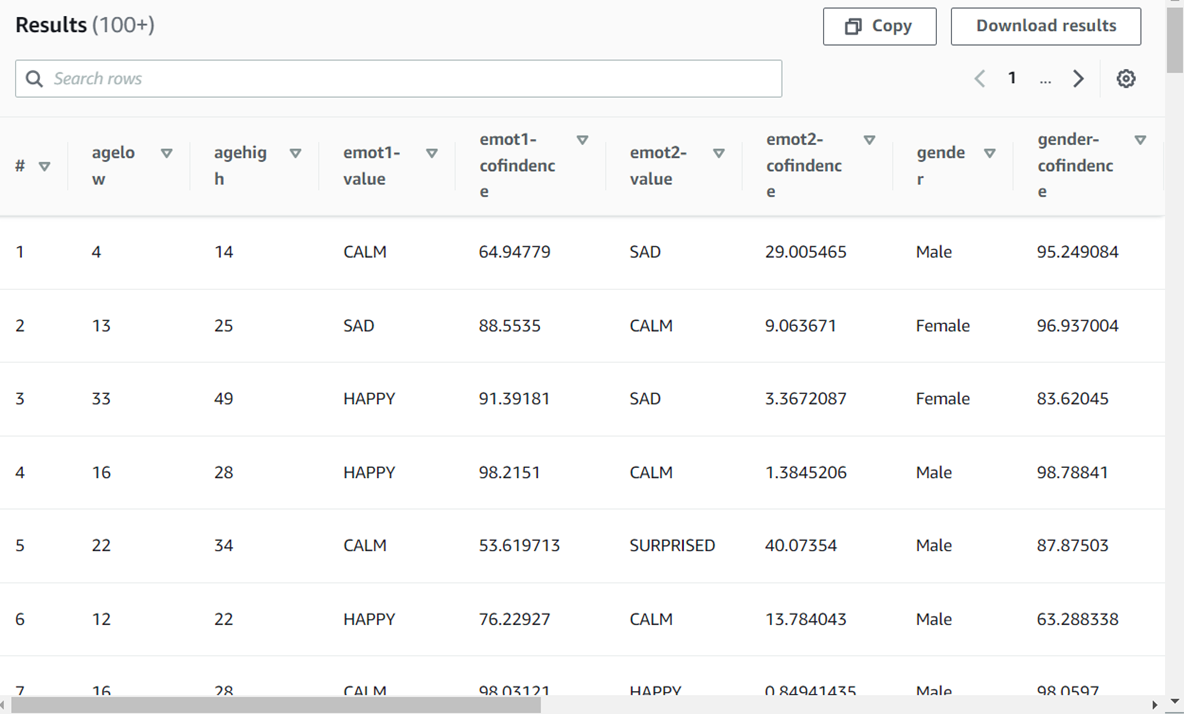
# 步驟4:查詢資料
1.點選**預覽資料表**

2.查詢資料顯示
 Sign in with Wallet
Connect another wallet
Sign in with Wallet
Connect another wallet