# Steps to Restore from Backup to Mayastor
## Step 1: Install Velero with GCP Provider on Destination (Mayastor Cluster)
Install Velero with the GCP provider, ensuring you use the same values for the `BUCKET-NAME` and `SECRET-FILENAME` placeholders that you used originally. These placeholders should be replaced with your specific values:
{% tabs %}
{% tab title="Command" %}
```text
velero install --use-node-agent --provider gcp --plugins velero/velero-plugin-for-gcp:v1.6.0 --bucket BUCKET-NAME --secret-file SECRET-FILENAME --uploader-type restic
```
{% endtab %}
{% tab title="Output" %}
```text
CustomResourceDefinition/backuprepositories.velero.io: attempting to create resource
CustomResourceDefinition/backuprepositories.velero.io: attempting to create resource client
CustomResourceDefinition/backuprepositories.velero.io: created
CustomResourceDefinition/backups.velero.io: attempting to create resource
CustomResourceDefinition/backups.velero.io: attempting to create resource client
CustomResourceDefinition/backups.velero.io: created
CustomResourceDefinition/backupstoragelocations.velero.io: attempting to create resource
CustomResourceDefinition/backupstoragelocations.velero.io: attempting to create resource client
CustomResourceDefinition/backupstoragelocations.velero.io: created
CustomResourceDefinition/deletebackuprequests.velero.io: attempting to create resource
CustomResourceDefinition/deletebackuprequests.velero.io: attempting to create resource client
CustomResourceDefinition/deletebackuprequests.velero.io: created
CustomResourceDefinition/downloadrequests.velero.io: attempting to create resource
CustomResourceDefinition/downloadrequests.velero.io: attempting to create resource client
CustomResourceDefinition/downloadrequests.velero.io: created
CustomResourceDefinition/podvolumebackups.velero.io: attempting to create resource
CustomResourceDefinition/podvolumebackups.velero.io: attempting to create resource client
CustomResourceDefinition/podvolumebackups.velero.io: created
CustomResourceDefinition/podvolumerestores.velero.io: attempting to create resource
CustomResourceDefinition/podvolumerestores.velero.io: attempting to create resource client
CustomResourceDefinition/podvolumerestores.velero.io: created
CustomResourceDefinition/restores.velero.io: attempting to create resource
CustomResourceDefinition/restores.velero.io: attempting to create resource client
CustomResourceDefinition/restores.velero.io: created
CustomResourceDefinition/schedules.velero.io: attempting to create resource
CustomResourceDefinition/schedules.velero.io: attempting to create resource client
CustomResourceDefinition/schedules.velero.io: created
CustomResourceDefinition/serverstatusrequests.velero.io: attempting to create resource
CustomResourceDefinition/serverstatusrequests.velero.io: attempting to create resource client
CustomResourceDefinition/serverstatusrequests.velero.io: created
CustomResourceDefinition/volumesnapshotlocations.velero.io: attempting to create resource
CustomResourceDefinition/volumesnapshotlocations.velero.io: attempting to create resource client
CustomResourceDefinition/volumesnapshotlocations.velero.io: created
Waiting for resources to be ready in cluster...
Namespace/velero: attempting to create resource
Namespace/velero: attempting to create resource client
Namespace/velero: created
ClusterRoleBinding/velero: attempting to create resource
ClusterRoleBinding/velero: attempting to create resource client
ClusterRoleBinding/velero: created
ServiceAccount/velero: attempting to create resource
ServiceAccount/velero: attempting to create resource client
ServiceAccount/velero: created
Secret/cloud-credentials: attempting to create resource
Secret/cloud-credentials: attempting to create resource client
Secret/cloud-credentials: created
BackupStorageLocation/default: attempting to create resource
BackupStorageLocation/default: attempting to create resource client
BackupStorageLocation/default: created
VolumeSnapshotLocation/default: attempting to create resource
VolumeSnapshotLocation/default: attempting to create resource client
VolumeSnapshotLocation/default: created
Deployment/velero: attempting to create resource
Deployment/velero: attempting to create resource client
Deployment/velero: created
DaemonSet/node-agent: attempting to create resource
DaemonSet/node-agent: attempting to create resource client
DaemonSet/node-agent: created
Velero is installed! ⛵ Use 'kubectl logs deployment/velero -n velero' to view the status.
thulasiraman_ilangovan@cloudshell:~$
```
{% endtab %}
{% endtabs %}
## Step 2: Verify Backup Availability
Check the availability of your previously-saved backups. If the credentials or bucket information doesn't match, you won't be able to see the backups:
{% tabs %}
{% tab title="Command" %}
```text
velero get backup | grep 13-09-23
```
{% endtab %}
{% tab title="Output" %}
```text
mongo-backup-13-09-23 Completed 0 0 2023-09-13 13:15:32 +0000 UTC 29d default <none>
```
{% endtab %}
{% endtabs %}
{% tabs %}
{% tab title="Command" %}
```text
kubectl get backupstoragelocation -n velero
```
{% endtab %}
{% tab title="Output" %}
```text
NAME PHASE LAST VALIDATED AGE DEFAULT
default Available 23s 3m32s true
```
{% endtab %}
{% endtabs %}
## Step 3: Restore Using Velero CLI
Initiate the restore process using Velero CLI with the following command:
{% tabs %}
{% tab title="Command" %}
```text
velero restore create mongo-restore-13-09-23 --from-backup mongo-backup-13-09-23
```
{% endtab %}
{% tab title="Output" %}
```text
Restore request "mongo-restore-13-09-23" submitted successfully.
Run `velero restore describe mongo-restore-13-09-23` or `velero restore logs mongo-restore-13-09-23` for more details.
```
{% endtab %}
{% endtabs %}
## Step 4: Check Restore Status
You can check the status of the restore process by using the `velero get restore` command.
```
velero get restore
```
When Velero performs a restore, it deploys an init container within the application pod, responsible for restoring the volume. Initially, the restore status will be `InProgress`.
{% hint style="note" %}
If your storage class was originally set to `cstor-csi-disk` because you imported this PVC from a cStor volume, the status might temporarily stay as `InProgress` until the process is completed.
{% endhint %}
## Step 5: Backup PVC and Change Storage Class
- Retrieve the current configuration of the PVC which is not in `Bound` status using the following command:
```
kubectl get pvc mongodb-persistent-storage-claim-mongod-0 -o yaml > pvc-mongo.yaml
```
- Confirm that the PVC configuration has been saved by checking its existence with this command:
```
ls -lrt | grep pvc-mongo.yaml
```
- Edit the `pvc-mongo.yaml` file to update its storage class. Below is the modified PVC configuration with `mayastor-single-replica` set as the new storage class:
```
apiVersion: v1
kind: PersistentVolumeClaim
metadata:
finalizers:
- kubernetes.io/pvc-protection
labels:
role: mongo
velero.io/backup-name: mongo-backup-13-09-23
velero.io/restore-name: mongo-restore-13-09-23
name: mongodb-persistent-storage-claim-mongod-0
namespace: default
spec:
accessModes:
- ReadWriteOnce
resources:
requests:
storage: 3Gi
storageClassName: mayastor-single-replica
volumeMode: Filesystem
```
## Step 6: Resolve issue where PVC is in a Pending
- Begin by deleting the problematic PVC with the following command:
```
kubectl delete pvc mongodb-persistent-storage-claim-mongod-0
```
- Once the PVC has been successfully deleted, you can recreate it using the updated configuration from the `pvc-mongo.yaml` file. Apply the new configuration with the following command:
```
kubectl apply -f pvc-mongo.yaml
```
## Step 7: Check Velero init container
After recreating the PVC with Mayastor storageClass, you will observe the presence of a Velero initialization container within the application pod. This container is responsible for restoring the required volumes.
You can check the status of the restore operation by running the following command:
```
kubectl describe pod <enter_your_pod_name>
```
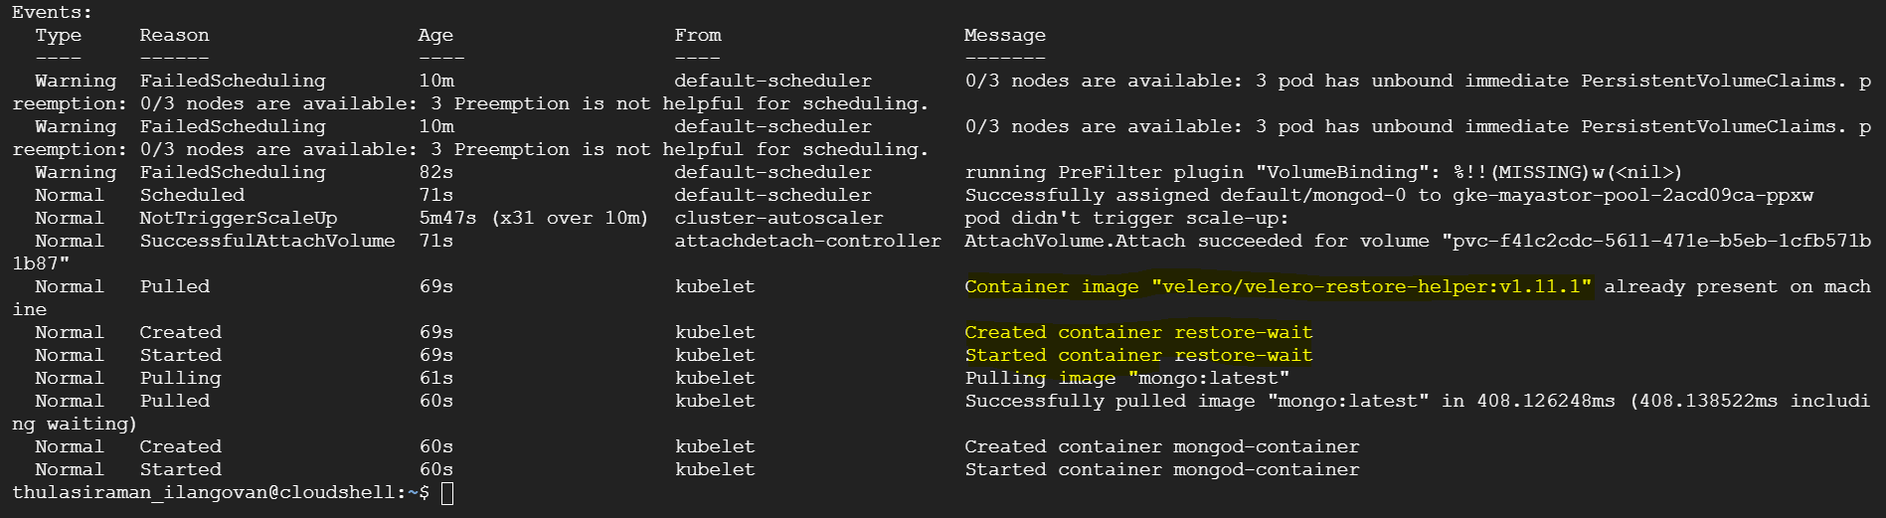
The output will display the pods' status, including the Velero initialization container. Initially, the status might show as "Init:0/1," indicating that the restore process is in progress.
You can track the progress of the restore by running:
{% tabs %}
{% tab title="Command" %}
```text
velero get restore
```
{% endtab %}
{% tab title="Output" %}
```text
NAME BACKUP STATUS STARTED COMPLETED ERRORS WARNINGS CREATED SELECTOR
mongo-restore-13-09-23 mongo-backup-13-09-23 Completed 2023-09-13 13:56:19 +0000 UTC 2023-09-13 14:06:09 +0000 UTC 0 4 2023-09-13 13:56:19 +0000 UTC <none>
```
{% endtab %}
{% endtabs %}
You can then verify the data restoration by accessing your MongoDB instance. In the provided example, we used the "mongosh" shell to connect to the MongoDB instance and check the databases and their content. The data should reflect what was previously backed up from the cStor storage.
```
mongosh mongodb://admin:admin@mongod-0.mongodb-service.default.svc.cluster.local:27017
```
## Step 8: Monitor Pod Progress
Due to the statefulset's configuration with three replicas, you will notice that the `mongo-1` pod is created but remains in a `Pending` status. This behavior is expected as Kubernetes sequentially provisions statefulset pods, ensuring each one is fully operational before moving to the next.
## Step 9: Capture the StatefulSet Configuration and Modify Storage Class
Capture the current configuration of the StatefulSet for MongoDB by running the following command:
```
kubectl get sts mongod -o yaml > sts-mongo-original.yaml
```
This command will save the existing StatefulSet configuration to a file named `sts-mongo-original.yaml`. Next, edit this YAML file to change the storage class to `mayastor-single-replica`.
```
apiVersion: apps/v1
kind: StatefulSet
metadata:
annotations:
backup.velero.io/backup-volumes: mongodb-persistent-storage-claim
meta.helm.sh/release-name: mongo
meta.helm.sh/release-namespace: default
generation: 1
labels:
app.kubernetes.io/managed-by: Helm
velero.io/backup-name: mongo-backup-13-09-23
velero.io/restore-name: mongo-restore-13-09-23
name: mongod
namespace: default
spec:
podManagementPolicy: OrderedReady
replicas: 3
revisionHistoryLimit: 10
selector:
matchLabels:
role: mongo
serviceName: mongodb-service
template:
metadata:
creationTimestamp: null
labels:
environment: test
replicaset: rs0
role: mongo
spec:
containers:
- command:
- mongod
- --bind_ip
- 0.0.0.0
- --replSet
- rs0
env:
- name: MONGO_INITDB_ROOT_USERNAME
valueFrom:
secretKeyRef:
key: username
name: secrets
- name: MONGO_INITDB_ROOT_PASSWORD
valueFrom:
secretKeyRef:
key: password
name: secrets
image: mongo:latest
imagePullPolicy: Always
lifecycle:
postStart:
exec:
command:
- /bin/sh
- -c
- sleep 90 ; ./tmp/scripts/script.sh > /tmp/script-log
name: mongod-container
ports:
- containerPort: 27017
protocol: TCP
resources: {}
terminationMessagePath: /dev/termination-log
terminationMessagePolicy: File
volumeMounts:
- mountPath: /data/db
name: mongodb-persistent-storage-claim
- mountPath: /tmp/scripts
name: mongo-scripts
dnsPolicy: ClusterFirst
restartPolicy: Always
schedulerName: default-scheduler
securityContext: {}
terminationGracePeriodSeconds: 10
volumes:
- configMap:
defaultMode: 511
name: mongo-replica
name: mongo-scripts
updateStrategy:
type: RollingUpdate
volumeClaimTemplates:
- apiVersion: v1
kind: PersistentVolumeClaim
metadata:
annotations:
volume.beta.kubernetes.io/storage-class: mayastor-single-replica #Make the change here
creationTimestamp: null
name: mongodb-persistent-storage-claim
spec:
accessModes:
- ReadWriteOnce
resources:
requests:
storage: 3Gi
volumeMode: Filesystem
```
## Step 10: Delete StatefulSet (Cascade=False)
Delete the StatefulSet while preserving the pods with the following command:
```
kubectl delete sts mongod --cascade=false
```
You can run the following commands to verify the status:
```
kubectl get sts
```
```
kubectl get pods
```
```
kubectl get pvc
```
## Step 11: Deleting Pending Secondary Pods and PVCs
Delete the MongoDB Pod `mongod-1`.
```
kubectl delete pod mongod-1
```
Delete the Persistent Volume Claim (PVC) for `mongod-1`.
```
kubectl delete pvc mongodb-persistent-storage-claim-mongod-1
```
## Step 12: Recreate StatefulSet
Recreate the StatefulSet with the Yaml file.
{% tabs %}
{% tab title="Command" %}
```text
kubectl apply -f sts-mongo-mayastor.yaml
```
{% endtab %}
{% tab title="Output" %}
```text
statefulset.apps/mongod created
```
{% endtab %}
{% endtabs %}
{% tabs %}
{% tab title="Command" %}
```text
kubectl get pods
```
{% endtab %}
{% tab title="Output" %}
```text
NAME READY STATUS RESTARTS AGE
mongo-client-758ddd54cc-h2gwl 1/1 Running 0 31m
mongod-0 1/1 Running 0 31m
mongod-1 1/1 Running 0 7m54s
mongod-2 1/1 Running 0 6m13s
ycsb-775fc86c4b-kj5vv 1/1 Running 0 31m
```
{% endtab %}
{% endtabs %}
{% tabs %}
{% tab title="Command" %}
```text
kubectl mayastor get volumes
```
{% endtab %}
{% tab title="Output" %}
```text
ID REPLICAS TARGET-NODE ACCESSIBILITY STATUS SIZE THIN-PROVISIONED ALLOCATED
f41c2cdc-5611-471e-b5eb-1cfb571b1b87 1 gke-mayastor-pool-2acd09ca-ppxw nvmf Online 3GiB false 3GiB
113882e1-c270-4c72-9c1f-d9e09bfd66ad 1 gke-mayastor-pool-2acd09ca-4v3z nvmf Online 3GiB false 3GiB
fb4d6a4f-5982-4049-977b-9ae20b8162ad 1 gke-mayastor-pool-2acd09ca-q30r nvmf Online 3GiB false 3GiB
```
{% endtab %}
{% endtabs %}
## Step 13: Verify Data Replication on Secondary DB
Verify data replication on the secondary database to ensure synchronization.
```
root@mongod-1:/# mongosh mongodb://admin:admin@mongod-1.mongodb-service.default.svc.cluster.local:27017
Current Mongosh Log ID: 6501c744eb148521b3716af5
Connecting to: mongodb://<credentials>@mongod-1.mongodb-service.default.svc.cluster.local:27017/?directConnection=true&appName=mongosh+1.10.6
Using MongoDB: 7.0.1
Using Mongosh: 1.10.6
For mongosh info see: https://docs.mongodb.com/mongodb-shell/
------
The server generated these startup warnings when booting
2023-09-13T14:19:37.984+00:00: Using the XFS filesystem is strongly recommended with the WiredTiger storage engine. See http://dochub.mongodb.org/core/prodnotes-filesystem
2023-09-13T14:19:38.679+00:00: Access control is not enabled for the database. Read and write access to data and configuration is unrestricted
2023-09-13T14:19:38.679+00:00: You are running this process as the root user, which is not recommended
2023-09-13T14:19:38.679+00:00: vm.max_map_count is too low
------
rs0 [direct: secondary] test> use mydb
switched to db mydb
rs0 [direct: secondary] mydb> db.getMongo().setReadPref('secondary')
rs0 [direct: secondary] mydb> db.accounts.find()
[
{
_id: ObjectId("65019e2f183959fbdbd23f00"),
name: 'john',
total: '1058'
},
{
_id: ObjectId("65019e2f183959fbdbd23f01"),
name: 'jane',
total: '6283'
},
{
_id: ObjectId("65019e31183959fbdbd23f02"),
name: 'james',
total: '472'
}
]
rs0 [direct: secondary] mydb>
```
 Sign in with Wallet
Connect another wallet
Sign in with Wallet
Connect another wallet