# IoT Workshop

## Agenda
- 13:00 - 13:20 – Short presentation
- 13:20 – 14:30 – Part 1, Connect sensor & Send data
- 14:30 – 14:40 – Break
- 14:40 – 16:00 – Part 2, Send & visualise data
## Hardware & Software
:::info
Everyone has the following?
:::
| Name | Type | Quantity | |
|:-: |:-: |:-: |:-: |
| Lopy4 | Development board | 1 | |
| Expansion Board V.3 | Expansion board | 1 | 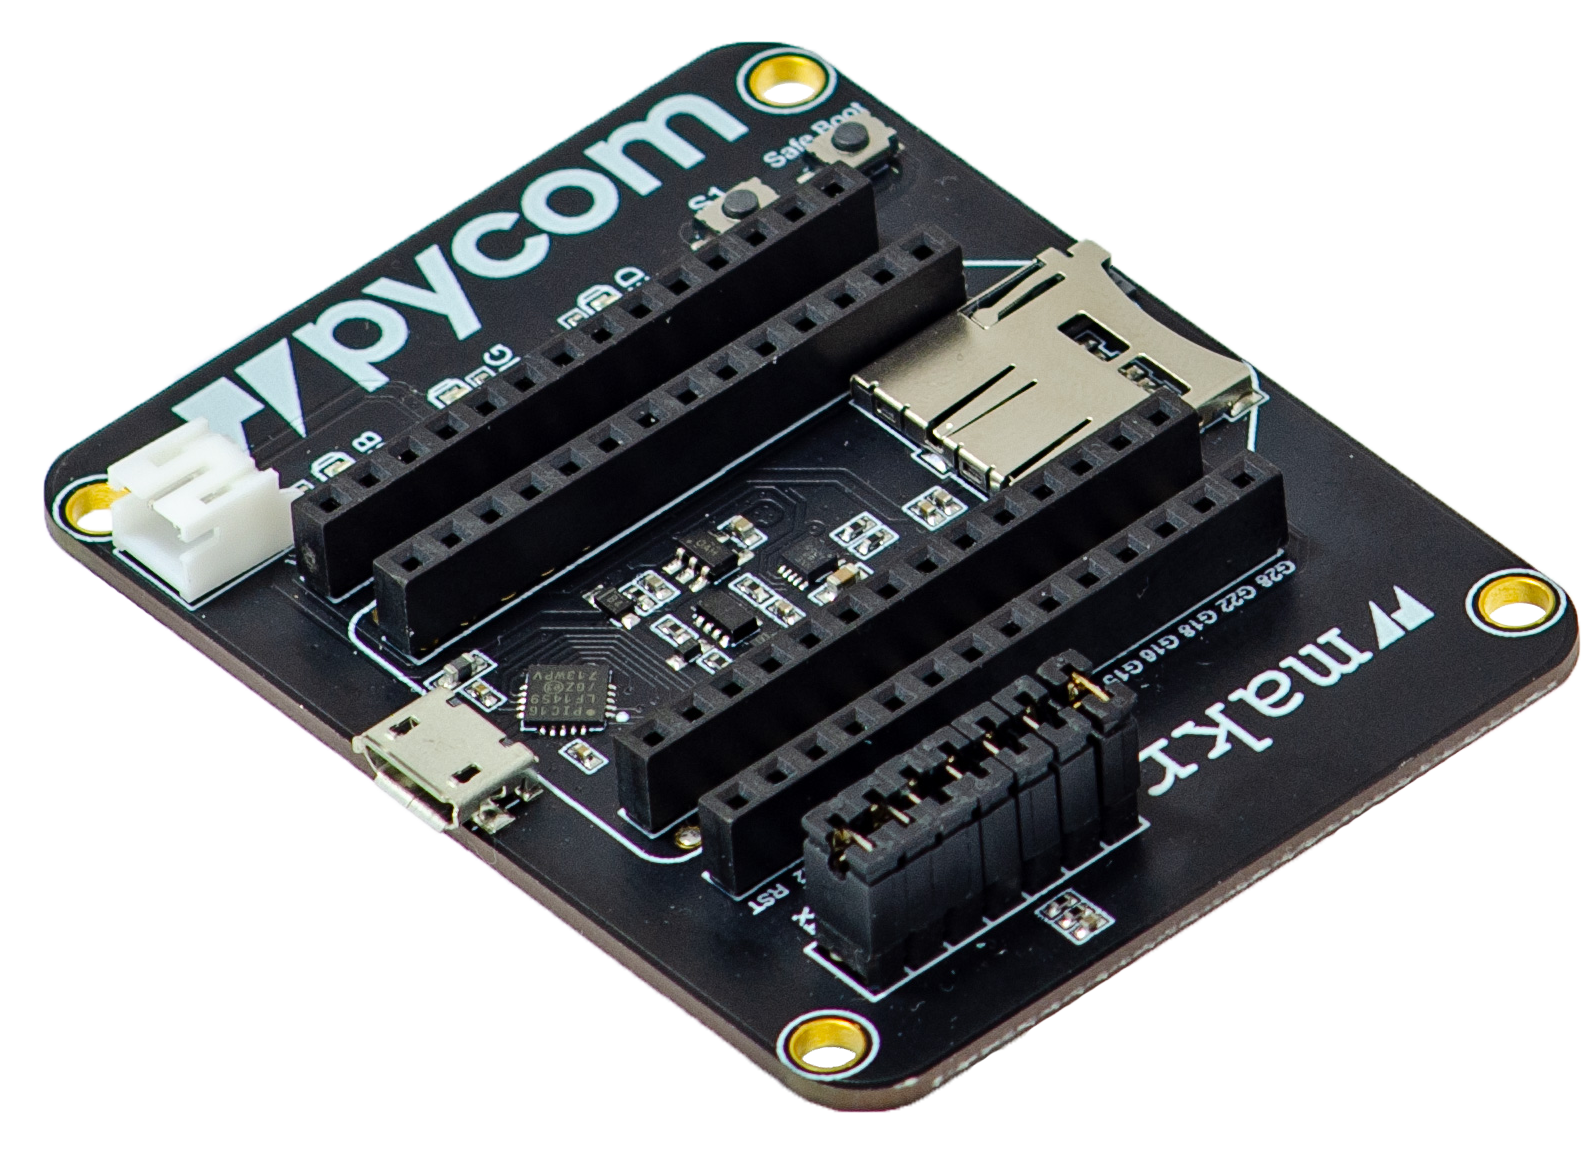 |
| Antenna | LoRa (868MHz/915MHz), Sigfox Antenna | 1 |  |
| DHT11 | Temperature & Humidity sensor | 1 | 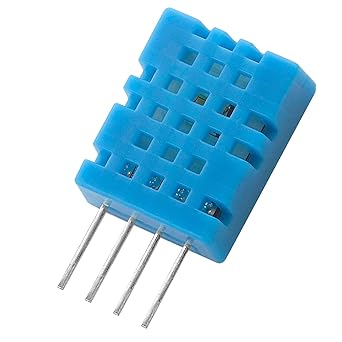 |
| Breadboard | - | 1 |  |
| Cables | Jumper wires | 3 | 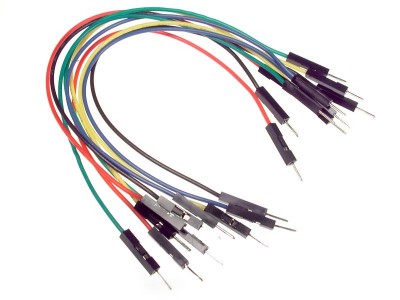 |
| USB-cable | Micro USB | 1 |  |
:::info
Did everyone manage to install the needed software? (VSCode, NodeJs och Pymakr)
https://docs.pycom.io/gettingstarted/software/vscode/
:::
| Software | |
|:-: |:-: |
| VSCode | |
| NodeJs | |
| Pymakr | |
-----
# The Things Stack (TTS)
:::danger
**⚠️ Important ⚠️ Make sure the LoRa antenna is connected properly before running any LoRa or Sigfox code on your device. Not doing so might break your device.** You can find how to properly connect the antenna [here](https://docs.pycom.io/tutorials/networks/sigfox/).
:::

## 1. Register
Before you can start using TTS, you need to [create a TTS account](https://account.thethingsnetwork.org/register). Once you have done that, go ahead and navigate to Console.

Then select Europe 1 (eu1) and choose the `Login with The Things ID` option to log in.

## 2. Create an application
Once you've logged in, you'll be redirected to the your homepage. There, you navigate to `Create an application`.
Give the application an appropriate ID, name and description.

When the application is created, you'll be redirected to the application page.

## 3. Add the pycom device to the application
Once there, navigate to `Add end device` in the bottom-right corner to add your pycom device to the application. The Lopy4 is not in TTS's LoRaWAN device repository yet, but you can still add it manually.

Set the **frequency plan** to `Europe 863-870 MHz (SF9 for RX2 - recommended)`, **LoRaWAN version** to `MAC V1.0.2` and the **regional parameters version** to `PHY V1.0.2 REV A`.
More information about activation modes can be found [here](https://www.thethingsnetwork.org/docs/lorawan/end-device-activation/).
The next step is to enter your device information. The `DevEUI` can be retrieved from your pycom device by running the following code-snippet in your interpreter, either in Atom or VSCode.
Alternatively, you can paste the code snippet inside your `main.py` and upload your files. Create`main.py` if it does not exist.
```python=
from network import LoRa
import binascii
lora = LoRa(mode=LoRa.LORAWAN, region=LoRa.EU868)
print(binascii.hexlify(lora.mac()).upper().decode('utf-8'))
```
The output should look something like:
```python=
70B3D54997C25011
```
Fill the `AppEUI` with zeros by pressing on the `Fill with zeros` button.
Finally, you generate your `AppKey` and register your end device to your application.
Once you've added your end device to your application, you should be redirected to your device page. The landing page should look like:

## 4. Connect to TTS using your pycom device
Download the code fom the [Github repo](https://github.com/iot-lnu/dht11-workshop) and continue.
Now, you connect to TTS using the `AppKey` you generated earlier.
:::danger
**⚠️ Important ⚠️ Make sure the LoRa antenna is connected properly before running any LoRa or Sigfox code on your device. Not doing so might break your device.** You can find how to properly connect the antenna [here](https://docs.pycom.io/tutorials/networks/sigfox/).
:::
First, add the snippet below at the begining of your `boot.py` that you have in your project folder in Atom or VSCode.
```python=
from network import LoRa
import time
import binascii
import socket
lora = LoRa(mode=LoRa.LORAWAN, region=LoRa.EU868)
app_eui = binascii.unhexlify('0000000000000000')
app_key = binascii.unhexlify('00000000000000000000000000000000')
lora.join(activation=LoRa.OTAA, auth=(app_eui, app_key), timeout=0)
# wait until the module has joined the network
while not lora.has_joined():
time.sleep(2.5)
print('Not joined yet...')
print('Network joined!')
s = socket.socket(socket.AF_LORA, socket.SOCK_RAW)
s.setsockopt(socket.SOL_LORA, socket.SO_DR, 5)
s.setblocking(False)
```
:::info
Remove duplicate imports if you have any after adding the snippet above.
:::
Now, replace the zeros in row 8 with your `AppKey`. In our case, the generated `AppKey` was `2AFCC3031C924792687395AB9D384262`. Note that only row 8 is changed.
```python=
from network import LoRa
import time
import binascii
import socket
lora = LoRa(mode=LoRa.LORAWAN, region=LoRa.EU868)
app_eui = binascii.unhexlify('0000000000000000')
app_key = binascii.unhexlify('2AFCC3031C924792687395AB9D384262')# Add your own app_key here
lora.join(activation=LoRa.OTAA, auth=(app_eui, app_key), timeout=0)
# wait until the module has joined the network
while not lora.has_joined():
time.sleep(2.5)
print('Not joined yet...')
print('Network joined!')
s = socket.socket(socket.AF_LORA, socket.SOCK_RAW)
s.setsockopt(socket.SOL_LORA, socket.SO_DR, 5)
s.setblocking(False)
```
:::warning
If your device tries to join for more than a few minutes, then it is an indication of poor coverage in your area. Perhaps you should consider other networks, like [Helium](https://hackmd.io/ikBVVe3zQymcUxo6rbIdlQ?view) or [Sigfox](https://hackmd.io/iItkcV_XTgCdjRooqlUyOg?view).
:::
## 5. Send messages with TTS
Now we need something to send, so let's read data from a DHT11 and send that data to TTS. Connect the sensor according to the schematic below:

Then, we need to create a file named `dht.py` and paste the following code inside it:
```python=
# https://github.com/JurassicPork/DHT_PyCom
import time
import pycom
from machine import enable_irq, disable_irq, Pin
class DHTResult:
'DHT sensor result returned by DHT.read() method'
ERR_NO_ERROR = 0
ERR_MISSING_DATA = 1
ERR_CRC = 2
error_code = ERR_NO_ERROR
temperature = -1
humidity = -1
def __init__(self, error_code, temperature, humidity):
self.error_code = error_code
self.temperature = temperature
self.humidity = humidity
def is_valid(self):
return self.error_code == DHTResult.ERR_NO_ERROR
class DHT:
'DHT sensor (dht11, dht21,dht22) reader class for Pycom'
#__pin = Pin('P3', mode=Pin.OPEN_DRAIN)
__dhttype = 0
def __init__(self, pin, sensor=0):
self.__pin = Pin(pin, mode=Pin.OPEN_DRAIN)
self.__dhttype = sensor
self.__pin(1)
time.sleep(1.0)
def read(self):
# pull down to low
self.__send_and_sleep(0, 0.019)
data = pycom.pulses_get(self.__pin,100)
self.__pin.init(Pin.OPEN_DRAIN)
self.__pin(1)
#print(data)
bits = []
for a,b in data:
if a ==1 and 18 <= b <= 28:
bits.append(0)
if a ==1 and 65 <= b <= 75:
bits.append(1)
#print("longueur bits : %d " % len(bits))
if len(bits) != 40:
return DHTResult(DHTResult.ERR_MISSING_DATA, 0, 0)
#print(bits)
# we have the bits, calculate bytes
the_bytes = self.__bits_to_bytes(bits)
# calculate checksum and check
checksum = self.__calculate_checksum(the_bytes)
if the_bytes[4] != checksum:
return DHTResult(DHTResult.ERR_CRC, 0, 0)
# ok, we have valid data, return it
[int_rh, dec_rh, int_t, dec_t, csum] = the_bytes
if self.__dhttype==0: #dht11
rh = int_rh #dht11 20% ~ 90%
t = int_t #dht11 0..50°C
else: #dht21,dht22
rh = ((int_rh * 256) + dec_rh)/10
t = (((int_t & 0x7F) * 256) + dec_t)/10
if (int_t & 0x80) > 0:
t *= -1
return DHTResult(DHTResult.ERR_NO_ERROR, t, rh)
def __send_and_sleep(self, output, mysleep):
self.__pin(output)
time.sleep(mysleep)
def __bits_to_bytes(self, bits):
the_bytes = []
byte = 0
for i in range(0, len(bits)):
byte = byte << 1
if (bits[i]):
byte = byte | 1
else:
byte = byte | 0
if ((i + 1) % 8 == 0):
the_bytes.append(byte)
byte = 0
#print(the_bytes)
return the_bytes
def __calculate_checksum(self, the_bytes):
return the_bytes[0] + the_bytes[1] + the_bytes[2] + the_bytes[3] & 255
```
Below, you can see how your `main.py` file should look like.
```python=
# Data is sent to Pybytes. Needs to flashed with Pybyte firmware
import time
from machine import Pin
from dht import DHT # https://github.com/JurassicPork/DHT_PyCom
import struct
# Type 0 = dht11
# Type 1 = dht22
th = DHT(Pin('P23', mode=Pin.OPEN_DRAIN), 0)
time.sleep(1)
while True:
result = th.read()
while not result.is_valid():
time.sleep(.5)
print("Not valid")
result = th.read()
temperature = result.temperature
humidity = result.humidity
print('Temperature:', temperature, 'Humidity:', humidity)
"""
Prepare the data by packing it before sending it to sigfox
Payload format is: >bb BB HHHH HHHH HHHH where
b = (1 byte, 8 bits, signed) Range: -128 to 127
B = Humidity (1 byte, 8 bits, unsigned) Range: 0 to 255
H = (2 bytes, 16 bits, unsigned) Range: 0 to 65,535
h = Temperature (2 bytes, 16 bits, signed) Range: -32,768 to 32,767
"""
package = struct.pack('>hB',
int(temperature),
int(humidity))
s.send(package)
time.sleep(60)
```
By saving `boot.py`, `dht.py` and `main.py` and uploading your code, you should see an output similar to the one below:

And in the end device page in your TTS console, you should see something like:
matches

Note that the MAC payload is in hex (base 16). The first two bytes represents our temperature value, and the third byte respresents our humidity value.
:::warning
On The Things Network's public community network a Fair Use Policy applies which limits the uplink airtime to 30 seconds per day (24 hours) per node and the downlink messages to 10 messages per day (24 hours) per node. More about that [here](https://www.thethingsnetwork.org/forum/t/fair-use-policy-explained/1300).
:::
# Datacake
Now that we have some sensor data being sent to the cloud using LoRaWAN, why not visualize it in a dashboard?
## Create a datacake account
https://datacake.co/
Then navigate to dashboard and klick on your profile icon:

then `Edit profile` -> `API` -> `Show` and copy the token.
## Create a datacake webhook in TTS

Now, we input the token we copied from datacake into the token field

and hit `Create datacake webhook`.
## Create a decoder and add fields
In datacake, choose your device and navigate to `Configuration` and scroll down until you see `Payload decoder`, then replace what ever code there is there with the code snippet below and hit `Save`.
```js=
function Decoder(payload, port) {
if(port === 1 || port === 2) {
return [
{
field: "TEMPERATURE",
// value: payload[0] // Unsigned and only one byte
// To view negative values, we shift bits.
value: (payload[0] << 24 >> 16 | payload[1]) // / 100
},
{
field: "HUMIDITY",
value: payload[2]
}
];
}
}
```
Finally, scroll down a little more and you should see `Fields`. Add two fields, one for `temperature` and one for `humidity`.

## Create a dashboard
Navigate to dashboard and toggle the button at the far right and start adding widgets!