# Guide to Adobe Premiere Pro
## Importing photos and videos from a hard drive into Premiere Pro
1. Insert the hard drive into the computer
2. Find the footage you need by going into finder, finding the drive underneath "location", and finding the correct folder
3. Open Premiere Pro and create a new project
4. Drag and drop the footage from finder into the "import" section of premiere, which is located on the bottom left hand side
5. drag and drop that footage from the "import" section into the timeline, which is located on the bottom right hand side
* An alternate way to import the media is to go to Media Browser (on the bottom left hand side), select the name of the hard drive under "local drives", and find the footage within the hard drive to import
## Basic Editing in Premiere
After you've imported your media, you'll be able to edit your footage.
Moving over to the **editing tab** you will find a lot of empty windows. Your media will be in the **project window** on the bottom left hand side.

To start editing you must start a **new sequence**, also known as a **timeline**. There are two ways to do this.
1) You can drag and drop your media onto the sequence window.
2) You can right click your desired clip and select "New Sequence From Clip"

Once making a timeline a new sequence will appear in your **project window**. If you ever lose your timeline in the sequence window you can select it in your **project window** and it will reopen.
The window on the top left is your **preview window**. This allows you to preview your media before you decide to put it on your timeline.
With a video clip selected in this window you can mark "in" and "out" points using "i" and "o" respectively on the keyboard. By marking in and out points you can easily select small clips that you want without having to trim them on the timeline. Once selecting in and out points you can press the comma key or the period key to bring a clip from your **project window** onto your timeline.
Once you have your desired clips on the timeline you can drag and arrange them.
The blue line on the timeline is your **playhead**. When you view your work it will start from where the playhead is.
Next to your timeline on the right hand side are your audio levels. As you view your timeline (you can do this by pressing the play button in the **program window** or by pressing the spacebar with your sequence window selected). More information about audio editing can be found in [simple audio editing](/97VCtFwBRx-88j2kbgV3Vw).
To the left hand side of your timeline is your tools.

Hovering over each icon will tell you the name and the keyboard shortcut for it. The most important tools you'll use are your **Selection Tool** and your **Razor Tool**. Your selection tool allows you to drag and arrange clips. Your razor tool allows you to cut clips. You can do most editing you'll need with these tools. You can learn more about tools at [tools overview](/XBz0aeliSG6O8oooM_bsAQ).
You can delete the clips or parts of clips you cut that you do not want by pressing the delete key.
You can lengthen and shorten clips by grabbing the end of the clip and dragging it.

If you want to change the speed of a clip or reverse it right click the clip and in the drop down menu select "Speed/Duration".
Once you have your clips trimmed and made the speed you want you can add effects and titles. You can find out more about titles at [title designs](/TfMrwzoDSUWBc3WvrHCDKQ).
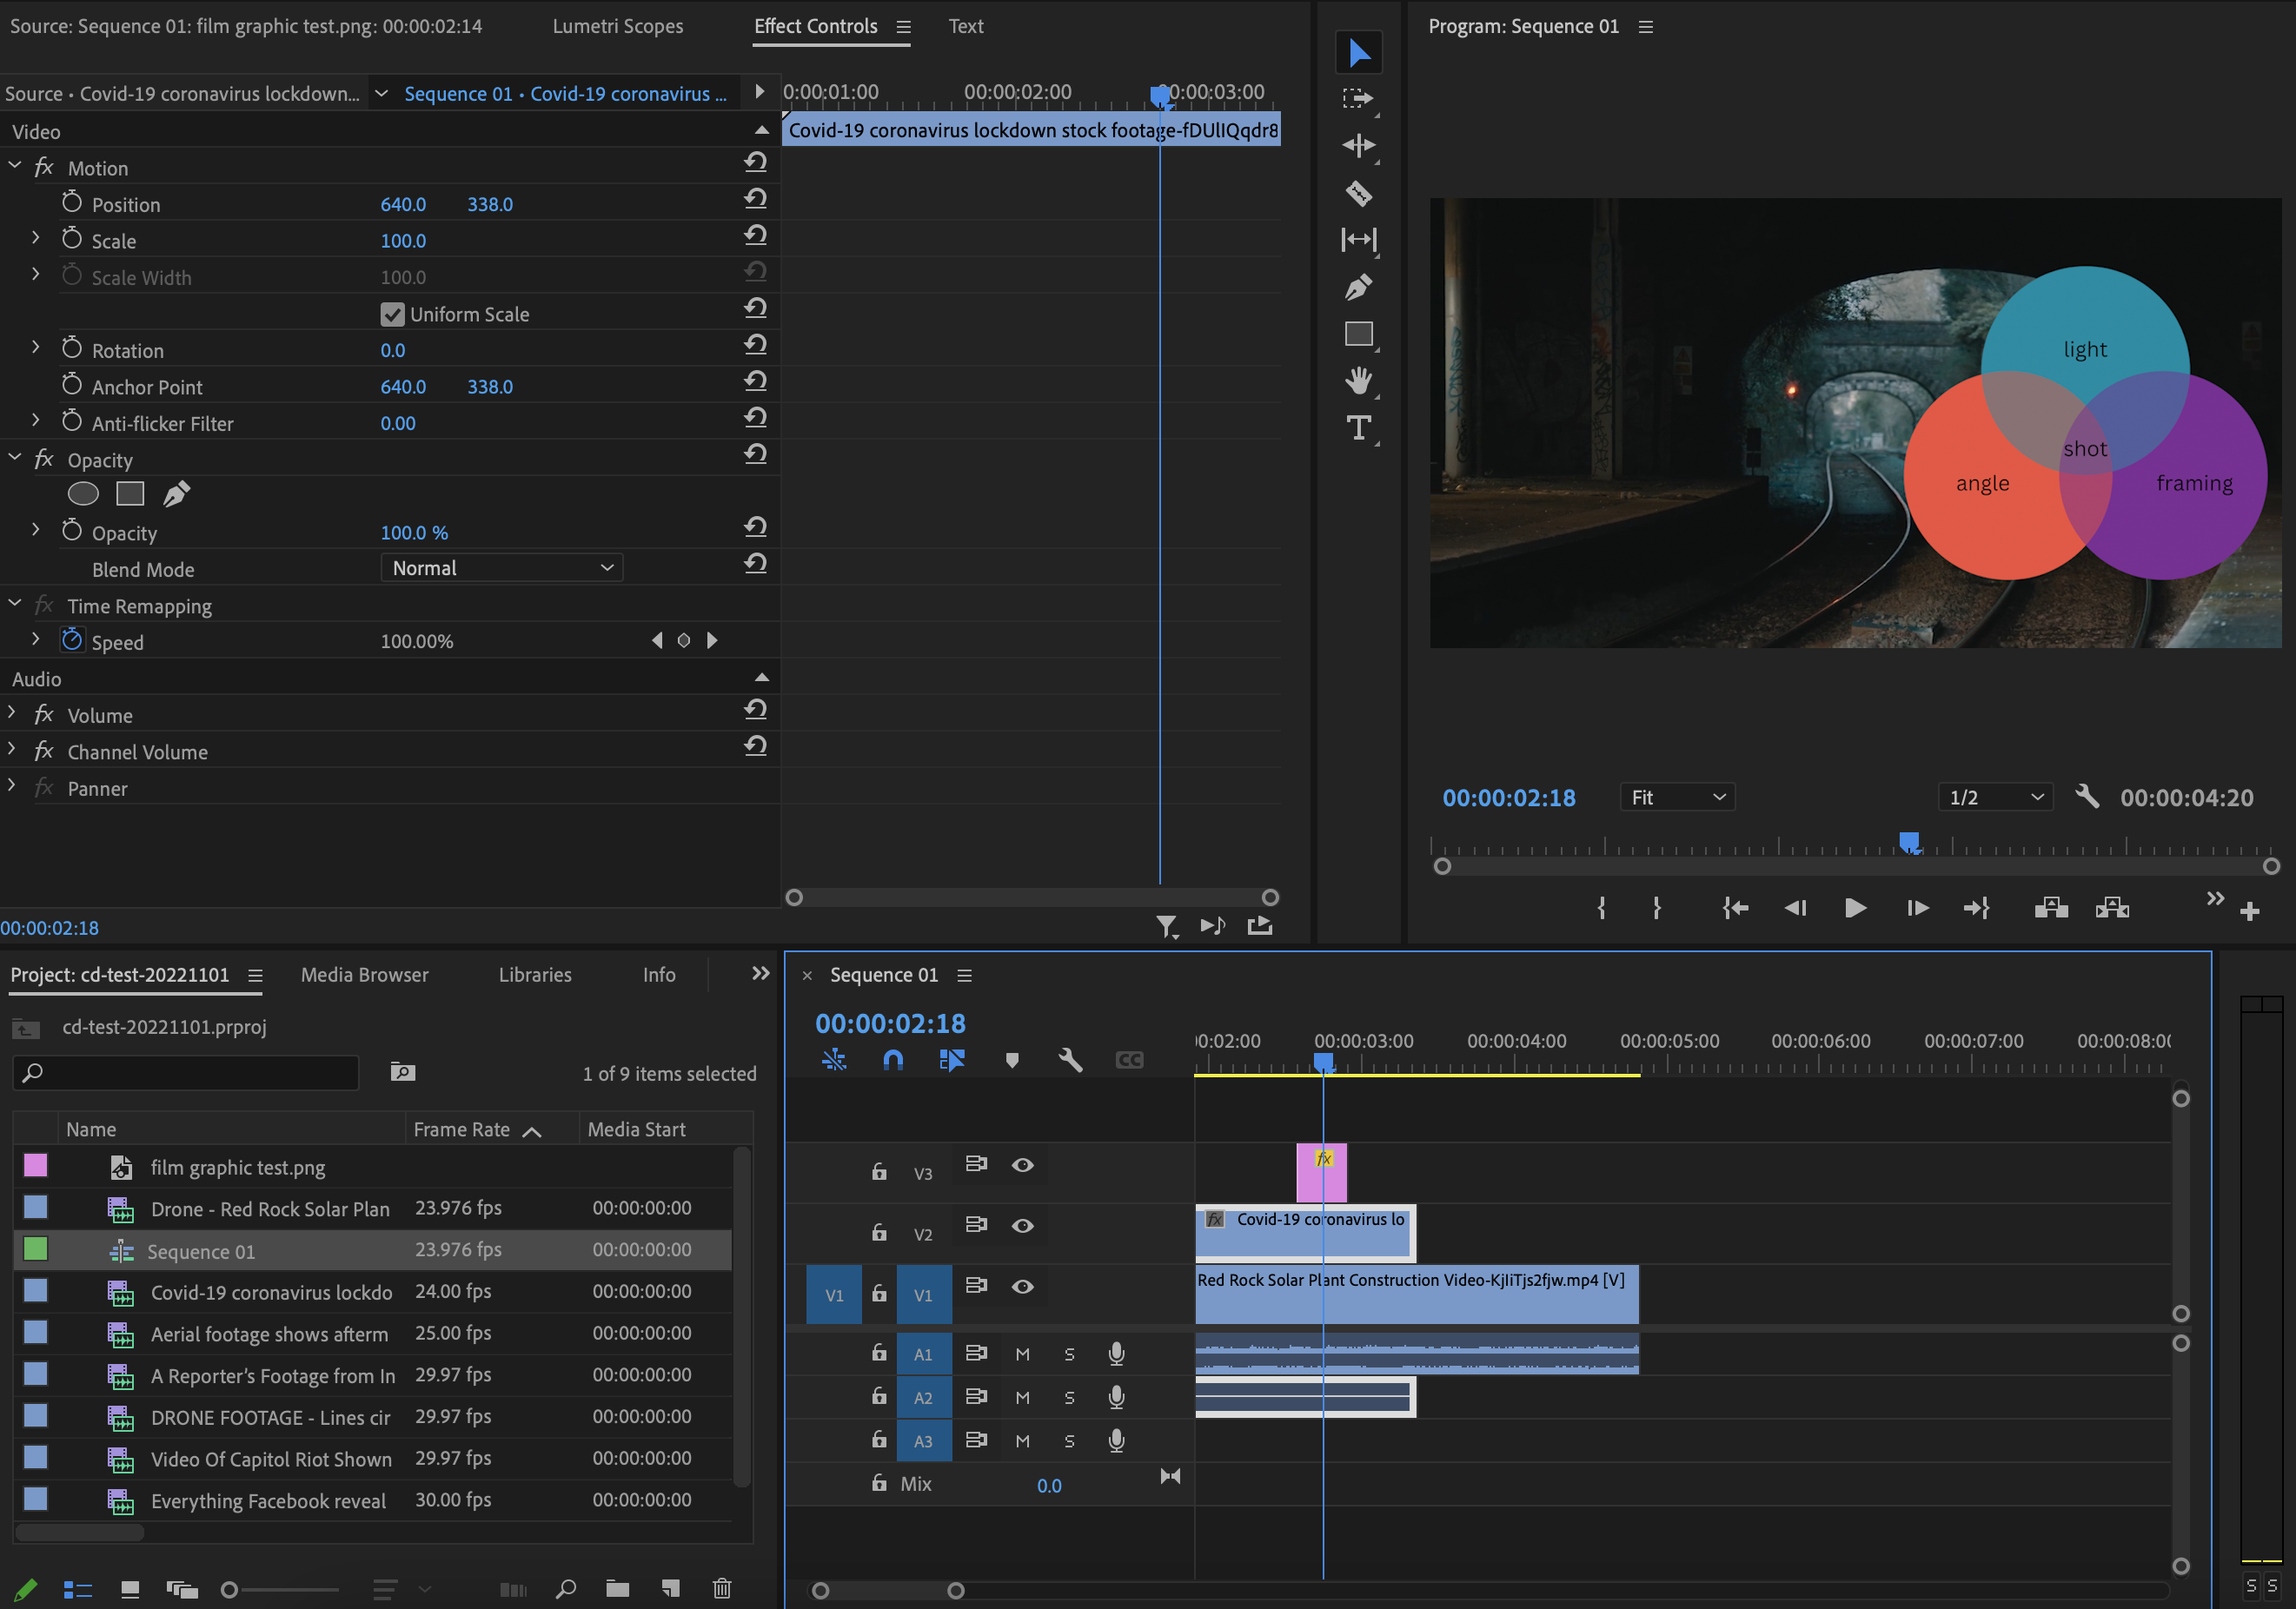
## adding a graphic element
To bring in a graphic to your video, you'll import that like you would any other media (i.e., by adding it to your project like you did in the steps outlined above). Double-click the graphical element to bring it up in your preview window in the top-left of the screen.
Then, set in and out points or drag it into your timeline and shorten it there, depending on how long you'd like your graphic to appear on screen.
If you'd like your graphic to appear on top of a video, place it on a video track above the clip you'd like it to appear on.
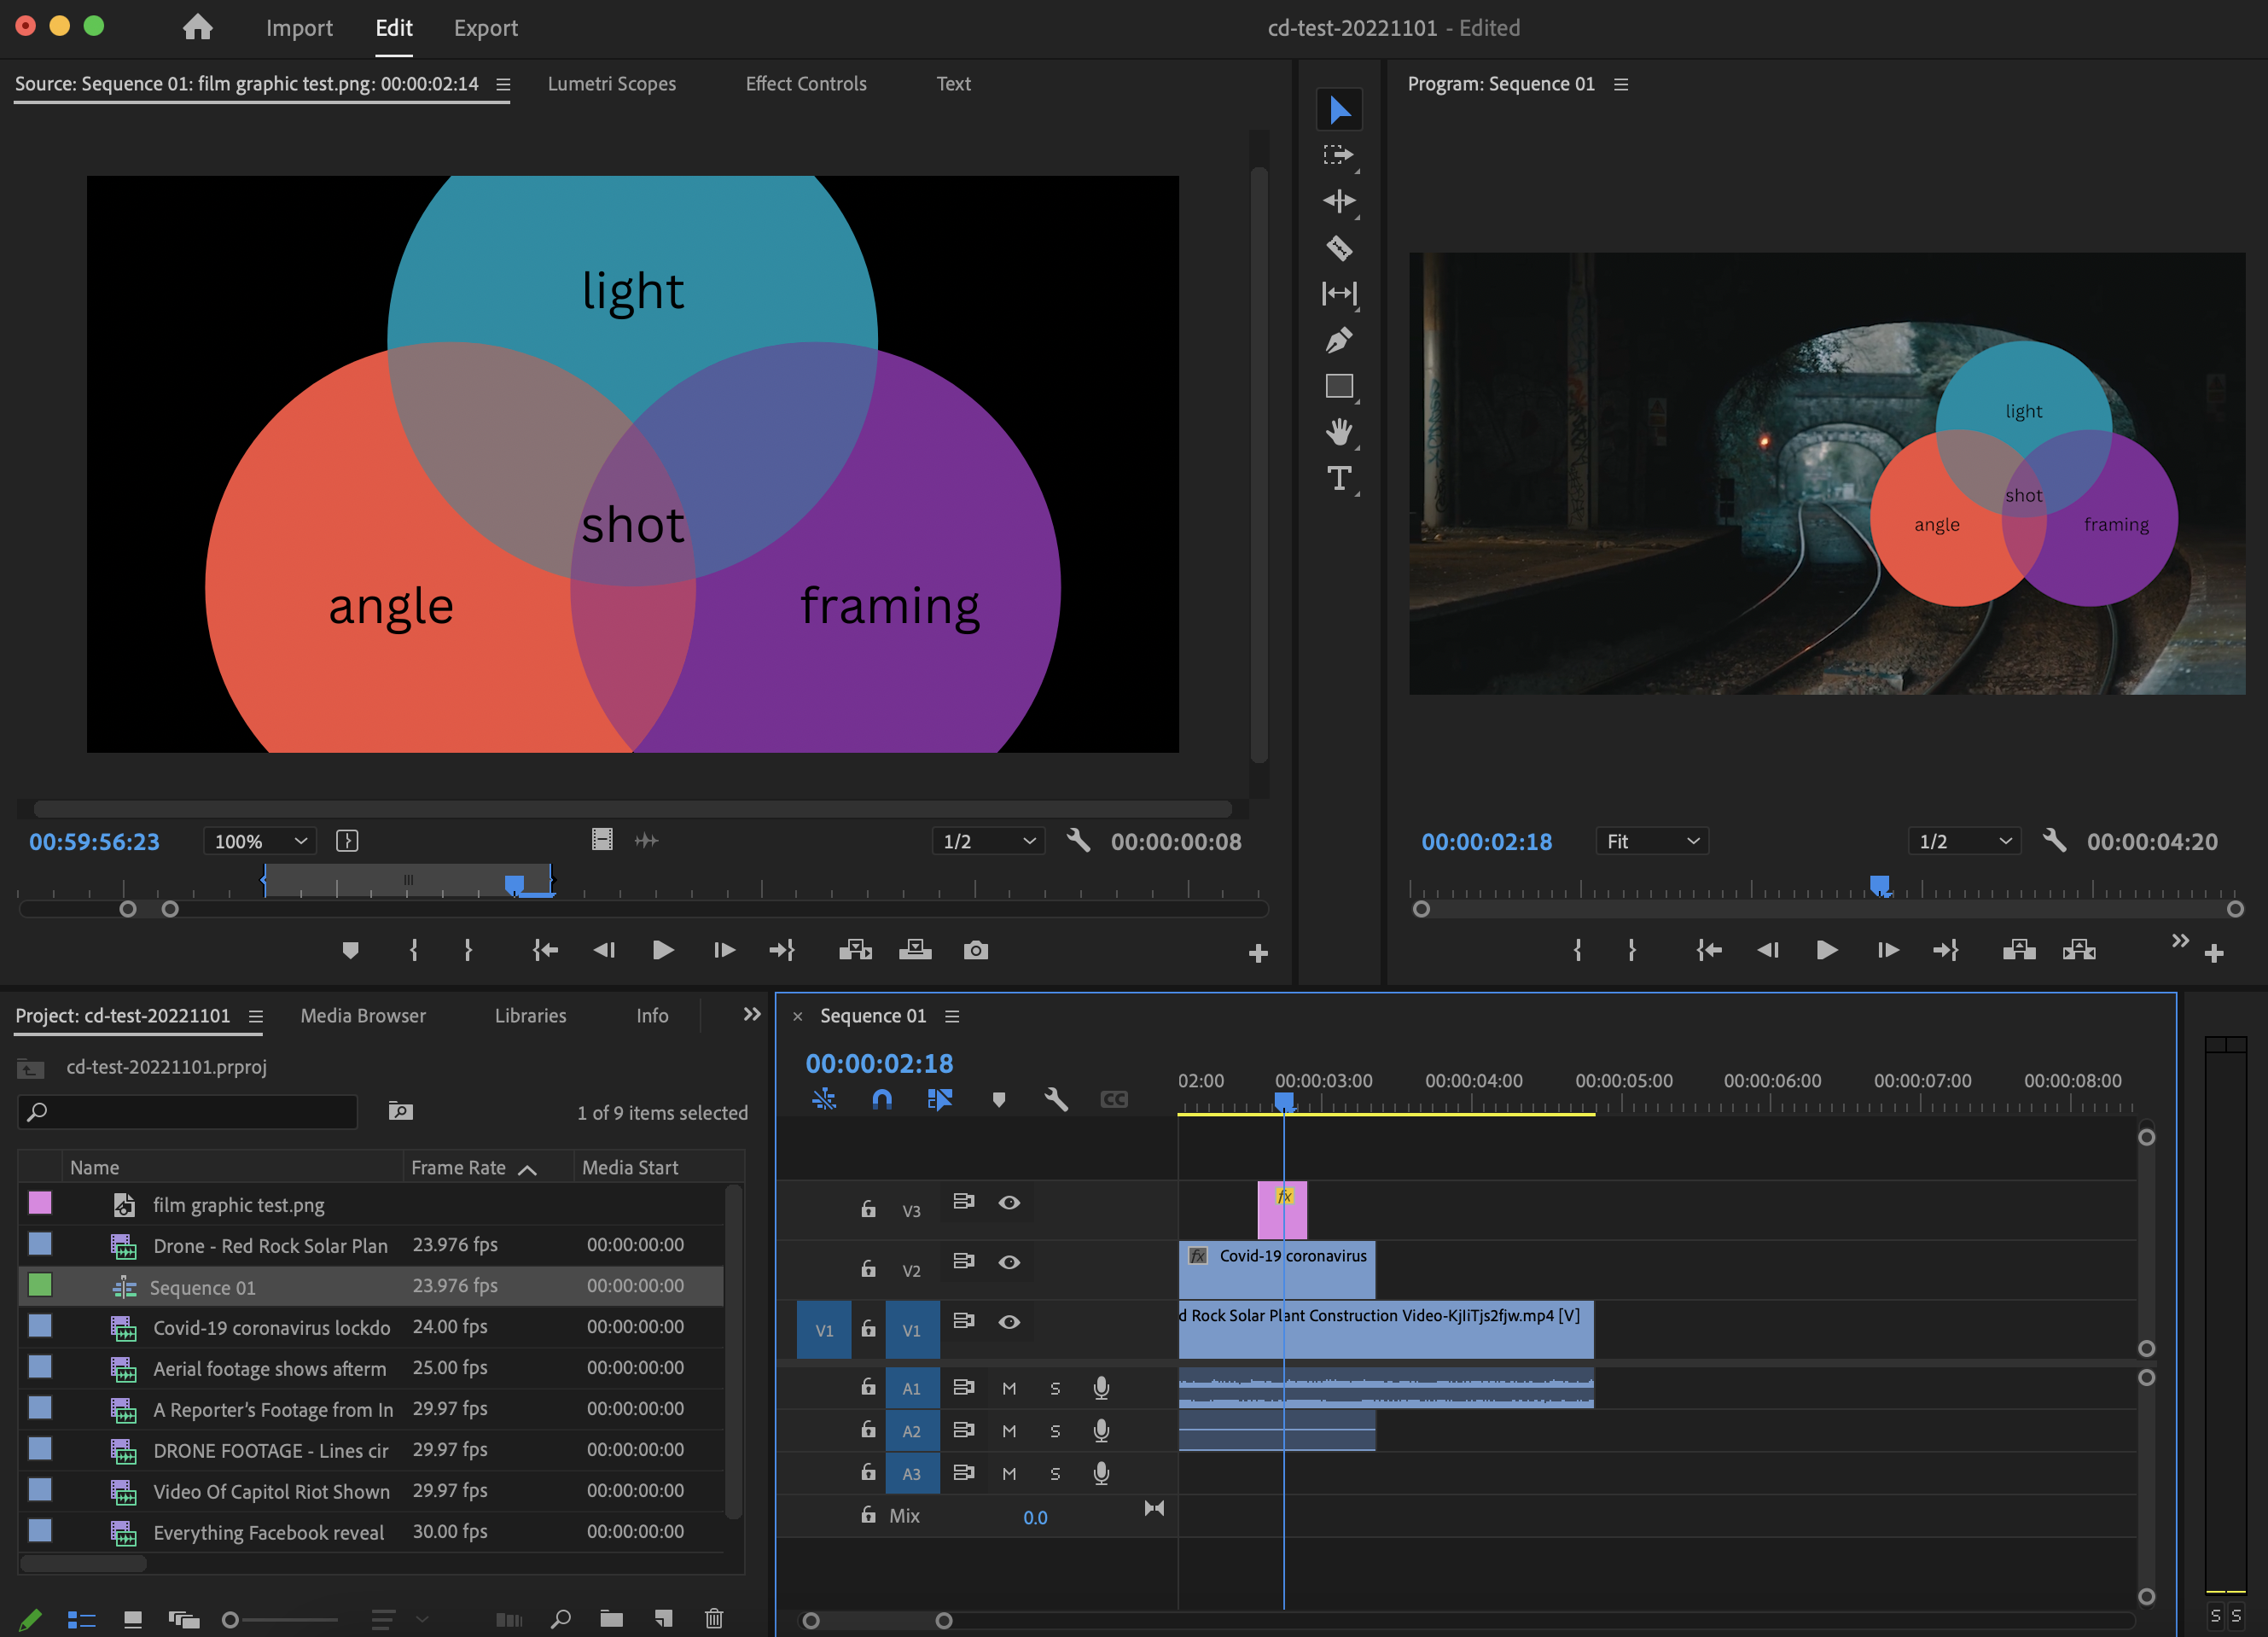
To move your graphic around, click on the "Effect Controls" tab in the edit panel (it should be above your preview screen). You can change the position and the scale/size of your graphic by clicking on the blue numbers and dragging left and right.
To get to the effects window click on this icon on the top righthand side of the screen. A drop down window will open and selecting "Effects" will open the effects window.

## music bed
You can source royalty free music from sites like [Purple Planet](https://www.purple-planet.com/) and import the file like you would any other media in Premiere (i.e., adding it to your Project via the instructions outlined above).
Click and drag the music bed into your timeline, placing it on an audio track.
You might need to mute other clips (and/or separate the audio track from the video track and delete the audio track - you can do this by right-clicking).