# next.js app basics
## start up your Next.js app
In terminal, navigate to your Development folder. From its parent folder (probably your Home folder), that would be
```
cd Development
```
Then start up a [Next.js](https://nextjs.org/) app with
```
npx create-next-app@latest my-app-name
```
You can call your app anything you'd like, but whatever you enter there will show up as a folder containing your starter NextJS app. So change directories into it. This command will also prompt a bunch of follow up questions, select "Yes" for all of them, except for the last question - select "No" for "Would you like to customize the default import alias?".

Once it's finished installing, change directories into the root folder of your app (`cd my-app-name`) and then type `ls` to check that all of the right folders are in your app. it should look something like this:

back in Terminal, you can cd into your app again or just keep going to the step below (open it in vs code) if you're totally sure you're already in your app.
```
cd my-workbook
```
open it in Visual Studio code
```
code .
```
This command will open the current directory in vs code (make sure you were in the app rather than the Development folder). Once it's open, go back to the terminal command and hit `command` and `T` together to open up a new tab in the root of your app. In either of the two tabs, type the following to start the development server.
```
npm run dev
```
Once you do this, you should be able to go to [localhost:3000](http://localhost:3000/) in your browser (ex. Google Chrome).
(optional) If you would like to connect to Github, type in the following in Terminal and follow the log-in instructions with your Github account:
```
git remote add origin https://github.com/your-github-account-name/my-workbook.git
git branch -M main
git push -u origin main
```
## server-side applications
We're going to build a server-side app using next.js, so it's useful to understand the basic concept that informs this structure. Next.js has some documentation that can help you understand [server- versus client-side applications](https://nextjs.org/docs/getting-started/react-essentials).
A server-side application is a type of software that runs on a web server, which is a powerful computer designed to host and manage websites and online services. Unlike static websites that display fixed content, server-side applications can generate content and respond to user interactions in real-time. They process user requests, retrieve data from databases, perform calculations, and then send back the appropriate response to be displayed on the user's browser.
**How Do Server-Side Applications Work?**
1. Client Sends a Request: When a user interacts with a web page or web application, their browser sends a request to the server. This request might involve actions like submitting a form, clicking a button, or loading a new page.
2. Server Processes the Request: The server-side application receives the request and processes it. It may involve tasks like querying databases to retrieve data, performing business logic, or generating dynamic content based on the request.
3. Server Sends a Response: Once the server-side application has processed the request, it sends a response back to the user's browser. This response contains the necessary data and instructions on how to display the content.
4. Client Displays the Content: The user's browser receives the response and uses it to render the content on the screen. This content might include HTML, CSS, and JavaScript, which determine how the page looks and behaves.
server-side apps can easily interact with databases to store and retrieve data, enabling features like user accounts, comments, and product listings.
As our first test of this, we'll connect our next.js app to an airtable base. but first, we should get our app's directory in order and do some basic coding in vs code to learn about components and styling
[here's a resource doc](https://hackmd.io/m5j3HN-gSUajCseood_QBA) that will help you understand how to set up your next.js 13 project.
## changing some basics features on the page.ts or page.js file
1. Let's simplify Page.tsx dramatically:
```
import Head from 'next/head'
import Image from 'next/image'
import styles from '../styles/Home.module.css'
export default function Home() {
return (
<div>
<h1>Y/N's app</h1>
</div>
)
}
```
1. Inside the `<title>` tags you can put the title of your site/page, this will show up in the browser tab (among other places) as the title of your page
2. Put a simple title for your project between the `<h1>` tags
3. Ultimately, when we build other pages, we'll put links to them in the footer so it's easy for us to find them.
note: If you are using a page.js file, all of these steps work, too!
It's definitely worth checking out some javascript basics next--especially making some variables and learning about how to assign values and pass in those values in your code. [This resource doc will show you how to do that!](https://hackmd.io/qz_n8IV4QAepX2Sha2bZew)
## connecting your app to airtable
This resource will walk you through [the steps you need to link an airtable base](https://hackmd.io/AhBpXa0TRneC0H_6QizCeA) to your app.
Below is from the getAirtableData.js utility code Xtine created to pass into her page.tsx file. She elected to make a utility folder because this will allow her to reference airtable across different pages in her app. The code you'll see in the resource above will pull airtable data into a particular page of your app.
Within src/app, make two folders: 'airtable' and 'openai.' Within 'airtable', make a file named 'route.js'. That's where you'll put the api route from airtable to your app.
```
import Airtable from 'airtable';
const fetchAirtableData = async (options) => {
const base = new Airtable({ apiKey: process.env.AIRTABLE_PAT }).base(process.env.BASE_ID);
const records = await base('One').select({}).all();
const processedData = records.map((record) => {
const { id, fields } = record;
return {
id,
...fields,
};
});
console.log(records)
return processedData
}
export default fetchAirtableData
```
Back on the page.js file (the homepage of the app), you want to create an async function that will call on the Airtable data in the getAirtableData.js file and pass it in.
```
import Airtable from 'airtable';
import fetchAirtableData from '../../route.js/getAirtableData'
import Card from '../../components/Card'
export default async function Page () {
const processedData = await getAirtableData();
return (
<div>
{processedData.map((record) => (
<Card key={record.id} record={record} />
))}
</div>
);
}
```
## making and importing an src/component
Make an src/component folder. In that folder, make a card.module.css file (note: Christine used the term "card" but you could use anything here - button, etc. - just keep it consistent!). You can try using chatGPT to get CSS styling to make your card look they way you want it to.
```
.Button {
background-color: ...
}
```
In that same folder, you'll want to make a card.js file, where we will write a react component that references the styling in our card.module.css file. In the code below, we're wrapping the card.module.css code around the <div> that is our Airtable records (which in this case are fields "One" and "Two").
```
import styles from '../components/Card.module.css'
const Card = (props) => {
return (
<div>
<div className={styles.Card}>{props.record.One}</div>
<div className={styles.Card}>{props.record.Two}</div>
</div>
)
}
export default Card
```
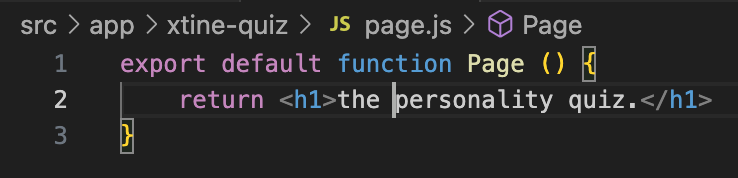
## useState and building the personality quiz
## tutorials
* [intro to git](https://www.linkedin.com/learning/git-essential-training-19417064/what-you-should-know?autoSkip=true&resume=false&u=2194065)
* [react tic-tac-toe tutorial](https://react.dev/learn/tutorial-tic-tac-toe)
## further reading
* To learn about the default folder structure, check out NextJS's [documentation on project structure](https://nextjs.org/docs/getting-started/project-structure).
* [nextJS routing basics](https://nextjs.org/docs/app/building-your-application/routing)
## glossary
* parent component
* A parent component is a higher-level component that contains and manages one or more child components. It provides data, state, and behavior that the child components can use. The parent component wraps around its children and is responsible for passing down any necessary props (properties) or data to them.
* child component
* A child component is a lower-level component that is nested within a parent component. It receives data from its parent component through props and can render UI elements, respond to user interactions, and perform other tasks independently or based on the data received from its parent.
 Sign in with Wallet
Connect another wallet
Sign in with Wallet
Connect another wallet