# Illustrator Activity Guide
Adobe Illustrator is a powerful graphic design tool that we will use a lot in graphics-lab. Today's activity offers a taste of one of the many ways Illustrator can be used to generate useful, custom artwork.
## Step by Step:
### Navigate the Ai Interface
* Understand Layers, Artboards, Properties, and Tools
1. **Layers** = the folders of things. Find the Layers Window and poke around to see how we organized things for you. There is a system for using layers and as you build more complex projects it becomes very important to utilize this organizational structure.
2. **Artboards** = your canvases, or workspaces. In the template doc, we have generated 6 artboards.
3. **Properties** = the settings and control panel. It will show you controls that are relevant to your current task. Try clicking on the image on the first artboard and see how how the Properties panel changes to show controls relevant to transforming or aligning images.
4. **Tools** = suite of tools that allow you to draw, select, navigate, paint, modify, or create text. Check out the Toolbar and hover your mouse over them to learn about what they do.
### Trace an image
* Goal
* Convert a raster image (e.g., JPEG, PNG) to vector artwork.
* Why would I use this?
* Useful when you want to use existing artwork as a starting point for generating new, customizable artwork.
* How to:
1. Choose one of the reference images to trace (go to Layers to find and make these images visible). Alternatively, you can open or drag a different image into Illustrator.
2. Select the selection tool (open arrowhead in the Toolbar). Click on the image and drag it to the bottom left artboard.
3. Copy and paste (Cmd+C then Cmd+V) the image to duplicate it. Move the duplicate to the bottom middle artboard.
4. With the duplicate image selected, go to Object > Image Trace > Make (depending on your version of Illustrator, you might see Create instead of Make).
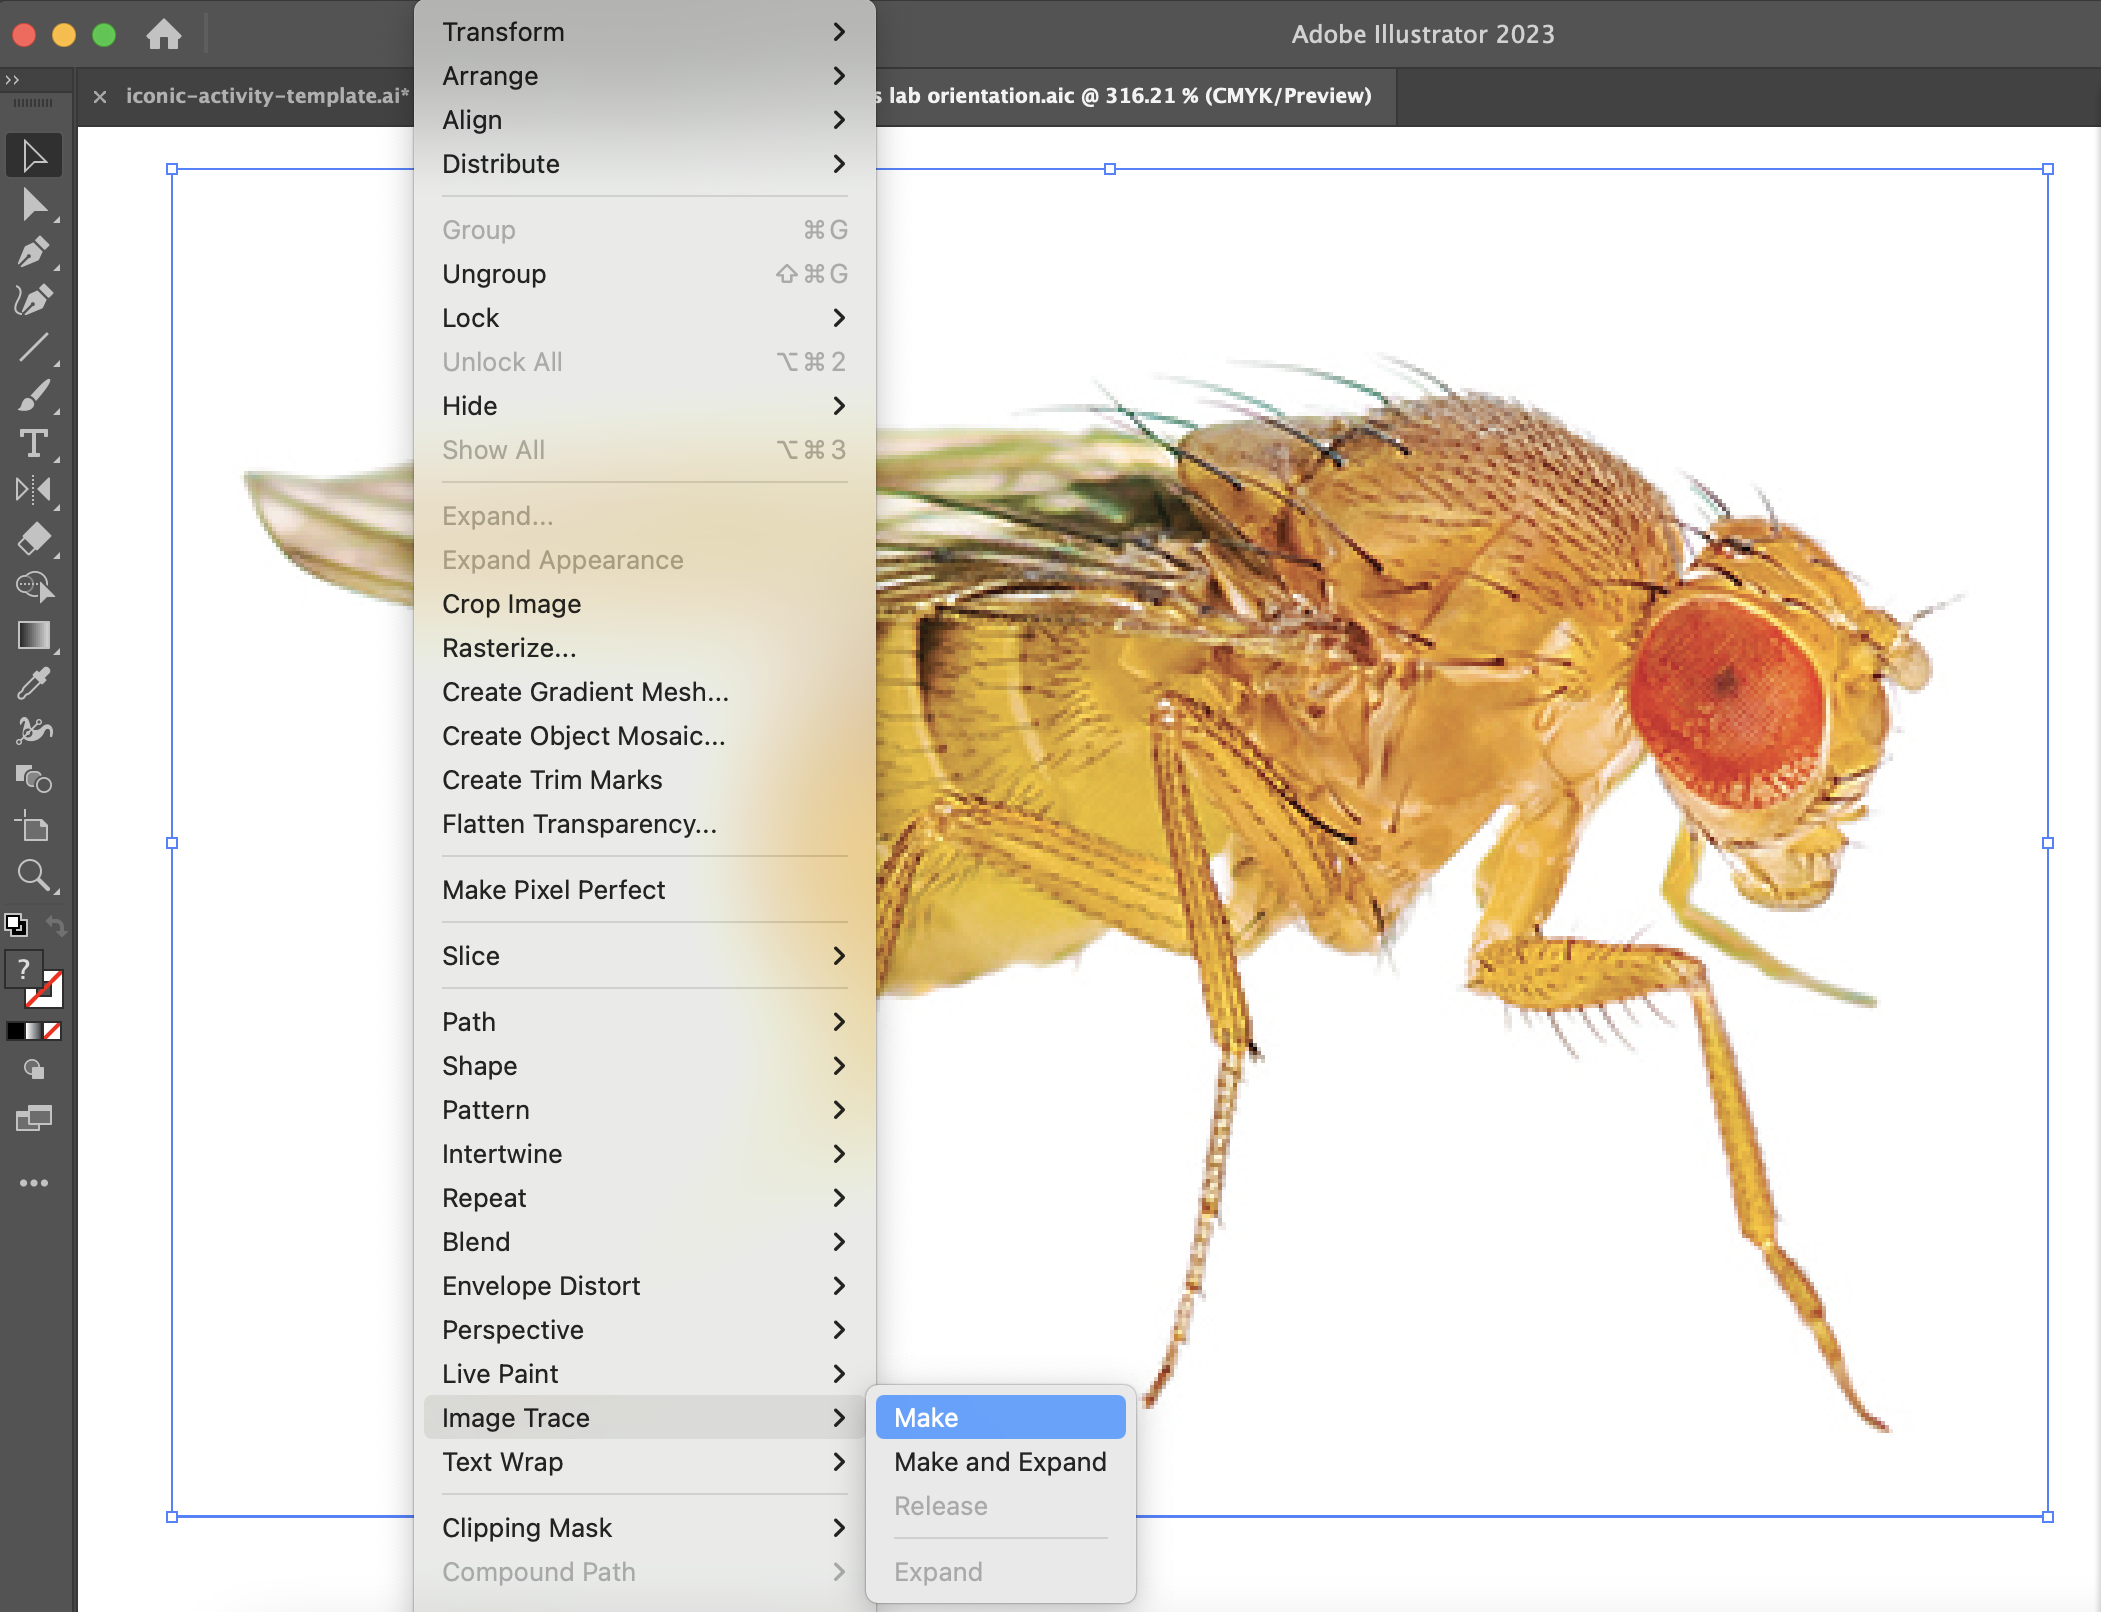
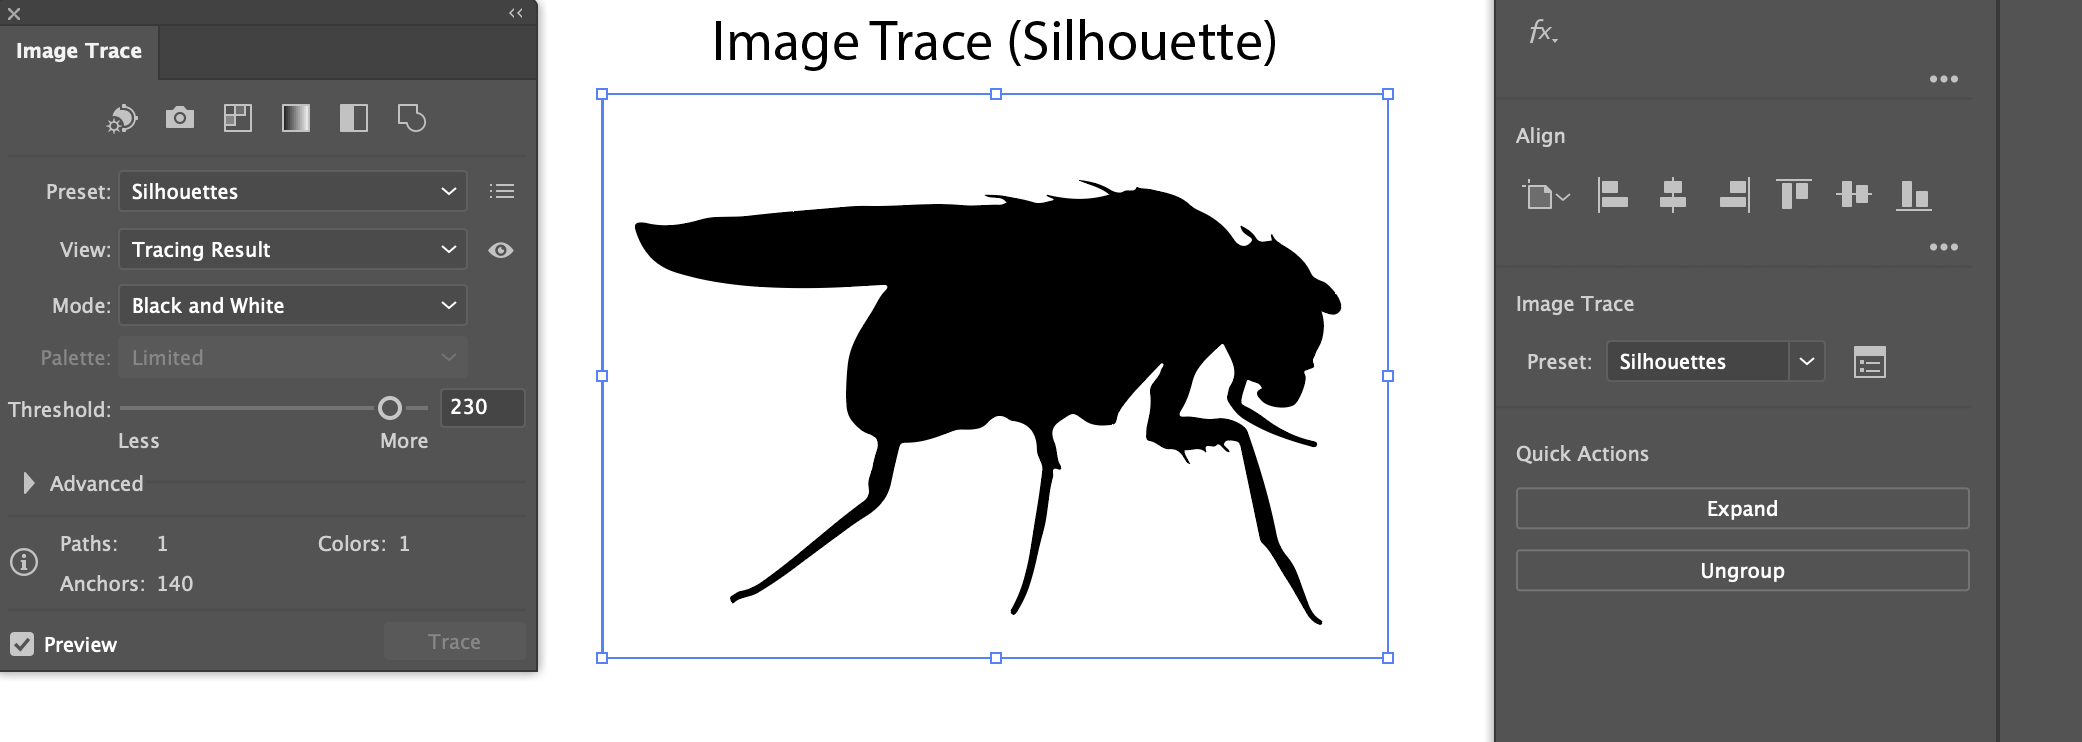
5. In the Properties panel, under Image Trace, click on the square graphic to open the Image Trace Panel.
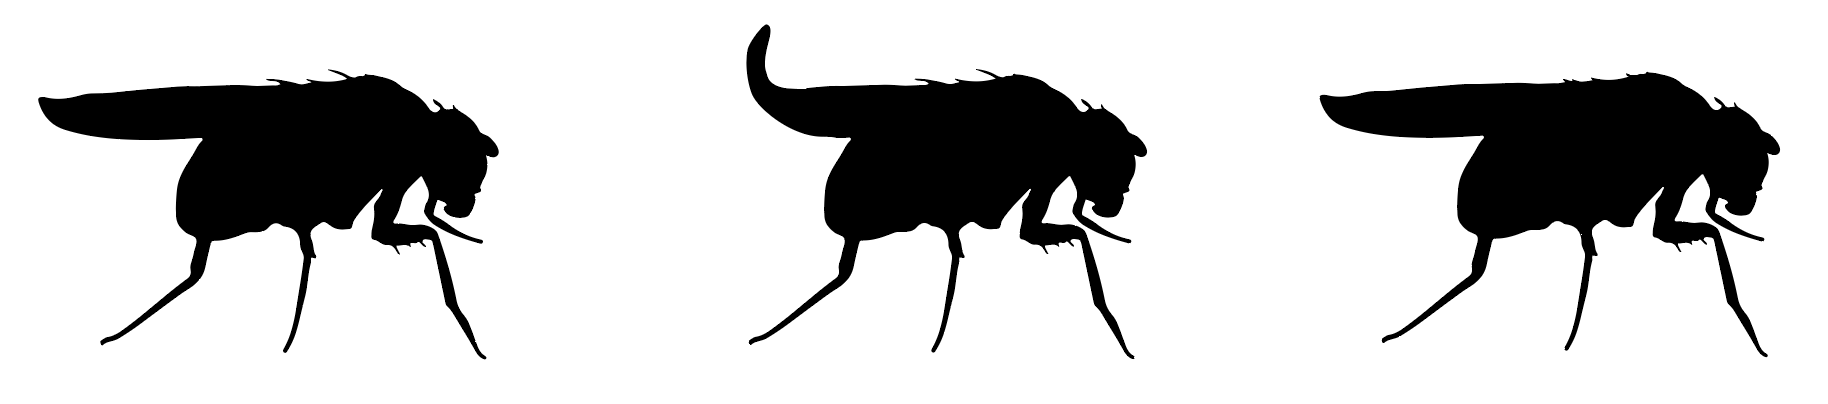
6. Select from one of the different Preset Options. Try silhouette first, then feel free to try one of the other options.
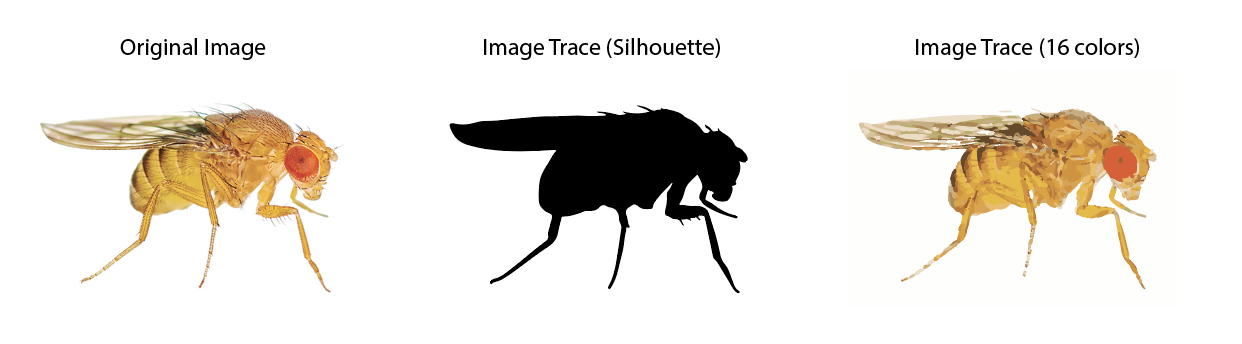
8. You will have different choices for settings to edit the trace depending on the Mode of the trace you have selected (Black and White, Color, or Grayscale).
-Black and white: choose a value for the threshold. Pixels in your image that are lighter than this value will become white, and pixels darker than this value will become black.
-Color: choose the number of colors used in the trace.

-Grayscale: choose the number of grays used in the trace
### Editing a traced image
* Goal
* Convert the traced object into paths (lines and curves).
* Why would I use this?
* Allows you to edit the traced object.
* How to:
1. Select the Selection Tool (open arrowhead) from the Toolbar. Click on your image trace.
2. Copy and paste (Cmd+C then Cmd+V) the trace to duplicate it. Move the duplicate to the bottom right artboard.
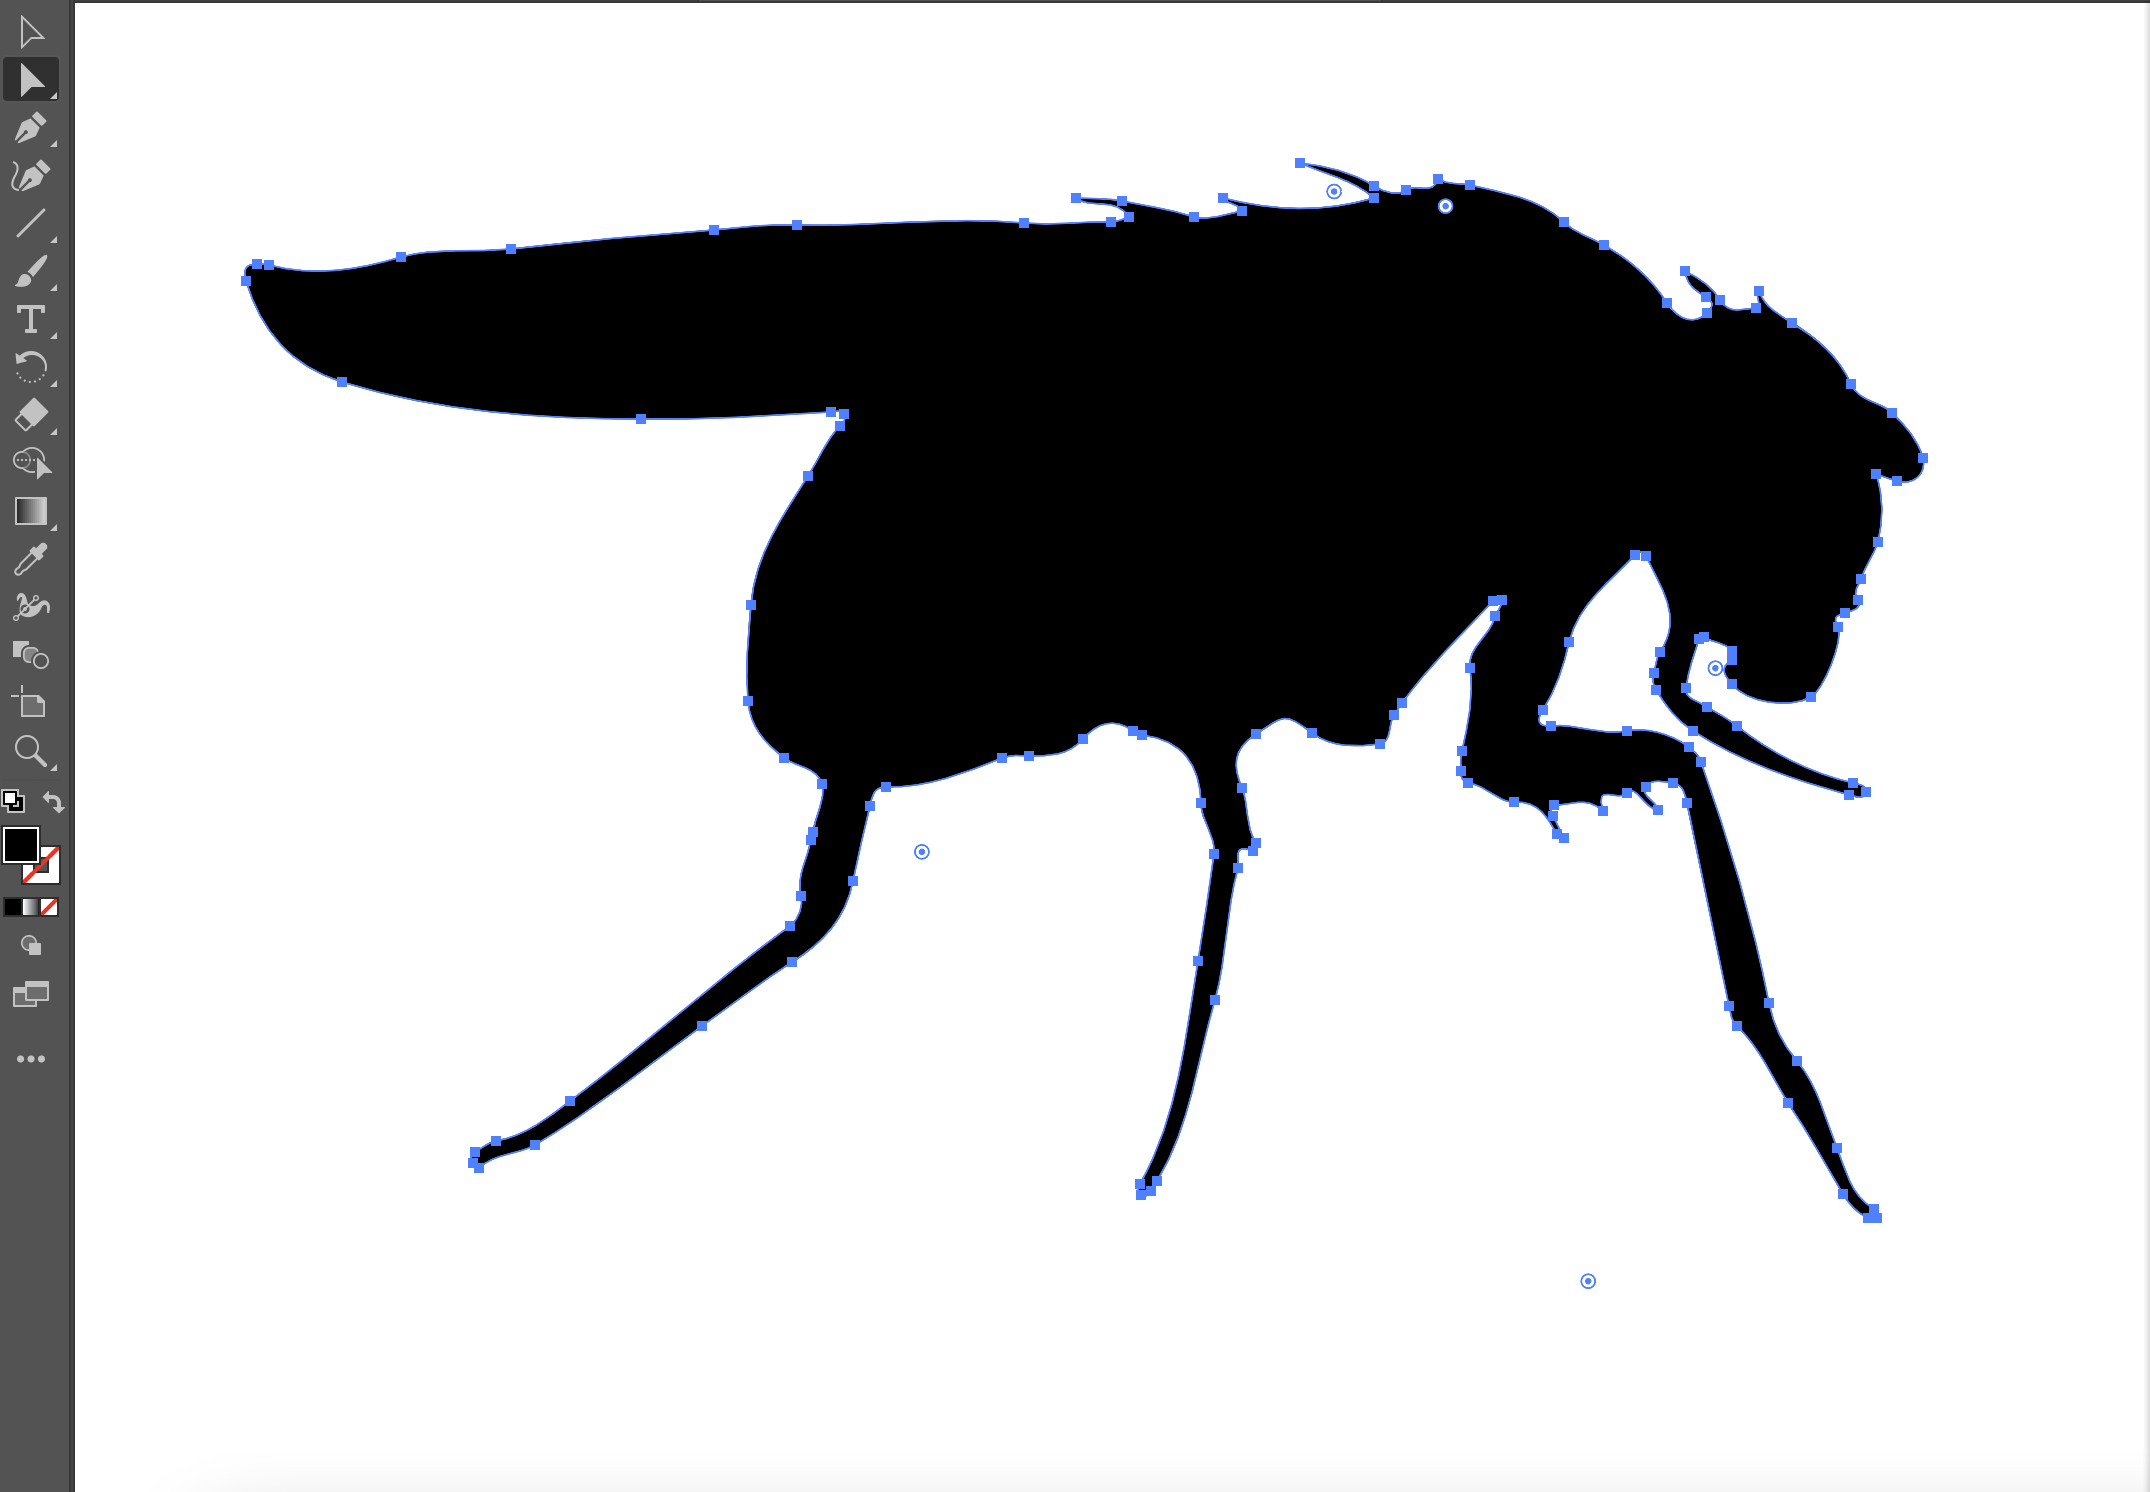
3. With the duplicate trace selected, in the Properties panel, click Expand.
4. Select the Direct Selection Tool (filled arrowhead) from the Toolbar. Adjust the position of anchor points (colored boxes) and the length or angle of line segments as desired. For example, I changed the shape of the wings and the length of the bristles on this fly.
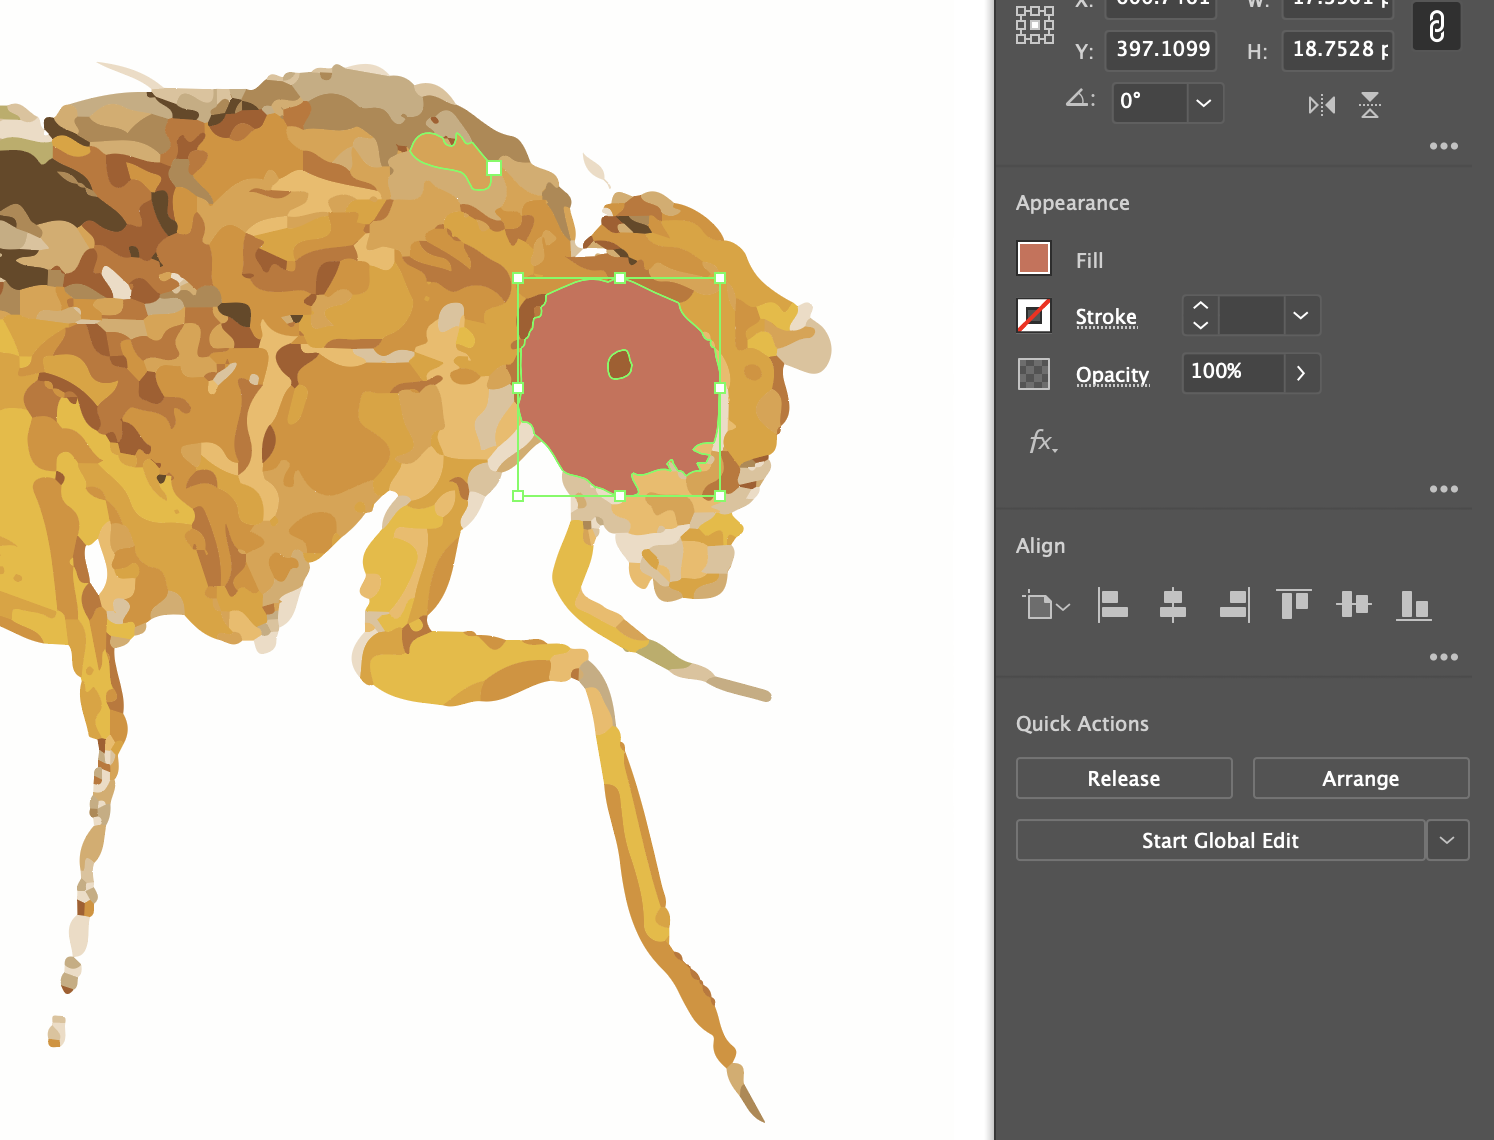
5. If you generated a color Image Trace, you can also alter the color of your artwork in the Properties panel. Go to Appearance > Fill. Here, I changed the color of the fly's eye.

## **Useful Resources**
[Using Image Trace ](https://https://helpx.adobe.com/illustrator/using/image-trace.html>)
[Editing Path Segments](https://helpx.adobe.com/illustrator/using/adjust-path-segments.html)
[Editing Appearance Attributes](https://helpx.adobe.com/illustrator/using/appearance-attributes.html)
 Sign in with Wallet
Connect another wallet
Sign in with Wallet
Connect another wallet