---
tags: resources, [Logic Pro X], [Garageband], [Podcast], [Music], [Audio], [MIDI]
author: Dézhawn Dumornay
---
# Logic Pro X / Garageband: Basic Editing
Logic Pro X and Garageband have various editors available to alter individual regions and tracks, allowing precise manipulations. The available editing tools differ based on the type of region or track selected.
### **The Piano Roll Editor**
This editor shows notes in selected MIDI regions. Each note appears as a colored bar in a time grid, indicating the duration (horizontally) and the pitch (vertically) of each note. To open the Piano Roll, simply double-click the desired MIDI region to display the Piano Roll beneath the Tracks area.
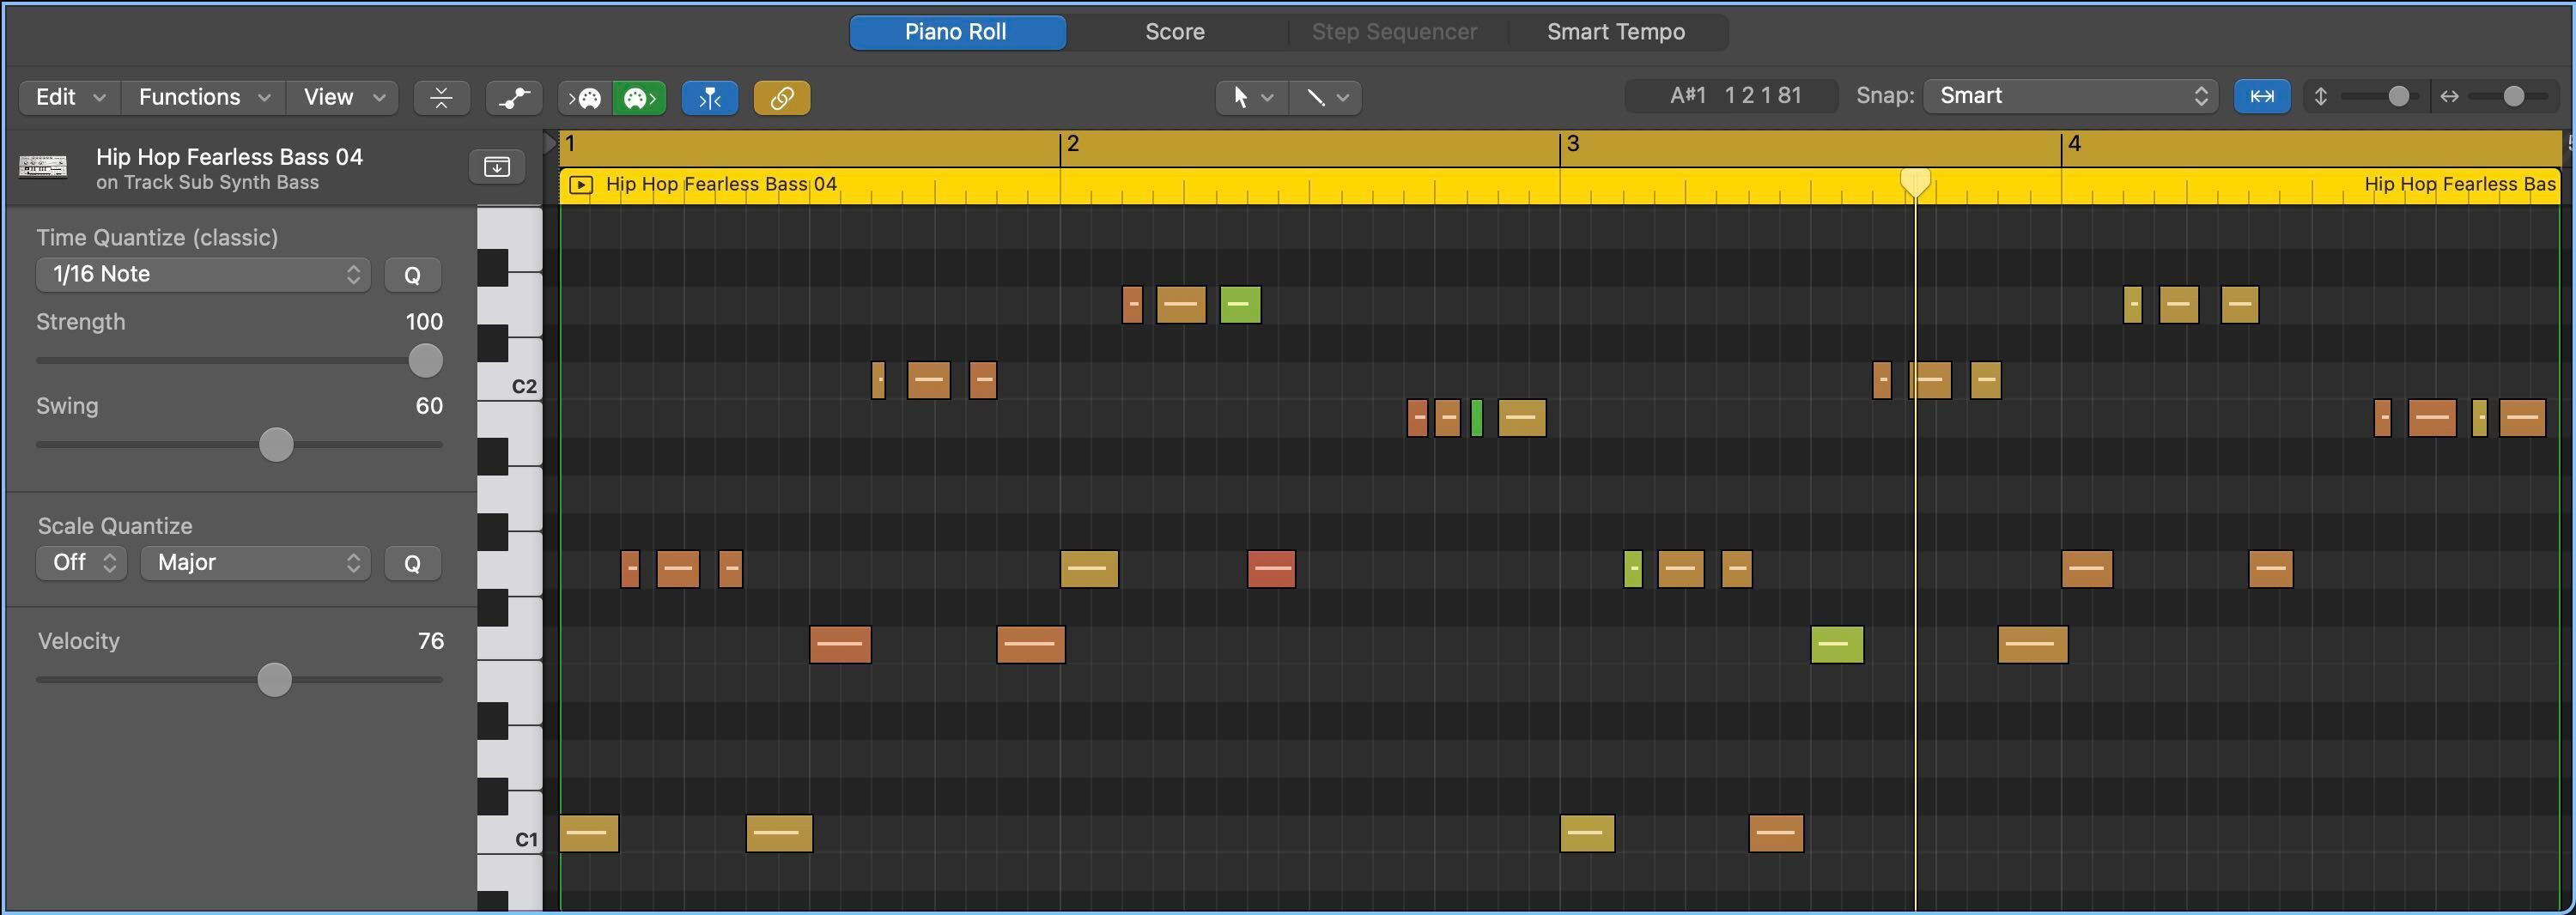
**Adding and Editing Notes**
- You can add notes directly into the Piano Roll using the Pencil tool.
- To record notes into the Piano Roll Editor, arm the track to record by pressing the **[R]** button on the desired track (when it is red that means it is active), then press the red Record button in the control bar located at the top of the logic window, or simply press R on the computer keyboard when you are ready to play.
- You can split regions and notes by using the scissors tool or by moving the playhead to the desired time of the split and pressing **[⌘T]**. This is helpful if you wish to edit only a selection of a longer midi region. For example, you can cut out a section of a midi region and move or duplicate only that portion to a new location.
- You can move selected notes in the Piano Roll by clicking and dragging to change their time position horizontally and their pitch vertically.
- To change the duration of notes drag either the left or right edge of the note horizontally.
### **The Audio Track Editor**
This editor displays the audio waveform of a selected audio track in the Tracks area. To open the Audio Track Editor, simply double-click the desired Audio region to display the Audio Track Editor beneath the Tracks area.
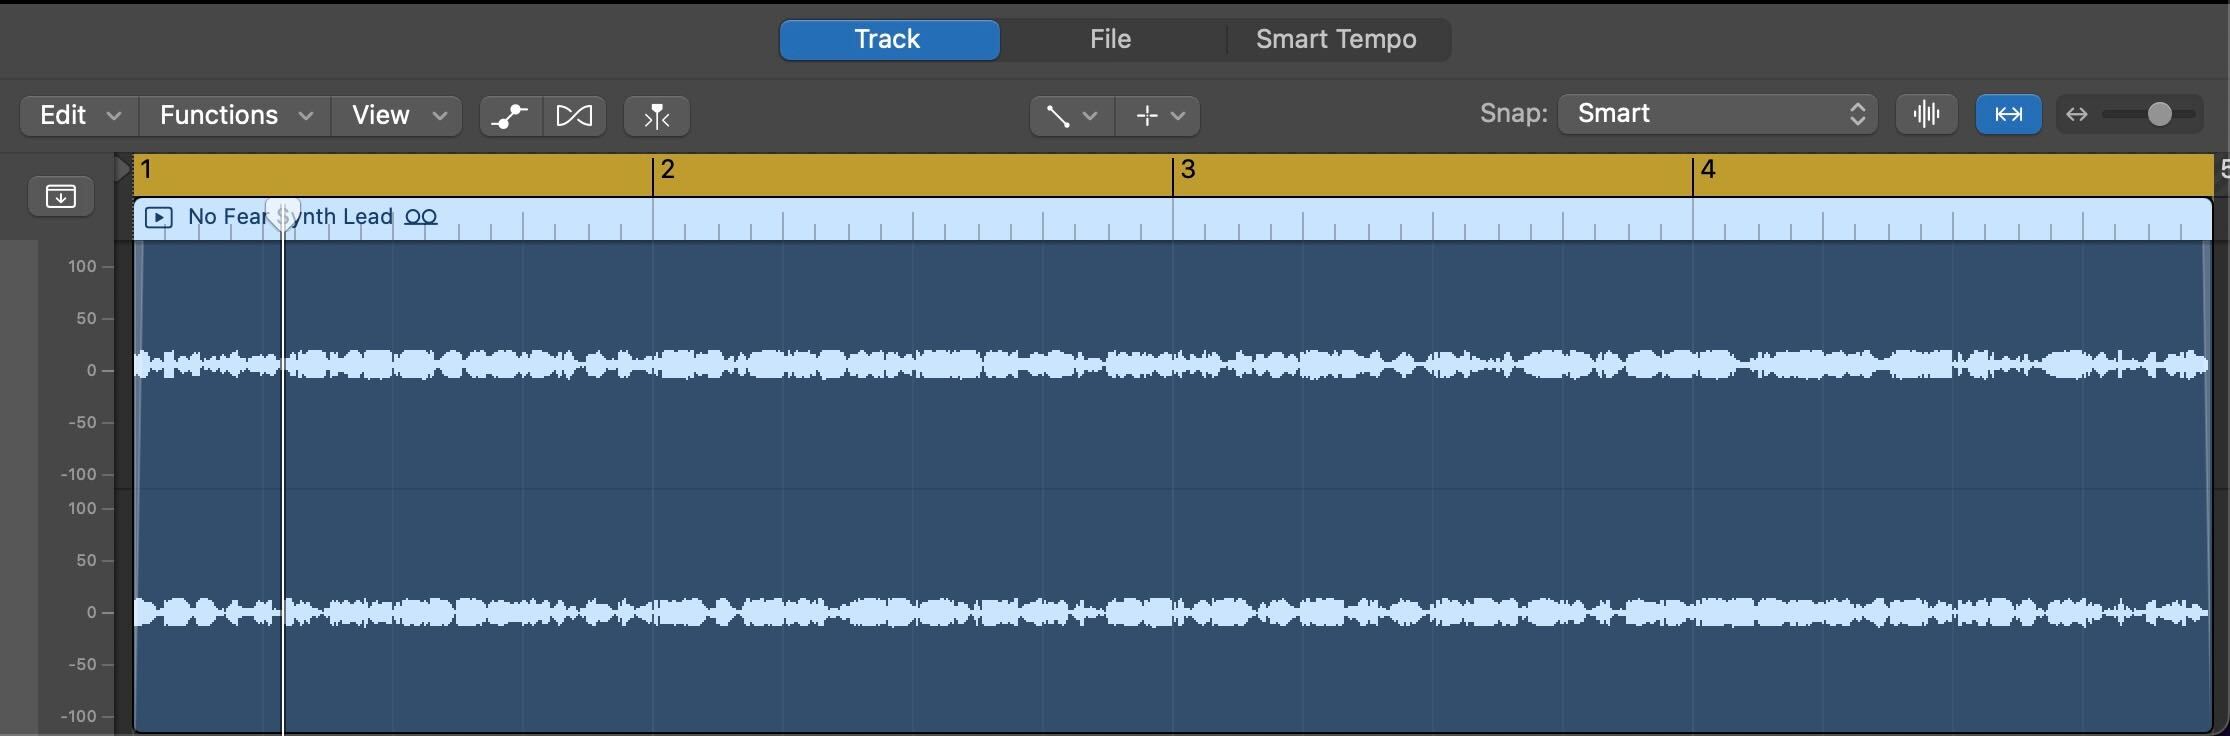
**Editing Audio Regions**
- You can split regions by using the scissors tool or by moving the playhead to the desired time of the split and pressing **[⌘T]**. This is helpful if you wish to edit only a selection of a longer audio region. For example, you can cut out a section of audio with a voice that is too quiet and boost the volume of only that portion.
- You can move selected audio regions in the Audio Region Editor by clicking and dragging the region horizontally to the desired location.
- To change the duration of audio regions drag either the left or right edge of the region horizontally.
- You can fade in and fade out audio regions by using the Fade tool or the Fade In and Fade Out parameters in the Region inspector located to the left of the Tracks area. Using the Fade tool, drag either the left or right edge of the region horizontally. If you do not see the fade on the audio region, zoom in on the area of the fade.
- You can edit the pitch as well as the gain (volume) of selected audio regions in the Region inspector located to the left of the Tracks area. Altering the pitch of audio can be useful not only for musical content, but for creative content as well. For example, making a voice higher or lower pitched to simulate different characters in a podcast story.
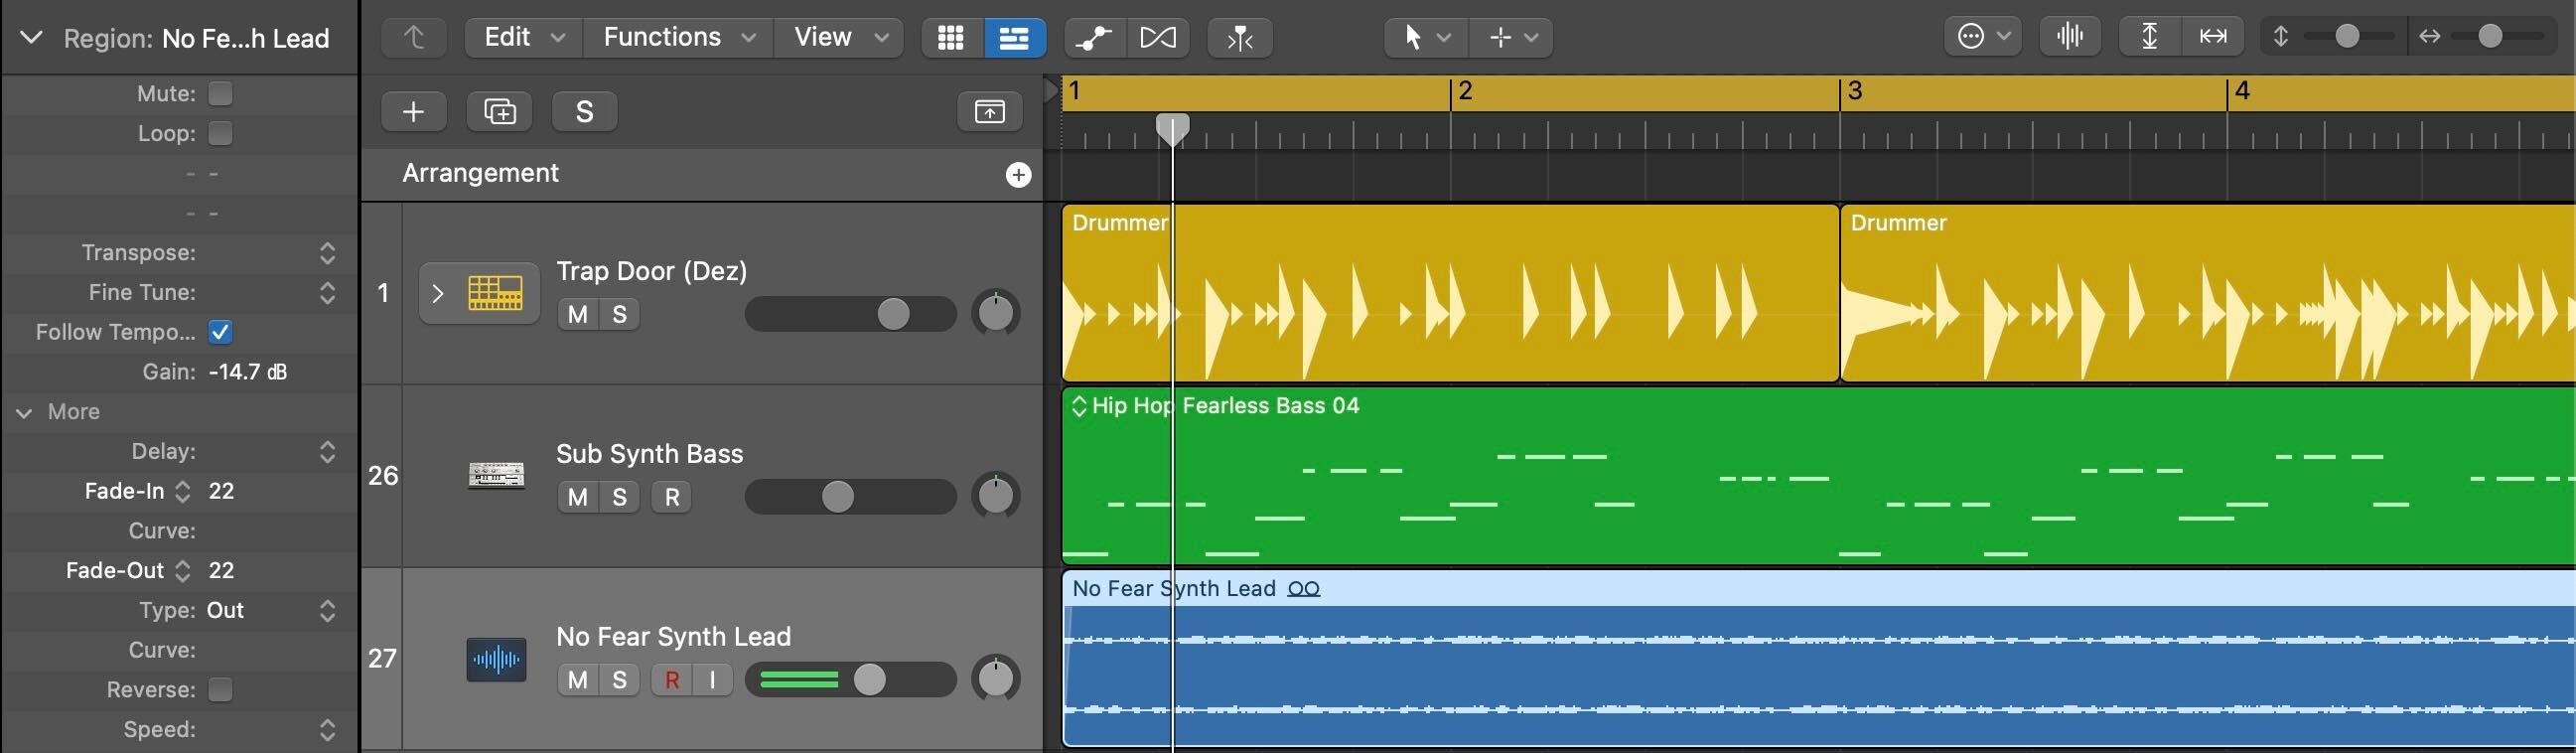
### **Automation**
Automation is available for all track types and allows you to create changes over time to various settings such as pan, volume, and effects.
To create an automation envelope:
1) Press **[A]** to show/hide the automation controls.
2) Choose between track automation and region automation by clicking the automation button in the track header.
3) Pick the parameter you want to automate from the parameter pop-up menu in the track header.
4) By clicking the automation line you can add and adjust automation points as you see fit.
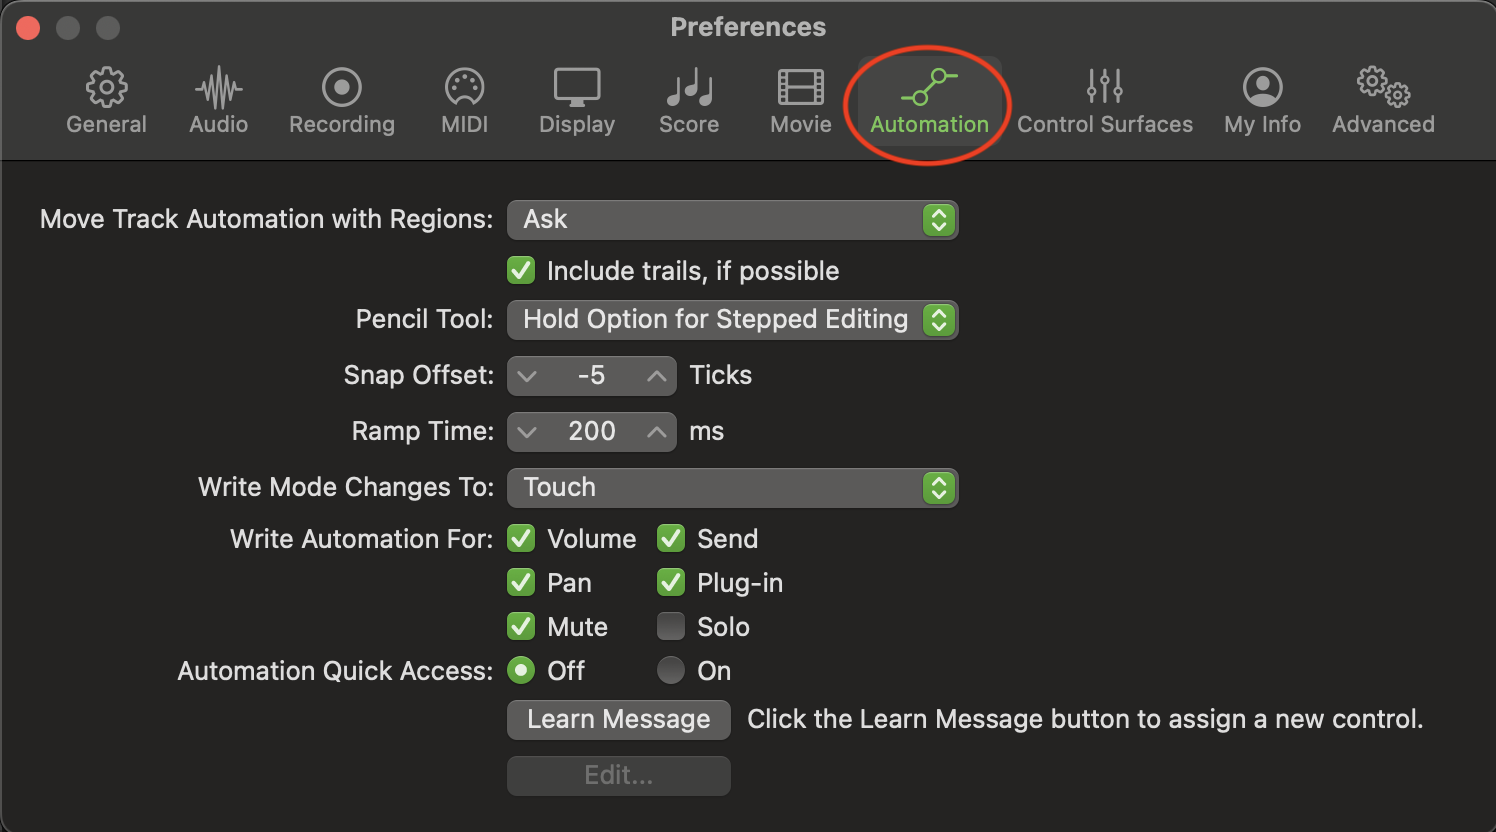
Automation preferences can be made available by enabling Complete Features in the Advanced Features. This will allow you to do things like automatically move automation with regions.

 Sign in with Wallet
Connect another wallet
Sign in with Wallet
Connect another wallet