---
tags: cd
---
# cd-prototype-fellows-playing-cards
### goals
* create something tangible for MDFs/LLUFs that they can share with others, for MDFs - maybe even their departments
* develop skills in template-making, graphic design, photo editing
* create resources (or a template) for MDFs who want to design these as mementos for students
### models
[LL pinterest board: project-ll-cards](https://www.pinterest.com/learninglabpins/project-ll-cards/)
### tools
Lightroom
Ps
Id
### process
I'm going to work with a photo of Jessi!

First, I brought the photo into Lightroom. This photo was already edited, but I wanted to play with the s-curves, contrast, and saturation before bringing the photo into Photoshop to do some color grading.
Here's what I came up with for now, using InDesign:
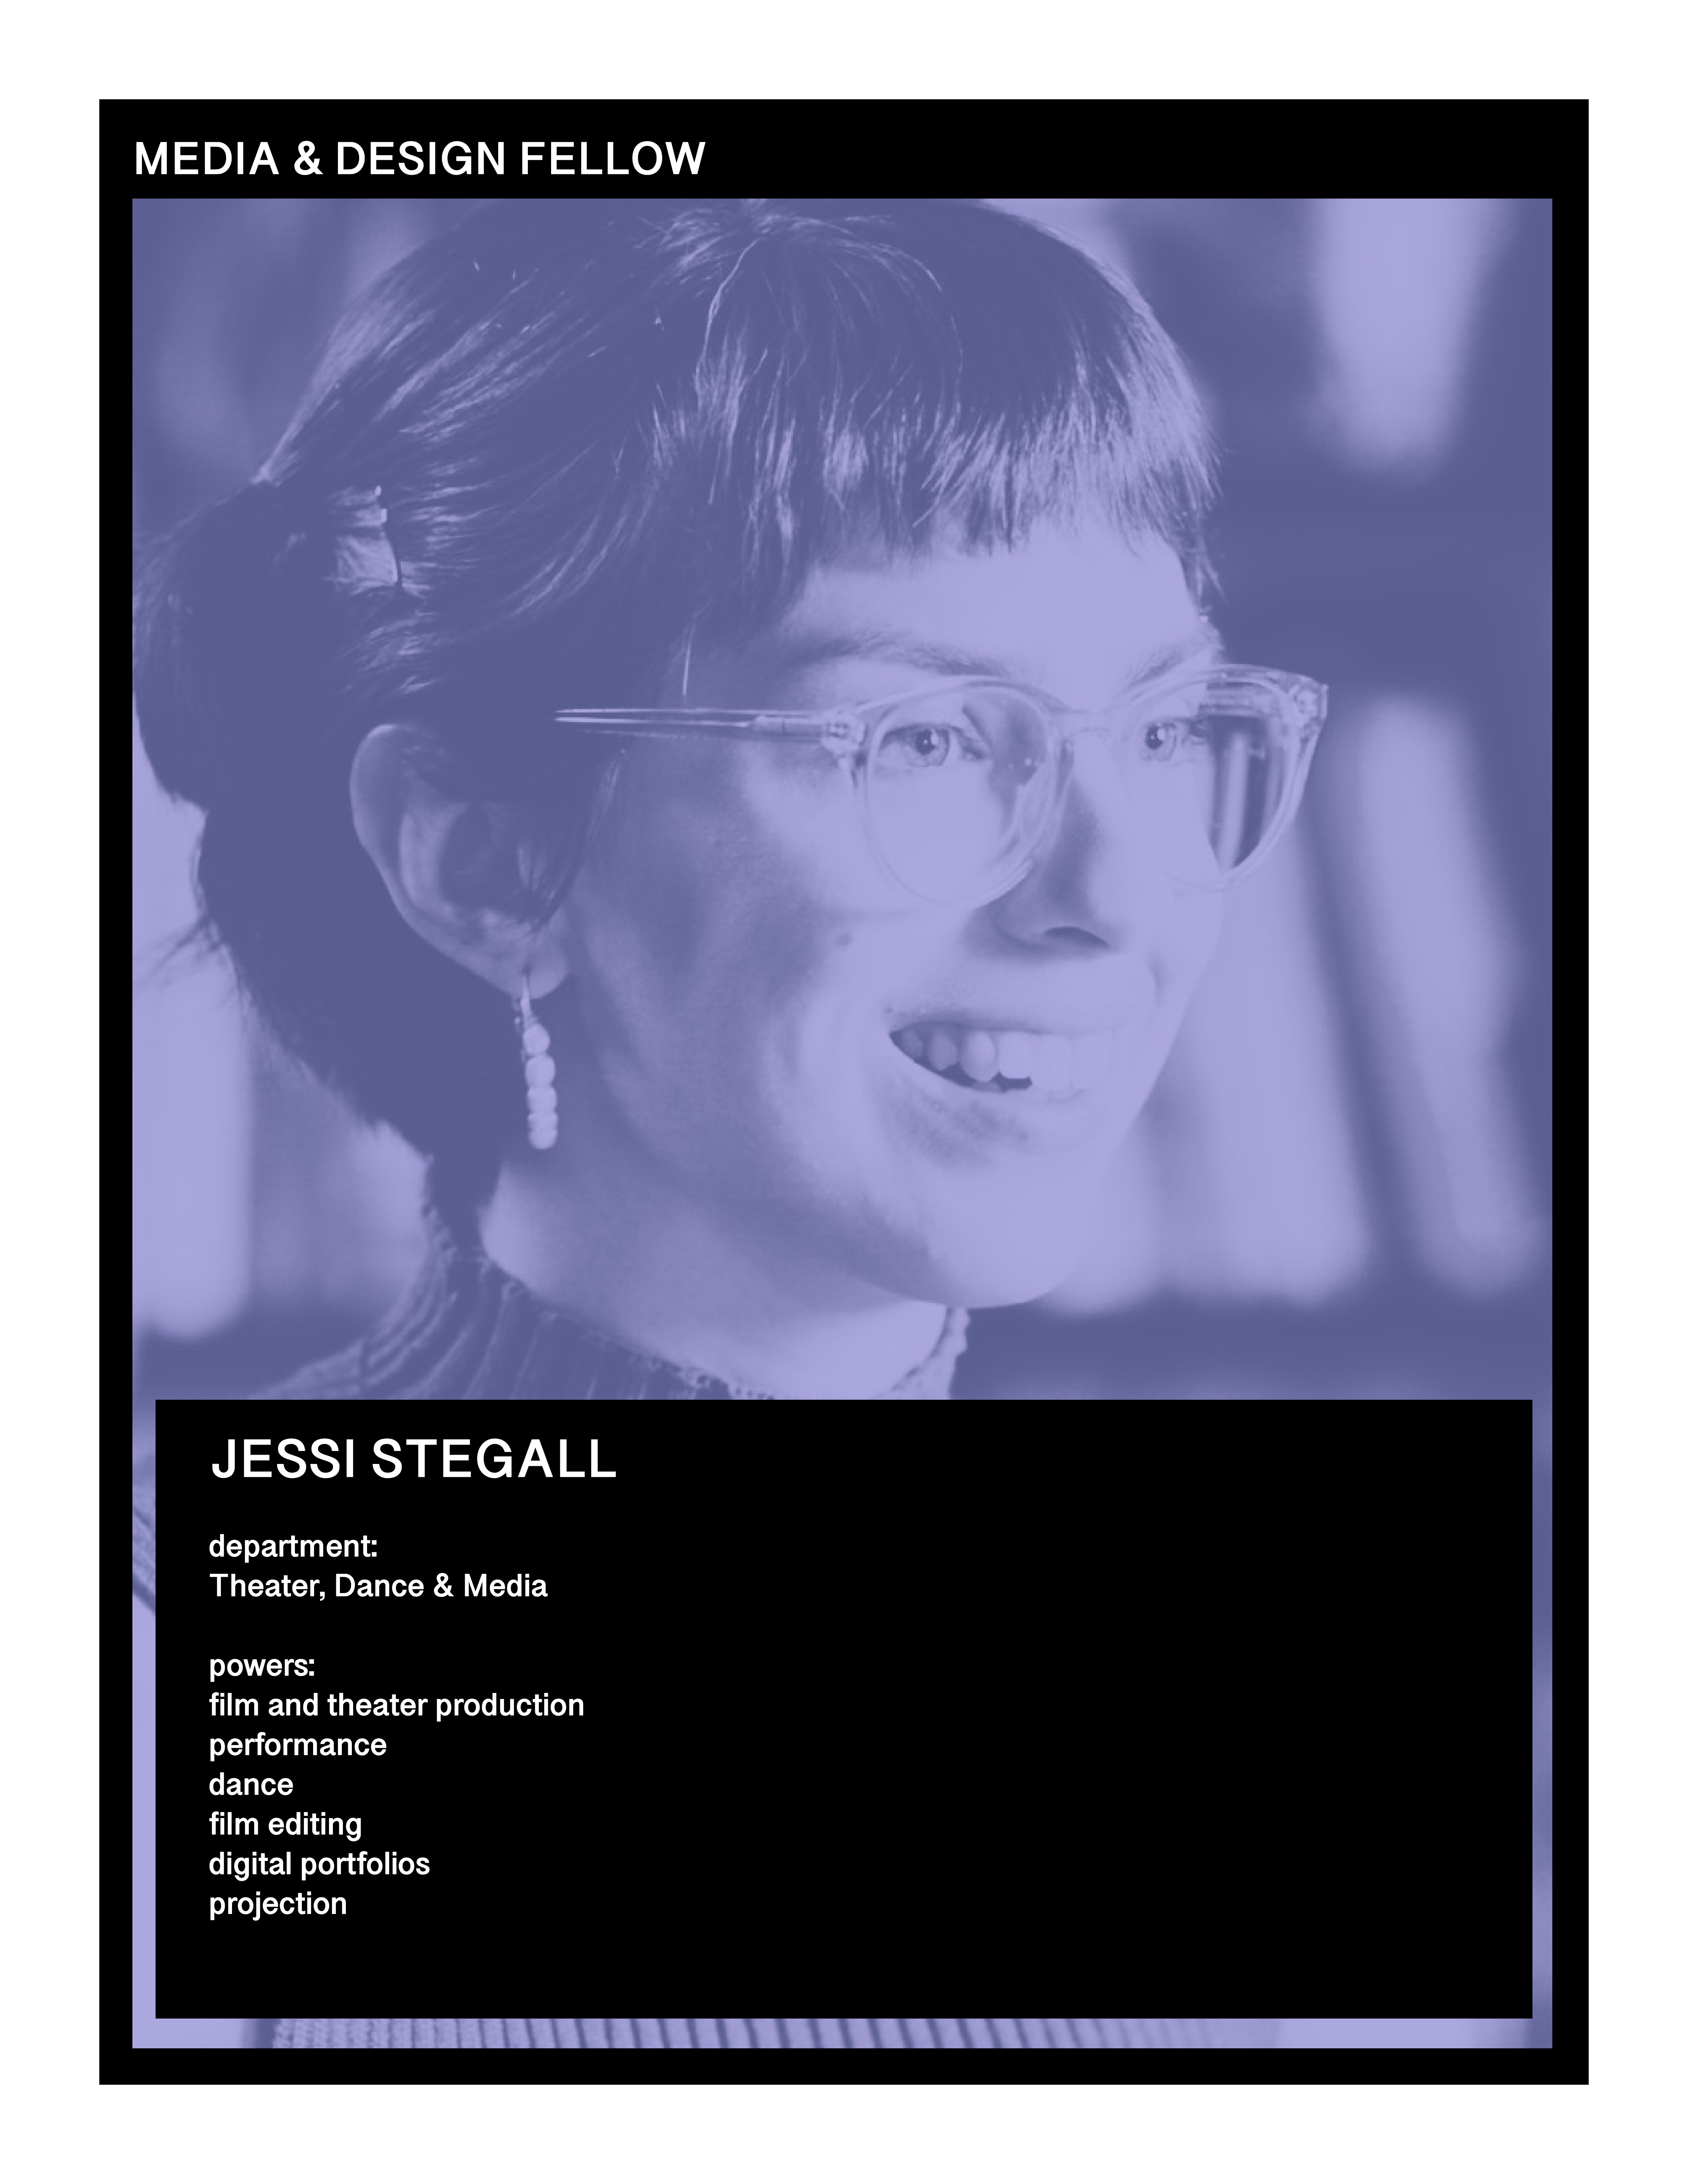
It's a very simple design, modeled on a baseball card. I used image, text, and filled-in boxes to create this look. Looking at some models, it became apparant that white text on a black (or otherwise very dark) background is conventional for playing cards (rather than using black text on a light background). Doing some kind of full-bleed image could be another option too. But I wanted to try something with a border. The advantage of a simple design like this is that it could easily be made into a template since it's really only about 4-5 boxes, 1 font, and a single image. I need to get the borders exactly even, though!
### notes
Could be fun to try this using the stills workflow in Resolve - quick turnaround using up-to-date footage/images
 Sign in with Wallet
Connect another wallet
Sign in with Wallet
Connect another wallet