---
tags: resource
---
# Vibe Coding for Video Essay Assets
This guide provides the technical foundation for "de-constructing" cinema. Using these command-line tools, which you can prompt any LLM like gemini to give you, you can:
* extract evidence
* isolate compositional elements
* prepare assets for your video essays.
---
## ffmpeg + yt-dlp: The Filmmaker's Toolkit
Before we start, ensure you have the two essential engines installed via Terminal:
1. **yt-dlp**: For high-quality archival of web-based video.
2. **ffmpeg**: The "Swiss Army Knife" of video processing.
**Mac Users:** Install both instantly using Homebrew: `brew install yt-dlp ffmpeg`
---
## Archiving: Downloading for Analysis
To process a film, you need a high-quality local copy. YouTube URLs often contain characters that confuse the computer, so **always wrap the URL in quotes.**
**NOTE**: all of the path names in this resource correspond to the pathname's on xtine's computer! You'd want to update the code to reflect where different files are on your machine.
### The "Clean Download" Command
This saves the video as an MP4 with a simple name to make your next steps easier.
```
yt-dlp -f "mp4" -o "source_video.mp4" "PASTE_URL_HERE"
```
## Extraction: Getting Your Evidence
In film studies, "Evidence" usually means high-resolution stills or specific clips.
Precision in timestamps ensures your analysis is focused on specific cinematic evidence rather than a generic sweep of the film, allowing you to isolate exact shots for formal study. By defining "In" and "Out" points in a tool like Quicktime (or any video editor!), you transform a massive video file into a targeted data set that supports your unique argument about a director’s style.
To get the exact timestamps for your commands, open your film file in QuickTime (for Mac users) or any other video viewer:
* Play through the film to find the specific sequence or frame you want to analyze.
* Fine-Tune with Arrow Keys: * Use the Right/Left Arrow Keys to move frame-by-frame.
* Find the exact "In" (start) and "Out" (end) points of the shot.
* Note the Timestamp: Look at the time elapsed in the playbar.
* QuickTime usually shows ```00:00```. For FFmpeg, we use the ```HH:MM:SS``` format.
* Example: If a shot starts at 1 minute and 12 seconds, your code will use ```-ss 00:01:12.```
### Narrative Sampling: The "Time-Lapse" Method
If you want to extract the "visual arc" of a movie without overwhelming yourself with individual files, you can sample it at regular intervals.
* **To get 1 frame per minute:** `fps=1/60`
* **To get 1 frame every 5 minutes:** `fps=1/300`
* **To get 1 frame every 10 minutes:** `fps=1/600`
**Why do this?** This is perfect for analyzing **Color Stories** (how a movie moves from dark to light) or **Character Progression** (how a protagonist's costume or location changes over time).
### Extracting a Single High-Res Still
Use this to capture a specific frame for a slide deck or paper.
```
ffmpeg -i source_video.mp4 -ss 00:05:12 -frames:v 1 output_frame.png
```
* ```-i```: Input. Tells FFmpeg which video file to open.
* ```-ss```: Seek. Jumps to a specific timestamp (Hours:Minutes:Seconds).
* ```-frames```:v 1: Frames. Tells the computer to stop exactly after 1 video frame.
### Exploding a Scene into a "Film Strip"
This captures one frame every second. Perfect for creating a physical contact sheet to annotate.
```
mkdir -p film_strip && ffmpeg -i source_video.mp4 -vf "fps=1" film_strip/frame_%03d.png
```
## Creating GIFs and Re-animating Stills
GIFs are essential for showing loops of camera movement or editing rhythms.
### Creating a High-Quality GIF Loop
For video essays, a GIF is a great way to show a recurring visual motif, style or pace of cutting, graphic matches, matches on action, etc.
```Bash
ffmpeg -i source_video.mp4 -ss 00:01:10 -t 5 -vf "fps=15,scale=640:-1:flags=lanczos,split[s0][s1];[s0]palettegen[p];[s1][p]paletteuse" loop.gif
```
### Turning a Folder of Stills into a GIF
If you have a folder of frames (like a storyboard), you can re-animate them:
```
mkdir -p ~/Desktop/kubrick_exports/film_strip && \
ffmpeg -i "/Users/cdauria/Desktop/kubrick/essay.mp4" -vf "fps=1" "/Users/cdauria/Desktop/kubrick_exports/film_strip/frame_%03d.png"
```
* ```-framerate 10```: Speed. Plays back 10 images per second.
* ```-pattern_type glob```: Wildcard. Tells the computer to grab every PNG in the folder.
* ```scale=800:-1```: Resizing. Sets the width to 800px; -1 keeps the aspect ratio perfect.
* ```palettegen / paletteuse```: Color Magic. Creates a custom color map so your GIF doesn't look grainy or "crushed."
## 🧩 Juxtaposition: Side-by-Side Comparison
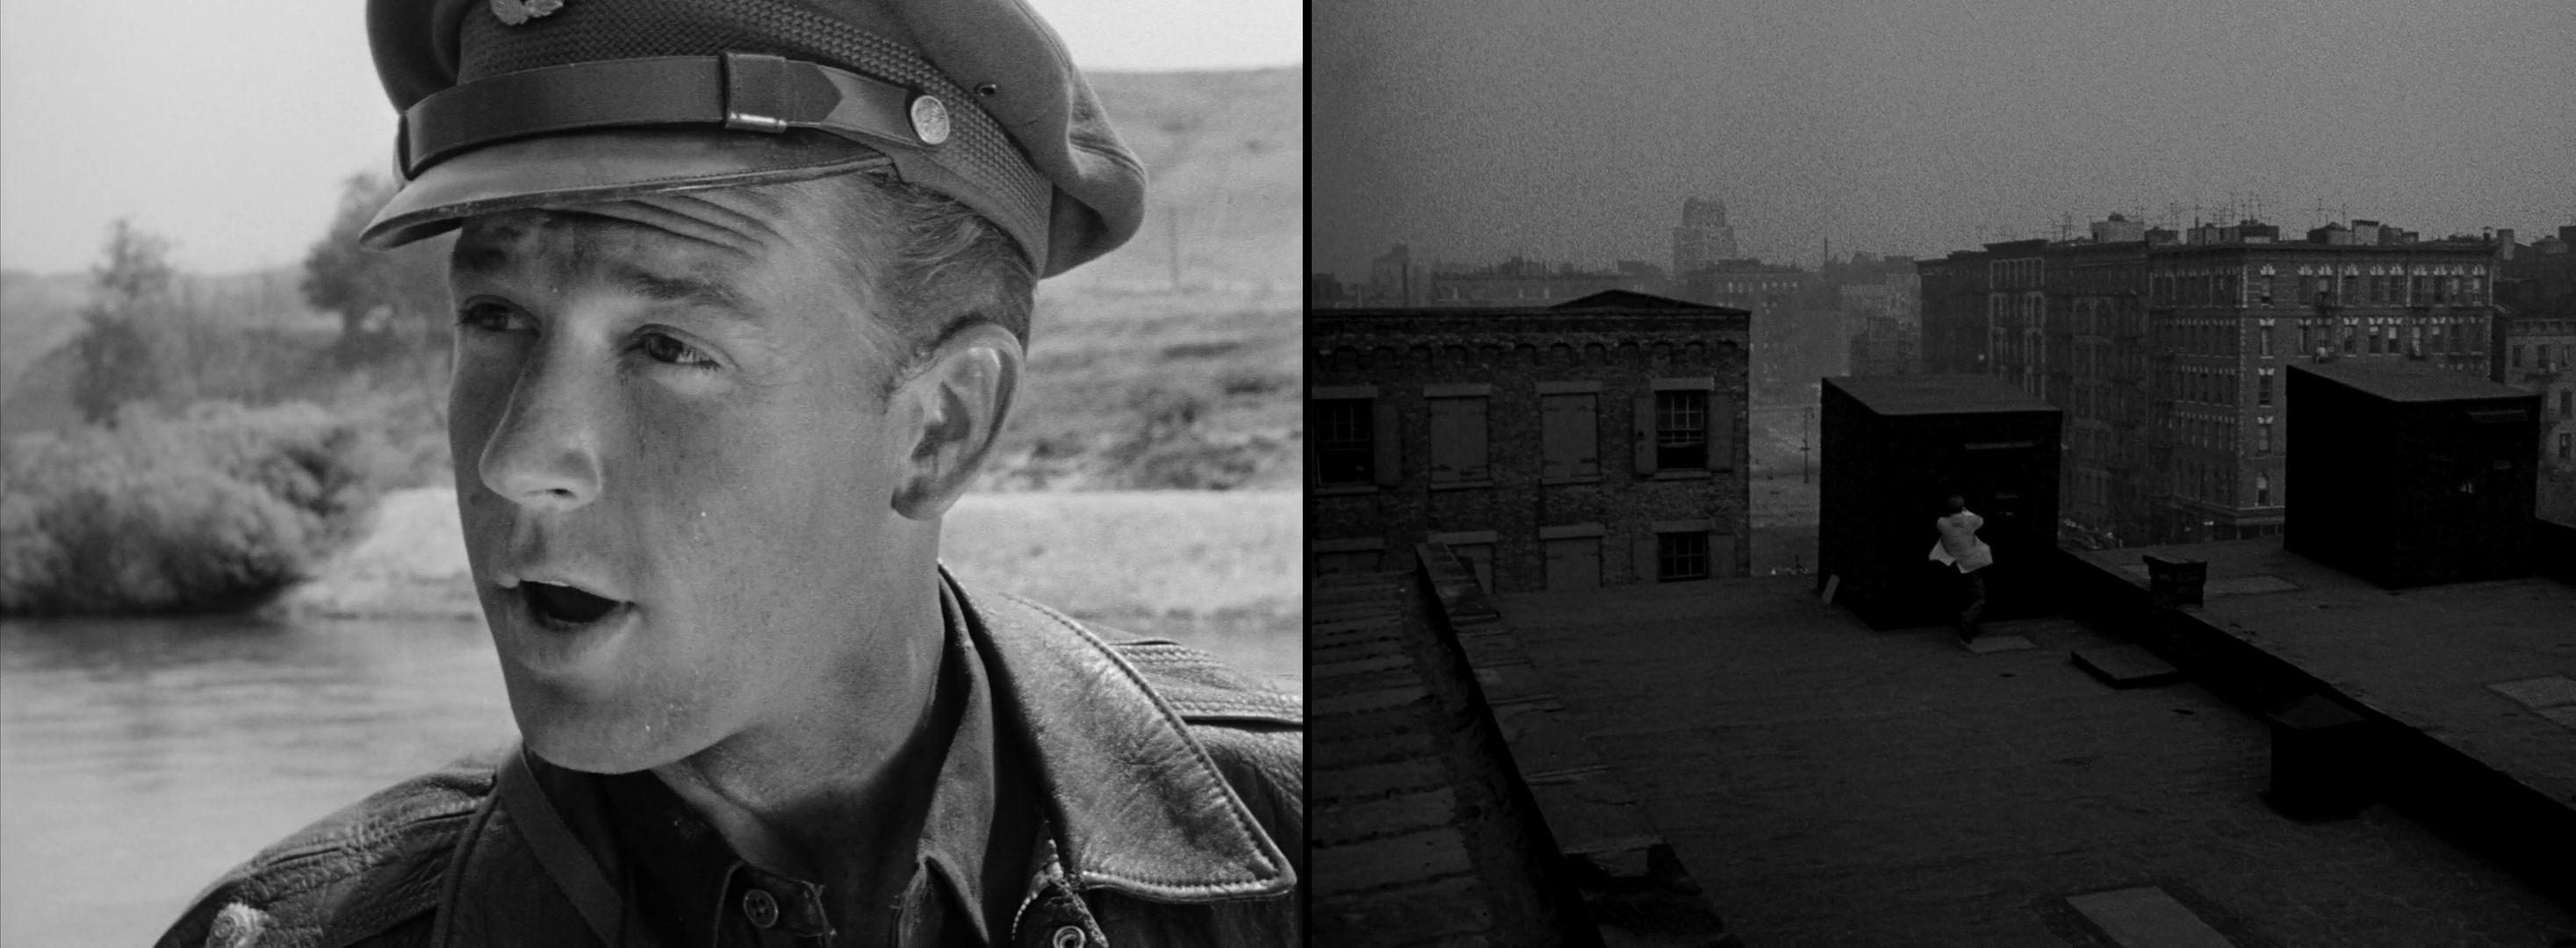
### The Diptych (Stitching two shots together)
If you have two stills (shot_A.png and shot_B.png), use this to join them:
```
ffmpeg -i shot_A.png -i shot_B.png -filter_complex "[0:v]scale=-1:720,pad=iw+10:ih:0:0:black[left];[1:v]scale=-1:720[right];[left][right]hstack" comparison.png
```
⚠️ Common Troubleshooting
* "File not found": Make sure you are in the same folder as your video. Type ```ls``` to see your files.
* "Output is empty": If your GIF or still is 0KB, your -ss (timestamp) might be longer than the video itself!
* Dragging Paths: If typing paths is hard, type ```ffmpeg -i``` and then drag and drop the video file from your folder directly into the Terminal window.
 Sign in with Wallet
Connect another wallet
Sign in with Wallet
Connect another wallet