Podcasting with: Logic Pro
-
**What is Logic Pro?**
Logic Pro is a fully functional Digital Audio Workstation that is often used to record and digitally produce music. It can be used for recording podcasts, and can be especially convenient because it has essentially the same interface as GarageBand, which many students have at least some experience with. Logic Pro also offers a wide range of digital insturments, pre-recorded loops, and options for audio editing that can add a lot of complexity to podcasting projects. However, it can only be used directly on Mac computers, which can present issues for students who want to work at home and have a different kind of computer.

Recording podcasts through Logic Pro offers both an approachable interface and opportunities for increased complexity for students who are interested in audio editing and additional musical elements. Its similarity to GarageBand makes it easy to get started for many students, but it also offers additional options for students who are interested in going further with the technical aspects of audio-based projects.
The integrated music production options are especially useful, and can allow students to customize and engage more directly with introductory music or thematically relevant music throughout their podcasts. While not strictly necessary for the production of more simple podcasts, these techniques can cause students to engage more with stylistic elements of audio-based projects, and tools for argumentation that effectively utilize the specificities of this form. By engaging in the form of audio-based products with more complexity students will be pushed to think in new ways about the content itself, and will be led to different analyses and conclusions than with more traditional projects.
**How to:**
First,, consult this resource on setting up audio interfaces
https://hackmd.io/@ll-25-26/S164xJCclx
When Logic Pro opens, select "Mic or Line" track
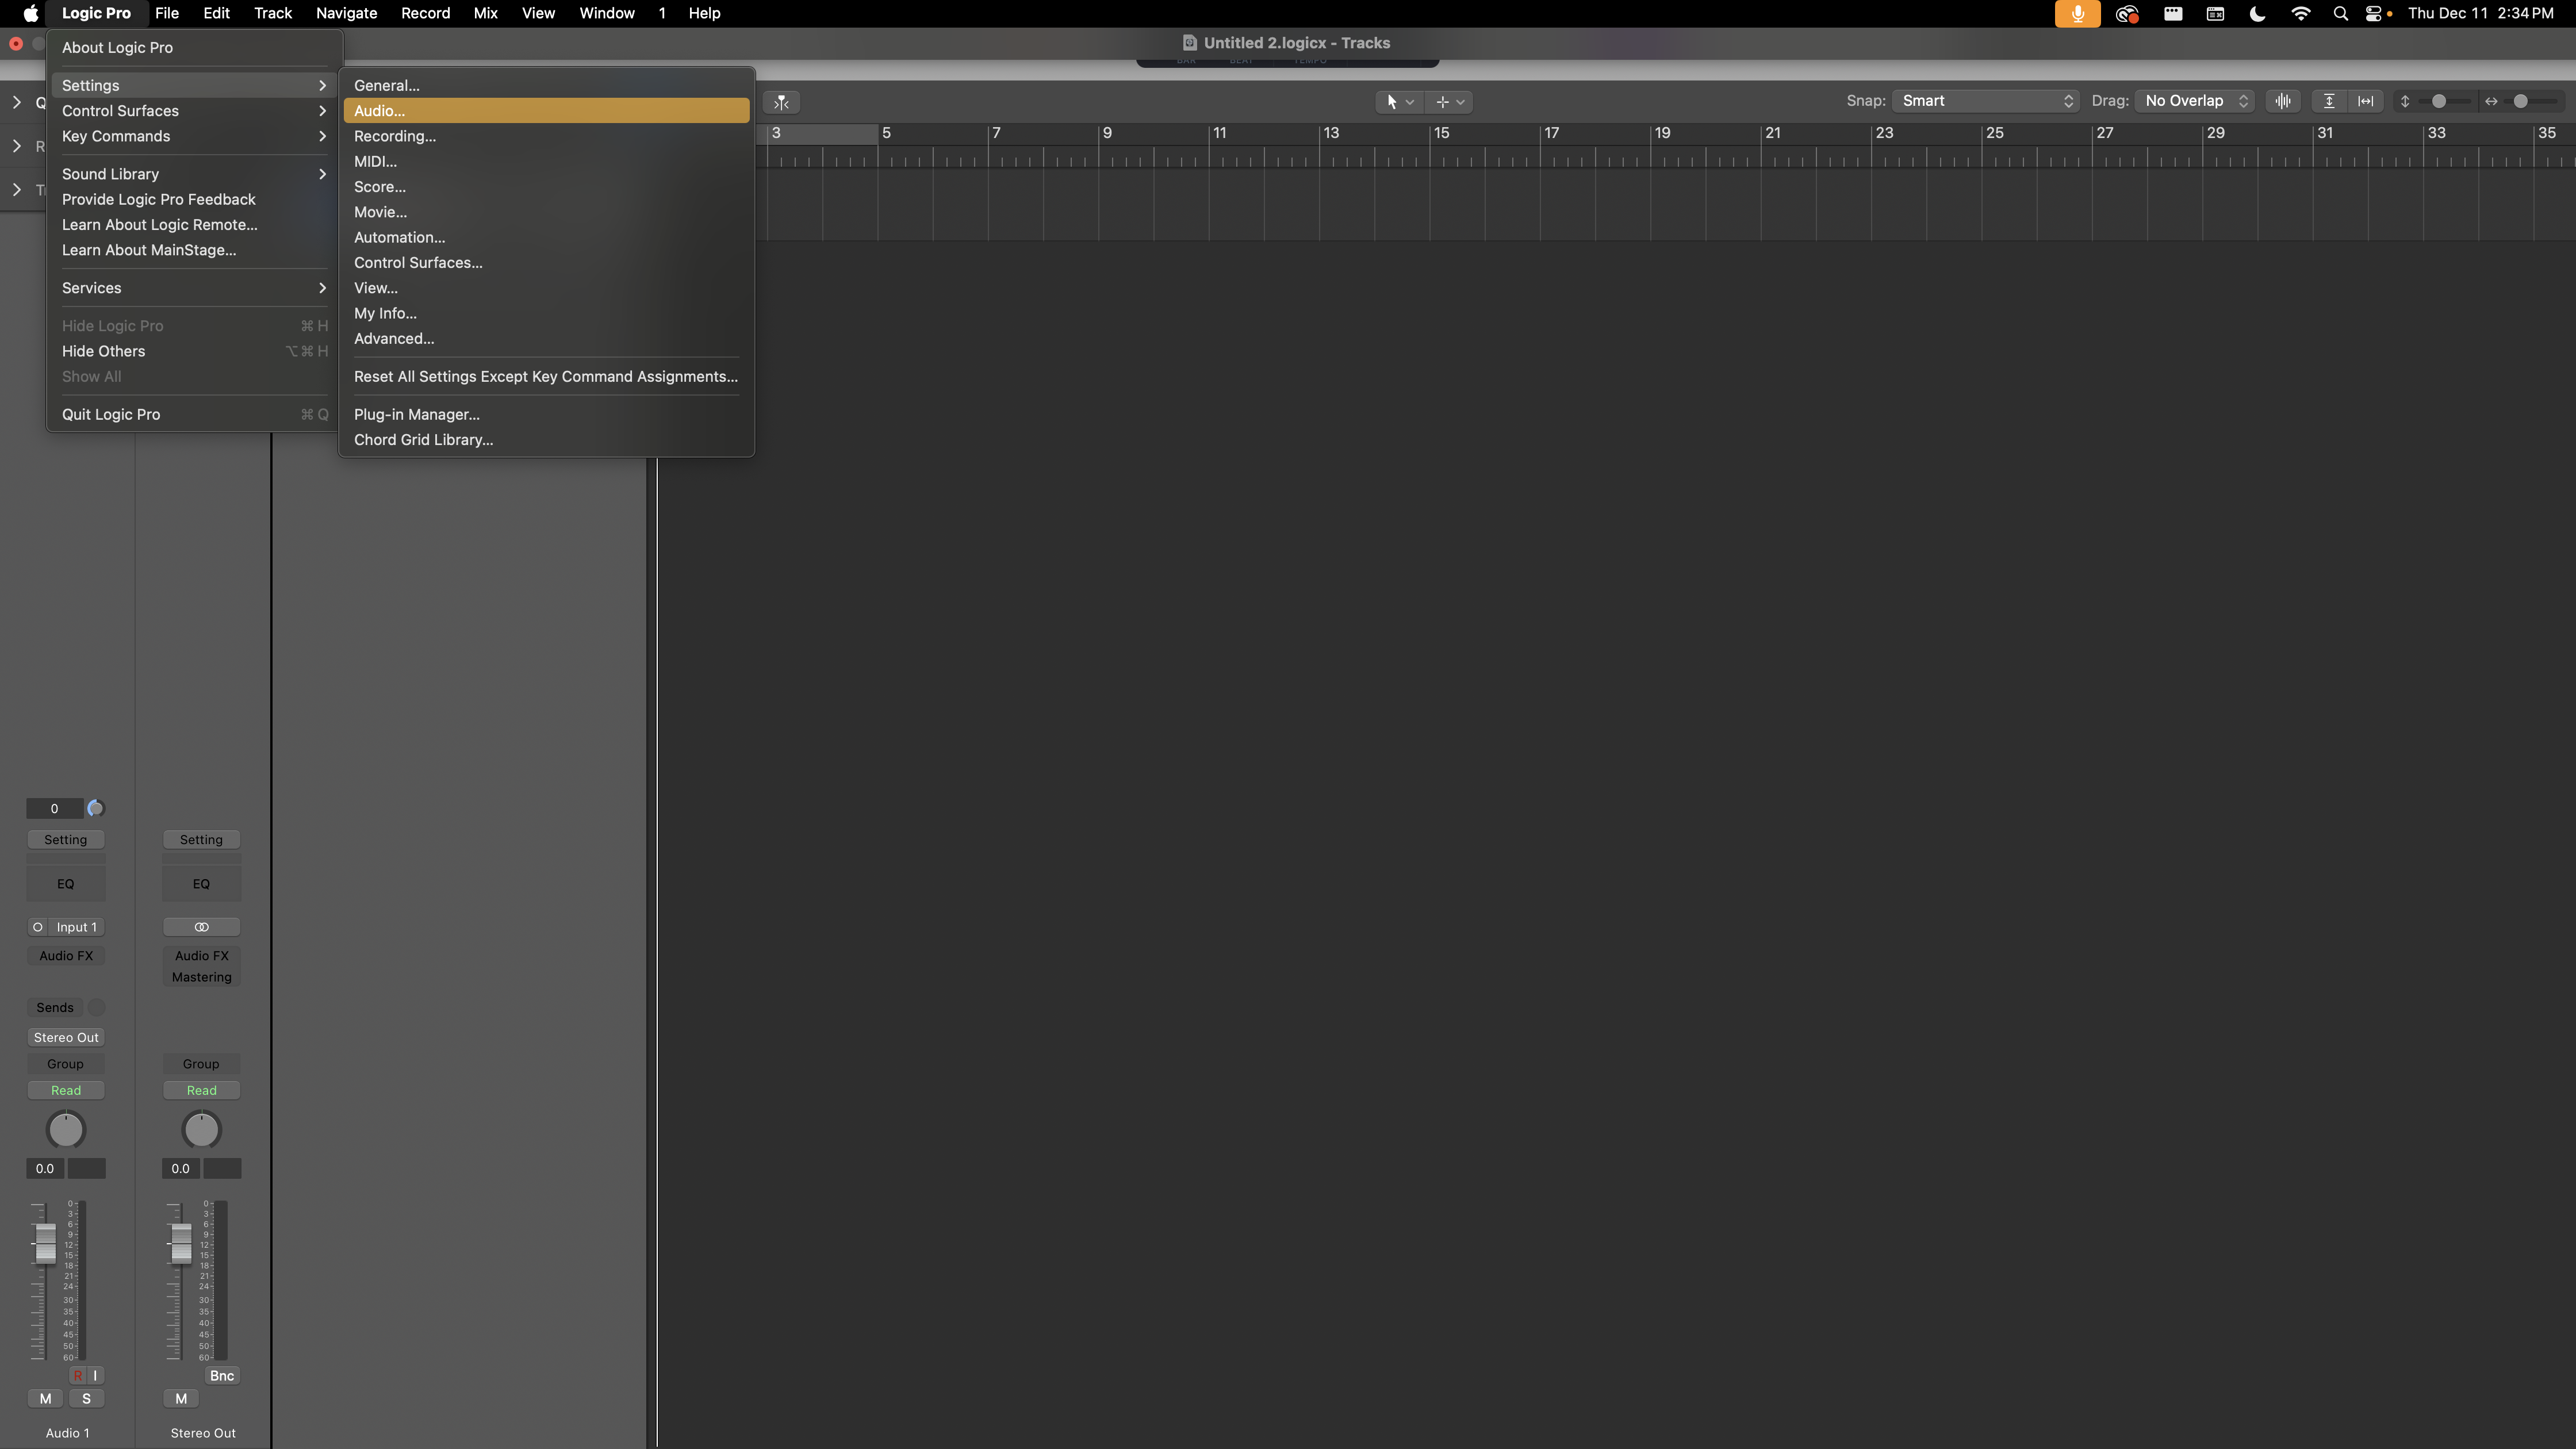
Then, confirm audio settings
- click Logic Pro in the top left corner
- then settings
- then audio
- confirm output device is "external headphones" and input device is "Scarlett 2i2 USB"
Basics:
- Add new audio tracks by right-clicking or double clicking and selecting "Mic or Line"
- Red button to start recording
- Play and pause buttons to listen back
- Audio clips can be trimmed by clicking and dragging from either side, and can be moved around easily
- Change the volume on different tracks with the volume sliders on the left side
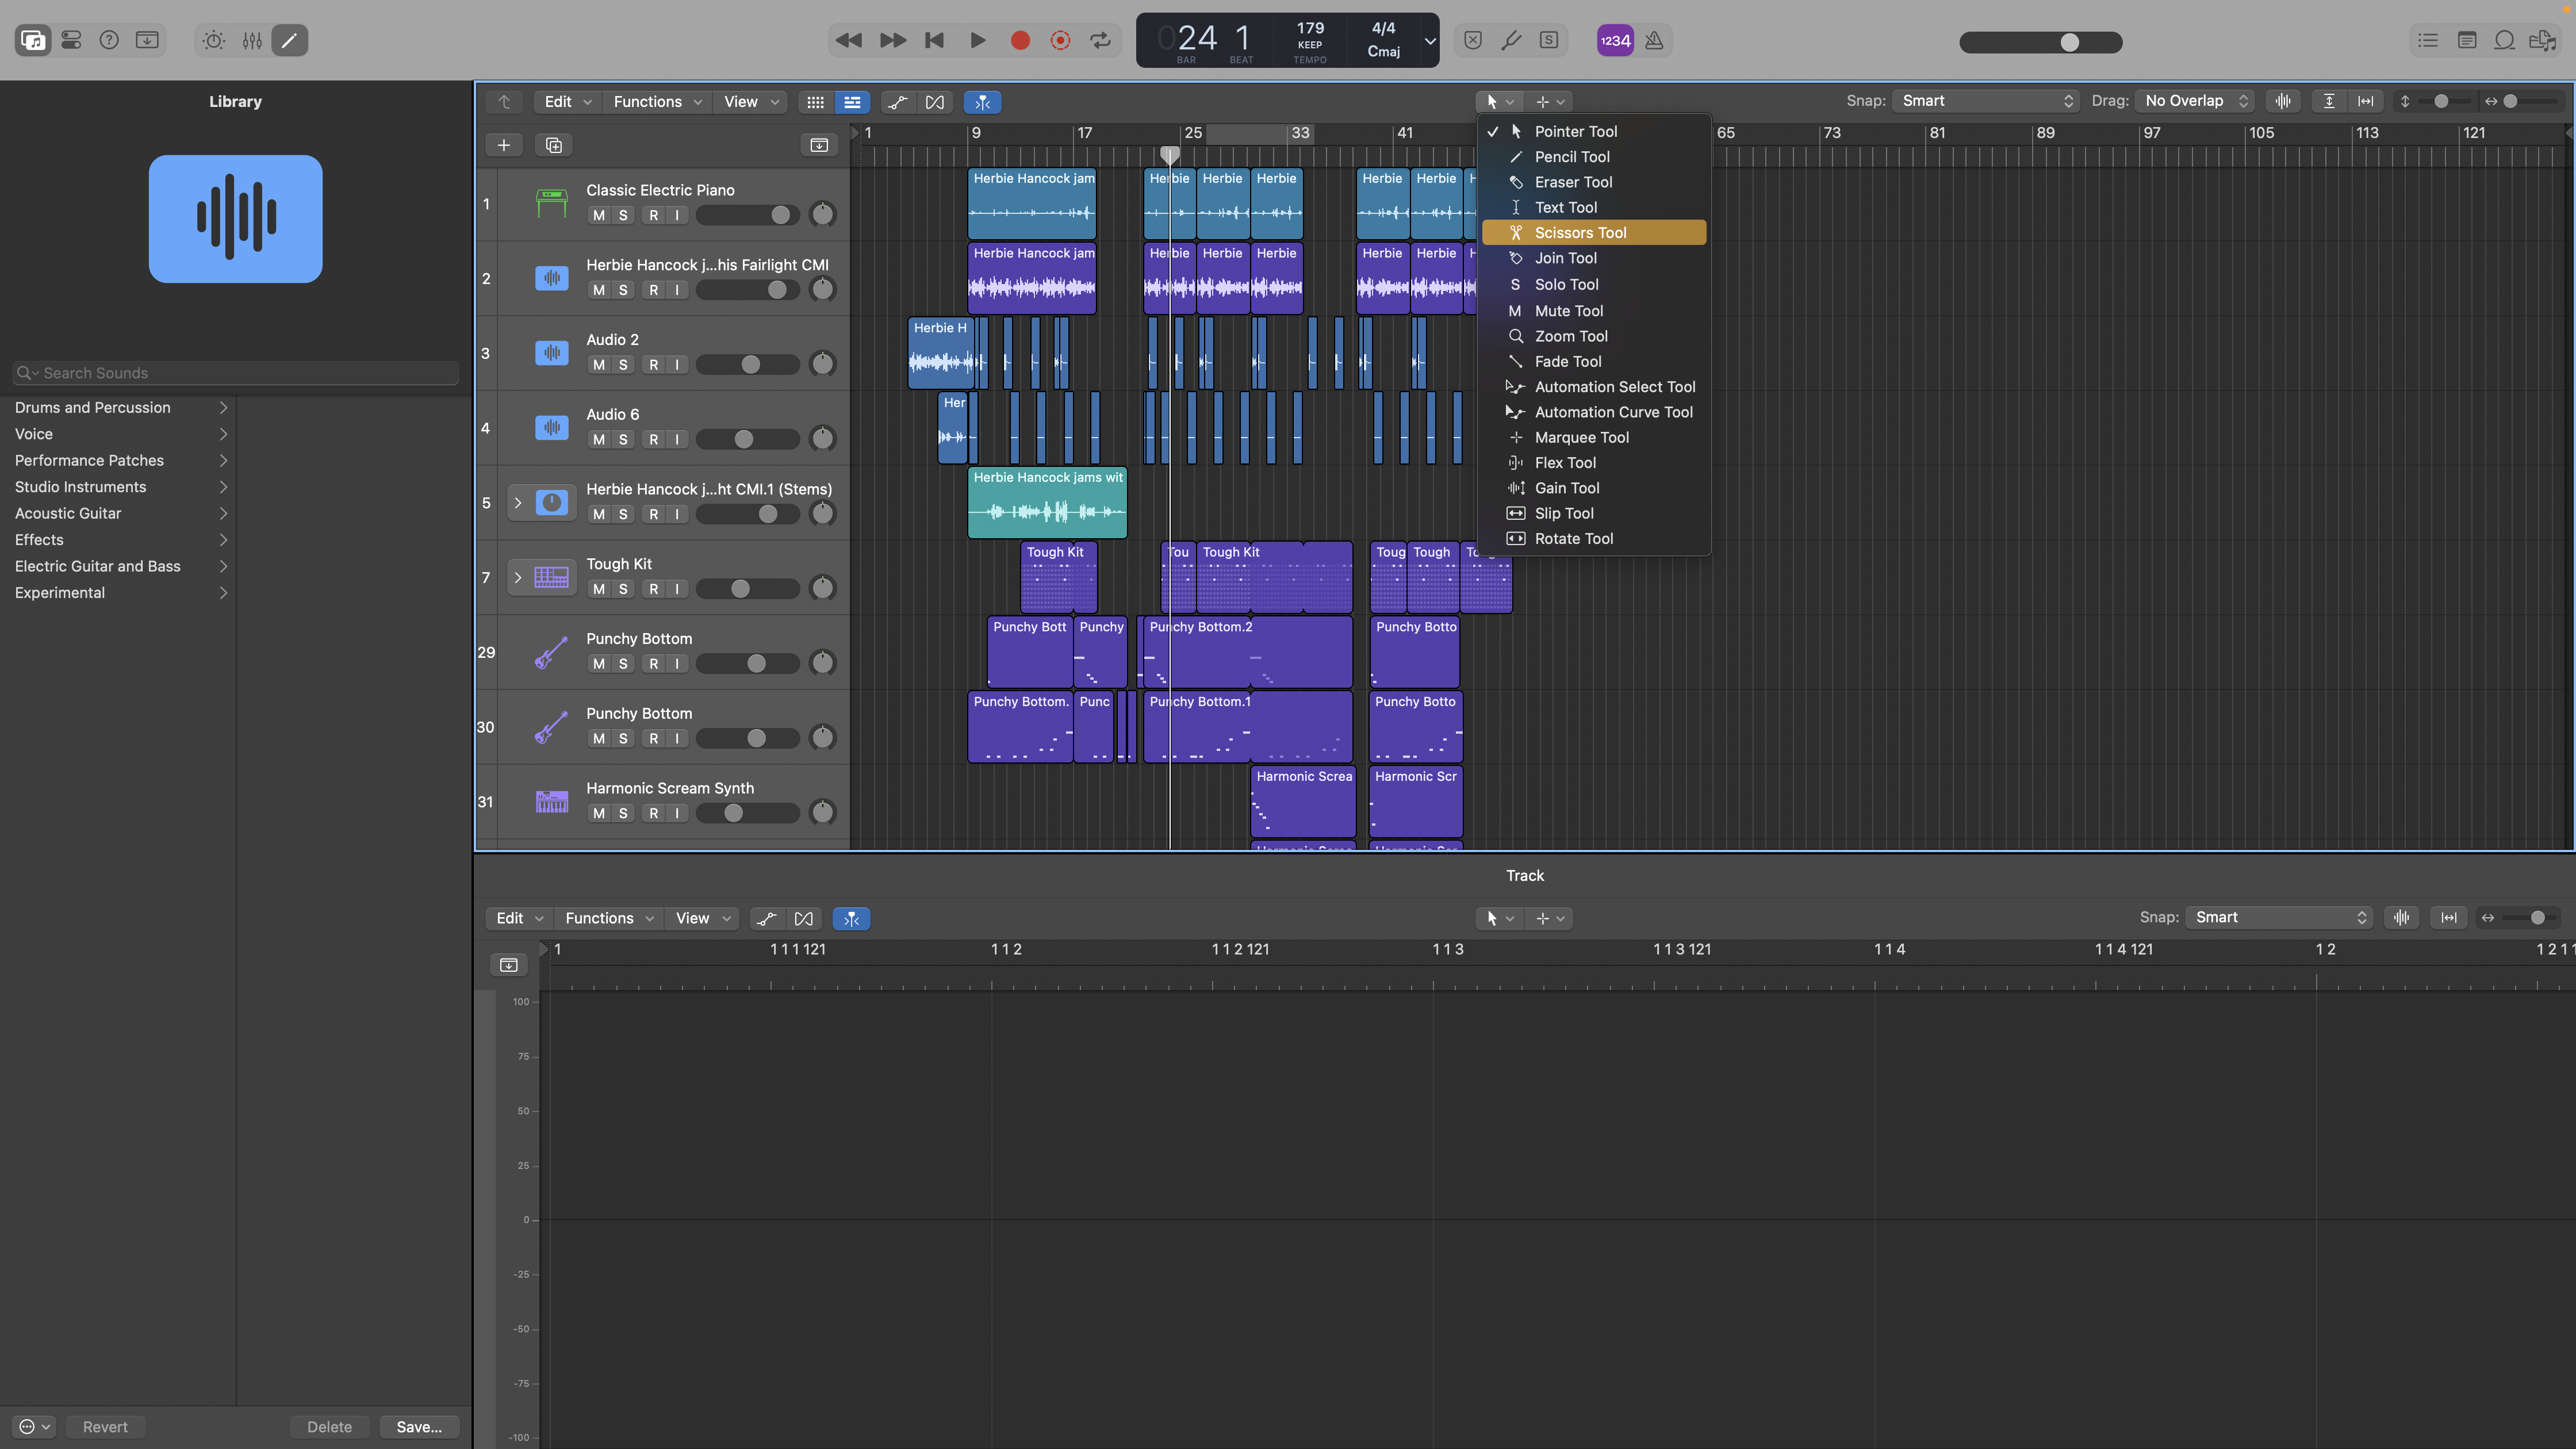
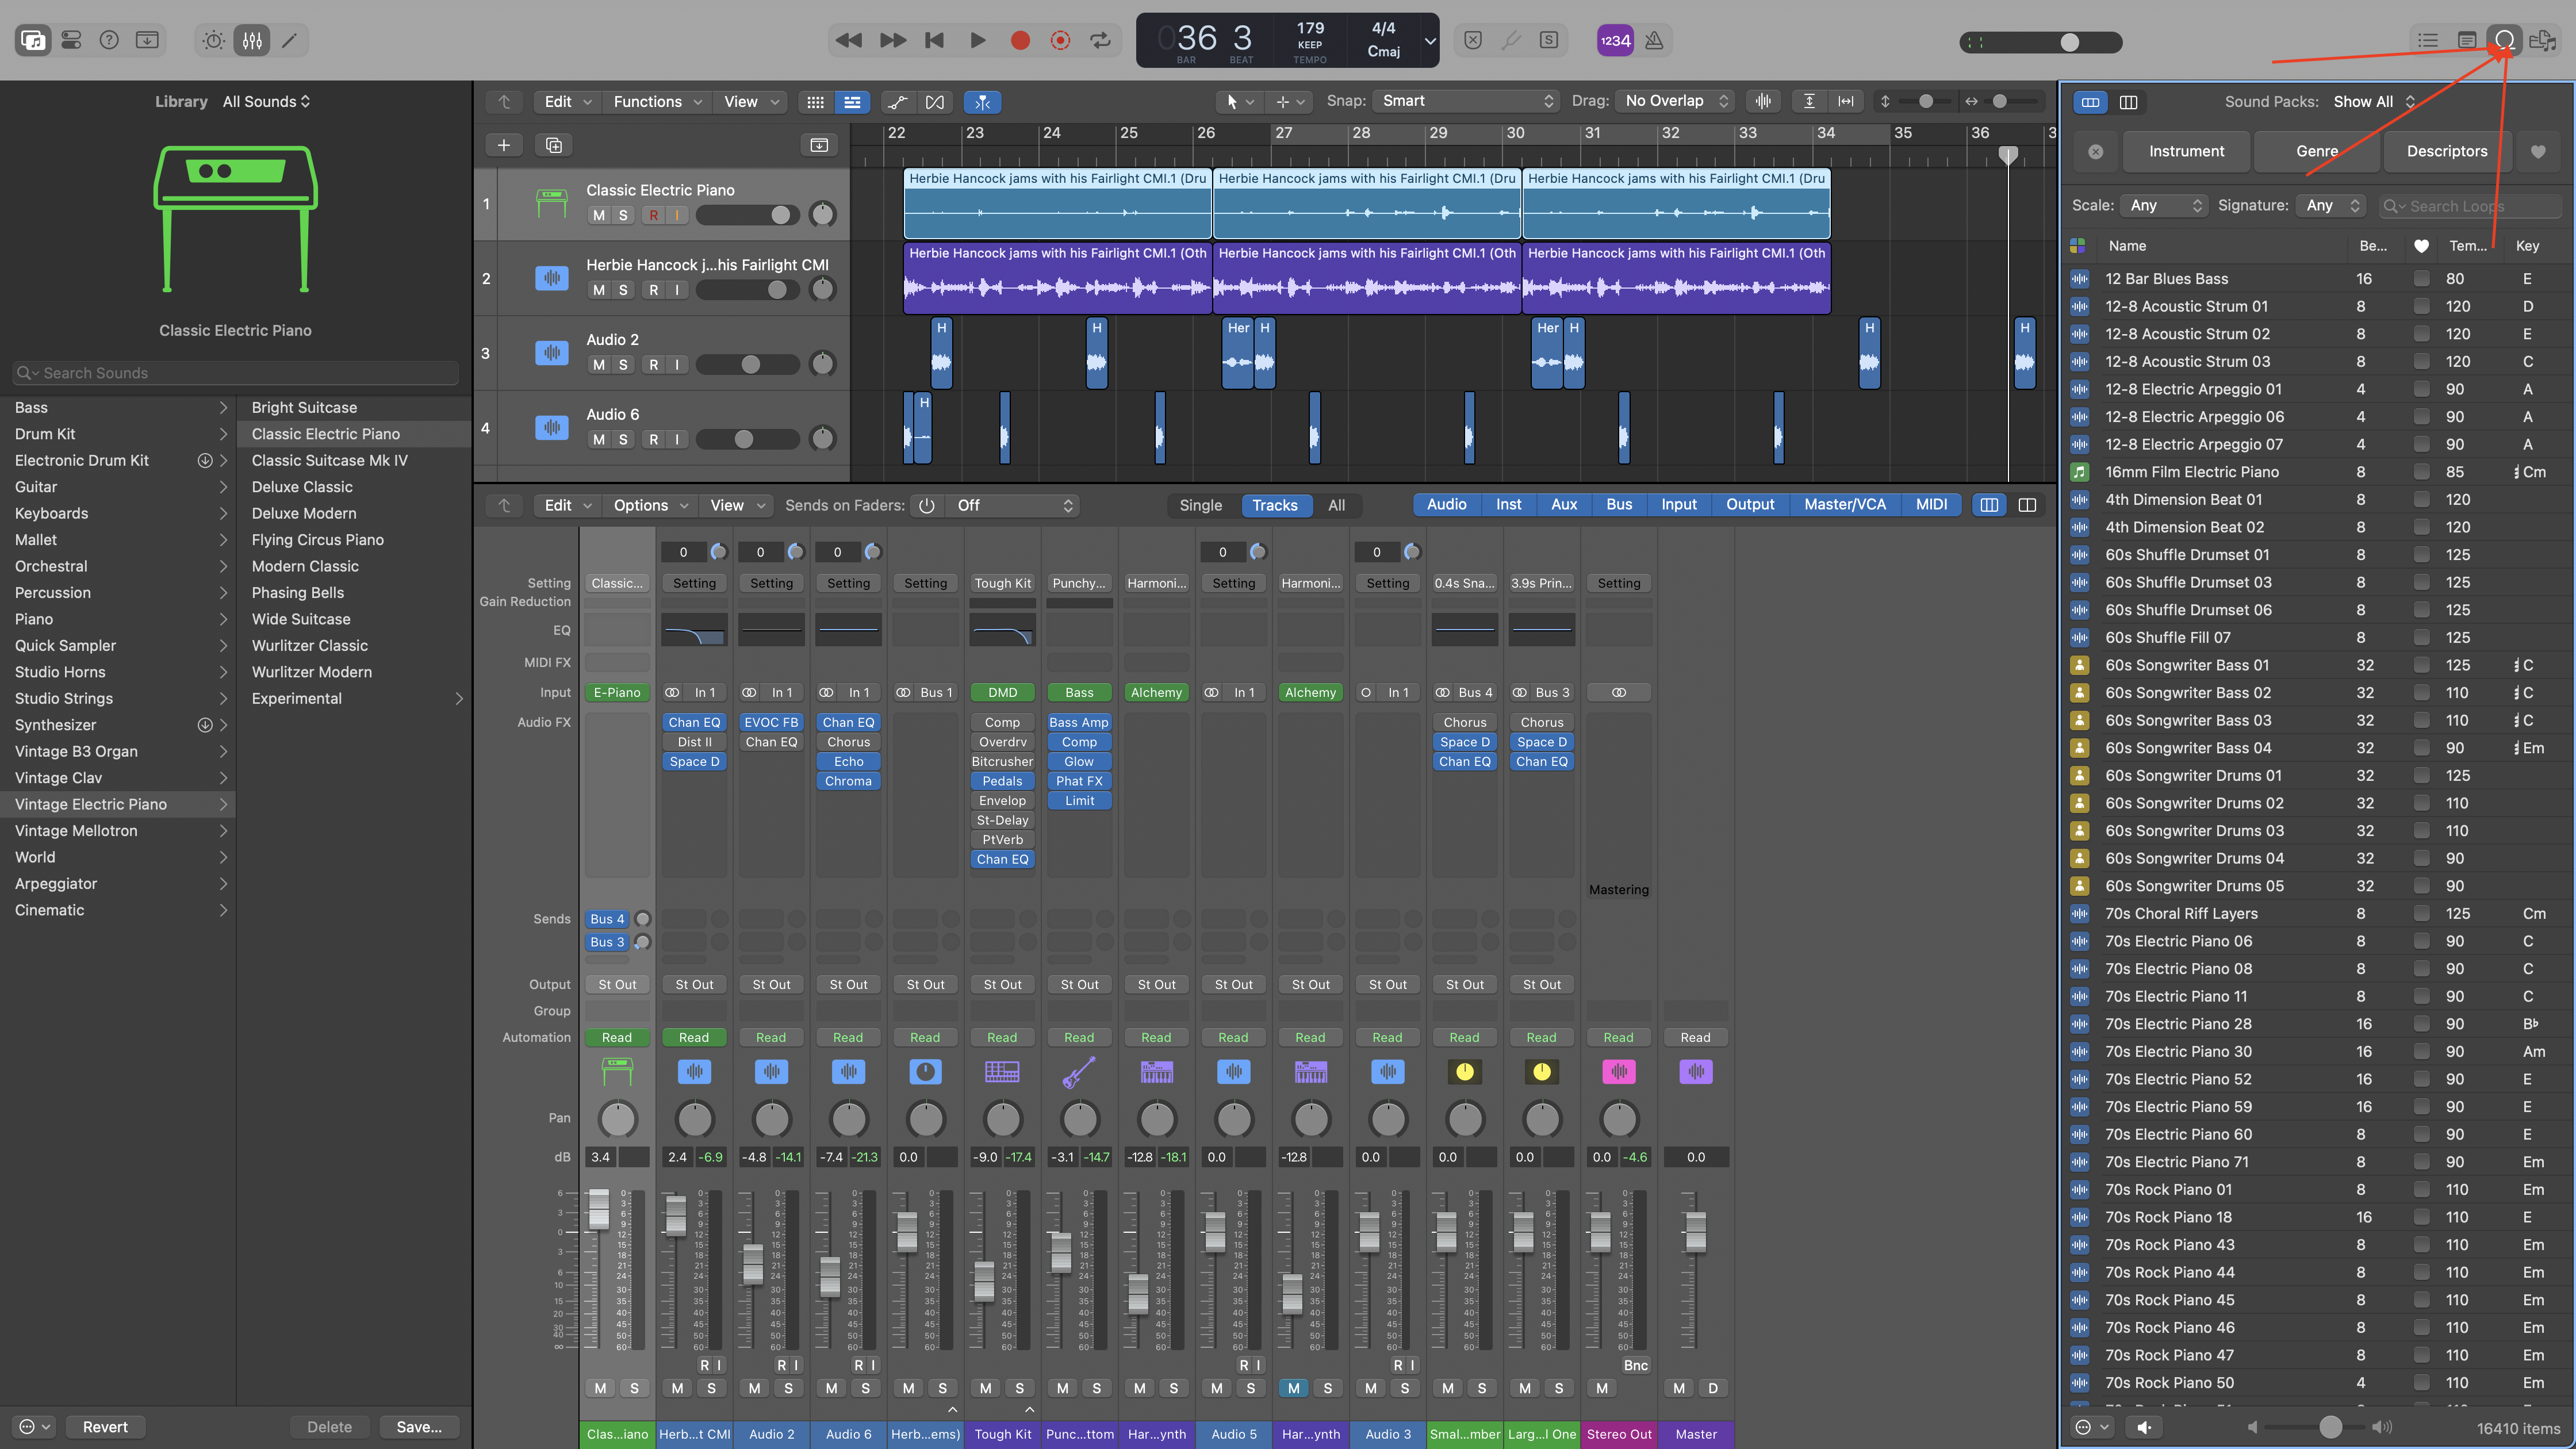
- Especially helpful is this toolbar, from here using the "scissor tool" you can cut up audio clips
More complexity:
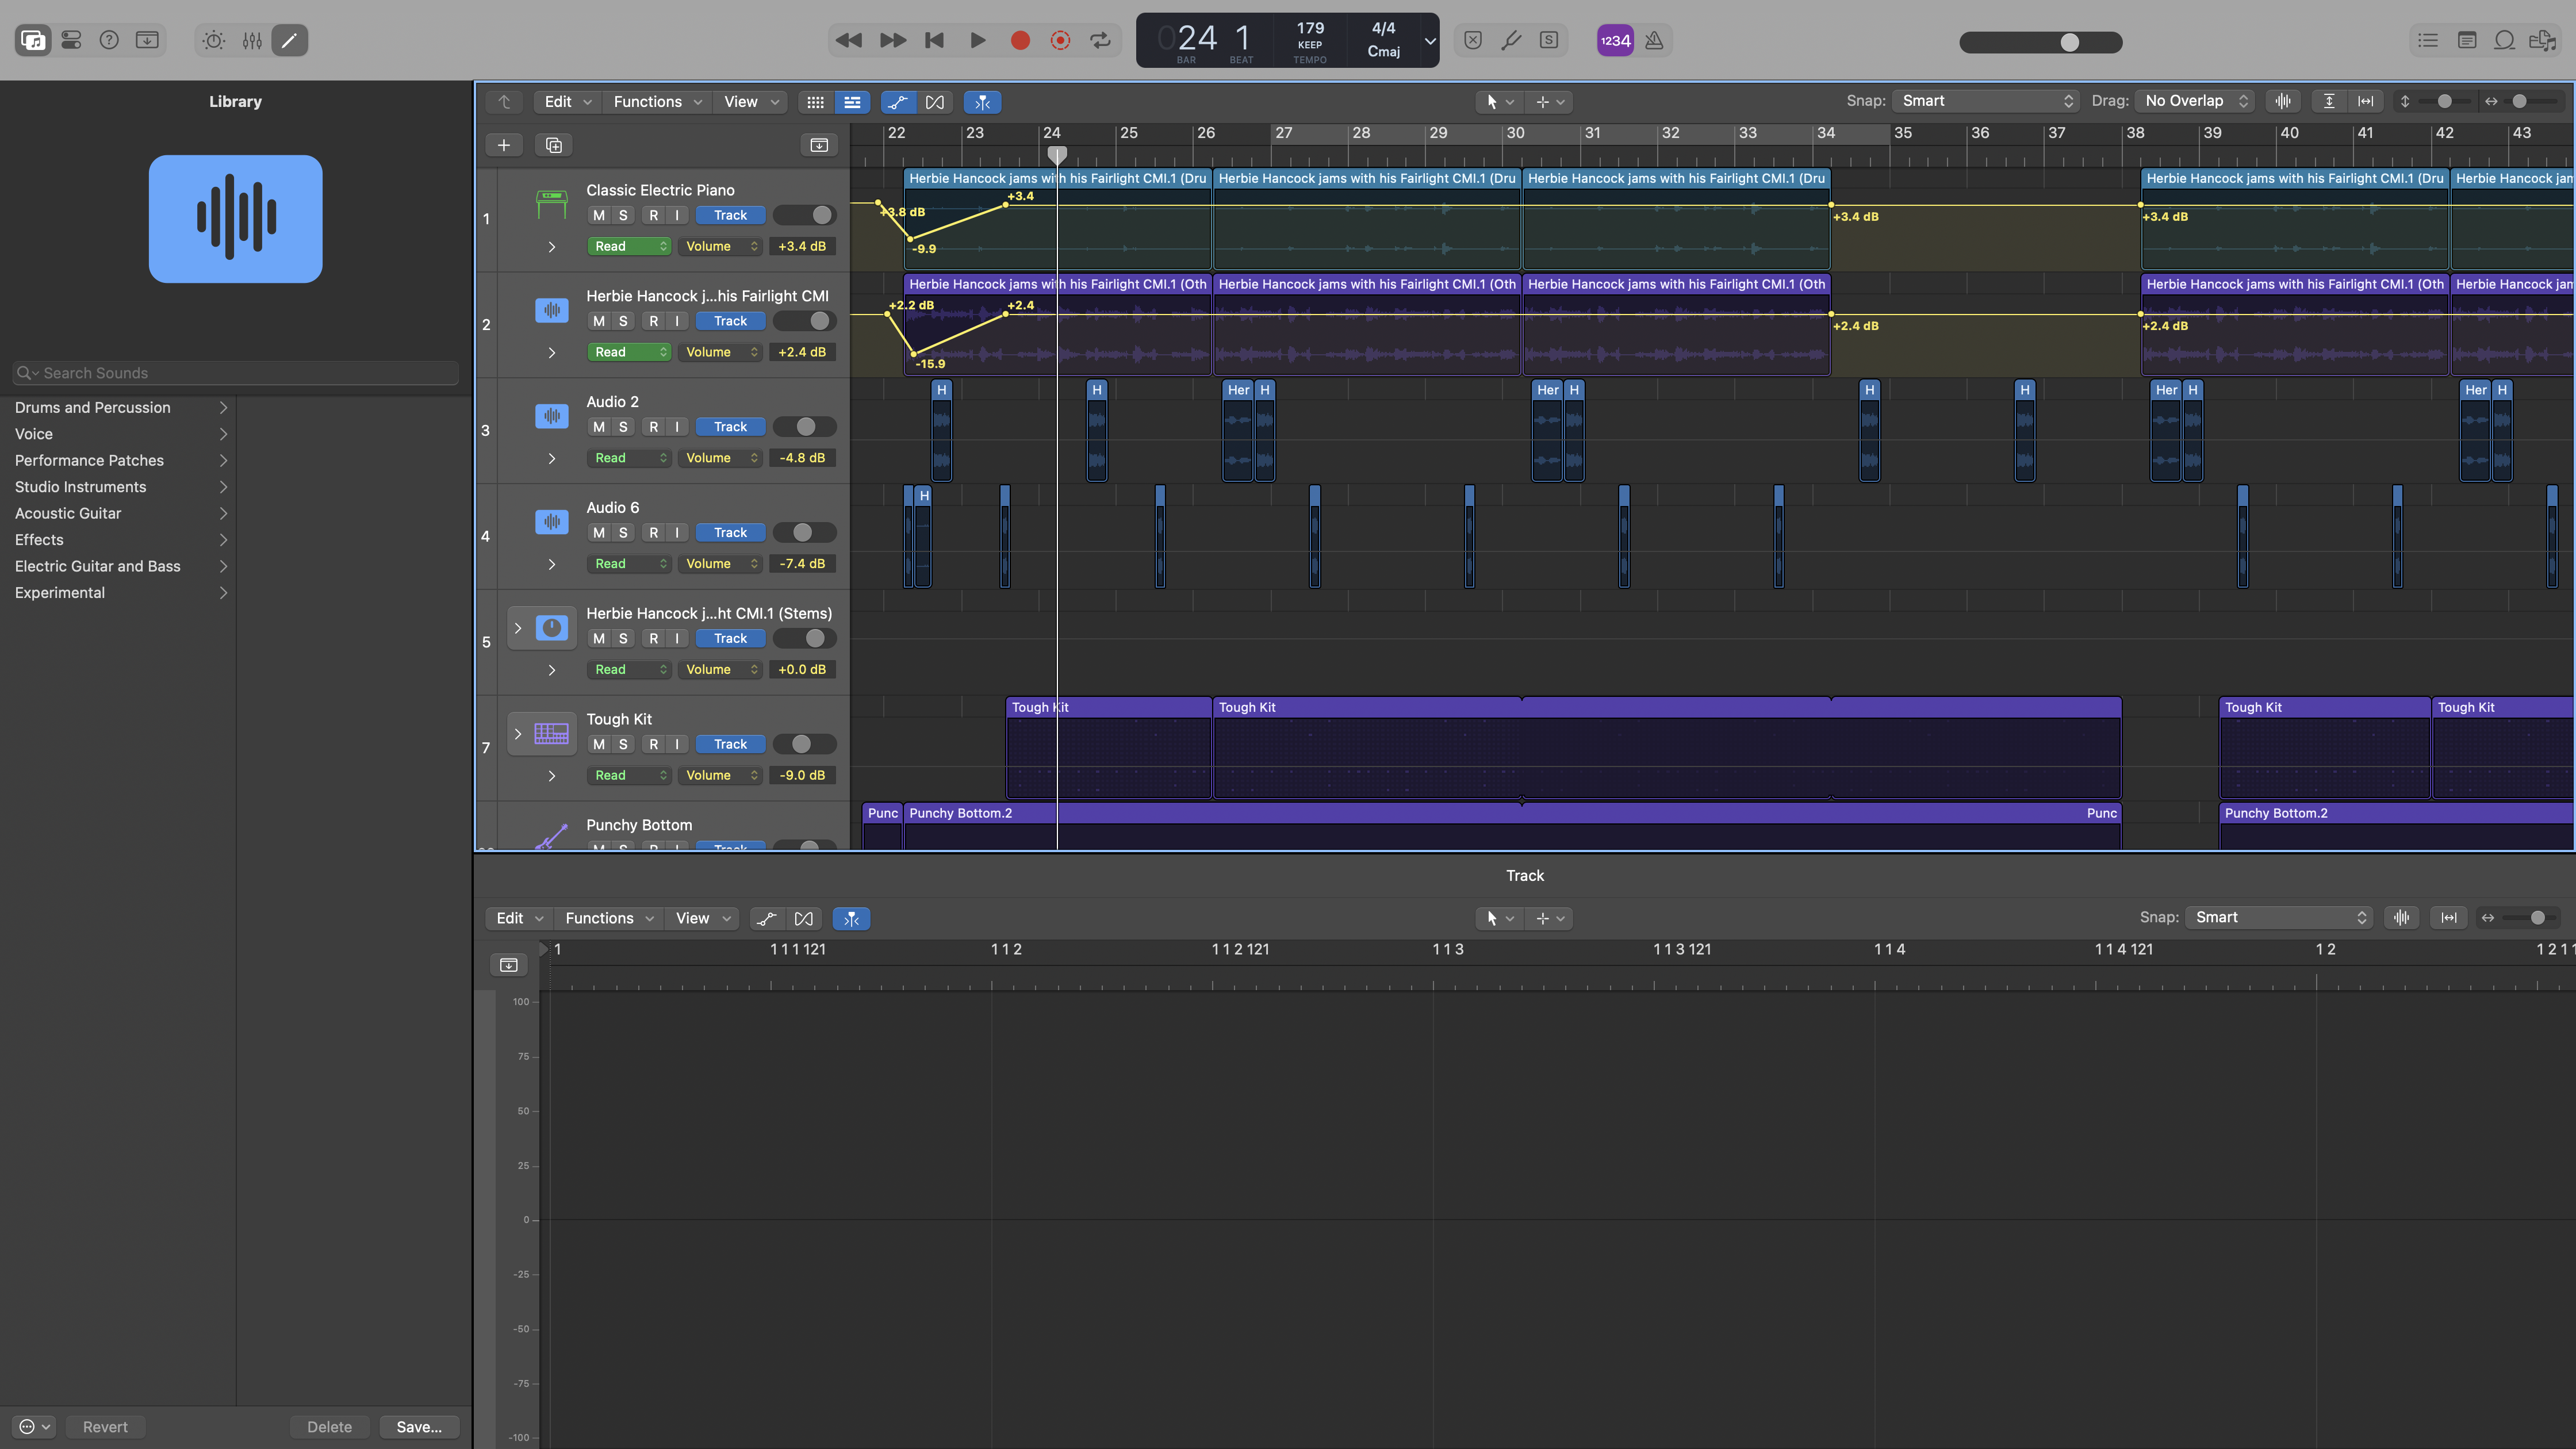
- Automation: Use this to make one audio track have different volumes at different points in time. You can click the A key to bring up the "automation" menu, and then can click on the yellow line in any audio track to make a volume point. You can make multiple points and drag them up or down to change the volume at that point, and the volume will increase or decrease between these points. This is pretty necessary for podcasting if you have multiple audio sources and want different ones to be more primary or secondary at different points.
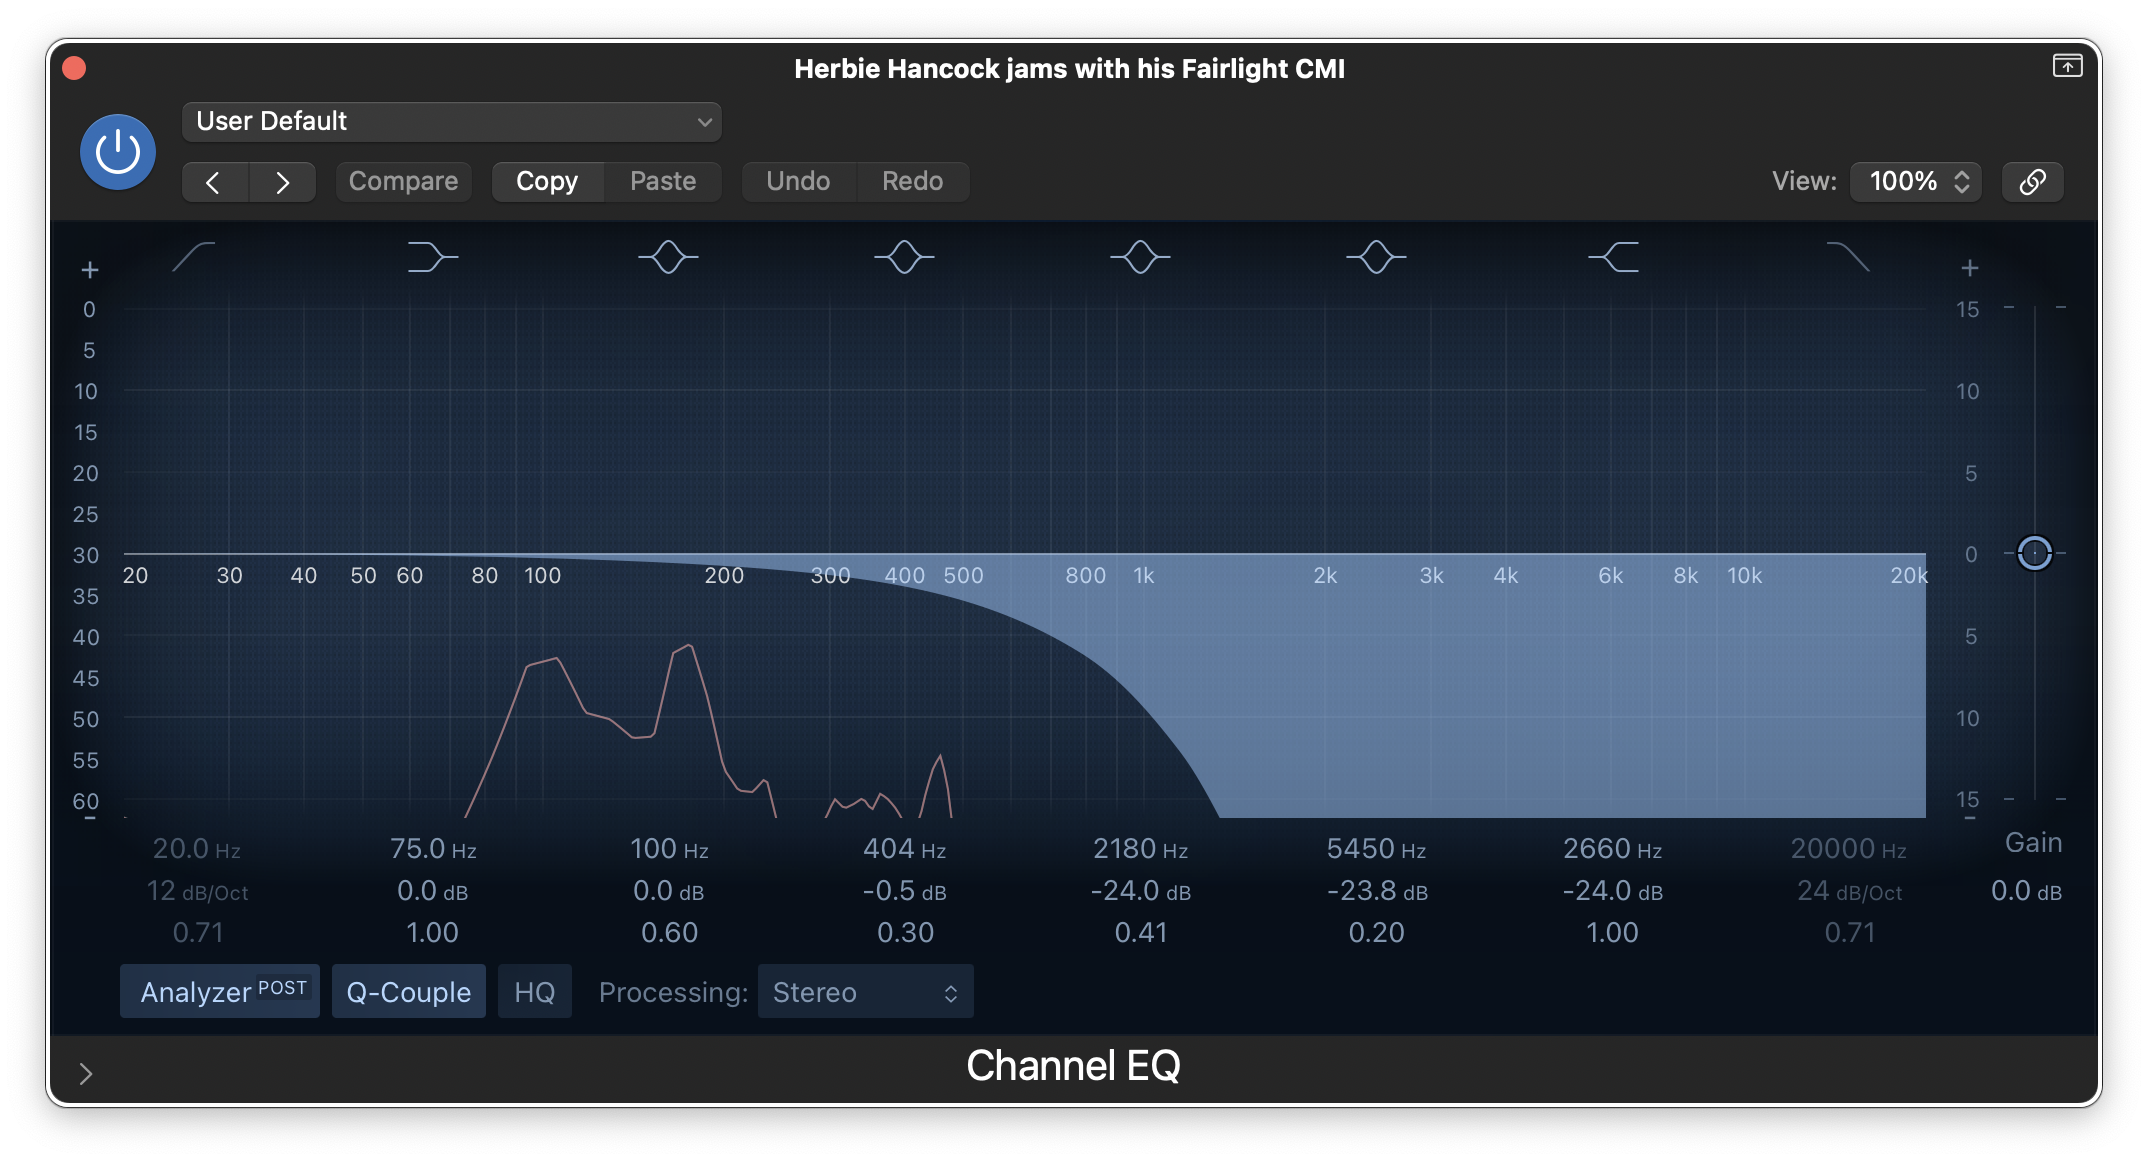
- EQ: Use this to edit an audio track by increasing or decreasing different frequencies. This is probably best used in the podcasting context for audio clips like ambient audio or sound effects if they have too much high or low frequencies or are hard to hear. Click the "EQ" square at the far left control strip. This will bring up an EQ menu which may seem confusing. Here you can see the frequencies of the audio clip. You can play around with dragging the different circles up or down to increase or decrease frequencies, but probably what will be most helpful is eliminating most of the highest or lowest frequencies, depending on your goals with the audio editing.
- Basic Musical Elements: This is most helpful for introductory or thematically relevant music throughout. You could definetly find some on YouTube and drag it in, but if you want more customizability or to ensure copyright standards it can be helpful to make music directly within the DAW.
- Loops: The simplest music clips in Logic Pro are built-in "loops." First, click on the loops menu on the top right corner, and listen through some of the options. Then, drag whichever you like into a new track. Some will work together, and some will not. Most helpful would probably be some kind of chord track, and some kind of drum track that can come in after.
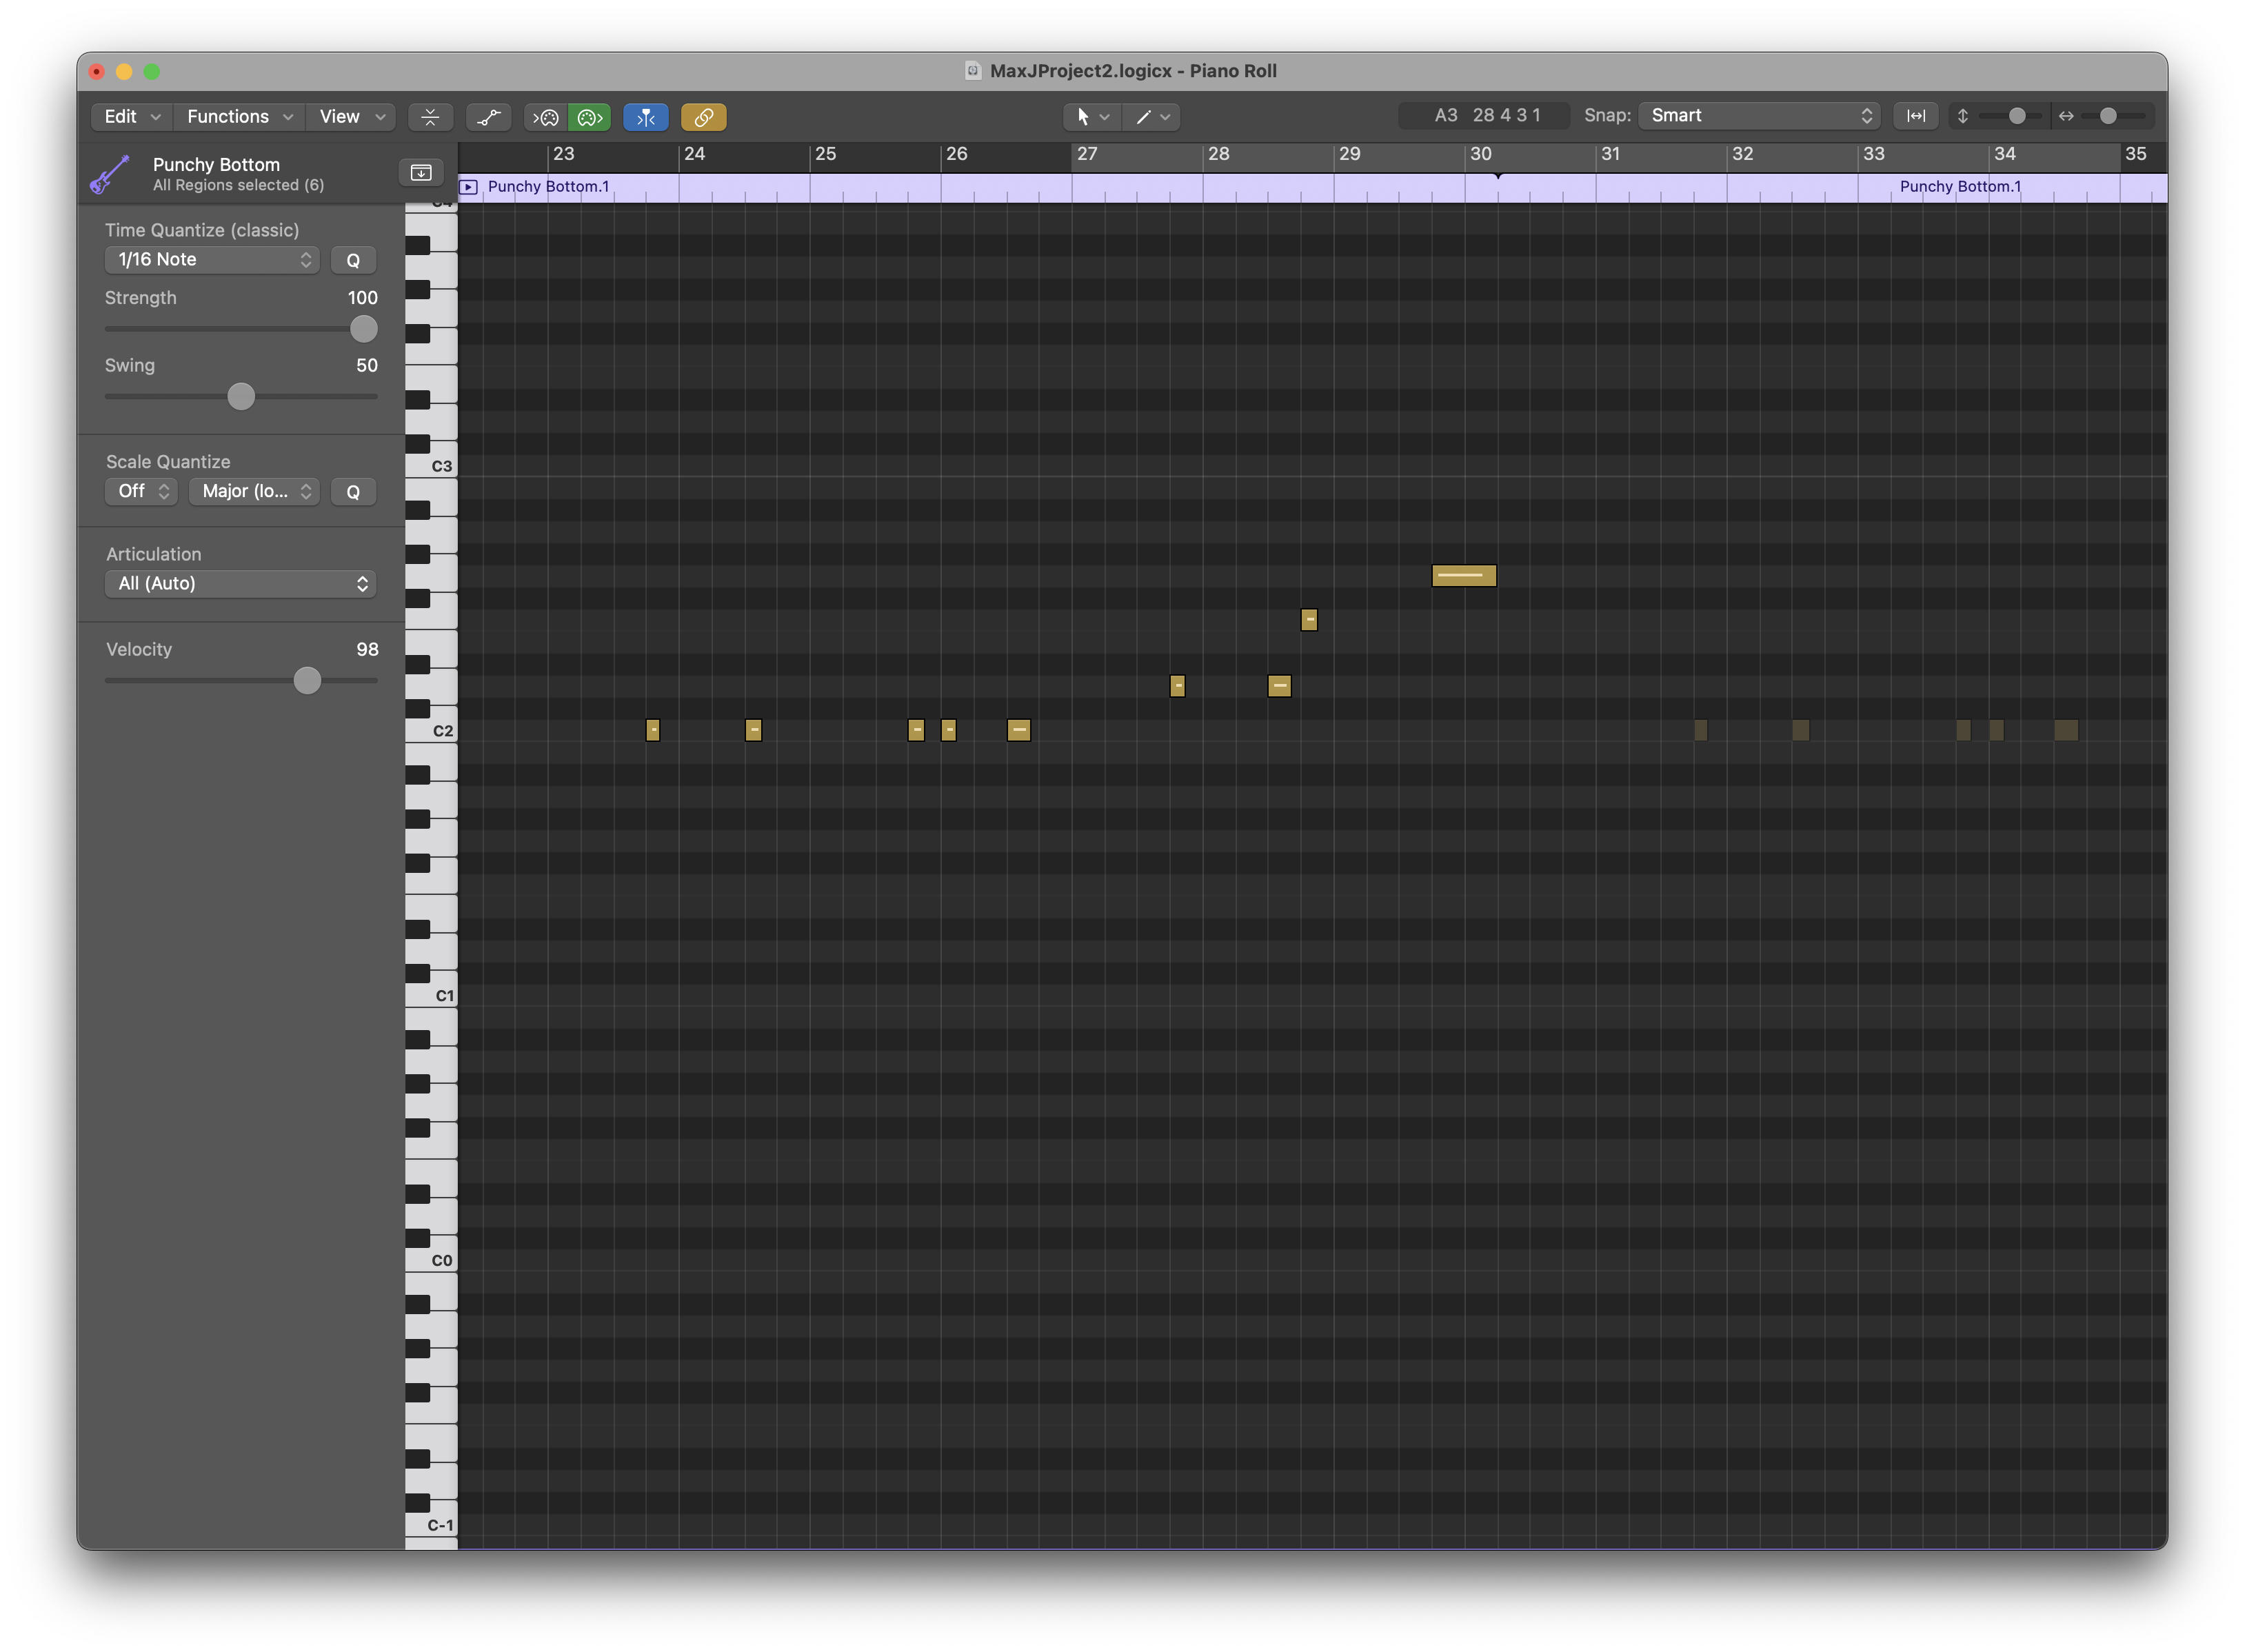
- Software instruments: If you are really interested in the musical side of this technology, software insturments can add a lot of fun options for you. To use these, double click and add a "software insturment" track. Then, you can select any insturment from the menu on the left side of the menu. You can then use the computer keyboard to play different notes. This has limited usability for those without more musical or digital production background, and the musical typing function can be confusing even for those who have knowledge of music theory. Another good option is the "piano roll", through which you can draw, drag, and drop notes in an interface without having to play them live. This may only be helpful for those with special interests in music production or to add more specific musical elements, such as a programmed synth tone, that don't require too much playing of digital insturments.
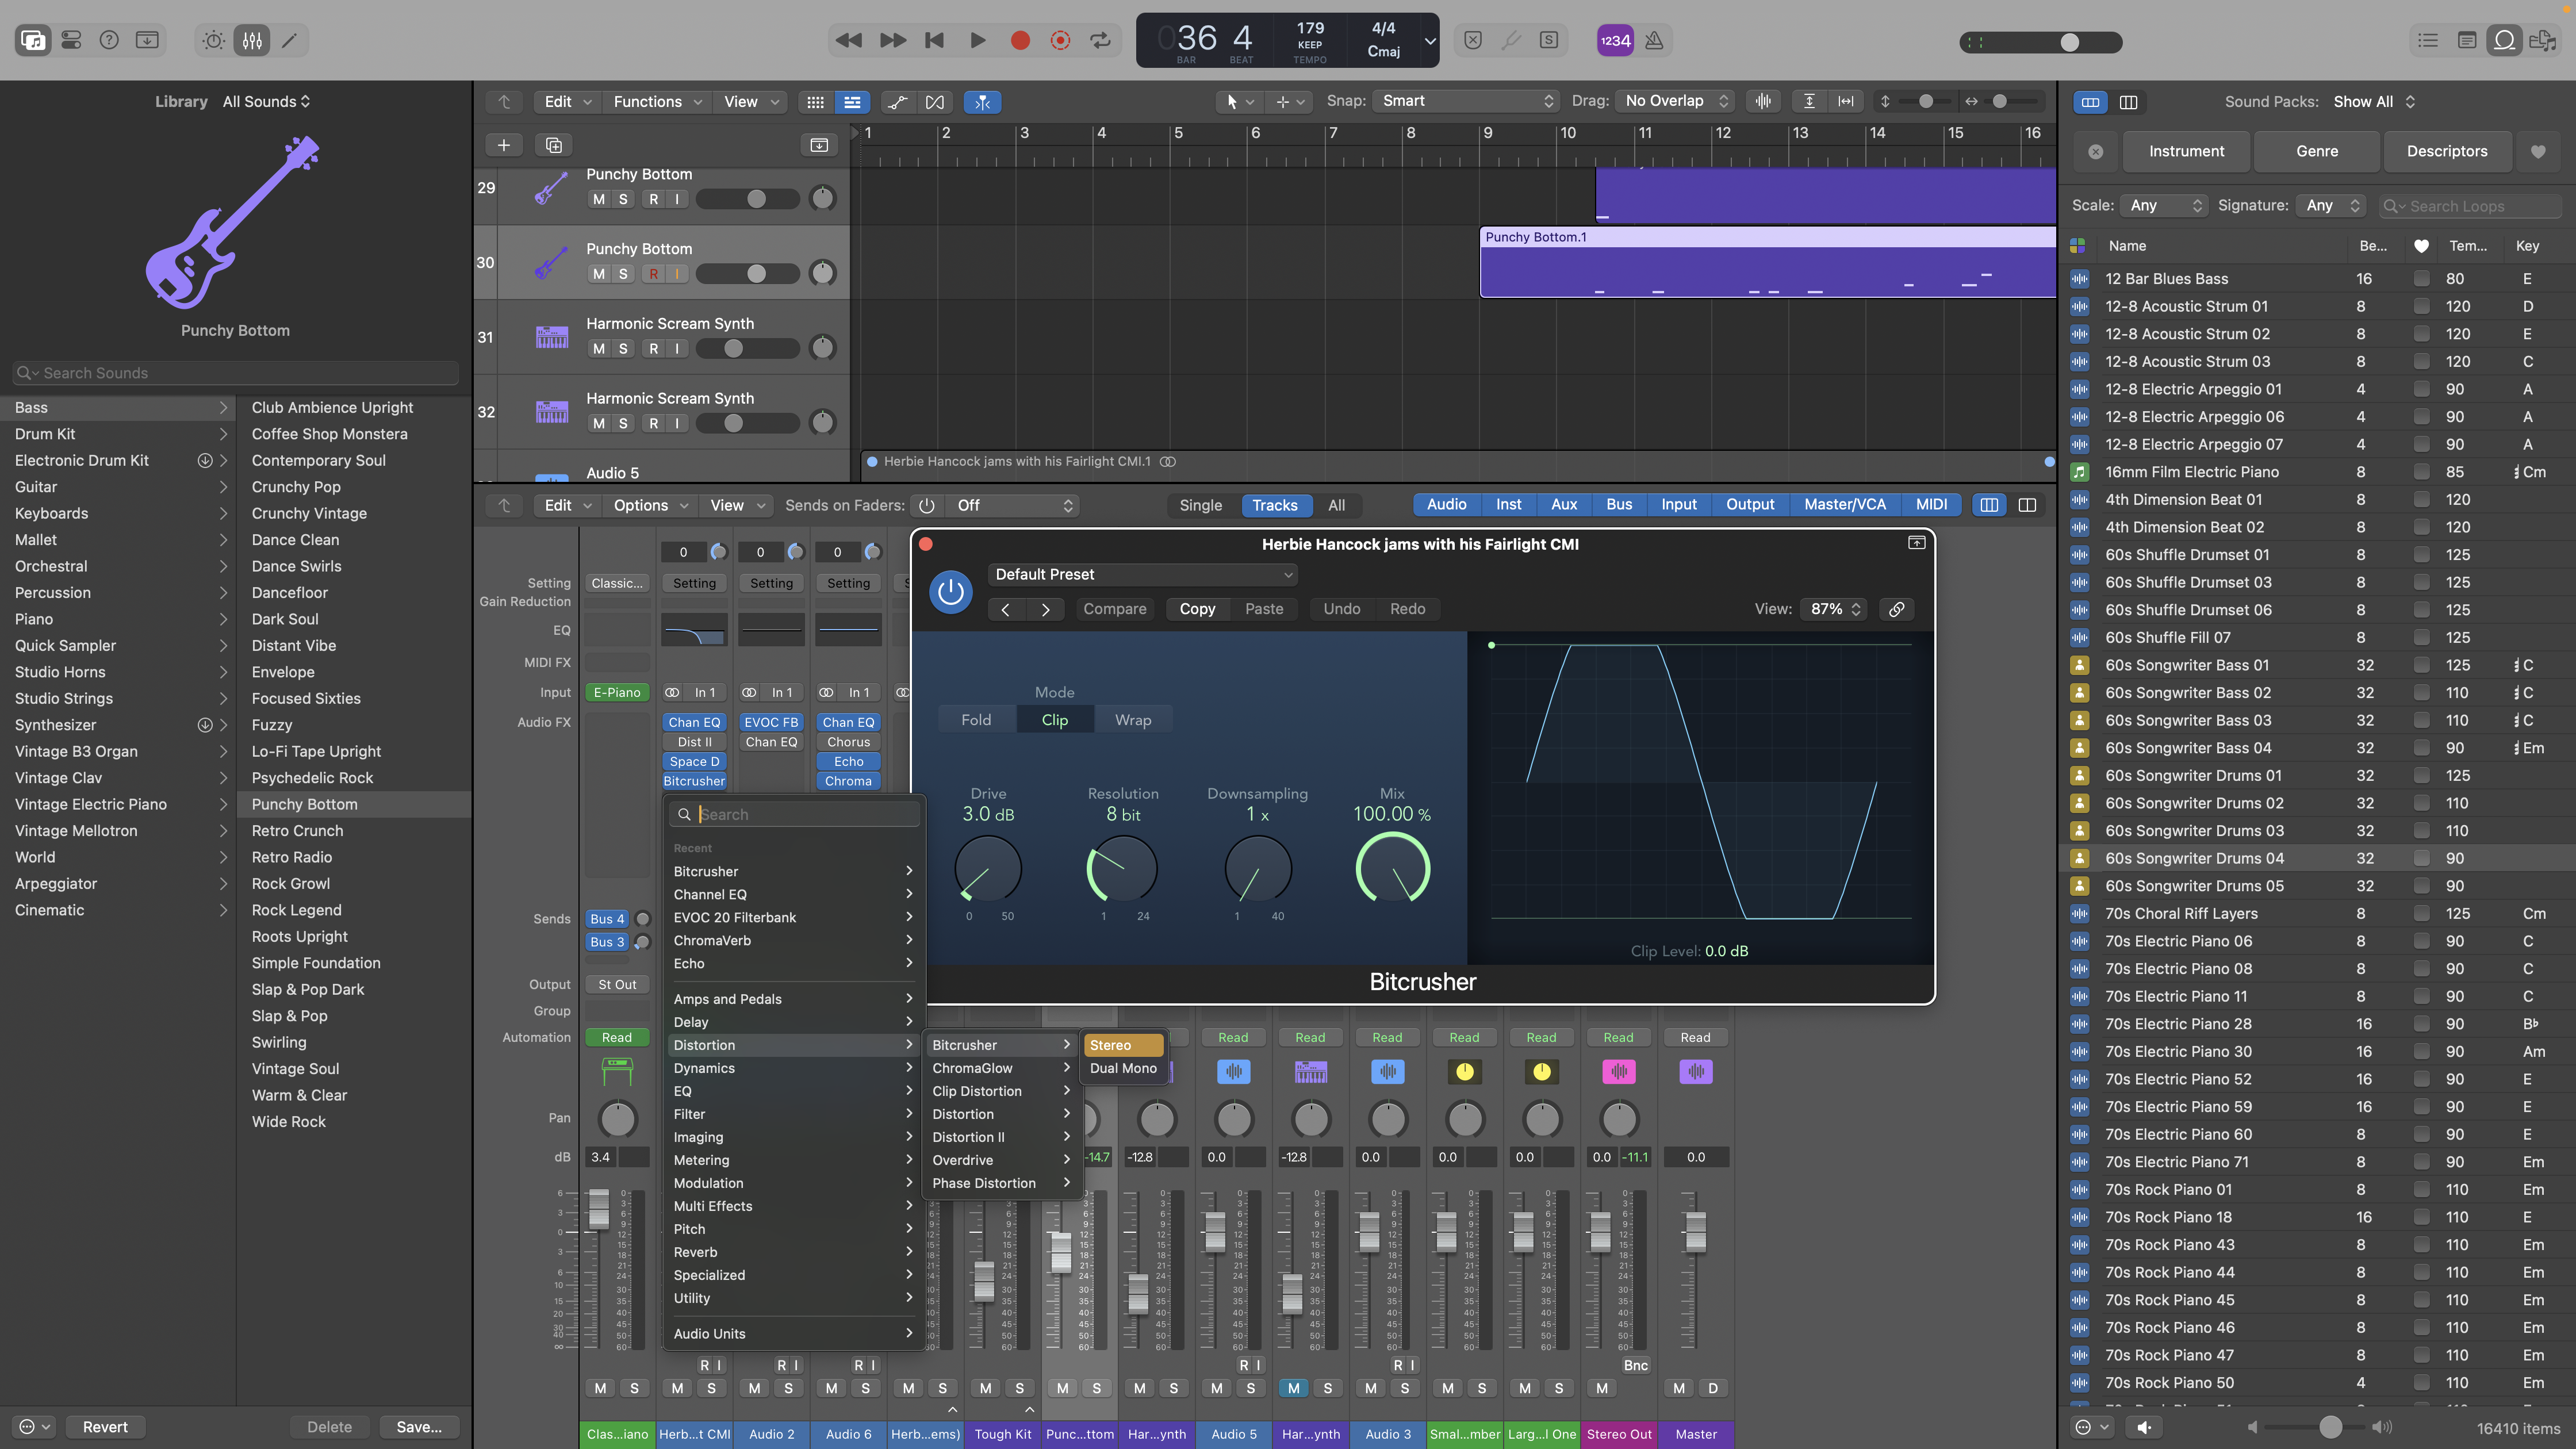
- Audio FX: Logic Pro also offers a full suite of audio effects to edit recorded audio or software insturments. These can change the sound of the software insturments profoundly, and be really fun to play around with for those interested in digital production. I recommend starting with one Distortion or Reverb effect and playing around with the options in it, but any effects can lead to interesting outcomes. Reverb could also be helpful for ambient audio or even certain recordings of voices, but most FX are applicable mostly just to music production.
 Sign in with Wallet
Connect another wallet
Sign in with Wallet
Connect another wallet