---
tags: lookbooks, hh22
---
# microproject-hh-juliana-lookbook
## the shot list
here's a rough breakdown of what shots to try and capture -- if inspiration strikes and you just can't put the camera down, feel free to take way more than just this!
* **3-4 establishing shots, at least one extreme wide shot**
* something that establishes the space you're working in -- but in your case, an extreme wide shot of the dome itself would also be an amazing asset
* **5-6 medium shots**
* this is specifically of you interacting with your work, whether it is installing lenses, reading data, working on a computer, or all of the above
* these can be head-on, from an angle, or in profile
* most commonly, the camera is positioned at around eye-level
* **8-10 close ups**
* a mix of your hands working, as well as you looking/interacting intently at your subject(this is often the most absurdly dramatic feeling, it's totally fine -- lean into the drama)
* these can also be in profile, head-on, or over your shoulder as well(looking at your hands/subject/etc)
* camera is usually at eye level
* **15+ extreme close-ups**
* this is where that macro lens really thrives
* looks closely at anything that has tiny information or interesting texture
* if the information you're showing is important, leave the camera static
* if you're capturing visual texture, feel free to slowly pan across your subject, do so first left -> right and then reverse it
* also, if you're using the macro lens, try rack focussing slowly from fore to background on tiny scales
* 15 also seems like it might be a lot, but these shots might only be used for 1 or 2 seconds at a time
when you're recording any shot(but this is super important for close-ups and extreme close-ups), let the camera roll for at least 10 seconds -- this is just to give the editor enough breathing room to select the absolute best 1-2 seconds of those 10. if you're making some kind of camera move, leave 5 seconds on the head and tail of each clip as well, for the same reason.
## framing
as you're setting these shots up, keep the rule of thirds in mind
<img src="https://miro.medium.com/max/1400/1*tcGoMhWaFp4iRefLcoZ7tg.jpeg" alt="example of the rule of thirds"
title="" width="460" height="270" />
the goal is to land your subject on the left third or right third -- most often with your subject facing the longer side
## establishing and wide shots
* it can be extremely helpful to start shooting with your wide shot, and choose what, within that wide shot, will be the first medium/close-up shot
* you can see this in the establishing shots section, either the next shot in the sequence is a medium shot, or a close-up. And most importantly, the motion you're doing in the wide shot carries over to the medium/close-up
* the easiest way to do this is to set up the wide, perform your action, and then reset it to the close-up and do the same action, identically
* you'll see further down that these same principles also work when cutting between close-ups of you and your work
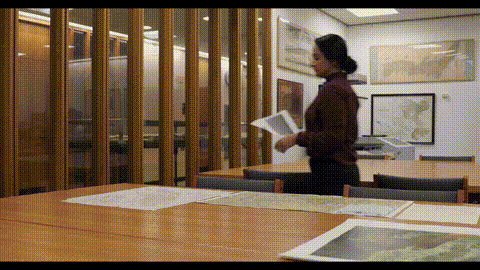
## medium shots
if the option arises, short, slow camera pans can add visual interest to otherwise simple shots
<img src="https://files.slack.com/files-pri/T0HTW3H0V-F03207YUXDZ/jess-medium.png?pub_secret=d5338f5b4f" alt="example of a medium shot"
title="" width="460" height="270" />
<img src="https://files.slack.com/files-pri/T0HTW3H0V-F0322GNCFM2/victoria-medium.png?pub_secret=c9ad0cbf78" alt="example of a medium shot"
title="" width="460" height="270" />
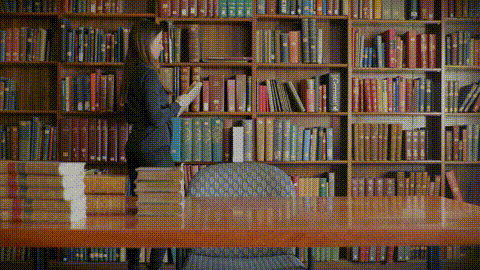
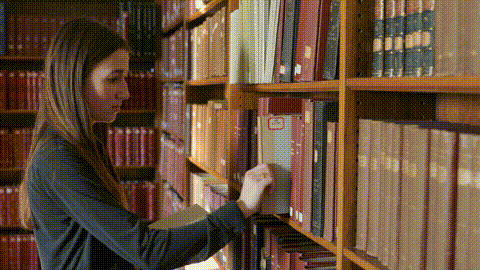
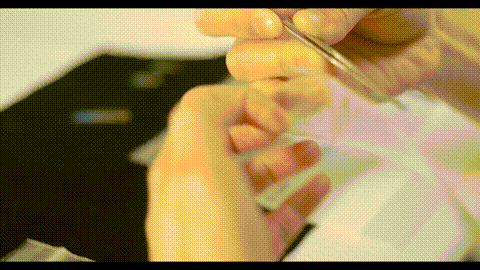
## close-ups
as you're panning/tilting, make sure that they're not always moving in the same direction - a left>right pan can cut together with a static shot or a right>left pan, but not so well to a shot with similar motion.
<img src="https://files.slack.com/files-pri/T0HTW3H0V-F032082PWHZ/victoria-foreground.png?pub_secret=d3d6752c6a" alt="example of a close-up"
title="" width="460" height="270" />
<img src="https://files.slack.com/files-pri/T0HTW3H0V-F031TH90QK0/jess-closeup-hands.png?pub_secret=768657aebc" alt="example of a close-up"
title="" width="460" height="270" />
<img src="https://files.slack.com/files-pri/T0HTW3H0V-F03207BCE0J/victoria-closeup2.png?pub_secret=fbb53a2b74" alt="example of a close-up"
title="" width="460" height="270" />
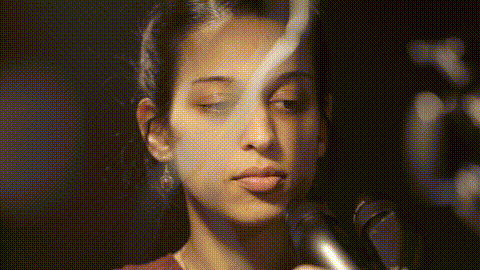
## extreme close ups
this is where the rack focus succeeds the most, it draws the eye to the exact place you'd like your audience to pay attention to, while also adding visual interest. feel free to use this profusely!
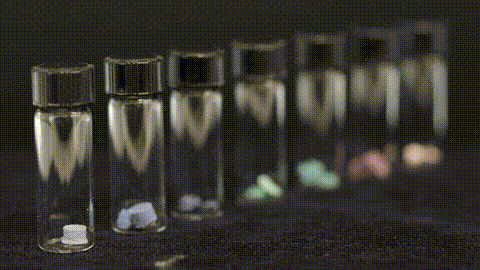
<img src="https://files.slack.com/files-pri/T0HTW3H0V-F032CQXSXQ9/bailey-macro1.png?pub_secret=d9284fc741" alt="example of an extreme close-up"
title="" width="460" height="270" />

<img src="https://files.slack.com/files-pri/T0HTW3H0V-F031X94EYCD/bailey-macro2.png?pub_secret=a32560b71a" alt="example of an extreme close-up"
title="" width="460" height="270" />
 Sign in with Wallet
Connect another wallet
Sign in with Wallet
Connect another wallet