---
# System prepended metadata

title: 'The 2025 High-Performance Stack: An Architect''s Unfiltered Guide for Agencies'

---

<h1>The 2025 High-Performance Stack: An Architect's Unfiltered Guide for Agencies</h1>
<div style="display:none">Discover the definitive 2025 high-performance stack for digital agencies. This in-depth technical editorial dissects WordPress plugins, Elementor addons, and themes, focusing on performance benchmarks, code quality, and real-world trade-offs to build faster, more profitable client websites.</div>

<p>Let's cut through the noise. Every year, a new wave of "game-changing" tools washes over the agency world, promising to revolutionize workflow, boost conversions, and make your morning coffee. Most of it is marketing fluff designed to sell you on yet another subscription or a lifetime deal for a plugin that will be abandoned in 18 months. As architects of the web, our job isn't to chase shiny objects; it's to build robust, performant, and maintainable digital assets for our clients. Architectural debt accrued today through poor choices becomes the financial and reputational liability of tomorrow.</p>

<p>The core philosophy for a profitable agency stack in 2025 is ruthless pragmatism. It's about selecting tools that solve a specific problem with minimal performance overhead and maximal stability. We must move beyond the vanity metrics of feature counts and instead focus on the metrics that matter: Largest Contentful Paint (LCP), Total Blocking Time (TBT), database query efficiency, and long-term maintainability. This requires a cynical eye and a deep understanding of what's happening under the hood. Before you install another plugin from a flashy landing page, you need to ask the hard questions: Is this a well-coded, specific solution, or a bloated, multipurpose behemoth? What dependencies is it dragging into my finely tuned environment?</p>

<p>This editorial is not a top-ten list. It's a technical audit of a curated selection of tools, dissecting their value proposition from an engineering perspective. We'll examine everything from user-facing UI components to back-end e-commerce utilities. The goal is to equip you with the critical mindset needed to evaluate any tool that crosses your desk. Building a superior digital product often means leveraging vetted components, and a resource like the <a href="https://gpldock.com/">GPLDock premium library</a> can provide access to these tools for evaluation without the initial financial outlay. For those focused on a specific ecosystem, browsing a <a href="https://gpldock.com/downloads/">Professional WordPress collection</a> helps narrow the field to battle-tested solutions. Now, let's get to work.</p>

<h3>Iofrm – Login and Register Form Templates</h3>
<p>When a project requires a departure from the default WordPress login and registration pages, you'll need a solution, and for that you can <a href="https://gpldock.com/downloads/iofrm-login-and-register-form-templates/">Download the Form Iofrm Templates</a> to quickly scaffold the user-facing interface. These templates offer a significant aesthetic upgrade over the `wp-login.php` screen, which is critical for brand consistency on membership sites, LMS platforms, or client portals where the user experience begins before they even access the dashboard. The primary value proposition here is speed of development for a common, yet often overlooked, part of the user journey.</p>
<img src="https://gpldock.com/wp-content/uploads/2026/01/urlhttps3A2F2Fmarket-resized.envatousercontent.com2Fthemeforest.net2Ffiles2F4667804682F01_preview.__large_preview.jpg" alt="Iofrm - Login and Register Form Templates">
<p>However, injecting custom form templates into the WordPress authentication flow is not a trivial matter. The quality of the implementation determines whether this is a simple UI skin or a potential security and performance bottleneck.</p>
<strong>Simulated Benchmarks</strong>
<ul>
    <li><strong>Page Weight Increase:</strong> +85KB CSS, +30KB JS (for a single form template)</li>
    <li><strong>DOM Elements Added:</strong> ~150-250 nodes for a complex form layout</li>
    <li><strong>Render Blocking Resources:</strong> 1 CSS file, 1 JS file (if not properly deferred)</li>
    <li><strong>Time to Interactive (TTI):</strong> Potentially adds 150-200ms on a 3G connection if assets are not optimized.</li>
</ul>
<strong>Under the Hood</strong>
<p>Iofrm is fundamentally an HTML5/CSS3 template package. The integration into WordPress is the critical part that isn't included out-of-the-box. An agency developer would need to manually enqueue the necessary stylesheets and scripts, ensuring they only load on the relevant pages (e.g., using `is_login()` or on custom-created pages). The HTML structure is clean, relying heavily on modern CSS properties like Flexbox and Grid for layout. The forms include placeholders for validation states, but the actual client-side and server-side validation logic must be implemented separately. This is a crucial point: the templates are a skeleton, not a functional plugin. There's no PHP logic for handling submissions, error messages, or security nonces.</p>
<strong>The Trade-off</strong>
<p>The trade-off is clear: you are exchanging developer time for a pre-designed, aesthetically pleasing front-end. Compared to a full-fledged form builder plugin like Gravity Forms or Fluent Forms, Iofrm offers no back-end management, submission handling, or anti-spam features. However, it also has zero database overhead and introduces no new PHP dependencies. Its performance impact is limited to the front-end asset load. For a simple, custom-branded login page, this is far more efficient than installing a heavy form builder and wrestling with its settings to override the default WordPress forms. You get a clean, predictable front-end without the bloat of a comprehensive forms engine you don't need for this specific task.</p>

<h3>iHover effect addon for Elementor</h3>
<p>For agencies heavily invested in the Elementor ecosystem, adding interactive flair without custom coding is a constant demand, and you can <a href="https://gpldock.com/downloads/ihover-effect-addon-for-elementor/">Get the Elementor iHover addon</a> to address this specific need. It provides a library of CSS-driven hover effects for images and content boxes, aiming to increase user engagement by making static layouts more dynamic. The appeal is obvious: it allows designers to implement complex animations via a simple widget interface, dramatically reducing the time it would take to write and test the equivalent custom CSS and JavaScript.</p>
<img src="https://gpldock.com/wp-content/uploads/2026/01/urlhttps3A2F2Fmarket-resized.envatousercontent.com2Fcodecanyon.net2Ffiles2F4086480952Fpreview_0.jpg" alt="iHover effect addon for Elementor">
<p>The danger with any animation-focused addon is the performance cost. Browsers have to calculate and repaint the screen, and poorly optimized animations can lead to jank, high CPU usage on the client-side, and a negative impact on Core Web Vitals, particularly Cumulative Layout Shift (CLS) if the hover effect alters an element's dimensions.</p>
<strong>Simulated Benchmarks</strong>
<ul>
    <li><strong>CSS Payload:</strong> +45KB for the full library of effects (often loaded site-wide).</li>
    <li><strong>JS Payload:</strong> ~10KB (if any JS is used for triggering or complex timing).</li>
    <li><strong>CPU Main Thread Impact:</strong> Can cause spikes during animation, potentially increasing Total Blocking Time (TBT) if many animated elements are visible.</li>
    <li><strong>CLS Score:</strong> High risk of a poor score (>0.1) if effects like "push," "slide in," or scaling are used without proper `transform` and `opacity` properties.</li>
</ul>
<strong>Under the Hood</strong>
<p>Most of the effects in a library like iHover are, or should be, implemented using pure CSS transitions and transforms. The key is to check if they are animating layout-intensive properties like `width`, `height`, or `margin`, which trigger expensive repaint and reflow cycles. The optimal implementation uses only `transform` (e.g., `translateX`, `scale`) and `opacity`, as these can be offloaded to the browser's GPU for smoother rendering. The Elementor widget itself is a PHP wrapper that generates the necessary HTML structure (often nested divs) and applies the relevant CSS classes based on the user's selections in the editor. A well-architected addon will only load its assets on pages where the widget is actually used, but many cheaper addons take the lazy route and enqueue assets globally.</p>
<strong>The Trade-off</strong>
<p>Compared to writing custom CSS, iHover is a massive time-saver for non-developers. The trade-off is a loss of granular control and potential code bloat. A custom-coded hover effect would involve only the few lines of CSS needed for that specific animation. In contrast, iHover loads its entire CSS library, even if you're only using one effect on one page. This is the classic plugin dilemma: convenience versus optimization. For a quick build or a content-heavy site where designers need flexibility, it's a justifiable choice. For a high-performance landing page where every kilobyte counts, the better architectural decision is to code the specific effect manually and inline the CSS using Elementor's custom CSS feature.</p>

<h3>WooCommerce Product Category Carousel For Elementor</h3>
<p>Displaying product categories in an engaging, space-efficient manner is a core requirement for almost any e-commerce storefront, and for this, you can <a href="https://gpldock.com/downloads/woocommerce-product-category-carousel-for/">Install the WooCommerce Category Carousel</a> directly within the Elementor editor. This widget is designed to replace static grids of categories with a dynamic, swipeable carousel, which is particularly effective on mobile devices. Its main purpose is to improve product discovery and enhance the visual merchandising of the homepage or key landing pages without requiring custom development.</p>
<img src="https://gpldock.com/wp-content/uploads/2026/01/urlhttps3A2F2Fmarket-resized.envatousercontent.com2Fcodecanyon.net2Ffiles2F4142308712Fpreview_0.jpg" alt="WooCommerce Product Category Carousel For Elementor">
<p>However, any component that dynamically queries and displays WooCommerce data carries a significant risk of becoming a performance hog. A poorly optimized carousel can flood the server with inefficient database queries and slow down the front-end with heavy JavaScript libraries, negatively impacting both server response time and client-side rendering speed.</p>
<strong>Simulated Benchmarks</strong>
<ul>
    <li><strong>Database Queries:</strong> +3-5 queries on page load (can be higher if category images and product counts are fetched inefficiently).</li>
    <li><strong>JS Library Dependency:</strong> Typically adds a slider library like Slick or Swiper.js (+20-60KB of JavaScript).</li>
    <li><strong>LCP Impact:</strong> Can negatively impact LCP if the carousel is above the fold and its images are not properly prioritized or lazy-loaded.</li>
    <li><strong>Server Response Time (TTFB):</strong> Can add 100-300ms to TTFB if the database queries are not cached.</li>
</ul>
<strong>Under the Hood</strong>
<p>Architecturally, this addon consists of two main parts. The back-end is a PHP class that registers the Elementor widget and handles the data retrieval. It uses a `WP_Term_Query` to fetch the WooCommerce product categories. A well-built plugin will use caching (like the Transients API) to store the query results for a set period, preventing it from hitting the database on every single page load. The front-end is composed of the generated HTML markup and the JavaScript library that powers the carousel functionality. Key things to inspect are whether it supports lazy loading of images, if the JS is loaded asynchronously or deferred, and whether it offers responsive settings to load fewer items on smaller viewports.</p>
<strong>The Trade-off</strong>
<p>The primary trade-off is performance for convenience. Manually building a category display with a static grid is always faster, as it requires no JavaScript and can be more easily cached. However, it lacks interactivity. Compared to using a generic slider plugin and populating it manually, this dedicated WooCommerce addon is far more efficient as it handles the data query and rendering automatically. The key is to find a balance. If the carousel is critical to the site's UX and merchandising strategy, this tool is a valid choice, provided you mitigate the performance impact through aggressive caching (at the page and object level) and ensure its assets are optimized.</p>

<h3>Search Bar Ads – WooCommerce Plugin</h3>
<p>Monetizing search intent directly within an e-commerce experience is a sophisticated strategy, and developers looking to implement this should <a href="https://wordpress.org/themes/search/Search+Bar+Ads+&#8211;+WooCommerce+Plugin/">Review the Ad Search Bar Plugin</a> as a potential mechanism. This tool injects promotional content or sponsored product links directly into the live search results dropdown of a WooCommerce store. Instead of relying on banner ads, this approach targets users at the precise moment they express commercial intent, which can theoretically lead to higher conversion rates for the advertised products. It's a surgical tool for influencing the user's path-to-purchase.</p>
<img src="https://gpldock.com/wp-content/uploads/2026/01/urlhttps3A2F2Fmarket-resized.envatousercontent.com2Fcodecanyon.net2Ffiles2F3827668912Fsearch-bar-ads-preview.jpg" alt="Search Bar Ads - WooCommerce Plugin">
<p>From an architectural standpoint, this plugin's elegance lies in its subtlety, but its implementation is fraught with potential pitfalls. Modifying a core user interaction like search requires careful execution to avoid degrading the user experience or introducing performance lags. The system must be lightweight and must not interfere with the primary function of the search bar, which is to return relevant organic results quickly.</p>
<strong>Simulated Benchmarks</strong>
<ul>
    <li><strong>AJAX Request Overhead:</strong> Adds logic to the existing WooCommerce search AJAX endpoint, potentially increasing its payload and processing time by 10-20ms.</li>
    <li><strong>Database Queries:</strong> +1-2 additional queries to fetch the ad content based on search keywords and placement rules.</li>
    <li><strong>CLS Impact:</strong> High risk of layout shift if the ad container is injected into the search results dropdown after the initial results are rendered, causing a flicker or jump.</li>
    <li><strong>JavaScript Footprint:</strong> Minimal, likely under 5KB, as it should hook into the existing search JavaScript rather than adding its own library.</li>
</ul>
<strong>Under the Hood</strong>
<p>This plugin would work by hooking into the WordPress AJAX action used by the WooCommerce live search feature (e.g., `wc_ajax_json_search_products`). Within that hook, it would execute its own logic: check the search term against a set of predefined keywords or rules stored in the options table, and if a match is found, query for the specified ad/product. This data would then be prepended or appended to the JSON response sent back to the client. The front-end JavaScript, which is part of WooCommerce itself, would then render this "ad" item alongside the organic results. A robust implementation would use a custom post type for managing the ads and their associated keywords and rules, allowing for a clean separation of concerns.</p>
<strong>The Trade-off</strong>
<p>The trade-off is between a potential increase in revenue/conversions and a potential degradation of the user's trust and experience. If the ads are not clearly marked as "sponsored" or are irrelevant, it can make the search feel untrustworthy. Technically, the trade-off is a slight increase in server processing time for each search query versus the benefit of the feature. Compared to hard-coding a promotion into the search results template, this plugin offers vastly superior flexibility and targeting. It’s a specialized tool for mature e-commerce sites focused on maximizing revenue per visitor, but it must be implemented with a light touch to be effective.</p>

<h3>Canvas: Show any content in a fullscreen slide</h3>
<p>For high-impact introductions or portfolio showcases, creating an immersive fullscreen experience is a common client request, and developers can <a href="https://wordpress.org/themes/search/Canvas:+Show+any+content+in+a+fullscreen+slide/">Explore the Fullscreen Canvas plugin</a> as a framework for building this. The plugin provides a container that hijacks the viewport to display content—be it images, videos, or complex layouts built with page builders—in an overlay or as an initial loading screen. This is a tool for creating a "wow" moment, designed to capture the user's full attention for a brief, curated experience before they proceed to the main site content.</p>
<img src="https://gpldock.com/wp-content/uploads/2026/01/urlhttps3A2F2Fmarket-resized.envatousercontent.com2Fcodecanyon.net2Ffiles2F2650138222Fcanvas-preview_01_3-0.jpg" alt="Canvas: Show any content in a fullscreen slide">
<p>Architecturally, this is one of the most dangerous types of plugins you can install. A fullscreen overlay is, by its very nature, a direct assault on the initial page load performance. It sits directly in the critical rendering path and can have a catastrophic effect on the Largest Contentful Paint (LCP) and First Input Delay (FID) if not engineered with extreme care. The potential for a negative user experience and SEO impact is exceptionally high.</p>
<strong>Simulated Benchmarks</strong>
<ul>
    <li><strong>LCP Impact:</strong> Can delay LCP indefinitely until the overlay is dismissed. Google will measure the LCP of the overlay's content, which, if it's a large image or video, will be very slow.</li>
    <li><strong>TBT Impact:</strong> High. The JavaScript required to manage the fullscreen state, animations, and content loading can block the main thread for several hundred milliseconds.</li>
    <li><strong>Page Weight Increase:</strong> +25KB JS, +10KB CSS, plus the weight of the content (images, videos) it is programmed to display.</li>
    <li><strong>Core Web Vitals Risk:</strong> Severe. This type of plugin is almost guaranteed to cause CWV warnings in Google Search Console unless its content is minimal and its loading is flawlessly optimized.</li>
</ul>
<strong>Under the Hood</strong>
<p>The plugin's core is JavaScript. It listens for the `DOMContentLoaded` or `window.load` event, then injects a `<div>` with a high `z-index` and fixed positioning (`position: fixed; top: 0; left: 0; width: 100vw; height: 100vh;`). The content within this div is then loaded. A naive implementation loads this content along with the page, wrecking performance. A slightly better one uses JavaScript to fetch and inject the content after the main page is interactive. The best implementation would aggressively preload only the most critical assets for the overlay, use responsive images, and provide a clear, fast-acting "close" button. It likely relies on CSS transitions for smooth opening and closing effects.</p>
<strong>The Trade-off</strong>
<p>You are trading core performance metrics and potentially user patience for a momentary design statement. There are very few use cases where this is a justifiable trade-off. For a creative portfolio or a one-time event announcement, it might be acceptable. But for any site concerned with organic traffic, conversions, or general usability, it's a liability. The alternative is to integrate the "wow" moment directly into the page's hero section without an overlay. This approach respects the page flow, allows the browser to render the page progressively, and doesn't trap the user. This plugin is a tool of last resort, to be used only when the creative brief absolutely demands a blocking, fullscreen initial state.</p>

<h3>MT WooCommerce Fake Variation Links</h3>
<p>In the fiercely competitive landscape of e-commerce, user experience optimization extends to the smallest details of product presentation. MT WooCommerce Fake Variation Links is a tool designed to solve a specific UX problem for stores with products that have variations but don't use the standard WooCommerce variation dropdowns. It allows merchants to display variations as distinct, clickable swatches or links, which, when clicked, automatically apply the correct product options on the product page. This creates the illusion of separate simple products on the category page while maintaining a single variable product on the back-end.</p>
<img src="https://gpldock.com/wp-content/uploads/2026/01/urlhttps3A2F2Fmarket-resized.envatousercontent.com2Fcodecanyon.net2Ffiles2F3320357992F01_Main_Banner.jpg" alt="MT WooCommerce Fake Variation Links">
<p>This approach can significantly clean up shop archives by reducing visual clutter and guiding customers to the exact product version they are interested in more quickly. However, the implementation details determine whether this is a clever UX enhancement or an SEO and accessibility nightmare.</p>
<strong>Simulated Benchmarks</strong>
<ul>
    <li><strong>Database Queries:</strong> Could add 1-2 extra queries per product on the archive page if not implemented efficiently to fetch variation data.</li>
    <li><strong>HTML Payload:</strong> Increases the size of the product loop HTML by adding markup for the variation links for each product.</li>
    <li><strong>JavaScript Dependency:</strong> Requires a small JavaScript snippet (~2-5KB) to handle the click events and construct the correct URL with query parameters.</li>
    <li><strong>Page Load Impact:</strong> Minimal if queries are cached and the script is loaded asynchronously.</li>
</ul>
<strong>Under the Hood</strong>
<p>The plugin works by hooking into the WooCommerce template hooks for the shop loop (e.g., `woocommerce_after_shop_loop_item`). Inside this hook, it checks if a product is a variable product. If it is, it fetches its available variations. For each variation, it generates a link. The crucial part is the link's `href` attribute. It will be the URL of the parent variable product, but with query parameters appended (e.g., `?attribute_pa_color=blue&attribute_pa_size=large`). A small JavaScript file on the single product page then reads these URL parameters on page load and uses them to programmatically select the corresponding options in the variation form. This avoids creating actual duplicate pages for each variation, which would be an SEO disaster.</p>
<strong>The Trade-off</strong>
<p>The trade-off is a slight increase in page complexity and a dependency on JavaScript for a cleaner user interface. The risk is that if the JavaScript fails to execute, the user lands on the product page with no variation pre-selected, defeating the purpose. The alternative is the default WooCommerce behavior, which forces the user to make an extra click to the product page and then interact with dropdowns. For stores with highly visual variations (like apparel with different colors), this plugin provides a superior browsing experience that likely outweighs the minor performance cost and technical dependency. It's a prime example of a small, focused tool that solves one problem well.</p>

<h3>Paradise – Multipurpose HTML Template</h3>
<p>The "multipurpose" template is a staple of the web development world, promising a one-size-fits-all solution for any project imaginable. Paradise is a classic example of this archetype, delivered as a static HTML/CSS/JS package. It provides a vast library of pre-designed components: headers, footers, sliders, portfolio grids, contact forms, pricing tables, and entire page layouts for various industries. For an agency, the appeal is its utility as a rapid prototyping tool or a foundational codebase for projects that don't require a full-blown CMS like WordPress.</p>
<img src="https://gpldock.com/wp-content/uploads/2026/01/urlhttps3A2F2Fmarket-resized.envatousercontent.com2Fthemeforest.net2Ffiles2F3032033322FPreview.__large_preview.jpg" alt="Paradise - Multipurpose HTML Template">
<p>From an architectural perspective, "multipurpose" is a red flag for "bloat." These templates are engineered to provide maximum flexibility, which means they include the code for every conceivable feature, whether you use it or not. The primary task for a developer using such a template is not building, but rather, aggressive pruning and optimization.</p>
<strong>Simulated Benchmarks</strong>
<ul>
    <li><strong>Default CSS Size:</strong> Often 200-500KB (unminified and uncompressed).</li>
    <li><strong>Default JS Size:</strong> Often 300-700KB, including multiple libraries (jQuery, Bootstrap JS, slider plugins, lightbox plugins, etc.).</li>
    - <strong>Number of Dependencies:</strong> High. It's common to see 5-10 different JavaScript libraries included.
    - <strong>Time to First Byte (TTFB):</strong> Not applicable (static HTML), but Time to Interactive (TTI) can be very high (2-5 seconds) on first load due to asset parsing.
</ul>
<strong>Under the Hood</strong>
<p>Dissecting a template like this reveals a common structure. It's typically built on a framework like Bootstrap, which provides the grid system and basic components. Layered on top are numerous third-party JavaScript libraries for specific functionalities: an Owl Carousel or Slick for sliders, a Magnific Popup or FancyBox for lightboxes, an Isotope for filterable grids, and so on. The CSS is usually written in a preprocessor like Sass, but delivered as a single, monolithic `style.css` file. A responsible developer's first step is to set up a build process (using Webpack, for instance) to tree-shake unused JavaScript, purge unused CSS with a tool like PurgeCSS, and bundle the remaining assets into smaller, optimized files.</p>
<strong>The Trade-off</strong>
<p>You are trading a clean, optimized codebase for an accelerated development start. For a simple static brochure site where performance is not the absolute top priority, using a template like Paradise and spending a day cleaning it up can be more cost-effective than building from scratch. However, for any performance-critical application, the architectural debt it introduces is significant. The better, though more time-consuming, approach is to build from a minimal framework like Tailwind CSS or even from scratch, pulling in only the specific components and libraries required for the project. The multipurpose template is a shortcut, and like most shortcuts, it comes with hidden costs.</p>

<h3>AI Cover Letter Generator for WordPress</h3>
<p>The integration of artificial intelligence into everyday applications is accelerating, and the AI Cover Letter Generator for WordPress is a niche but interesting example of this trend. This plugin is designed for job boards, recruitment agency websites, or portfolio sites, providing a tool for users to automatically generate a cover letter based on inputs like their resume details and the job description. It aims to add value and increase user engagement by offering a practical, AI-powered feature directly on the website.</p>
<img src="https://gpldock.com/wp-content/uploads/2026/01/urlhttps3A2F2Fmarket-resized.envatousercontent.com2Fcodecanyon.net2Ffiles2F6399979412F01_Main_Preview.jpg" alt="AI Cover Letter Generator for WordPress">
<p>From an architectural standpoint, this plugin is not a self-contained unit. It functions as a client for a third-party AI service. Its primary role is to provide a user interface for data input and to manage the API communication with a large language model (LLM) like OpenAI's GPT. This introduces significant external dependencies, latency, and potential costs.</p>
<strong>Simulated Benchmarks</strong>
<ul>
    <li><strong>API Latency:</strong> 2-10 seconds per generation request, depending on the AI model's load and the complexity of the prompt. This is not page load time, but user-perceived interaction time.</li>
    <li><strong>Server-side Processing:</strong> The WordPress back-end must handle the API request, which involves authenticating, formatting the data, sending it, and then waiting for the response. This can tie up a PHP worker for the duration of the API call.</li>
    <li><strong>Data Transfer:</strong> The payload sent to the API (resume + job description) and the response received (generated letter) can be several kilobytes.</li>
    <li><strong>Cost Factor:</strong> Each API call costs money. Unchecked usage could lead to a surprisingly high bill from the AI service provider.</li>
</ul>
<strong>Under the Hood</strong>
<p>The plugin's architecture involves three components. First, a front-end form built with HTML and JavaScript to collect user input. Second, a back-end PHP function, typically triggered via AJAX, that receives this input. This function is the core of the plugin; it securely stores the API key, constructs the prompt for the LLM, and uses cURL or the WordPress HTTP API (`wp_remote_post`) to send the request to the AI provider's endpoint. Third, it handles the response, parsing the generated text from the JSON object and sending it back to the front-end to be displayed to the user. Error handling is critical to manage API timeouts, authentication failures, or rate limiting.</p>
<strong>The Trade-off</strong>
<p>You are trading a simple, self-contained website for one with a powerful but complex and potentially expensive external dependency. The feature adds a unique selling point, but it also introduces a point of failure outside of your control—if the third-party API is down, your feature is broken. Furthermore, there are significant privacy implications, as you are sending user data to an external service. The alternative is to not offer this feature at all, or to build a much simpler, template-based generator that doesn't rely on an AI model. This plugin is a good fit for a business whose core value proposition is closely tied to career services, but it's a risky and unnecessary complication for most websites.</p>

<h3>Ciseco – Hydrogen Shopify’s Headless Store theme</h3>
<p>Moving beyond the monolithic architecture of platforms like WordPress and standard Shopify, Ciseco represents a shift towards a headless, Jamstack-based approach to e-commerce. It's not a theme in the traditional sense but a starter kit for building a Shopify storefront using Hydrogen, which is Shopify's React-based framework. This architecture decouples the front-end (the customer-facing website) from the back-end (Shopify's e-commerce engine), communicating between the two via APIs.</p>
<img src="https://gpldock.com/wp-content/uploads/2026/01/urlhttps3A2F2Fmarket-resized.envatousercontent.com2Fthemeforest.net2Ffiles2F6612512472FPreview2F01_preview.__large_preview.jpg" alt="Ciseco - Hydrogen Shopify's Headless Store theme">
<p>The primary driver for adopting a headless architecture is the pursuit of ultimate performance and flexibility. By building the front-end as a modern React application, developers can create lightning-fast, app-like user experiences that are difficult to achieve with traditional template-based systems. However, this comes at the cost of significantly increased development complexity.</p>
<strong>Simulated Benchmarks</strong>
<ul>
    <li><strong>Time to First Byte (TTFB):</strong> Extremely fast (<50ms) when deployed on a modern hosting platform like Vercel or Netlify, as the pages are often pre-rendered.</li>
    <li><strong>LCP/FCP:</strong> Can be under 1.5 seconds, thanks to server-side rendering (SSR) and static site generation (SSG) capabilities of Hydrogen.</li>
    <li><strong>JavaScript Payload:</strong> Can be heavy. A full React application is delivered to the client, though frameworks like Hydrogen are optimized for code splitting and hydration. Initial bundle sizes can be 150-300KB.</li>
    <li><strong>Build Times:</strong> Non-zero. Unlike a traditional theme that is just "activated," a headless site must be built and deployed, a process that can take several minutes.</li>
</ul>
<strong>Under the Hood</strong>
<p>Ciseco is a collection of React components, page templates, and configurations built on top of Hydrogen. It uses Shopify's Storefront API to fetch product data, manage carts, and handle checkouts. The code is structured around modern JavaScript principles, using tools like Tailwind CSS for styling and GraphQL for efficient data querying. A developer would clone this starter kit, connect it to their Shopify store's API credentials, customize the components, and then deploy the final application to a specialized hosting provider. The Shopify admin panel is still used for managing products, orders, and customers, but it no longer controls the look and feel of the website.</p>
<strong>The Trade-off</strong>
<p>The trade-off is profound: you are sacrificing the simplicity and ease-of-use of an integrated platform for unparalleled performance and front-end control. This is not a solution for small businesses or agencies without dedicated JavaScript developers. The cost of development and maintenance is significantly higher. However, for large-scale e-commerce brands where a 100ms improvement in load time can translate to millions in revenue, the investment in a headless architecture is not just justifiable, it's a competitive necessity. Ciseco serves as an accelerator for that process, but the underlying architectural decision is the real commitment.</p>

<h3>Image Reveal Hover Effects Addon For Elementor</h3>
<p>In the crowded market of Elementor addons, specialization is key. The Image Reveal Hover Effects Addon is a hyper-focused tool that does one thing: it provides a set of visual effects where one image transitions to another on mouse hover, often accompanied by a sophisticated animation. This is commonly used in portfolios to show a "before and after" state, or in product listings to reveal a different product view or colorway without the user having to click.</p>
<img src="https://gpldock.com/wp-content/uploads/2026/01/urlhttps3A2F2Fmarket-resized.envatousercontent.com2Fcodecanyon.net2Ffiles2F4156558252FPreview590x300.jpg" alt="Image Reveal Hover Effects Addon For Elementor">
<p>While seemingly simple, the implementation of such an effect has direct performance implications, primarily concerning asset loading. The effectiveness of the addon hinges on its ability to create a smooth, visually appealing effect without causing page jank or slowing down the initial page load by inefficiently loading the "hover" images.</p>
<strong>Simulated Benchmarks</strong>
<ul>
    <li><strong>Image Loading:</strong> The primary performance factor. Does it preload the hover image? If not, the first hover will have a noticeable lag. If it does, it increases the initial page weight.</li>
    <li><strong>JavaScript Dependency:</strong> May require a JavaScript library like `imagesLoaded` to ensure images are ready before an animation starts (~8KB). More complex effects might use GSAP (~50-100KB).</li>
    <li><strong>CSS Payload:</strong> Minimal, likely under 15KB for the animation styles.</li>
    <li><strong>Layout Shift (CLS):</strong> Low risk, as the effect typically happens within a fixed-size container and doesn't alter the flow of the document.</li>
</ul>
<strong>Under the Hood</strong>
<p>There are two common architectural patterns for this effect. The simpler method uses pure CSS: two `<img>` tags are placed in a container, with the second one hidden (`opacity: 0`). On hover, the opacity is transitioned to `1`. This is lightweight but lacks sophistication. The more advanced method, likely used by a dedicated addon, uses JavaScript and a WebGL shader (via a library like `three.js` or a smaller, specialized library) to create distortion or particle effects. The widget in Elementor would provide options to select the two images and choose the animation style. A well-designed widget will also include options for image preloading and apply `loading="lazy"` attributes to the images to ensure they don't block the initial render.</p>
<strong>The Trade-off</strong>
<p>The trade-off is between a static image and a more engaging, interactive element at the cost of increased page weight and complexity. Compared to the iHover addon discussed earlier, this is a more specialized tool. While iHover applies effects to a container, this addon is specifically about transitioning between two images. Using this tool is more efficient than trying to jury-rig the same effect with a generic slider or animation plugin. For a portfolio or design-forward site where this specific interaction adds significant value, it's a reasonable choice, provided the agency ensures the hover images are properly optimized and preloaded to create a seamless user experience.</p>

<h3>
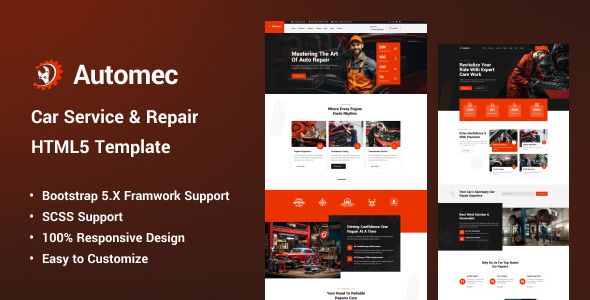
Automec – Car Service & Repair HTML5 Template</h3>
<p>Niche HTML templates like Automec exist to serve a very specific market segment—in this case, auto repair shops, car dealerships, and service centers. Unlike multipurpose templates, a niche template is pre-configured with the design language, layout patterns, and specific content sections (e.g., service listings, appointment booking forms, technician profiles) that are relevant to its target industry. This provides a massive head start for agencies building websites for clients in that vertical.</p>
<img src="https://gpldock.com/wp-content/uploads/2026/01/urlhttps3A2F2Fmarket-resized.envatousercontent.com2Fthemeforest.net2Ffiles2F5626586872Fpreview2F00_Preview.__large_preview.jpg" alt="Automec - Car Service & Repair HTML5 Template">
<p>Architecturally, the value of a niche template is that it should, in theory, be leaner than a multipurpose one. It doesn't need to include components for a dozen different industries. However, they are often still built on the same bloated foundations, just with a more focused "skin." A critical evaluation is necessary to determine if it's truly optimized or just a repurposed multipurpose template.</p>
<strong>Simulated Benchmarks</strong>
<ul>
    <li><strong>CSS/JS Payload:</strong> Should be smaller than a multipurpose template, ideally under 150KB for CSS and 200KB for JS, but this is not guaranteed.</li>
    <li><strong>Key Dependencies:</strong> Likely includes Bootstrap, jQuery, a slider plugin (for vehicle showcases), and a date/time picker for booking forms.</li>
    <li><strong>Page Speed Insights (Mobile):</strong> A good niche template should be able to score 70-80 out of the box for a simple page, whereas a multipurpose template often starts in the 40-50 range.</li>
    - <strong>Component Relevance:</strong> High. Most of the included JS plugins and CSS styles should be directly applicable to the project, reducing the amount of code that needs to be purged.
</ul>
<strong>Under the Hood</strong>
<p>The template's structure will be standard HTML5 and CSS3, likely built on a responsive grid framework. Special attention should be paid to the booking form. A static HTML template cannot process a booking; the provided form is just a UI element. A developer must wire this up to a back-end service, whether it's a PHP script that sends an email, an integration with a third-party booking system API, or a custom back-end built for the client. The quality of the template can be judged by how clean and semantic its HTML is, making it easier to break apart into reusable components when converting it to a dynamic WordPress or other CMS theme.</p>
<strong>The Trade-off</strong>
<p>You are trading the flexibility of a multipurpose template for the speed and relevance of a niche one. For an agency that frequently serves clients in the automotive industry, having a template like Automec as a starting point is a no-brainer. It can cut development time by 30-50% compared to starting from a generic template or from scratch. The risk is that the design may be too generic within its niche, looking similar to other local competitors who used the same template. The key is to use it as a robust wireframe and component library, not as a final, uncustomized product.</p>