# How to build a "Home Winery Assistant"
By Xi Chen (xc222as)
>This IoT project uses Pycom devices to build a home wiery assitant which detects the temperature and the vibrations caused by bubbling inside the fermentation tube, therefore tells the user how the fermentation process is going on by visualizing it on IoT platforms.
:::info
:bulb: Building this project will take approximately a half day depending on how well you have related knowledge.
:::
## Objective
- **Why you chose the project**
I like drinking wine and I usually buy cheaper wine when I travel and take them back home to Sweden. Under Corona pandemic, it became hard to travel, therefore I began to make own wine at home. When it came to the course project, I was thinking if there is any project I can do to combine wine-making and what I learned in this course. Therefore I chose this project.
- **What purpose does it serve**
The final product of this project will help to detect the vibrations caused by bubbling in the fermentation tube, and thereby show the fermentation process by visualizing the detected vibrations. The user can have an overview of the whole process and be aware when fermentation is finished. Moreover, the temperature will also be monitered and visualized during the whole process.
- **What insights you think it will give**
This project gives us a new perspective on how modern technology can be helpful in our daily life, for example in home wine making. Even though this is not high technology, it still is professional and full of fun. On the other hand, the project shows us that it is not hard to apply IoT technology at all and everyone has the capability to build something which can be really interesting.
## List of material
The following materials are used in this project:
| | Name | Function |
|:---:| ------------- |:---------------------- |
|1| LoPy4|Micropython-programmable microcontroller |
|2| Expansion Board | Enable LoPy4 to connect with USB and pins|
|3| Breadboard |A board for easier connections |
|4| Jumpwire | Connect different items/pins |
|5| Temperature Sensor MCP9700 | Measure temperature |
|6| Vibration Sensor with high sensitivity SW-18010P | Detect vibrations |
You need just to buy the following items instead, since the "LNU-bundle" includes item 1-5 in the table above:
| Picture | Name | Price | Link |
|:---:| :--------- |:-------- |:----:|
|N/A| LNU – 1DT305 Tillämpad IoT – LoPy4 and sensors bundle | 949 SEK |[:link:][bundle]|
|| Vibration Sensor with high sensitivity | 42 SEK |[:link:][vibration_sensor]|
[bundle]:
https://www.electrokit.com/produkt/lnu-1dt305-tillampad-iot-lopy4-and-sensors-bundle/
[Vibration_sensor]:
https://www.electrokit.com/produkt/vibrationssensor-hog-kanslighet/
Besides these, a micro-USB cable together with a USB charger or a powerbank is needed to supply power to the devices.
## Connecting everything together
Here is a picture of how everything should look like after connecting together.

- **Insert your LoPy4 development board into the expansion board.**
Make sure that the reset button and RGB LED are above the USB connector.
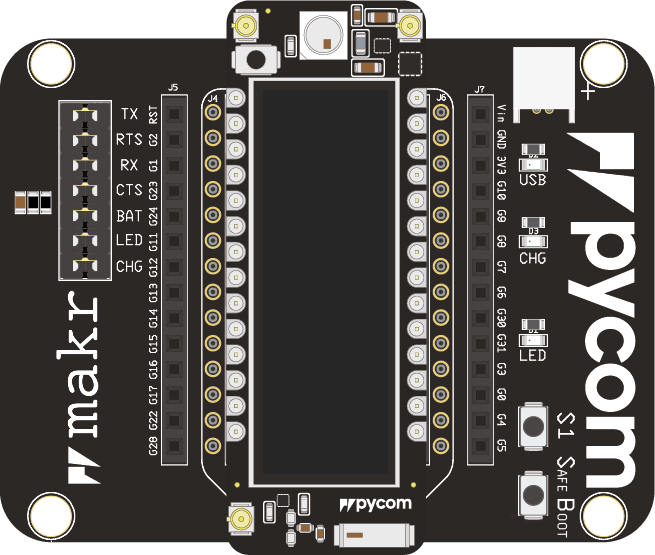
- **Connect the expansion board and the breadboard.**
The breadboard contains 2 longer rails on each side. Choose one side, connect the two rails seperately to V~dd~ (Positive voltage, operating voltage, in this case 3V3) and GND (ground, 0V). Then you can connect all your sensors on the breadboard.
- **Connect the temperature sensor MCP9700.**
The sensor has 3 pins. Insert it on the breadboard. Connect the positive voltage leg to 3V3, the ground leg to GND and the output leg to P15.

- **Connect the vibration sensor SW-18010P**
The sensor has 3 pins. Insert it on the breadboard. Connect the positive voltage leg to 3V3, the ground leg to GND and the output leg to P16, in the similar way as connecting the temperature sensor. This sensor has a potentiometer on it, you can rotate it to adjust the sensitivity.
:::info
:bulb: This sensor works also on 5V power. If you need to connect it to 5V, you can connect it to the Vin port on the expansion board.
:::
:::info
:bulb: If you have suitable jumpwires, you can separate the vibration sensor from the breadboard and then bind the sensor on the fermentation tube, so that it detects the vibrations more easily.
:::
- **Insert a USB cable into the expansion board**
When you need to update the firmware or upload the codes, connect the cable on your computer. Otherwise, you can connect it to your USB charger or a powerbank and put all equipment on the lid of the wine container, close to the fermentation tube.
## Computer setup
In order to setup your computer, there are a couple of things you need to install on your operating system. The operating system I have on my computer is Windows 10. I have also tried to install everything on Ubuntu 16 and it worked well.
- **Install Node.js**
Firstly, you need to install Node.js on your computer. You can download it at: [:link:https://nodejs.org/en/](https://nodejs.org/en/). Normally, the compatible version for your system is already shown when you enter the website. If it does not, you need to selected a compatible version under "Downloads". Choose the "LTS" version to downloa which is recommended for most users. Run the downloaded file and follow the instructions to finish installation of Node.js.

:::info
:bulb: If you use Ubuntu or debian, you can excute the following command in the terminal to install Node.js:
```linux
sudo apt install nodejs
```
:::
Then you need to choose an IDE (stands for "Integrated Development Environment") between Atom and VS Code to work with. The IDE chosen for this project is Atom.
:::info
:bulb: If you choose to use VS Code as your IDE, you can skip the following part "Install Atom", and follow the instructions on this [:link: link](https://hackmd.io/a1Nq_9kqR0CZBrYL1xNJDg) if you use Windows, or this [:link: link](https://hackmd.io/@lnu-iot/By-h1SRou) if you use Ubuntu/Linux
:::
- **Install Atom**
To install Atom is simple. Basically you need to just go to [:link:https://atom.io/](https://atom.io/), download the installation file, run the downloaded file to install.

:::info
:bulb: On Atom's official website, there is a complete instruction on how to install Atom. More detailed information can be found there. [:link:](https://flight-manual.atom.io/getting-started/sections/installing-atom/)
:::
The next step is to install the Pymakr plugin for your IDE.
- **Install Pymakr Plugin for Atom**
The basic steps to install Pymakr is to open Atom, and find "file > settings > Install" or just press "Install a Package" on the welcome guide.
Search for Pymakr and select the official Pycom Pymakr Plugin.
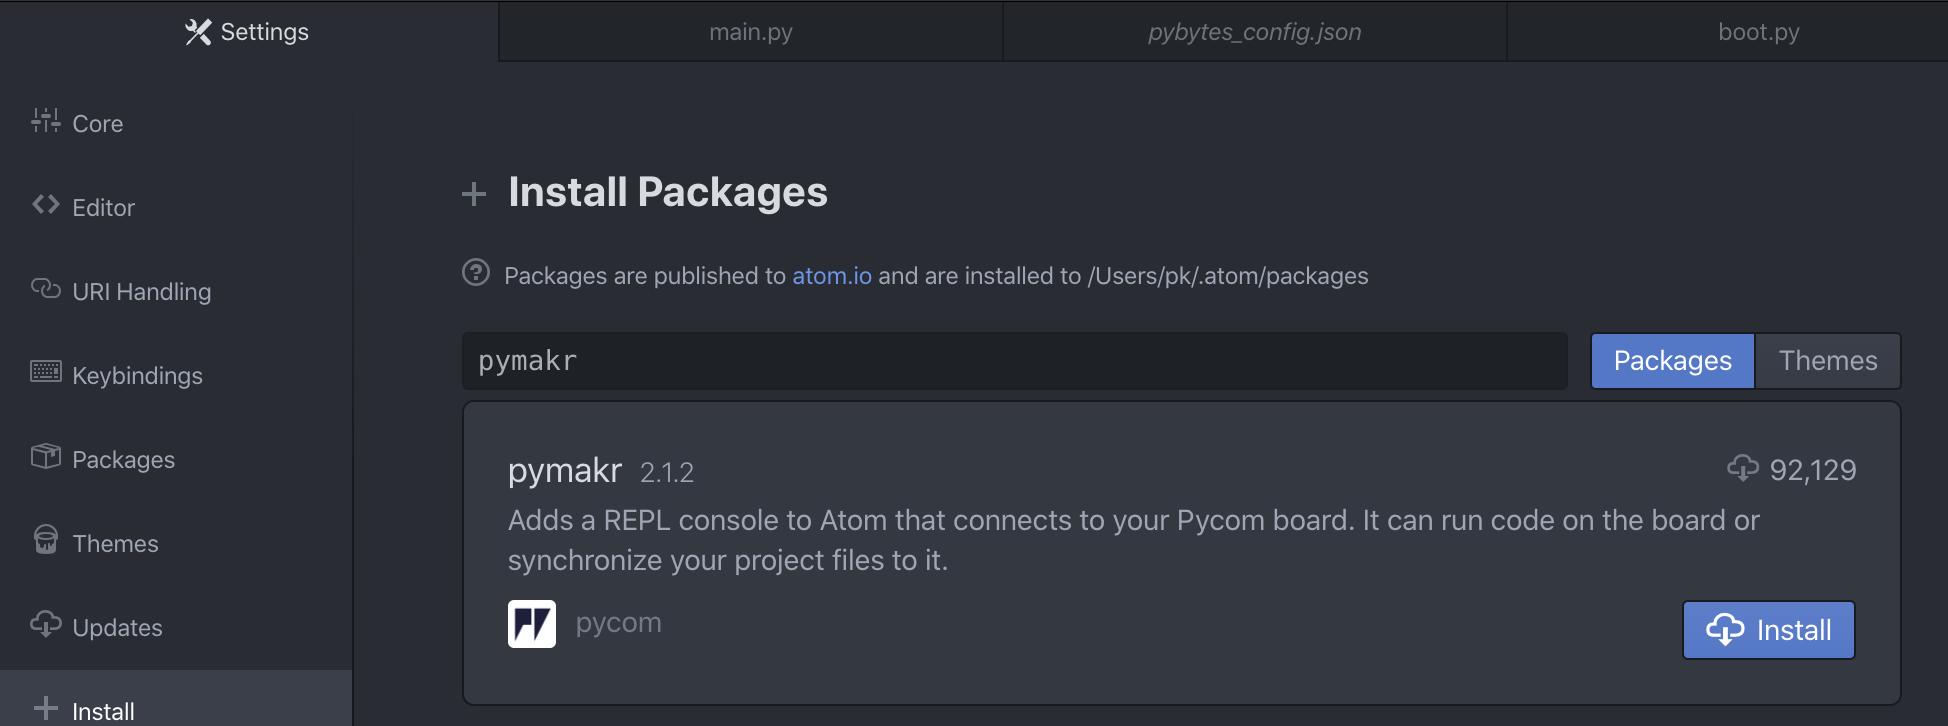
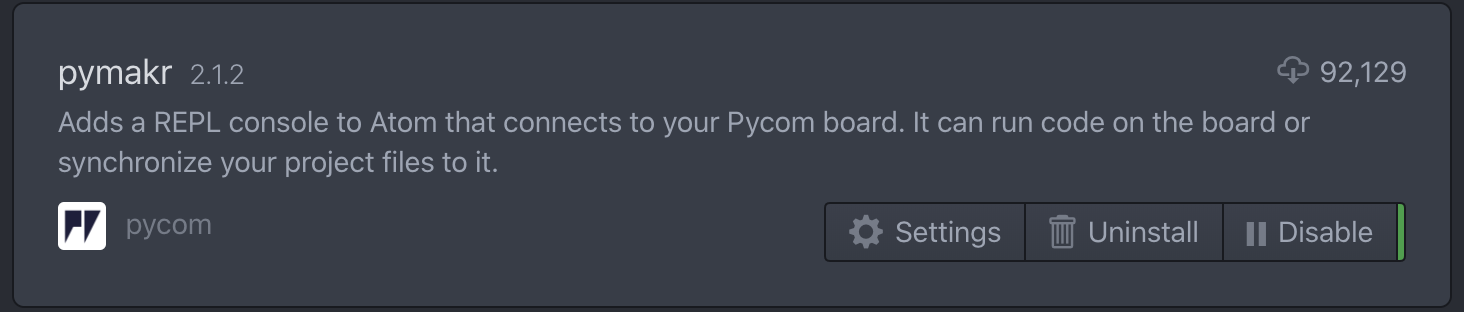
Click the "Install" button, then it should start installation. And when it is done, you should be able to see this:
However, I encounted errors as the following picture shows when installing Pymakr, which means that you need to install Python and Visual Studio on your computer. Follow the next two steps to install them, and them come back to this step and install Pymakr again.

- **Install Python** (if you encounter the errors mentioned above)
Visit this [:link: link](https://www.python.org/downloads/release/python-395/), choose a compatiable version of Python at the bottom of the page, download, and run it to install. The one which is compatiable to my system is [:link: Windows installer (64-bit)](https://www.python.org/ftp/python/3.9.5/python-3.9.5-amd64.exe) During installation, it is important that you check the box saying "Add to PATH".
- **Install Visual Studio Community**
Go to [:link: https://visualstudio.microsoft.com/downloads/](https://visualstudio.microsoft.com/downloads/), download Visual Studio 2019 Community (The free version) and run the downloaded file to install it. During installation, you need to check "Desktop development with C++", as shown in the picture below.

Restart your computer and then go back to the previous step to install Pymakr again, which should work well now. If you connect your Pycom device to the computer via USB now, you should be able to see that it connects successfully in Atom with Pymakr Plugin. If you encounter errors when connecting, you may find an answer [:link: here](https://hackmd.io/@lnu-iot/rk4qNlajd#Issues-per-OS).
Now you can create a project in Atom. Upload or download your code just by clicking the upload button or the download button. Remember to do a safe booting every time before you upload or download the code, which will prevent the device from running any code or connect to any wireless network, so that upload and download can be run successfully.
:::info
:bulb: Find more information about safe booting at [:link: https://docs.pycom.io/gettingstarted/programming/safeboot/](https://docs.pycom.io/gettingstarted/programming/safeboot/)
:::
It is always good to update your device's firmware to the lastest version. And you can update your Lopy4's firware together with a Pybytes registration, which makes your device up-to-date and also be able to connect to WiFi automatically after booting.
- **Register your device at Pybytes**
Firstly, you need to register an account at [:link: Pybytes](https://pybytes.pycom.io/) and then log in.
Click "Add Device" and select "LoPy4". Choose "WiFi" in the next step and fill in your WiFi credentials in the subwindow. Then give your device a namen and save it. You can see that your devie is successfully added now.
If you go to the profile page of the added device, you will see a tab named "Provision". There, you can get the Pybytes activation token which will be used in the next step when you provision your device.

:::info
:bulb: Check [:link: this official page](https://docs.pycom.io/pybytes/gettingstarted/) if you need more details.
:::
- **Update Lopy4's firmware with Pybytes registration**
:::info
:bulb: Official information about how to update the firmware can be found [:link: here](https://docs.pycom.io/updatefirmware/device/)
:::
Download the firmware updating tool at [:link: https://docs.pycom.io/updatefirmware/device/](https://docs.pycom.io/updatefirmware/device/)
Connect your device via USB with safe booting. Make sure you have shut down your IDE software Atom or VS Code. Turn on the downloaded tool.
Use default settings in the tool, but remember to select "Force update pybytes registration" before you go to next step.

Fill in the Pybytes activation token which you got in the previous step.

Continue until the updating is finished. :warning: Never plug out your device or shut down your any thing under updating process.
Until now, a new file named "pybytes_config.json" should be created on your device which contains your WiFi information. And your device should be able to connect to WiFi automatically after rebooting, and you are able to send data from your device to Pybytes.
## Platform
Both Pybytes and Ubidots are tested in this project. However, it turned out that Ubidots was a better choice, since it is easier to use and more functionalities are provided by the platform. Ubidots is a cloud platform for IoT. It can receive data remotely from IoT devices and visualize the data on the dashboard designed by the user. The dashboard provided by Ubidots is easier to manipulate and it works on both desktop and mobile phone. So the user can check the received the data and visualization whereever their is Internet connection. The free version of Ubidots is enough for this little project. There is no need to pay for an advanced version. Click this [link](https://ubidots.com/) to get a free account at Ubidots.
:::info
:bulb: Here’s an official guide on how to send data to Ubidots with webhooks from your Pycom device: [:link:][ubidots]
:::
[ubidots]:https://help.ubidots.com/en/articles/961994-connect-any-pycom-board-to-ubidots-using-wi-fi-over-http
## The code
The programming code is divided into several files:
- **boot.py** which will run every time directly after the device starts/boots. The following code needs to be added in order that sending data to Ubidots works.
```python=1
from machine import UART
import machine
import os
uart = UART(0, baudrate=115200)
os.dupterm(uart)
machine.main('main.py')
```
- **pybytes_config.json** which contains the information for wireless connection, etc.
This file is automatically created after you update the firmware with “Force update pybytes registration”. However, you can update your WiFi SSID/password in this file if needed.
- **A directory "lib"** should be created in order to store related library files. Create a file named **urequests.py** in this directory which is used for sending data to Ubidots. Copy and paste the library from this [link :link:](https://github.com/jotathebest/micropython-lib/blob/master/urequests/urequests.py) into the urequests.py file.
- **main.py** which contains the main code.
The main code contains mainly six parts which represents six different functionalities.
- **Code for basic setup**
In this part of the code, necessary libraries are imported and WiFi connection is established if you choose to connect to WiFi manually.
```python=
import urequests as requests
import machine
import time
import pycom
from machine import ADC
from machine import Pin
```
:::info
:bulb: If you want to connect to WiFi manually, use the following code.
```python=1
import WLAN
wlan = WLAN(mode=WLAN.STA)
wlan.antenna(WLAN.INT_ANT)
# Assign your Wi-Fi credentials
wlan.connect("your_WiFi_SSID", auth=(WLAN.WPA2, "your_WiFi_password"), timeout=5000)
while not wlan.isconnected ():
machine.idle()
print("Connected to Wifi\n")
```
:::
- **Code for temperature measuring**
This part contains code related to the temperature sensor, which enables the sensor return temperature value to the device.
```python=1
adc_temp = ADC()
apin_temp = adc_temp.channel(pin='P15')
def get_temp():
millivolts = apin_temp.voltage()
celsius = -(millivolts - 500.0) / 10.0
return celsius
```
- **Code for vibration detecting**
This part contains code related to the vibration sensor, which enables the sensor return value of how many vibrations are detected.
```python=1
VibPin = 'P16'
Pin(VibPin, mode=Pin.IN)
adc_Vib = ADC(bits=10)
apin_Vib = adc_Vib.channel(attn=ADC.ATTN_11DB, pin=VibPin)
def get_vib():
count = 0
time_start = time.time()
while time.time() < time_start + 60: # The sensor will detect vibrations in 60 seconds
val = apin_Vib()
if val != 0:
count += 1
return count
```
- **Code for transmitting the data**
The code here is to send the collected data to the cloud platforms. In my project, the data is transmitted to both Ubidots and Pybytes, just for comparing the two platforms.
```python=1
# Code for Unbidots
# Part of the code is from the official guide provided by Ubidots:
# https://help.ubidots.com/en/articles/961994-connect-any-pycom-board-to-ubidots-using-wi-fi-over-http
TOKEN = "XXXXXXXXXXXXXXXXXXXXXXX" # Put here your Ubidots TOKEN
# Builds the json to send the request
def build_json(variable1, value1, variable2, value2):
try:
data = {
variable1: {"value": value1},
variable2: {"value": value2},
}
return data
except:
return None
# Sends the request. Please reference the REST API reference https://ubidots.com/docs/api/
def post_var(device, value1, value2):
try:
url = "https://industrial.api.ubidots.com/"
url = url + "api/v1.6/devices/" + device
headers = {"X-Auth-Token": TOKEN, "Content-Type": "application/json"}
data = build_json("temp", value1, "count", value2, "", value3)
if data is not None:
print(data)
req = requests.post(url=url, headers=headers, json=data)
return req.json()
else:
pass
except:
pass
```
:::info
:bulb: Follow this [link :link:](https://help.ubidots.com/en/articles/590078-find-your-token-from-your-ubidots-account) if you have difficulties to find your Ubidots TOKEN.
:::
```python=1
# Code for Pybytes
def send_to_pybytes(celsius, count):
pybytes.send_signal(1, celsius)
pybytes.send_signal(2, count)
return Noun
```
- **Code for LED blinking**
This part of the code is not mandatory but is just for making the user have better control over what the device is doing at the moment.
When the device is detecting the vibrations, the LED turns red;
```python=1
pycom.heartbeat(False)
def turn_red():
pycom.rgbled(0x130000) # Red
```

When sending data to Ubidots (or Pybytes), it turns blue;
```python=1
def turn_blue():
pycom.rgbled(0x000013) # Blue
```

And when idling, it turns green.
```python=1
def turn_green():
pycom.rgbled(0x001300) # Green
```

- **Code for controlling the whole flow**
```python=1
while True:
turn_red() # Red
celsius = get_temp()
count = get_vib()
turn_blue() # Blue
send_to_pybytes(celsius, count)
print("Data sent to PyBytes!")
post_var("pycom", celsius, count)
print("Data sent to Ubidots!")
turn_green() # Green
time.sleep(58) ```
## Transmitting the data / connectivity
- **How often is the data sent?**
The fermentation process varies actually not so much within 2 minutes, so I have programmed so that the device detects and collects data in one minute, and then pause for one minute, which will decrease unnecessary device running, power consuming and over-frequent data sending. In this case, the data is sent every other minute.
- **Which wireless protocols did you use (WiFi, LoRa, etc …)?**
WiFi is used in this project, since the device is located inside the house and WiFi is available. Moreover, Lora is not available in my region, so I could not test it.
- **Which transport protocols were used (MQTT, webhook, etc …)**
Webhooks (or so-called POST-requests) is used in this project in order to sent data to Ubidots.
## Presenting the data
A screen-captured dashboard example from Ubidots in the middle of the fermentation process is shown below.

The dashboard contains four widgets:
- **Lately detected temperture** (up left)
A Thermometer which shows the exact lastest received temperature value with two decimal points.
- **Line chart which shows the detected temperature values during the whole process** (up right)
The Y-axis range is set to 25.5-27. However, it can be changed as you want.
- **Dot chart which shows the detected vibrations during the whole process** (down left)
The "Y-axis range" of this widget is set to 0-20000, because a lot of abnormal values which are extremely bigger than other values have been recorded, probably caused by the quality of the sensor or over-sensitiveness of the sensor. These values are thus hidden in the chart while only "normal" values are shown in the chart, which gives a perfect overview of the fermentation process.
- **Table which shows the values of detected vibrations** (down right)
A "values table" which shows all values of detected vibrations. No special settings are needed. Just set it up in the style you want.
Since the device detects vibrations in one minute and takes a break in one minute, it sends data to Ubidots every other minute. The data is saved in Ubidots and the dashboard updates also every other minute.
## Final results
As it is shown in the pictures from the dashboard, the fermentation process from day 2 to the day this tutorial was written was recorded. The fermentation is not totally finished until now. However, we still can see the trend from the pictures. There is unfortunately an empty gap on the pictures which refers to a approximately 4 hours' period when the powerbank was running out of power. However, it does not affact the overview of the process.

The chart above shows the detected temperature every other minute. It can be seen that the temperature was between 25.9 and 26.9 degrees during the whole detected period.

This chart shows the accumulated detected vibrations (which gave value "1") within a period of 60 seconds from the vibration sensor. After hiding those "abnormal" points, we can see a relatively perfect curve of detected vibrations caused by bubbling in the fermentation tube. Even though the process is not totally finished now, we can see that it will be finished soon from the curve. When the curve has gone down and stays stable for a period, we can know that the fermentation process is finished in the container.
## Future improvement
There are some points I think can be done in the future in order to make the device better.
- More LEDs can be added in the project in order to make it more user-friendly. For example, when the temperature increases or decreases to a abnormal level, an LED will blink as an alarm. When the amount of the detected vibrations drops to a stable level, a green LED will blink to tell the user that the fermentation process is finshed.
- Testing of using other type of sensors, for example a movement detecting sensor or sound detecting sensor, instead of vibration sensor can be implemented, in order to compare the final results.
- Replacing the powerbank and the cable by batteries in a battery case. Using a case outside the device in order to protect the device from water, dust, etc.
- Testing other wireless protocols, such as LoRa, instead of WiFi.
- Testing other platforms other than Ubidots or Pybytes for visualizing the data.
 Sign in with Wallet
Connect another wallet
Sign in with Wallet
Connect another wallet