# Sound Design Basics Guide
Utilizing pre-recorded material like Apple Loops and Ableton Live clips are a great way to create music for any project. However, if you find yourself wanting to design your own sounds from scratch, it is worth first understanding a few fundamentals.
We will use a software wavetable synthesizer called [Vital](https://vital.audio/) for our short sound design exploration (but any software synth will do). What's cool about it is that:
1. ***It is free***
2. You can use it as stand-alone software or inside any DAW on macOS or Windows (GarageBand, Logic Pro, Ableton Live etc.)
- So, any cool sound you make can be used anywhere!
Download Vital for free [here](https://vital.audio/).
The sound we will be making is this warm, pulsating drone pad:
<iframe style="border: 0; width: 100%; height: 52px;" src="https://bandcamp.com/EmbeddedPlayer/album=3081038187/size=small/bgcol=333333/linkcol=ffffff/artwork=none/transparent=true/" seamless><a href="https://danielbermudes.bandcamp.com/album/sounddesignbasics">SoundDesignBasics by Daniel Bermudes</a></iframe>
...this can be great for scoring podcasts too :)
Feel free to copy the settings in the images too!
## OSCILLATOR
We begin our exploration inside the Oscillator section. Here, we have *waveforms* that provide us all sorts of different sonic possibilities. There are countless wave shapes to choose from, but there are (4) fundamental ones:
<iframe style="border: 0; width: 100%; height: 42px;" src="https://bandcamp.com/EmbeddedPlayer/album=3303256570/size=small/bgcol=333333/linkcol=ffffff/artwork=none/track=4204695691/transparent=true/" seamless><a href="https://danielbermudes.bandcamp.com/album/waveform-examples">Waveform Examples by Daniel Bermudes</a></iframe>
<iframe style="border: 0; width: 100%; height: 42px;" src="https://bandcamp.com/EmbeddedPlayer/album=3303256570/size=small/bgcol=333333/linkcol=ffffff/artwork=none/track=2406044579/transparent=true/" seamless><a href="https://danielbermudes.bandcamp.com/album/waveform-examples">Waveform Examples by Daniel Bermudes</a></iframe>
<iframe style="border: 0; width: 100%; height: 42px;" src="https://bandcamp.com/EmbeddedPlayer/album=3303256570/size=small/bgcol=333333/linkcol=ffffff/artwork=none/track=489423611/transparent=true/" seamless><a href="https://danielbermudes.bandcamp.com/album/waveform-examples">Waveform Examples by Daniel Bermudes</a></iframe>
<iframe style="border: 0; width: 100%; height: 42px;" src="https://bandcamp.com/EmbeddedPlayer/album=3303256570/size=small/bgcol=333333/linkcol=ffffff/artwork=none/track=1880707037/transparent=true/" seamless><a href="https://danielbermudes.bandcamp.com/album/waveform-examples">Waveform Examples by Daniel Bermudes</a></iframe>
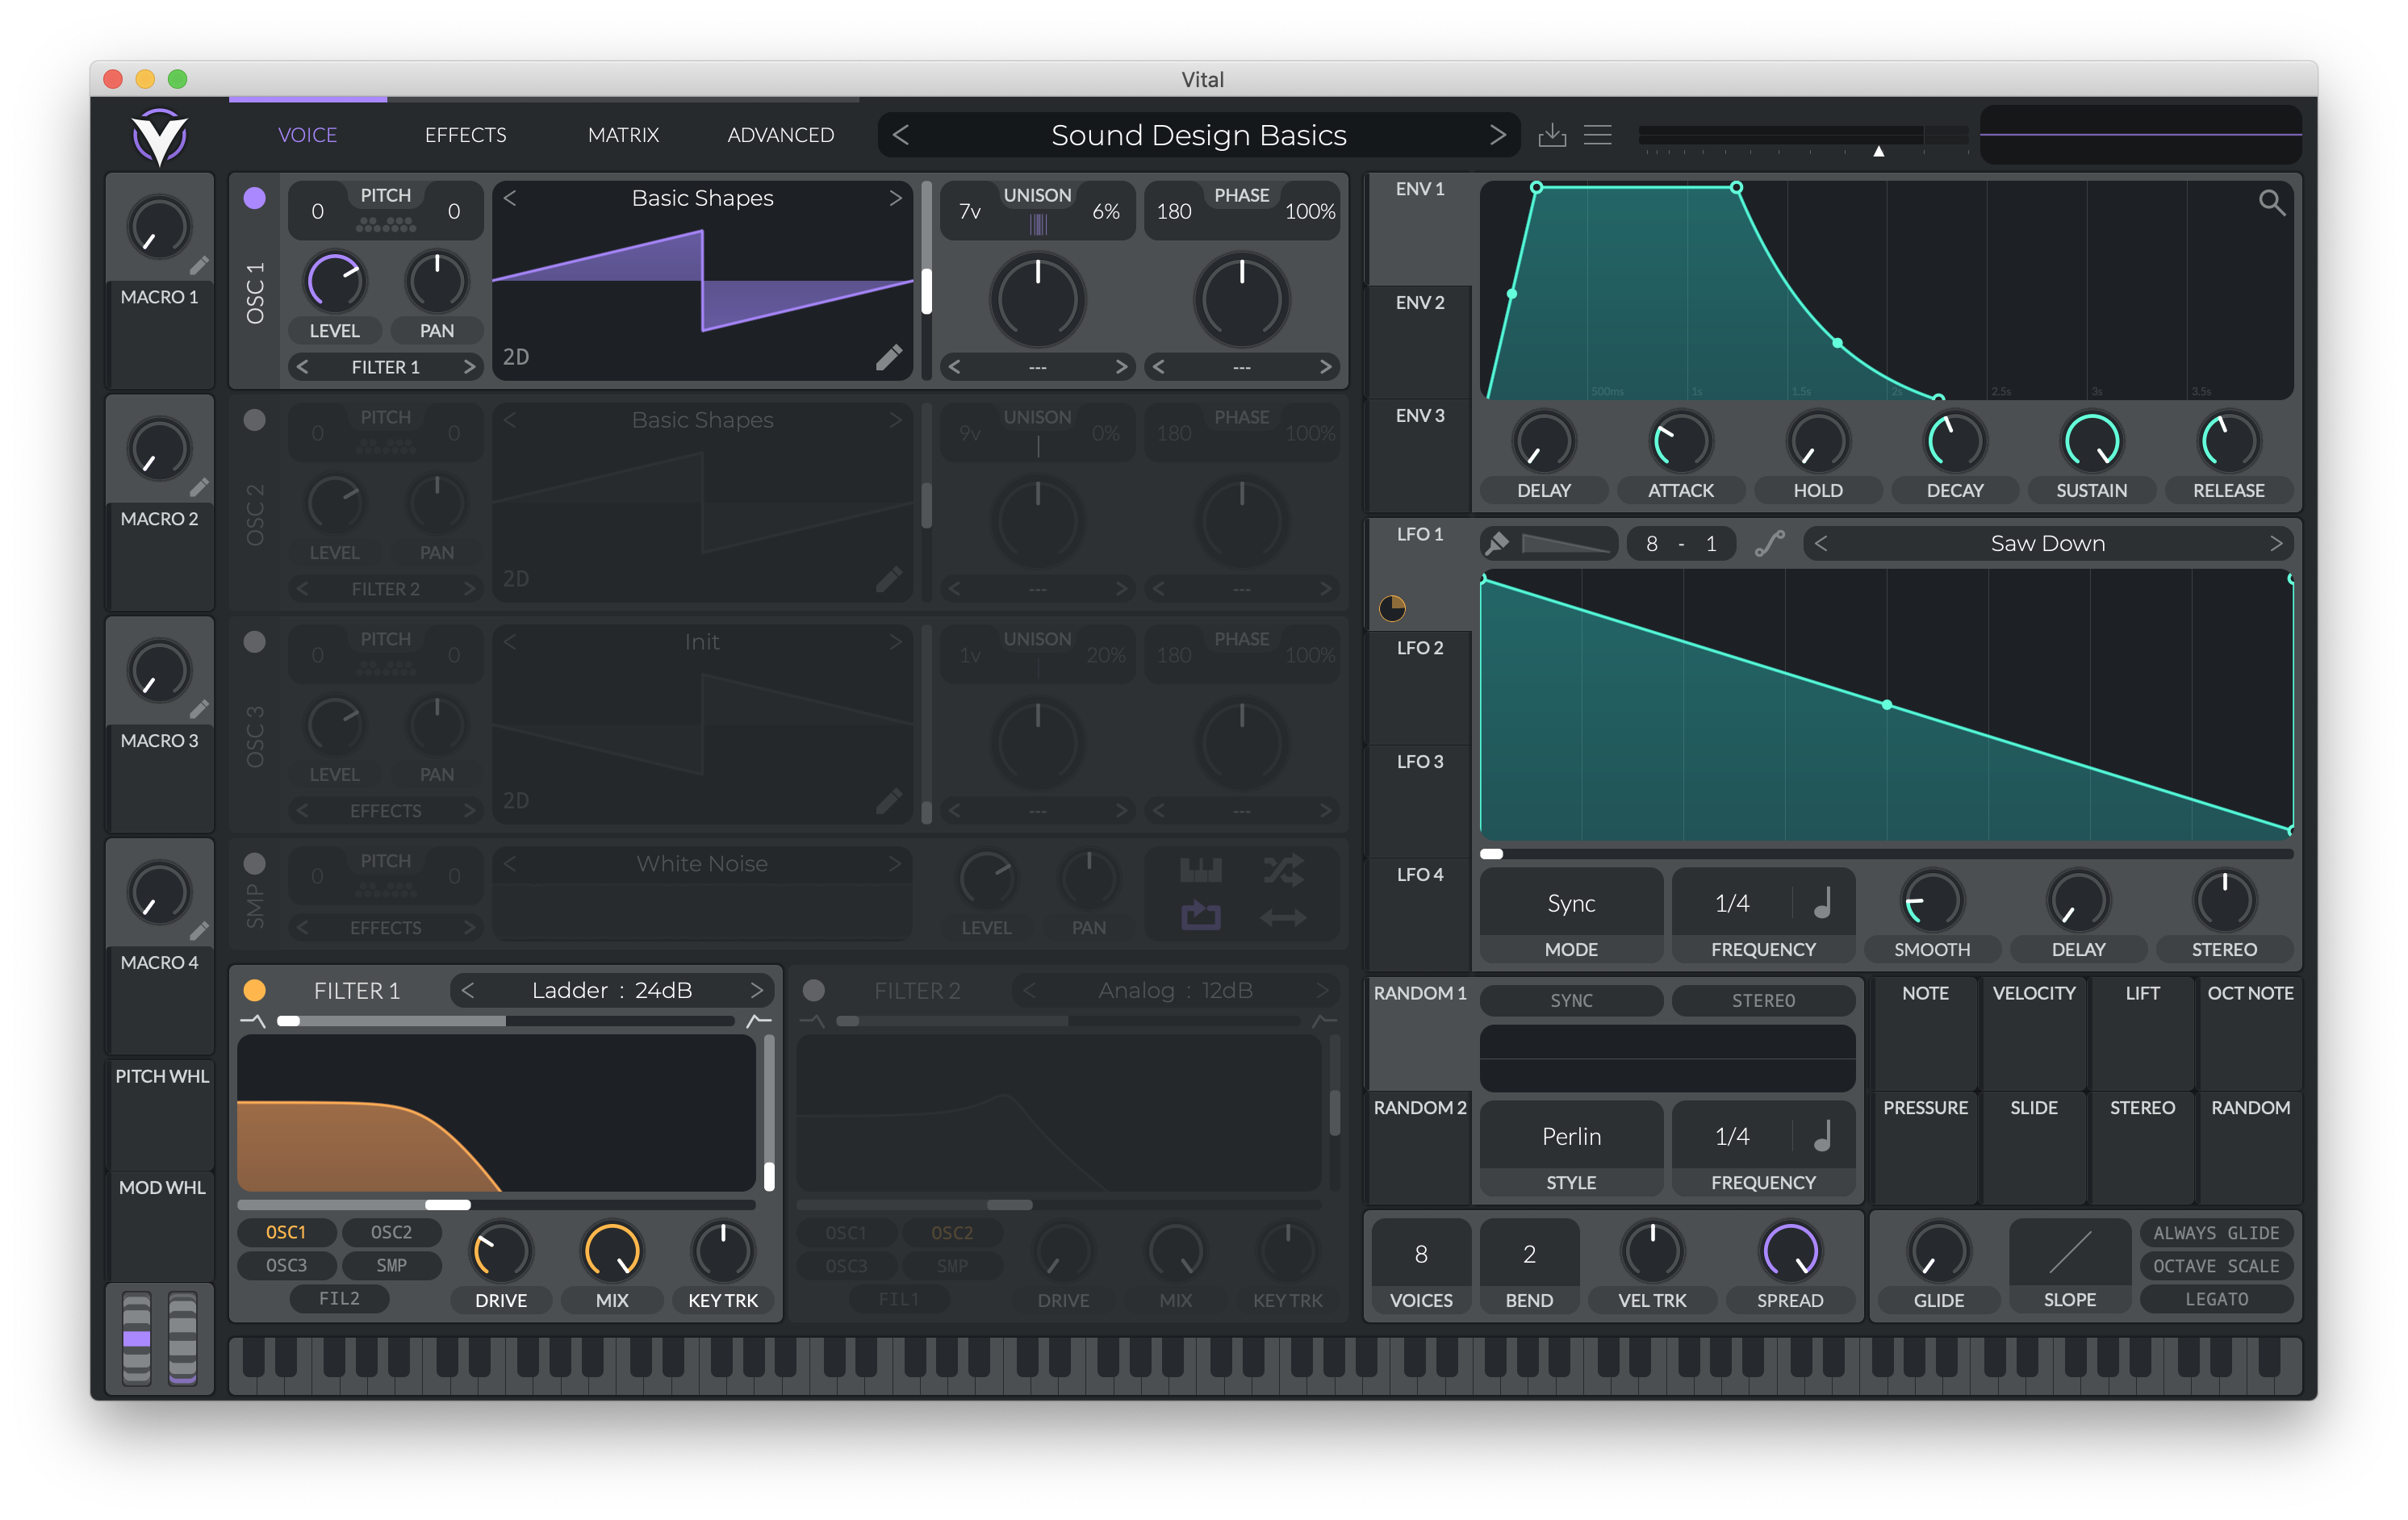
Since we have (3) available oscillators, we can have up to three waveforms playing at the same time! But, for our example we will just use Oscillator 1 to play a sawtooth wave.
- To find it, click the wavetable selector (default is 'Init') and select the 'Basic Shapes' category.
- Use the vertical white slider to scroll through the various waveforms until you find the sawtooth shape (pictured above)
- IMPORTANT: under [Unison](https://soundbridge.io/make-bigger-synths-using-unison/), increase the Voice count from '1v' to '7v', and decrease the Detune amount to a value around '6%' (this will make our synth sound "larger than life")
To play these sounds, use the keyboard at the bottom of Vital or your computer.
This what we have so far:
<iframe style="border: 0; width: 100%; height: 42px;" src="https://bandcamp.com/EmbeddedPlayer/album=3081038187/size=small/bgcol=333333/linkcol=ffffff/artwork=none/track=3801139475/transparent=true/" seamless><a href="https://danielbermudes.bandcamp.com/album/sounddesignbasics">SoundDesignBasics by Daniel Bermudes</a></iframe>
## FILTER
Filters allow for shaping the tone of a sound. There are (2) basic ones to know:
- Low Pass: Cuts away high frequency content, allowing lower frequencies to *pass* through
- High Pass: Cuts away low frequency content, allowing higher frequencies to *pass* through
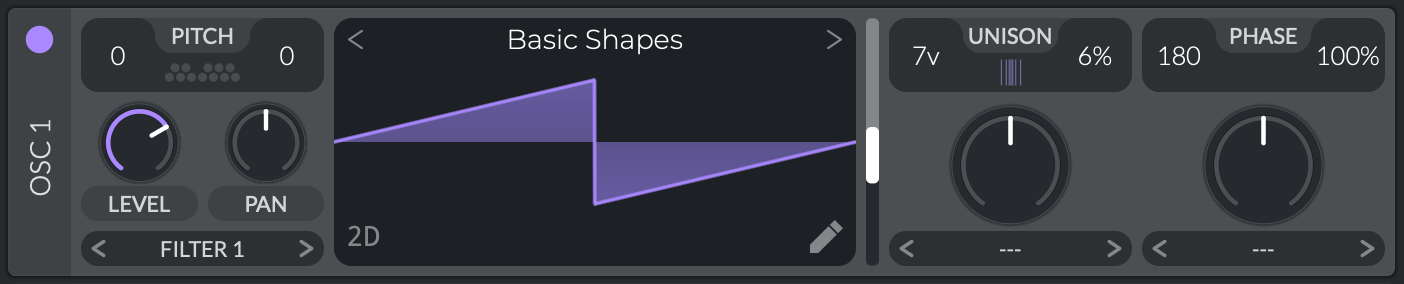
In our example we will use a lowpass ladder filter, a recreation of the classic Moog Ladder Filter developed by [Bob Moog](https://moogfoundation.org/about/humble-visionary/) in the 1960s.
- Turn on the filter (orange button on top-left corner)
- Select the 'Ladder' filter with a slope of '24db' in the drop-down menu.
- Increase the **Drive** parameter for a more saturated sound.
- To open or close the filter (like in our example), move the horizontal white slider.
The vertical white slider shown is the [Resonance](https://electronicmusic.fandom.com/wiki/Resonance#:~:text=In%20the%20types%20of%20filter,resonance%20setting%2C%20self%2Doscillate.) parameter. Adjusting this can create those sci-fi, alien tones (especially when opening/closing the filter). I left a very tiny amount for higher frequency detail.
Now we have this:
<iframe style="border: 0; width: 100%; height: 42px;" src="https://bandcamp.com/EmbeddedPlayer/album=3081038187/size=small/bgcol=333333/linkcol=ffffff/artwork=none/track=2536669177/transparent=true/" seamless><a href="https://danielbermudes.bandcamp.com/album/sounddesignbasics">SoundDesignBasics by Daniel Bermudes</a></iframe>
## ENVELOPE
In short, an envelope describes how a sound morphs over time. The most basic one to look at is the [ADSR](https://www.masterclass.com/articles/adsr-envelope-explained#what-is-an-adsr-envelope) envelope:
- Attack
- Decay
- Sustain
- Release
Every sound you hear goes through these (4) distinct stages. An envelope will allow us to modulate a parameter in Vital on a note-by-note basis (every new note will trigger the envelope again).
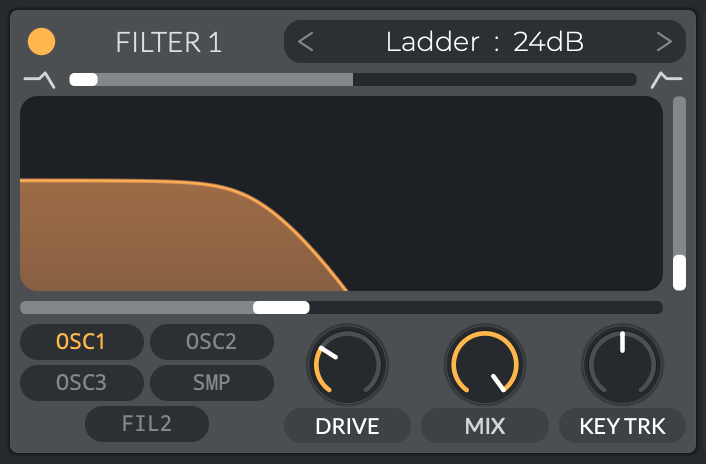
Inside **ENV 1**, specifically experiment with the 'Attack' and 'Release' knobs. Hear how the sound slowly fades in and out when you increase these two parameters.
*NOTE: **ENV 1** is specifically assigned to control the <u>amplitude</u> of the sound. **ENV 2 & 3** are left available for modulating other parameters in the synth.*
Check it out:
<iframe style="border: 0; width: 100%; height: 42px;" src="https://bandcamp.com/EmbeddedPlayer/album=3081038187/size=small/bgcol=333333/linkcol=ffffff/artwork=none/track=1043160850/transparent=true/" seamless><a href="https://danielbermudes.bandcamp.com/album/sounddesignbasics">SoundDesignBasics by Daniel Bermudes</a></iframe>
The details are in the beginning and end of the example. Listen carefilly how the sound comes in and goes out. Subtle, but effective.
## LFO
Similarly to an envelope, an LFO (Low Frequency Oscillator) allows us to modulate a parameter *continuosly* unlike an envelope that is triggered.
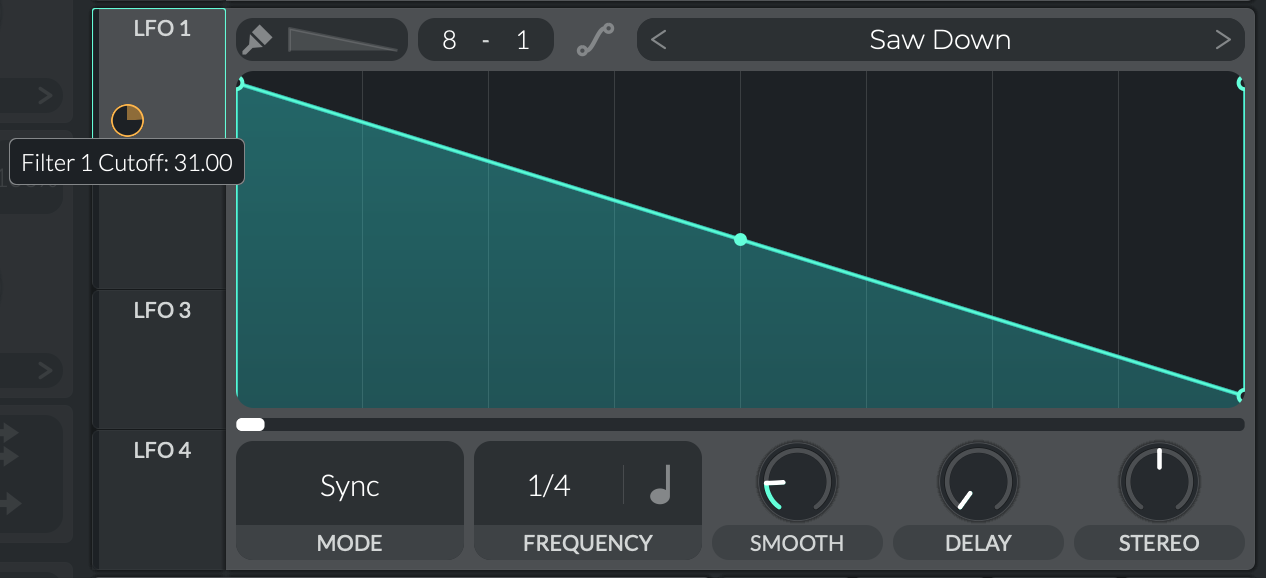
For our sound:
- Select 'Saw Down' in the drop-down menu
- Drag up in the Frequency box to change the *rate* of this pulsing effect.
- In the Mode box, select 'Sync'
- IMPORTANT: Hover over **LFO 1** until you see this icon:
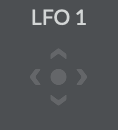
- Click, drag, and drop it over to the Filter section.
- This assignment will now allow **LFO 1** to modulate the filter, giving us that pulsating effect!
- You can change how much the LFO is modulating the filter by increasing/decreasing the orange circle (change it to taste)
Now hear it:
<iframe style="border: 0; width: 100%; height: 42px;" src="https://bandcamp.com/EmbeddedPlayer/album=3081038187/size=small/bgcol=333333/linkcol=ffffff/artwork=none/track=3411974193/transparent=true/" seamless><a href="https://danielbermudes.bandcamp.com/album/sounddesignbasics">SoundDesignBasics by Daniel Bermudes</a></iframe>
**Pro Tip:** Often times, a complex sound is the result of just one LFO or Envelope modulating various parameters on a synth. Experiment with connecting LFOs and Envelopes to different areas in Vital; you'll begin to develop cool things quickly.
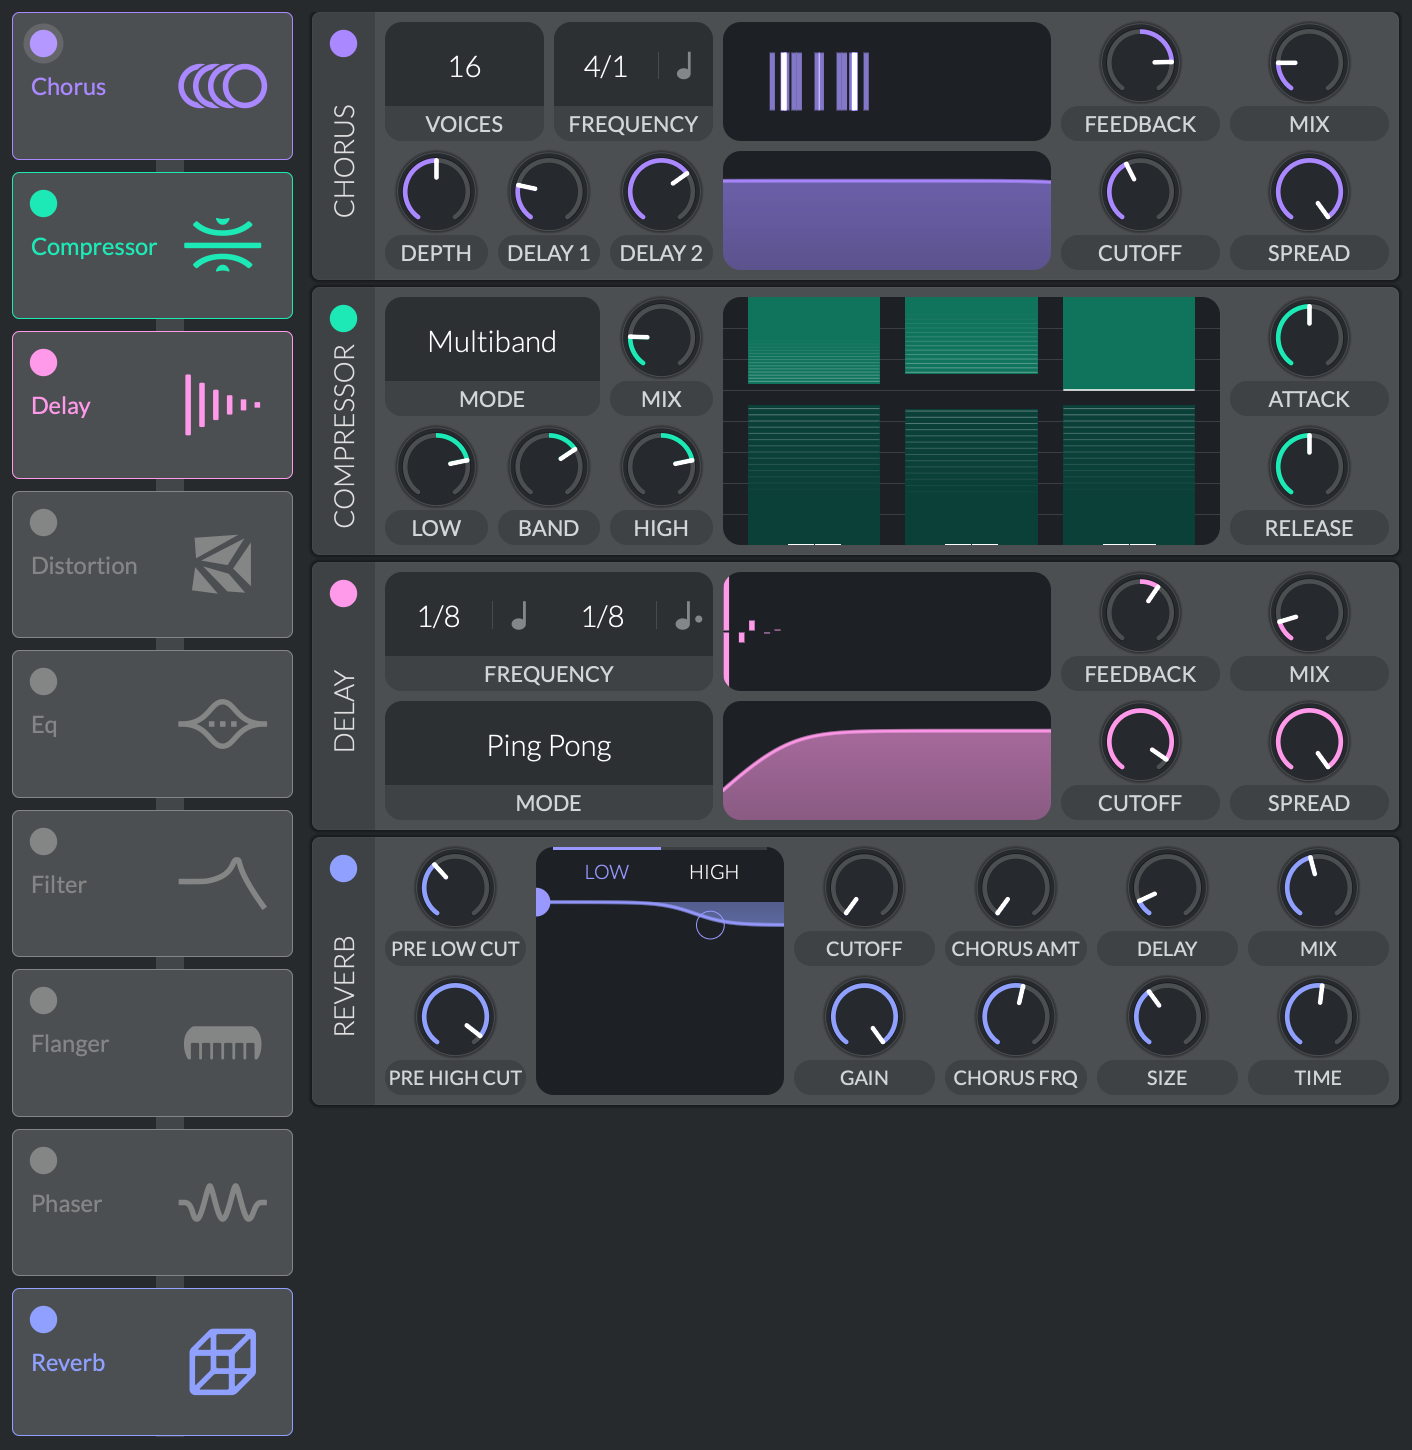
## EFFECTS
- [Chorus](https://www.izotope.com/en/learn/understanding-chorus-flangers-and-phasers-in-audio-production.html#chorus)
- [Compressor](https://www.izotope.com/en/learn/multiband-compression-basics-izotope-mastering-tips.html)
- [Delay](https://www.teachmeaudio.com/mixing/equipment/effects/delay)
- [Reverb](https://www.izotope.com/en/learn/reflecting-on-reverb-what-it-is-and-how-to-use-it.html)
In short, effects allow us to add even more character to a sound. Vital has a wide range of effects that add depth, space, thickness etc. in our sound design. Try them all in the Effects Tab!
The effects used in this example are these:
The result now sounds pretty similar to what we had in the beginning:
<iframe style="border: 0; width: 100%; height: 42px;" src="https://bandcamp.com/EmbeddedPlayer/album=3081038187/size=small/bgcol=333333/linkcol=ffffff/artwork=none/track=2991392659/transparent=true/" seamless><a href="https://danielbermudes.bandcamp.com/album/sounddesignbasics">SoundDesignBasics by Daniel Bermudes</a></iframe>
---
While designing something from scratch is obviously fun, do check out the available presets in the main drop down menu; they're super rad and valuable for learning!
For a complete user manual on Vital, click [here](https://static1.squarespace.com/static/606b615de4309721c5c34b58/t/606f4c46d0db2166e36a2b86/1617906759643/Vital+User+Manual+Hookline.pdf).
 Sign in with Wallet
Connect another wallet
Sign in with Wallet
Connect another wallet