# *Cleaning* Audio in Adobe Audition
When cleaning any piece of audio, it's common to pull up an equalizer effect as a starting point. EQ's are great indeed for boosting and cutting away specific frequencies. However, in a situation where a large amount of background noise is present in a recording, is there a better solution?
Say hello to the [Spectral Frequency Display](https://helpx.adobe.com/audition/how-to/audition-spectral-frequency-display-cc.html) editor inside Adobe Audition.
### What is Adobe Audition?
Just like GarageBand, Logic Pro and Ableton Live, Adobe Audition is a [Digital Audio Workstation](https://www.sweetwater.com/insync/daw/) that is capable of audio recording, mixing and editing. In particular, it includes audio repairing features that will be explored in greater detail.
For our example, we will be attempting to remove much of the noisey outside environment in this interview conducted outside. Here is the clip:
<iframe style="border: 0; width: 100%; height: 42px;" src="https://bandcamp.com/EmbeddedPlayer/album=844980590/size=small/bgcol=ffffff/linkcol=0687f5/track=443699318/transparent=true/" seamless><a href="https://danielbermudes.bandcamp.com/album/cleaning-audio-in-adobe-audition">Cleaning Audio in Adobe Audition by Daniel Bermudes</a></iframe>
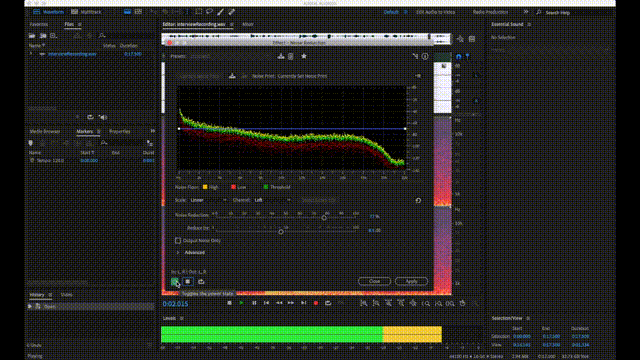
## Noise Prints
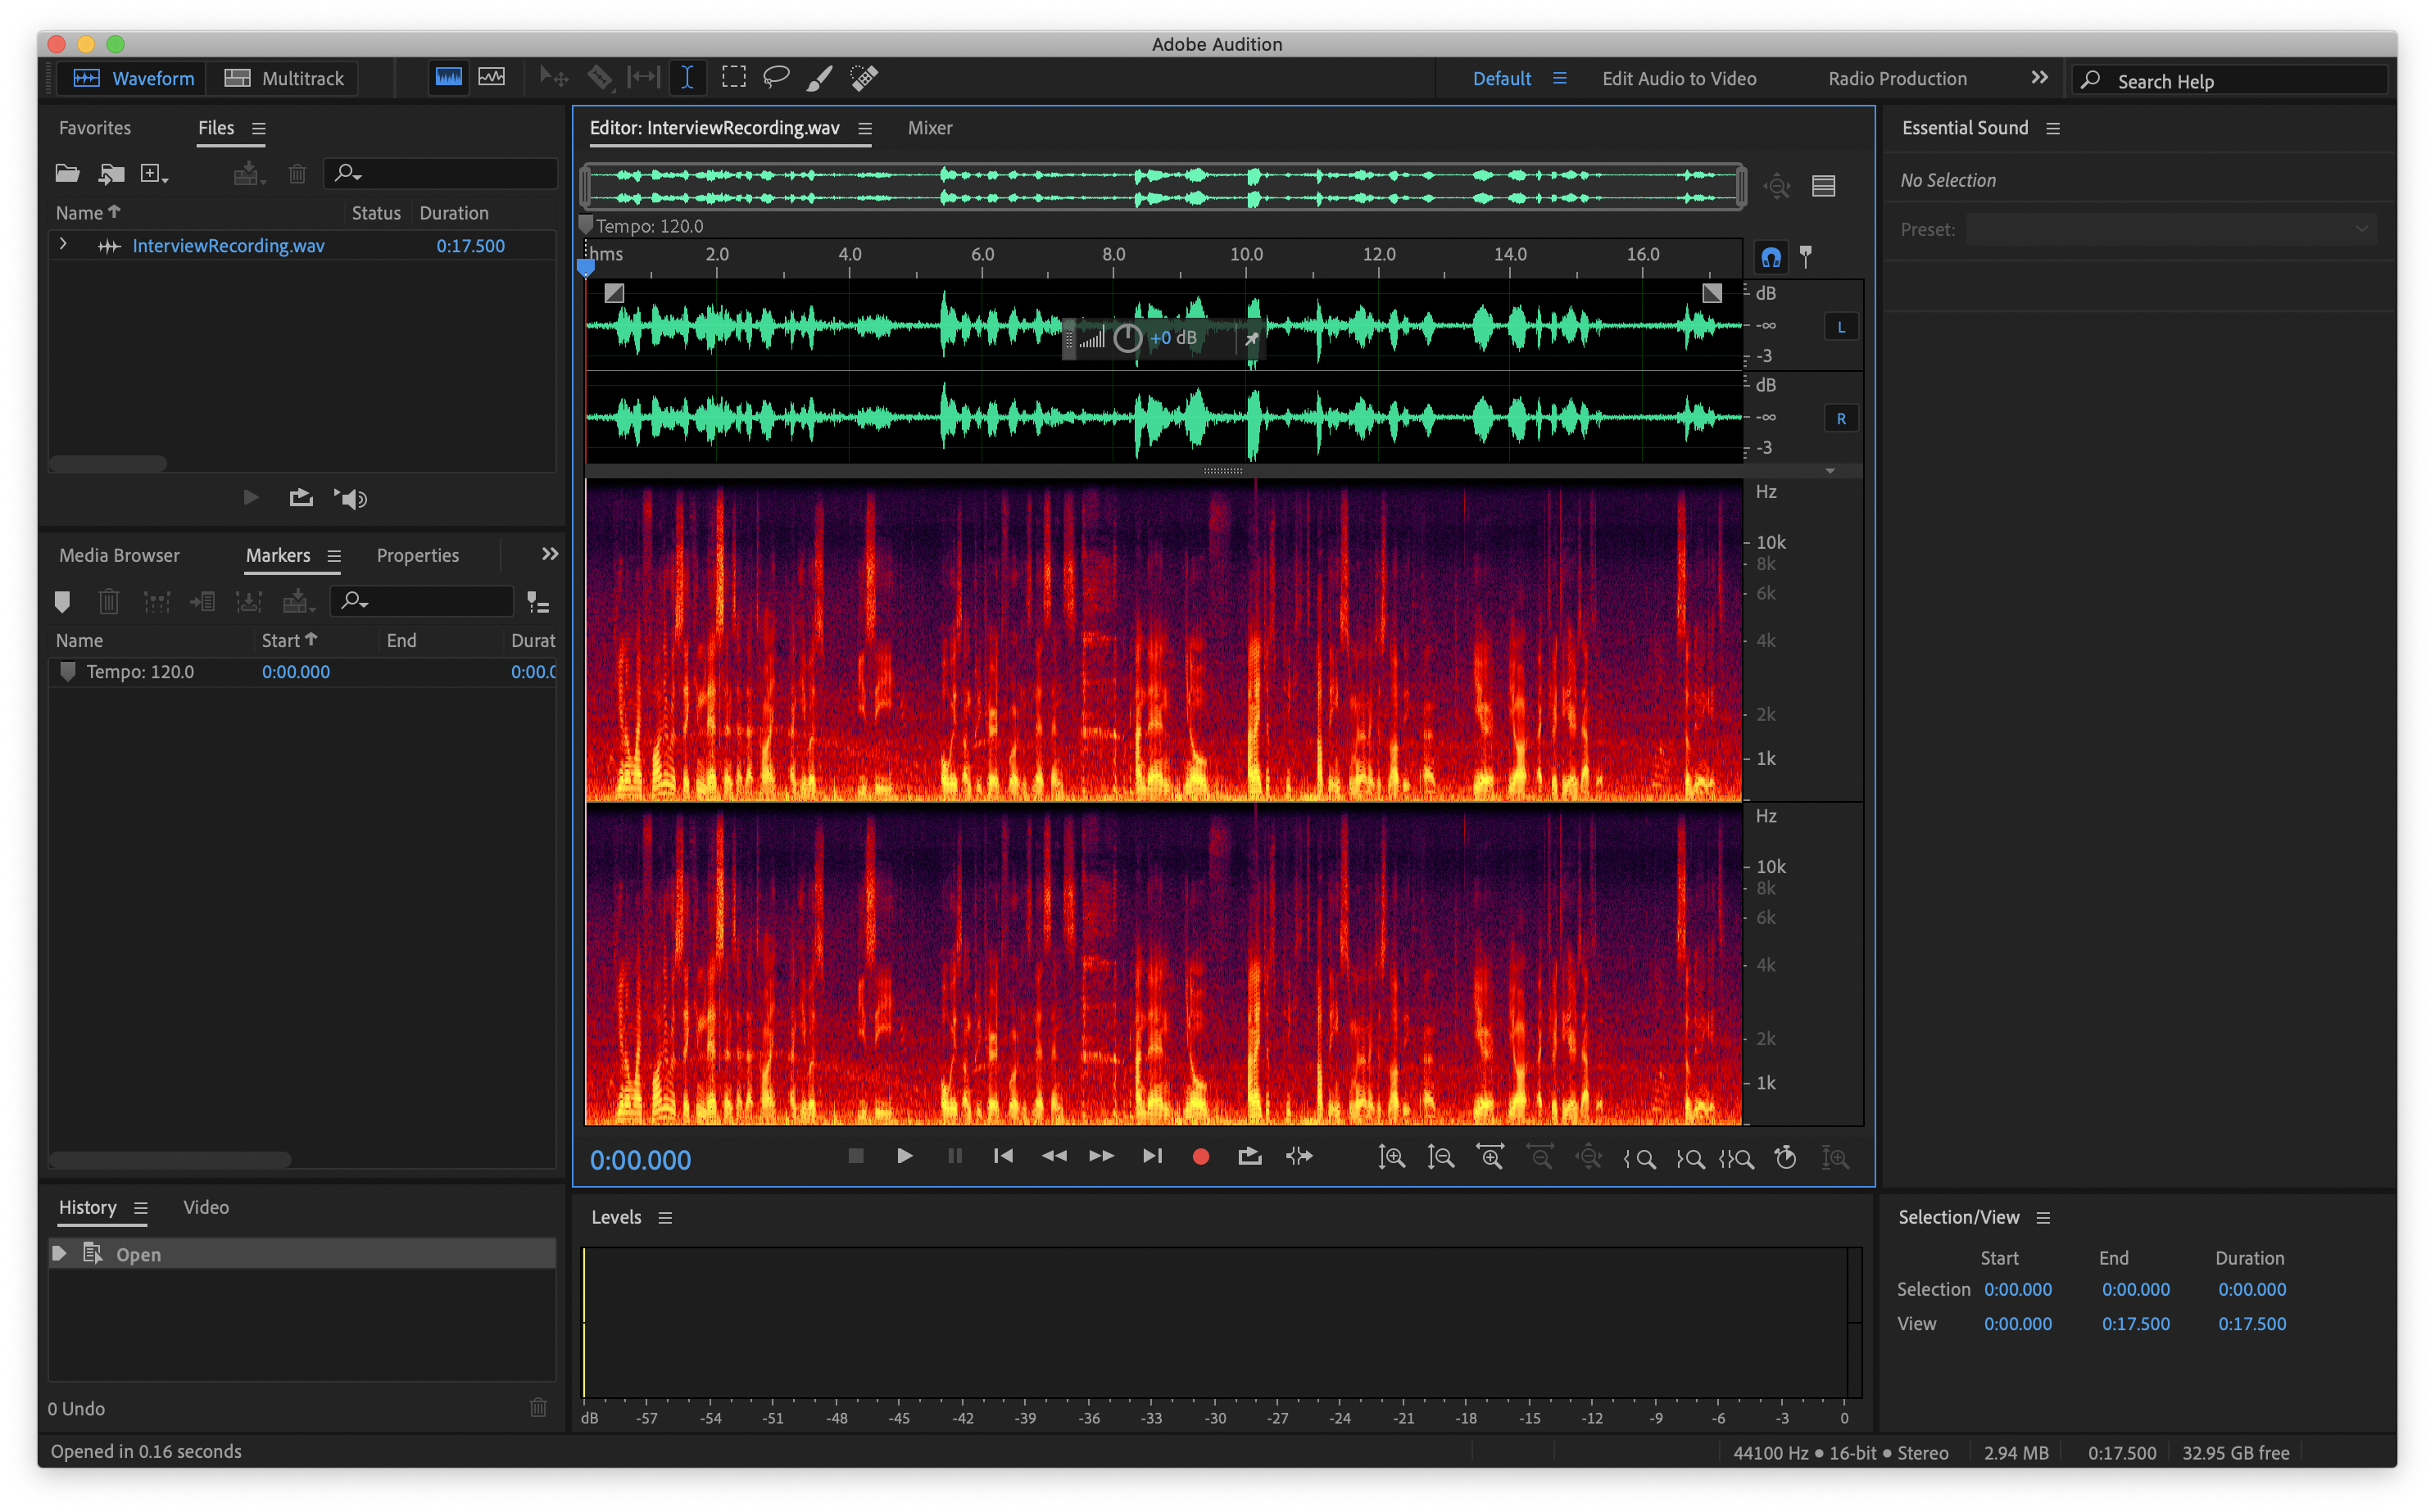
First, **import your audio clip to be edited**. You can use *Command + I* as a short cut. A new window will appear and you will see your audio displayed as a waveform and in a spectrogram.
- If you don't see the spectral frequency display, press *Shift + D* to open it.
In order for Audition to know what needs to be removed, we need to teach it what it is we are trying to remove. This is where [noise prints](https://en.wikipedia.org/wiki/Noise_print) come into play. Making one will allow the noise reduction algorithm inside Audition to attenuate just the background noise in the entire audio file.
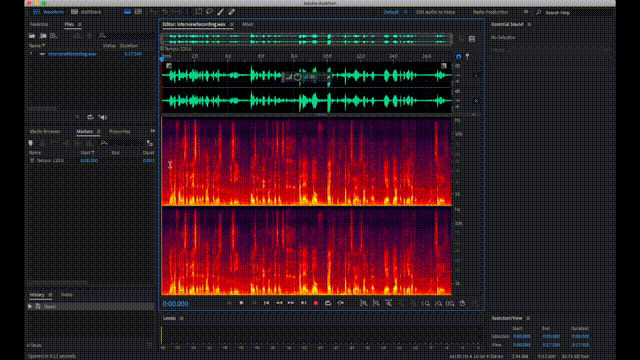
**Highlight an area that contains only the background noise**. You can zoom in to help better pick an area. Sometimes the beginning and end of a recording will have empty space, which can serve as great noise prints.
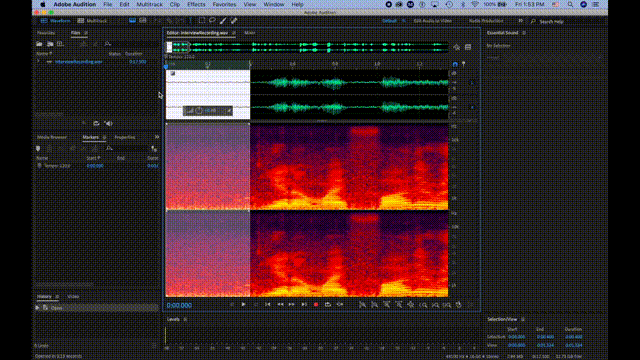
Next, we are going to make the noise print itself. **Follow this path starting from the menu bar up top: Effects --> Noise Reduction / Restoration --> Noise Reduction (process)**
Now **select the "Capture Noise Print" button, then "Entire File"** to have Audition attenuate that noise through the entire audio clip. Hit play to preview the result.
### Fine-Tuning Noise Reduction
For even more control over the noise reduction, do **play around with the "Noise Reduction" and "Reduce by"** parameters. With them, you can determine if you need more or less reduction.
*Note: Often it is better to leave a small amount of background noise in your audio, or else the audio can sound too washed-out and unnatural!*
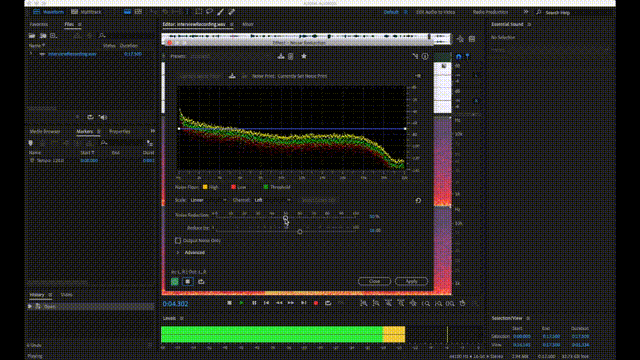
To turn on or off the reduction effect, simply toggle the power button.
And voila! Here is our final result:
<iframe style="border: 0; width: 100%; height: 42px;" src="https://bandcamp.com/EmbeddedPlayer/album=844980590/size=small/bgcol=ffffff/linkcol=0687f5/track=3897635769/transparent=true/" seamless><a href="https://danielbermudes.bandcamp.com/album/cleaning-audio-in-adobe-audition">Cleaning Audio in Adobe Audition by Daniel Bermudes</a></iframe>
## Last Remarks...
At the end of the day, Audition's **Noise Reduction** is a powerful tool for removing background noise. But, nothing compares to great microphone placement when recording! Always remember kids to place your mic as close to the sound source as possible for better coverage:)
 Sign in with Wallet
Connect another wallet
Sign in with Wallet
Connect another wallet