---
tags: report, lluf, jk, micheal-a
---
# Micheal Awah 21-22

| [realityLab](/bA86p68MToWpzQqz9_bF8Q) | [graphicsLab](/8CstaZbWTL6-3j7tnYo6Fw) |
| -------- | -------- |
## Tools
* Blender
* Solidworks
* Unity
* Adobe Indesign
* Canva
* Shorthand
## Works
### 3D Modeling Skill Building
**DOUGHNUT: BLENDER**
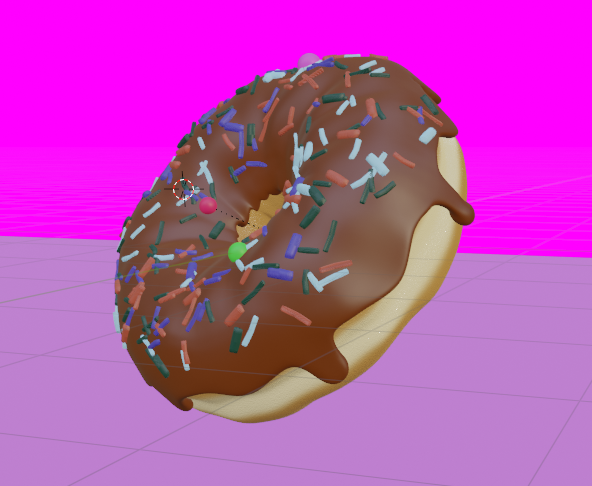
This project involved the designing and modelling of a doughnut using the 3d modelling software blender. The main motivation behind this project was to learn the basic components of blender and its functionality. The process of of modelling began with a default blender torus. The next step was to give the torus a more natural structure but making the surface uneven. The next step was adding layering to the torus which in this case was chocolate
(but can be anything). And then finally the frosting on the doughnut was added. The hardest part of this project was sculpting the torus to ensure it looked very realistic and adding material to the design.
3D modelling is an important skill for college students because it provides a level of design depth that rough sketches or 2D designs cannot, such as improved control over details. It is also important within the engineering discipline because it lets engineers explore the physical aspects of a design without surrendering to physical limitations and a software like blender can play this role in ways better that traditional engineering 3d software.
If I were working on a projecting like this in the future, I will spend less time ensuring the design looked perfect whilst still in proggress because it is easier to make changes when evaluating my work at the end. Also, I will try to explore new tools that I have not previously as opposed to only sticking to the tools used in a tutorial.
Software and skill like this is equally important to students in engineering as well as in the humanities and social sciences because they could be implemented in multimodal projects which make use of a variety of skills and transcend every feild of study.
---
**Humanoid: Blender**

This project was intended to test of my knowledge in modelling on blender. I worked on this with the least possible help from professionals. It is essentially a humanoid. Designing this was relatively trivial because I learned from the doughnut project. I started with a cube design and then I began to extrude the different faces to and added more faces until I arrived a structure like the one in the picture. This project is quite recent and not complete but should be done within the next few days. This is important because it could be used to demonstrate human anatomy in classrooms in a more interactive way as opposed to using pictures.
---
**Walkthrough: Unity**

This project (made possible with the help of Tica Lin) was about designed using Unity, a cross-platform game engine developed by Unity Technologies, which is primarily used to develop video games and simulations for computers, consoles and mobile devices. In this project I create a walkthrough of Harvard College houses using the the house logo and date founded. The idea was to create a small demostration of how this software could be used to design simulations and possibly video games. i think this is important because by combining the sills from 3d modelling alongside creating simulations, then there's a very wide range of applications that are possible. College students could use this in certain classes like STEM to ease theoritical explanation of certain concepts.
This is important for college students because it could be used to make demonstrations and simulations for STEM classes. It could also be used in non-STEM fields of study to make animations to describe a variety of concepts especially in multimodal projects.
Check out video: https://youtu.be/tAhXpjypfNk
*Click the link above to access the full video where you can understand how the wallthrough functions and then you can get a sense of how this would be used in an animnation.*
---
### GRAPHICS AND DESIGN
**Comic Strip: Canva and Adobe Indesign**
*The main take away is the implementation of designing techniques and less about the actual story in the comic. Notwithstanding, have fun reading.*
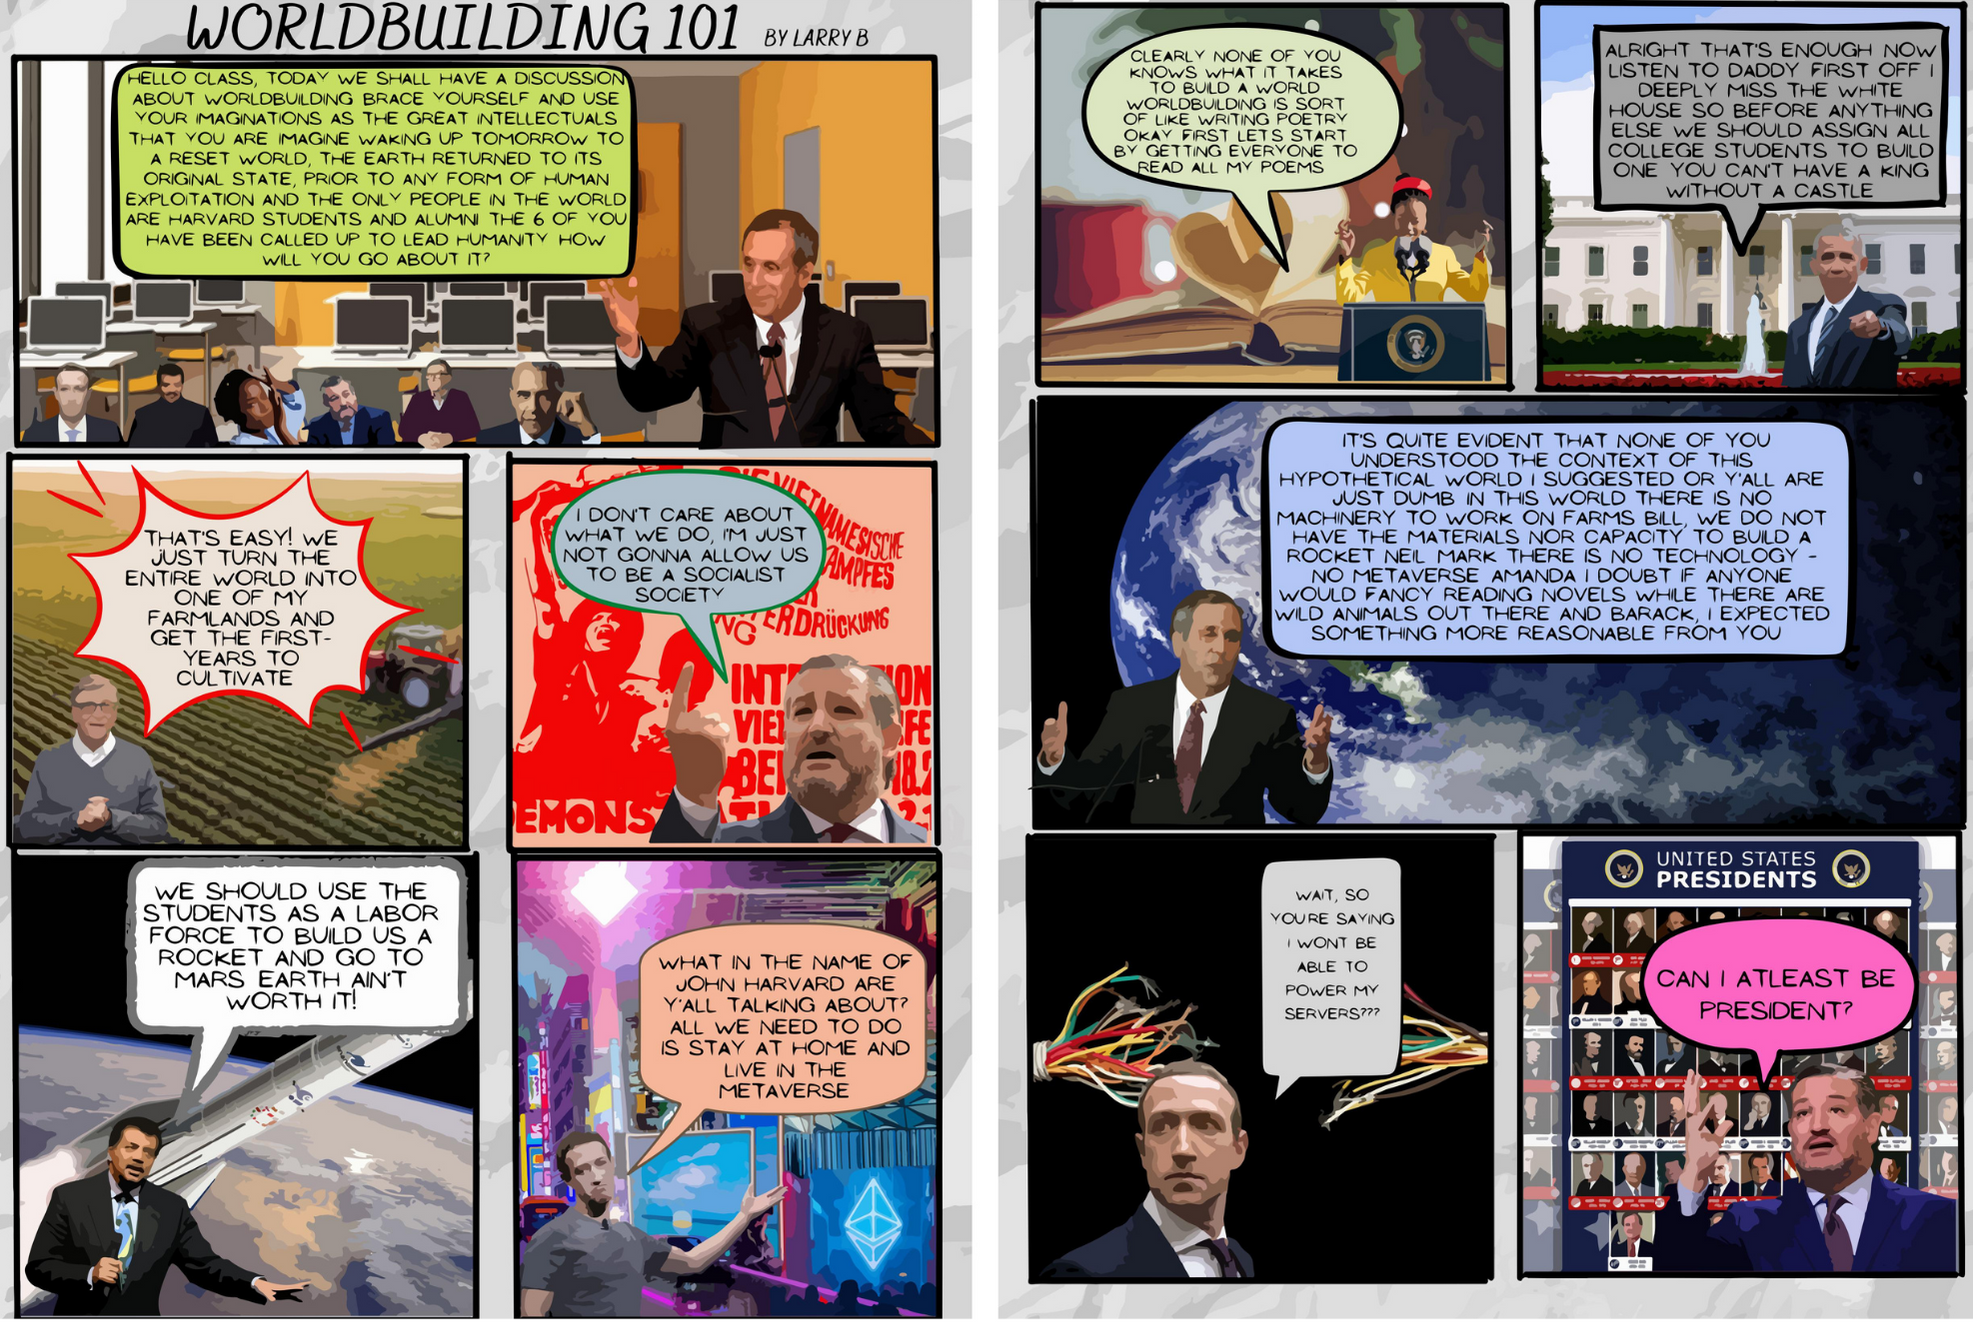
This project was about designing a sample page of a comic book. The first step was developing the idea in the form of a script which was quite challenging because it meant the project not only involved artistic skills but writing skills as well. Writing the script also means including characters. To ake the story more relatable, I used Harvard alumni as chracters and developed a satirical storyline. The next step was finding a layout for my scenes. I found a lot of samples online where I got inspired and created my own layout on canva depending on the number of dialogues the I wanted to put into my comic. The next step was integrating the characters and brackgrounds unto the layout page alongside the scripts. Finally the last step was vectorizing the entire page using adobe indesign so it looks more like an animation than a realistic image.
It is important for college students to learn these skills because they could be integrated into class projects and thesis writeups to make the content more engaging and interactive.
---
**Magazine Spread: Adobe Indesign**

This project involved desiging a magazine page in Adobe indesign. It is quite similiar to the comic strip project. The basic steps are desinging a layout, integrating the content with the layout and addin the necessary scripts.
In this project, I wanted to answer the question of how stars are made. through a 5 page magazine. In the course of doing this I used the life of Kanye West, an American rapper, singer, songwriter and producer. I analysed his life, and how he rose to fame and success from being a painting student in his youth to being in the top 5 richest black men in the world. I highlighted key features in his life and added some visuals to provide more context.
This could be important for college students in certain disciplines such as art. This could also be used to communicate ideas in different disciplines as they usually offer short and easy-to-read sentences, alongside other visual and text cues (e.g. character sighs, door slams etc.) for context. They're also helpful for children with learning difficulties; children with autism can learn a lot about identifying emotions through the images in a comic book.
---
**Shorthand: Girl in the wall art**
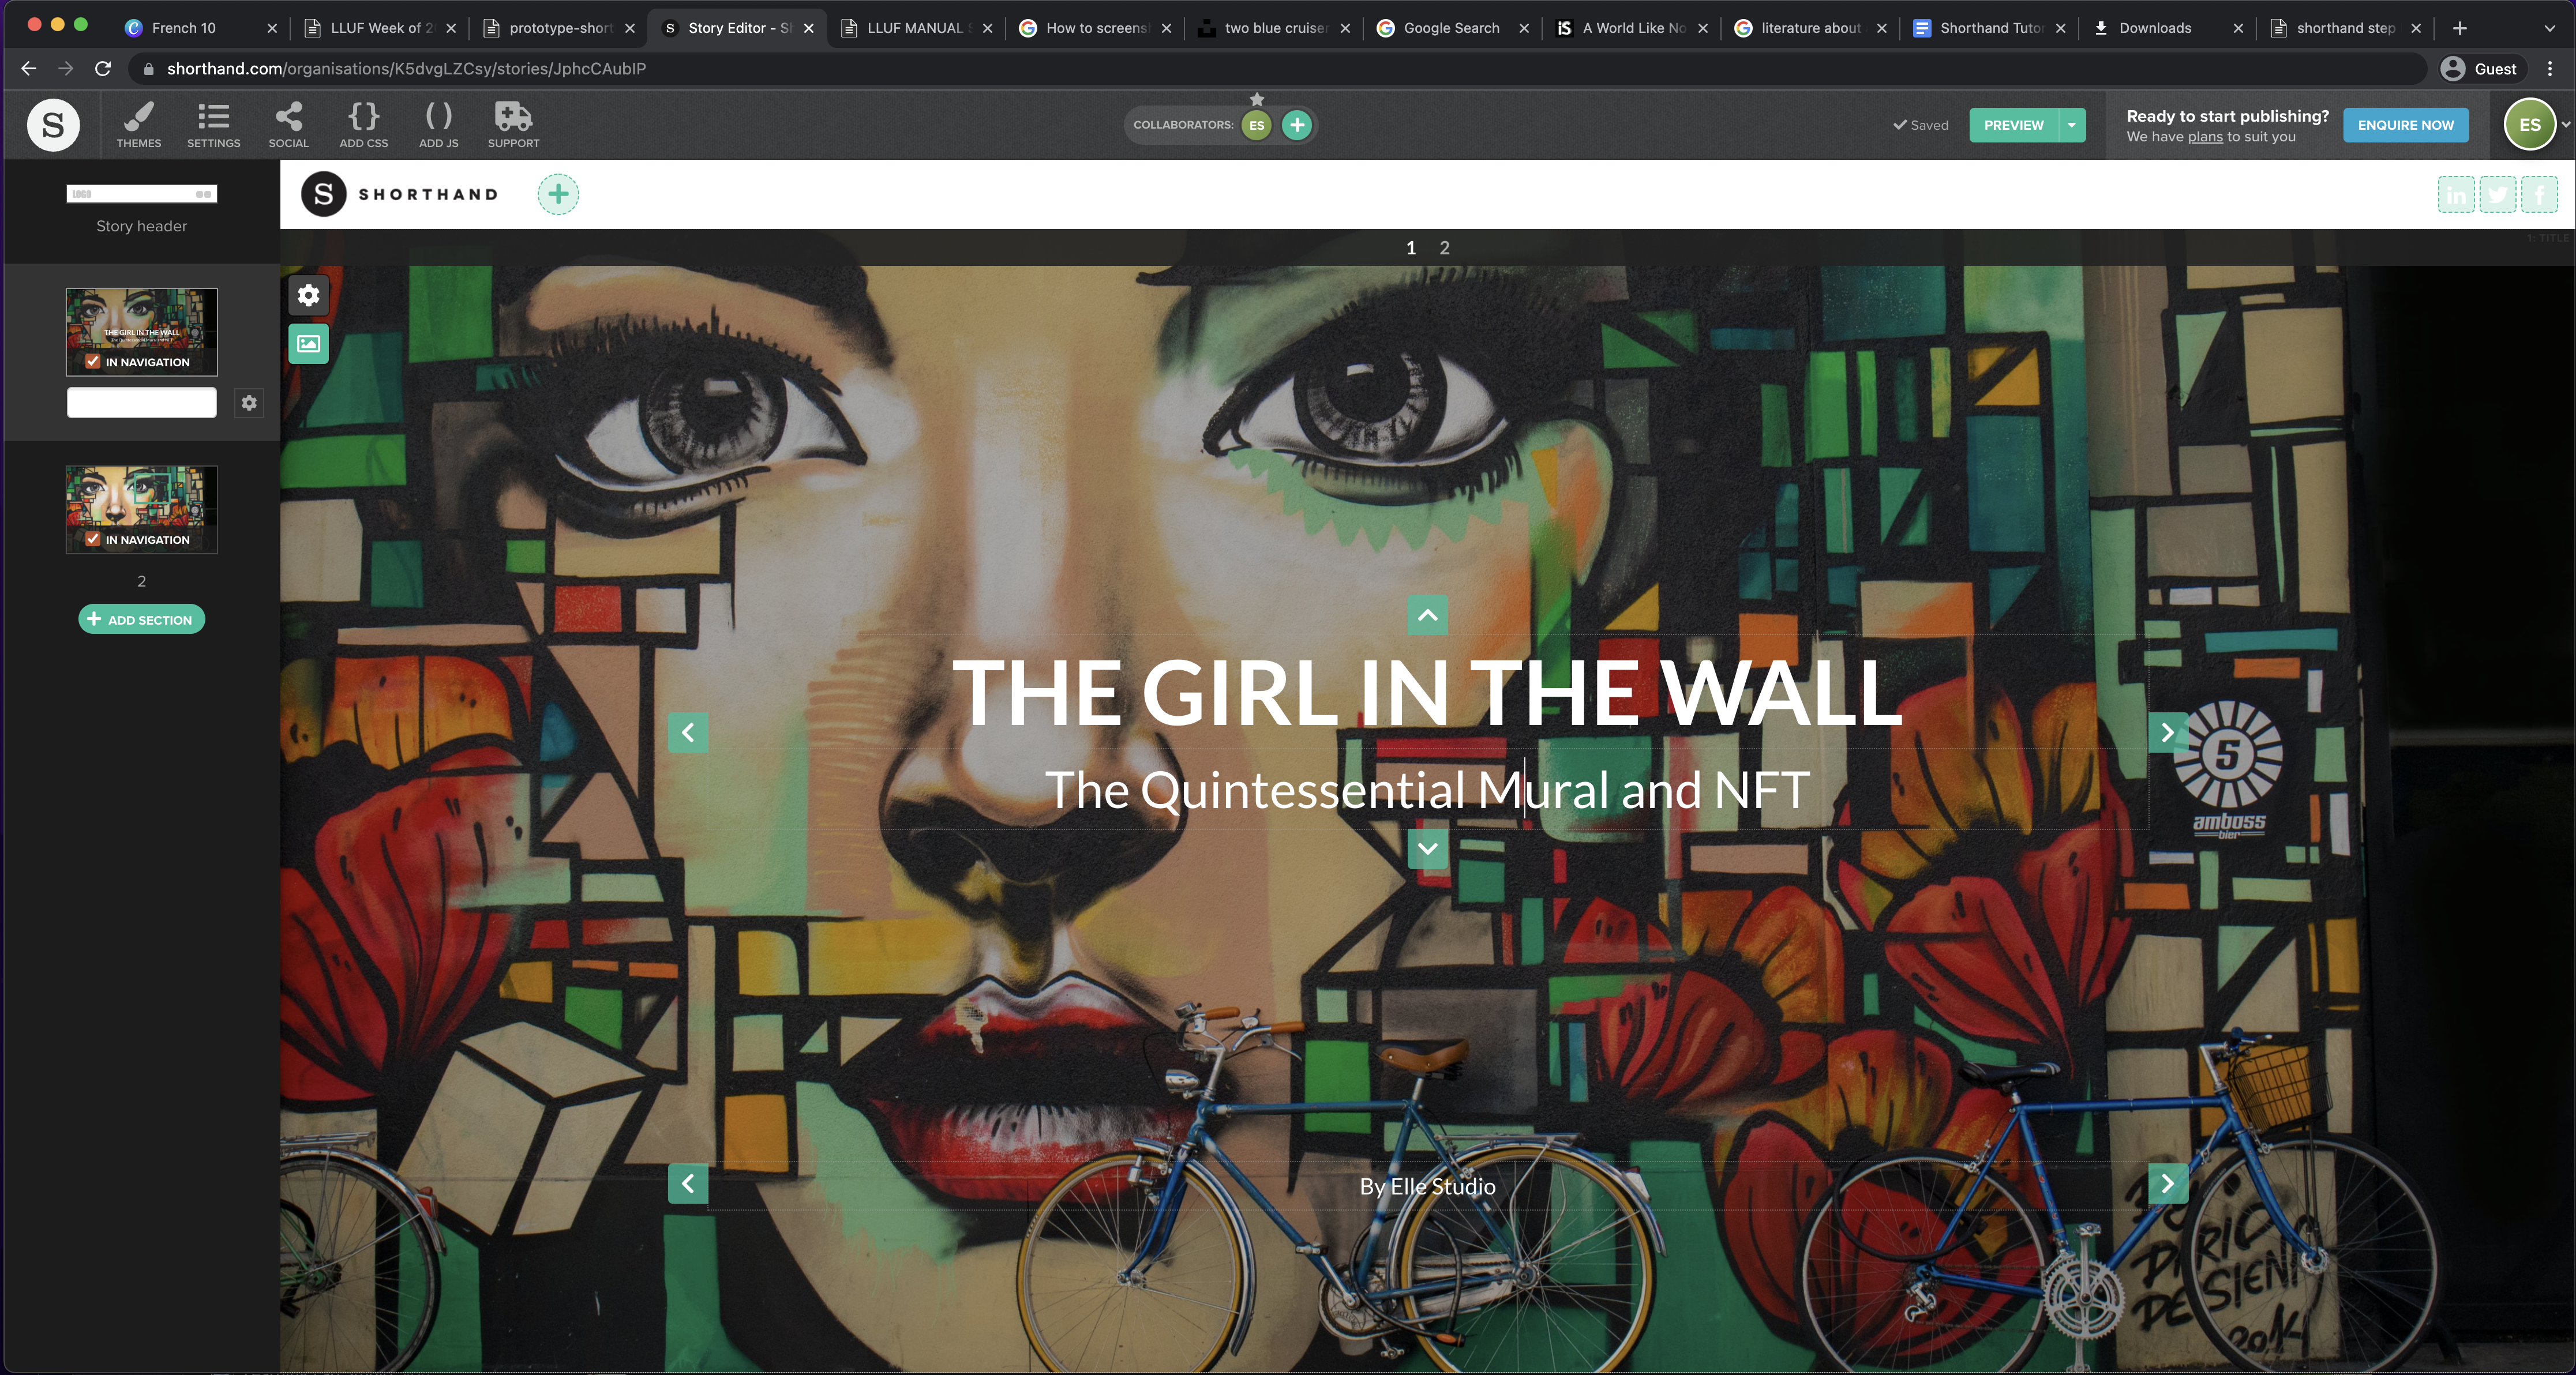
This project involved web publishing using Shorthand. Shorthand is seemingly easy to use once you get a grip of what it's about but at the very least it is used to create elaborate descriptions/analysis of the contents of an image. My prototype was based on a mural and an NFT which sold a great deal. The idea of this project was to highlight what made this NFT so exceptional and likable. I highlighted a few key features in the image and gave a detailed description of why I think they made this mural so unique. My prototype involved the following stages: Selecting a well detailed photo, locating what part of the photo I wanna highlight, deciding what description I wanna give for this specific regions and implementing on Shorthand.
I used Shorthand to describe why I thought the girl in the wall mural was a very successful NFT by highlighting the outstanding details on the mural. Shorthand is very helpful for college students who want to publish online or create an online portfolio.
[View full preview here](https://preview.shorthand.com/OXXqhA1D9x4y5CXm?_gl=1*wrjxr1*_gcl_aw*R0NMLjE2NTIyOTk0MjUuQ2p3S0NBand2ZTJUQmhCeUVpd0Fha3RNMUpPQWVPMFFxZVp4Q3JYcGdqcTkzVEdjLVk5UFRWTDFNOVU0RVNUZXMzcVBtV1VrOElocmlob0N5YXNRQXZEX0J3RQ..)
---
### WORK FLOWS IN REALITY
**SOLIDWORKS TO BLENDER WORKFLOW**
This project is essentially a tutorial on converting from solidworks to blender. It can be summarized into main steps as below.
* STEP 1: SAVE THE MESH
The most common extension to use is `.stl` which is quite basic because it essentially converts the meshes to simple geometric shapes which is easily read by most 3-D viewing sofwares.
1. File > > Save As

2. Select Location > > save as `.stl`
* STEP 2: IMPORT .STL FILE INTO BLENDER
Here we would need to pay special attention to the dimensions of our model, the scale and its orientation.
1. File > > import > > `.stl`
* STEP 3: APPLY MODIFIERS
This stage would involve smoothing up the model and adding as many vertices as needed, adding an edge split modifier as well as checking for errors.
* SAVE FILE AS `.VRML`
The major difference between this and `.stl` is that `.vrml` contains color while `.stl` does not.
* Proceed through steps 2 and 3 above

END PRODUCT!
---
**EXPLODED TELESCOPE**
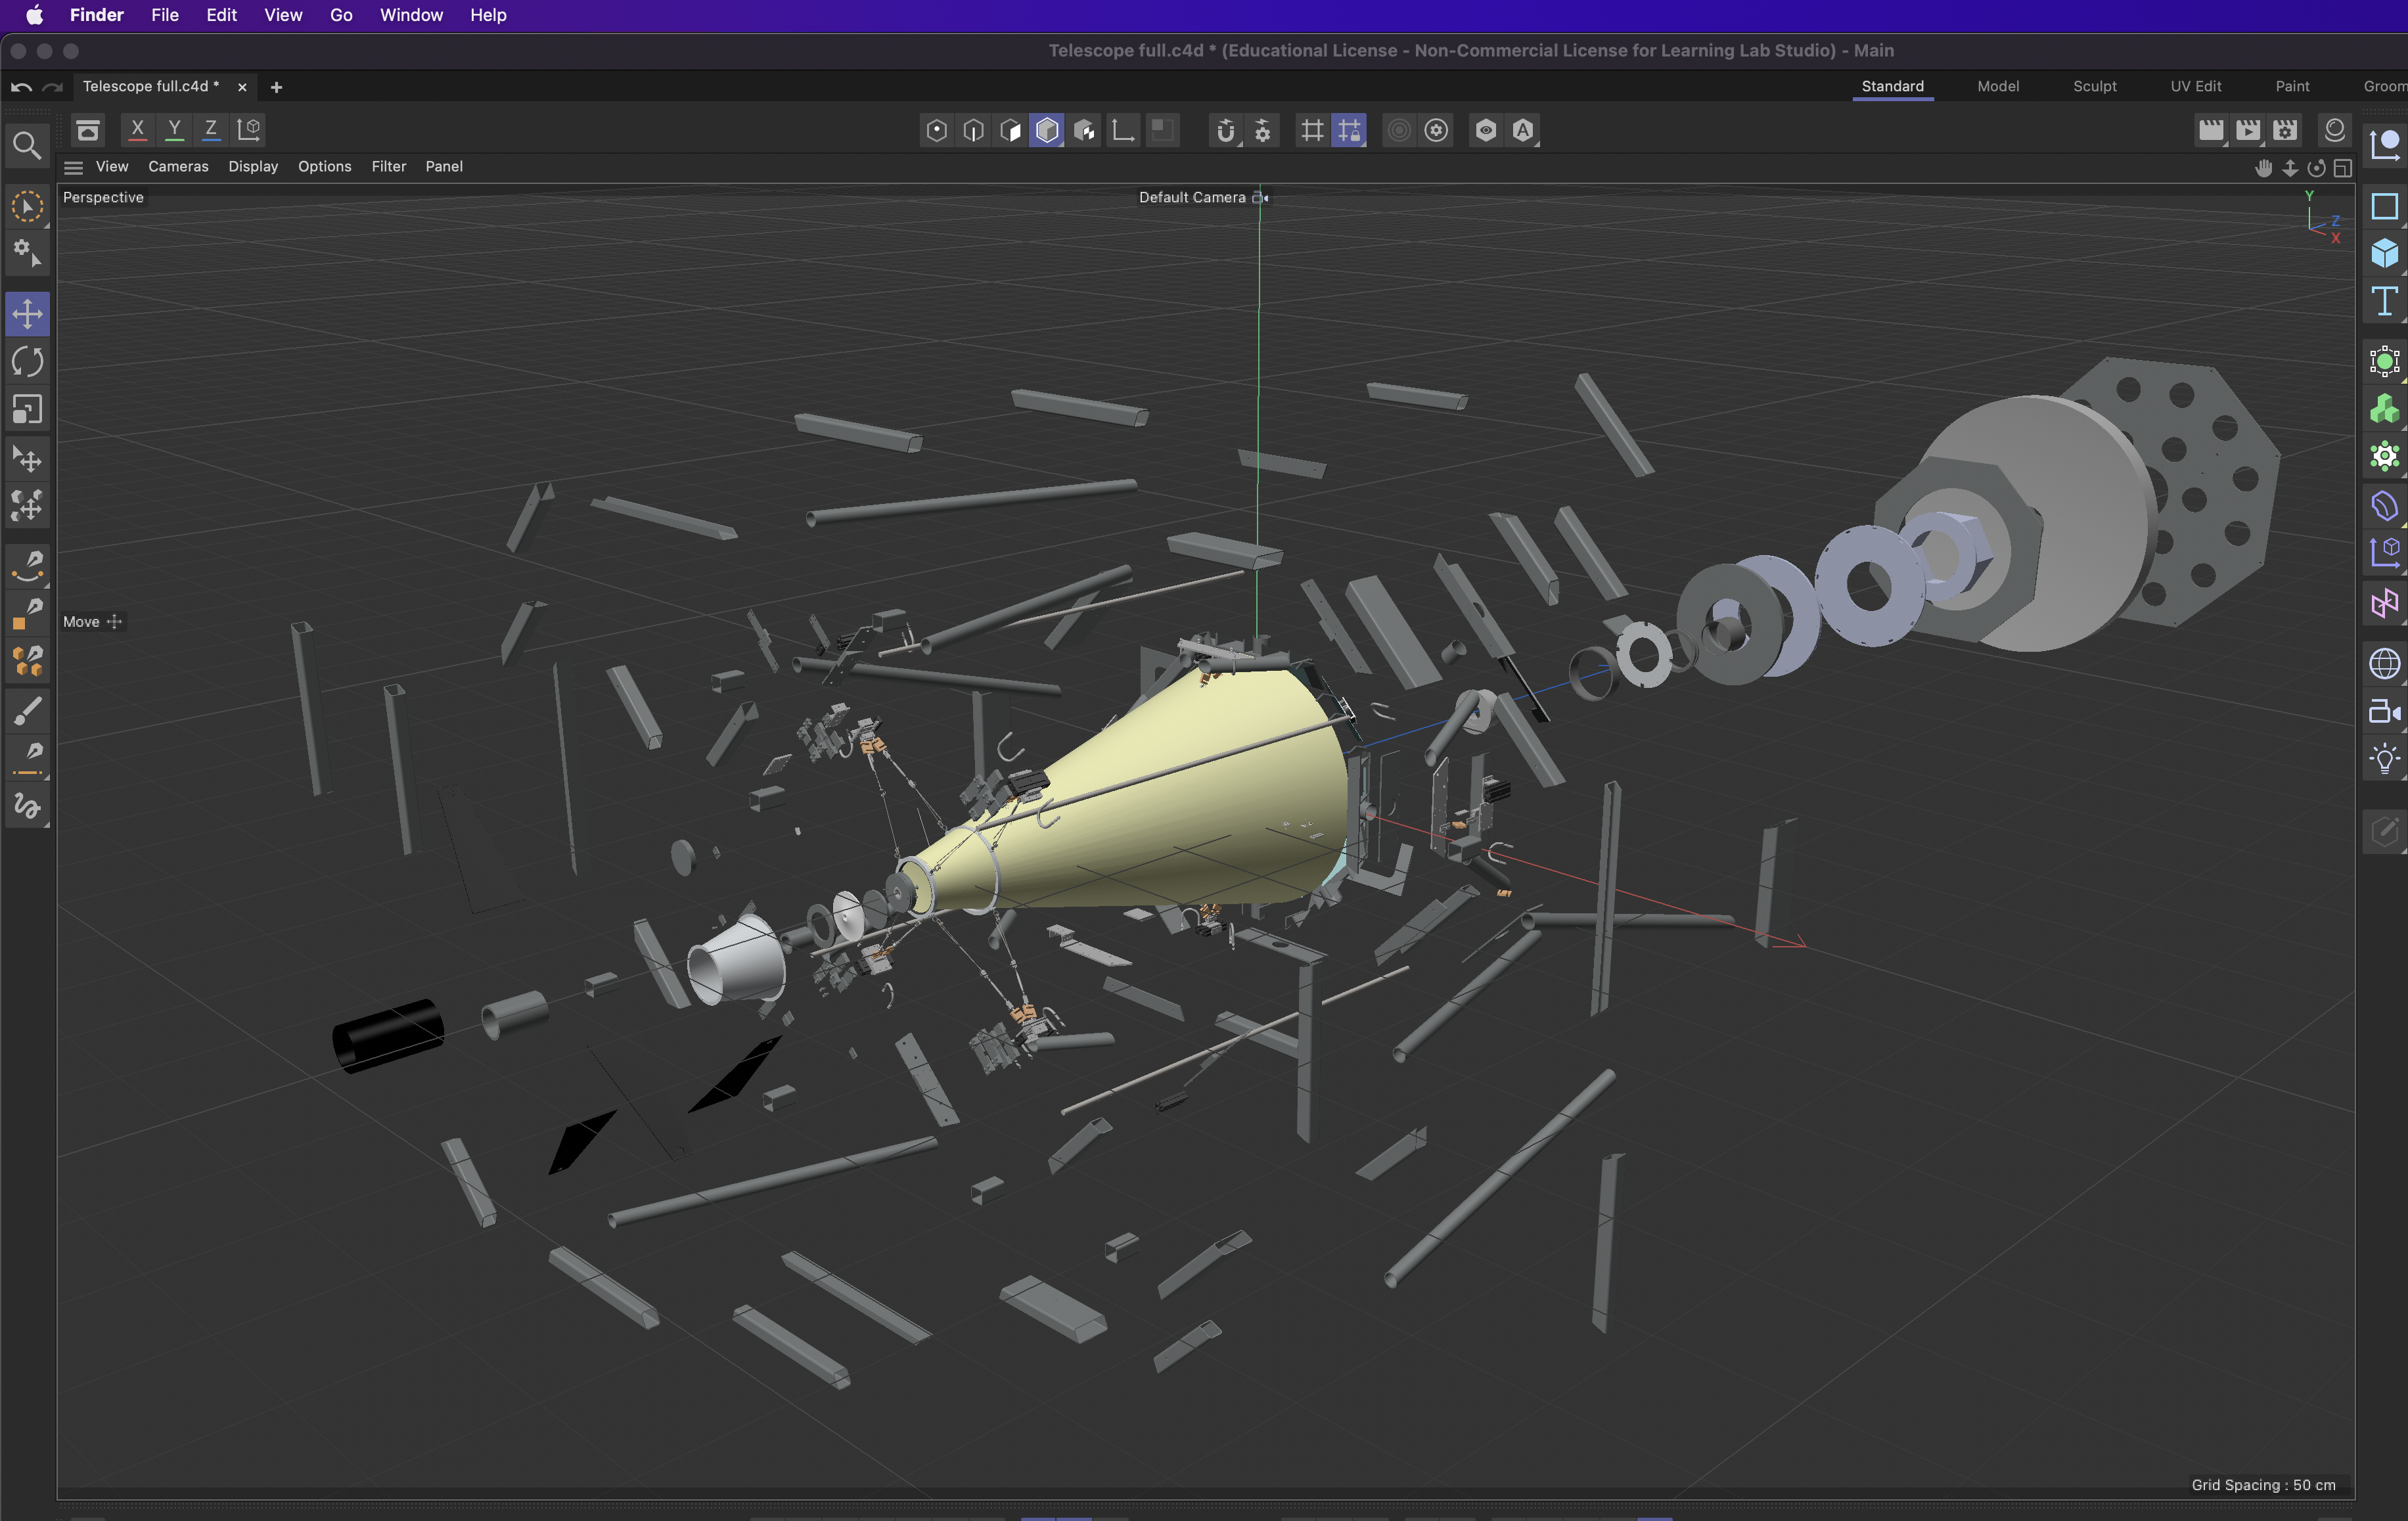
This project involved creating an exploded view for a telescope solidworks assembly. I basically made use of the workflow from above, that is, from solidworks to blender and then from blender to Cinema 4D. Cinema 4D is a professional 3D modeling, animation, simulation and rendering software solution. In this project i took the model and isolated all the individual parts by spreading them out about a given radius from the center of the telescope. The next step was putting this in an animation and then rendering the animation.
This is an important skill for College students especially in STEM because it is used in making demonstrations and getting a vision of how many components a system is made of. It could also be used to generate designs for augmented reality.
---
 Sign in with Wallet
Connect another wallet
Sign in with Wallet
Connect another wallet