# Trillion Parameter AI at Home – A Complete Guide to Running Kimi K2 as Your Coding Agent

### TL;DR -- Full Setup Summary + GitHub Repo
**Model:** Kimi K2 Instruct- an open 1T-parameter Mixture-of-Experts model from Moonshot AI, rivals GPT-4 in coding tasks.
**Challenge:** Base FP8 version is 1.09 TB and needs ~16× H200 GPUs. I used a quantized 2-bit version (381 GB) instead.
**Setup:**
- Used E2E Networks’ TIR instance with 4× H200 GPUs (~560 GB VRAM) and ~2 TB RAM.
- Ran model using llama.cpp with CUDA + quantized GGUF via Unsloth.
- Served via llama.cpp’s OpenAI-compatible HTTP server.
**Tools:**
- Used Kimi CLI for chat.
- Integrated with OpenCode CLI agent for TUI/code execution.
**Performance:**
- ~35–45 tokens/sec on my rig with 32k context.
- Solved complex tasks like building Flappy Bird in Python and multi-step legacy code refactor.
**Cool bits:**
- Fully local, no API keys.
- Kimi exhibits 'agentic' behavior; it can spontaneously trigger tools or execute code during a conversation.
- Integrated tunneling via Cloudflare to access it remotely.
**Setup Repo:** [https://github.com/abhishekmishragithub/llm-experiments-with-tooling](https://github.com/abhishekmishragithub/llm-experiments-with-tooling)
This repo includes model download instructions, server launch scripts for inferencing, and full configs for Kimi CLI and OpenCode integration.
---
I’ve always loved tinkering with AI coding assistants or agents I would say. The idea of powerful coding agents running entirely on my hardware is very enticing to me. Recently, Moonshot AI’s [Kimi K2 Instruct](https://huggingface.co/moonshotai/Kimi-K2-Instruct) caught my attention (literally all over the x and reddit it was). It’s a new open model that reportedly rivals OpenAI’s GPT 4.1 and Anthropic’s Claude in [coding and reasoning tasks](https://huggingface.co/moonshotai/Kimi-K2-Instruct#model-variants). Kimi K2 is a 1 trillion-parameter Mixture-of-Experts (MoE) model, and it has demonstrated performance on par with top proprietary models in [key benchmarks](https://github.com/MoonshotAI/Kimi-K2?tab=readme-ov-file#3-evaluation-results). The only catch: it’s huge. Running the full 1 TB model requires serious horsepower (quite literally, multiple high-end GPUs).
Reading community stories got me curious to try this model and I got my gears turning. People were already finding ways to run Kimi K2 at home. One [Redditor](https://www.reddit.com/r/LocalLLaMA/comments/1m0lyjn/kimi_has_impressive_coding_performance_even_deep/?utm_source=share&utm_medium=web3x&utm_name=web3xcss&utm_term=1&utm_content=share_button?utm=e2e) even managed to have K2 handle a 90,000-token C++ project on their home server with a few RTX 3090s, achieving around 7 tokens/second generation at a 128k context after heavy optimization. That blew my mind, this open model was tackling tasks that would normally demand something like Claude or GPT-4. Motivated by the hacker ethos of owning my tools, I set out to build a local coding assistant powered by Kimi K2 Instruct.
In this post, I’ll walk through how I set up a fully local, coding focused CLI agent using Kimi K2. This will cover setting up the beefy hardware for the model setup and wiring up a simple terminal interface (with tool use) via Kimi CLI and OpenCode.
## Hardware Setup & Challenges
First things first, Kimi K2 is MASSIVE. We’re talking 1 trillion parameters total (with 32B active at a time, thanks to MoE). This isn’t your typical “throw it on Colab” model. For my setup, I provisioned a dedicated machine on E2E Networks’ TIR cloud platform with 4× NVIDIA H200 GPUs (each ~141 GB HBM3 memory, so ~568 GB total VRAM) and ~2 TB of system RAM. This is a mini supercomputer by most standards, but still only a fraction of the ideal specs for K2. Moonshot’s [own guidance](https://github.com/MoonshotAI/Kimi-K2/blob/main/docs/deploy_guidance.md) calls for 16× H200s for full 128k context, to comfortably run the model in FP8 precision. In other words, my 4×H200 setup was at the very low end of what might run K2 base fully.
My initial plan was to run Kimi K2 Base in native FP8 using vLLM, but I hit roadblocks. The 1 TB model pushed my 4×H200 GPUs to their limits, and vLLM threw low-level CUDA errors when initializing the multi-GPU communication. In short, the base model was impractical on this rig. (If you do have access to 16+ H200 class GPUs or equivalent, you could follow Moonshot’s vLLM recipe to run the full FP8 mode, but that’s out of reach for most of us.) Instead, I pivoted to a more attainable solution - quantization.
## GPU Instance Setup on E2E Cloud (via TIR Platform)
For experimentation and benchmarking, I provisioned a GPU instance directly through the E2E TIR platform. I used the TIR - AI Platform from the E2E dashboard to launch a GPU node, selecting the Python 3.10 base image (with CUDA 12.2 pre-installed) and deployed an instance with 4x H200 GPUs, 120 vCPUs, and 1.5TB RAM. SSH access was enabled via a pre-uploaded key for seamless login. While this method gives full control and flexibility for advanced workflows (like benchmarking or building custom runtimes), the recommended approach for most users is to use the "Inference Endpoint" option available in the same TIR interface. This allows for faster and simpler deployment of foundation models without worrying about infrastructure setup, GPU compatibility, or container orchestration, which is ideal for serving production or testing inference workloads with minimal friction.
I was able to provision a 4xH200 setup with the click of a button, which saved me from wrestling with on-prem hardware.
If you'd like to follow the full step-by-step process to create a GPU instance on E2E, refer to the official guide [here](https://docs.e2enetworks.com/docs/tir/Nodes/GuideTIR/)
### Below are the key steps I followed:
Step 1 – Launch Dashboard: Starting from the E2E TIR platform dashboard.

Step 2 – Choose 'Launch GPU'

Step 3 – Select Image type (Base OS): Python 3.10 + CUDA 12.2 as the base environment)

Step 4 – Set Compute Configuration: Choosing GPU type, Cluster type & Pricing


Step 5 – Set Access Policy: Enabling SSH, setting security group & launching the instance

Step 6 – Active GPU View: Confirming the running H200 instance.

## Model Setup: Running Kimi K2 Instruct via Quantization
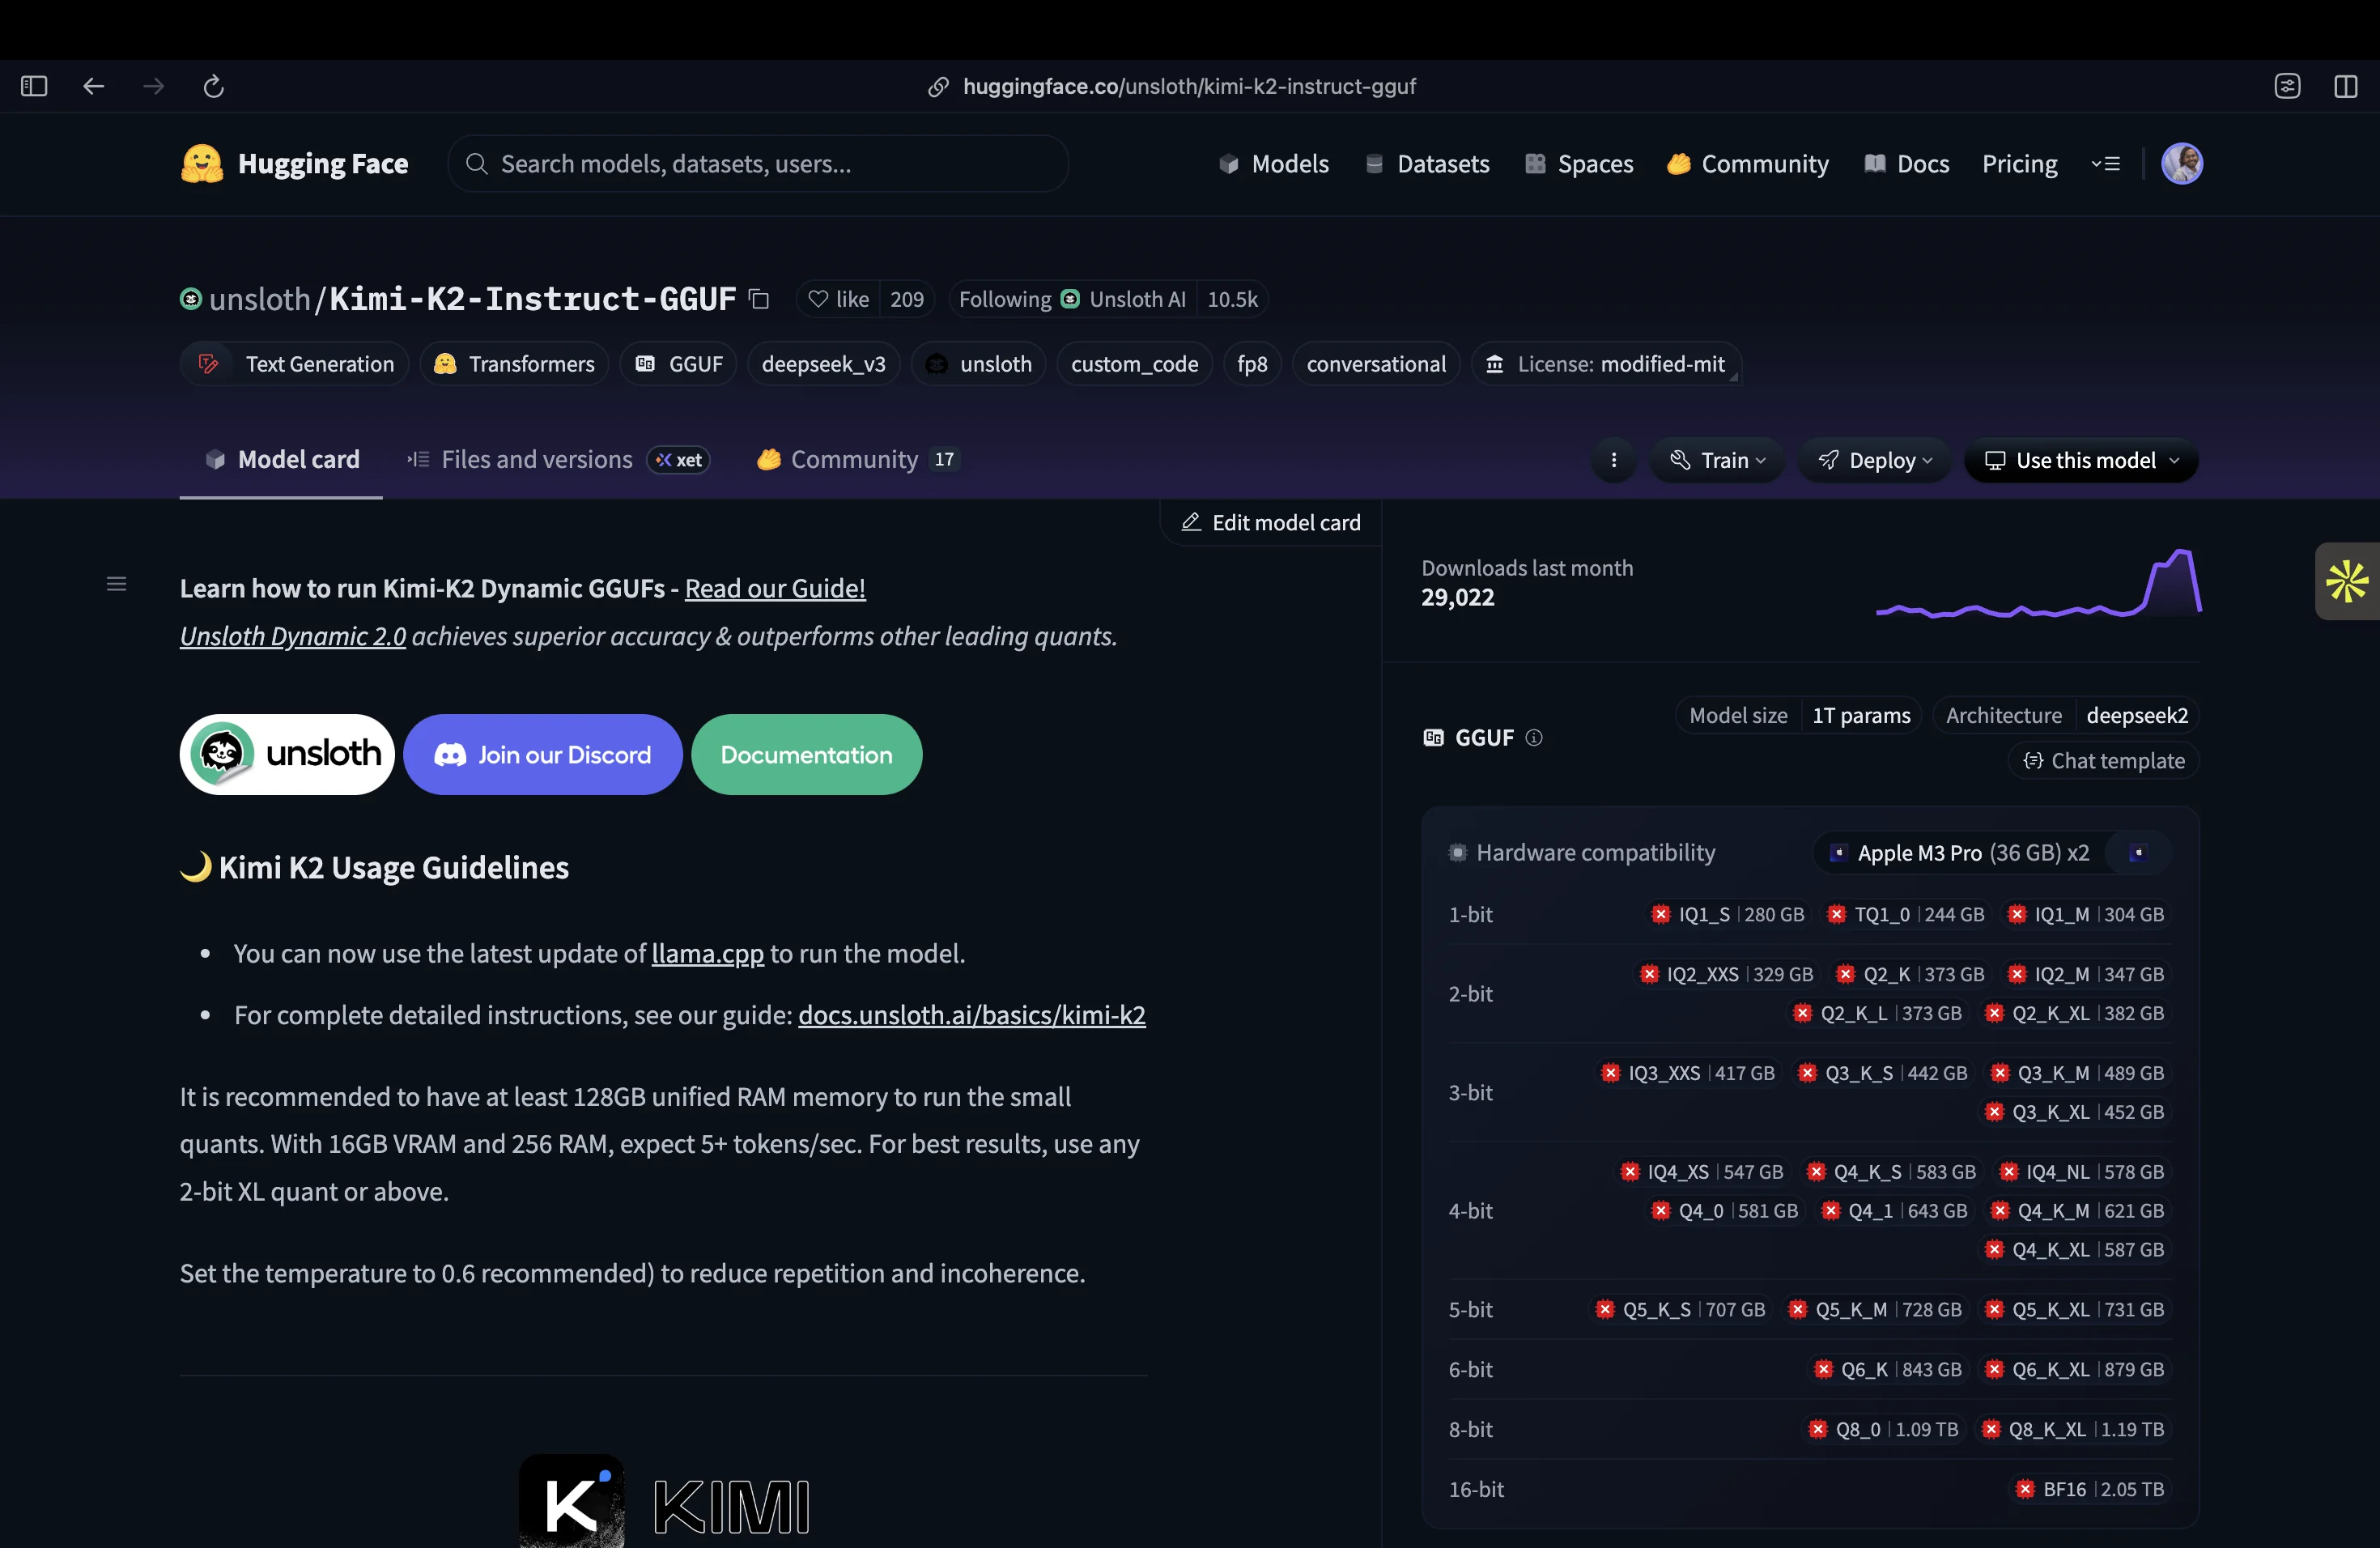
To make Kimi K2 runnable on “just” 4 GPUs, I turned to the quantized version of the model. The folks at [Unsloth provide Kimi K2 Instruct](https://huggingface.co/unsloth/Kimi-K2-Instruct-GGUF/tree/main) in various quantized formats (GGUF files) that dramatically reduce memory usage with minimal accuracy loss. Quantization is essentially compressing the model weights, trading a bit of precision for a huge gain in feasibility. Here were the main options I considered:
- **1.8-bit Dynamic Quant (245 GB)**: UD-TQ1_0: The smallest quantization (about 20% of full size). This can technically fit on a single 24 GB GPU by offloading most of the MoE layers to CPU or disk, though you’d need ~256 GB of RAM to avoid swapping. Expect around 5 tokens/s generation with this setup. This ultra-compact model has a bit more quality loss, but is a viable “last resort” for limited hardware.
- **2-bit Dynamic Quant (381 GB)**: UD-Q2_K_XL: The recommended sweet spot by Unsloth, balancing size and accuracy. Requires roughly ~380 GB of combined VRAM+RAM to run smoothly (e.g., 2× H200 ≈284 GB VRAM plus ~120 GB RAM; or a single 48 GB GPU plus ~340 GB RAM).
Many hobbyists have used this on high-end rigs, for example, a single RTX 4090 (24 GB) paired with 256 GB RAM can run the 2-bit model at ~5–6 tokens/s (16k context). With more GPUs or more RAM, speed improves.
This is the option I chose for my setup, since my total memory (~560 GB VRAM + ~2 TB RAM) exceeds 381 GB, allowing the model to fully reside in memory for best performance.
- **4-bit Quant (570–588 GB)**: Multiple 4-bit variants exist (e.g. Red Hat W4A16 at ~540 GB, or Unsloth’s UD-Q4 at ~588 GB). These offer higher fidelity (nearly no drop in accuracy on benchmarks), but they demand ~600 GB of memory for weights. A server with 6× H200 (or 8× A100 80GB) would be a realistic minimum here.
- **8-bit (FP8) Full Model (1.09 TB)**: The original weights in FP8 format. This is as close to lossless as you can get (FP8 is the native training precision). However, as mentioned, you need on the order of 16× H200 GPUs (or equivalent) to host 1.09 TB in VRAM. This is Moonshot’s “full context” setup for 128k token chats. Outside of specialized clusters or cloud instances, this isn’t feasible for most. (That’s why we quantize!)
In the end, I went with the 2-bit UD-Q2_K_XL (381 GB) model. With my setup, I could keep the entire model in RAM/VRAM with no disk swapping. This setup is near optimal performance for that quantization level.
> As per Unsloth’s doc, for the best performance, have your VRAM + RAM combined = the size of the quant you're downloading. If not, it'll still work via disk offloading, just it'll be slower!.
Fortunately, I met that criterion, thanks to E2E Cloud :)
## Downloading the Quantized Model
The quantized GGUF checkpoints are available on Hugging Face. I used the Hugging Face CLI to grab the Kimi-K2 Instruct 2-bit GGUF files:
### Install Hugging Face CLI if not already
```bash
pip install huggingface_hub
```
### Download the 2-bit "UD-Q2_K_XL" quantized model (eight shards, ~381GB total)
```bash
huggingface-cli download unsloth/Kimi-K2-Instruct-GGUF \
--include "UD-Q2_K_XL/*" \
--local-dir models/kimi-k2-gguf
```
This pulls the 2-bit GGUF files into `models/kimi-k2-gguf`. (For a different quant level, just adjust the --include pattern. For example, *UD-TQ1_0* for the 1.8-bit mode, or *UD-Q4_K_XL* for the 4-bit model.) Make sure you have enough disk space.
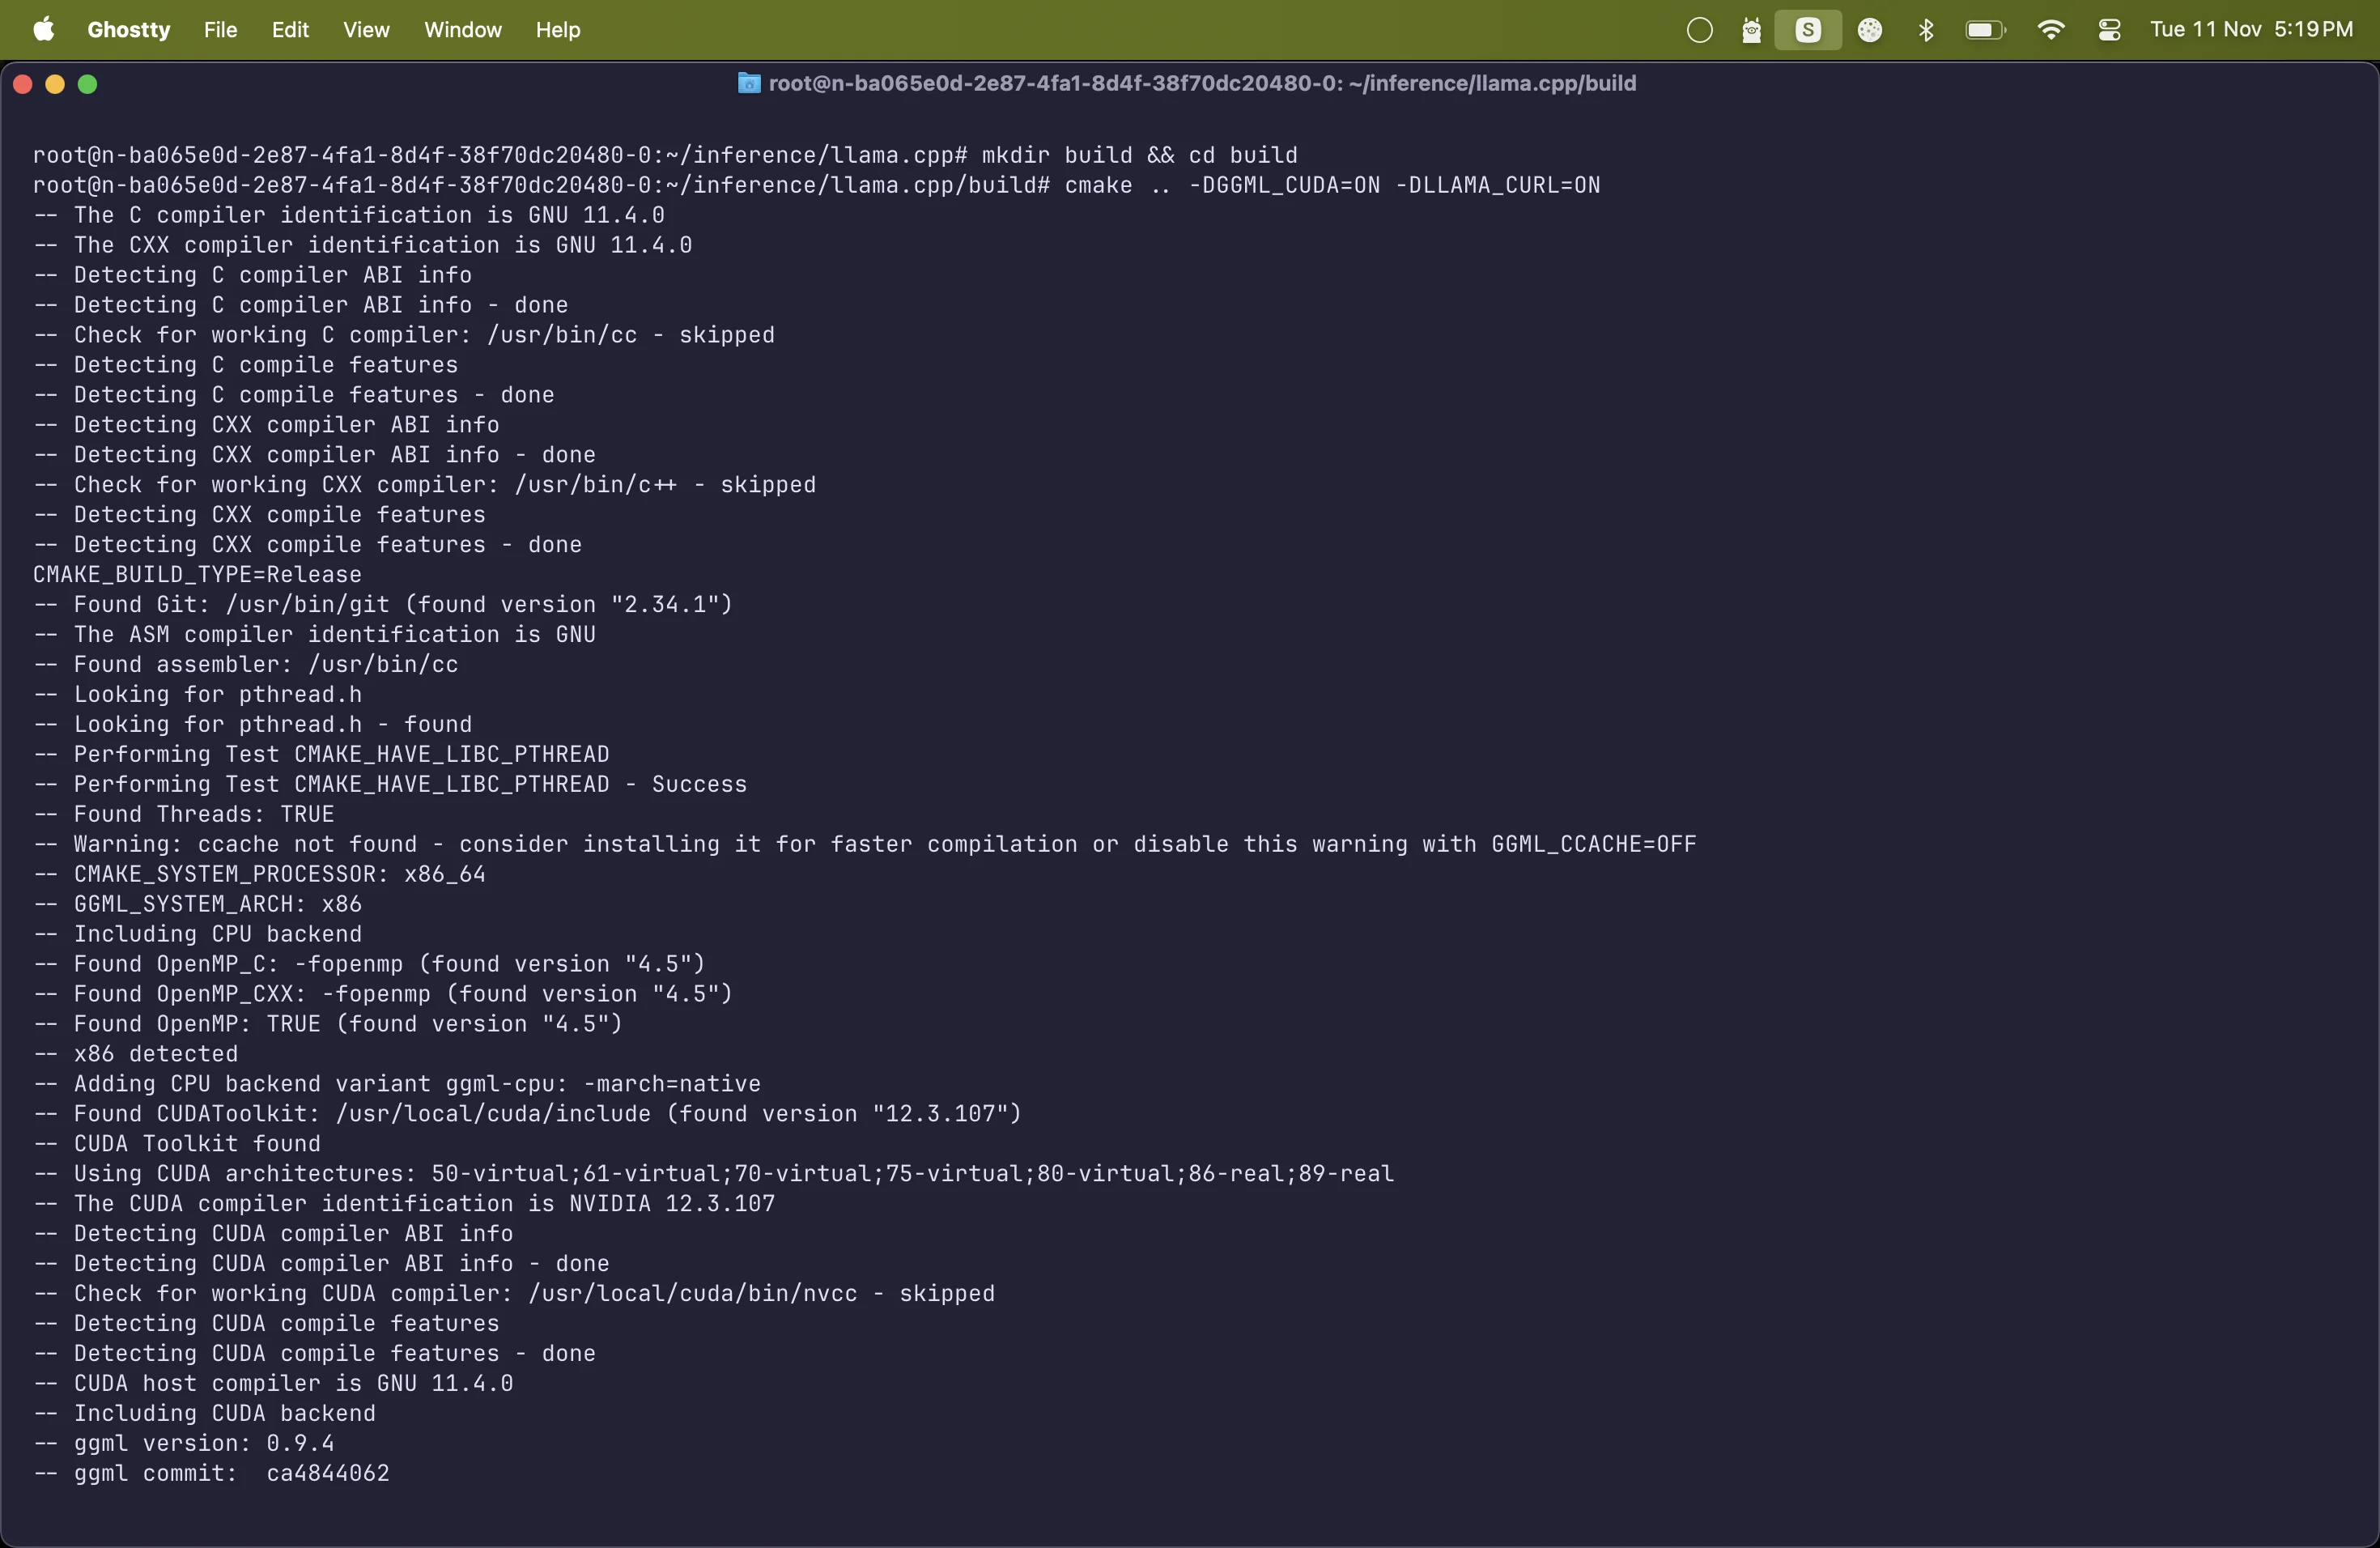
## Setting up llama.cpp with CUDA
Next, I set up the inference engine - llama.cpp, an optimized C++ runtime for LLMs that supports these GGUF quantized models. Since I have GPUs, I compiled llama.cpp with CUDA support to accelerate inference:
### Clone the llama.cpp repository
```bash
git clone https://github.com/ggml-org/llama.cpp
cd llama.cpp
```
#### Build with CUDA support (and Curl for tool usage)
```bash
mkdir build && cd build
cmake .. -DGGML_CUDA=ON -DLLAMA_CURL=ON
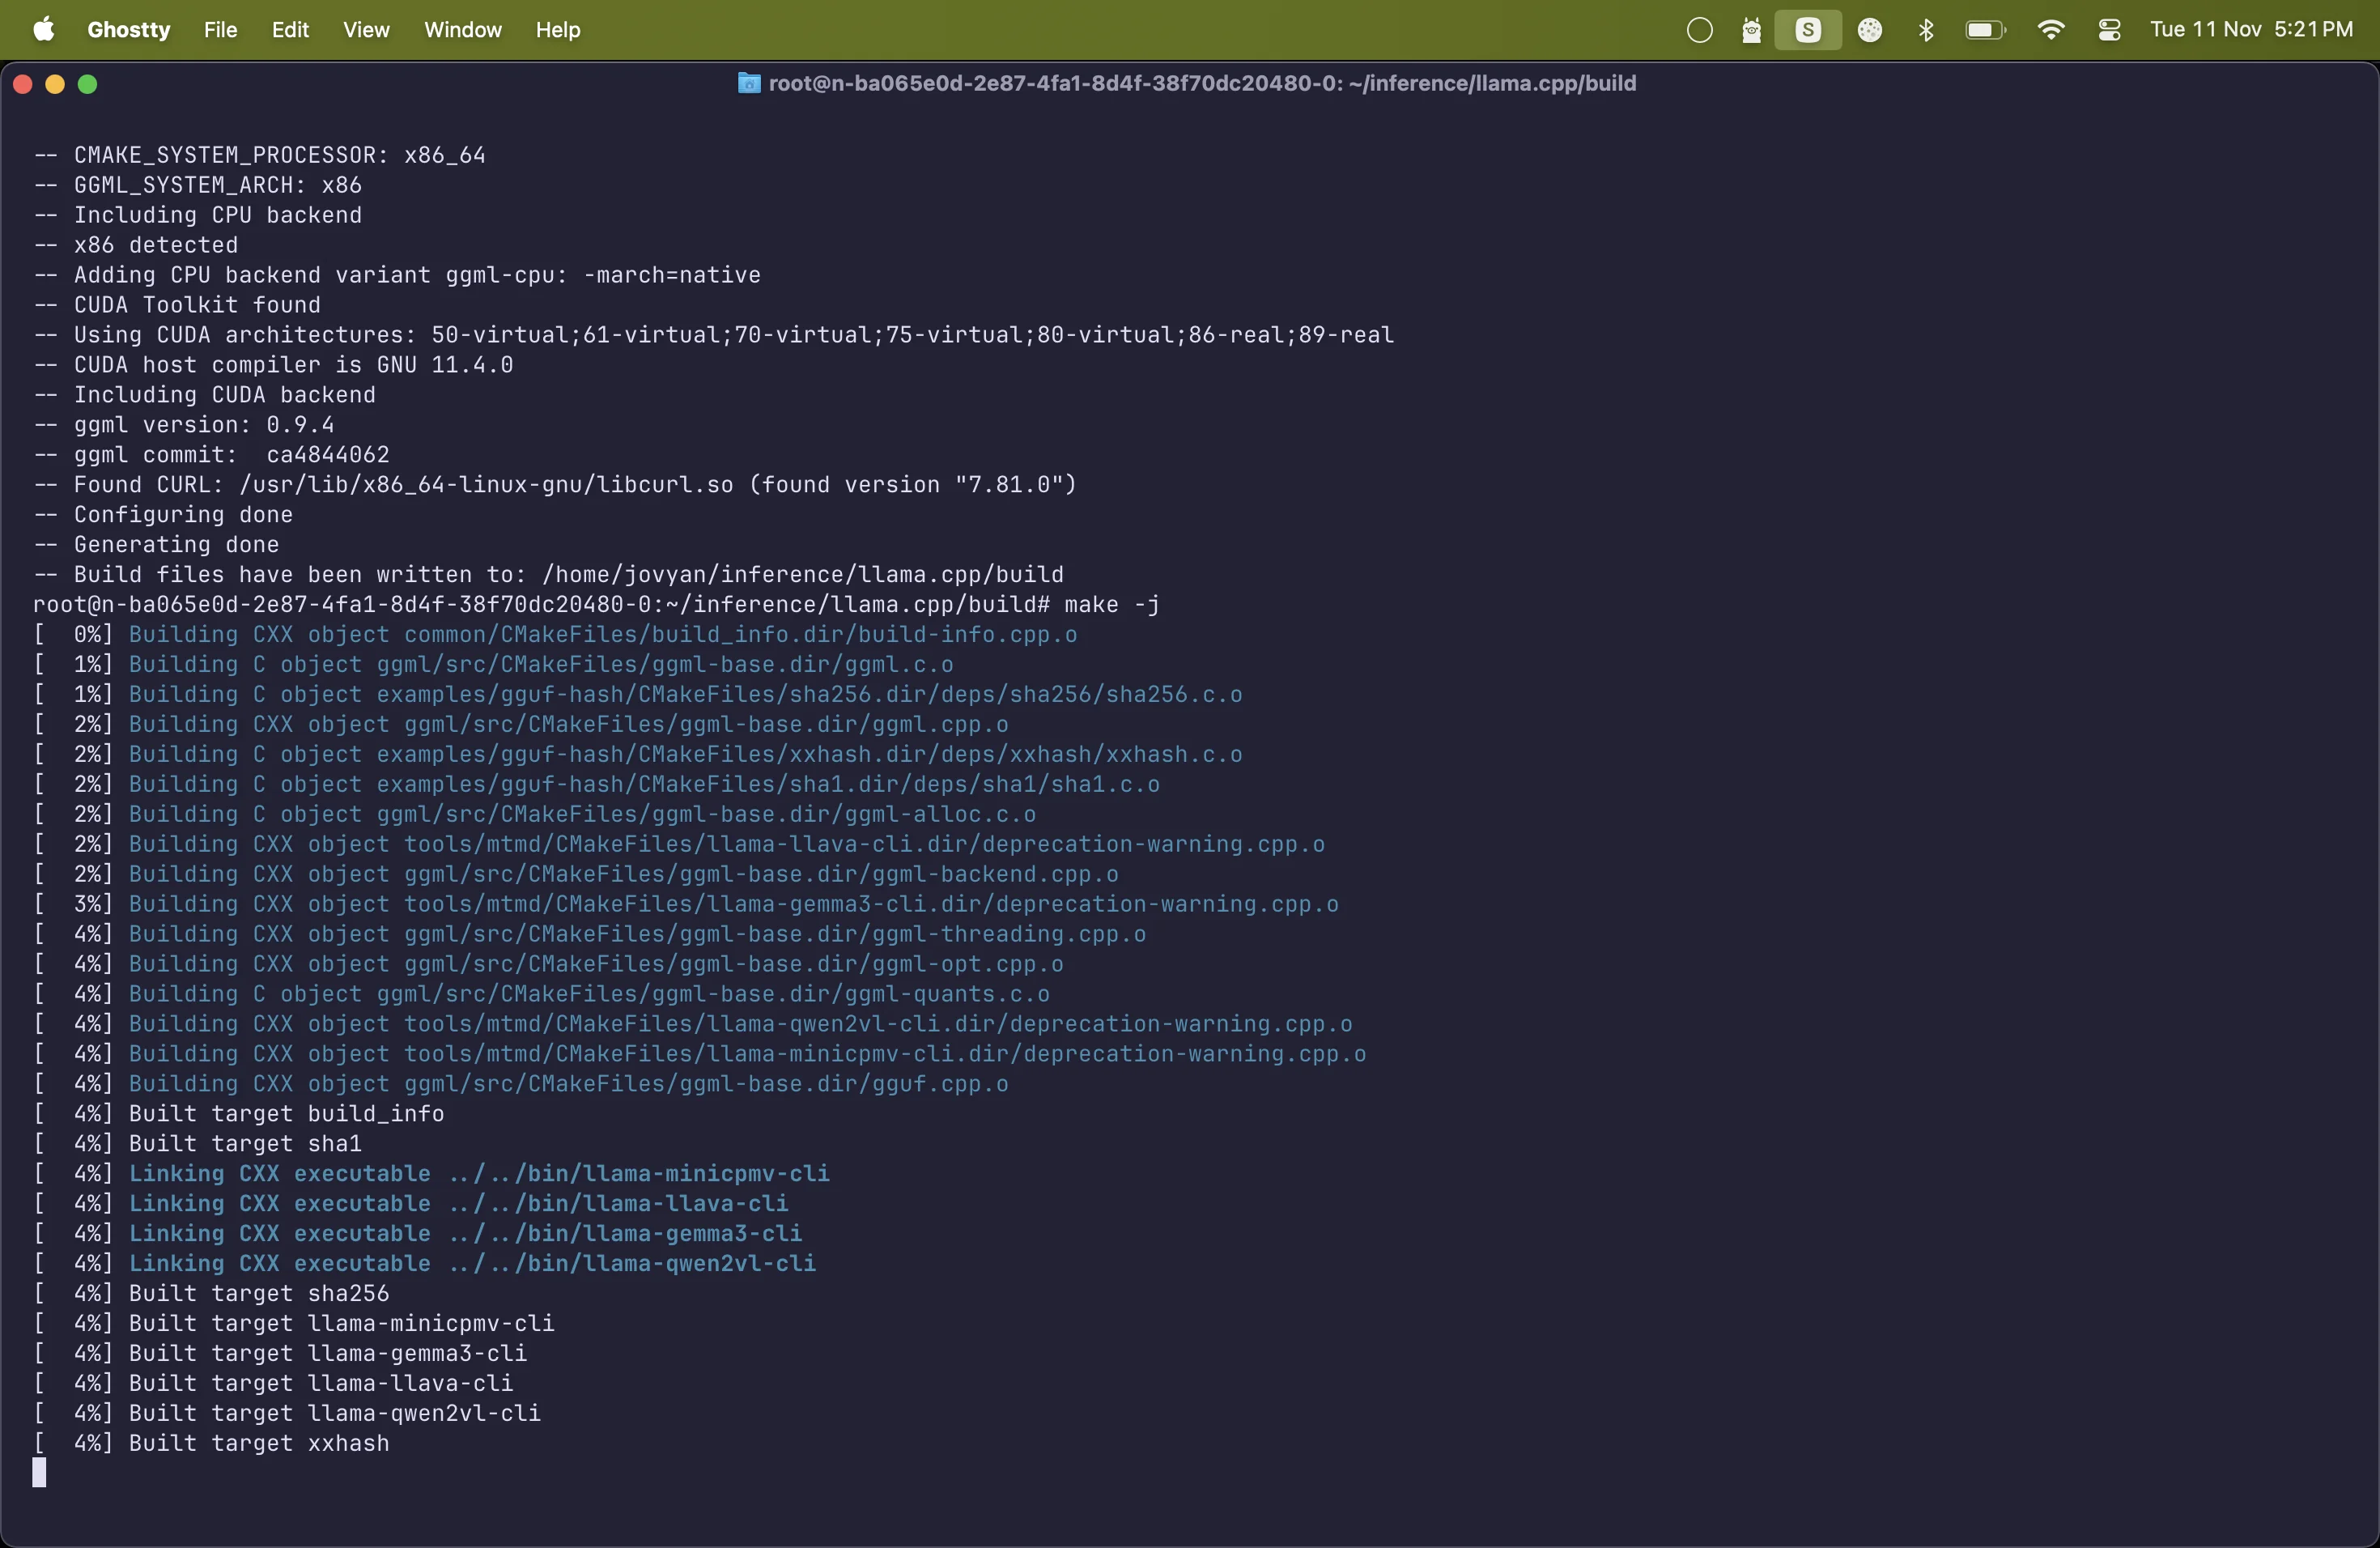
make -j
```
This produces the llama.cpp binaries, including llama-server (an OpenAI-compatible HTTP server) and llama-cli (a simple CLI). I’ll be using llama-server to serve the model so that other tools (like my CLI agent interfaces) can query it via an OpenAI API format.
> Note: If you don’t have an NVIDIA GPU, you can omit -DGGML_CUDA=ON to build a CPU only version. Just be aware that running Kimi K2 on CPU alone requires a ton of RAM (250+ GB) and will be very slow (likely <1 token/sec on most CPUs).
## Launching the Model with llama.cpp
With the model downloaded and llama.cpp built, it’s time to fire up the model server. I used llama.cpp’s server with a configuration tuned for my hardware.
> Note: llama.cpp expects a single GGUF V3 file; if the Hugging Face repo provides multi‑part shards (00001‑of‑00008…), concatenate them in order into one file before serving.
Before that, let's merge the model files into a single GGUF file to be served by the llama.cpp server. The model that we downloaded is split into multiple shards. We need to merge them into a single file before running the server. You need only the first part of the split model file.
The `llama-gguf-split` utility automatically recognizes all parts of the shard as long as they are in the same directory and follow the correct naming convention.
```bash
./llama.cpp/llama-gguf-split --merge models/kimi-k2-gguf/UD-Q2_K_XL/Kimi-K2-Instruct-UD-Q2_K_XL-00001-of-00008.gguf models/kimi-k2-gguf/UD-Q2_K_XL/Kimi-K2-Instruct-UD-Q2_K_XL.gguf
```
Now we can run the llama.cpp server. Here’s the command I ran:
```bash
./llama.cpp/llama-server \
--model models/kimi-k2-gguf/UD-Q2_K_XL/Kimi-K2-Instruct-UD-Q2_K_XL.gguf \
--host 0.0.0.0 --port 8000 \
--n-gpu-layers 61 \
--tensor-split 1,1,1,1 \
--main-gpu 0 \
--threads 96 \
--numa distribute \
--batch-size 2048 --ubatch-size 512 \
--ctx-size 32768 \
--parallel 4 --cont-batching \
--cache-type-k q4_0 --cache-type-v q4_0 \
--flash-attn on \
--temp 0.6 --min-p 0.01 \
--jinja \
--alias kimi-k2-instruct
```
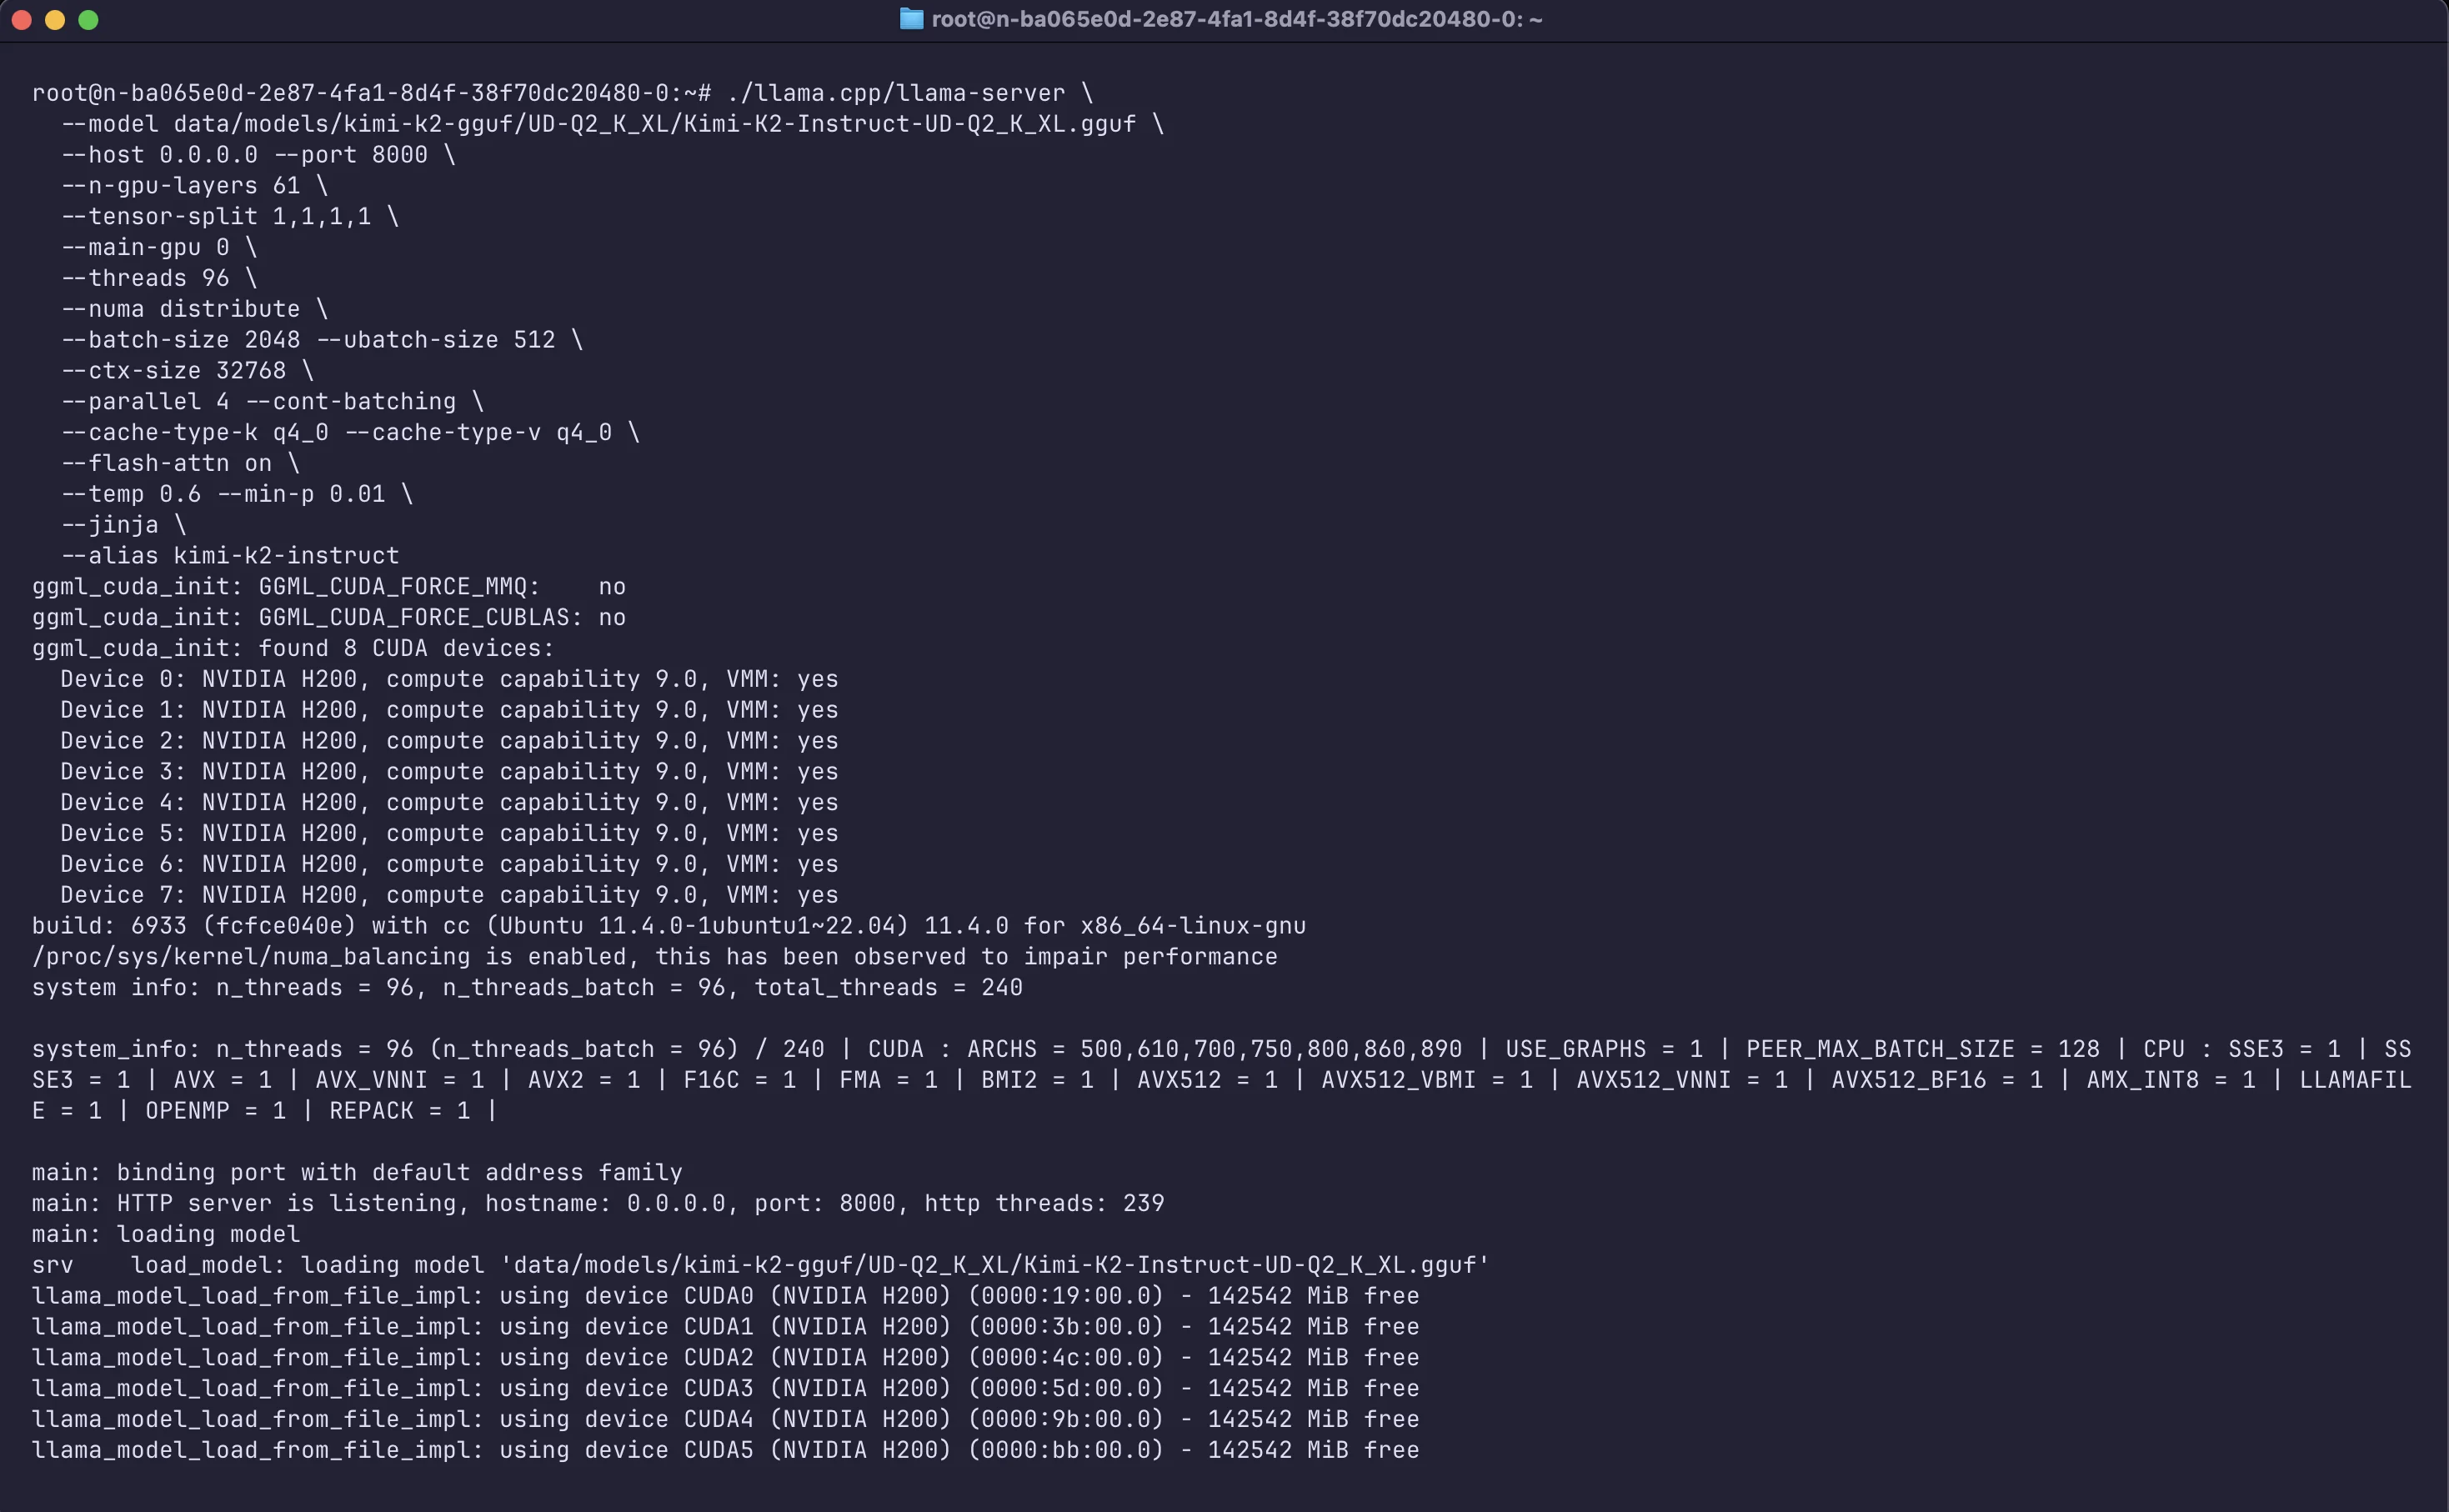
Let me break down the important flags here:
- Model & Server: ``--model`` points to the GGUF file. `--host 0.0.0.0 --port 8000` makes the server listen on port 8000 for API requests (I used 0.0.0.0 so it’s accessible externally – more on that later).
- GPU Offloading: `--n-gpu-layers 99` offloads virtually all model layers to GPU memory. Essentially, I’m telling llama.cpp to use the GPUs as much as possible. Best practice is to match the layer's flag to the model’s actual layer count. Technically for this model you can set the layers value to 62, as this model has 62 Transformer blocks (you can run `–info` with llama.cpp cli on model file and check). With 4× H200 (564 GB VRAM) the entire model weights can sit in VRAM. This maximises speed.
`--tensor-split 1,1,1,1` distributes weights evenly across the 4 GPUs and `-main-gpu 0` designates GPU0 as the anchor device for initial allocations and scheduling.
- Parallelism: `--threads 96` uses 96 CPU threads to assist (for any parts running on CPU, like tokenization, orchestration, small kernels, the MoE layers that didn’t fit in VRAM). I chose 96 since my server has plenty of CPU cores – you can adjust based on your CPU. I also set `--parallel 4` and `--cont-batching` to allow up to 4 concurrent requests to be processed in batches. This helps utilize the GPUs fully if multiple prompts come in simultaneously (useful if, say, you have multiple terminal sessions or an API with multiple users). If you see OOM or throttling, reduce`--parallel` or `ctx size`.
- Batching for Speed: `--batch-size 2048` and -`-ubatch-size 512` increase the token batching. Larger batch sizes let the model generate multiple tokens in a single GPU pass, greatly improving throughput on NVIDIA H100/H200 GPUs. I found 2048 to be a good batch size for 2 H200s (with 512 microbatch), this gave a nice speed-up in tokens/sec. If you have more GPUs or more VRAM headroom, you could push this higher.
- Context Length: `--ctx-size 32768 `sets a 32k token context window. Kimi K2 technically supports up to 128k context in the base model, but the 2-bit quant I used is calibrated for 32k by default. (128k would require even more memory for the KV cache, which isn’t practical on 2 GPUs.) In practice, 32k tokens (roughly ~24k words) is plenty for my coding use cases.
- Memory Optimization: `--cache-type-k q4_0 --cache-type-v q4_0` compresses the attention key/value cache, reducing the VRAM use for long contexts with minimal quality loss. If you notice degradation on very long prompts, try `q5_k` for a bit more fidelity.
- Speed Tricks: `--flash-attn on` enables FlashAttention, leveraging the H200’s high-bandwidth memory for faster attention calculation (this gave a ~2× speed boost in my tests). This flag requires your llama.cpp to be built with support and a compatible GPU (H100/H200 or A100 with certain SM versions).
- Sampling Settings: I set the decoding parameters as per Moonshot’s recommendation: temperature 0.6 and `min_p 0.01`. Kimi K2 can sometimes repeat or ramble at higher temperatures; 0.6 keeps it focused. The `min_p` setting helps suppress extremely low-probability tokens (essentially a strict nucleus cutoff). These tweaks improve coherence, especially for code.
- Tool Use (Agentic Mode): The` --jinja` flag enables Kimi’s special tooling format. Kimi K2 was trained to use “tools” (like running code, web search, etc.) via a JSON-based format in its outputs. With `--jinja`, llama.cpp’s server will recognize and format function-call outputs to match the OpenAI API style. This is crucial for allowing our CLI agent to handle tool requests from the model. (We’ll see this in action soon.)
After a minute or two of loading (280+ GB of weights takes a bit of time), the server was up and running. At this point, we have a local API endpoint that speaks the OpenAI API protocol – ready to serve our Kimi K2 Instruct model’s completions and chat responses!
> Note: (If everything is set up correctly, you can test the server quickly with curl or python: try hitting http://localhost:8000/v1/models to see if the model is listed, or send a POST to http://localhost:8000/v1/chat/completions with a test prompt. You can also open the URL http://localhost:8000/ in the browser and should see [web UI chat interface](https://github.com/abhishekmishragithub/llm-lab/blob/main/kimi-k2-gguf/assets/connecting_to_llama_cpp_server.png))
## Terminal Interface with Kimi CLI
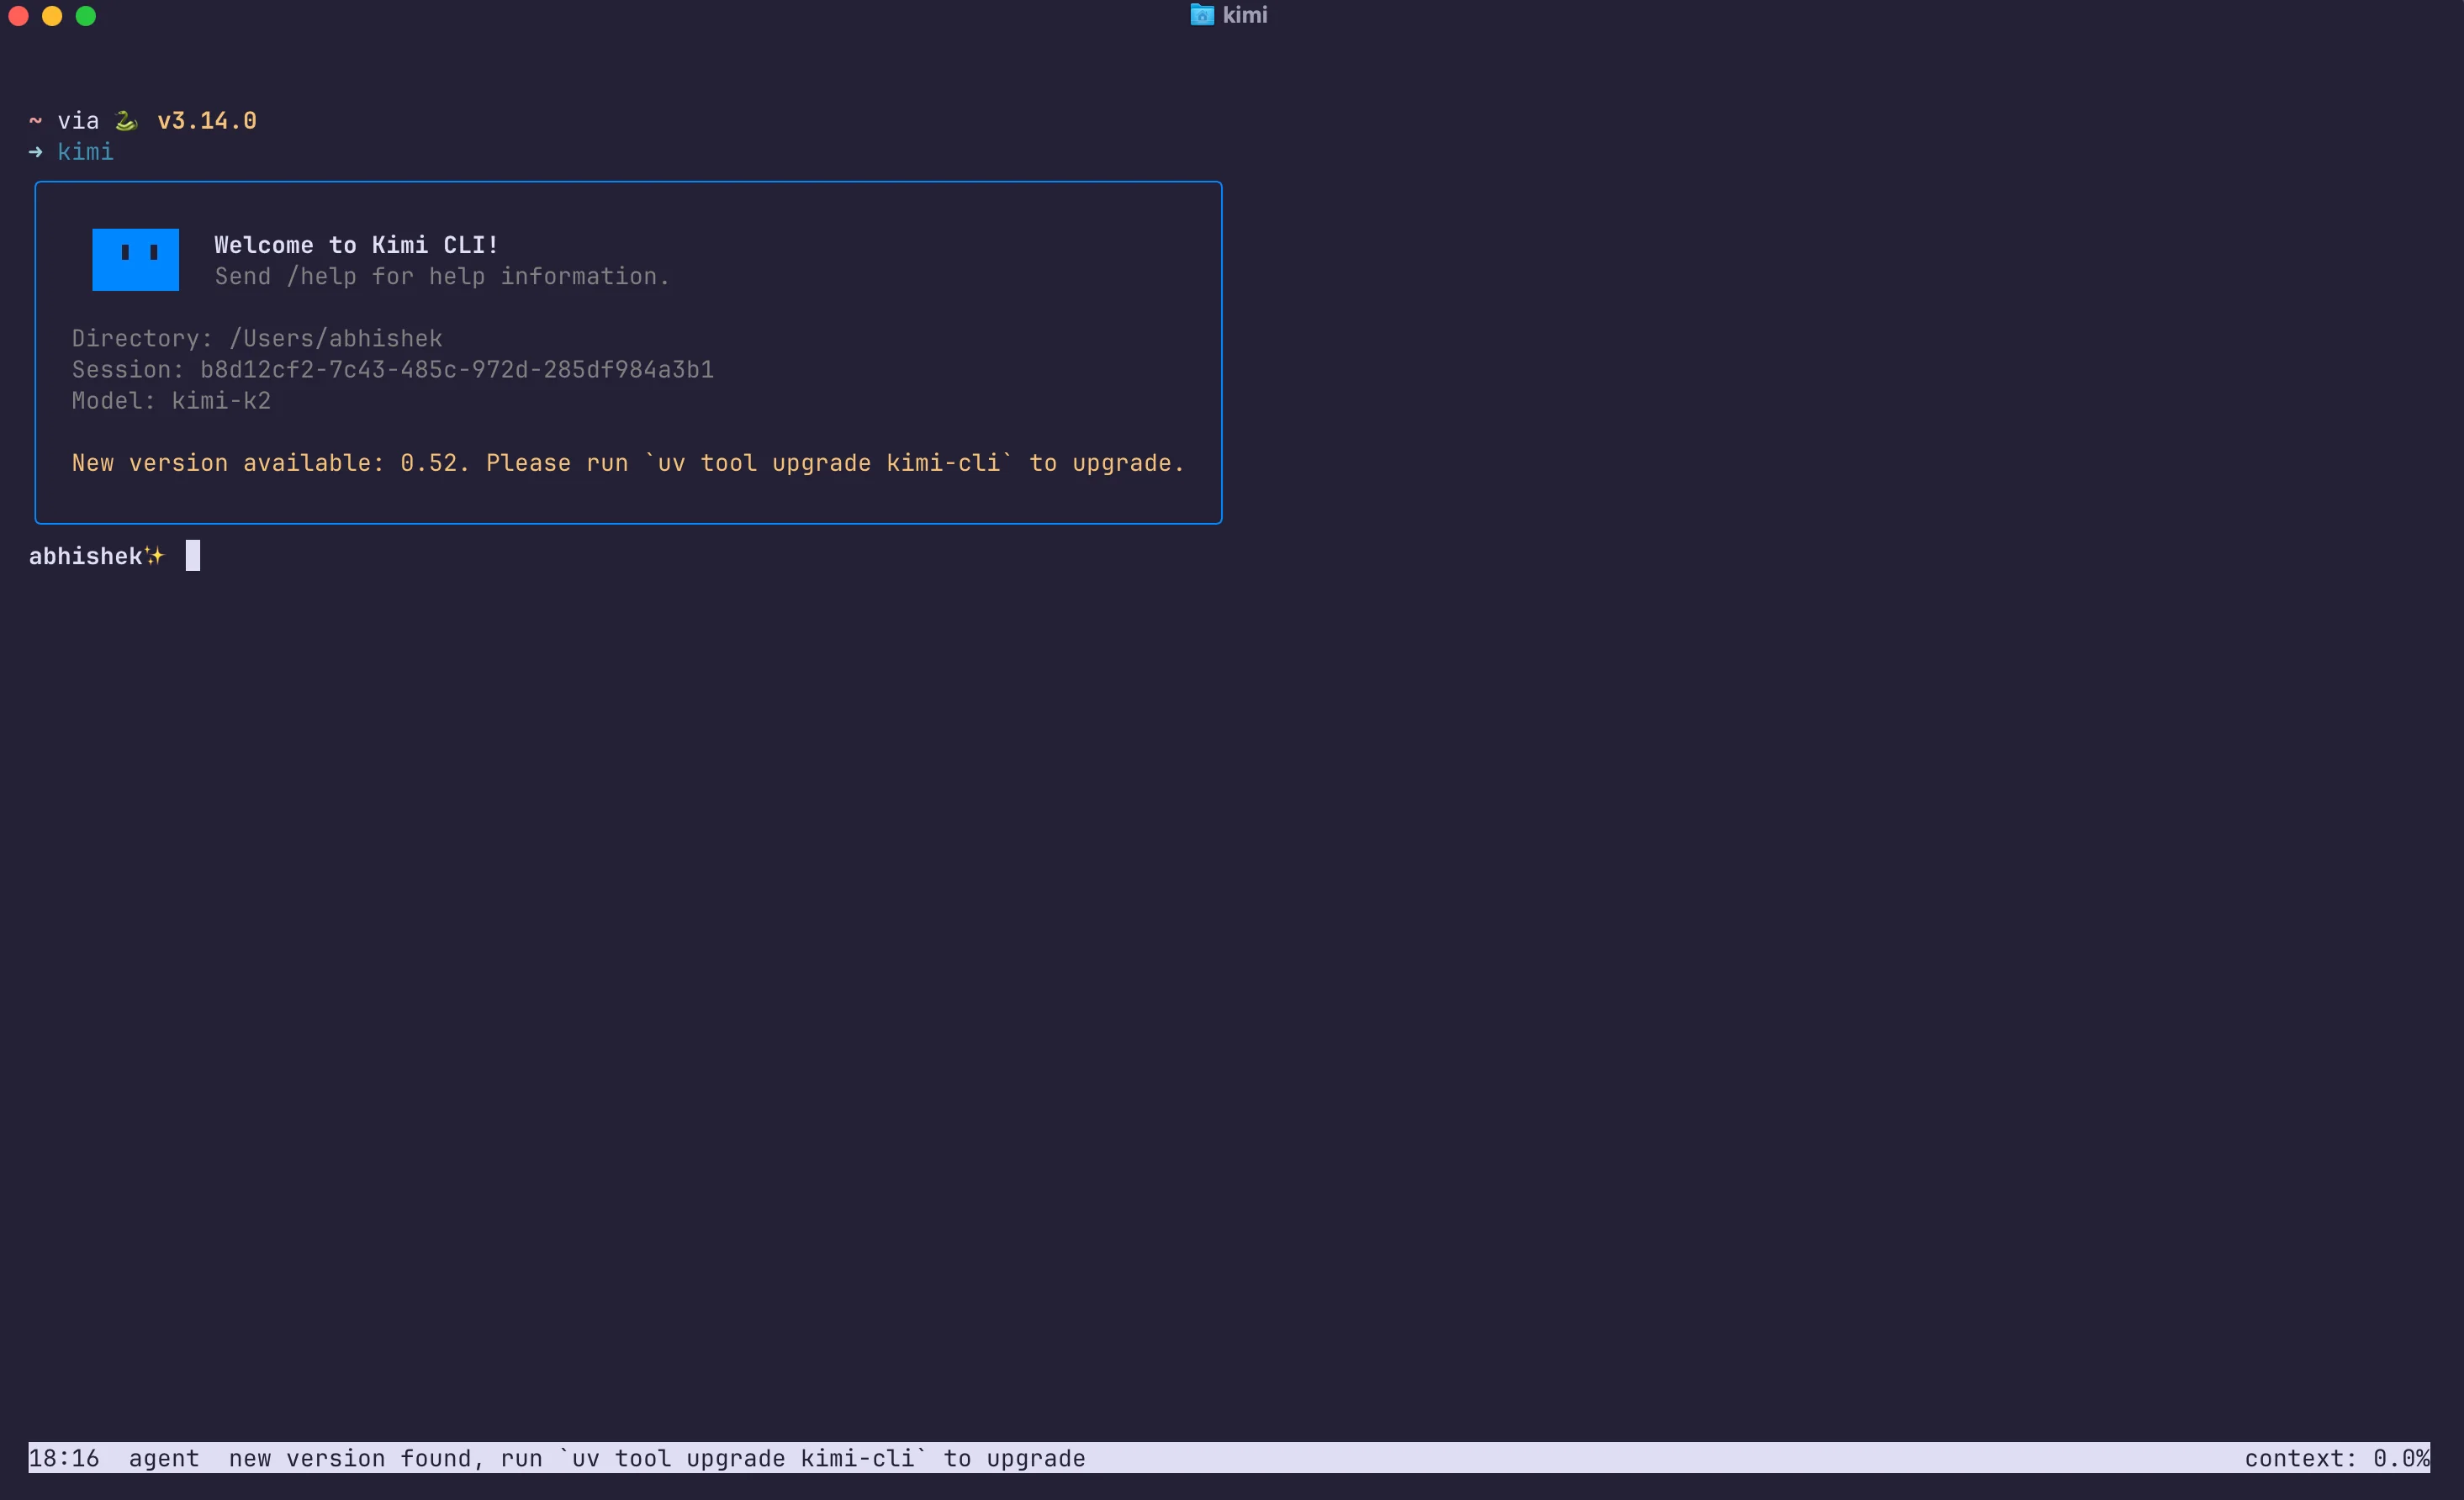
Having a model running is great, but I wanted a nice CLI interface to chat and interact with it (especially for coding tasks). Moonshot provides a lightweight CLI client called [Kimi CLI](http://github.com/moonshotai/kimi-cli) that works similar to OpenAI’s official examples, but can interface with a local model. I installed it via uv :
### Install Astral 'uv' tool (if not already installed)
```bash
curl -LsSf https://astral.sh/uv/install.sh | sh
source ~/.local/bin/env
```
### Install the Kimi CLI tool
```bash
uv tool install kimi-cli
```
### Launch Kimi CLI (this will create a config file on first run)
```bash
kimi
```
When you first run `kimi` it generates a config at `~/.kimi/kimi.json`. We need to edit this config to point the CLI to our local model server. I updated it to define a custom provider (an OpenAI-compatible endpoint) and a model entry for Kimi-K2:
```json
{
"default_model": "local-kimi-k2",
"models": {
"local-kimi-k2": {
"provider": "openai-local",
"model": "kimi-k2",
"max_context_size": 131072,
"capabilities": null
}
},
"providers": {
"openai-local": {
"type": "openai_legacy",
"base_url": "http://localhost:8000",
"api_key": "dummy"
}
},
"loop_control": {
"max_steps_per_run": 100,
"max_retries_per_step": 3
},
"services": {}
}
```
A quick rundown of this config: I created a provider called "`openai-local`" of type `openai_legacy` – this essentially tells Kimi CLI to treat it as an OpenAI-like API. The base_url is set to our llama.cpp server ([localhost:8000/v1](https://localhost:8000/v1)), and the `api_key` can be anything (llama.cpp doesn’t check API keys, so "dummy" works). Then I defined a model `local-kimi-k2` that uses this provider and refers to "`kimi-k2`" as the model name. (Since our llama.cpp server only has one model loaded, it doesn’t strictly require the exact name, but I used "kimi-k2" for clarity. If I had multiple models, I could use the ``--alias`` flag when launching the server to name them, and match that here.)
With that in place, running kimi drops me into an interactive cli chat powered by my own Kimi K2. It’s like having Claude code in your terminal, but backed by the local K2 model. The CLI supports multiline editing, and thanks to our` --jinja` setup, it can handle tool invocation output as well.
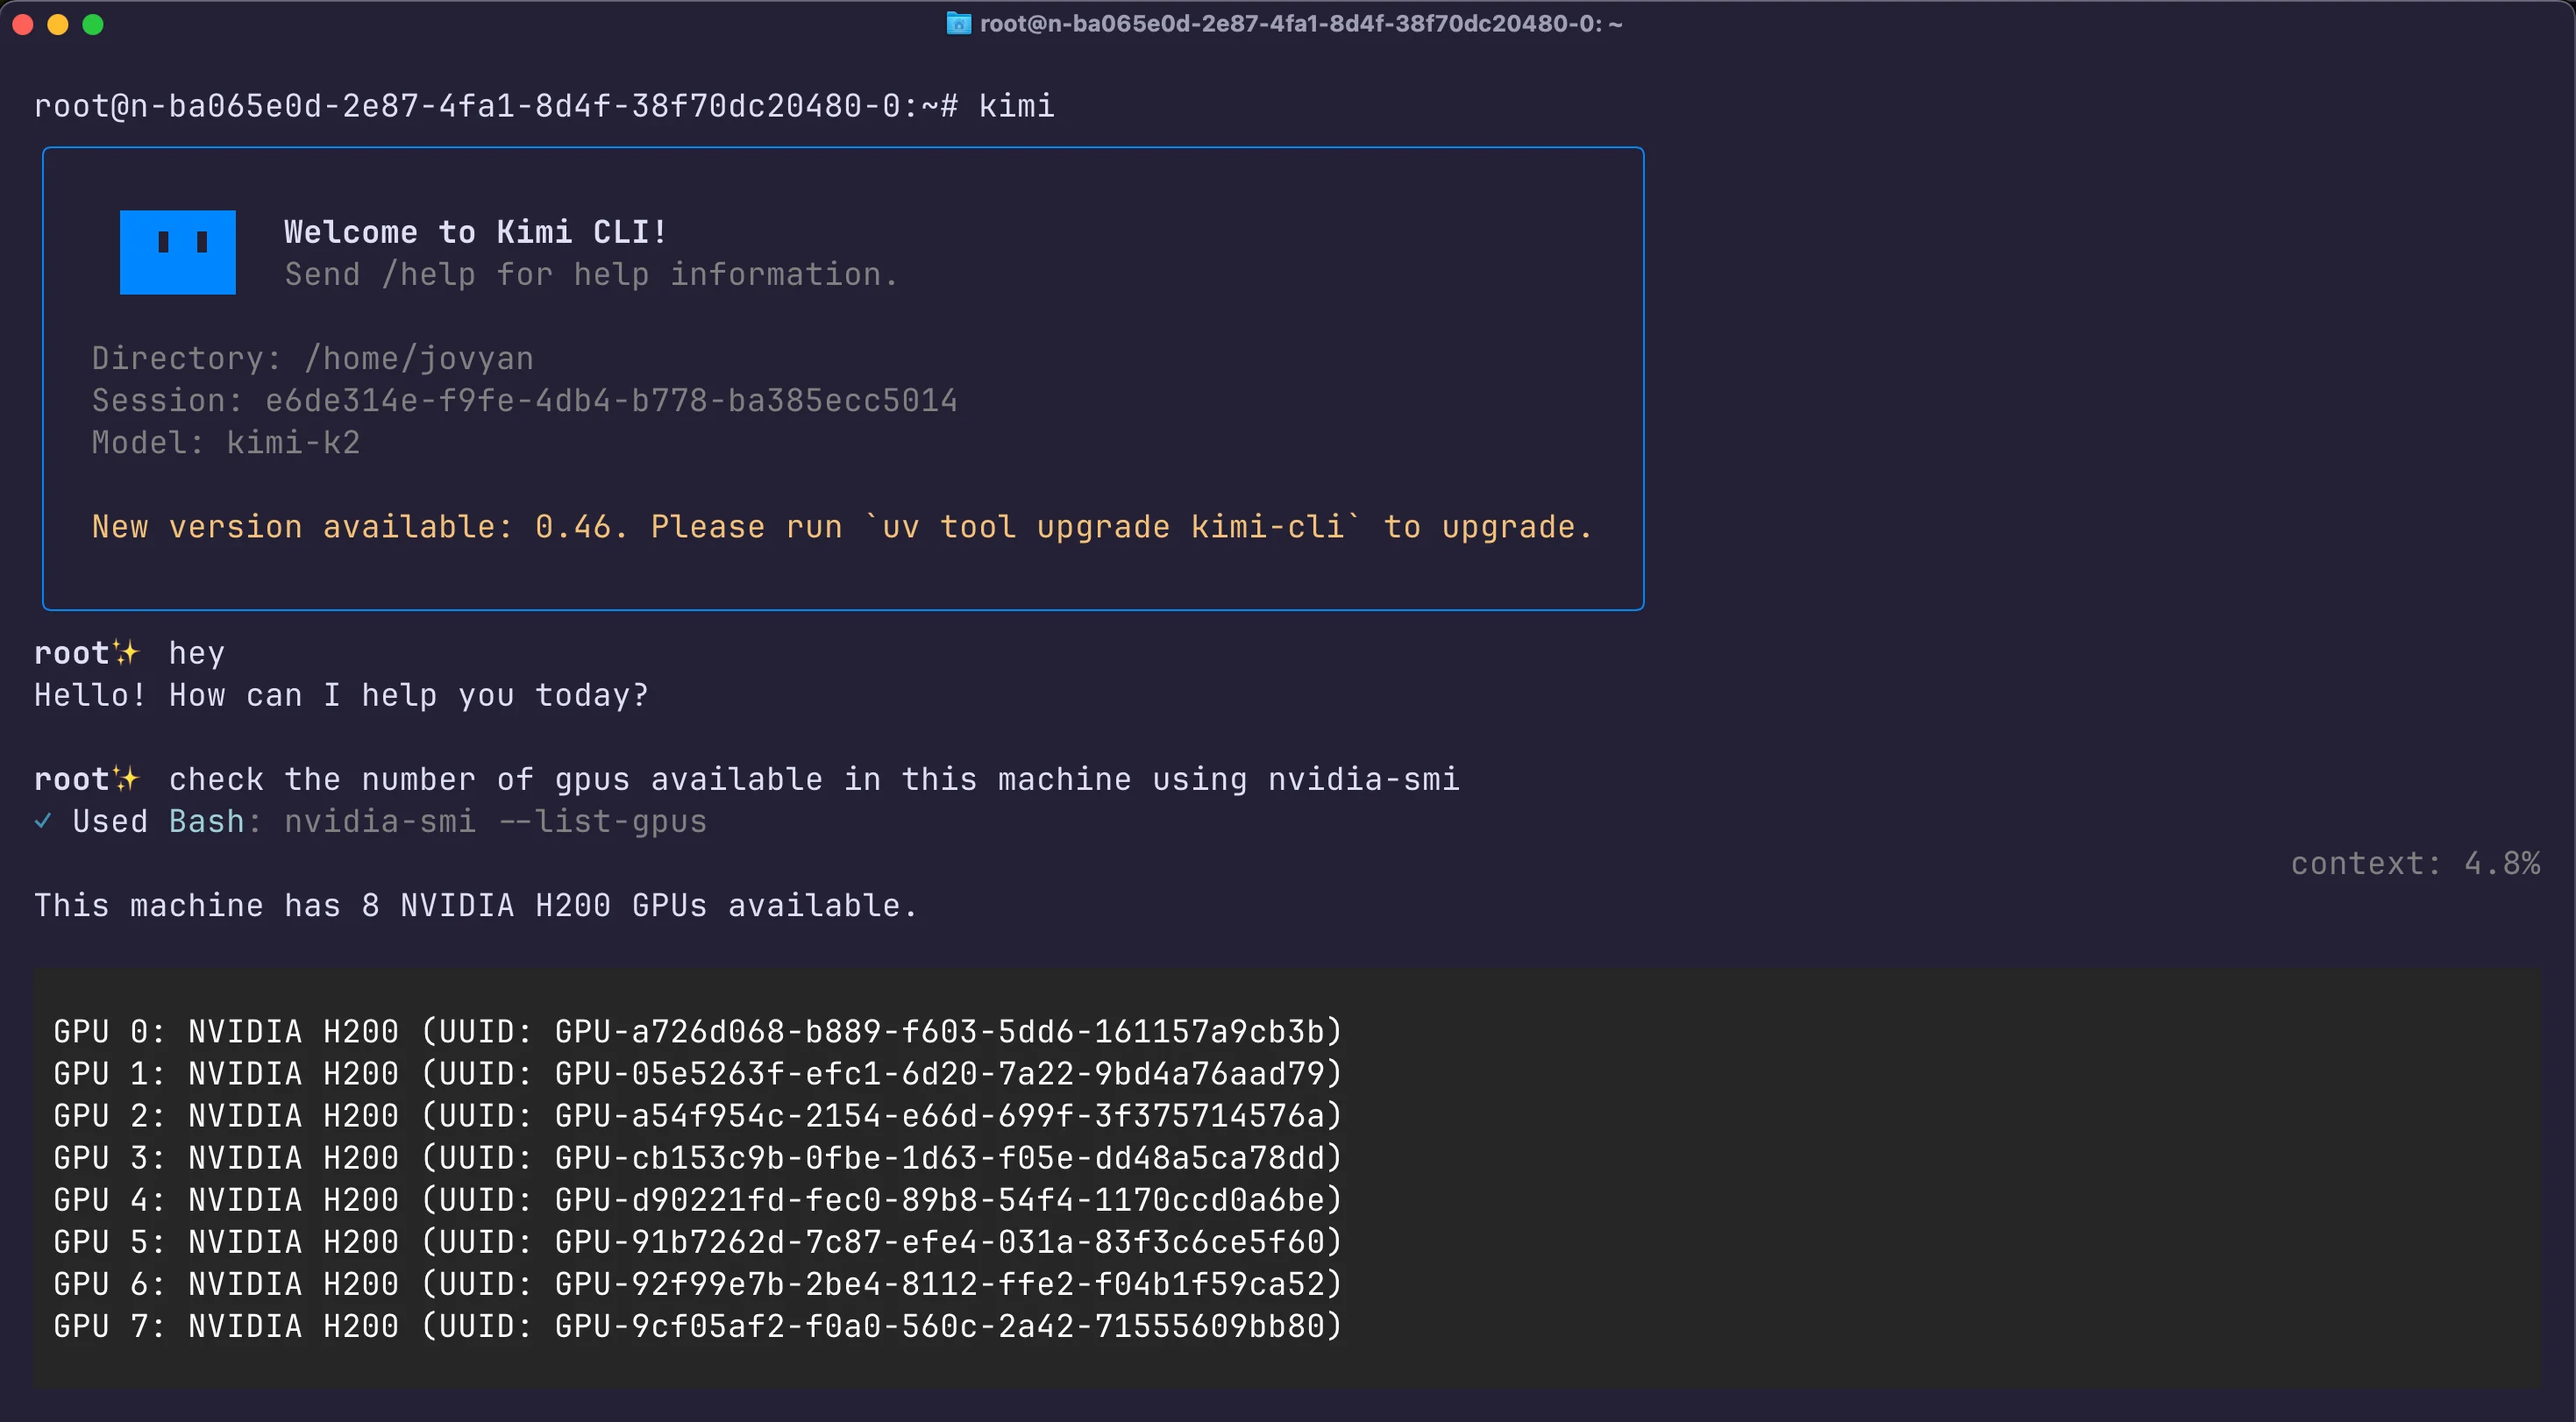
One really cool aspect is that Kimi K2 is an agentic model, it was trained to use tools like a browser, code executor, etc., when appropriate. In the CLI, this manifests as the model sometimes responding with a special <Tool> message indicating it wants to use a tool. For example, if you ask it to run code or search the web, it might output a function call. The Kimi CLI is set up to catch those and actually execute them (if configured). In my testing, I saw K2 spontaneously attempt to execute JS/Python code for certain tasks, in my case creating a flappy bird program for example. Having a local coding agent at your fingertips? Feels like wielding the Force like a Jedi!.

To make testing easier across devices, I also set up a [Cloudflare Tunnel](https://developers.cloudflare.com/cloudflare-one/networks/connectors/cloudflare-tunnel) to expose my local Kimi API to the internet. This assigned a temporary subdomain (e.g. https://<random>.trycloudflare.com/v1) that forwarded to my localhost:8000. I then updated base_url in the config to that URL, allowing me to connect to Kimi from anywhere (my laptop, etc.) securely. This step isn’t necessary if you’re just using Kimi on the same machine, but it’s a neat trick for remote access. (Cloudflare offers free tunnels , you can create one with
```bash
cloudflared tunnel --url http://localhost:8000
```
and get a public endpoint instantly.
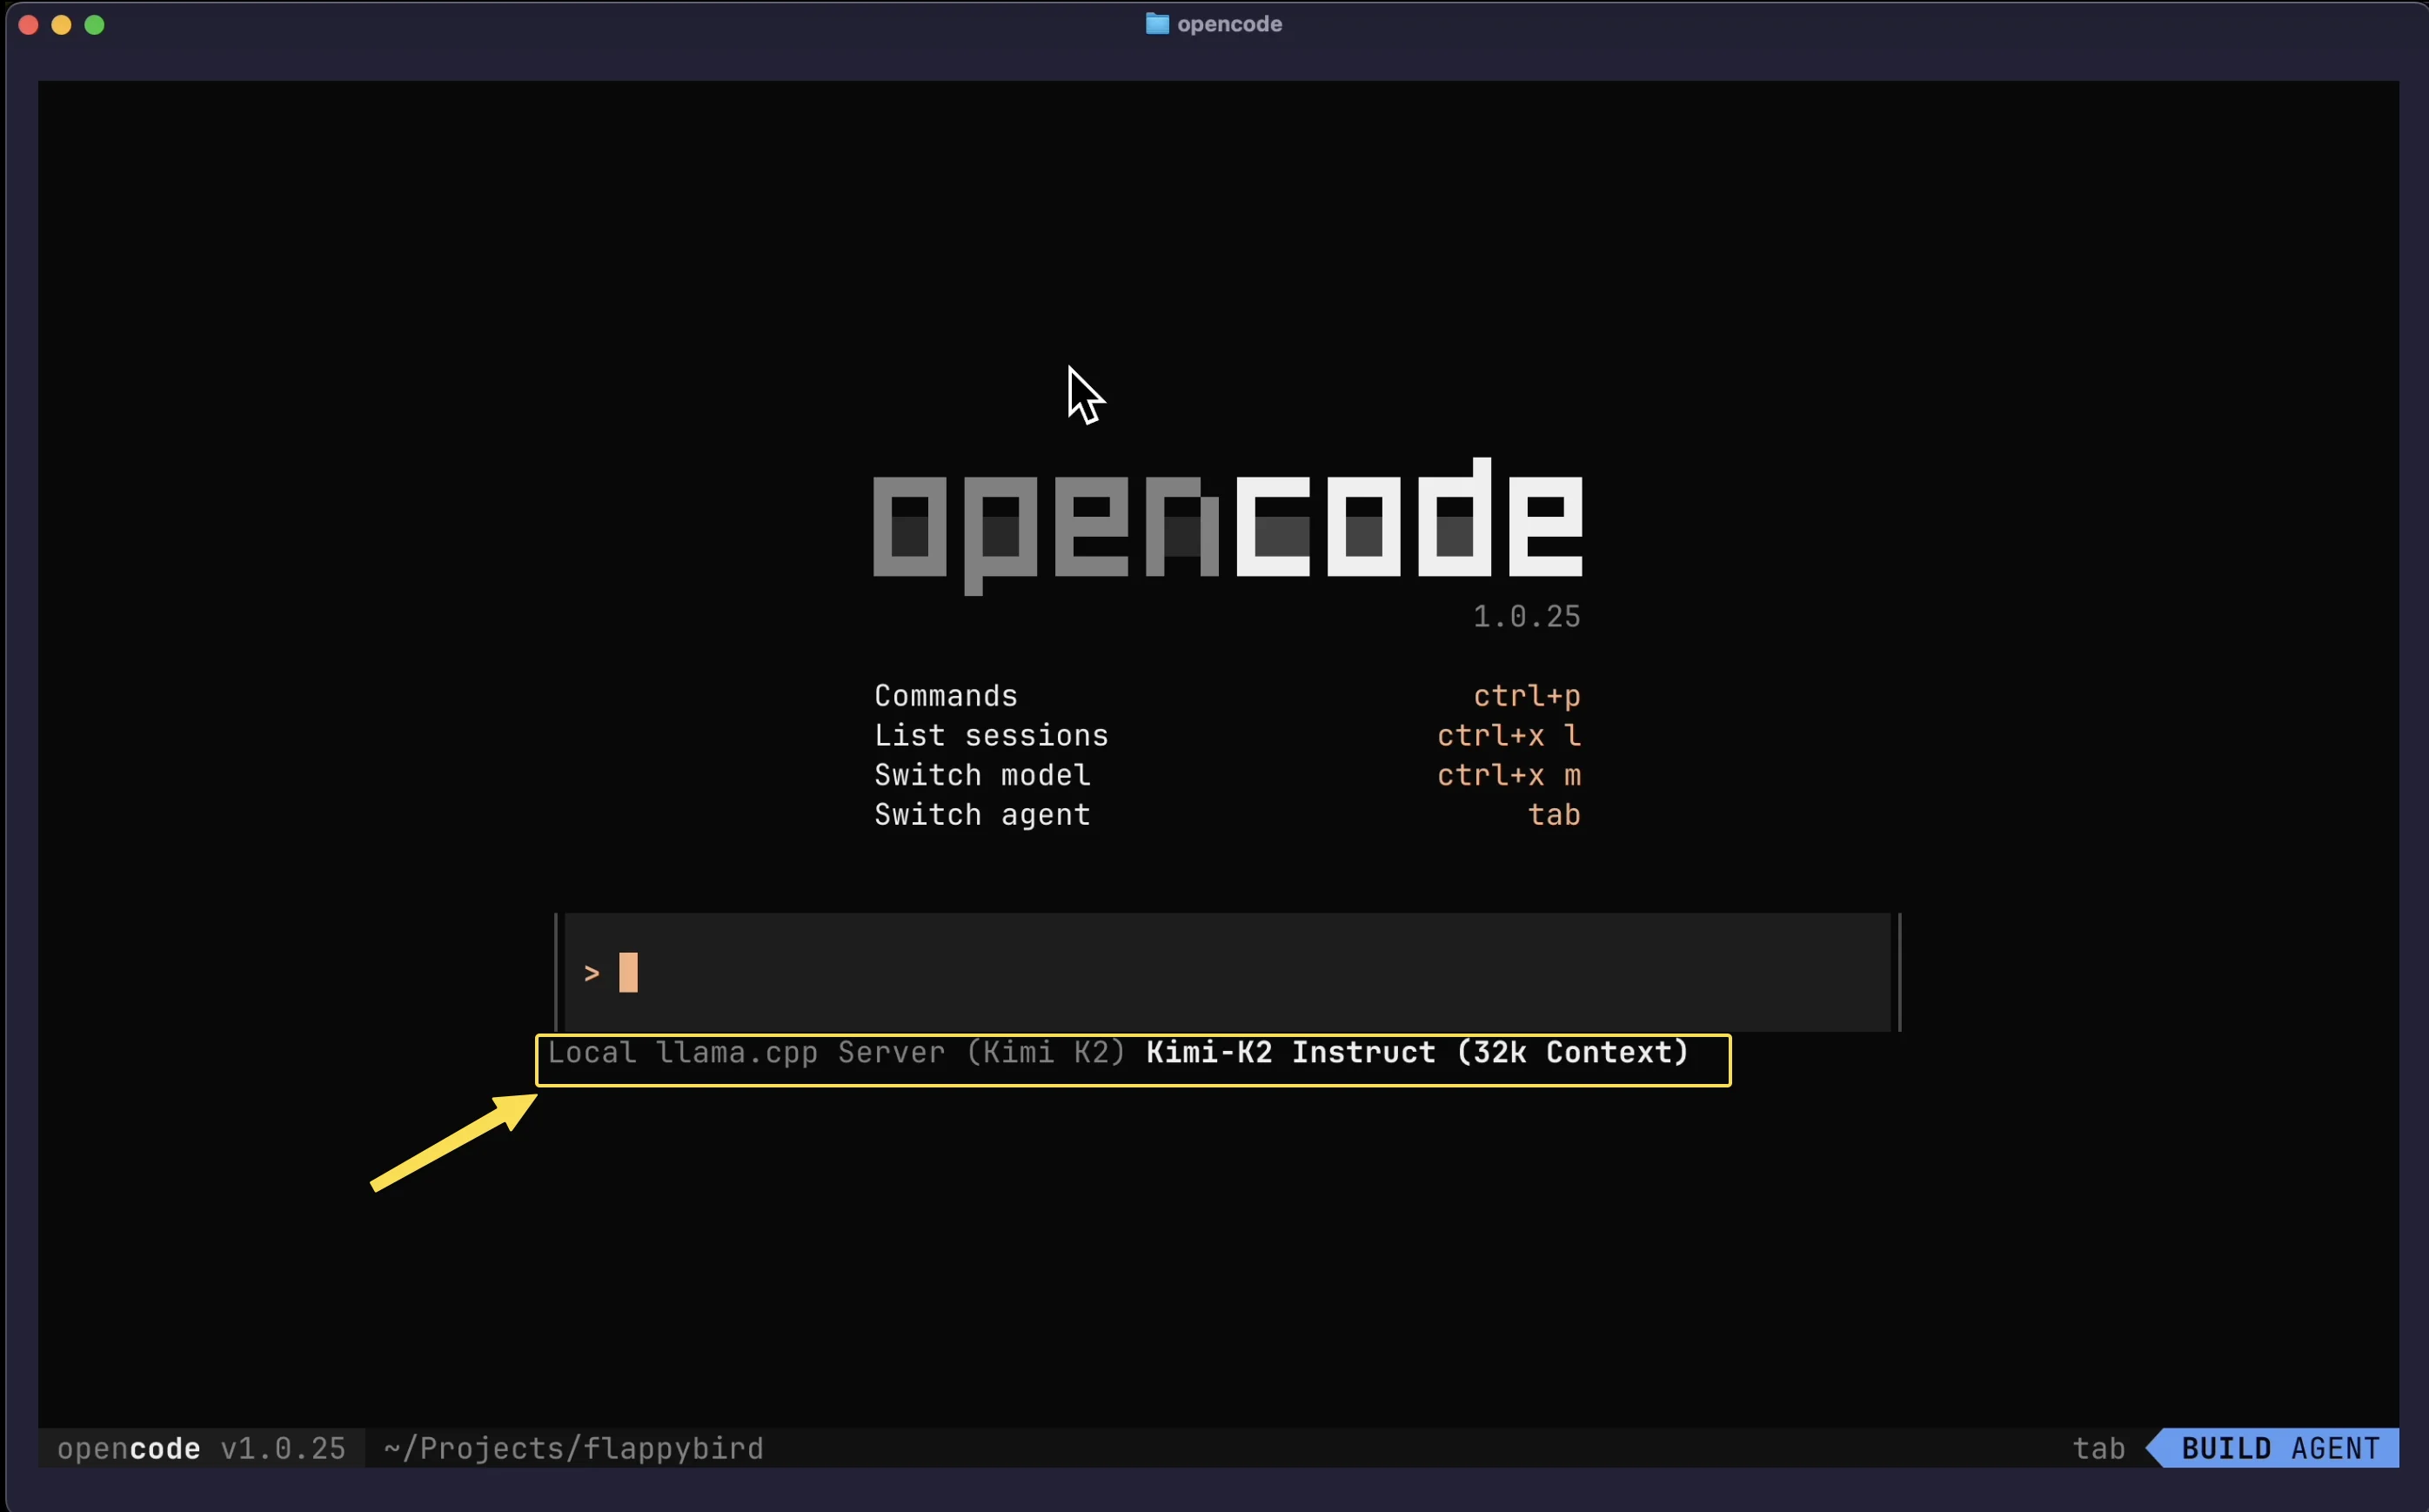
## Bonus read, Using OpenCode as AI Coding Agent with Kimi K2 :)
While the Kimi CLI is great for chatting and simple tool use, I also explored [OpenCode](http://opencode.ai), an open-source coding assistant CLI. OpenCode recently got a lot of traction from the community for a robust cli coding agent as compared to claude code as well. OpenCode provides a richer interface for code-centric tasks, like it can manage files, run code snippets, and has an interactive Text User Interface (TUI) for multi-step conversations. I wanted to integrate Kimi K2 as the brain behind OpenCode.
### Installation: OpenCode can be installed via npm (Node.js). I installed it with:
```bash
npm install -g @opencode/cli # (assuming Node.js is available)
```
After installation, the config file is located at ~/.config/opencode/opencode.json. I edited this file to add a local provider pointing to my llama.cpp server, similar to what we did for Kimi CLI. Here’s a snippet of my OpenCode config with the relevant parts:
```json
// please refer to https://opencode.ai/docs/config/
{
"$schema": "https://opencode.ai/config.json",
// 1. set the default model for quick use
"model": "local-llama-cpp/kimi-k2-instruct",
"provider": {
// 2. define a custom provider ID (e.g., 'local-llama-cpp')
"local-llama-cpp": {
"name": "Local llama.cpp Server (Kimi K2)",
"npm": "@ai-sdk/openai-compatible",
"options": {
// 3. set the base URL, including the '/v1' path for the OpenAI API/compatible endpoint
"baseURL": "http://0.0.0.0:8000/v1"
// or the specific IP if connecting remotely.
// "baseURL": "https://models.abhishekmishra.dev/v1"
},
"models": {
// 4. define the model ID OpenCode will use: `provider_id/model_id`
"kimi-k2-instruct": {
"name": "Kimi-K2 Instruct (32k Context)",
// this 'id' must match the model name the llama.cpp server expects in the API request.
"id": "kimi-k2-instruct",
"context_size": 32768 // matches the llama.cpp server's --ctx-size
}
}
}
}
}
```
In plain terms, I defined a provider called "local-llama-cpp" using the OpenAI-compatible adapter, pointed it to http://localhost:8000/v1, and registered a model kimi-k2-instruct under that provider. I also set this as the default model ("model": "local-llama-cpp/kimi-k2-instruct" at the top). The "id": "kimi-k2-instruct" is important, it should match the model name the server expects. You can also use the alias name that I used while launching the llama.cpp server. Although it will accept any model ID in requests (as the server is running only 1 model); but I used a descriptive ID for clarity.
Now, using OpenCode with Kimi is straightforward. You can launch the interactive TUI by simply running:
```bash
opencode
```
This opens a terminal UI (TUI) where you can chat with the model and also issue special commands (like saving code to files, executing code, etc.). Alternatively, for quick one-off queries you can use a single command:
You can also use the cli with
```bash
opencode run -m local-llama-cpp/kimi-k2-instruct "Why is the sky blue?"
```
This will print the assistant’s answer directly and exit.


Using OpenCode, I was able to have Kimi K2 write and run code locally. For example, I gave it a prompt to “Create a Flappy Bird game in JS, with specific requirements” – a known challenge prompt used to test advanced coding models. Impressively, K2 generated the entire game code with all the asked features in one go. This Flappy Bird test is something only the top models can solve; Kimi K2 is noted as being one of the few that can one-shot it even at 2-bit quantization. Sure enough, the code it produced looked complete. I saved the code via OpenCode and ran it – after installing Pygame, the game window launched with the randomly colored background, pipes, a jumping bird, etc., exactly as specified!


Another test: I used OpenCode to have Kimi analyze and refactor a piece of legacy code from one of my projects. The model was able to understand the code (several hundred lines), explain what it did, and suggest more efficient implementations. When I prompted it to apply the changes, it provided a revised code snippet which, after some minor tweaks, worked correctly. This kind of multi-step coding assistance, understanding context, maintaining state across interactions, and even executing code to verify.
## Results & Impressions
After setting all this up, I effectively have a GPT-4 level coding assistant living in my terminal – and it’s all running locally on my hardware. How does it perform? In short, I’m impressed:
- **Capability:** Kimi K2 lives up to the hype in coding tasks. It’s able to handle large codebases thanks to the 32k context. It writes functions and classes intelligently, finds bugs in code when prompted, and follows complex instructions (like the Flappy Bird spec) to the letter. In my comparisons, it genuinely feels on par with GPT-4 in many coding scenarios. It also has the tool use capabilities, if I ask a knowledge question, it sometimes wants to do a web search (I haven’t hooked up a web tool, but this shows its training). For pure coding help, it’s top-notch.
- **Speed:** The quantized model is slower than smaller models or cloud APIs, but it’s not unreasonable. On my 4×H200 setup, I observed around 35-45 tokens per second in typical code generation. That means a medium-sized answer of 200 tokens comes out in ~10 seconds. For interactive use, this is acceptable – not instantaneous, but considering the complexity of tasks it handles, I’m fine waiting half a minute for a detailed answer or code. There is a short delay for the first token (~2-3 seconds) then it streams smoothly. If you have a less powerful setup (say 1 GPU or more CPU offloading), expect a few tokens/sec. Conversely, more GPUs or a higher quant (4-bit) can push to higher tokens/sec.
- **Stability:** Running such a large model in llama.cpp has been surprisingly stable. I did some long sessions and even hammered it with multi-gigabyte prompt loads (just to test extremes), and it held up. Memory usage is heavy but manageable given my resources. The llama.cpp server process consumed roughly 300 GB of RAM and nearly all 280 GB of VRAM at peak – which is expected. There were no crashes or major glitches. Kudos to the llama.cpp and Unsloth teams for making trillion-param models actually runnable.
- **Considerations:** One thing to keep in mind is that Kimi K2, while powerful, isn’t a plug-and-play product like ChatGPT. There’s a bit of prompt engineering needed at times. I used a simple system prompt (“You are a helpful assistant”) and it mostly works out of the box. But for optimal results in coding, I sometimes prod it with “Let’s think step by step” or ask it to verify output. Also, the model can be verbose; adjusting temperature or using min_p as we did helps. In a couple of cases, it repeated a previous answer when I re-asked something, likely due to the long context confusion. These are minor quirks that can be ironed out with future fine-tuning.
All in all, this experiment has been a resounding success. Less than a year ago, the thought of running a GPT-4-caliber coder on my own machine was fantasy. Now it’s reality. I have full control, no API fees, and the peace of mind that my code never leaves my environment. Kimi K2 Instruct perfectly delivers on being an open alternative to the best closed models, and with quantization, it’s brought more power into the hands of individual builders.
I’m excited to keep refining this setup. There’s room to push it further, perhaps try the 4-bit quant when I can afford a bigger GPU node, or experiment with the model’s tool usage by adding safe web browsing or a documentation search plugin. But even in its current form, my local coding agent is already saving me time in debugging and offering insights into code problems that I’d struggle with alone. Next up I have the [Kimi K2 Thinking](https://huggingface.co/moonshotai/Kimi-K2-Thinking) model in the queue to experiment with and share my experience!
With some investment in hardware and a bit of elbow grease, it’s absolutely possible to run state-of-the-art AI code assistants yourself. Kimi K2 Instruct shows that open source models are closing the gap with giants like GPT-4, enabling a future where we aren’t solely reliant on cloud APIs for top-tier AI help. For those of us who value privacy, control, and hackability, that future is incredibly exciting.
Happy coding with K2, and welcome to the trillion-parameter club :D !
## Sources & References
- **[Hugging Face – MoonshotAI Kimi K2 Instruct Model Card](https://huggingface.co/moonshotai/Kimi-K2-Instruct)**
The official model page for `Kimi-K2-Instruct`, including configuration, model architecture, and licensing details. Useful for downloading base weights or exploring other checkpoints.
- **[Unsloth – Kimi K2 GGUF Quantized Models](https://huggingface.co/unsloth/kimi-k2-instruct-GGUF)**
Ready-to-run quantized GGUF versions of Kimi K2 for `llama.cpp`. Includes Q2_K, Q4_K_M, Q6_K, and Q8_0 variants with tokenizers. Perfect for local inference setups with reduced VRAM.
- **[Reddit: Kimi has impressive coding performance, even deep-stack reasoning](https://www.reddit.com/r/LocalLLaMA/comments/1m0lyjn/kimi_has_impressive_coding_performance_even_deep/)**
Community discussion around Kimi K2’s reasoning and coding performance in the wild. Some users have successfully tested on multiple 3090s, highlighting Kimi’s flexibility and potential for local deployment.
- **[E2E Networks – TIR Platform GPU Plans](https://www.e2enetworks.com/pricing)**
India-based cloud provider used in this experiment. My setup used the GDC.4xH200-60.750GB_SXM_v1 hourly plan (₹1200/hr) with 4×H200 (564 GB total VRAM), ~2TB RAM, 120 vCPUs. TIR makes multi-GPU LLM serving more accessible for devs.
- **[Kimi CLI – Moonshot’s Official Client (Astral.sh)](https://github.com/moonshotai/kimi-cli)**
Moonshot’s lightweight CLI client to chat with Kimi models locally. Works well with both quantized (`llama.cpp`) and base (`vLLM`) backends. Ideal for building your own CLI coding assistant.
- **[OpenCode CLI Agent – CLI-first Autocoding Agent](https://github.com/sst/opencode/)**
Inspired by Gemini Code, OpenCode lets you run a local/remote model and interact via structured CLI flows. Supports shell actions, VS Code-style commands, and integrates well with Kimi or Mistral.