---
tags: ironhack, lecture,
---
<style>
.markdown-body img[src$=".png"] {background-color:transparent;}
.alert-info.lecture,
.alert-success.lecture,
.alert-warning.lecture,
.alert-danger.lecture {
box-shadow:0 0 0 .5em rgba(64, 96, 85, 0.4); margin-top:20px;margin-bottom:20px;
position:relative;
ddisplay:none;
}
.alert-info.lecture:before,
.alert-success.lecture:before,
.alert-warning.lecture:before,
.alert-danger.lecture:before {
content:"👨🏫\A"; white-space:pre-line;
display:block;margin-bottom:.5em;
/*position:absolute; right:0; top:0;
margin:3px;margin-right:7px;*/
}
b {
--color:yellow;
font-weight:500;
background:var(--color); box-shadow:0 0 0 .35em var(--color),0 0 0 .35em;
}
.skip {
opacity:.4;
}
</style>

# React & Express | File Upload
## Learning Goals
After this lesson, you will be able to:
- Upload files from your React app
- Use `Cloudinary` to store the files you uploaded from your app
## Introduction
In this lesson, we will learn how to upload a file with the MERN stack and Cloudinary.
## Server-side setup
At this point we will not spend too much time on how to set up your server for file upload since we already covered this in module 2. That's why proceed to downloading this [File-Upload-Example-Server](https://github.com/ironhack-labs/file-upload-example-server) app where we already preset a lot of things for you.
:::info lecture
Clonons le projet :
:::
```bash
$ git clone https://github.com/ironhack-labs/file-upload-example-server
$ cd file-upload-example-server
$ npm install
```
:::info
First, we have to mention that for learning purposes `.env` file is not included in .gitignore, or better saying it's commented out. Reason for this is to save time to set up your Cloudinary (and PORT is already there for us soooo... all good).
:::
Since we mentioned `PORT`, just a quick reminder - PORT will be set to `5000` in backend and reason for that as you know is having react app running on the port 3000 later on. This is not anything new for you, we saw this in lesson about integration backend and frontend and setting up the users in react.
Let's talk a bit about Cloudinary set up. As you can see, we created `configs` folder in the root and we have `cloudinary-setup.js` file in there. The code is exactly the same as the one we already saw in module 2 so no need to talk about it now. Since it's been a while, we will remind you that you have to install a couple of packages in order to make cloudinary work properly, so when in root:
:::info lecture
Installons les paquets relatif à l'upload :
:::
```bash
$ npm install cloudinary multer-storage-cloudinary multer
```
You can see all these packages already required at the top of the `cloudinary-setup.js` file. Nice, now let's move to the next important thing: getting your **credentials** from Cloudinary website. These are available on [https://cloudinary.com/console](https://cloudinary.com/console).
In the `.env` file, add the following values:
:::info lecture
N'oublions pas de définir nos valeurs pour Cloudinary dans `.env` :
[](https://cloudinary.com/console)
:::
```bash
cloudName = add-your-cloudinary-name
cloudKey = add-your-cloudinary-key
cloudSecret = add-your-cloudinary-secret
```
Now let's make some use of all this set up: you can see in the `models` folder, we already have set up `thing-model.js`. This is a hypothetical model of anything you want to create. We used the name *thing* in the rest of this lesson.
The Schema of this model is next:
```javascript
// models/thing-model.js
...
const thingSchema = new Schema({
name: { type: String, required: true },
description: { type: String, required: true },
imageUrl: { type: String, required: true },
})
```
We see that a *thing* will have name, description and one image. There's one more thing pre-set for us, and that's a route to *create a thing* but it doesn't include *file upload* yet so let's work on that together.
Besides `routes/thing-routes.js` that are already in the app and added in the *app.js*, let's create `routes/file-upload-routes.js` and the following code in it:
:::info lecture
Créons notre router qui va gérer l'`/upload` :
:::
```javascript=
// routes/file-upload-routes.js
const express = require('express');
const router = express.Router();
// include CLOUDINARY:
const uploader = require('../configs/cloudinary-setup');
router.post('/upload', uploader.single("imageUrl"), (req, res, next) => {
// console.log('file is: ', req.file)
if (!req.file) {
next(new Error('No file uploaded!'));
return;
}
// get secure_url from the file object and save it in the
// variable 'secure_url', but this can be any name, just make sure you remember to use the same in frontend
res.json({ secure_url: req.file.secure_url });
})
module.exports = router;
```
:::info lecture
- L9 : `uploader.single("imageUrl")` le `champ` contenant le fichier s'appelera `imageUrl`
- L18 : le serveur répond un JSON contenant l'URL Cloudinary du fichier
:::
:::info lecture
Sans oublier de monter ce router dans `app.js`
:::
And of course, let's add this file to `app.js`:
```js
// app.js
...
// include your new routes here:
app.use('/api', require('./routes/file-upload-routes'));
```
There's just one more thing to set up in the backend, and you probably know which one: the almighty `CORS` to enable cross-origin communication since we will have two app communicating and sending data back and forward.
Let's first install `cors`:
:::info lecture
Paramétrons le CORS :
:::
```bash
$ npm install cors
```
and require it on the top of *app.js*:
```js
const cors = require("cors");
```
And the last thing is to add the *cors* functionality to *app.js*, usually before session part but since this app doesn't have users, we can add it **before routes middleware**:
```js
// allow access to the API from different domains/origins
app.use(cors({
// this could be multiple domains/origins, but we will allow just our React app
origin: [ "http://localhost:3000" ]
}));
```
---
Great, our server is set up. You can use *Postman* to test your two routes, and you should be able to create *the first instance of things collection* in the *file-upload-example-server* database.
Adding the file:
:::info lecture
Plus qu'à tester dans Postman :
:::
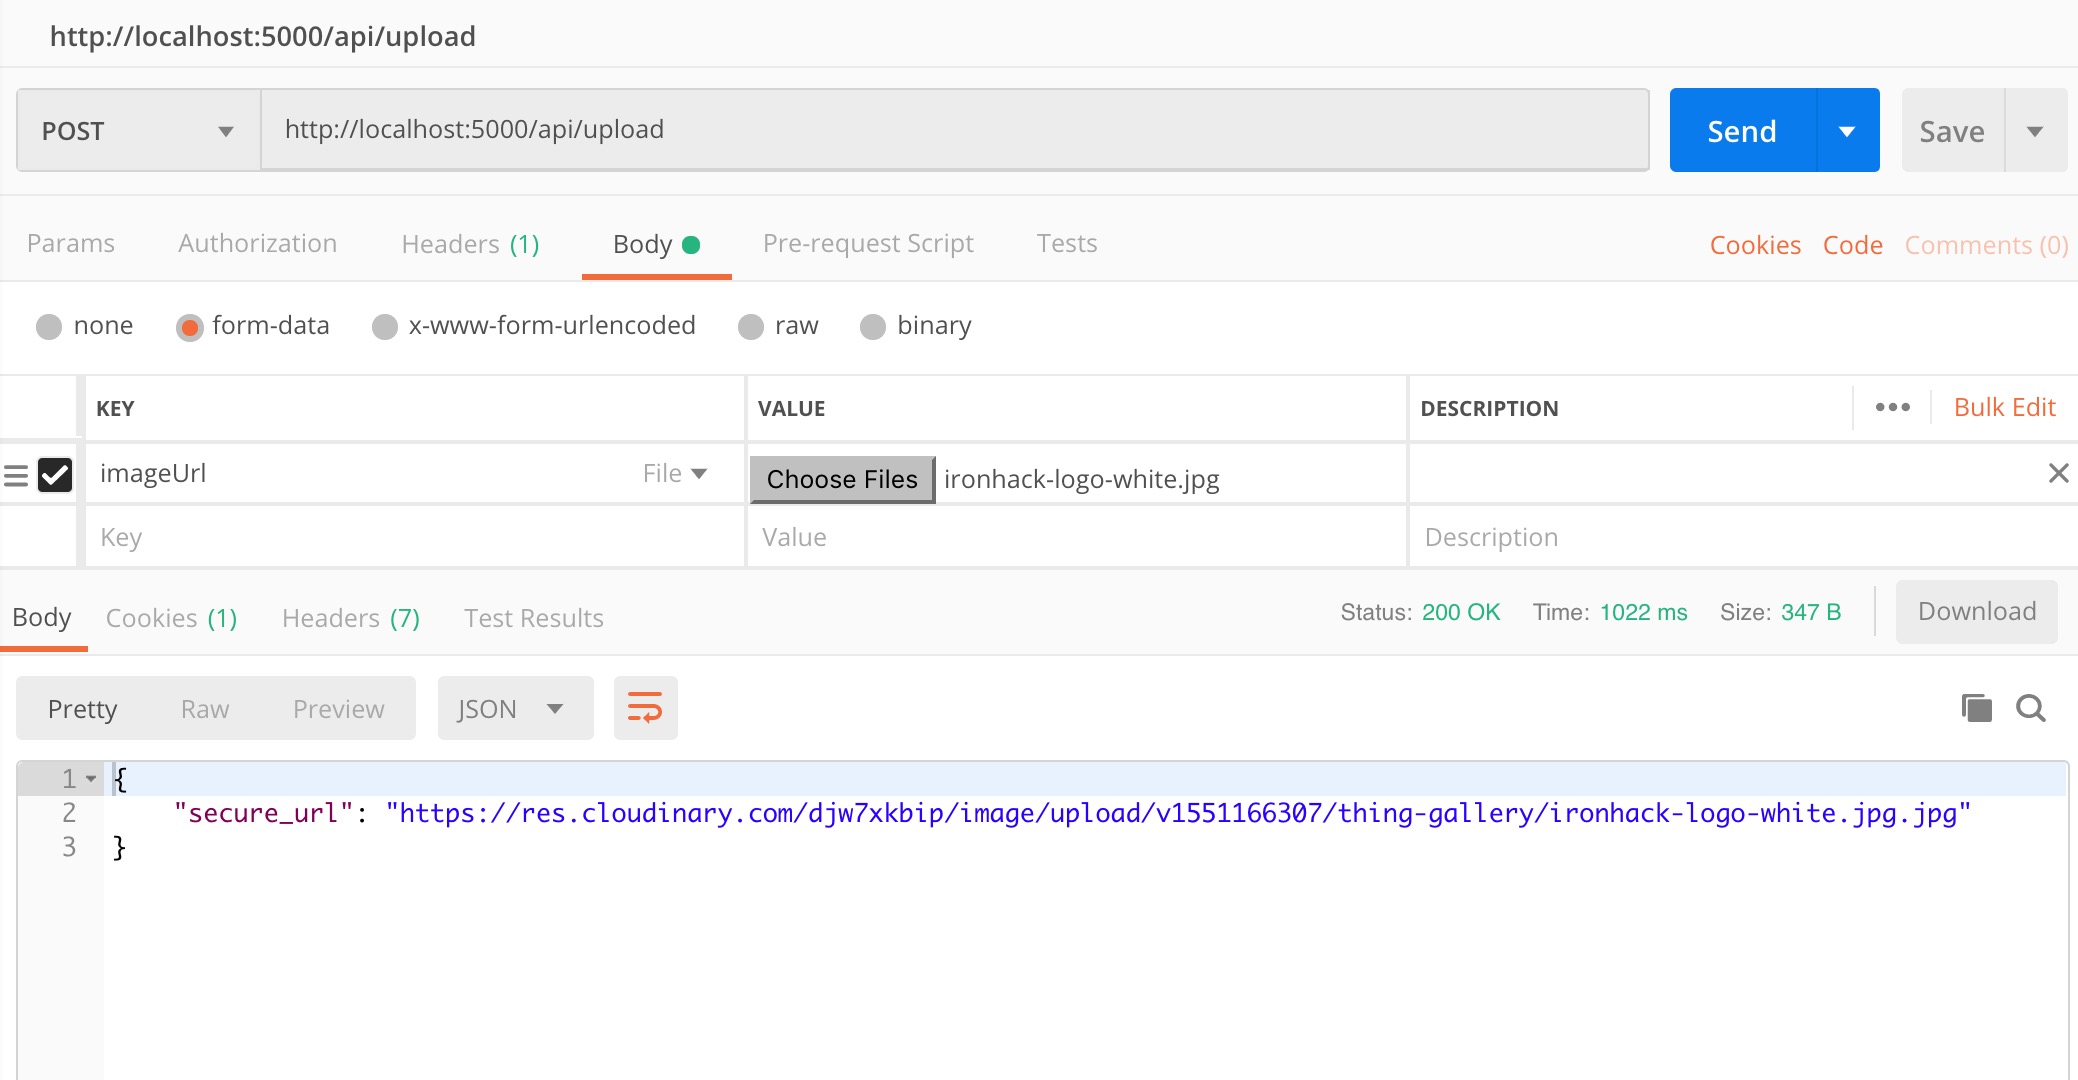
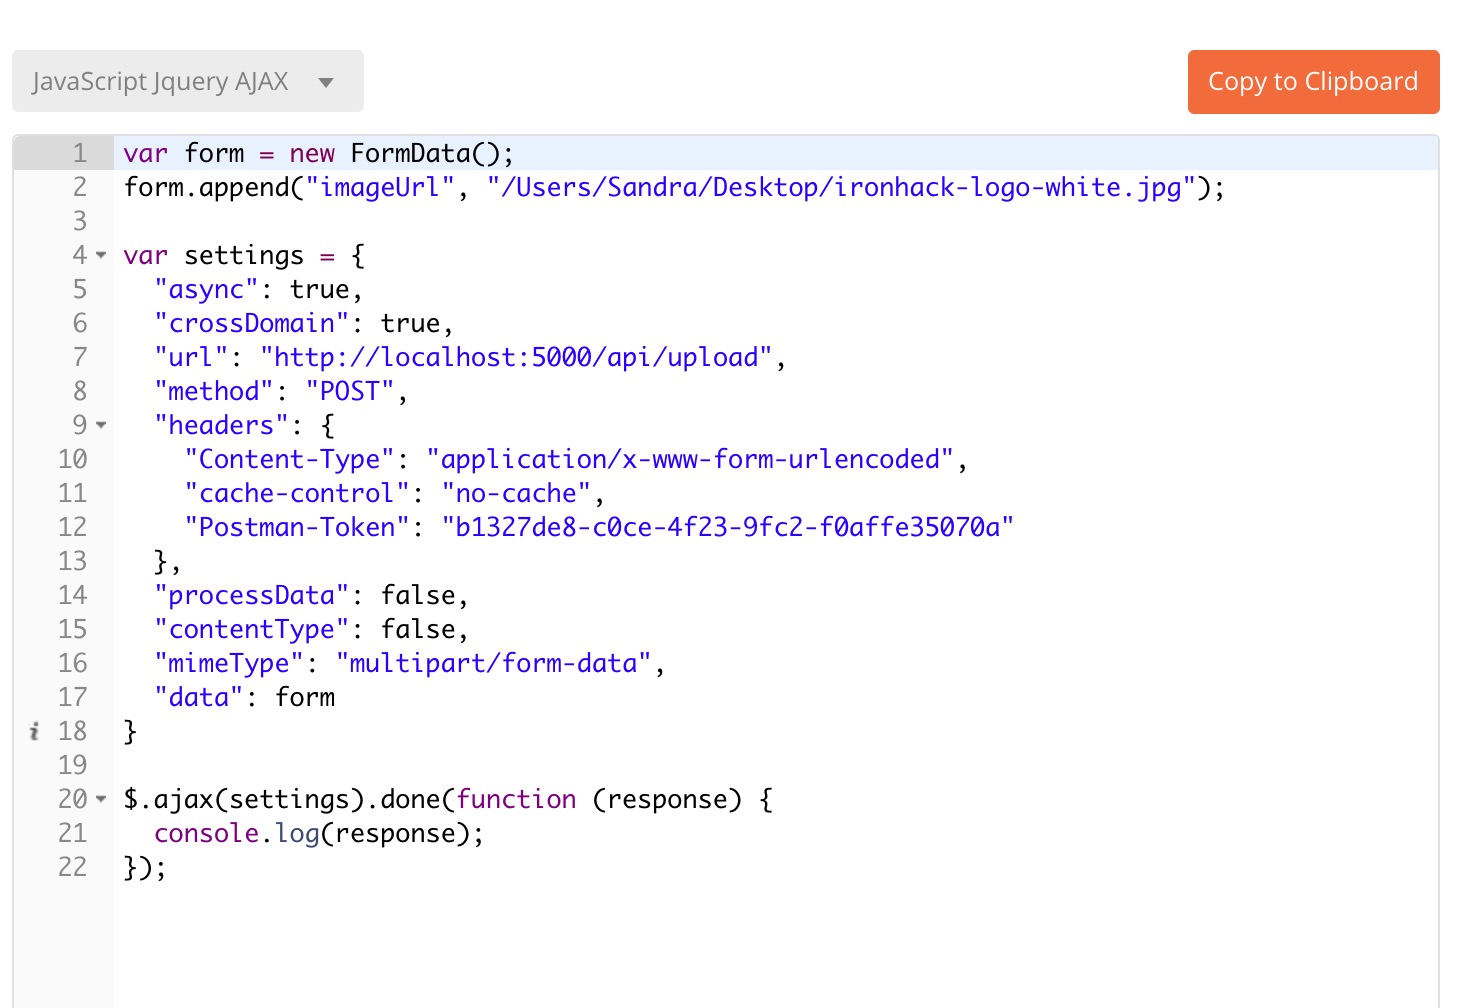
On Postman, if you click on *Code* (just bellow *Save*) and select *JavaScript > JavaScript Jqurey AJAX*, you will see an JavaScript example to simulate the same request:
## Client-side setup
Now let's create client app using `create-react-app`:
:::info lecture
Créons une CRA `file-upload-example-client` :
:::
```bash
$ create-react-app file-upload-example-client
$ cd file-upload-example-client
$ npm start
```
We know for sure we will need `axios` so let's install it on the client side:
```bash
$ npm install axios
```
:::info lecture
```shell
$ mkdir src/{components,api}
```
:::
Create the following in the `src` folder:
- `src/components`
- `src/api/service.js`
The `service.js` will handle all the calls between the two apps:
:::info lecture
Créons un service axios, gérant :
- l'upload d'un fichier : `@handleUpload()`
- la création d'une `Thing` : `@saveNewThing`
:::
```jsx
// src/api/service.js
import axios from 'axios';
const service = axios.create({
baseURL: 'http://localhost:5000/api',
// withCredentials: true // => you might need this when having the users in the app
});
const errorHandler = err => {
// console.error(err);
throw err;
};
export default {
service,
handleUpload(theFile) {
// console.log('file in service: ', theFile)
return service.post('/upload', theFile)
.then(res => res.data)
.catch(errorHandler);
},
saveNewThing(newThing) {
// console.log('new thing is: ', newThing)
return service.post('/things/create', newThing)
.then(res => res.data)
.catch(errorHandler);
}
}
```
Now, let's create a new component inside the `components` folder, the `<AddThing />`:
:::info lecture
Enfin, notre composant `<AddThing>` :
:::
```jsx=
// src/components/AddThing.js
import React, { Component } from "react";
// import the service file since we need it to send (and get) the data to(from) server
import service from '../api/service';
class AddThing extends Component {
state = {
name: "",
description: "",
imageUrl: ""
}
handleChange = e => {
const { name, value } = e.target;
this.setState({ [name]: value });
}
//
// this method handles just the file upload
//
handleFileUpload = e => {
console.log("The file to be uploaded is: ", e.target.files[0]);
const uploadData = new FormData();
// imageUrl => this name has to be the same as in the model since we pass
// req.body to .create() method when creating a new thing in '/api/things/create' POST route
uploadData.append("imageUrl", e.target.files[0]);
service.handleUpload(uploadData)
.then(response => {
// console.log('response is: ', response);
// after the console.log we can see that response carries 'secure_url' which we can use to update the state
this.setState({ imageUrl: response.secure_url });
})
.catch(err => {
console.log("Error while uploading the file: ", err);
})
;
}
//
// this method submits the form
//
handleSubmit = e => {
e.preventDefault();
service.saveNewThing(this.state)
.then(res => {
console.log('added: ', res);
// here you would redirect to some other page
})
.catch(err => {
console.log("Error while adding the thing: ", err);
})
;
}
render() {
return (
<div>
<h2>New Thing</h2>
<form onSubmit={e => this.handleSubmit(e)}>
<label>Name</label>
<input type="text"
name="name"
value={ this.state.name }
onChange={ e => this.handleChange(e)} />
<label>Description</label>
<textarea
name="description"
value={ this.state.description }
onChange={ e => this.handleChange(e)} />
<input type="file"
onChange={(e) => this.handleFileUpload(e)} />
<button type="submit">Save new thing</button>
</form>
</div>
);
}
}
export default AddThing;
```
:::info lecture
- L26-29 : Utilisation de `FormData` pour "simuler" formulaire pour l'`imageUrl` :
```javascript
const uploadData = new FormData();
uploadData.append("imageUrl", e.target.files[0]);
service.handleUpload(uploadData).then(...)
- L35 : une fois uploadé, nous mettons à jour le state `imageUrl` pour ensuite être capable de le soumettre avec le formulaire :
```javascript
.then(response => {
this.setState({ imageUrl: response.secure_url });
})
```
:::
:::info lecture

:::
The last thing before we test file upload from React/client side is to include `<AddThing />` component into `App.js`:
```jsx
// App.js
import React, { Component } from 'react';
import './App.css';
import AddThing from './components/AddThing'; // <== !!!
class App extends Component {
render() {
return (
<div className="App">
<AddThing />
</div>
);
}
}
export default App;
```
Now you can try to add the file to whatever you decide to create.
## Summary
Knowing how to upload photos or any other type of file could be necessary for some apps that we might work on in the future. During the 2nd module we learned how to do file upload using **Cloudinary**, but back then we were rendering views using *hbs*. Now we are using React so the process is a bit different but you shall no worry since you just learned how to do it :wink:.
## Extra Resources
- [React Image Upload Example](https://academind.com/learn/react/snippets/image-upload/)
 Sign in with Wallet
Connect another wallet
Sign in with Wallet
Connect another wallet