# 建立虛擬機 in Cent OS by KVM
## 甚麼是 CentOS
CentOS,全名為Community Enterprise Operating System,
是一種免費、開源的Linux發行版,
主要目標是提供一個穩定、可預測且易於管理的平台,專為企業級應用而設計。
它是基於Red Hat Enterprise Linux (RHEL)的源碼重新構建的,因此能夠與RHEL高度兼容,擁有相同的軟件包管理系統和軟件庫。
CentOS提供了一個穩健的環境,適合運行高要求的服務器和應用,並且保持免費使用,廣受全球許多企業和專業人士的信賴和使用。
同時它的社區支持也非常活躍,提供了大量的文檔、論壇和IRC頻道來幫助使用者解決問題。
## 甚麼是 KVM
KVM(Kernel-based Virtual Machine)是一種開源的虛擬化技術,
內建於Linux內核中,允許Linux作業系統上運行多個隔離的虛擬機器。
透過使用硬體加速功能(如Intel VT或AMD-V),
KVM為每個虛擬機器提供了私有的虛擬硬體,包括處理器、記憶體、磁盤、網絡接口等,從而實現近乎原生的性能。
它支持多種作業系統,包括Linux、Windows及其他Unix系統。
作為一個高效且可擴展的虛擬化解決方案,KVM廣泛應用於雲計算、虛擬私人服務器(VPS)和企業數據中心。
## 如何確定能建立虛擬主機
### 檢查虛擬化支持
```bash
# 結果必須大於 0
egrep -c '(vmx|svm)' /proc/cpuinfo
```
### 檢查基本資源
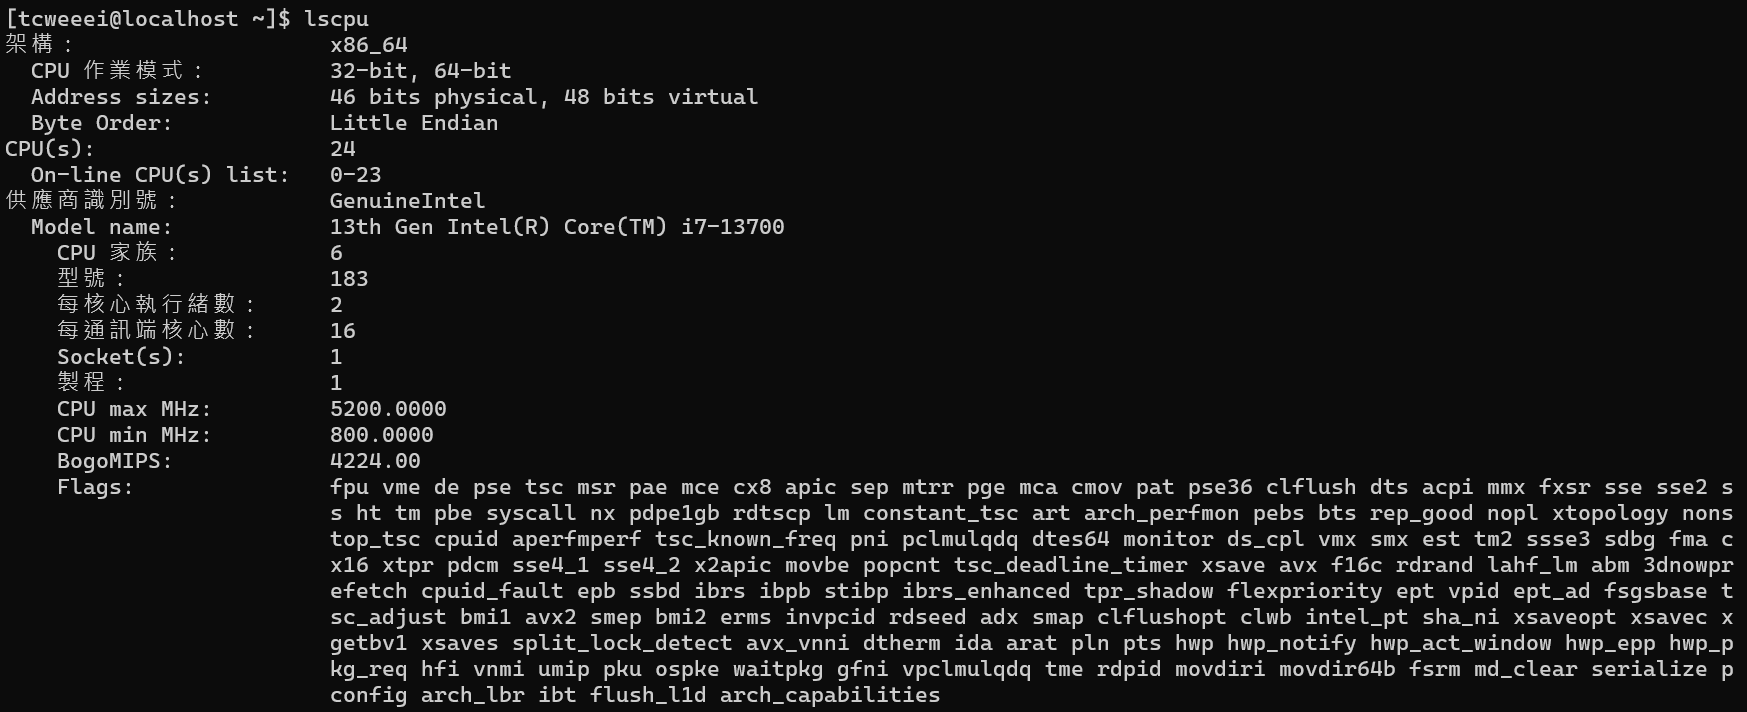
```shell!
# 詳細獲得CPU資訊
lscpu
```
```shell!
# 簡易獲得CPU核心數
nproc
```

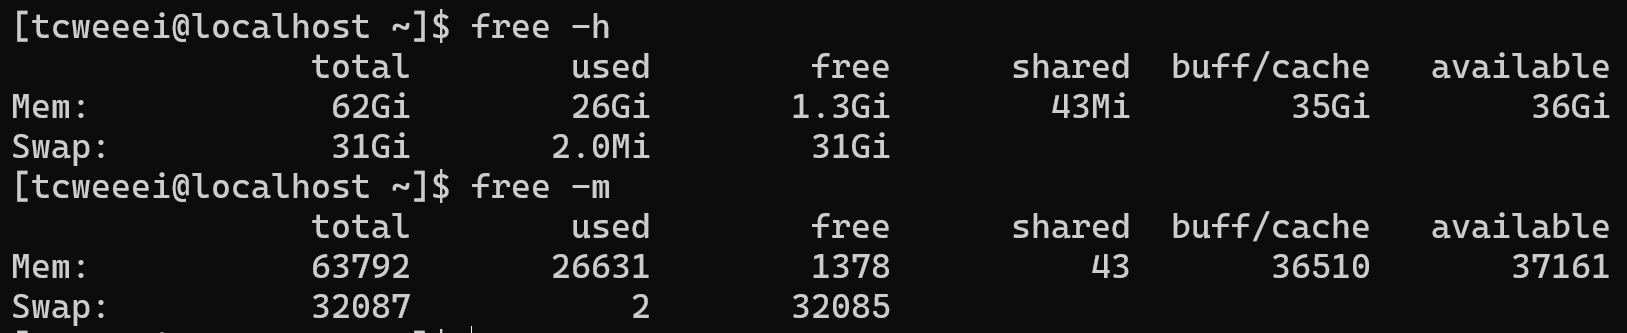
```shell!
# 簡易查詢當前 RAM 記憶體狀態
free -h
# 簡易查詢當前 Memory 記憶體狀態
free -m
```
## 基礎設定 與 下載 KVM
```shell!
# 如果系統不具有相關軟件倉庫 要先下載
sudo yum install epel-release
# 更新安裝的包
sudo yum update
# 下載相關的軟件包
sudo yum install qemu-kvm qemu-img virt-manager libvirt libvirt-python libvirt-client virt-install virt-viewer bridge-utils
```
將 SELinux 關閉 編輯 /etc/sysconfig/selinux 檔案設定
```
# SELinux=enforcing
SELinux=disabled
```
重新開機 載入設定
```shell
sudo reboot
```
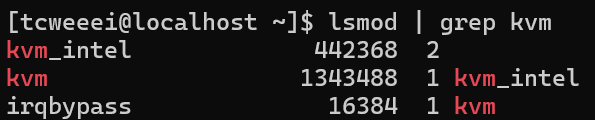
確認 已經載入 KVM
```shell
lsmod | grep kvm
```
```shell
# 啟動 libvirtd 服務
sudo systemctl start libvirtd
# 設定開機自動啟動
sudo systemctl enable libvirtd
```
## 建立虛擬主機
### 建立指令
```shell!
# 下方分別設置 vm 名稱、RAM、CPU、儲存位置、size(記憶體)
sudo virt-install --name=vm --ram=6144 --vcpus=6 --disk path=/var/lib/libvirt/images/vm.img,size=20 --os-variant=centos7 --graphics none --console pty,target_type=serial --location='http://mirror.centos.org/centos/7/os/x86_64/' --extra-args='console=ttyS0,115200n8 serial'
```
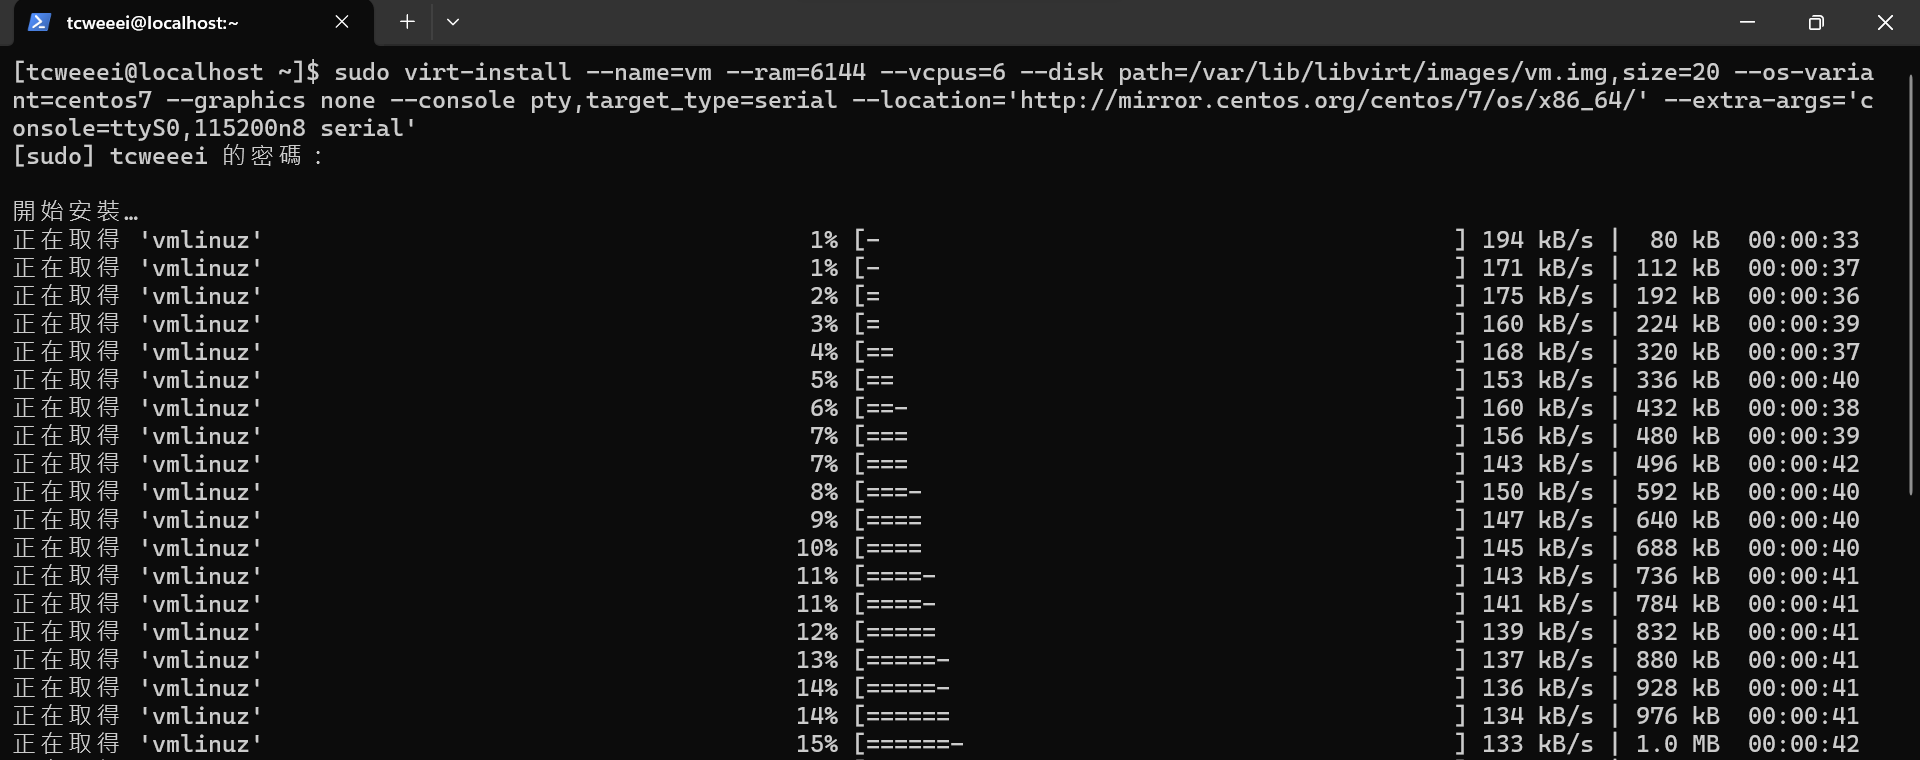
```!
備註 :
安裝過程可能有點久,如果長時間卡在一畫面,可能會是記憶體不足或是網路問題導致下載失敗,可以直接跳到最後方刪除該虛擬雞的所有資訊,調整後再重新建立虛擬機。
```
### 設定 並 安裝 OS
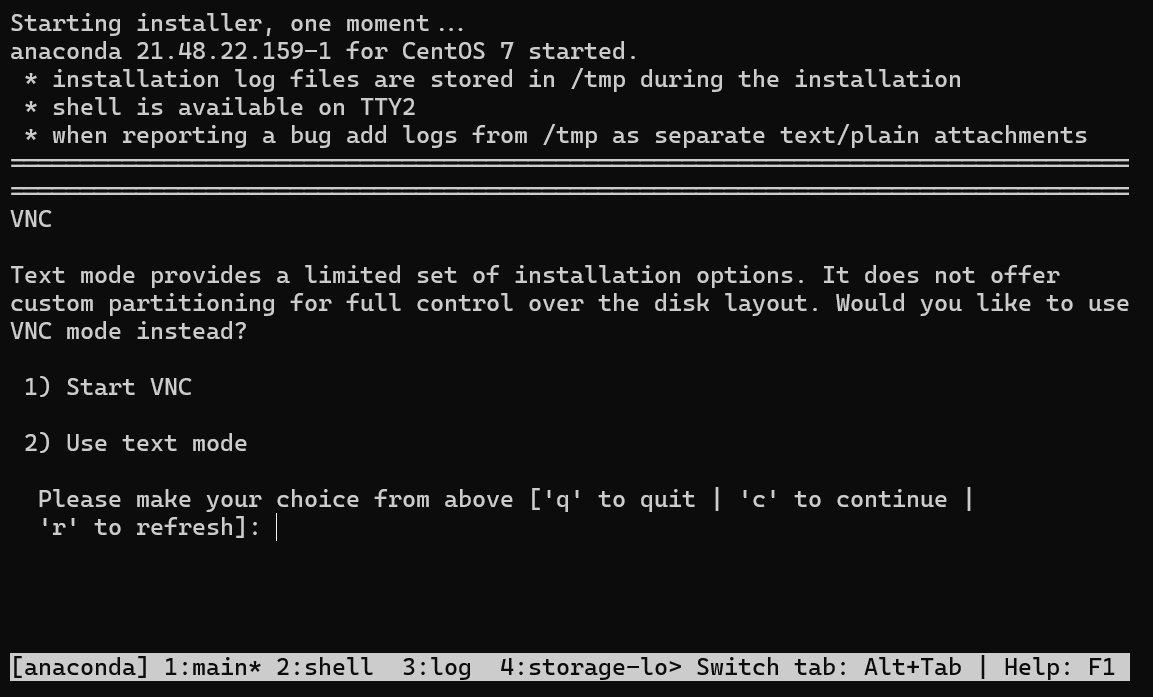
透過上方指令後,會出現這畫面開始作業系統基本設定。
1. 透過 UI (VNC方式) 進行設定
2. 特過文字介面進行設定
這裡透過文字介面即可( 輸入 2 後,按 Enter )
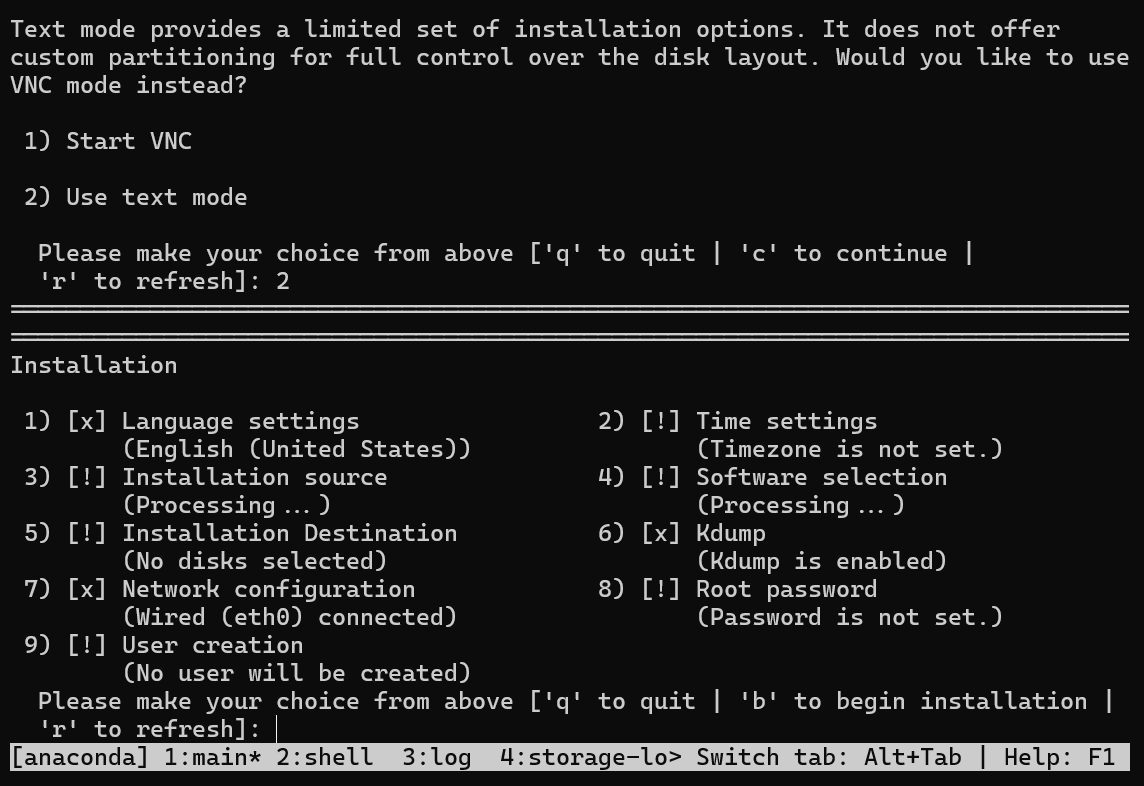
接下來依序進行設定
### 語言設定 ( 輸入 1 後,按 Enter )
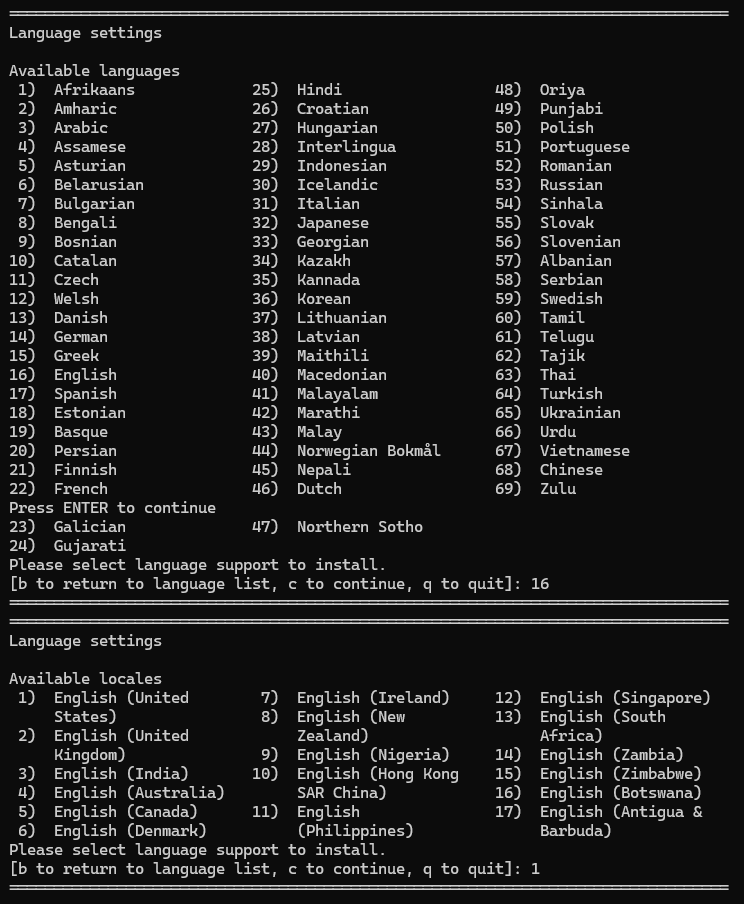
直接選擇英文即可
### 時區設定 ( 輸入 2 後,按 Enter )
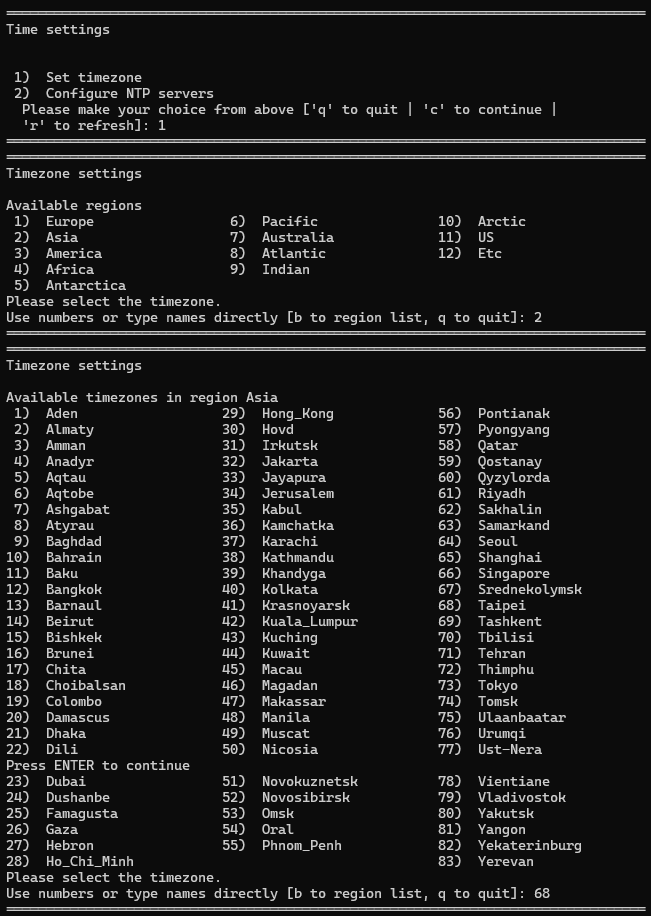
直接選擇時區,選擇台北即可
### 儲存位置 ( 輸入 5 後,按 Enter )
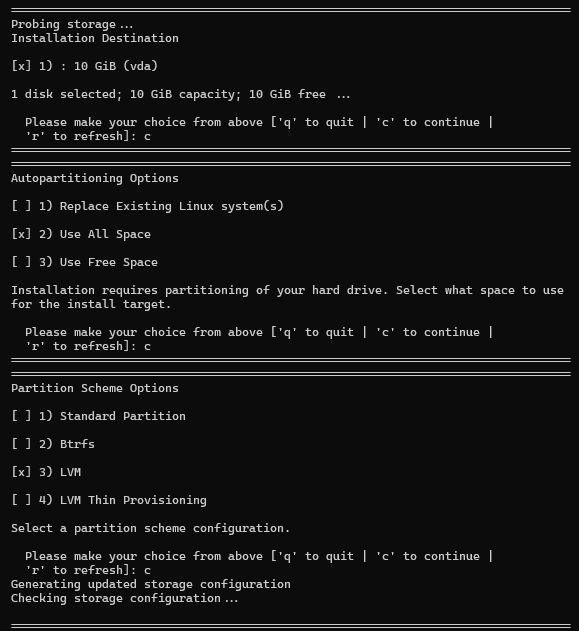
一路按 C 即可,直接安裝整個磁碟,可以根據個人需求做調整。
### 管理員密碼 ( 輸入 8 後,按 Enter )

連續輸入兩次管理員密碼
### 新增使用者 ( 輸入 9 後,按 Enter )
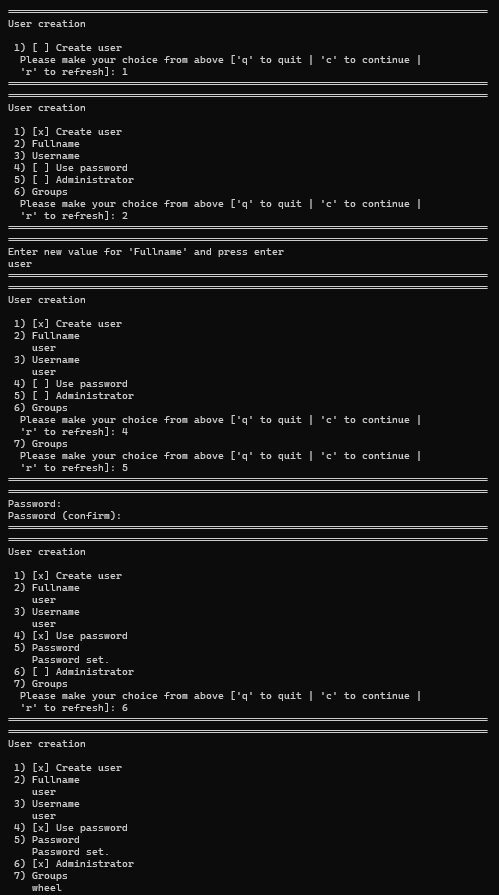
依序設定名稱、密碼、管理員群組等等
結束按 c 回去菜單頁面
### 開始安裝
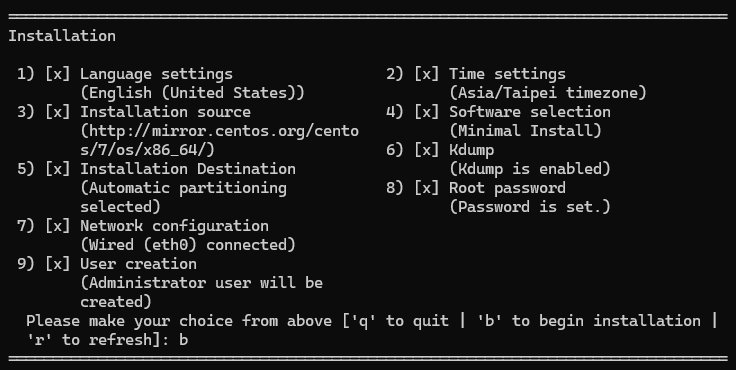
按 b 開始安裝
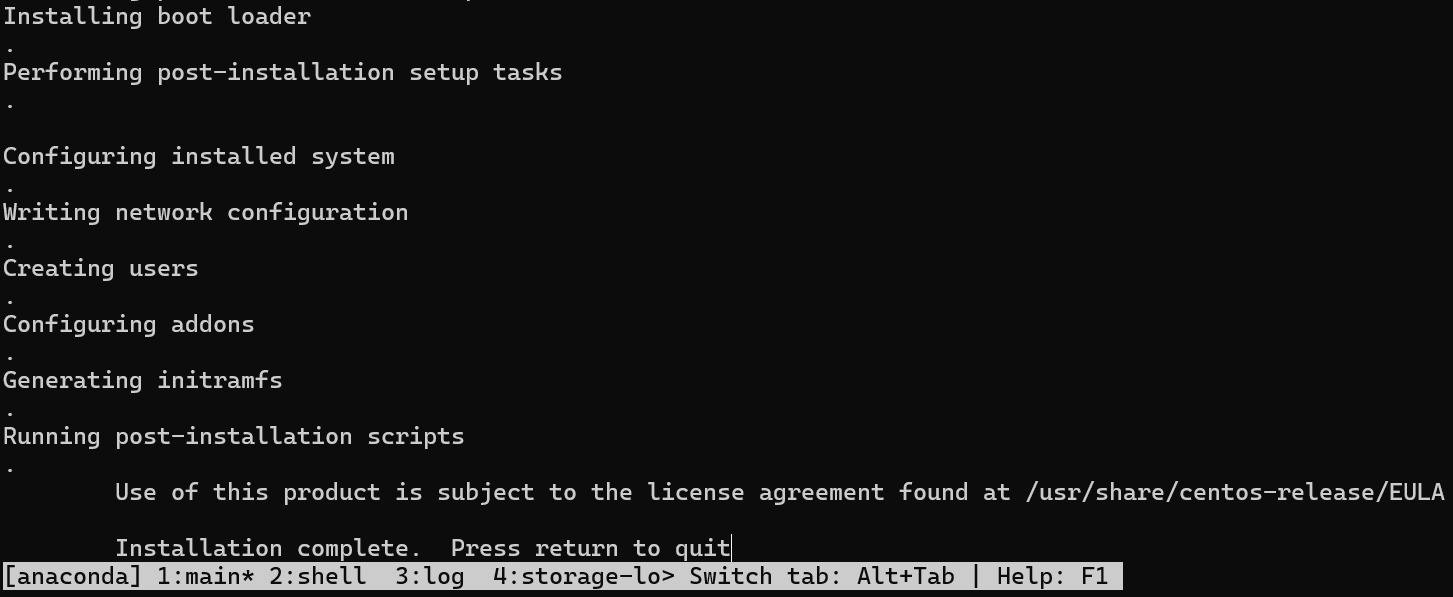
安裝完成 , 按 enter 繼續
### 登入與退出 VM
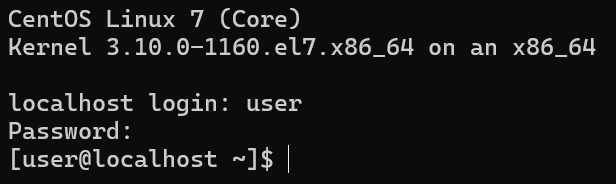
輸入 使用者名稱 與 密碼 可以直接進入

與一般關機不同,必須透過 ctrl+] 方能退出
```!
備註:
使用注音輸入法,系統會誤以為要輸入】,請切換輸入法後再輸入 ctrl+] 方能退出
```
## 連線虛擬主機 與 查看虛擬主機資訊
```shell!
# 列出所有 vm 資訊
virsh --connect qemu:///system list
```

沒錯,剛運行的虛擬機正在執行
```shell!
# 查看指定vm詳細資訊 (vm 更換成虛連線虛擬機名稱)
virsh --connect qemu:///system domifaddr vm
```

很好,還有其虛擬機的IP位址(可用ssh連線)
```shell!
# 連線 指定名稱虛擬機 (vm 更換成虛連線虛擬機名稱)
virsh --connect qemu:///system console vm
# 亦可透過 ssh 進行連線
# (user 更換成vm中存在的user名稱)
# (vm-ip 更換成虛連線虛擬機IP)
ssh user@vm-ip
```

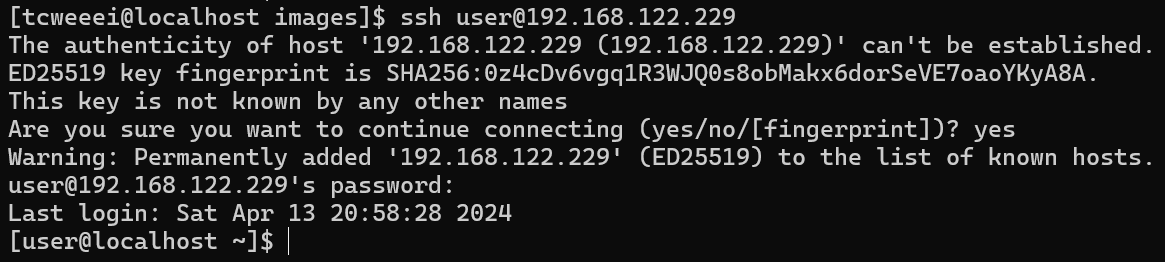
OK,兩種連線方式都沒問題
## 刪除虛擬主機
```shell!
# 強制關機並刪除定義 (vm 更換成虛連線虛擬機名稱)
virsh --connect qemu:///system destroy vm
virsh --connect qemu:///system undefine vm
```
```shell!
# 刪除vm本身的image資訊
# 此處與前方設定的vm儲存位置有關係
sudo rm /var/lib/libvirt/images/vm.img
```