---
title: WhatsApp chatbot
sidebar_label: WhatsApp
---
This document will guide you through creating a WhatsApp business account and setting up your own WhatsApp chatbot. For more information, see [WhatsApp Accounts](https://docs.yellow.ai/docs/cookbooks/whatsapp-channel/whatsapp-channel/).
## 1. WhatsApp chatbot
Follow the below steps to connect your chatbot to WhatsApp business account:
### 1.1 Create WhatsApp Business Account
1. Login to [Yellow.ai](http://cloud.yellow.ai/) platfrom.
<img src="https://i.imgur.com/JnvcYEz.jpg" alt="drawing" width="90%"/>
2. On the switcher, click **Channels**.
<img src="https://i.imgur.com/kv01RDY.png" alt="drawing" width="90%"/>
3. Click **WhatsApp Messenger** on the **Messaging** page. To start with WhatsApp account creation, click **Get started**.
<img src="https://i.imgur.com/14XbqIg.png" alt="drawing" width="90%"/>
4. Choose your account type from the drop-down and enable the checkbox to ensure that you have read the above information. Click on **Connect WhatsApp**.
:::note
Ensure that you have admin access to the Facebook business manager account.
:::
<img src="https://i.imgur.com/BQwpnxC.jpg" alt="drawing" width="90%"/>
5. You have to login to your Facebook account that is linked with your Business Manager account.
<img src="https://i.imgur.com/Lqov4YW.png" alt="drawing" width="40%"/>
6. Click on **Get started** to proceed with the next steps.
<img src="https://i.imgur.com/L8hKZeO.png" alt="drawing" width="40%"/>
7. Read the terms and conditions of WhatsApp Business and Meta. Click on **Continue**.
<img src="https://i.imgur.com/Er17Zwe.png" alt="drawing" width="40%"/>
8. Select an existing Business Manager account or create a new account to start with.
<img src="https://i.imgur.com/qyp074p.png" alt="drawing" width="50%"/>
9. Create a new WABA and click on **Continue**. You can also select an existing WABA if you already have one with Yellow.ai.
<img src="https://i.imgur.com/p0nEs2n.png" alt="drawing" width="60%"/>
10. Based on the details provided it verifies the information.
<img src="https://i.imgur.com/KcCKCf4.png" alt="drawing" width="60%"/>
11. Click on **Continue to step 2** to proceed with the number edition process.
<img src="https://i.imgur.com/D4ZmNvm.png" alt="drawing" width="60%"/>
12. Enter a display name for your WhatsApp Business Account. You must think carefully when entering the **WhatsApp Business Display Name**. The name you provide will be displayed on your WhatsApp business account. To give an appropriate name, read through the [naming guidelines](https://www.facebook.com/business/help/757569725593362).
<img src="https://i.imgur.com/CtbvpMf.png" alt="drawing" width="60%"/>
13. Select a category and enter the business description to create your WhatsApp business profile. Note that, you can later edit the information on the Yellow.ai platform. Click on **Continue**.
<img src="https://i.imgur.com/z0iSidb.png" alt="drawing" width="60%"/>
14. Enter a phone number that does not have a WhatsApp account, and ensure that it receives any incoming message or voice call for the OTP verification.
<img src="https://i.imgur.com/hdo6P8e.png" alt="drawing" width="60%"/>
:::note
The number you give should not be connected to any WhatsApp account. If connected, ensure you disconnect the number from WhatsApp account.
:::
15. Enter the OTP received on the number via your preferred method. Please choose the retries wisely as its limited to upto 3 attempts in 24hour.
<img src="https://i.imgur.com/DnIuZZD.png)" alt="drawing" width="60%"/>
16. Once the verification is successfully completed, click on **OK** and the platform will display the WhatsApp business account details.
<img src="https://i.imgur.com/R9iT4B8.png))" alt="drawing" width="60%"/>
17. The platform will take you back to the **Messaging** page. A dialog box is displayed. You must select the same WABA you created and the number that was added, and click **Connect**.
<img src="https://i.imgur.com/CNm6g2g.png)" alt="drawing" width="90%"/>
18. Once the account is created, you can view your account on the **WhatsApp messenger** page.
<img src="https://i.imgur.com/ezgp1Qy.png)" alt="drawing" width="90%"/>
19. You can also add multiple numbers by clicking on **+ Add Number** at the top right corner.
<img src="https://i.imgur.com/0wkbQHP.png)" alt="drawing" width="90%"/>
20. You can click on view more to view the business details, and you can also edit based on your requirements.
<img src="https://i.imgur.com/LfIwYrC.png)" alt="drawing" width="90%"/>
### 1.2 Create Facebook Business Manager (FBM) account
1. If you already created the account, just login. If not, follows the steps to create an FBM account.
2. Go to [Facebook Business Manager](https://business.facebook.com/overview) and click **Create Account**.
3. Furnish your business name, your name and your business email ID.
4. Carefully give the business details asked correctly. This will help in creating the FBM account.
5. Hurray! You have now created the FBM.
### 1.3 Verfiy Business account with Facebook
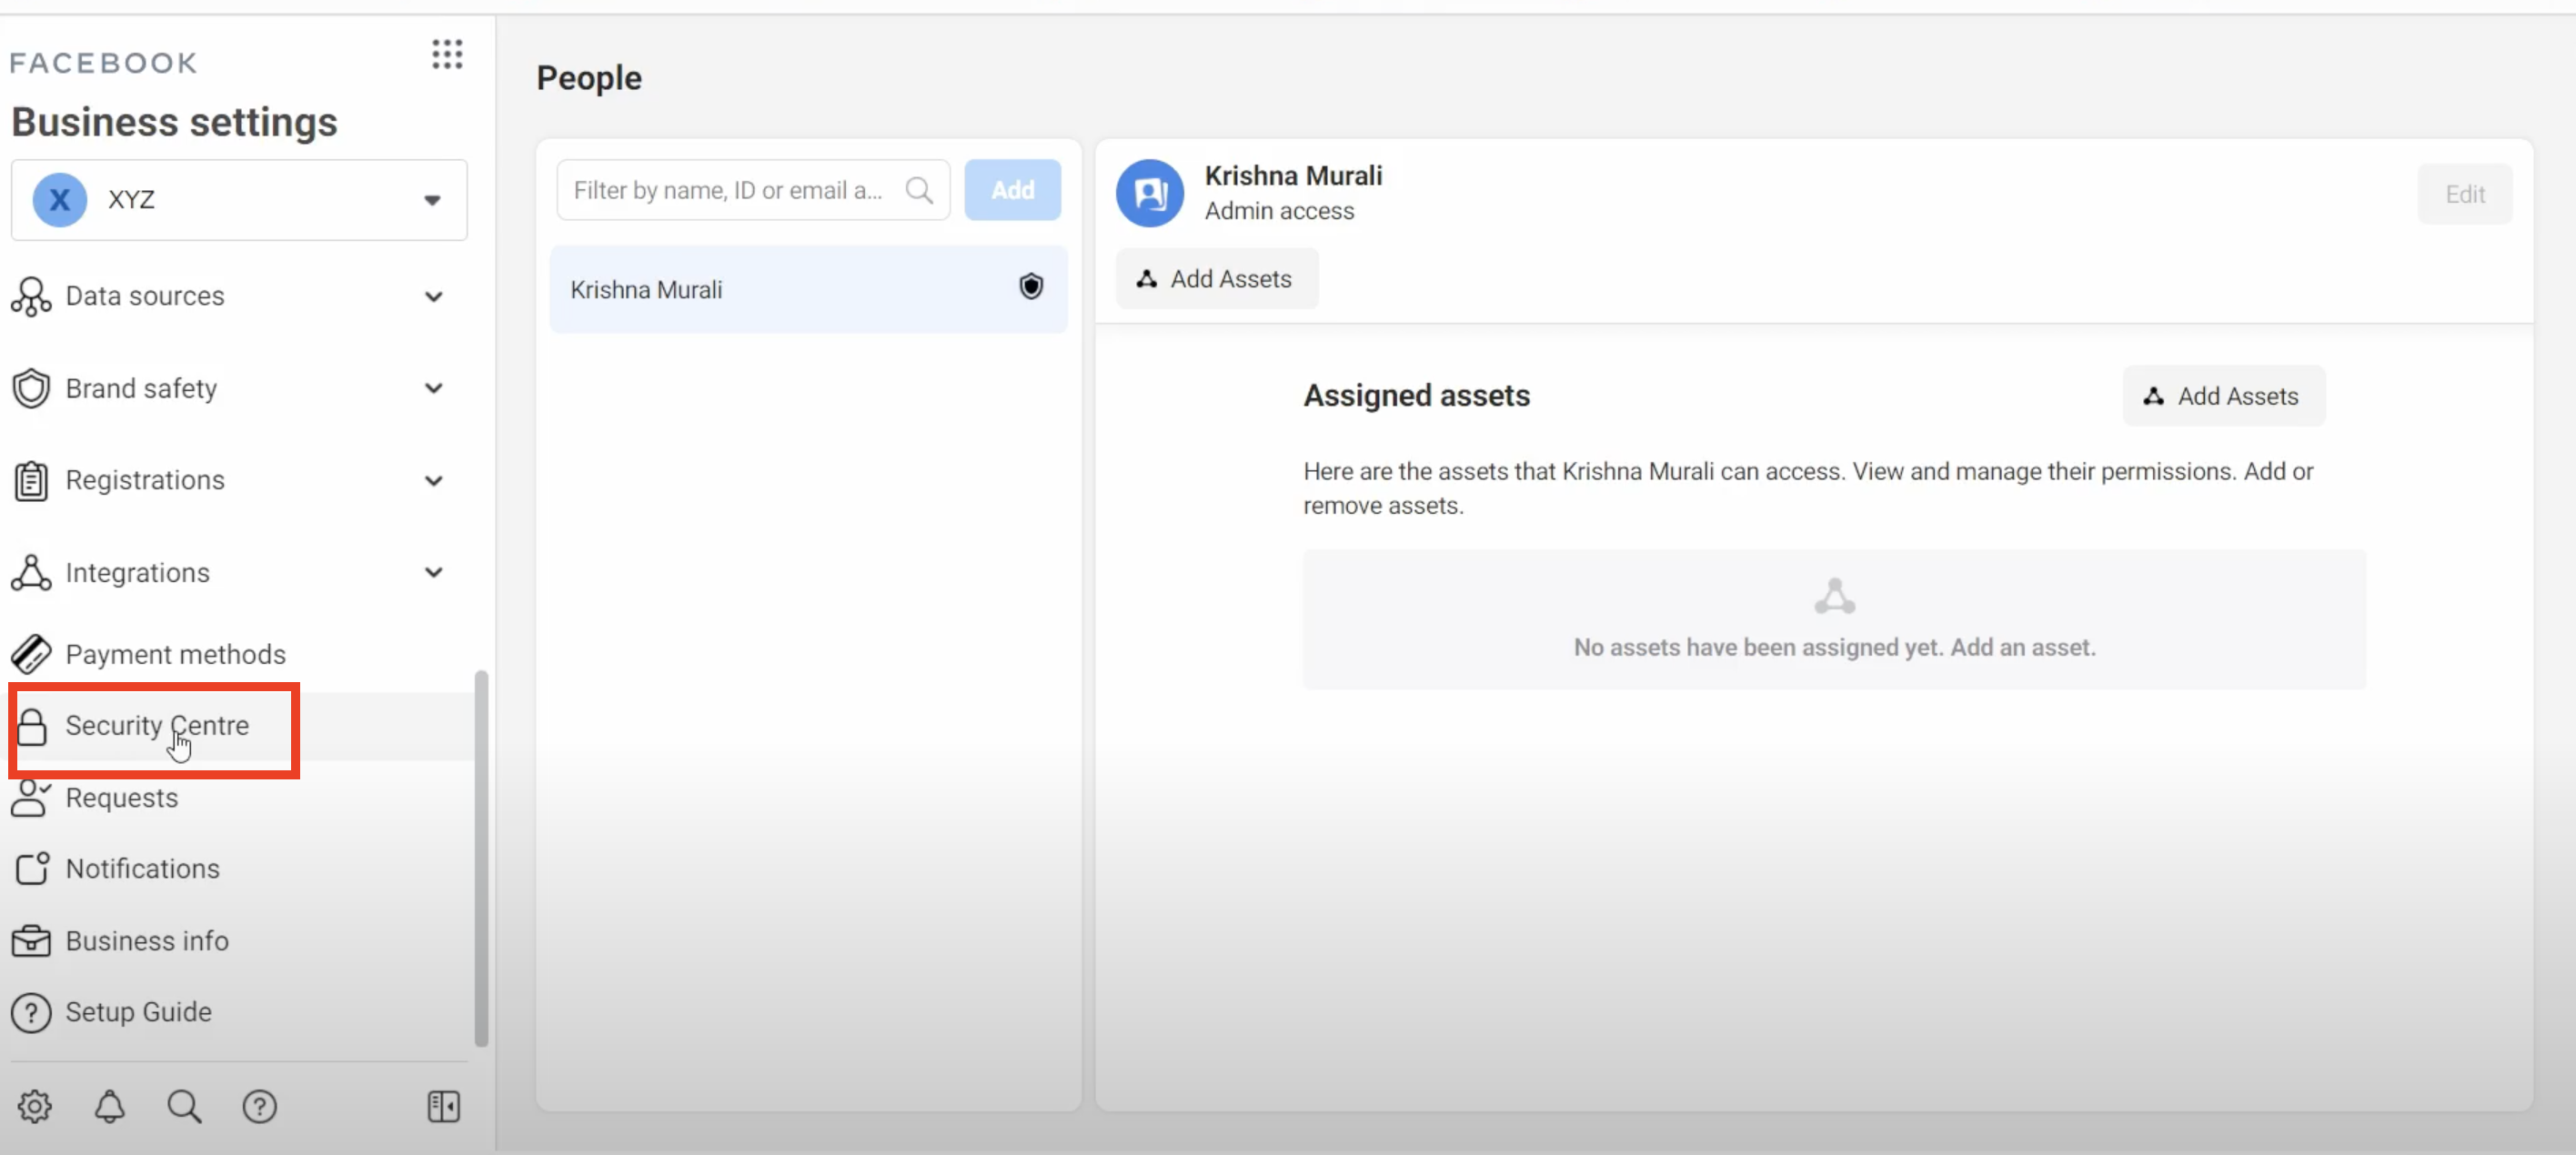
1. Now, let's get to verification. In the FBM, go to **More Tools > Business Settings > Select your Business**.
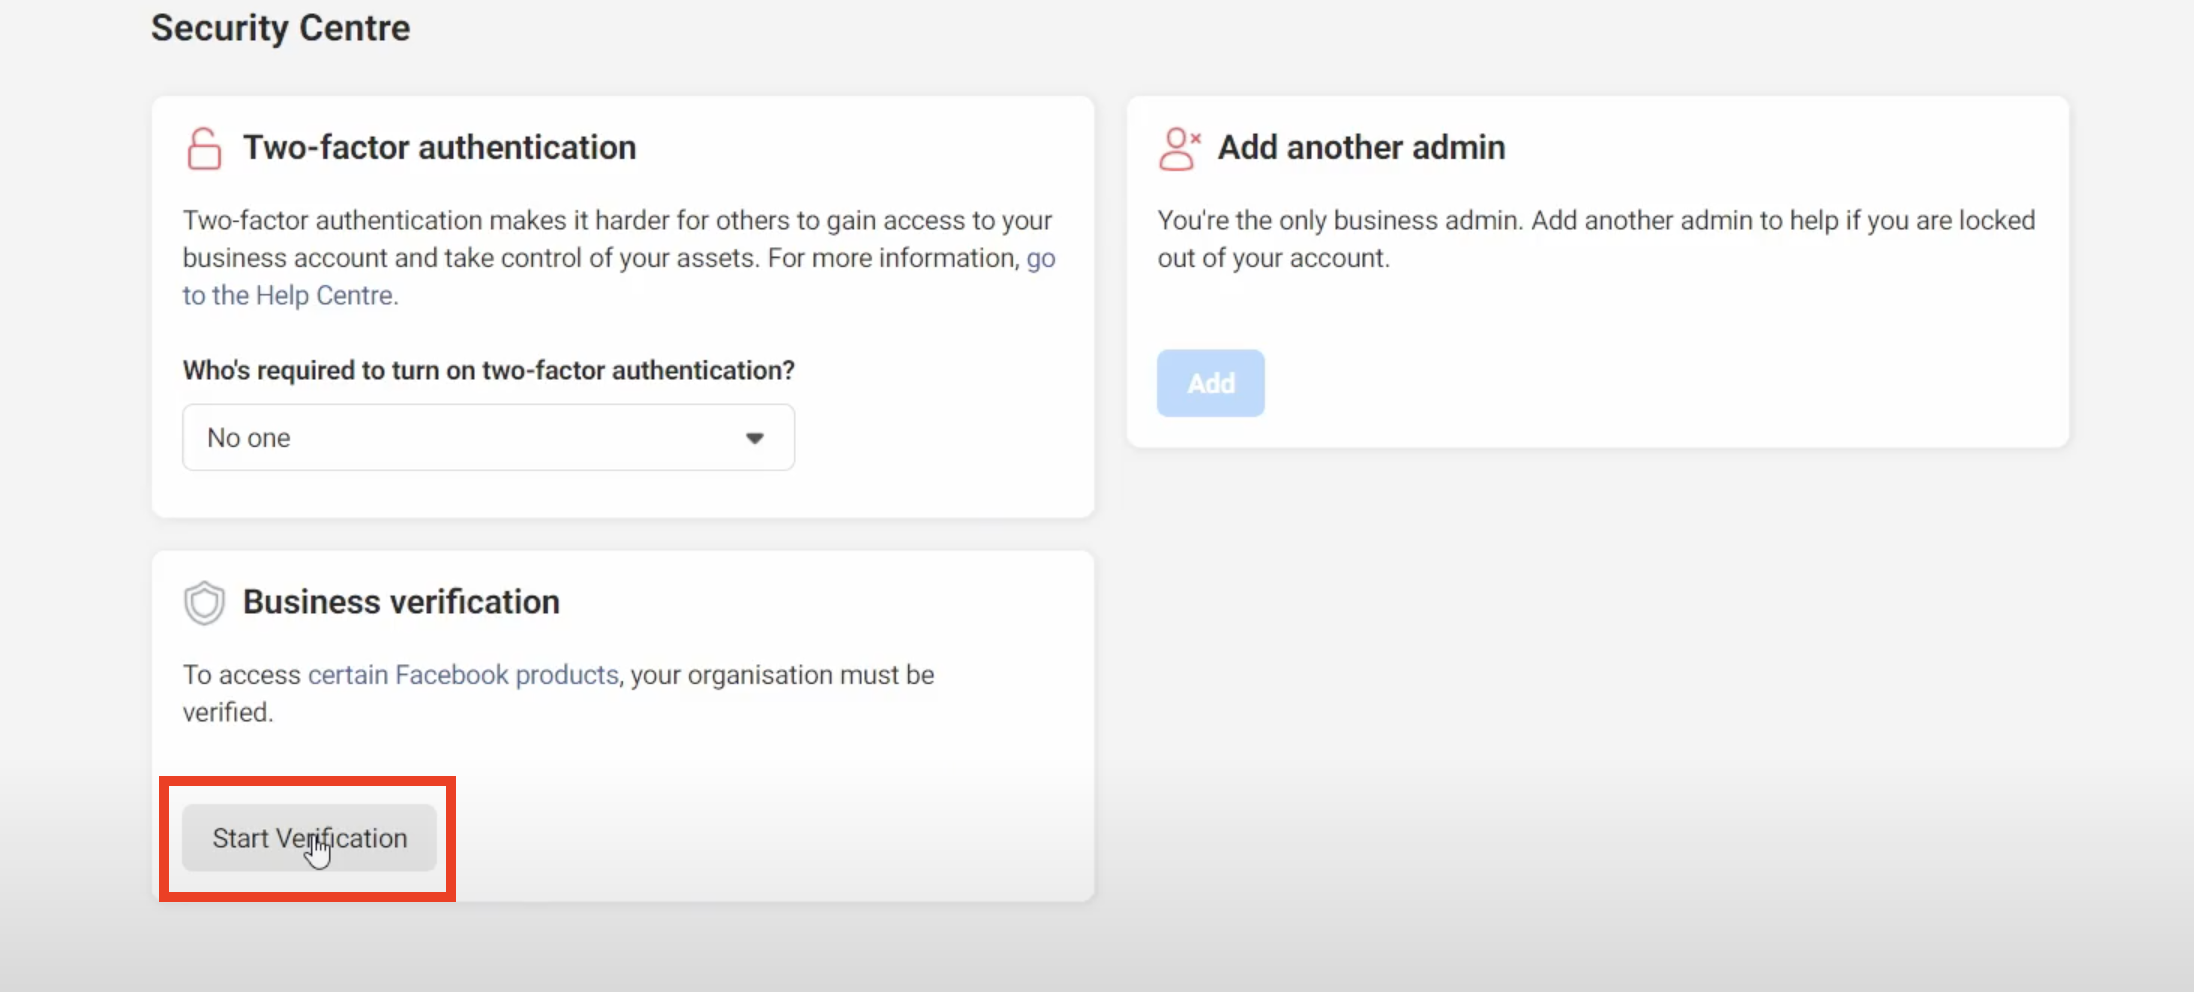
2. Click on **Security Centre**.
3. Let's start with the verification.
4. Furnish the legal business details.

5. Look for your business in the the list. This is listed based on the business name you given. If your business is listed, select your business and go to step 6. If not visible, click **None of these** and directly **jump to step 7**.
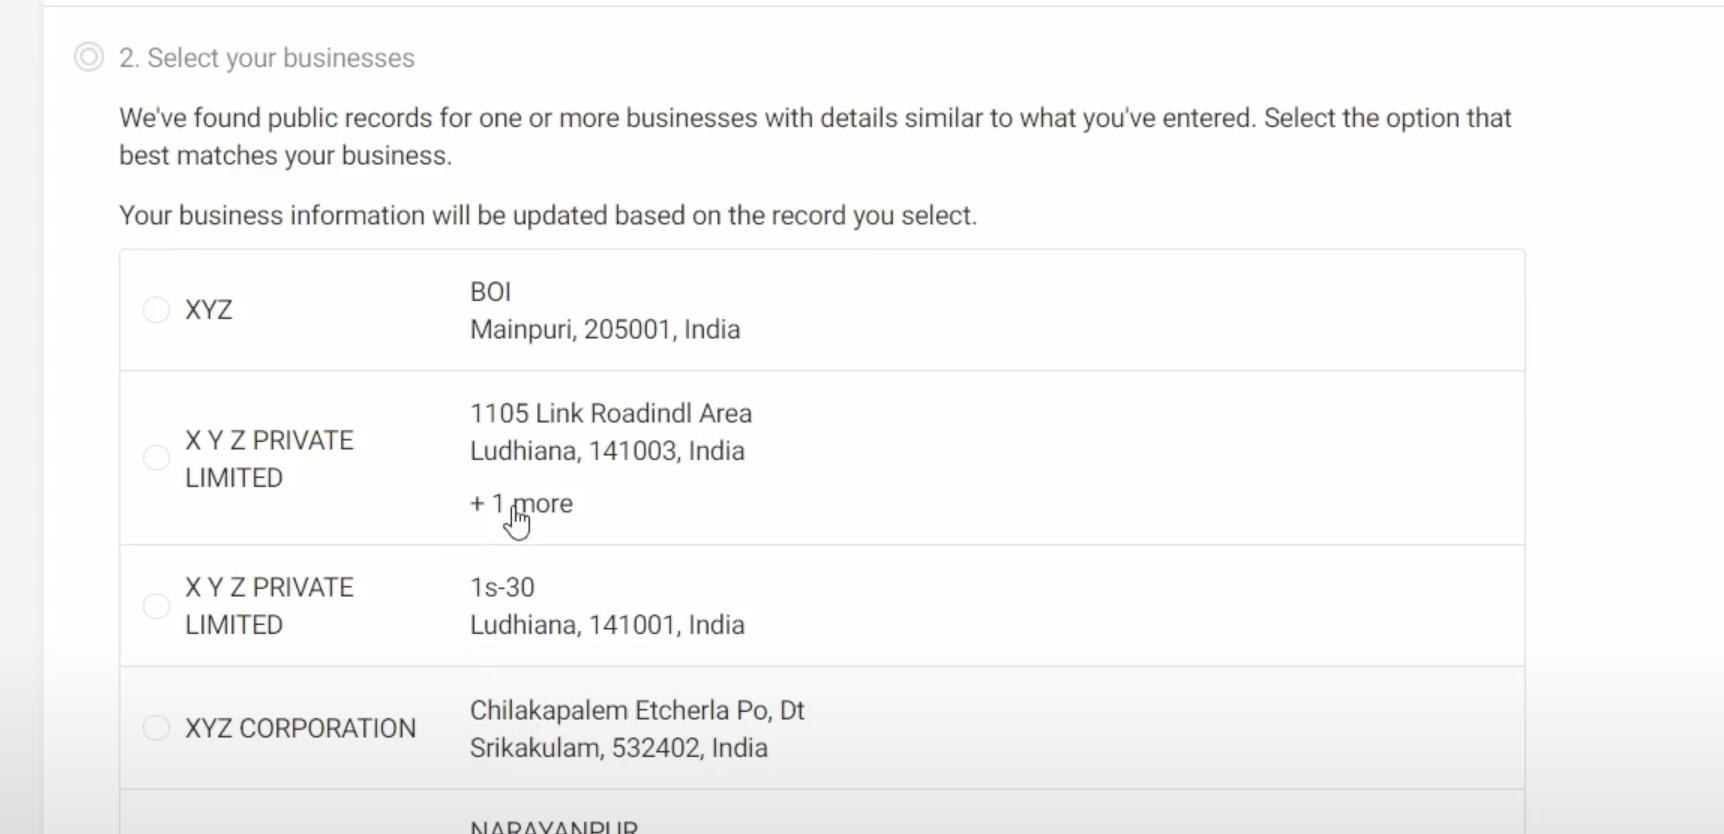
6. Confirm the business details - business name, address, phone number. After this **jump to step 8**.

7. Upload relevant legal business documents for the Facebook team to review. Check **accepted legal documents** [here](https://www.facebook.com/business/help/159334372093366).

8. Final step: choose to get the **verification code via Email or phone** and enter the code.

Submit the verification recieved.

For some reason, if you wish to cancel the verification request, go to **Security Center > Cancel**.

## 2. Catalog setup
Prerequisites
The following are the prerequisites to use WhatsApp Product Node -
1. [Product Listed on Catalog](#21-commerce-manager-catalog)
2. [Updated Business and Compliance Info](#23-business-and-compliance-info-mandatory-for-indian-number-waba)
3. Additional Fields added incase of Indian Businesses
4. [Catalog Linked with the WABA](#22-link-catalog-to-a-waba)
#### Sample flow of WhatsApp single/multi product message (SPM/MPM)
* Currently, WhatsApp supports either a single product or a vertical carousel of up tp 30 products in a single two way message.
<img src="https://i.imgur.com/0Fc5Asl.png" width="350px"/>
<img src="https://i.imgur.com/Nlw4IDw.png" width="350px"/>
* The recipient can click just on the view option to expand the Product details or the vertical carousel of products as shown here.
<img src="https://i.imgur.com/GnDzjeE.png" width="350px"/>
<img src="https://i.imgur.com/CgEn4CB.png" width="350px"/>
* The recipient can add preferred products to the cart using the Add To Cart option or the + option across each item. Once the products are added to the cart, the recipient can send the cart to the business to proceed to the next steps.
<img src="https://i.imgur.com/ClYimi7.png" width="350px"/>
### 2.1 Commerce manager (Catalog)
The Facebook Commerce manager helps in listing the products to be used for SPM/MPM. It is not possible to send any product on WhatsApp without listing the products on the FB's Commerce Manager.
:::note
To use catalog, it's mandatory for the Businesses to have a Business Manager Account with Catalog.
:::
To create a Catalog in FB Commerce Manager for your Business -
1. Log on to [Facebook Business Manager](https://business.facebook.com/settings) and go to **Business Settings**. Use the client's BM to create Production Catalogs.
2. Navigate to **Data Sources** and click on **Catalog**.

3. Select **Add** > **Create a New Catalog**.
* If this will be your first catalogue, click Get Started. Select Create a catalogue and then click Get Started.
* If you already have at least one catalogue, you'll see all of your catalogues listed. Select + Add Catalogue to create a new one.

4. Select the type of inventory you advertise or sell, then click **Next**.
5. Choose how you want to add items to your catalogue - Upload product info, or Connect a partner platform.
6. Select the Business Manager account that your catalogue belongs to. This unlocks more ways to use your catalogue than selecting a personal account and enables you to assign other people permission to work on the catalogue. To select a Business Manager account, you must be a [business admin](https://en-gb.facebook.com/micro_site/url/?click_from_context_menu=true&country=IN&destination=https%3A%2F%2Fen-gb.facebook.com%2Fbusiness%2Fhelp%2F442345745885606&event_type=click&last_nav_impression_id=2bDTYoj64VaSUC2PQ&max_percent_page_viewed=52&max_viewport_height_px=711&max_viewport_width_px=1437&orig_http_referrer=https%3A%2F%2Fwww.google.com%2F&orig_request_uri=https%3A%2F%2Fen-gb.facebook.com%2Fbusiness%2Fhelp%2F1275400645914358&primary_cmsid=1275400645914358&primary_content_locale=en_GB®ion=apac&scrolled=true&session_id=1QKGQufmtkRFBOVm3&site=fb4b&extra_data[view_type]=v3_initial_view&extra_data[site_section]=help&extra_data[placement]=%2Fbusiness%2Fhelp%2F1275400645914358).
7. Enter a name for your catalogue and click **Create**.

:::note
For detailed instructions, see [Facebook's documentation](https://en-gb.facebook.com/business/help/1275400645914358?id=725943027795860)
:::
Once the Catalog is created, you can go to the Commerce Manager available on the top right and manage your Catalog from the Commerce Manager Dashboard.
You can add products to the Catalog either manually or through [Data Feed](https://www.facebook.com/business/help/1898524300466211?id=725943027795860).
An ideal way to manage your products is through Data Feed as it allows adding products with complete information using a CSV file, and sync the data through the Commerce Manager (CM).
You can automate the sync on your preferred cadence such as Hourly, Daily etc. To find the CSV headers and supported values on the Data Feed, see [here](https://www.facebook.com/business/help/120325381656392?id=725943027795860).

It is important to note the following points in Catalog before using its products.
1. ContentID can be given from the Business side or will get generated automatically from FB side. This id needs to be unique and will be used as Product ID in the WhatsApp product msg node.
2. It takes some time to update products when syncing the catalogs using the data feed. You cannot send products on WhatsApp until this process is completed.
3. For Businesses in India, it is mandatory to have these fields (origin_country, importer_name, and importer_address) filled in as per field specification bfor each product to be used as SPM/MPM.
4. You can add the field values (origin_country, importer_name, and importer_address) in the CSV file or use Data Rule to fill the values by default from the Data Feed settings page.

### 2.2 Link Catalog to a WABA
Once the Catalog is set up, the Business has to share the Catalog cccess with the BSP (Yellow.ai) to use items from the Catalog in WABA accounts created by Yellow.
To share Catalog access with the BSP and connect it to WABA -
1. On the Client's BM, go to **Catalog** and select **Assign Partner**.

2. Enter the BSP's (yellow.ai’s) BM ID to link to the Catalog of the business.
<img src="https://i.imgur.com/kzQnZTG.png" width="70%"/>
3. The Businesses Catalog should show the BSPs name as partner for the Catalog. Provide Manage Catalog Permission.

4. Once the access is shared, the BSP will get the Catalog listed at their end as shown below.

5. After getting the access, the BSP have to link the Catalog to the WABA. To do this, the BSP has to go to the **Phone Number** page on the WABA Account on BM and click on the **Cart** icon on the left pane, and > Choose the Catalog which needs to be linked.
<img src="https://i.imgur.com/5oJrzpP.png" width="70%"/>
6. Your Catalog should appear in the Connected catalog list. This confirms that the Catalog is ready to be used on the WABA and the Phone number attached to this WABA.
<img src="https://i.imgur.com/6NAB8Uy.png" width="70%"/>
### 2.3 Business & compliance info. (Mandatory for Indian number WABA)
It is mandatory for Indian Businesses to provide the Business and Compliance info to use the SPM/MPM feature on their WABA accounts.
Log on to the [Cloud Platform](https://cloud.yellow.ai/) and go to **Channels** > **WhatsApp**, and fill in the details.
<img src="https://i.imgur.com/g7gw6v9.png" width="65%"/>
[](https://www.craft.do/s/0loidngTNNAzkK/b/8CA0C2DD-ECD2-437F-BBFB-C1303B7E0966/How_to_Create_an_End_to_End_Catalog_)
:::note
To create a new Catalog Journey on the Yellow.ai Platform, see [here](https://docs.yellow.ai/docs/platform_concepts/studio/build/nodes/message-nodes#8-whatsapp-product-message).
:::
### 2.3 FAQs
1. **Is SPM/MPM Supported on Cloud API?**
No, currently, SPM/MPM is not supported for Cloud API Hosted WABAs. Please reach out to Engagement Team for rolling back the WABA to OnPrem before using SPM/MPM. There will be additional hosting charges for the OnPrem Infra. AMs are required to get a sign off from the Customer for the infra cost before agreeing for the support of the SPM/MPM.
2. **When is the support of SPM/MPM will be available on Cloud API WABA?**
As of now there is no tentative timeline due to some issues with respect to SPM/MPM on Cloud API WABA which needs to be resolved before taking a decision on the same.
3. **Can we integrate the Catalog with the platform?**
No, Catalog Integration is not live yet and will be evaluated in Q1 2023.
4. **Can Shopify or other ecom platforms can be used for syncing the products on FB Catalog?**
Yes, Shopify Catalogs can be synced with WhatsApp Catalogs for the products uploaded on the Shopify to be used on the SPM/MPM as well. Its requested to the client to get in touch with Shopify Team to add the Sync of the Products with WA Catalog to get started. The feature is available but not explored yet from Yellow’s side due to limitation of access of active Shopify instance
5. **Can we upload or update the Product quantity or availability from the Platform?**
No, since there is no integration available for the CM and the Platform its not possible to currently manage the catalog in any way from platform.
6. **How many products can be added in a Catalog?**
There is no set limit as of now on the number of items that can be added on a catalog.
7. **How many products can be sent in a single message to the user?**
Businesses can send upto 30 Products on a MPM.
8. **Is the feature available similar to the Jio Mart WABA?**
No, Jio Mart Catalog feature is a Beta Feature and is exclusive to JioMart only and not available for GA or any other BSPs. There is no tentative timeline for the release of the feature.
9. **Can the business send dynamic pricing based on the user location or other parameters?**
No, Product pricing is static and cannot be changed user to user.
10. **Can the price or other mandatory fields be hidden if not required?**
No, it's not possible to hide the mandatory fields like Image, Product Title, Description and Price can be hidden from the user while sending.
11. **Is it possible to send digital goods like recharges, Loan offers etc to be sent as a product message?**
Yes, digital goods are allowed to be sent as SPM/MPM. BFSI customers can also use SPM/MPM to showcase card, load or other finance related products on SPM/MPM.
## 3. WhatsApp business account guidelines
When setting up your WhatsApp Business Profile, you must follow the below guidelines for display name:
* A display name should represent a business or its service, organization, product, or department. Note that, organizations with a government affiliation will need to be approved by the WhatsApp team.
* A display name must have grammatically correct capitalization and may not include all uppercase, except for acronyms. <br/>For example, **Not accepted:** RETAIL BUSINESS ORGANISATION<br/> **Accepted:** Retail Business Organisation.
* A dispaly name should not contain the following:
* Extra punctuation
* Emojis
* Character symbols such as trademark designations
* URL format
* An individual's full name
* A generic term (For example, Apparals)
* Geographic location (For example, Texas) * A slogan or a long description.
* A display name must have consistent branding with external sources. For example, a company's website or marketing (Fresh Produce Cold Pressed Juices).
* A display name must have a clear relationship for your business (must be referred on the business’ website or external media references). <br/>For example, **Accepted:** Name of a charity mentioned on a non-profit organization's website.<br/>**Not accepted:** Name of a charity not mentioned on any external websites.