# Render.comを使ったRailsの爆速デプロイ方法
## 今回使用するRailsアプリの作成
※vendorにgemを入れている関係で素のrailsコマンドが使えないので開発の際は`bin/rails`か`bundle exec rails`コマンドを使いましょう
### ディレクトリとファイルの準備
```
mkdir deploy_sample
cd deploy_sample
touch Dockerfile.dev
touch compose.yml
```
### Dockerを使った開発環境の作成
#### PostgreSQL(Node.jsあり)
Dockerfile.dev
```dockerfile
FROM ruby:3.3.6
ARG UID=1000
ENV LANG C.UTF-8
ENV TZ Asia/Tokyo
ENV BUNDLE_APP_CONFIG /myapp/.bundle
RUN apt-get update -qq \
&& apt-get install -y ca-certificates curl gnupg \
&& mkdir -p /etc/apt/keyrings \
&& curl -fsSL https://deb.nodesource.com/gpgkey/nodesource-repo.gpg.key | gpg --dearmor -o /etc/apt/keyrings/nodesource.gpg \
&& NODE_MAJOR=20 \
&& echo "deb [signed-by=/etc/apt/keyrings/nodesource.gpg] https://deb.nodesource.com/node_$NODE_MAJOR.x nodistro main" | tee /etc/apt/sources.list.d/nodesource.list \
&& wget --quiet -O - /tmp/pubkey.gpg https://dl.yarnpkg.com/debian/pubkey.gpg | apt-key add - \
&& echo "deb https://dl.yarnpkg.com/debian/ stable main" | tee /etc/apt/sources.list.d/yarn.list
RUN apt-get update -qq && apt-get install -y build-essential libpq-dev nodejs yarn vim
RUN useradd -m -u $UID rails
RUN mkdir /myapp
WORKDIR /myapp
COPY . /myapp
RUN chown rails:rails -R /myapp
```
compose.yml
```yml
services:
db:
image: postgres
restart: always
environment:
TZ: Asia/Tokyo
POSTGRES_PASSWORD: password
volumes:
- postgresql_data:/var/lib/postgresql
ports:
- 5432:5432
healthcheck:
test: ["CMD-SHELL", "pg_isready -d myapp_development -U postgres"]
interval: 10s
timeout: 5s
retries: 5
web:
build:
context: .
dockerfile: Dockerfile.dev
command: bash -c "bundle install && bundle exec rails db:prepare && rm -f tmp/pids/server.pid && ./bin/dev"
tty: true
stdin_open: true
volumes:
- .:/myapp
environment:
TZ: Asia/Tokyo
ports:
- "3000:3000"
user: "1000:1000"
depends_on:
db:
condition: service_healthy
volumes:
postgresql_data:
```
### rails new(esbuild & tailwind)
```
docker compose build
docker compose run --rm web /bin/bash -c "bundle init && bundle add rails -v '~> 7.0'"
docker compose run --rm web /bin/bash -c "bundle config set --local path vendor/bundle && bundle in
stall"
docker compose run --rm web bundle exec rails new . -d postgresql -j esbuild --css=tailwind
echo '/vendor/bundle' >> .gitignore
```
config/database.ymlにhost・username・passwordを追加
```yml
default: &default
adapter: postgresql
encoding: unicode
# For details on connection pooling, see Rails configuration guide
# https://guides.rubyonrails.org/configuring.html#database-pooling
pool: <%= ENV.fetch("RAILS_MAX_THREADS") { 5 } %>
host: db
username: postgres
password: password
```
Procfile.devのwebに` -b 0.0.0.0 -p 3000`をつける
```
web: env RUBY_DEBUG_OPEN=true bin/rails server -b 0.0.0.0 -p 3000
js: yarn build --watch
css: yarn watch:css
```
```
docker compose up
```
`http://localhost:3000`
### scaffoldでDBを使う機能を作成(検証用のため実行不要)
#### scaffoldでTask機能を作成
```
docker compose exec web bin/rails g scaffold tasks name:string --skip-jbuilder --skip-helper --skip-test-framework
docker compose exec web bin/rails db:migrate
```
#### `config/routes.rb`にroot_pathの設定を追加
```ruby
Rails.application.routes.draw do
resources :tasks
# Define your application routes per the DSL in https://guides.rubyonrails.org/routing.html
# Reveal health status on /up that returns 200 if the app boots with no exceptions, otherwise 500.
# Can be used by load balancers and uptime monitors to verify that the app is live.
get "up" => "rails/health#show", as: :rails_health_check
# Defines the root path route ("/")
root "tasks#index"
end
```
## Renderを使ったデプロイ方法
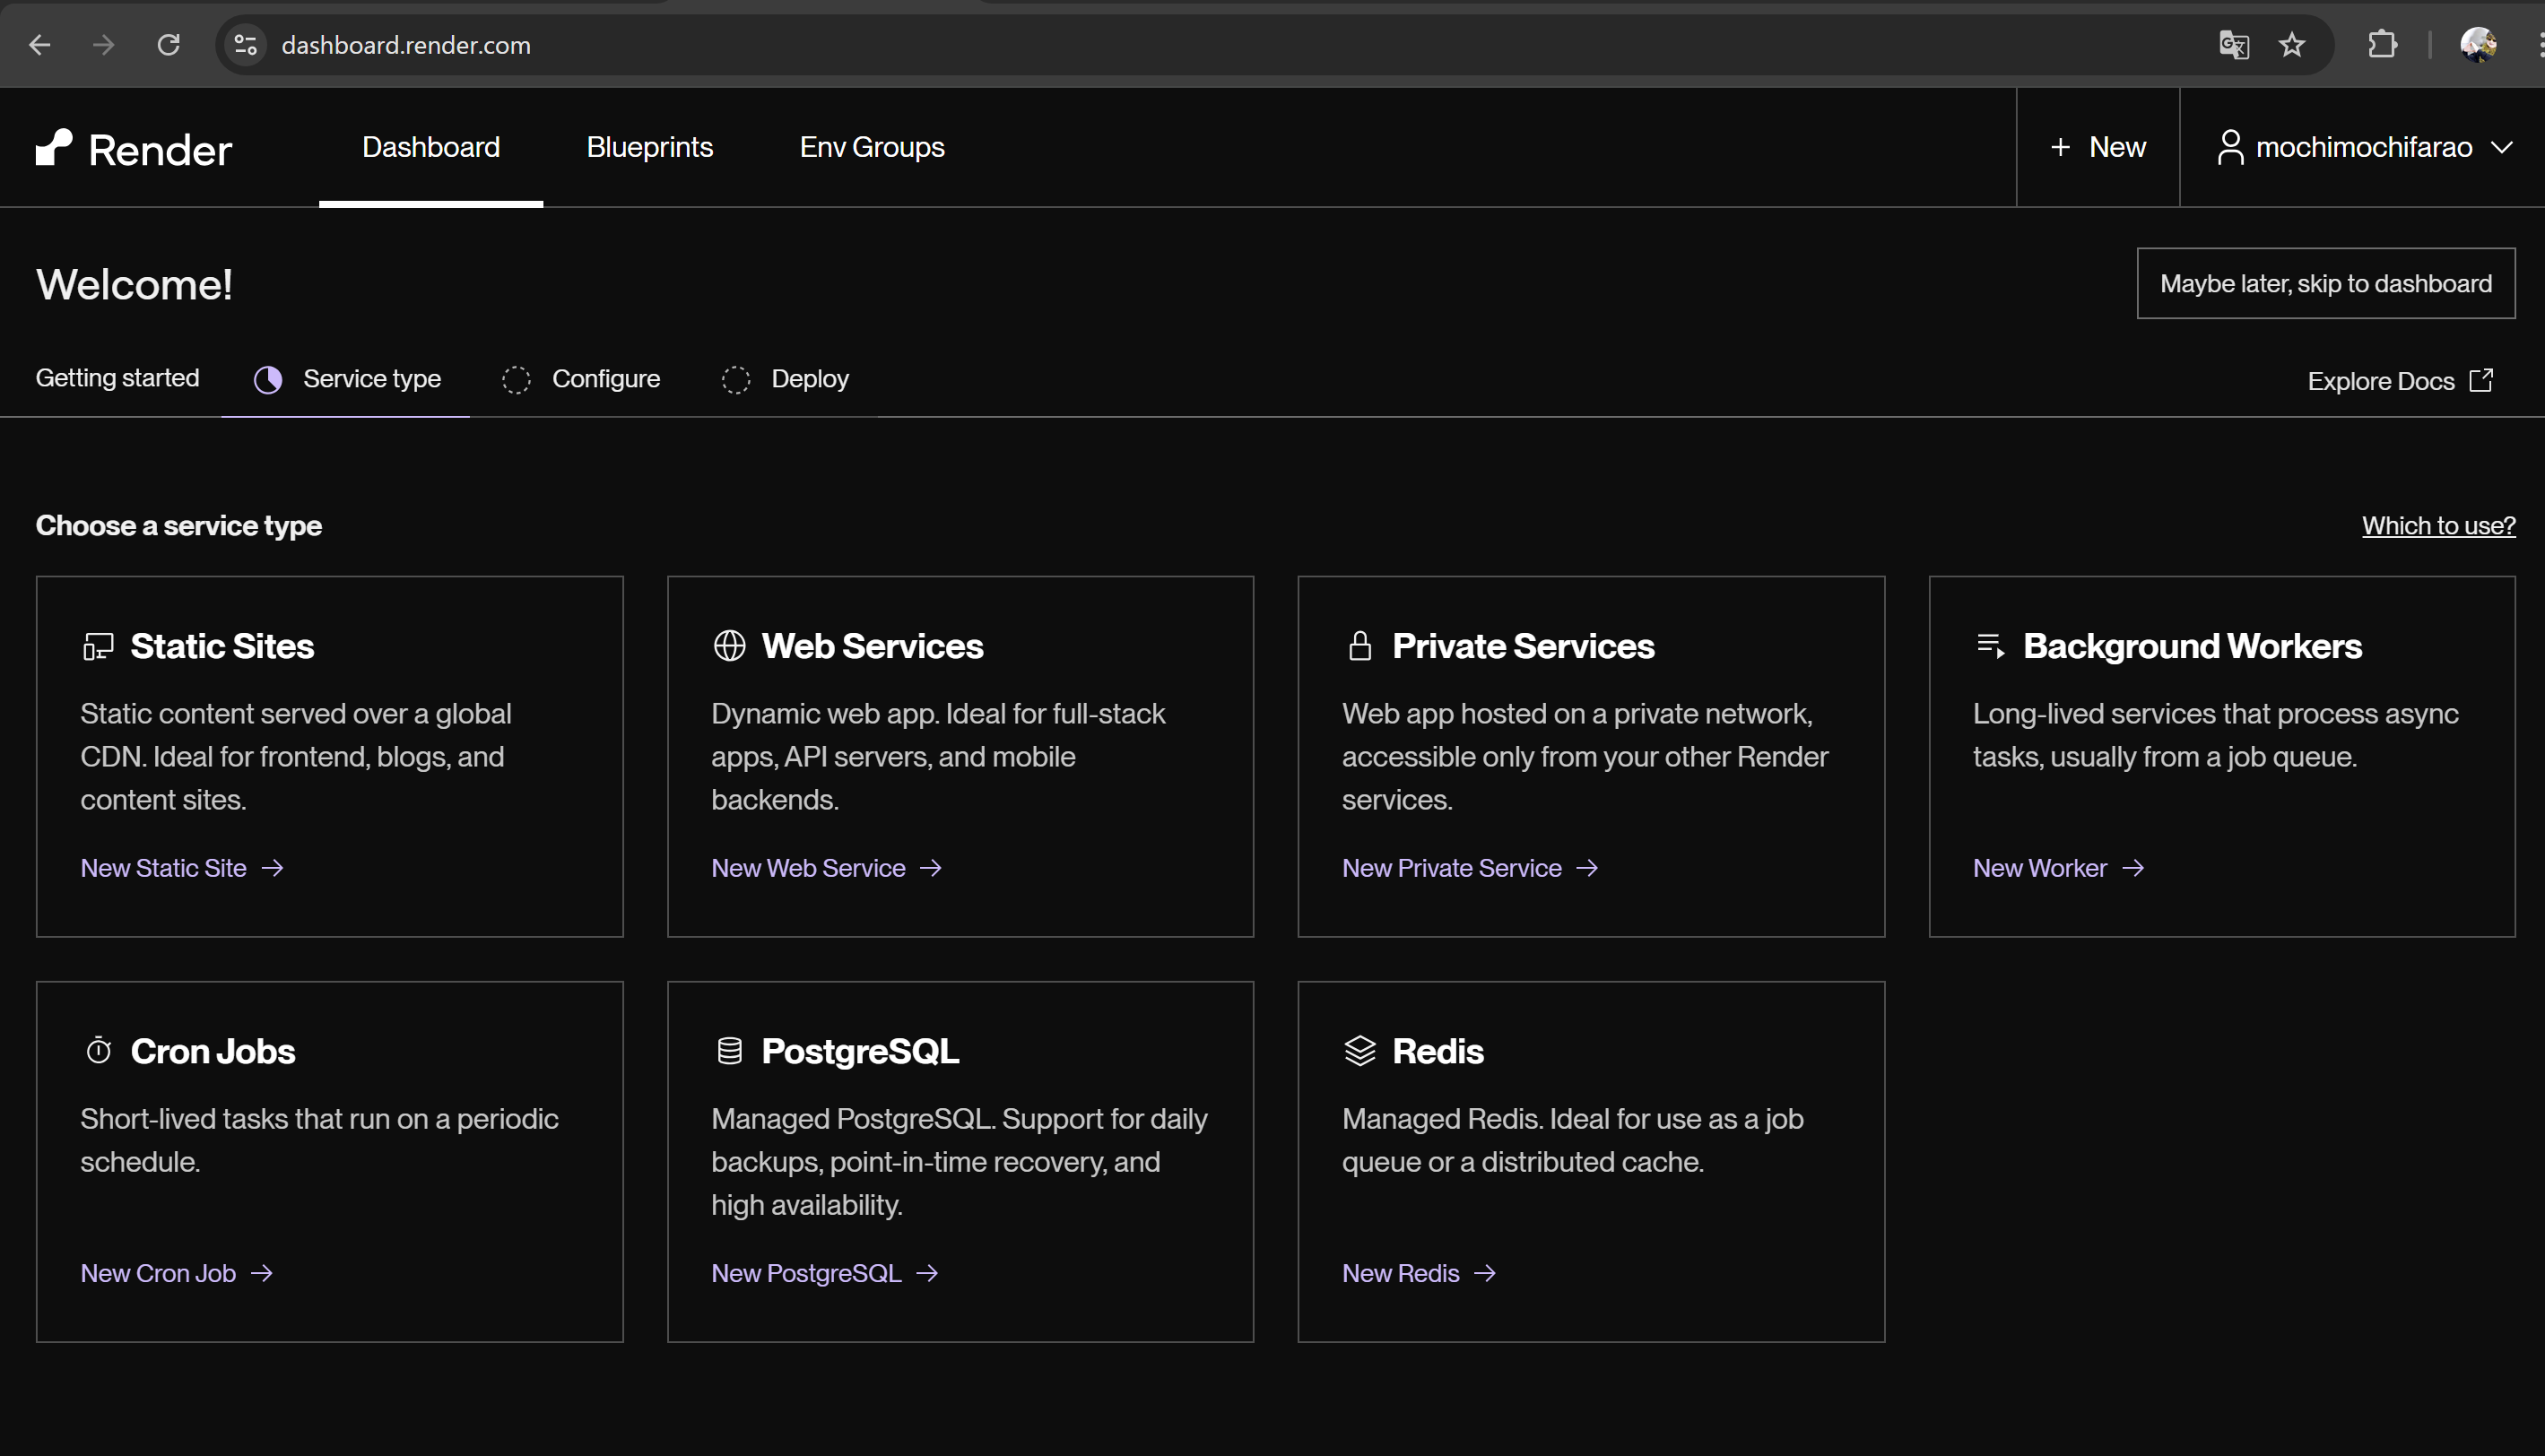
### データベースサービスを作成
#### 1. PostgreSQLを選択しましょう
[](https://startup-technology.gyazo.com/06148ce1dd93fd620707ea8d78a2bee8)
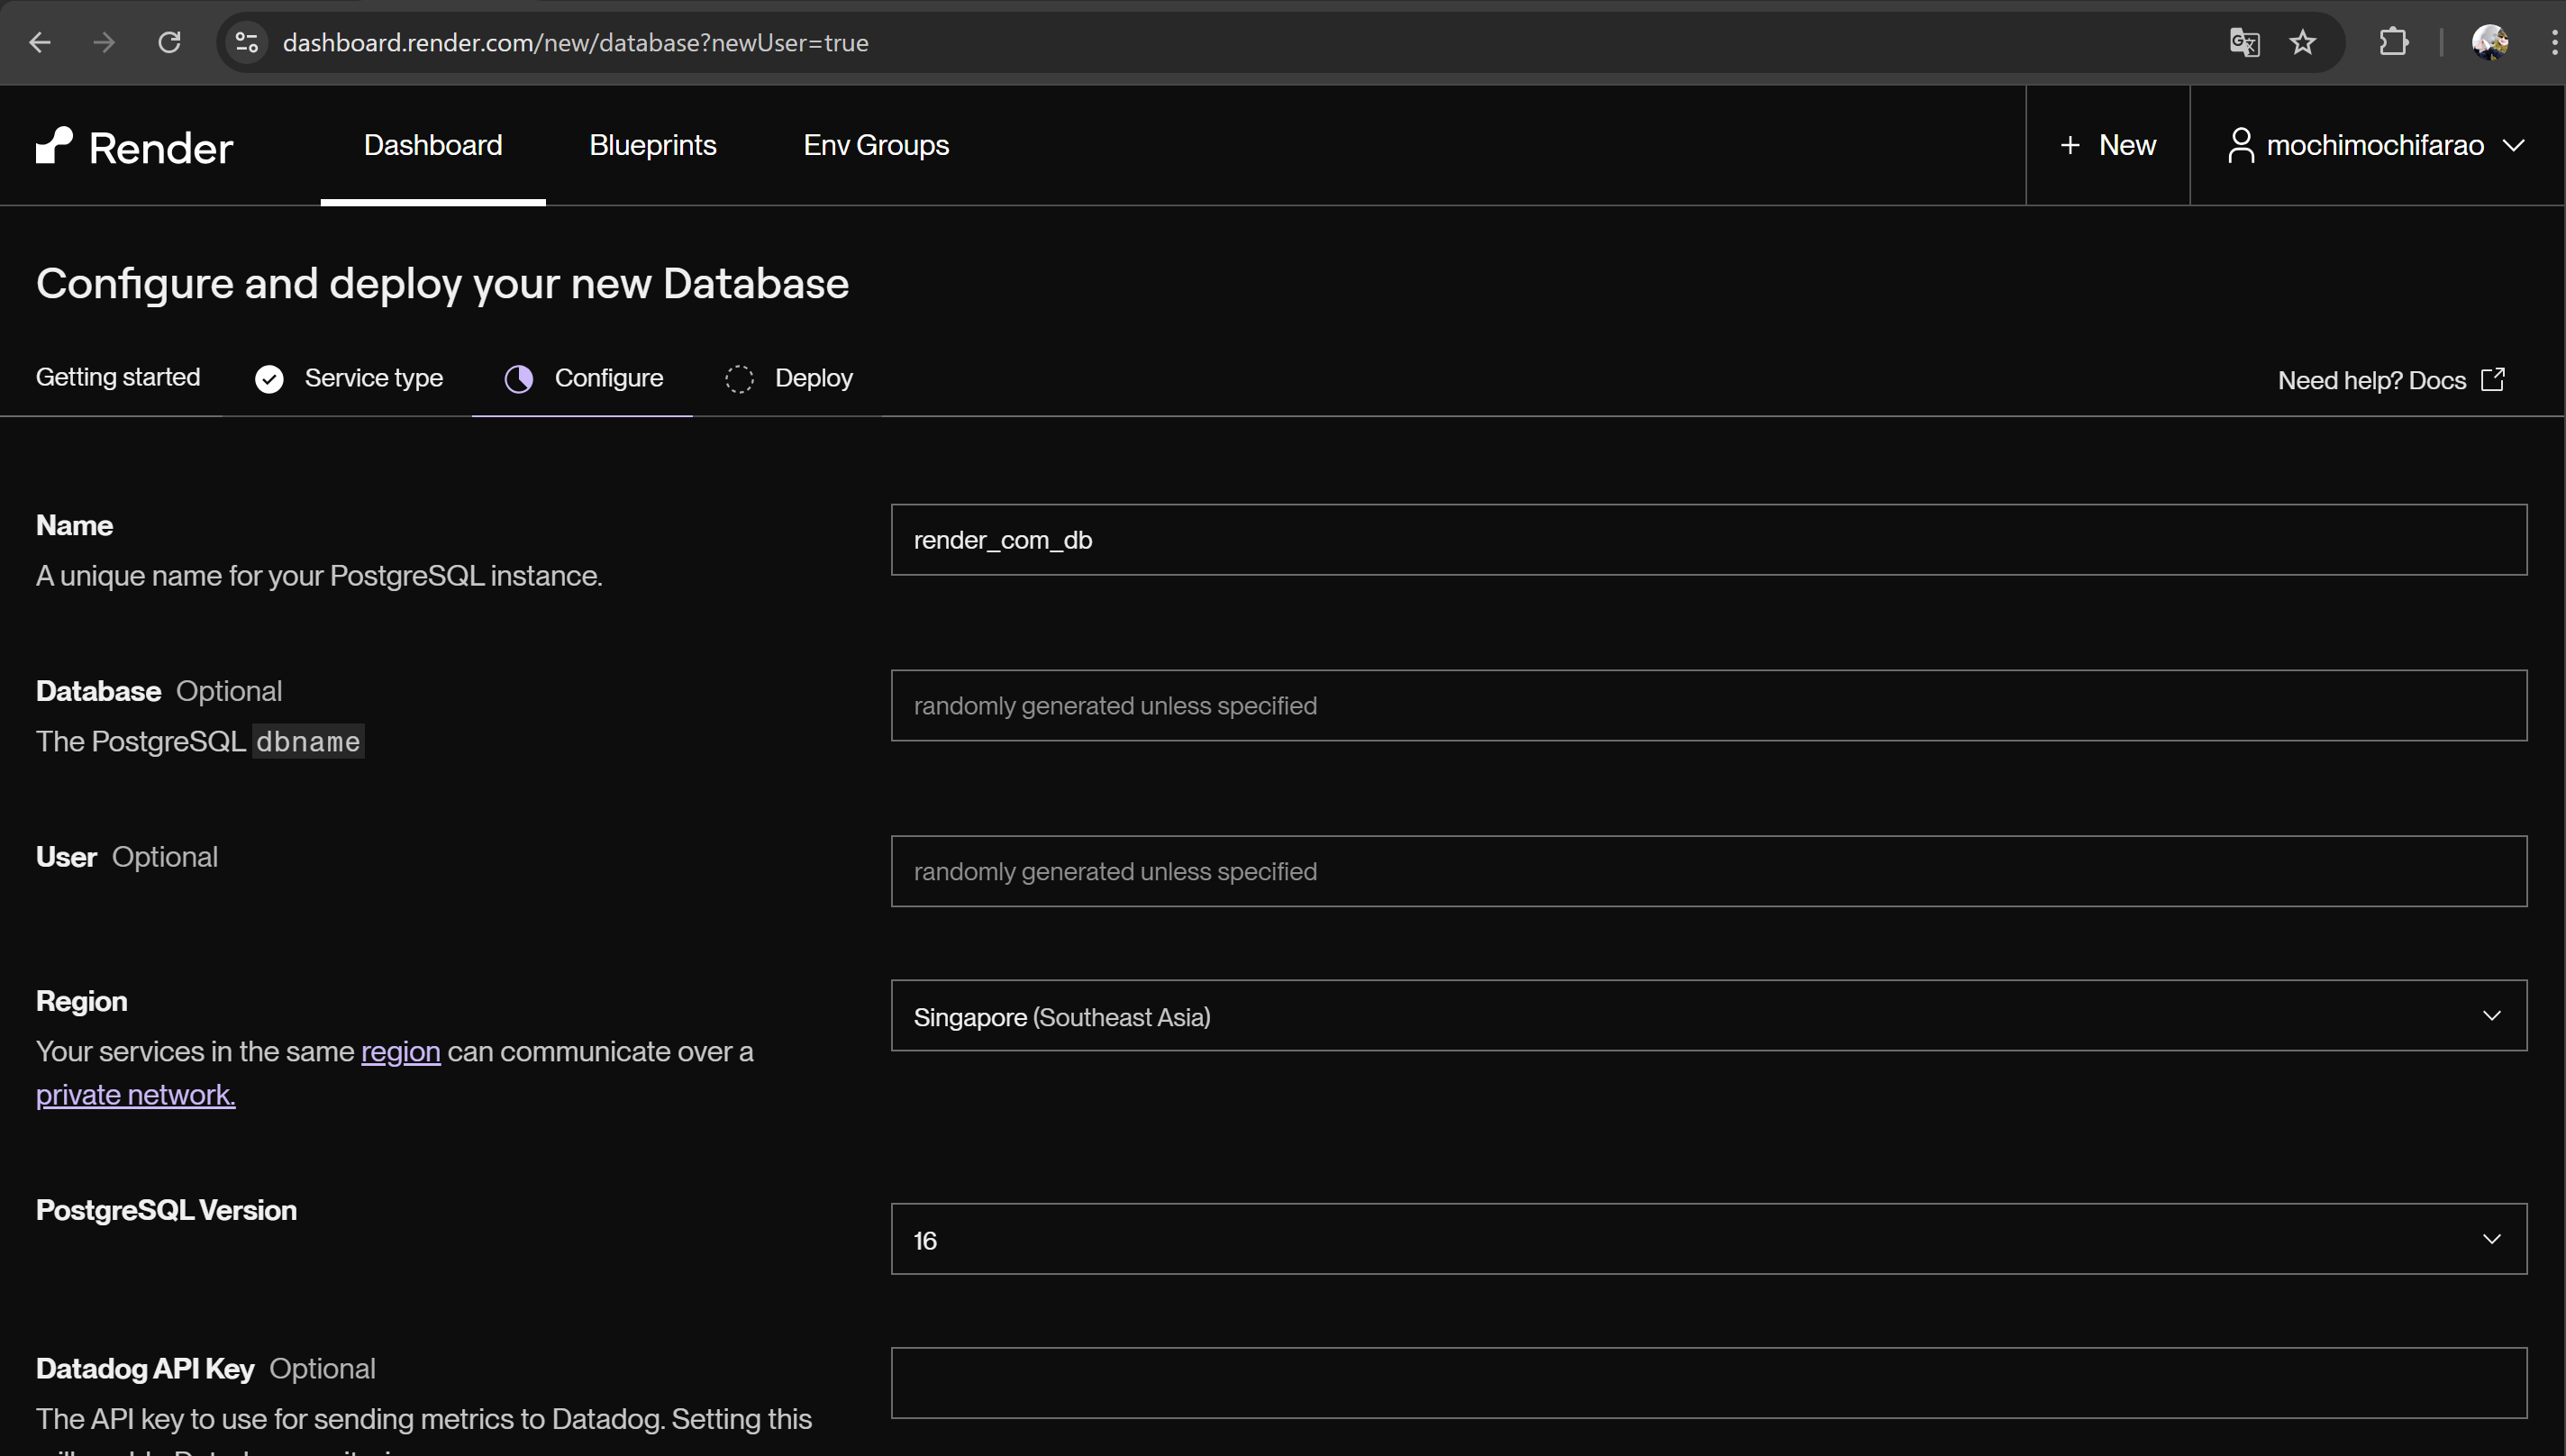
#### 2. Nameの入力とRegionの選択
1. Nameには適当な名前を付けましょう
2. Regionは適当にシンガポールあたりを選んでおくとよいでしょう
※Web Servicesの作成時にRegionを合わせる必要があることだけ覚えておきましょう
[](https://startup-technology.gyazo.com/d6c46a3238c84c437761e8179feac98b)
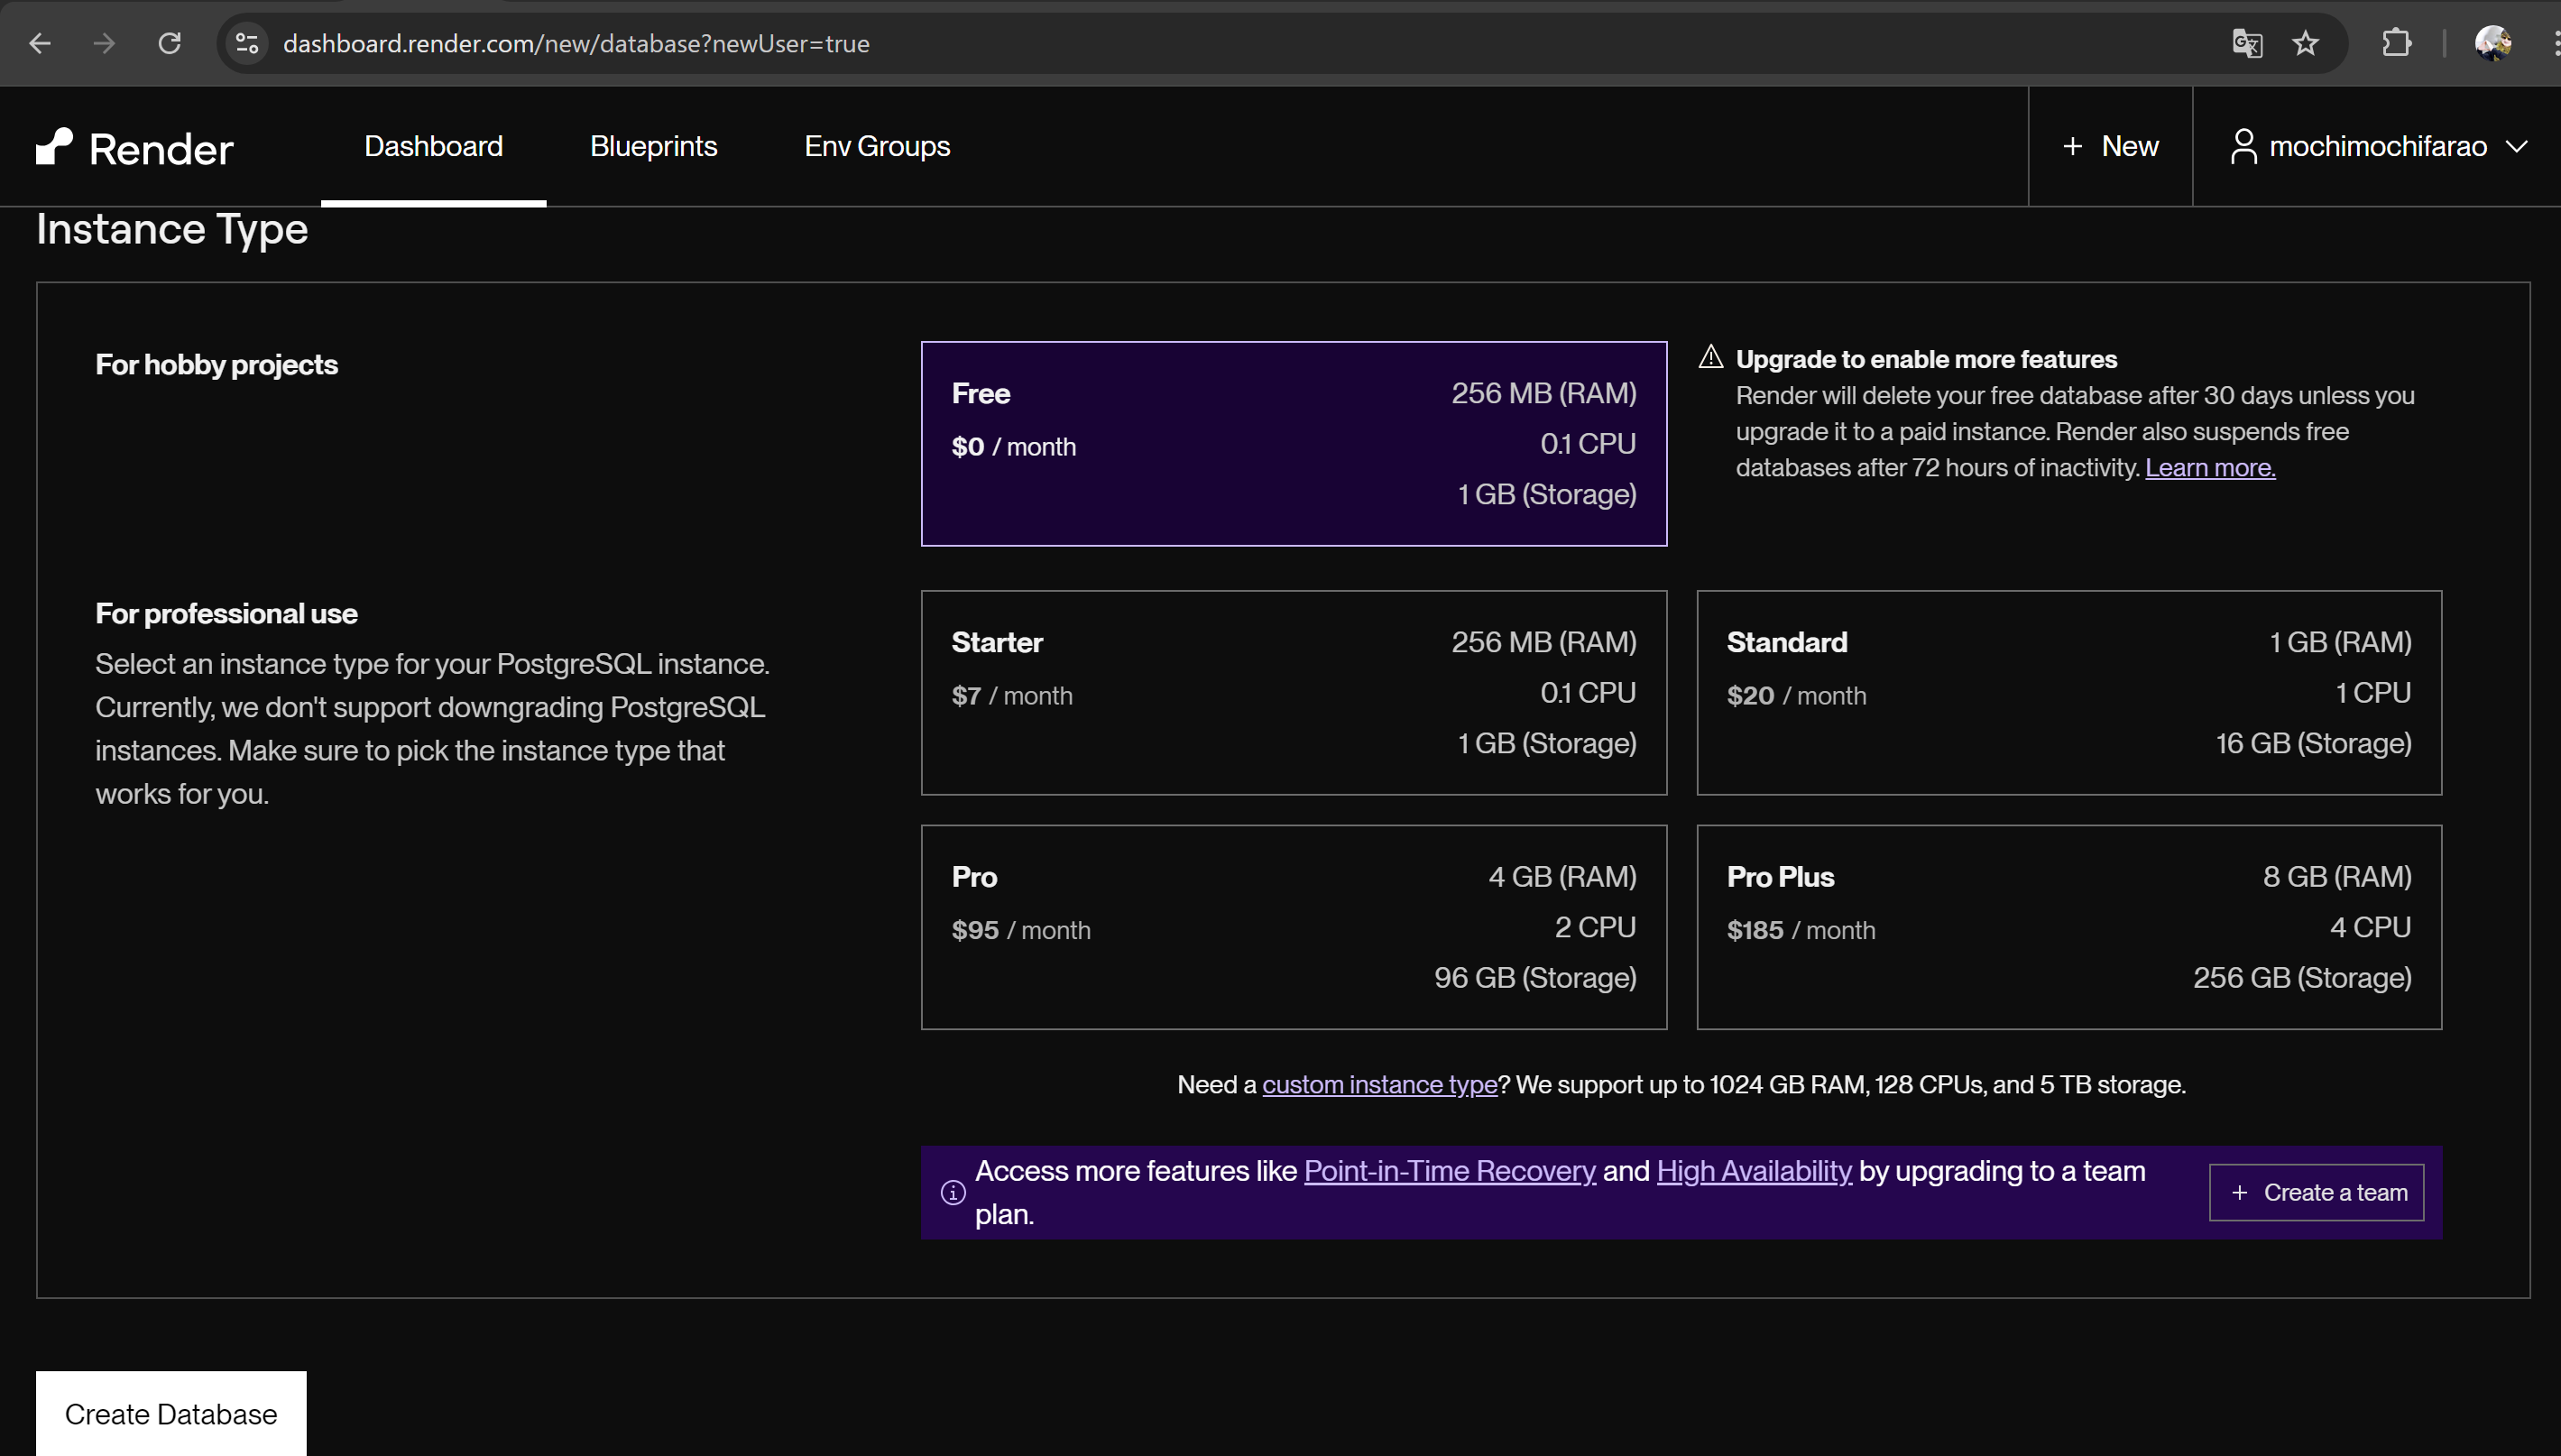
#### 3. Planの選択
今回は無料のものを選択しています
※注意事項は読んでおきましょう
[](https://startup-technology.gyazo.com/79c4aef8bb2d7d20d10265f17b77528a)
#### 4. Internal Database URL
Web Servicesを作成するときにInternal Database URLの値を環境変数に入れるのでどこで確認できるかを把握しておきましょう
データベースの作成後にDashboardから確認出来ます
[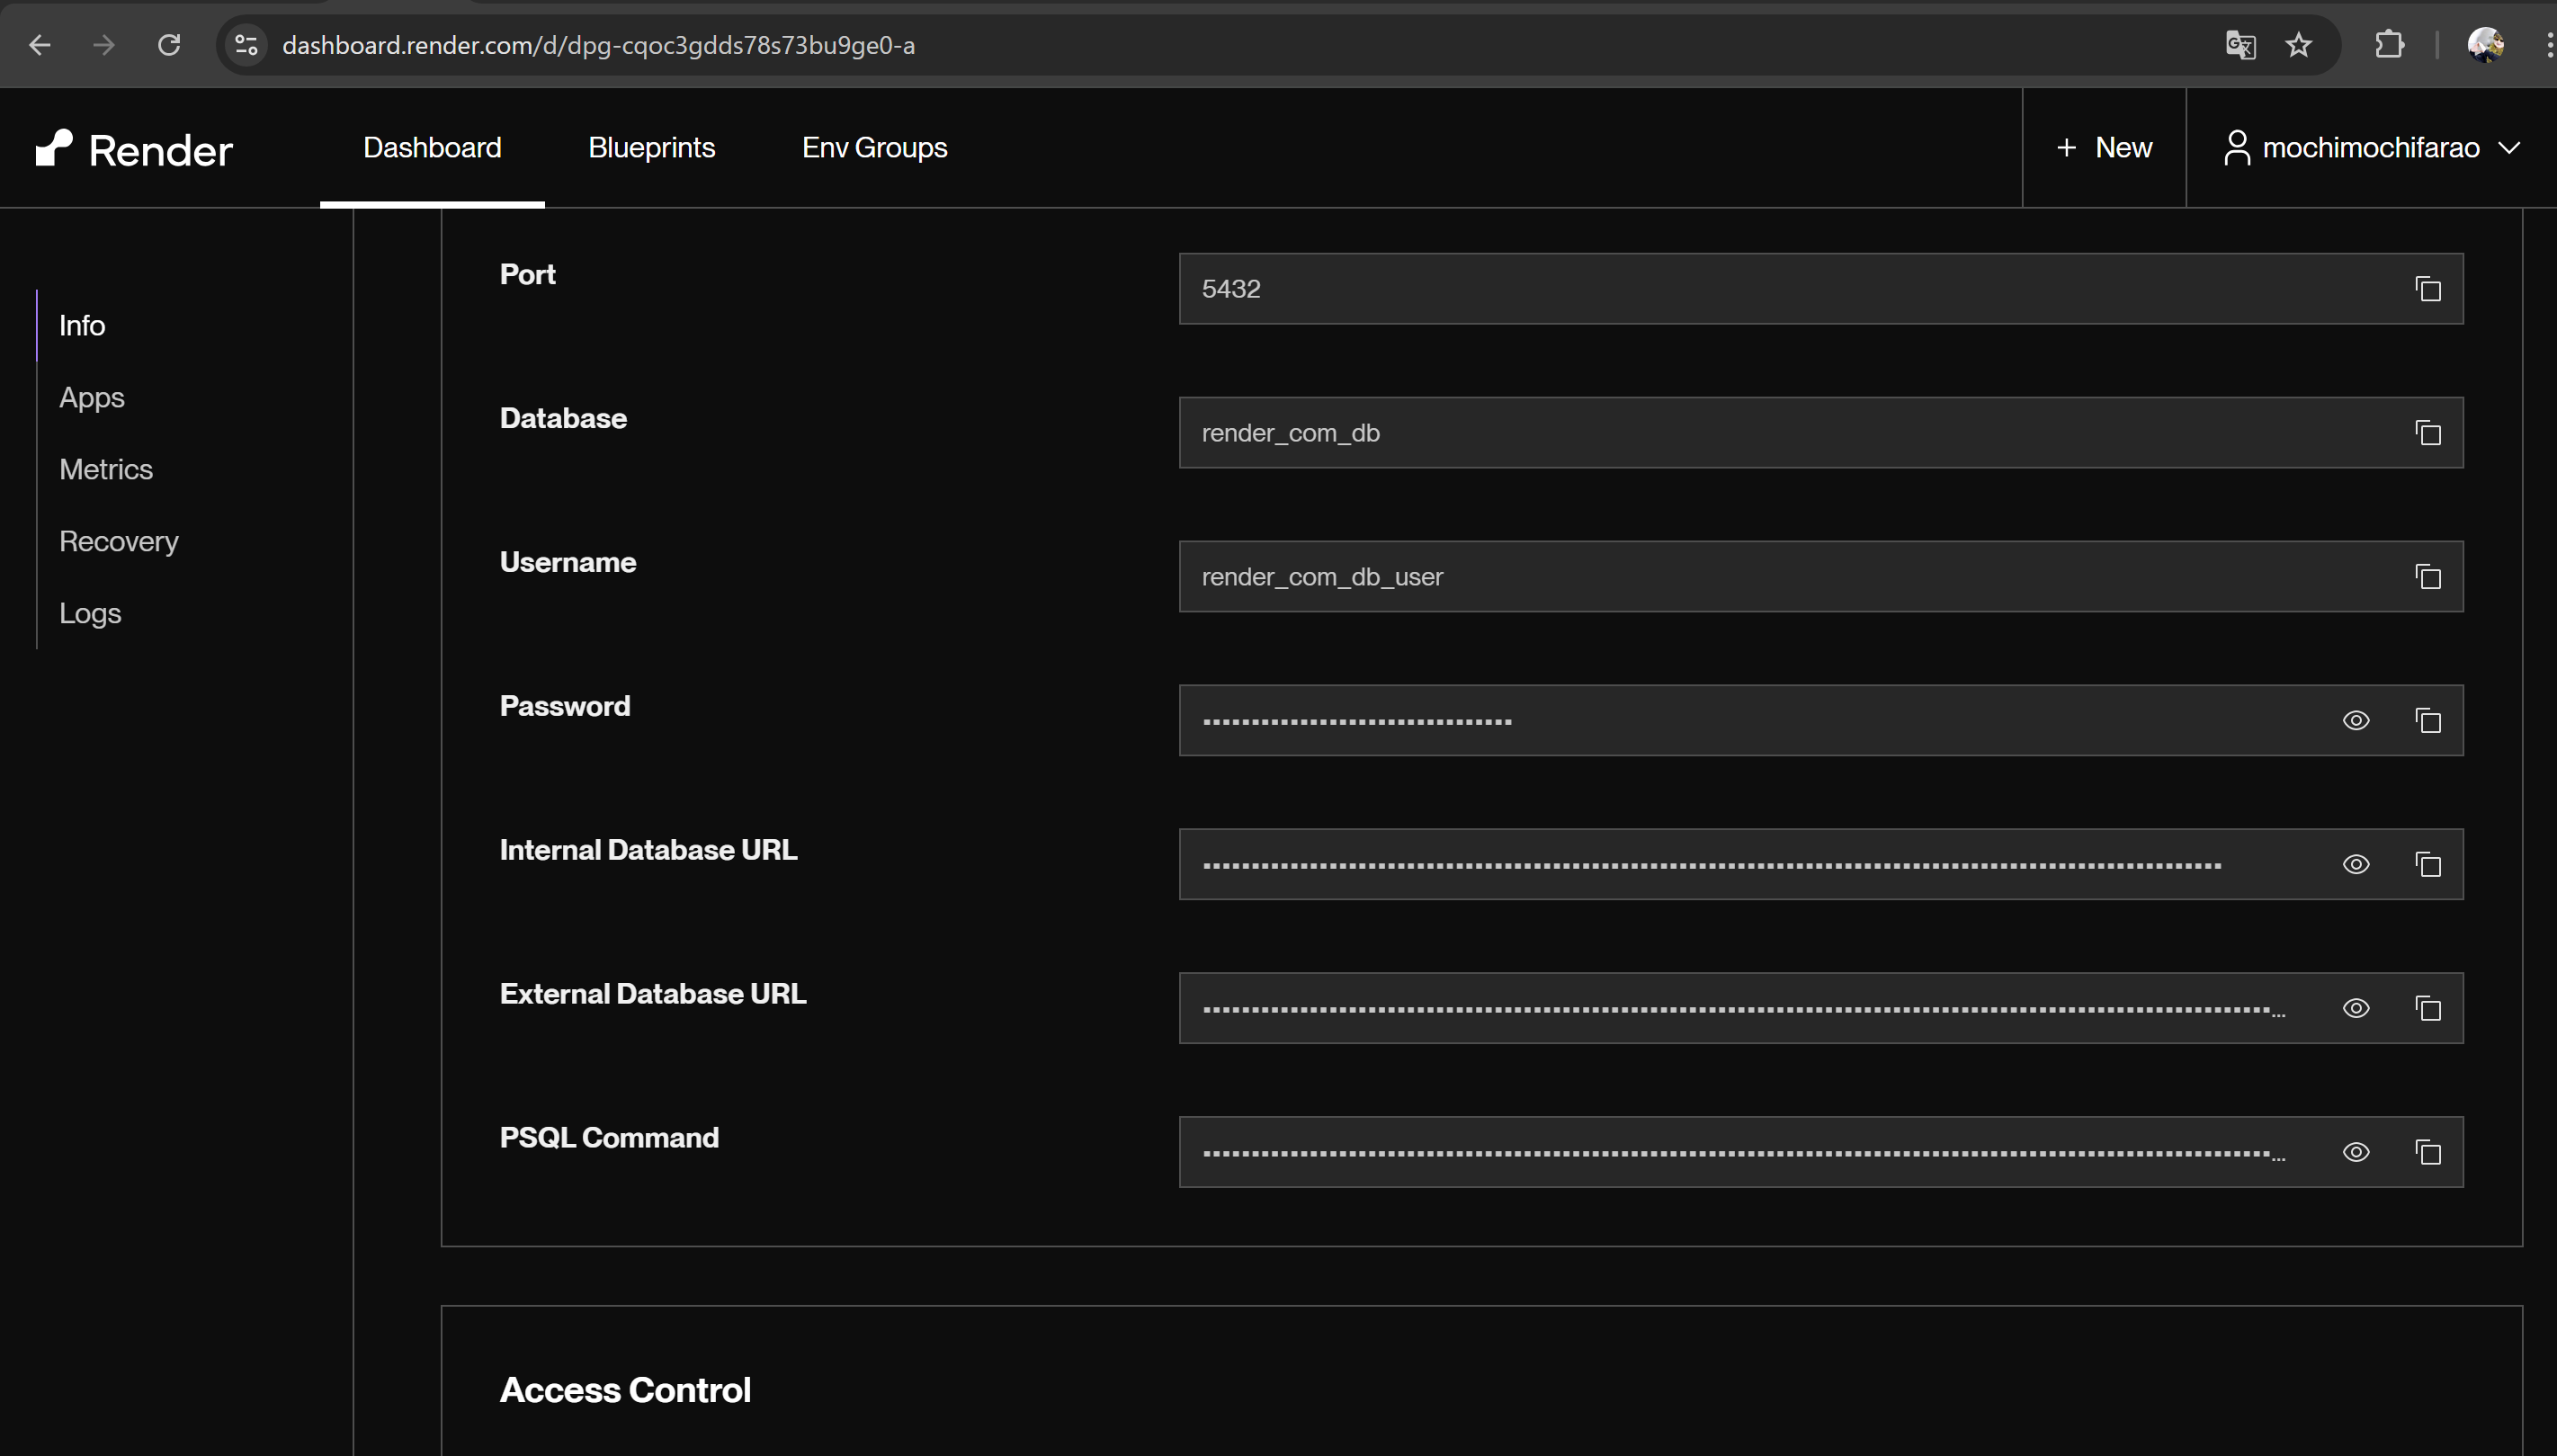](https://startup-technology.gyazo.com/4305fc70576e9a905273e9d14cb7e731)
### Web Servicesを作成
#### 1. Web Servicesを選択
[](https://startup-technology.gyazo.com/06148ce1dd93fd620707ea8d78a2bee8)
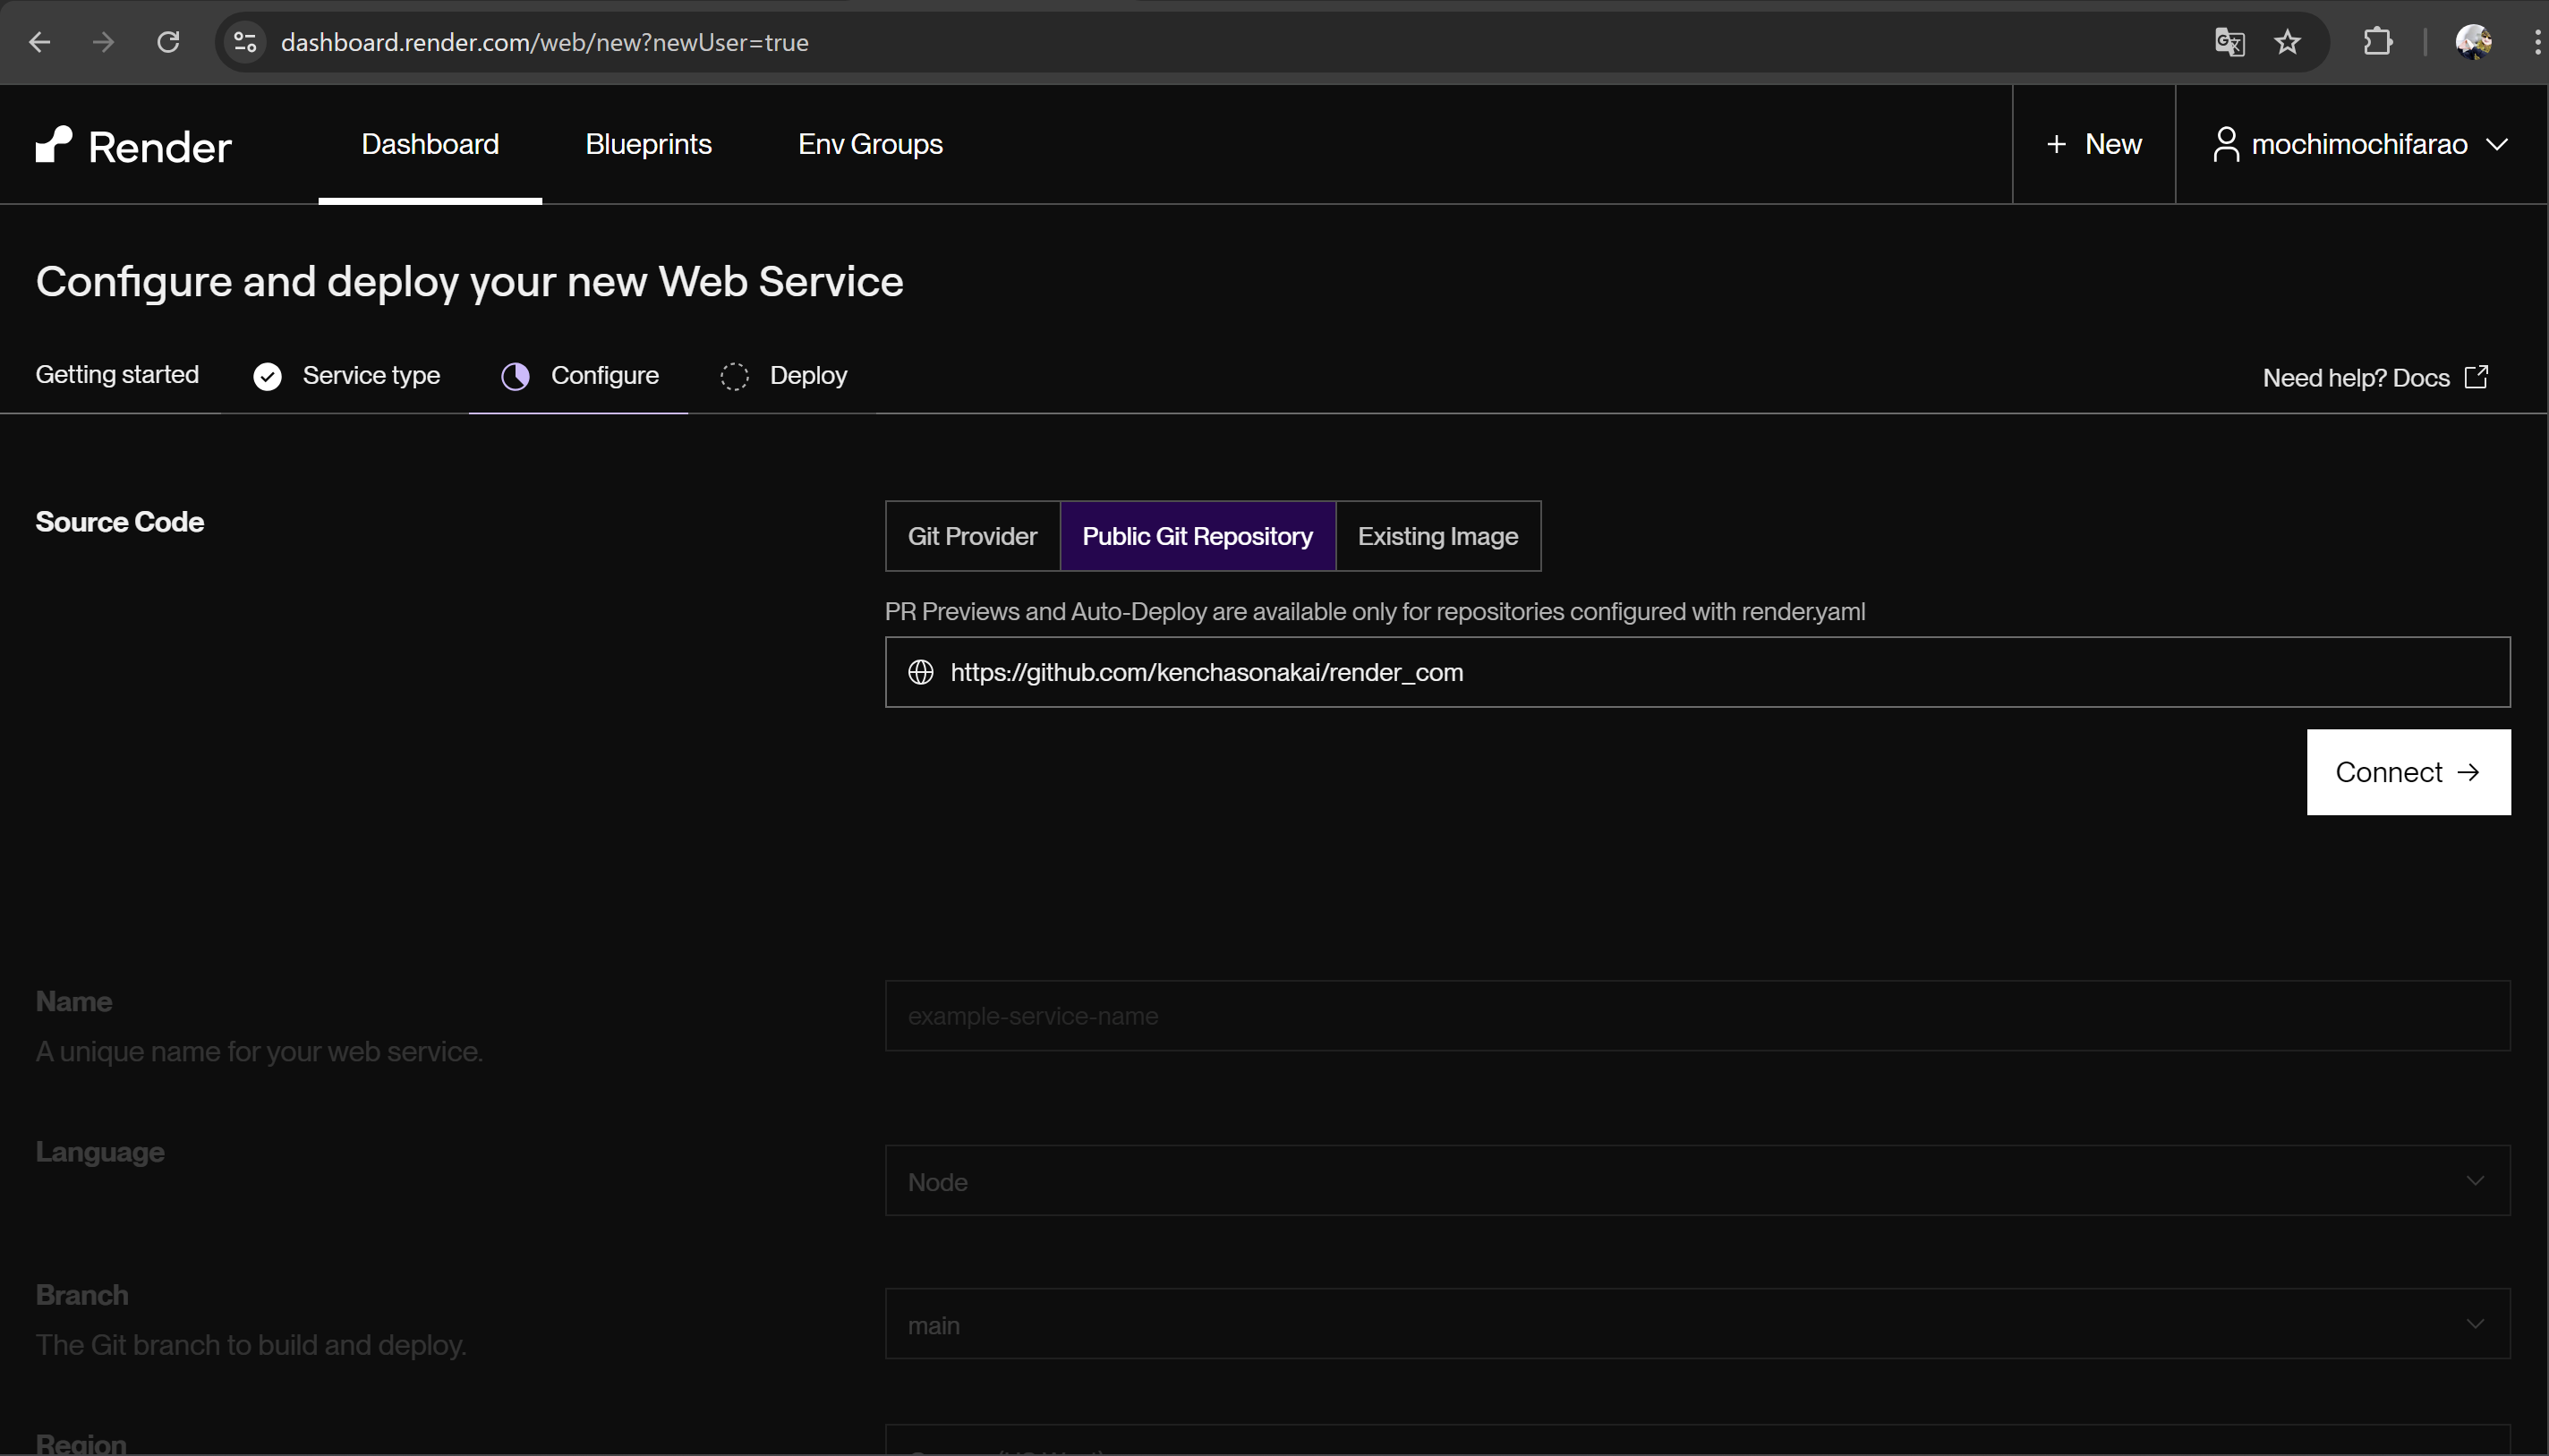
#### 2. Public Git RepositoryにデプロイしたいリポジトリのURLを入力
※今回のやり方はPublicのもののみデプロイできます
[](https://startup-technology.gyazo.com/d2546c1f7fca3aa421ee46ecc5ecb3f0)
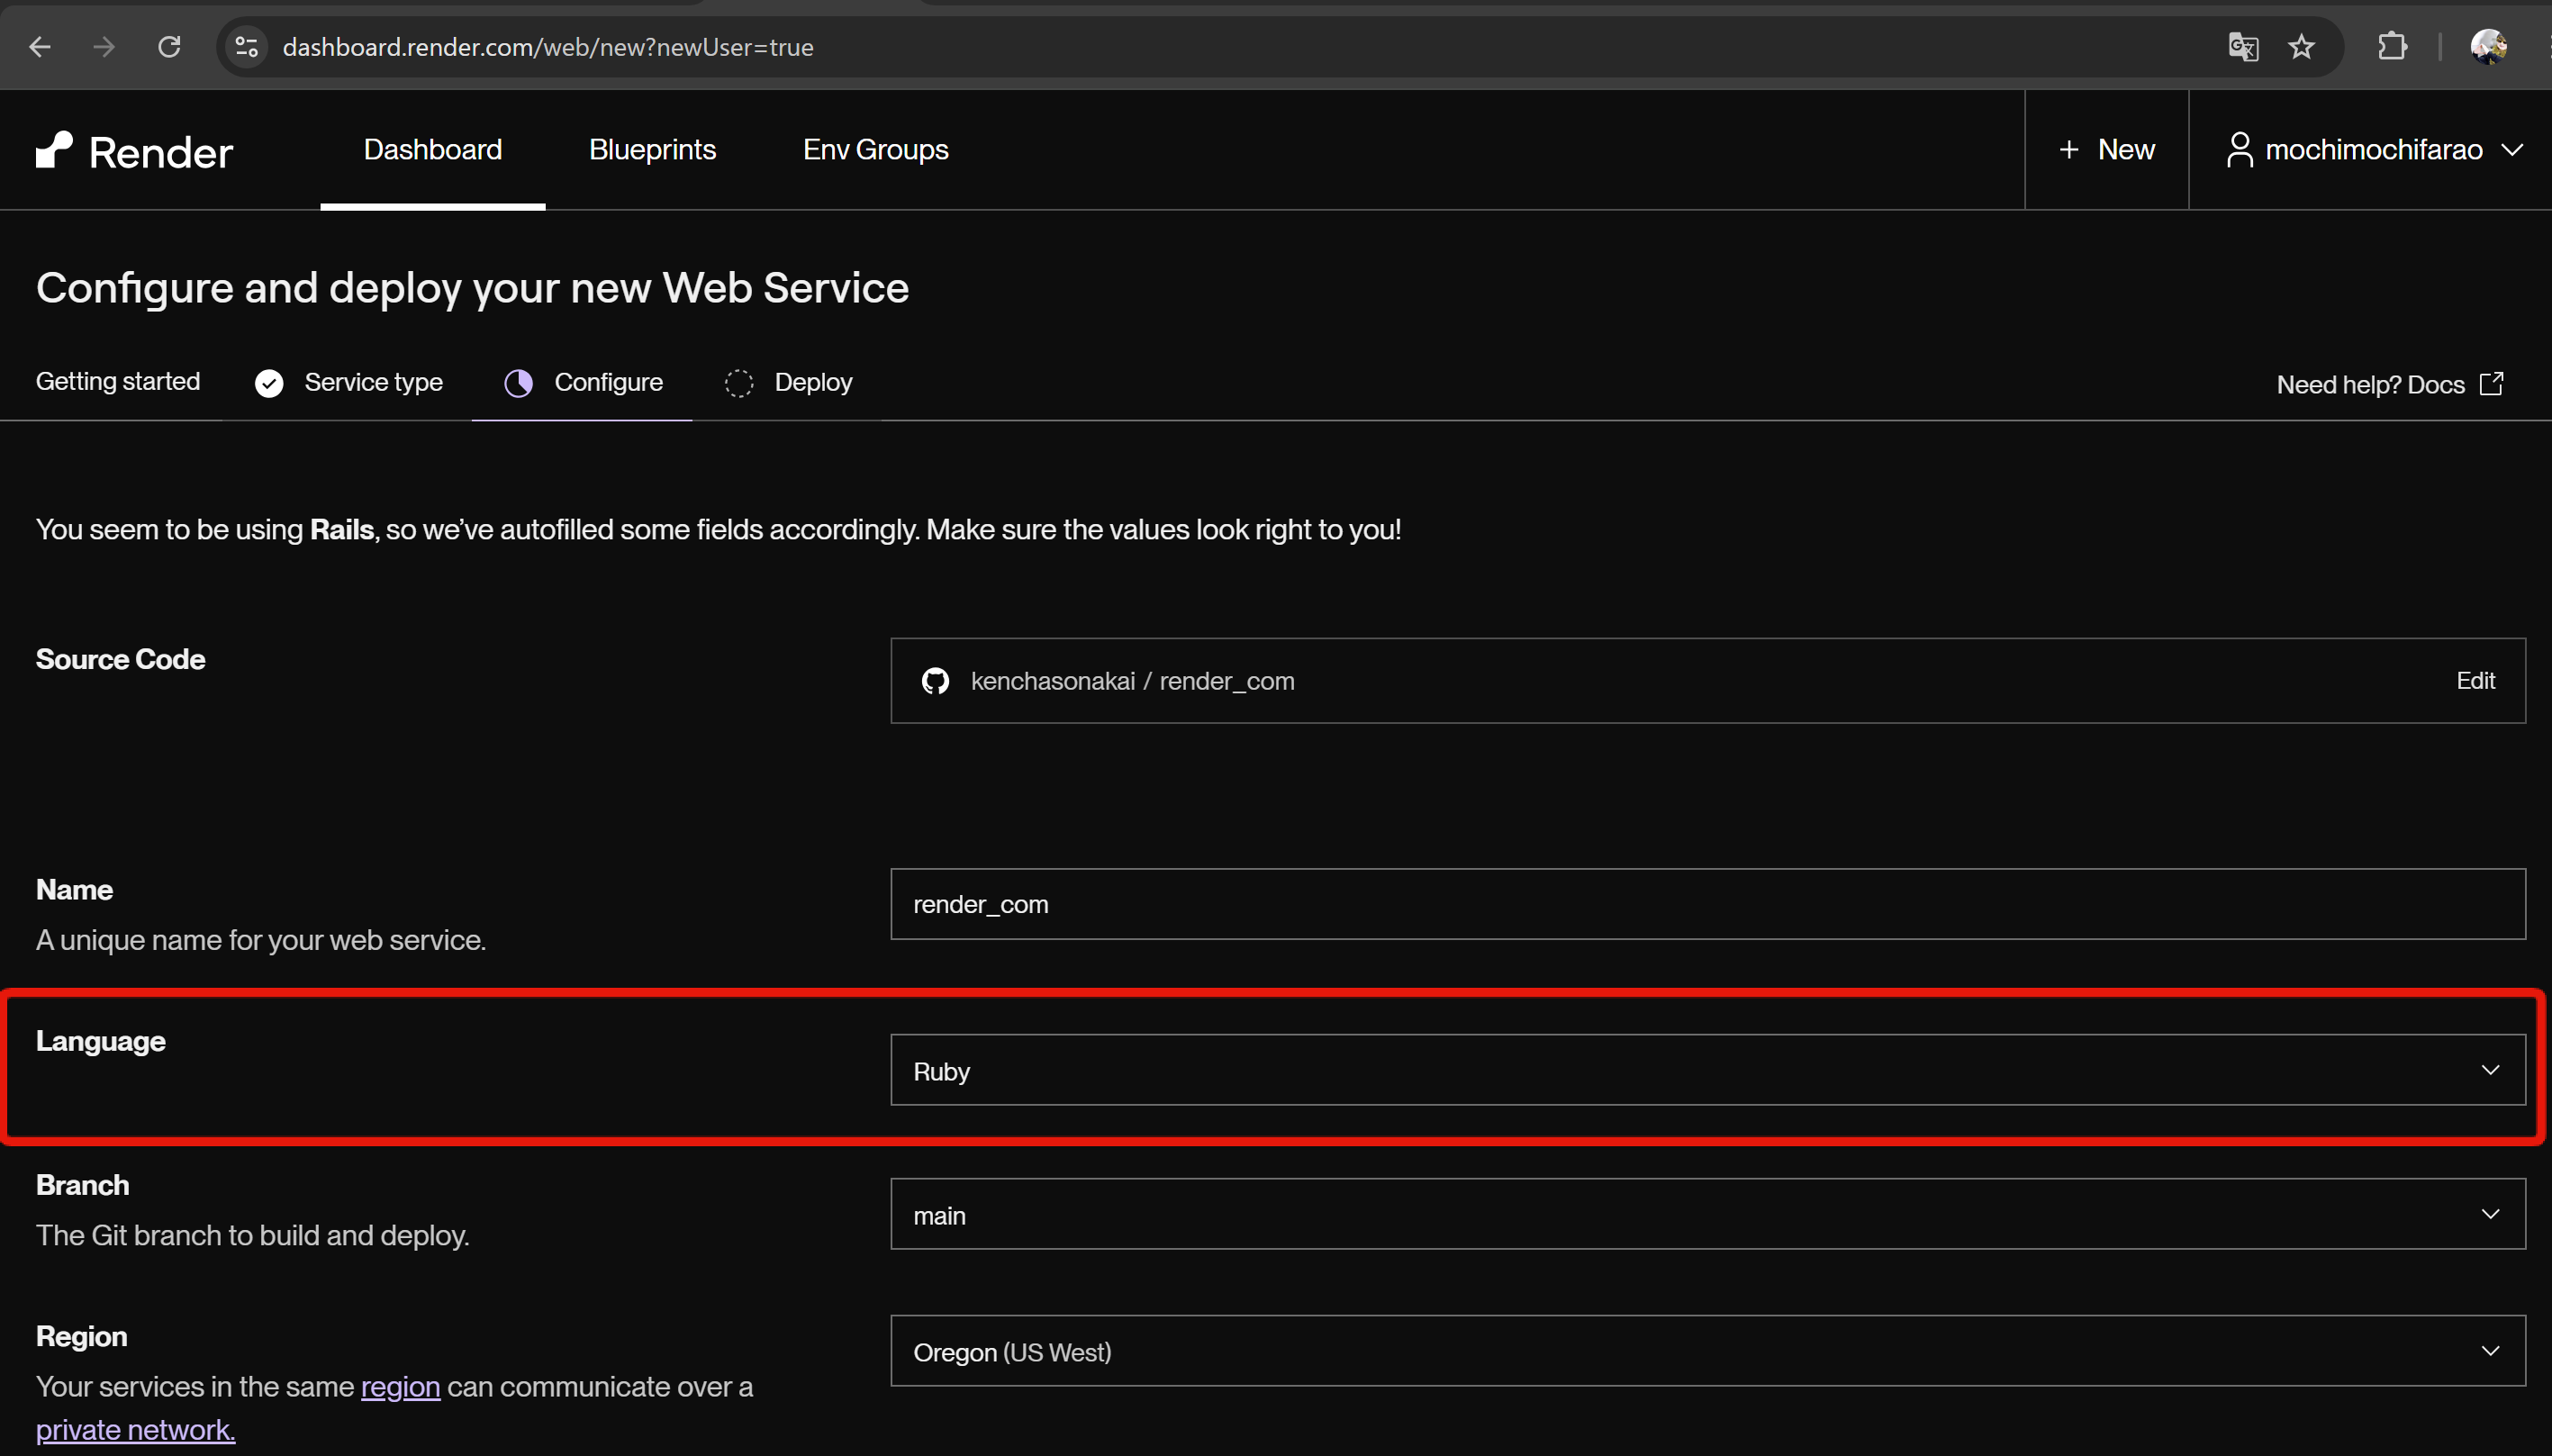
#### 3. Languageの設定
LanguageはDockerではなくRubyを選択しましょう
[](https://startup-technology.gyazo.com/f5edb0b4b5a9c36188c56ef1b4f96df8)
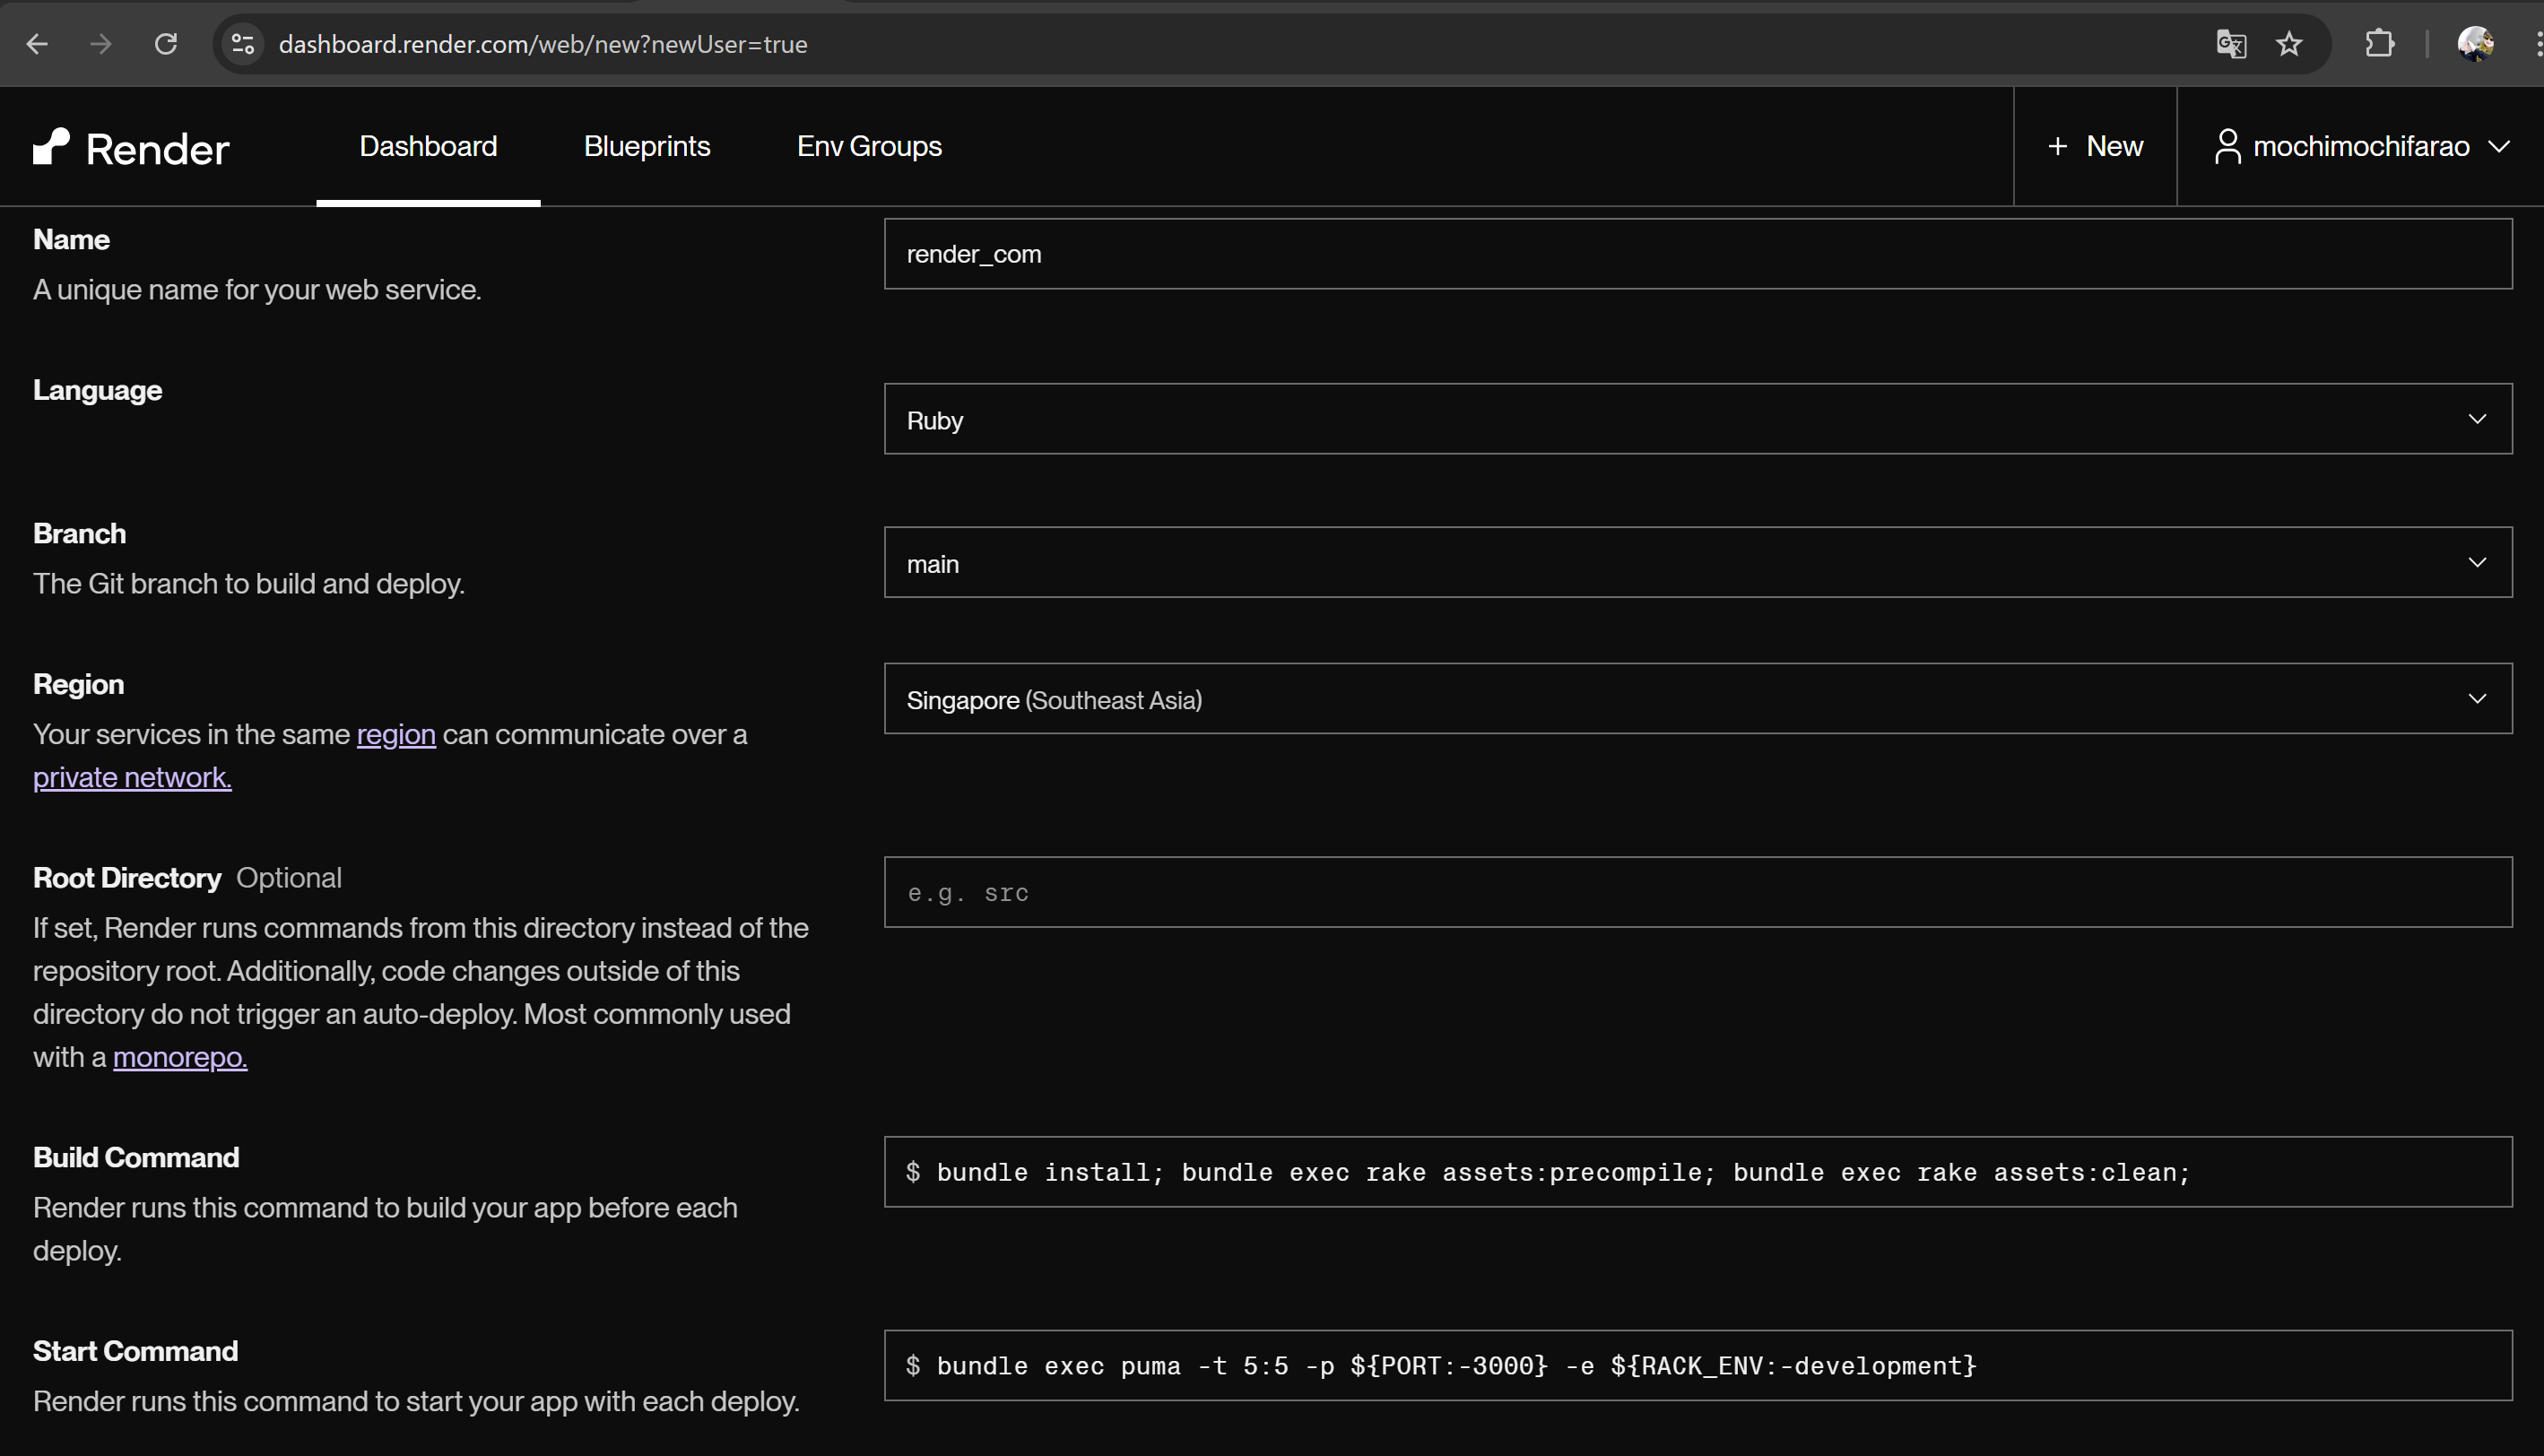
#### 4. Regionの設定
Regionは適当にシンガポールあたりを選んでおくとよいでしょう
※データベースのRegionと合わせる必要があることだけ覚えておきましょう
[](https://startup-technology.gyazo.com/b18cec058c9d0f24b44bb659d641516b)
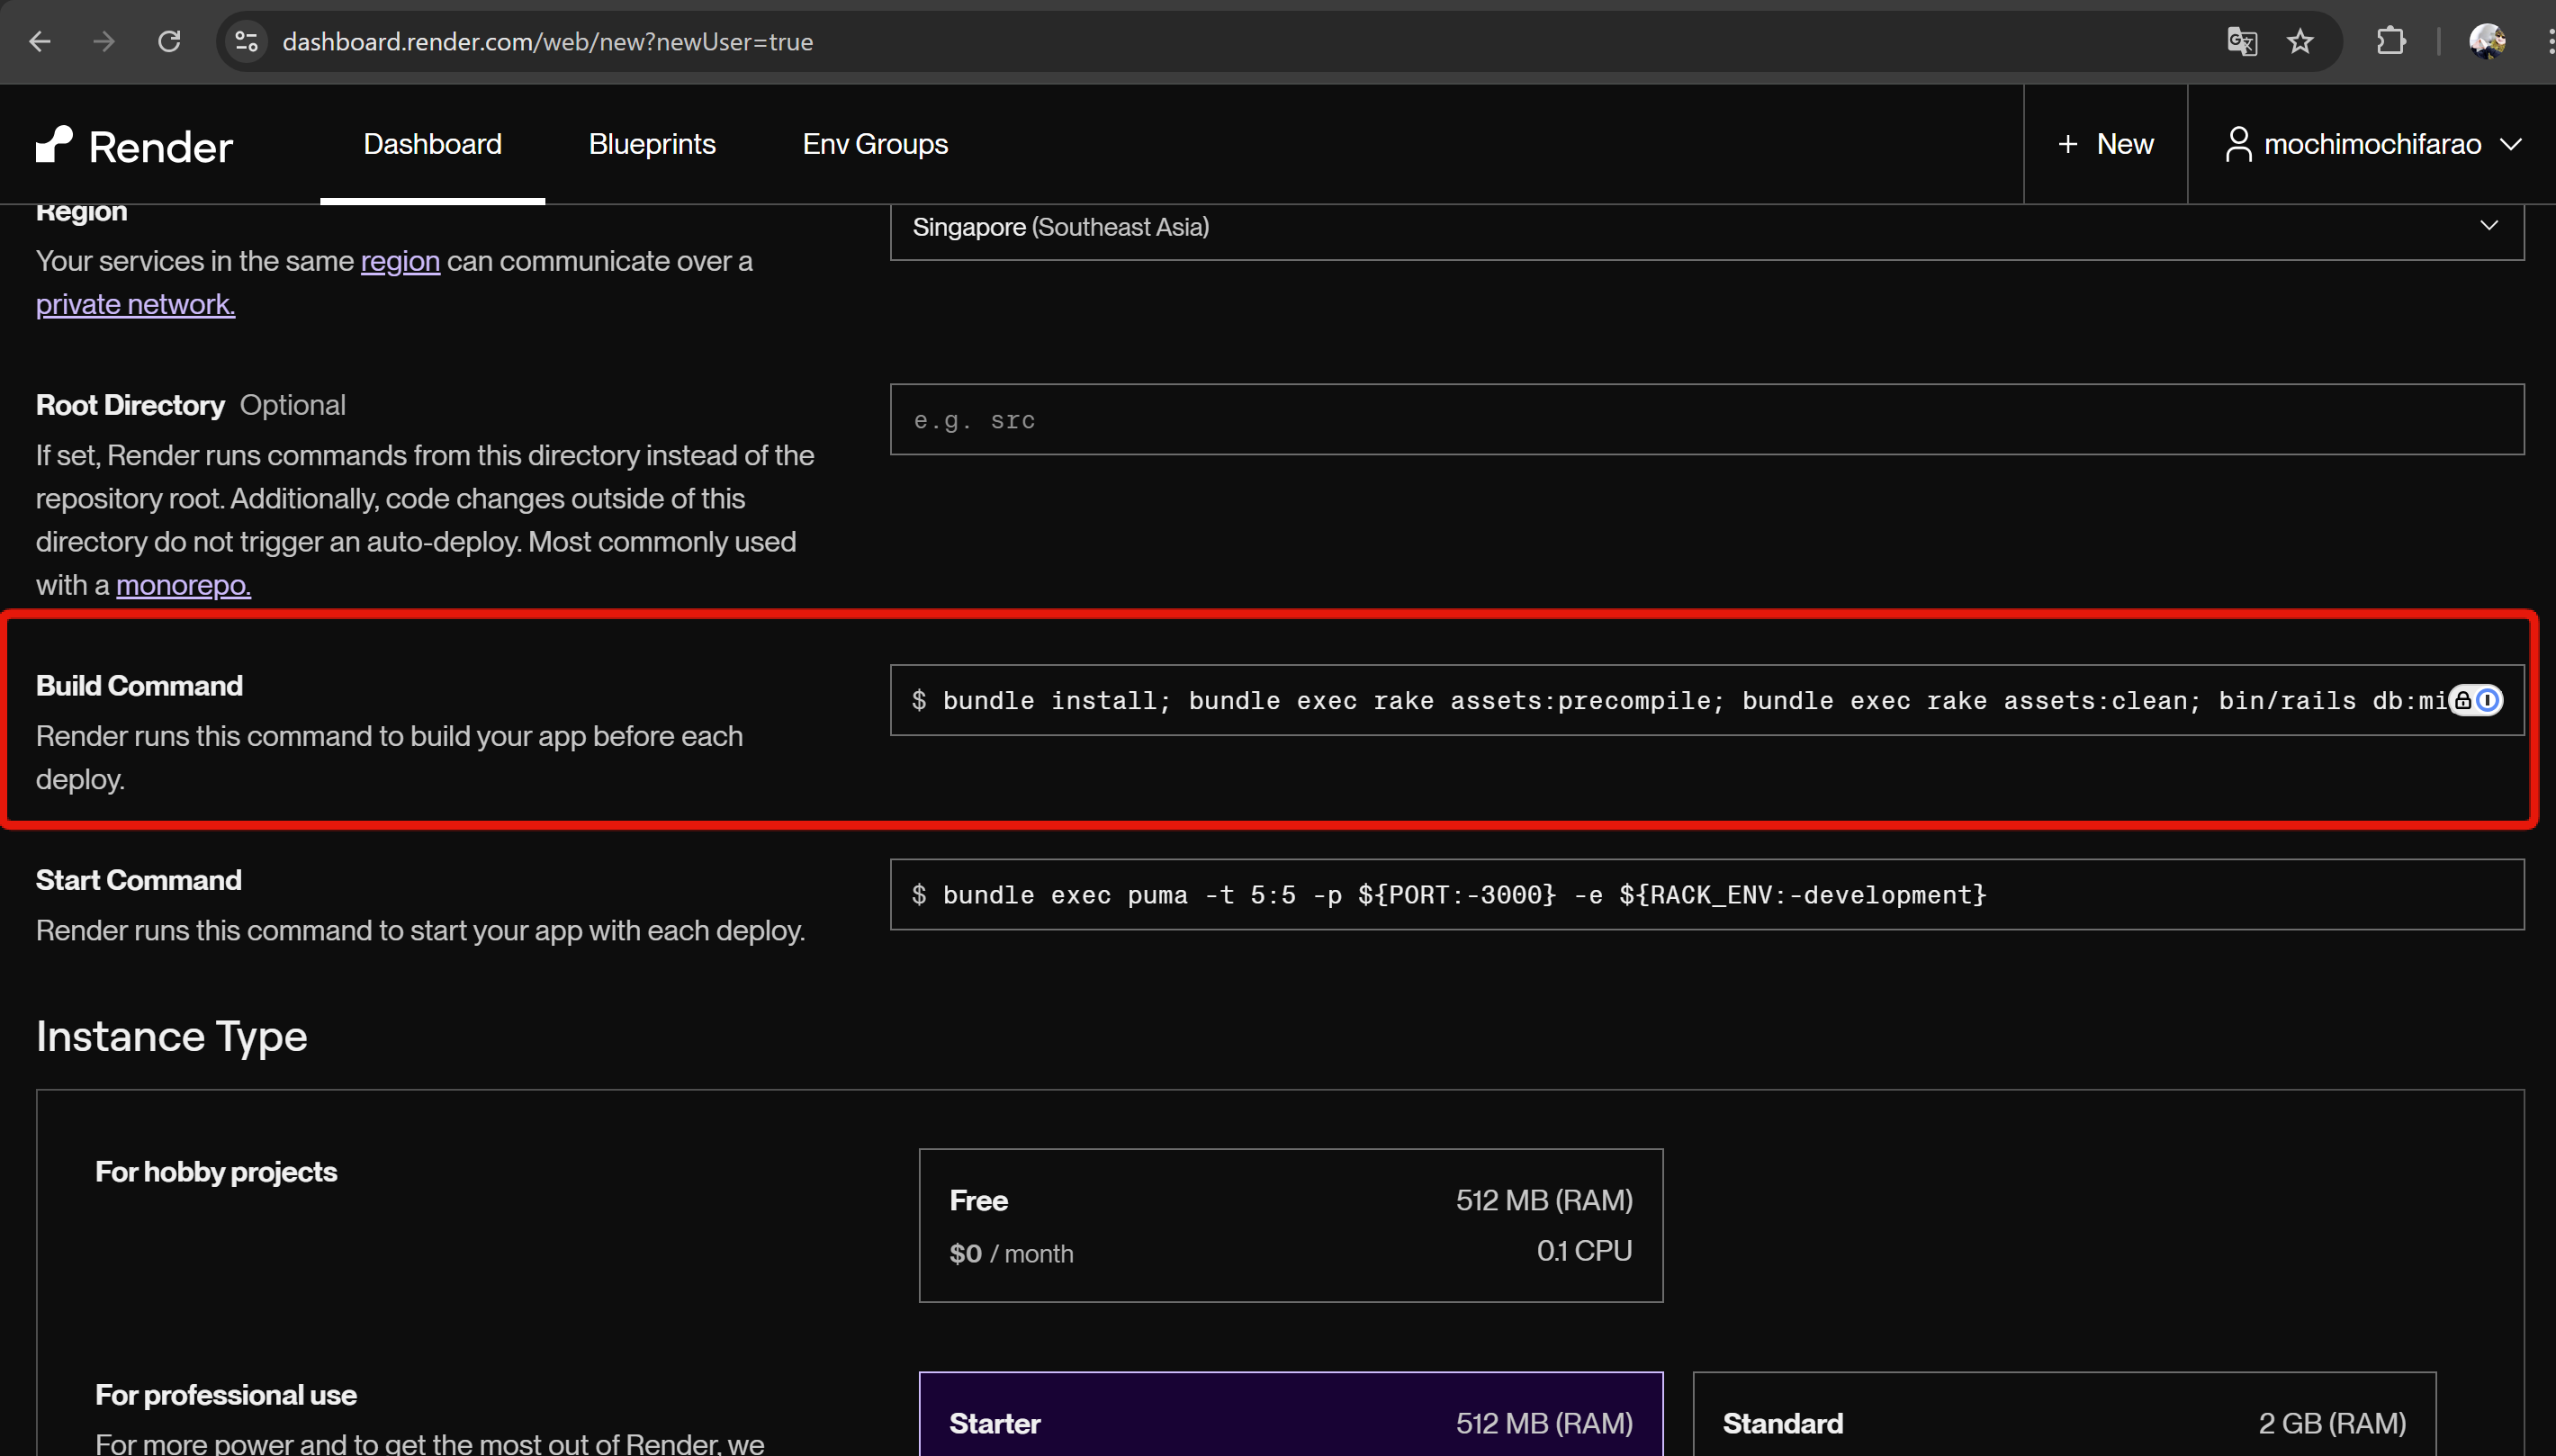
#### 5. Build Commandの設定
Build CommandはRailsサーバーを立ち上げる前に行いたいコマンドを記載します
今回の例は初期設定のコマンドに`bin/rails db:migrate`を追加してあります
```
bundle install; bundle exec rake assets:precompile; bundle exec rake assets:clean; bin/rails db:migrate;
```
例えば毎回seedの投入をしたかったりするならここに`bin/rails db:seed`を追加すると実行されます
[](https://startup-technology.gyazo.com/5b14e48e2de46b7f47d56c7355f7ed5a)
#### 6. Planの選択
今回は無料のものを選択しています
※注意事項は読んでおきましょう
[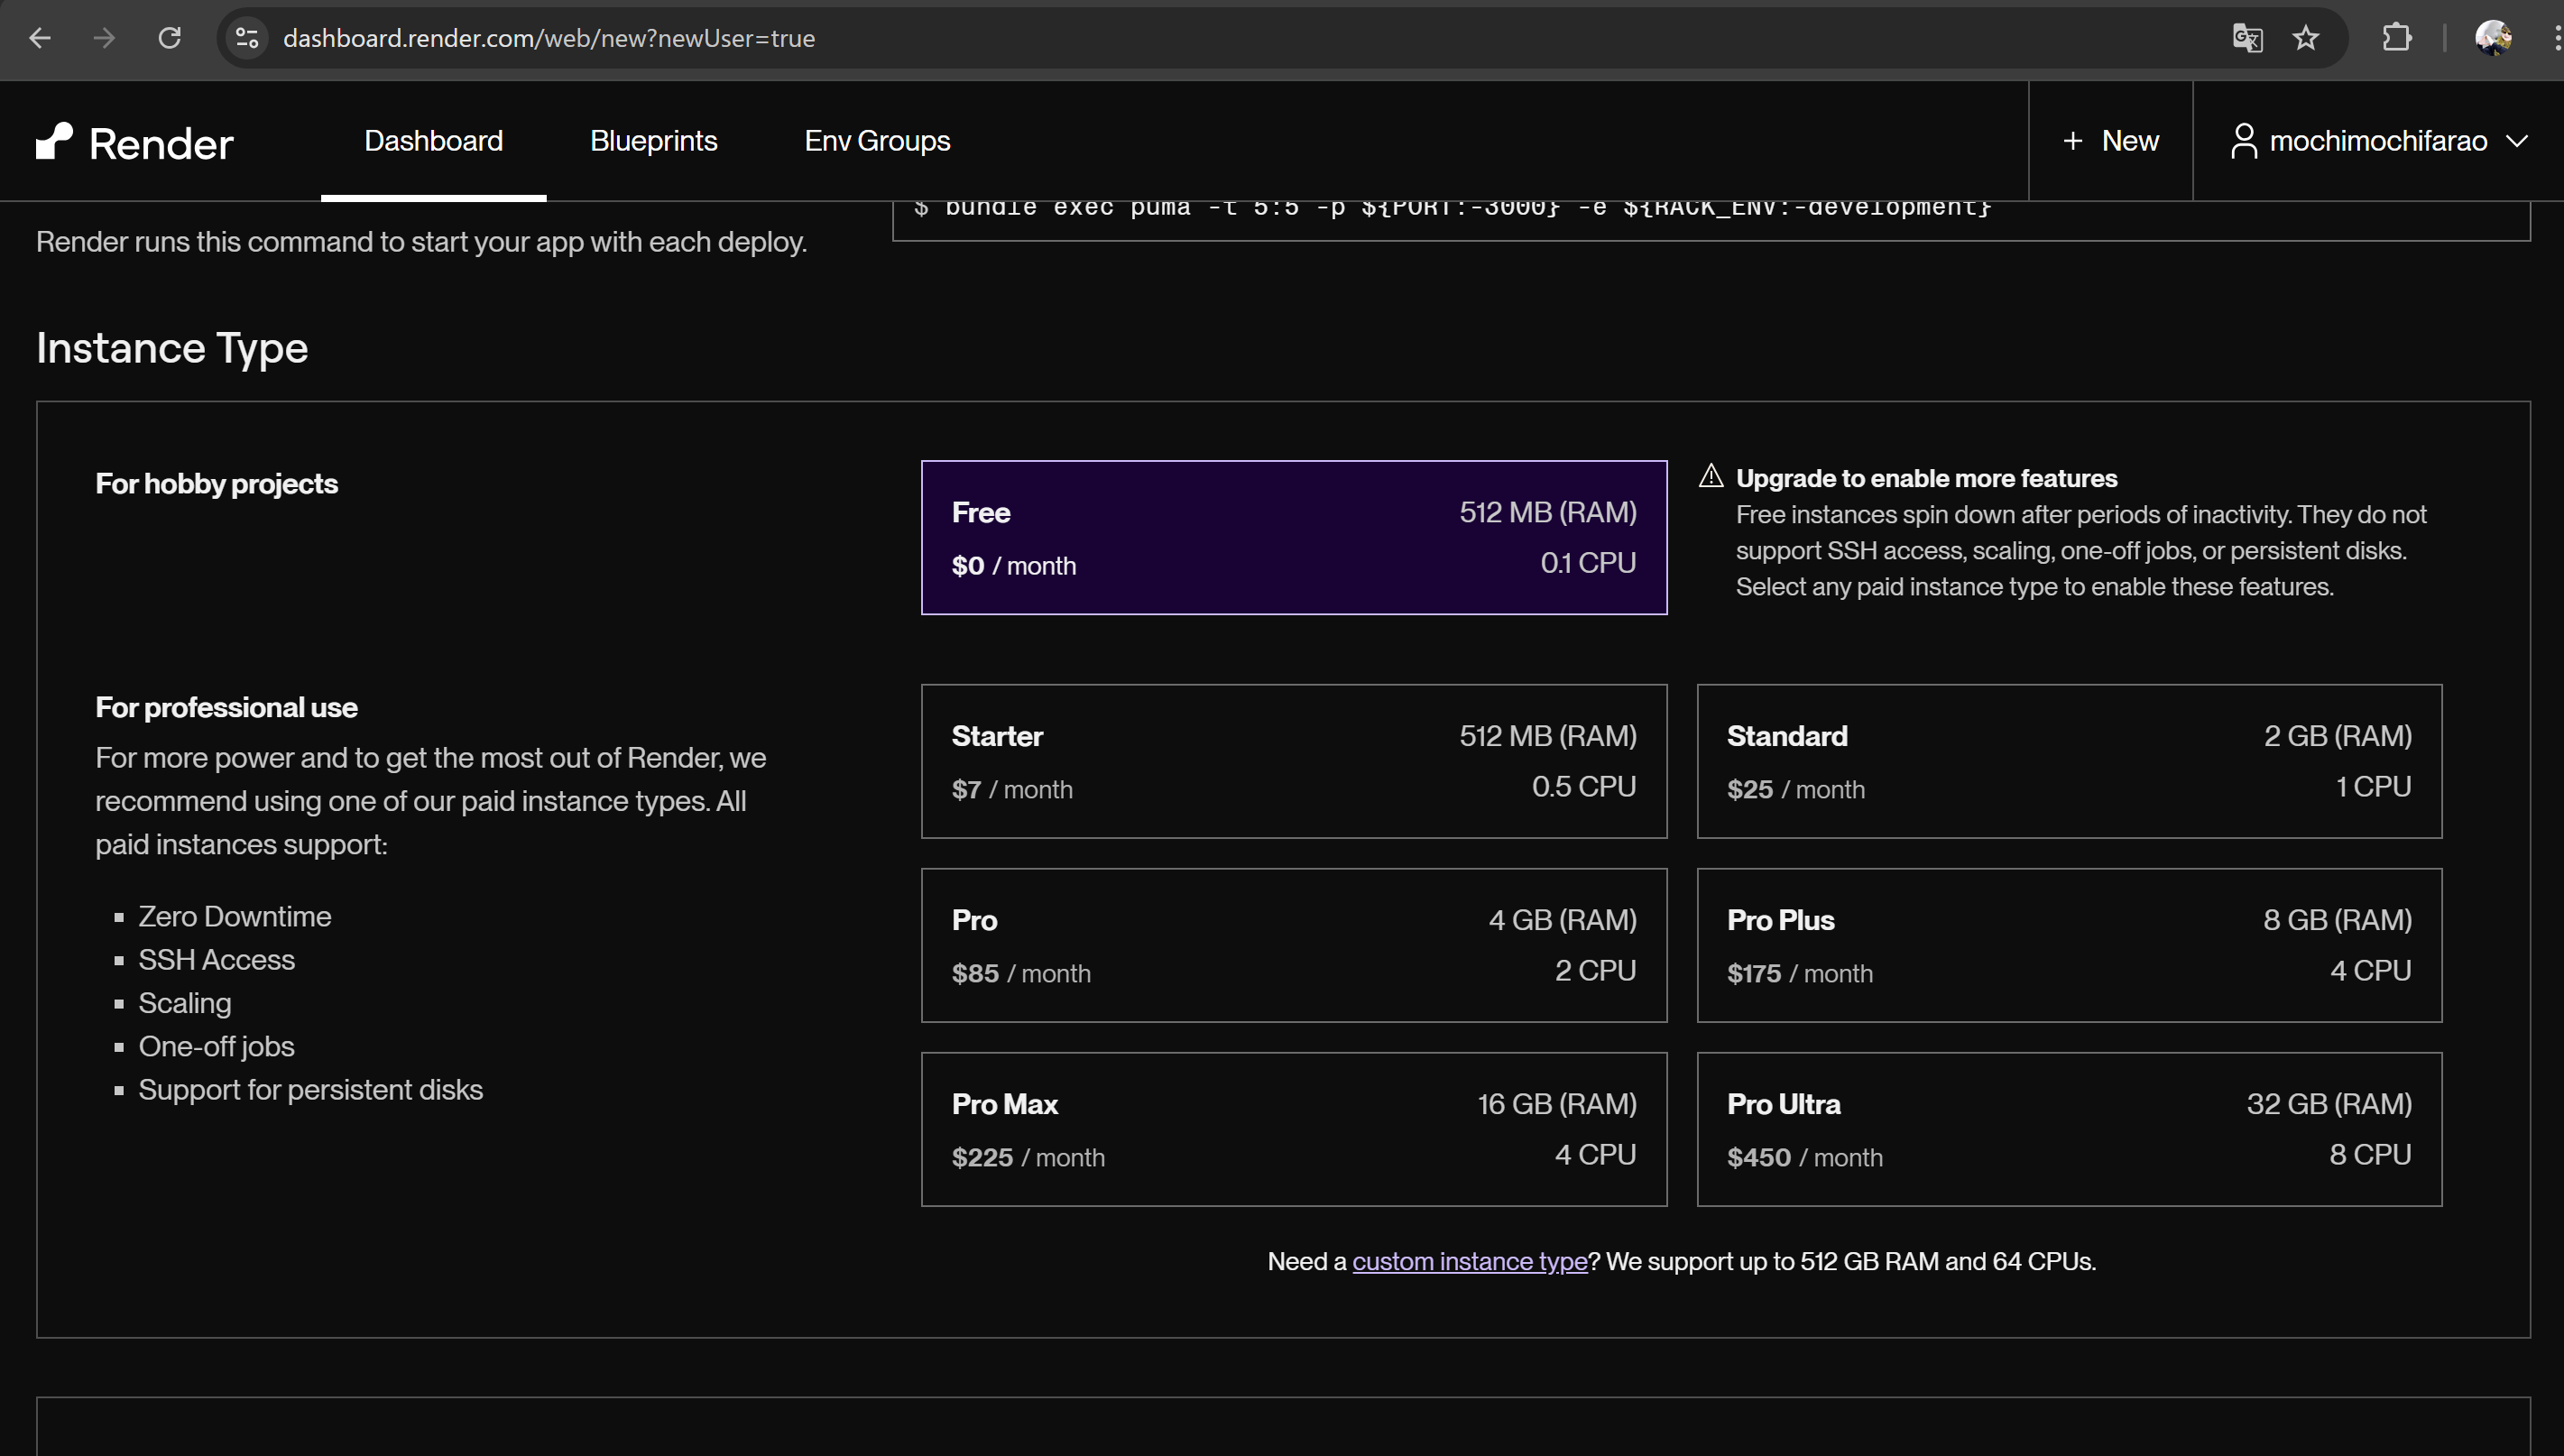](https://startup-technology.gyazo.com/9669ced4f1257aa78005d20af605307a)
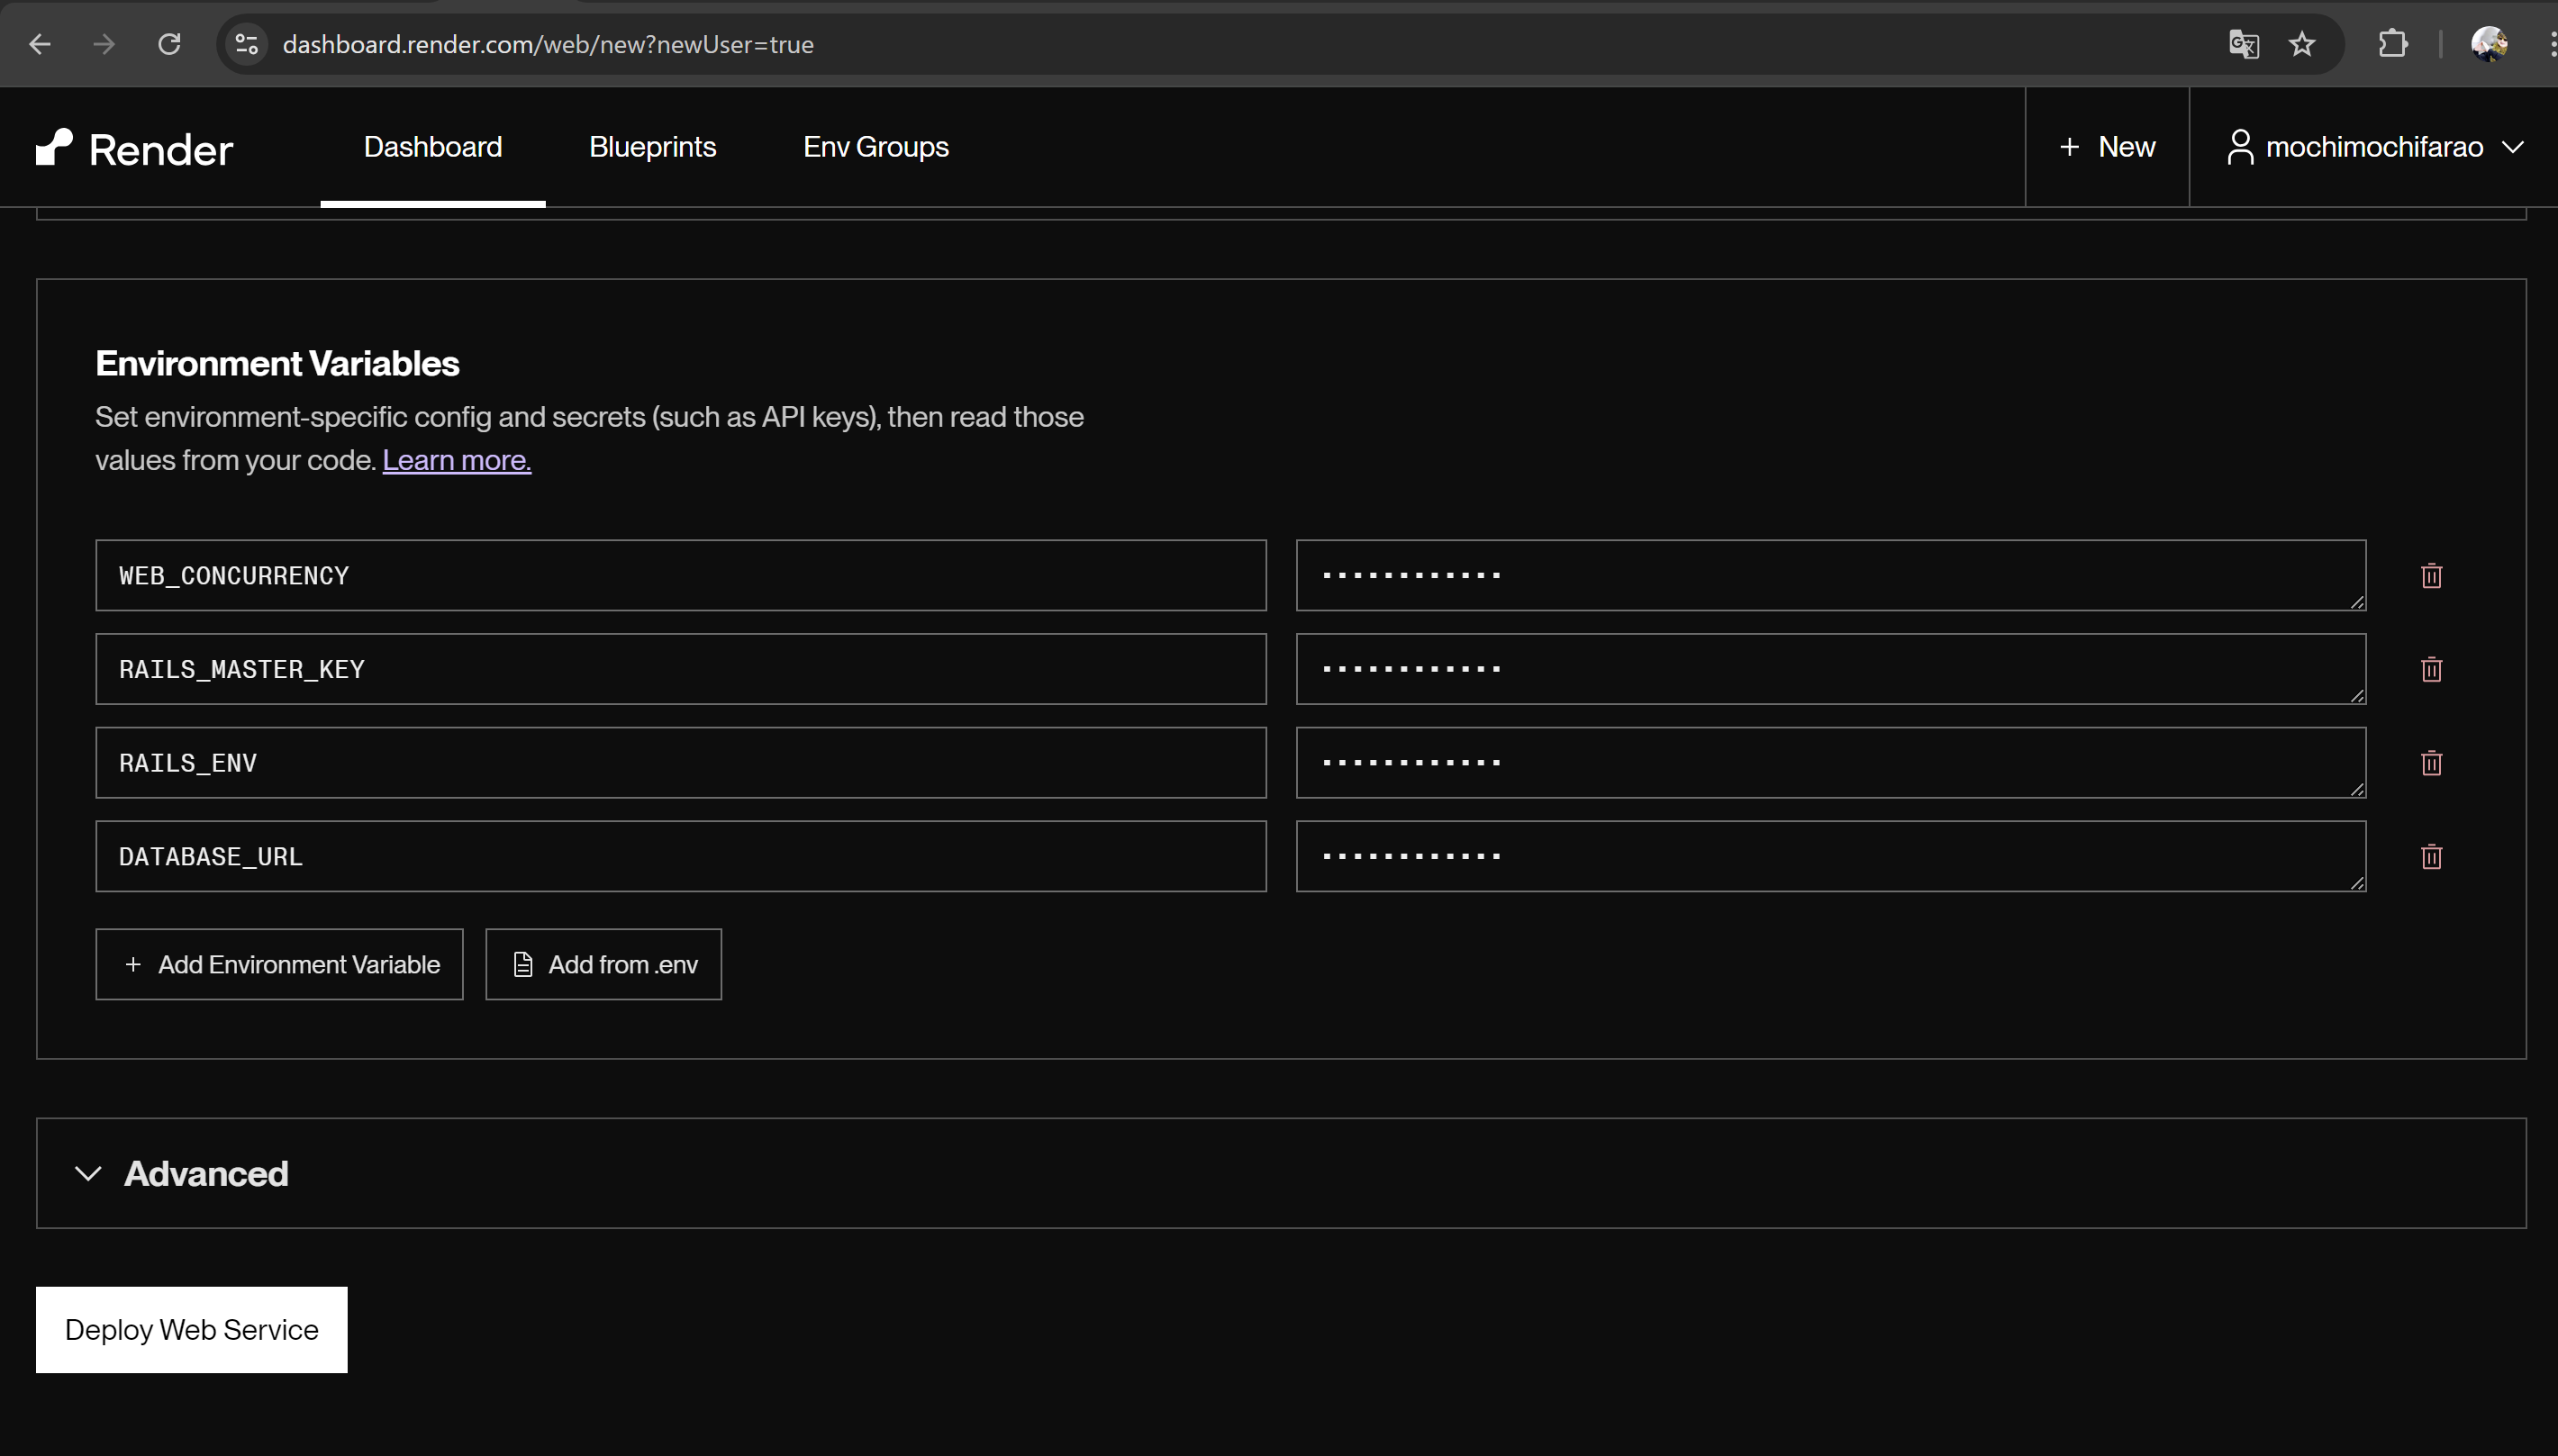
#### 7. 環境変数の登録
初期のものに下記のものを追記しています
- RAILS_MASTER_KEY
- RAILS_ENV
- DATABASE_URL
RAILS_MASTER_KEYにはrails newしたときに出来た`config/master.key`ファイルに記載されている値を入力します
RAILS_ENVには`production`と入力します
DATABASE_URLには作成したデータベースのInternal Database URLを入力します
Dashboardから作成したデータベース(PostgreSQL)の詳細ページにいって確認しましょう
[](https://startup-technology.gyazo.com/d22217b8bc4512a7aaf4ec7ea4ef6a1a)
#### 8. 終わり
最後にDeploy Web Serviceボタンを押すとデプロイ出来ます
エラーが出たりしたらログをみて解決していきましょう