# Hardhat Guide: How to Unit Test a Contract
In this guide, we'll cover the fundamentals of using [Hardhat](https://hardhat.org/) to unit test a Solidity smart contract. Testing is one of the most important parts of smart contract development, so let's jump right in! 🦅
We will be setting up some simple tests on a `Faucet.sol` smart contract while covering some of the different aspects of Solidity testing using JavaScript.
## Guide Requirements
- **[Hardhat](https://hardhat.org/)**: Hardhat is an Ethereum development platform that provides all the tools needed to build, debug and deploy smart contracts.
## Useful JS + Solidity Testing Resources
We will use these resources throughout this guide but bookmark these for any other testing you do!
- **[ChaiJS](https://www.chaijs.com/)**
- **[Chai BDD Styled](https://www.chaijs.com/api/bdd/)**
- **[Chai Assert](https://www.chaijs.com/api/assert/)**
- **[Mocha Hooks](https://mochajs.org/#hooks)**
- **[Solidity Chai Matchers](https://ethereum-waffle.readthedocs.io/en/latest/matchers.html)**
## Step 1: Hardhat Project Structure Setup
1. In a directory of your choice, run `npm init -y`
2. Run `npm install --save-dev hardhat`
3. Run `npx hardhat` and you will get the following UI on your terminal:

4. Select `Create a JavaScript project`
You will then get a few more options such as if you want to create a `.gitignore` and install some dependencies like in the following image:

5. **Select YES to all of these options!**
> It might take a minute or two to install everything! 💿
Your project should now contain the following:
- **Files**: `node_modules`, `package.json`, `hardhat.config.js`, `package-lock.json`, `README.md`
- **Folders**: `scripts`, `contracts`, `test`
## Step 2: Add a `Faucet.sol` Contract File
1. In your `/contracts` directory, go ahead and delete the `Lock.sol` that Hardhat includes for you by default
> You can do this by running `rm -rf Lock.sol` in your terminal or just delete it manually via your IDE
2. Run `touch Faucet.sol`
3. Open the file and copy-paste the following:
```solidity
// SPDX-License-Identifier: MIT
pragma solidity 0.8.17;
contract Faucet {
address public owner;
constructor() {
owner = msg.sender;
}
event FallbackCalled(address);
function withdraw(uint _amount) payable public {
// users can only withdraw .1 ETH at a time, feel free to change this!
require(_amount <= 100000000000000000);
(bool sent, ) = msg.sender.call{value: _amount}("");
require(sent, "Failed to send Ether");
}
function withdrawAll() onlyOwner public {
(bool sent, ) = owner.call{value: address(this).balance}("");
require(sent, "Failed to send Ether");
}
function destroyFaucet() onlyOwner public {
selfdestruct(payable(owner));
}
// function will be invoked if msg contains no matching calldata
receive() external payable {
emit FallbackCalled(msg.sender);
}
modifier onlyOwner() {
require(msg.sender == owner);
_;
}
}
```
4. Save the file. 💾
5. Check out / audit the contract! 👀 ⬇️
6. **Start thinking about what we could possibly test for!** 🤔 Lots of things right? *Let's list out a few*:
- **A lot of the logic in the contract depends on the owner being set correctly in the constructor, so we'll want to test that.**
- **We don't want someone instantly draining all of our funds, so we should check that the `require` clause in the `withdraw()` function works as expected**
- **The `destroyFaucet()` function should only be called by the owner, as should the `withdrawAll` function.**
Let's set up some unit tests to test that all of these assumptions are correct! 🧪
## Step 3: Add Test File Structure
We will build out our unit tests for our `Faucet.sol`. As we build out the test script, we will cover some of the important parts of Solidity testing.
1. In your `/test` folder, rename the sample file included by Hardhat either from `Lock.js` to `FaucetTests.js`
2. You are welcome to create your own test file in this folder from scratch. Hardhat already gives us a pre-written scaffold in `Lock.js` so better to take advantage of that and just re-name the sample file
3. Woah, this sample file has a TON of stuff! 🤯 Those are just tests relevant to the sample `Lock.js` file included by Hardhat, let's clean the file and repurpose for the `Faucet.sol` contract
4. Open the `FaucetTests.js` file and copy-paste the following:
```javascript
const { loadFixture } = require('@nomicfoundation/hardhat-network-helpers');
const { expect } = require('chai');
describe('Faucet', function () {
// We define a fixture to reuse the same setup in every test.
// We use loadFixture to run this setup once, snapshot that state,
// and reset Hardhat Network to that snapshot in every test.
async function deployContractAndSetVariables() {
const Faucet = await ethers.getContractFactory('Faucet');
const faucet = await Faucet.deploy();
const [owner] = await ethers.getSigners();
console.log('Signer 1 address: ', owner.address);
return { faucet, owner };
}
it('should deploy and set the owner correctly', async function () {
const { faucet, owner } = await loadFixture(deployContractAndSetVariables);
expect(await faucet.owner()).to.equal(owner.address);
});
});
```
Let's first define some of these newer terms like `describe` and `it`... 📖
In the code above, we open a `describe` function called `Faucet`. The best way to think of this is just a general function scope that "describes" the suite of test cases enumerated by the "it" functions inside.
Inside that `describe`, we have an `it` function. These are your specific unit test targets... just sound it out!: "I want `it` to x.", "I want `it` to y.", etc.
Inside the `it` function, we use the `loadFixture` functionality we imported in the first line to help bring all the variables we need for each test easily.
Inside the `deployContractAndSetVariables` function, we use the `contractFactory` abstraction provided to us by Ethers.
[From the Hardhat testing docs](https://hardhat.org/tutorial/testing-contracts): A `ContractFactory` in ethers.js is an abstraction used to deploy new smart contracts, so Faucet here is a factory for instances of our faucet contract.
We then `await` for the `faucet` instance we created from our `ContractFactory` to be deployed. This is our basic setup - after all these lines, we now have a deployed contract instance with which we can test! We then return them via `loadFixture` so that we can use them super easily via:
```javascript
const { faucet, owner } = await loadFixture(deployContractAndSetVariables);
```
**The code is ready to test as soon as you save it.** It includes just one simple unit test checking that `owner` is set correctly at contract deployment. ✅ It is basically testing the following line in the `Faucet.sol` constructor:
```solidity
owner = payable(msg.sender);
```
If you want to see how we wrote the code above, check this video out!! 👀 ⬇️
<Loom id='c0c33b6cb06145998fb07c4f9a63530b' />
4. Run `npx hardhat test` in your terminal - if you successfully set up all of the above, you should see:
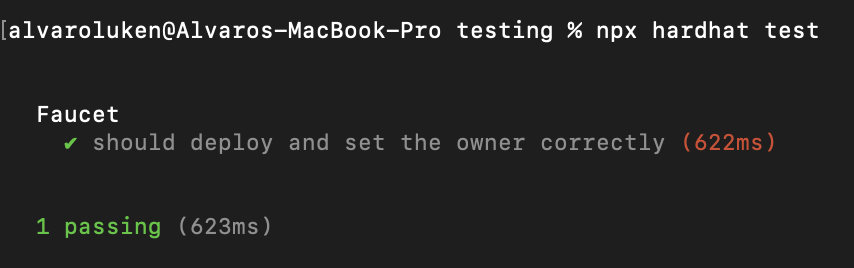
We've successfully accounted for the first assumption we made above 🎉:
### - **A lot of the logic in the contract depends on the owner being set correctly in the constructor, so we'll want to test that.**
## Step 4. Add Withdrawal Amount Test 🔎
Let's continue working through each assumption we made above. Next one is:
### - **We don't want someone instantly draining all of our funds, so we should check that the `require` clause in the `withdraw()` function works as expected**
Do you think you can do this by yourself? Take a moment and try to think how you would implement this test...
> Hint: It's basically adding a new `it()` block! 🧑💻
Let's run through adding a new unit test for this assumption... 🏇
1. Add a new `it` function scope
> Pro-tip: just copy-paste the entire previous `it` function and replace the contents for the new test! No need to write out the whole syntax again. Like this:

2. As shown in the gif above, name it something that denotes we are testing the withdraw functionality of the contract
For now, we want to test that we can't withdraw more than .1 ETH as denoted by the `require` statement in our contract's `withdraw()` function.
**It's time to use `expect`! again**
Since we want to use `expect`, we'll need to import some special functionality more specific to Solidity. We will be using these [Solidity Chai Matchers](https://ethereum-waffle.readthedocs.io/en/latest/matchers.html).
> This import is already in the file! 💯
3. `ethereum-waffle` should already be installed, but run `npm install ethereum-waffle` just in case
Cool, we have the necessary imports and installations. 🧩
As opposed to the first unit test, we will the [**Revert** Chai Matcher](https://ethereum-waffle.readthedocs.io/en/latest/matchers.html#revert) to `expect` a transaction to revert. This is how we make sure we cover certain cases that we expect **should revert**.
4. Add the following variable to your `deployContractAndSetVariables` function:
```javascript
let withdrawAmount = ethers.utils.parseUnits("1", "ether");
```
5. Remember to `return` it:
```javascript
return { faucet, owner, withdrawAmount };
```
6. Add the following to your newly created `it` block:
```javascript
const { faucet, withdrawAmount } = await loadFixture(deployContractAndSetVariables);
await expect(faucet.withdraw(withdrawAmount)).to.be.reverted;
```
We are creating `withdrawAmount` variable equal to 1 ether, which is *way over* what the `require` statement in the `withdraw()` function allows; **so we expect it to revert**! 🚫
Go ahead and change the value to be less than .1 ETH and see the terminal get angry when you run `npx hardhat test`... not reverting! 😱
5. Our test file should look like this so far:
```javascript
const { loadFixture } = require('@nomicfoundation/hardhat-network-helpers');
const { expect } = require('chai');
describe('Faucet', function () {
// We define a fixture to reuse the same setup in every test.
// We use loadFixture to run this setup once, snapshot that state,
// and reset Hardhat Network to that snapshot in every test.
async function deployContractAndSetVariables() {
const Faucet = await ethers.getContractFactory('Faucet');
const faucet = await Faucet.deploy();
const [owner] = await ethers.getSigners();
let withdrawAmount = ethers.utils.parseUnits('1', 'ether');
return { faucet, owner, withdrawAmount };
}
it('should deploy and set the owner correctly', async function () {
const { faucet, owner } = await loadFixture(deployContractAndSetVariables);
expect(await faucet.owner()).to.equal(owner.address);
});
it('should not allow withdrawals above .1 ETH at a time', async function () {
const { faucet, withdrawAmount } = await loadFixture(
deployContractAndSetVariables
);
await expect(faucet.withdraw(withdrawAmount)).to.be.reverted;
});
});
```
Run `npx hardhat test`, do your tests pass? 🤨 If so, heck yeahhhhh! 🎉
## Step 5 - Challenge: Add Critical Function Tests ☢️
We have just one more initial assumption to test:
### - **The `destroyFaucet()` function should only be called by the contract owner, as should the `withdrawAll` function.**
This last one shouldn't be too bad to test! We just need to make sure the `onlyOwner` modifier is working, similar to the first test. These are some of the most important (in fact, critical!!) functions in our contract so we want to make sure they are indeed only callable by the owner.
As a challenge, implement these tests! Some good corner cases to test with these two functions:
- can only the owner call them?
- does the contract actually self destruct when the `destroyFaucet()` is called? (this one is tricky! hint: [`getCode`](https://docs.ethers.io/v5/single-page/#/v5/api/providers/provider/-%23-Provider-getCode))
- does the `withdrawAll()` function successfully return all of the ether held in the smart contract to the caller?
Use the same testing flow outlined above for efficiency! Here is the suggested flow:
1. Just copy-paste a current `it` block
2. Replace with whatever new functionality you need specific to your new testing assumption
3. Remember to update any necessary variables in the `deployContractAndSetVariables` function and `return` them
4. Import the variables into your `it` block via:
```javascript
const { faucet, owner, anyVariable } = await loadFixture(deployContractAndSetVariables);
```
There are many more cases that you can test for to create really iron-clad and comprehensive unit tests - and thus create iron-clad smart contracts! 💪 The testing rabbit hole is particularly great for anyone looking to get a solid foundation in smart contract security, lots of testing there for sure! Good luck, smart contract tester! 🫡